


微软word如何插入页码
When you insert a picture into a document, Word always defaults to the Pictures Library folder for selecting your picture file. However, you can specify a different folder as the default picture location that displays when you insert pictures in Word.
将图片插入文档时,Word始终默认使用“图片库”文件夹来选择图片文件。 但是,您可以指定其他文件夹作为在Word中插入图片时显示的默认图片位置。
If you have a common folder where you store all your images you insert into your Word documents, you can specify that folder as the default picture location in Word. For example, I keep all my screenshots for my articles in a folder called “HTG Images”, so I’m going to set this as my default picture folder. This feature is similar to setting the default save location in Word.
如果您有一个公用文件夹来存储所有插入到Word文档中的图像,则可以将该文件夹指定为Word中的默认图片位置。 例如,我将文章的所有屏幕截图保存在名为“ HTG Images”的文件夹中,因此将其设置为默认图片文件夹。 此功能类似于在Word中设置默认保存位置 。
NOTE: This only works in Word 2016.
注意:仅在Word 2016中有效。
To change the default picture location in Word, open an existing or a new document and click the “File” tab.
要在Word中更改默认图片位置,请打开现有文档或新文档,然后单击“文件”选项卡。

On the backstage screen, click “Options” in the list of items on the left.
在后台屏幕上,单击左侧项目列表中的“选项”。

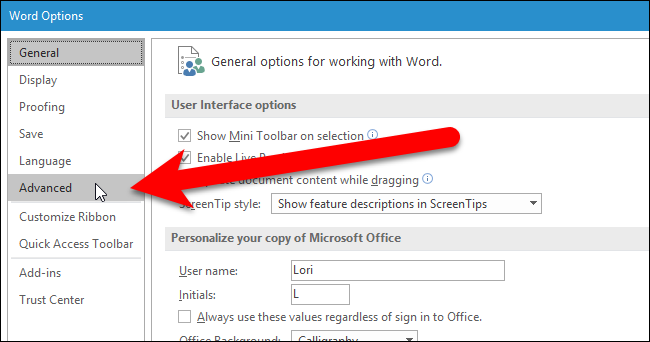
On the Word Options dialog box, click “Advanced” in the list of items on the left.
在“ Word选项”对话框中,在左侧的项目列表中单击“高级”。
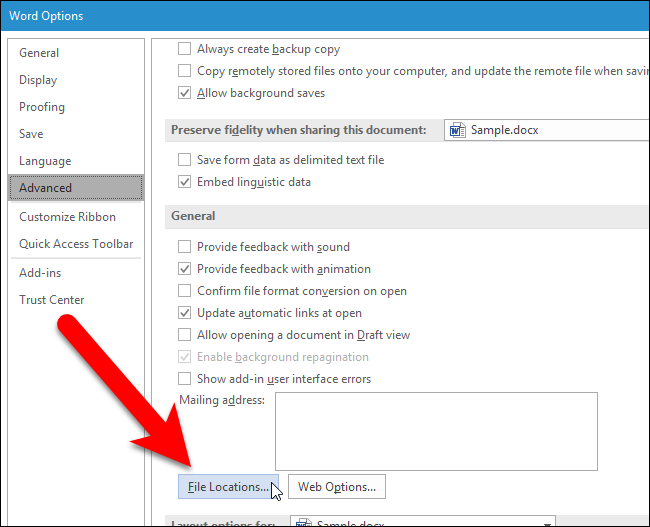
Scroll down to the General section and click “File Locations”.
向下滚动到“常规”部分,然后单击“文件位置”。
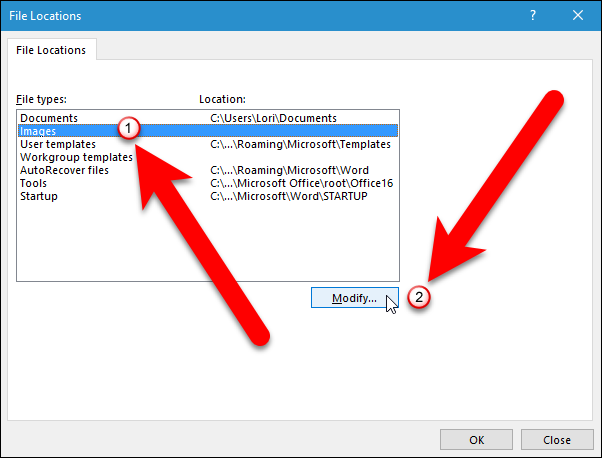
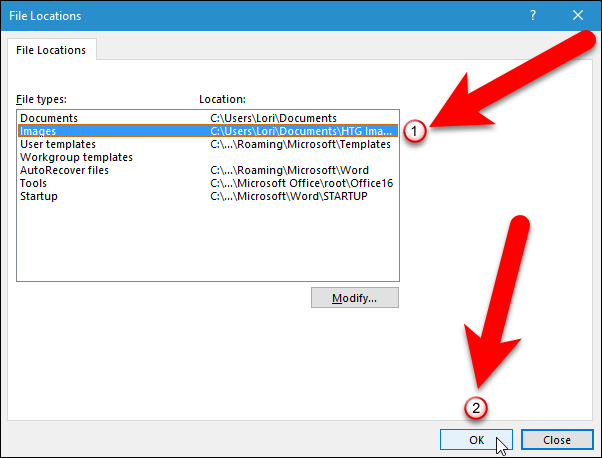
On the File Locations dialog box, click “Images” under File types and then click “Modify”.
在“文件位置”对话框中,单击“文件类型”下的“图像”,然后单击“修改”。
Notice that the Location for Images is empty. When you do not specify a Location, the default Pictures Library folder is used as the Images location, and Word remembers the last folder you accessed when inserting a picture in the current Word session.
请注意,图像位置为空。 当您未指定位置时,默认图片库文件夹用作图像位置,并且Word会记住在当前Word会话中插入图片时访问的最后一个文件夹。
On the Modify Location dialog box, navigate to the folder you want to use as your default Images folder and click “OK”.
在“修改位置”对话框上,导航到要用作默认图像文件夹的文件夹,然后单击“确定”。

The full path to the selected folder is inserted under Location for the Images file type. Click “OK”.
所选文件夹的完整路径将插入到“图像”文件类型的“位置”下。 点击“确定”。
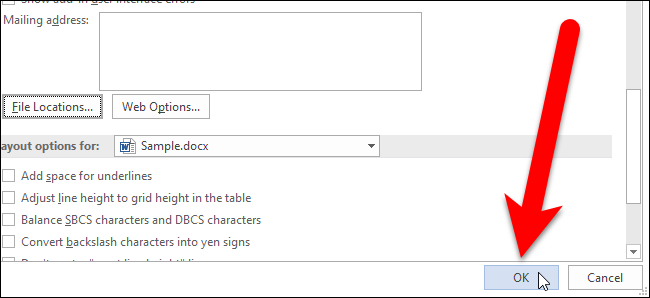
You are returned to the Word Options dialog box. Click “OK” to close it.
您将返回到“ Word选项”对话框。 单击“确定”将其关闭。
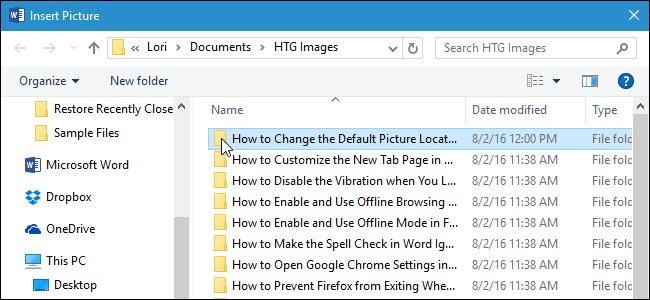
Now, when you click “Pictures” on the Insert tab to insert a picture into your Word document…
现在,当您在“插入”选项卡上单击“图片”以将图片插入到Word文档中时…
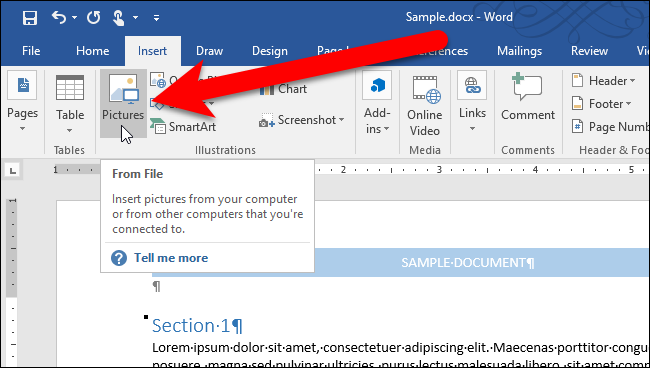
…the Insert Picture dialog box opens directly to the folder you specified as the default Images location.
…“插入图片”对话框将直接打开您指定为默认图像位置的文件夹。

There is a limitation you should know about when setting a custom default images folder. Word remembers the folder you last used when saving or opening documents in the current Word session. However, this is not true when you set a custom default images folder. Every time you insert a picture, the Insert Picture dialog box defaults to the folder you specified, not the last one you opened. To have Word remember the folder you last opened to insert a picture, you must remove the path from the Location column for the Images file type on the Modify Locations dialog box. However, you cannot simply delete the path. You must use the Registry Editor to remove the entry Word when you set this option.
设置自定义默认图像文件夹时,应了解一个限制。 Word会记住在当前Word会话中保存或打开文档时最后一次使用的文件夹。 但是,当您设置自定义默认图像文件夹时,情况并非如此。 每次插入图片时,“插入图片”对话框均默认为您指定的文件夹,而不是最后打开的文件夹。 若要让Word记住上次打开的用于插入图片的文件夹,必须从“修改位置”对话框上“图像”文件类型的“位置”列中删除路径。 但是,您不能简单地删除路径。 设置此选项时,必须使用注册表编辑器删除Word条目。
Standard warning: The Registry Editor is a powerful tool and misusing it can render your system unstable or even inoperable. This is a pretty simple hack and as long as you stick to the instructions, you shouldn’t have any problems. That said, if you’ve never worked with it before, consider reading about how to use the Registry Editor before you get started. And definitely back up the Registry (and your computer!) before making changes.
标准警告:注册表编辑器是一个功能强大的工具,滥用它会使您的系统不稳定甚至无法运行。 这是一个非常简单的技巧,只要您按照说明进行操作,就不会有任何问题。 也就是说,如果您以前从未使用过它,请在开始之前考虑阅读有关如何使用注册表编辑器的信息 。 并在进行更改之前一定要备份注册表 (和您的计算机 !)。
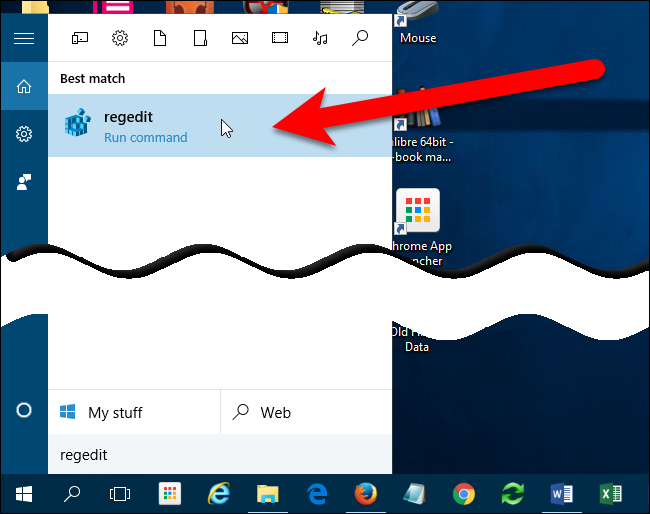
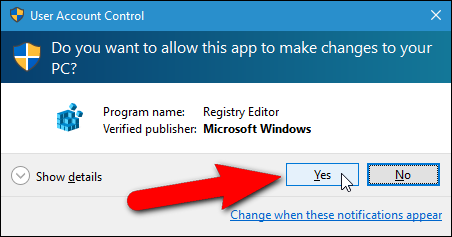
Open the Registry Editor by clicking on Start and typing regedit . Press Enter to open Registry Editor, or click on regedit under Best match.
通过单击开始并键入regedit打开注册表编辑器。 按Enter打开注册表编辑器,或单击“最佳匹配”下的regedit 。
NOTE: You may not see this dialog box, depending on your User Account Control settings.
注意:根据您的“ 用户帐户控制”设置 ,您可能看不到此对话框。
In the tree structure on the left, navigate to the following key:
在左侧的树结构中,导航到以下键:
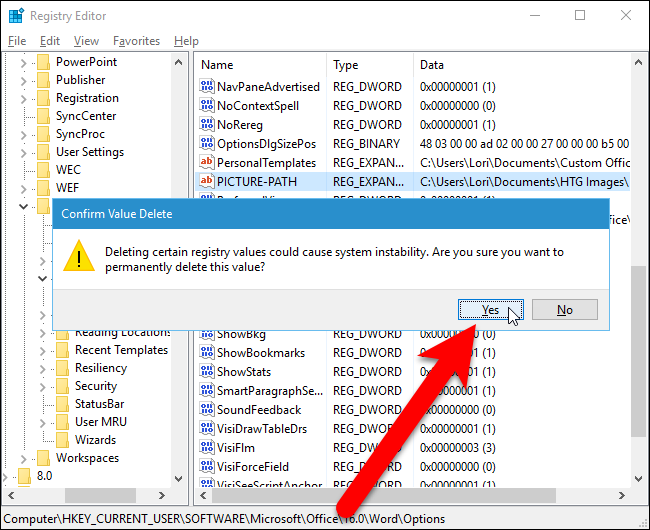
HKEY_CURRENT_USER\Software\Microsoft\Office\16.0\Word\Options
Find the PICTURE-PATH entry on the right. The value of the entry should be the path you specified on the File Locations dialog box. Press the “Delete” key to delete the entry. Make sure you only delete the PICTURE-PATH entry, not the entire Options key.
在右侧找到“ PICTURE-PATH条目。 条目的值应该是您在“文件位置”对话框中指定的路径。 按“删除”键删除条目。 确保仅删除PICTURE-PATH条目,而不是整个Options键。

The Confirm Value Delete dialog box displays making sure you want to delete the entry. Click “Yes”.
显示“确认值删除”对话框,以确保您要删除该条目。 点击“是”。
Close the Registry Editor by selecting “Exit” from the “File” menu, or by clicking the “X” button in the upper-right corner of the window.
通过从“文件”菜单中选择“退出”,或单击窗口右上角的“ X”按钮,关闭注册表编辑器。

If you’re not comfortable editing the Registry yourself, we’ve created a downloadable registry hack you can use to delete the “PICTURE-PATH” key from the registry. Extract the .zip file, double-click the .reg file, and click through the prompts.
如果您不满意自己编辑注册表,我们已经创建了一个可下载的注册表黑客,您可以用来从注册表中删除“ PICTURE-PATH”键。 提取.zip文件,双击.reg文件,然后单击提示。
Delete the PICTURE-PATH Value registry hack
if you enjoy working with the Registry, it’s worth taking the time to learn how to make your own Registry hacks.
如果您喜欢与Registry一起工作,那么值得花时间学习如何制作自己的Registry hack 。
微软word如何插入页码


 被折叠的 条评论
为什么被折叠?
被折叠的 条评论
为什么被折叠?
 到【灌水乐园】发言


