


我的世界paperclip
介绍 (Introduction)
This is the first part of my series - covering file uploading gems available for Rails developers. For this edition, we will cover the popular Paperclip gem.
这是我系列的第一部分-涵盖可供Rails开发人员使用的文件上传gem。 在此版本中,我们将介绍流行的Paperclip宝石。
Paperclip is an easy to use file uploading tool made available by the awesome folks at thoughtbot.
回形针是一种易于使用的文件上载工具,由Thoughtbot的优秀人士提供。
In this tutorial, we will build a Rails application from scratch with file uploading functionality added. We will make use of Paperclip, seeing the awesome features it provides to us.
在本教程中,我们将从头开始构建一个Rails应用程序,并添加文件上传功能。 我们将使用Paperclip,看看它提供给我们的强大功能。
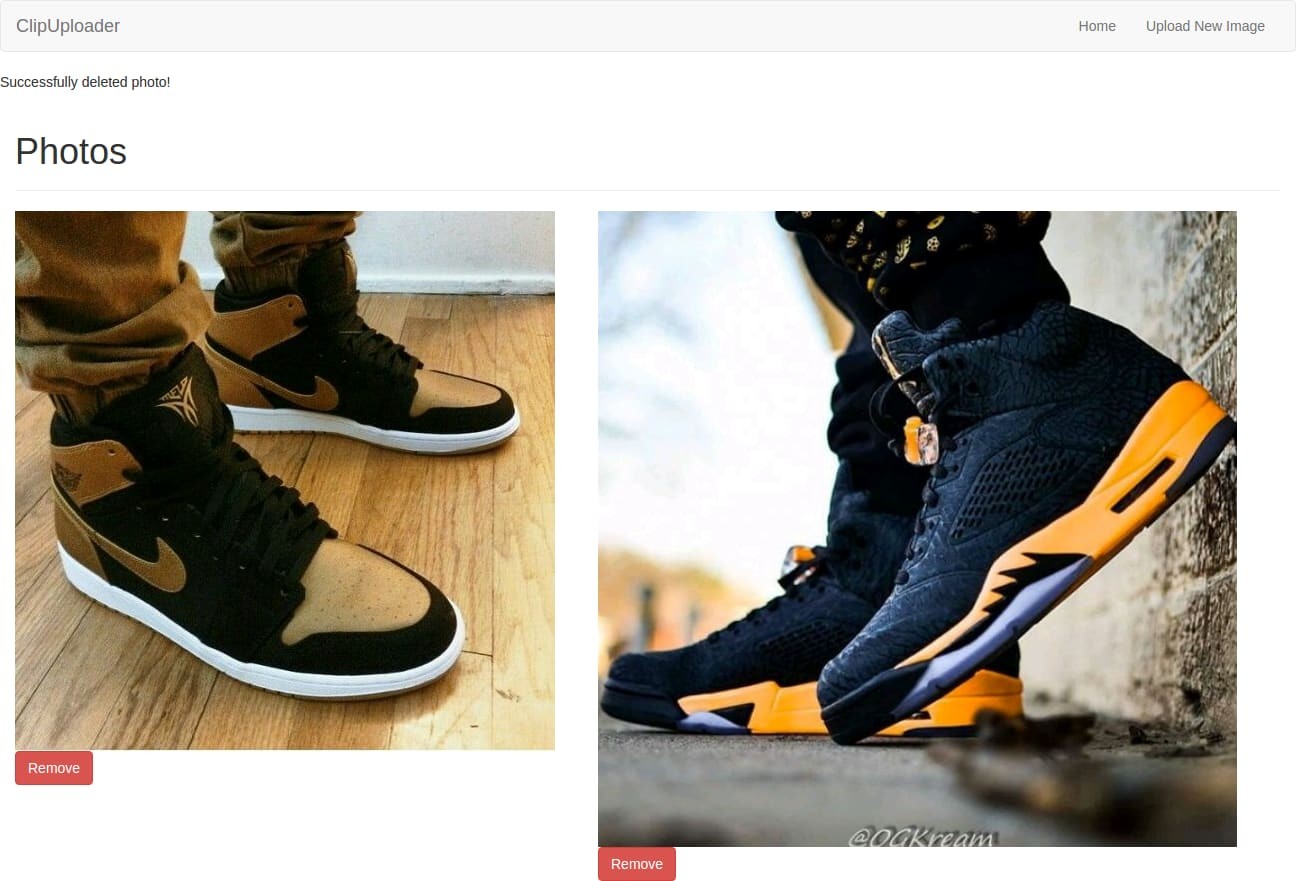
Here is a snapshot of what we want to build.
这是我们要构建的快照。
The code for this tutorial is available on Github.
Github上提供了本教程的代码。
配置 (Setting Up)
For PaperClip to work, we need to have ImageMagick installed on our machine.
为了使PaperClip正常工作,我们需要在计算机上安装ImageMagick 。
For Mac users you can do so by running the command.
对于Mac用户,您可以通过运行命令来执行此操作。
brewinstall imagemagickUbuntu users should run the command.
Ubuntu用户应运行该命令。
sudo apt-get install imagemagick -yLet us start by creating our Rails application. For the purpose of this tutorial I'll call mine ClipUploader.
让我们从创建Rails应用程序开始。 就本教程而言,我将其称为ClipUploader 。
rails new ClipUploader -TThe -T flags tells Rails to generate the new application without the default test suite.
-T标志告诉Rails生成没有默认测试套件的新应用程序。
Once that is done, you will want to add Twitter Bootstrap for the purpose of styling your application.
完成后,您将需要添加Twitter Bootstrap来设计应用程序的样式。
Open your Gemfile and add the Bootstrap gem
打开您的Gemfile并添加Bootstrap gem
#Gemfile

...
gem 'bootstrap-sass'
Run the command to install the gem.
运行命令以安装gem。
bundleinstallRename app/assets/stylesheets/application.css to app/assets/stylesheets/application.scss and import the necessary files needed for Bootstrap to work.
将app/assets/stylesheets/application.css重命名为app/assets/stylesheets/application.scss并导入启动Bootstrap所需的必要文件。
#app/assets/stylesheets/application.scss

...
@import 'bootstrap-sprockets';
@import 'bootstrap';
Using your text editor, create a new file to hold our navigation code.
使用您的文本编辑器,创建一个新文件来保存我们的导航代码。
#app/views/layouts/_navigation.html.erb

<nav class="navbar navbar-default">
    <div class="container-fluid">
    <!-- Brand and toggle get grouped for better mobile display -->
    <div class="navbar-header">
      <button type="button" class="navbar-toggle collapsed" data-toggle="collapse" data-target="#navbar-collapse" aria-expanded="false">
        <span class="sr-only">Toggle navigation</span>
        <span class="icon-bar"></span>
        <span class="icon-bar"></span>
        <span class="icon-bar"></span>
      </button>
      <a class="navbar-brand" href="#">ClipUploader</a>
    </div>
    <div class="collapse navbar-collapse" id="navbar-collapse">
        <ul class="nav navbar-nav navbar-right">
          <li><%= link_to 'Home', root_path %></li>
          <li><%= link_to 'Upload New Image', new_photo_path %></li>
        </ul>
    </div>
  </div>
</nav>
The code above creates a naviation bar to hold your main navigation links.
上面的代码创建一个导航栏来保存您的主要导航链接。
Tweak your application layout to look like what I have below:
调整您的应用程序布局,使其看起来像我下面的样子:
#app/views/layouts/application.html.erb

<!DOCTYPE html>
<html>
  <head>
    <title>ClipUploader</title>
    <%= csrf_meta_tags %>

    <%= stylesheet_link_tag    'application', media: 'all', 'data-turbolinks-track': 'reload' %>
    <%= javascript_include_tag 'application', 'data-turbolinks-track': 'reload' %>
  </head>

  <body>
    <!-- Renders navigation file located at app/views/layouts/_navigation.html.erb -->
    <%= render "layouts/navigation" %>
    <div id="flash">
      <% flash.each do |key, value| %>
        <div class="flash <%= key %>"><%= value %></div>
      <% end %>
    </div>
    <div class="container-fluid">
      <%= yield %>
    </div>
  </body>
</html>
To make the navigation bar visible in your application, you have to render it in your application layout. That is what we did above.
要使导航栏在您的应用程序中可见,您必须在应用程序布局中呈现它。 那就是我们上面所做的。
集成回形针 (Integrate PaperClip)
Open up your Gemfile and add the PaperClip gem.
打开您的Gemfile并添加PaperClip gem。
#Gemfile

...
gem "paperclip", "~> 5.0.0"
Install the gem.
安装宝石。
bundleinstall We will be making use of one controller, let us generate that.
我们将使用一个控制器,让我们生成它。
rails generate controller Photos Using your text editor, edit your PhotosController to look like what I have below:
使用您的文本编辑器,编辑PhotosController使其外观如下所示:
#app/controllers/photos_controller.rb

 class PhotosController < ApplicationController

 #Index action, photos gets listed in the order at which they were created
 def index
  @photos = Photo.order('created_at')
 end

 #New action for creating a new photo
 def new
  @photo = Photo.new
 end

 #Create action ensures that submitted photo gets created if it meets the requirements
 def create
  @photo = Photo.new(photo_params)
  if @photo.save
   flash[:notice] = "Successfully added new photo!"
   redirect_to root_path
  else
   flash[:alert] = "Error adding new photo!"
   render :new
  end
 end

 private

 #Permitted parameters when creating a photo. This is used for security reasons.
 def photo_params
  params.require(:photo).permit(:title, :image)
 end

end
In the above controller, we created three actions. The new and create actions are used when a photo is to be uploaded. If the photo gets saved the user is redirected to the root_path, else the new page is rendered.
在上面的控制器中,我们创建了三个动作。 要上传照片时,将使用new和create动作。 如果照片被保存,则用户将被重定向到root_path ,否则将呈现new页面。
Let us generate our Photo model.
让我们生成Photo模型。
rails generate model Photo title:stringMigrate your database:
迁移数据库:
rake db:migrateWe need to add a few attributes to the photos table. To do that we will make use of the generator provided by Paperclip. Run the command below from your terminal.
我们需要在photos表中添加一些属性。 为此,我们将使用Paperclip提供的生成器。 从终端运行以下命令。
rails generate paperclip photo imageThis will generate a new migration file that looks like this:
这将生成一个新的迁移文件,如下所示:
#xxxxxxxx_add_attachment_image_to_photos.rb

class AddAttachmentImageToPhotos < ActiveRecord::Migration
  def self.up
    change_table :photos do |t|
      t.attachment :image
    end
  end

  def self.down
    remove_attachment :photos, :image
  end
end
Now run the migration.
现在运行迁移。
rake db:migrateOpen up your Photo model to add PaperClip functionality.
打开您的Photo模型以添加PaperClip功能。
#app/models/photo.rb

...
  #Mounts paperclip image
  has_attached_file :image
PaperClip cannot work if your Photo model is not equipped with it. You do so by adding the line of code used above.
如果您的Photo模型未配备,PaperClip将无法工作。 您可以通过添加上面使用的代码行来实现。
You need to create the files below and paste in the code.
您需要在下面创建文件并粘贴代码。
First, your index page should look like this.
首先,您的索引页面应如下所示。
#app/views/photos/index.html.erb

<div class="page-header"><h1>Upload Photo</h1></div>

<div class="media">
  <% @photos.each do |photo| %>
    <div class="media-left">
      <!-- Renders image -->
      <%= link_to image_tag(photo.image.url, class: 'media-object'), photo.image.url, target: '_blank' %>
    </div>
    <div class="media-body">
      <h4 class="media-heading"><%= photo.title %></h4>
    </div>
  <% end %>
</div>
Your new.html.erb file should look like this.
您的new.html.erb文件应如下所示。
#app/views/photos/new.html.erb

<div class="page-header"><h1>Upload Photo</h1></div>

<%= form_for @photo, html: { multipart: true } do |f| %>
  <% if @photo.errors.any? %>
    <div id="error_explanation">
      <h2>
        <%= "#{pluralize(@photo.errors.count, "error")} prohibited this photo from being saved:" %>
      </h2>
      <ul>
        <% @photo.errors.full_messages.each do |msg| %>
          <li>
            <%= msg %>
          </li>
          <% end %>
      </ul>
    </div>
  <% end %>

  <div class="form-group">
    <%= f.label :title %>
    <%= text_field :title, class: 'form-control' %>
  </div>

  <div class="form-group">
    <%= f.label :image %>
    <%= f.file_field :image, class: 'form-control' %>
  </div>

  <div class="form-group">
        <%= f.submit 'Upload Photo', class: 'btn btn-default' %>
    </div>
<% end %>
Time to configure your routes.
是时候配置您的路线了。
Open your route configuration file and paste in the following.
打开您的路由配置文件,然后粘贴以下内容。
#config/routes.rb
...
root to: "photos#index"
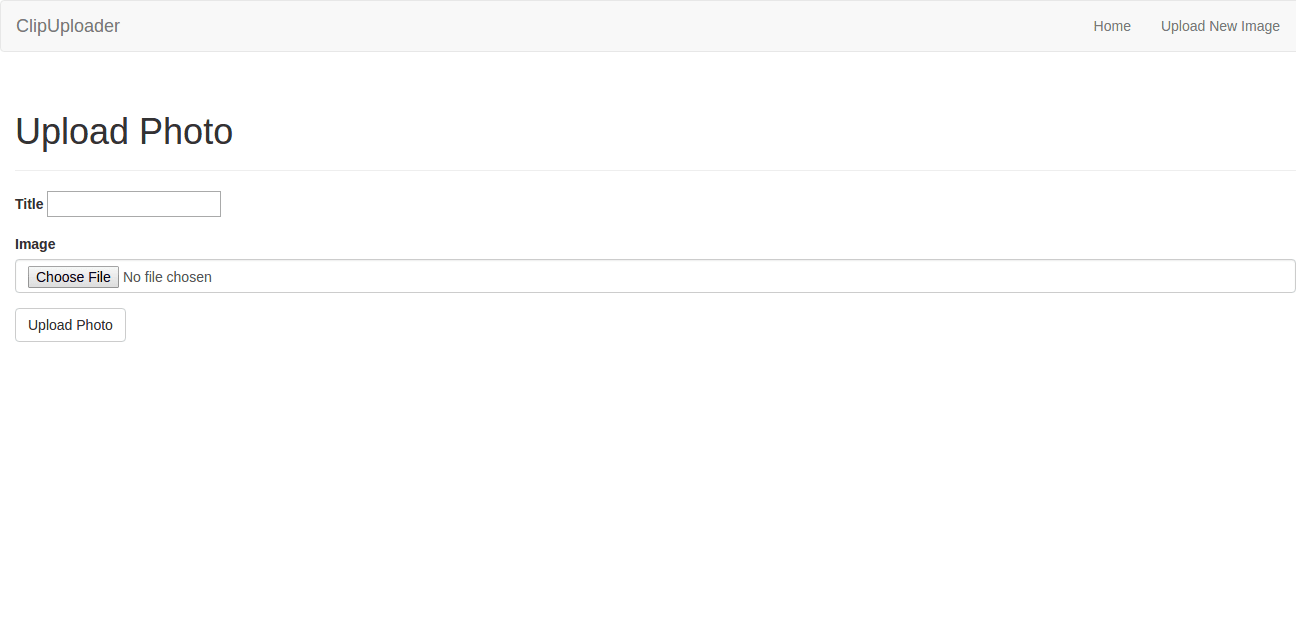
resources :photosWe are listing the available photos on the home page of our application. Fire up your rails server and point your browser to http://localhost:3000/photos/new and you should get this.
我们在应用程序的首页上列出了可用的照片。 启动您的Rails服务器,然后将浏览器指向http://localhost:3000/photos/new ,您应该会得到它。
验证方式 (Validations)
Try uploading an image and you will get an error that looks like this.
尝试上传图片,您会收到如下错误。
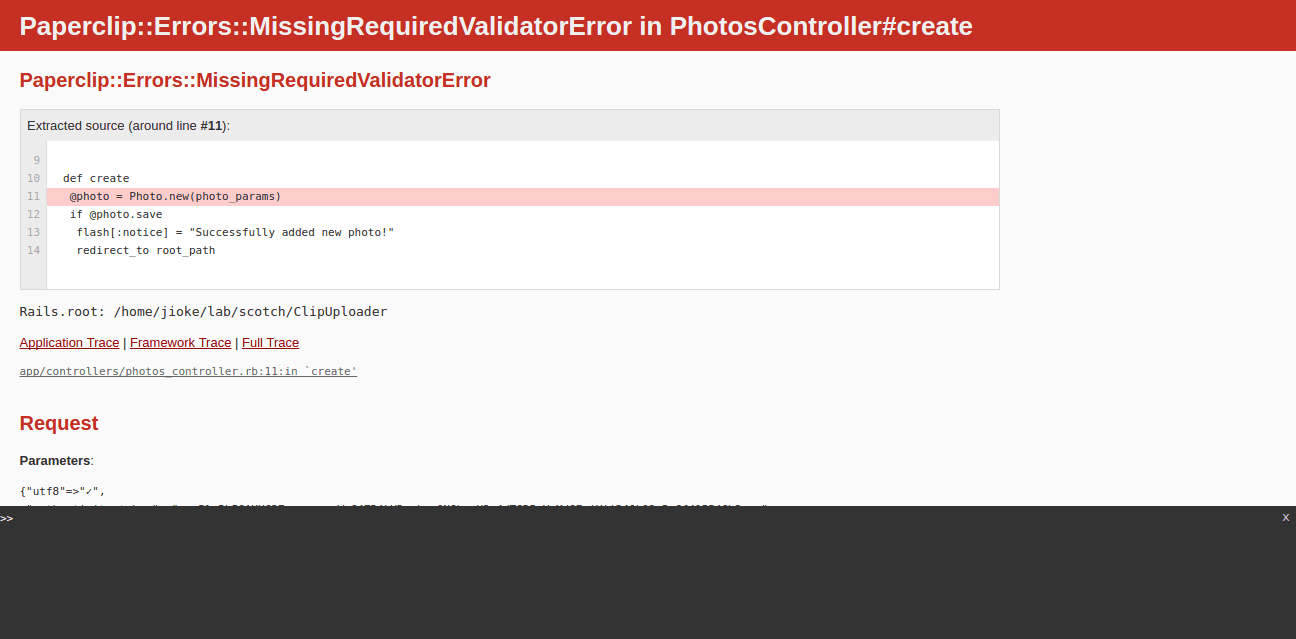
You get this because PaperClip is concerned about the security of your application against malicious files. To fix this open up your Photo model and add this line of code.
之所以会这样,是因为PaperClip担心应用程序对恶意文件的安全性。 要解决此问题,请打开您的Photo模型并添加以下代码行。
#app/models/photo.rb

...
  #This validates the type of file uploaded. According to this, only images are allowed.
  validates_attachment_content_type :image, content_type: /\Aimage\/.*\z/
PaperClip provides you with validators to ensure that malicious files are not uploaded to your application - this is what you just did above. The method validates the file type. In the above code, only images are permitted to be uploaded.
PaperClip为您提供验证器,以确保不会将恶意文件上传到您的应用程序-这就是您上面所做的。 该方法验证文件类型。 在以上代码中,仅允许上传图像。
Try uploading an image again and it will work this time.
尝试再次上传图像,这次将可以正常使用。
#app/models/photo.rb

...
  #Use this if you do not want to validate the uploaded file type.
  do_not_validate_attachment_file_type :image
If you prefer to take care of the validation of files uploaded yourself. You can tell PaperClip explicitly not to validate your file type using the line of code above.
如果您愿意照顾自己上传的文件的验证。 您可以使用上面的代码行明确告诉PaperClip不要验证您的文件类型。
PaperClip provides more validation options for developers to protect their application against malicious file uploads. You have to add it to your model.
PaperClip为开发人员提供了更多的验证选项,以保护其应用程序免受恶意文件上传的侵害。 您必须将其添加到模型中。
#app/models/photo.rb

...
  #Validates file, file type and file size
  validates_attachment :image, presence: true,
  content_type: { content_type: "image/jpeg" },
  size: { in: 0..10.kilobytes }
In the above code we want to validate that an image is uploaded, and also ensure that non-image files are not uploaded. We've also gone ahead to set the maximum size allowed to 10kilobytes.
在上面的代码中,我们要验证是否已上传图像,并确保未上传非图像文件。 我们还继续将允许的最大大小设置为10 KB。
删除照片 (Deleting a Photo)
In case you are wondering if it is possible to delete a uploaded file, PaperClip has got you covered. Add the code below to your PhotosController.
如果您想知道是否可以删除上传的文件,请使用PaperClip。 将以下代码添加到您的PhotosController 。
#app/controllers/photos_controller.rb

...

  #Destroy action for deleting an already uploaded image
  def destroy
  @photo = Photo.find(params[:id])
    if @photo.destroy
      flash[:notice] = "Successfully deleted photo!"
      redirect_to root_path
    else
      flash[:alert] = "Error deleting photo!"
    end
  end
The destroy action is called on whenever a user wants to delete a photo. You'll need to add a button on your views. So open up app/views/photos/index.html.erb and make it look like this:
每当用户想要删除照片时,都会调用destroy操作。 您需要在视图上添加一个按钮。 因此,打开app/views/photos/index.html.erb并使其如下所示:
#app/views/photos/index.html.erb

<div class="page-header"><h1>Photos</h1></div>

<div class="media">
  <% @photos.each do |photo| %>
    <div class="media-left">
      <!-- Renders image -->
      <%= link_to image_tag(photo.image.url, class: 'media-object'), photo.image.url, target: '_blank' %>
      <!-- Button to delete image -->
      <%= link_to 'Remove', photo_path(photo), class: 'btn btn-danger', method: :delete, data: {confirm: 'Are you sure?'} %>
    </div>
    <div class="media-body">
      <h4 class="media-heading"><%= photo.title %></h4>
    </div>
  <% end %>
</div>
Now on your index page when you click the Remove button you will see a pop-up asking you to confirm if you want to delete the photo.
现在,在索引页面上,单击“ Remove按钮,您将看到一个弹出窗口,要求您确认是否要删除照片。
回形针VS其他宝石 ( PaperClip VS Other Gems )
You might be wondering, when is the best time for me to use PaperClip in my Rails application when compared to other gems. Here are the options I have for you.
您可能想知道,与其他宝石相比,什么时候是我在Rails应用程序中使用PaperClip的最佳时间? 这是我为您提供的选择。
- Easy Attachment: PaperClip provides you with the option of enabling file upload in your Rails application easily. The process is involved is simple. 简易附件:PaperClip为您提供了在Rails应用程序中轻松启用文件上传的选项。 所涉及的过程很简单。
- PaperClip is a great option when building simple application. It is advisable to avoid PaperClip is your application will be complex. For complex applications you may want to consider CarrierWave. 在构建简单应用程序时,PaperClip是一个很好的选择。 建议避免使用PaperClip,因为您的应用程序会很复杂。 对于复杂的应用程序,您可能需要考虑使用CarrierWave。
- PaperClip is also not your perfect choice if your application will require multiple file upload. PaperClip handles single file upload pretty well. 如果您的应用程序需要上传多个文件,PaperClip也不是您的理想选择。 PaperClip可以很好地处理单个文件的上载。
- If you need a gem that is actively maintained by an experienced team, PaperClip falls into such category. PaperClip is maintained and funded by thoughtbot. 如果您需要由经验丰富的团队积极维护的宝石,PaperClip属于此类。 PaperClip由Thoughtbot维护和资助。
结论 ( Conclusion )
We have been able to cover the basics and important aspects of file upload with PaperClip. To dig deep check out the official Github repo. In the next part of this series, we will take a look at another file uploading gem.
我们已经能够涵盖使用PaperClip上传文件的基本知识和重要方面。 要深入研究,请查看Github官方仓库 。 在本系列的下一部分中,我们将介绍另一个文件上传gem。
翻译自: https://scotch.io/tutorials/file-upload-in-rails-with-paperclip
我的世界paperclip


 1320
1320

 被折叠的 条评论
为什么被折叠?
被折叠的 条评论
为什么被折叠?
 到【灌水乐园】发言


