


Most JavaScript frameworks these days usually have some sort of Command Line Interface (CLI) that enables users quickly scaffold applications and get straight to building apps, without doing repetitive set up tasks. Some common ones are:
如今,大多数JavaScript框架通常都具有某种命令行界面(CLI),使用户能够快速搭建应用程序并直接构建应用程序,而无需执行重复的设置任务。 一些常见的是:
Sometimes these CLIs come with a lot of configurations, which may be fun to use, but also a bit complex, since some commands may take in a lot of parameters and flags.
有时,这些CLI带有许多配置,使用起来可能很有趣,但也有些复杂,因为某些命令可能会包含很多参数和标志。
The Vue CLI introduced a Graphical User Interface (GUI), which can save us a lot of time and give us clarity on what we are actually doing while building a Vue App generated with the CLI.

Vue CLI引入了图形用户界面(GUI),可以为我们节省大量时间,并使我们在构建使用CLI生成的Vue应用程序时可以清楚地了解自己的实际工作。
NOTE The UI Tool is till in Beta, and a lot may change.
注意 UI工具尚处于Beta版,因此可能会有很多更改。
先决条件 ( Prerequisites )
- You should have a basic to intermediate understanding of JavaScript and VueJS 您应该对JavaScript和VueJS有基本到中级的了解
- You should have NodeJS installed. 您应该已经安装了NodeJS。
安装 ( Installation )
You need to have Vue CLI 3 installed.
您需要安装Vue CLI 3。
npm i -g @vue/cliTyping in vue on your terminal should give you this.
在终端上键入vue应该可以为您提供此功能。
vue

  Usage: vue<command> [options]

  Options:

    -V, --version                         output the version number
    -h, --help                            output usage information

  Commands:

    create [options] <app-name>           create a new project powered by vue-cli-service
    add <plugin> [pluginOptions]          install a plugin and invoke its generator in an already created project
    invoke <plugin> [pluginOptions]       invoke the generator of a plugin in an already created project
    inspect [options] [paths...]          inspect the webpack config in a project with vue-cli-service
    serve [options] [entry]               serve a .js or .vue file in development mode with zero config
    build [options] [entry]               build a .js or .vue file in production mode with zero config
    ui [options]                          start and open the vue-cli ui
    init [options] <template> <app-name>  generate a project from a remote template (legacy API, requires @vue/cli-init)
    config [options] [value]              inspect and modify the config


  Run vue <command> --help for detailed usage of given command.
Among the options, you can see there's a command called ui. This is what we're going to explore.
在这些选项中,您可以看到有一个名为ui的命令。 这就是我们要探索的。
...
ui [options]                          start and open the vue-cli ui
...

`
搭建Vue应用 ( Scaffold a Vue App )
Create a directory where you want your Vue apps to be, I'll call mine vue-ui
在您想要Vue应用程序所在的目录中创建一个目录,我将其命名为vue-ui
mkdir vue-uiThen open the Vue UI tool with
然后使用打开Vue UI工具
vue uiThis opens the Vue GUI on http://localhost:8001 on your default browser.

这将在默认浏览器上的http://localhost:8001上打开Vue GUI。
The three sections shown are intuitive but to explain:
所示的三个部分很直观,但可以解释:
- Projects - will list projects of the current directory, or the ones you have used this tool to generate 项目 -将列出当前目录的项目,或您使用此工具生成的项目
- Create - will allow you to create a new Vue project 创建 -将允许您创建一个新的Vue项目
- Import - will allow you to import a project from either a directory, or a remote github repository. 导入 -允许您从目录或远程github存储库中导入项目。
At the bottom of the screen, on the status bar, you will be shown where your current directory is, and on the far right, you can change the theme of the app.
在屏幕底部的状态栏上,将显示您当前目录的位置,在最右边,您可以更改应用程序的主题。
Let's create a project. Click on the Create Tab, and click on the Create a new project here button.
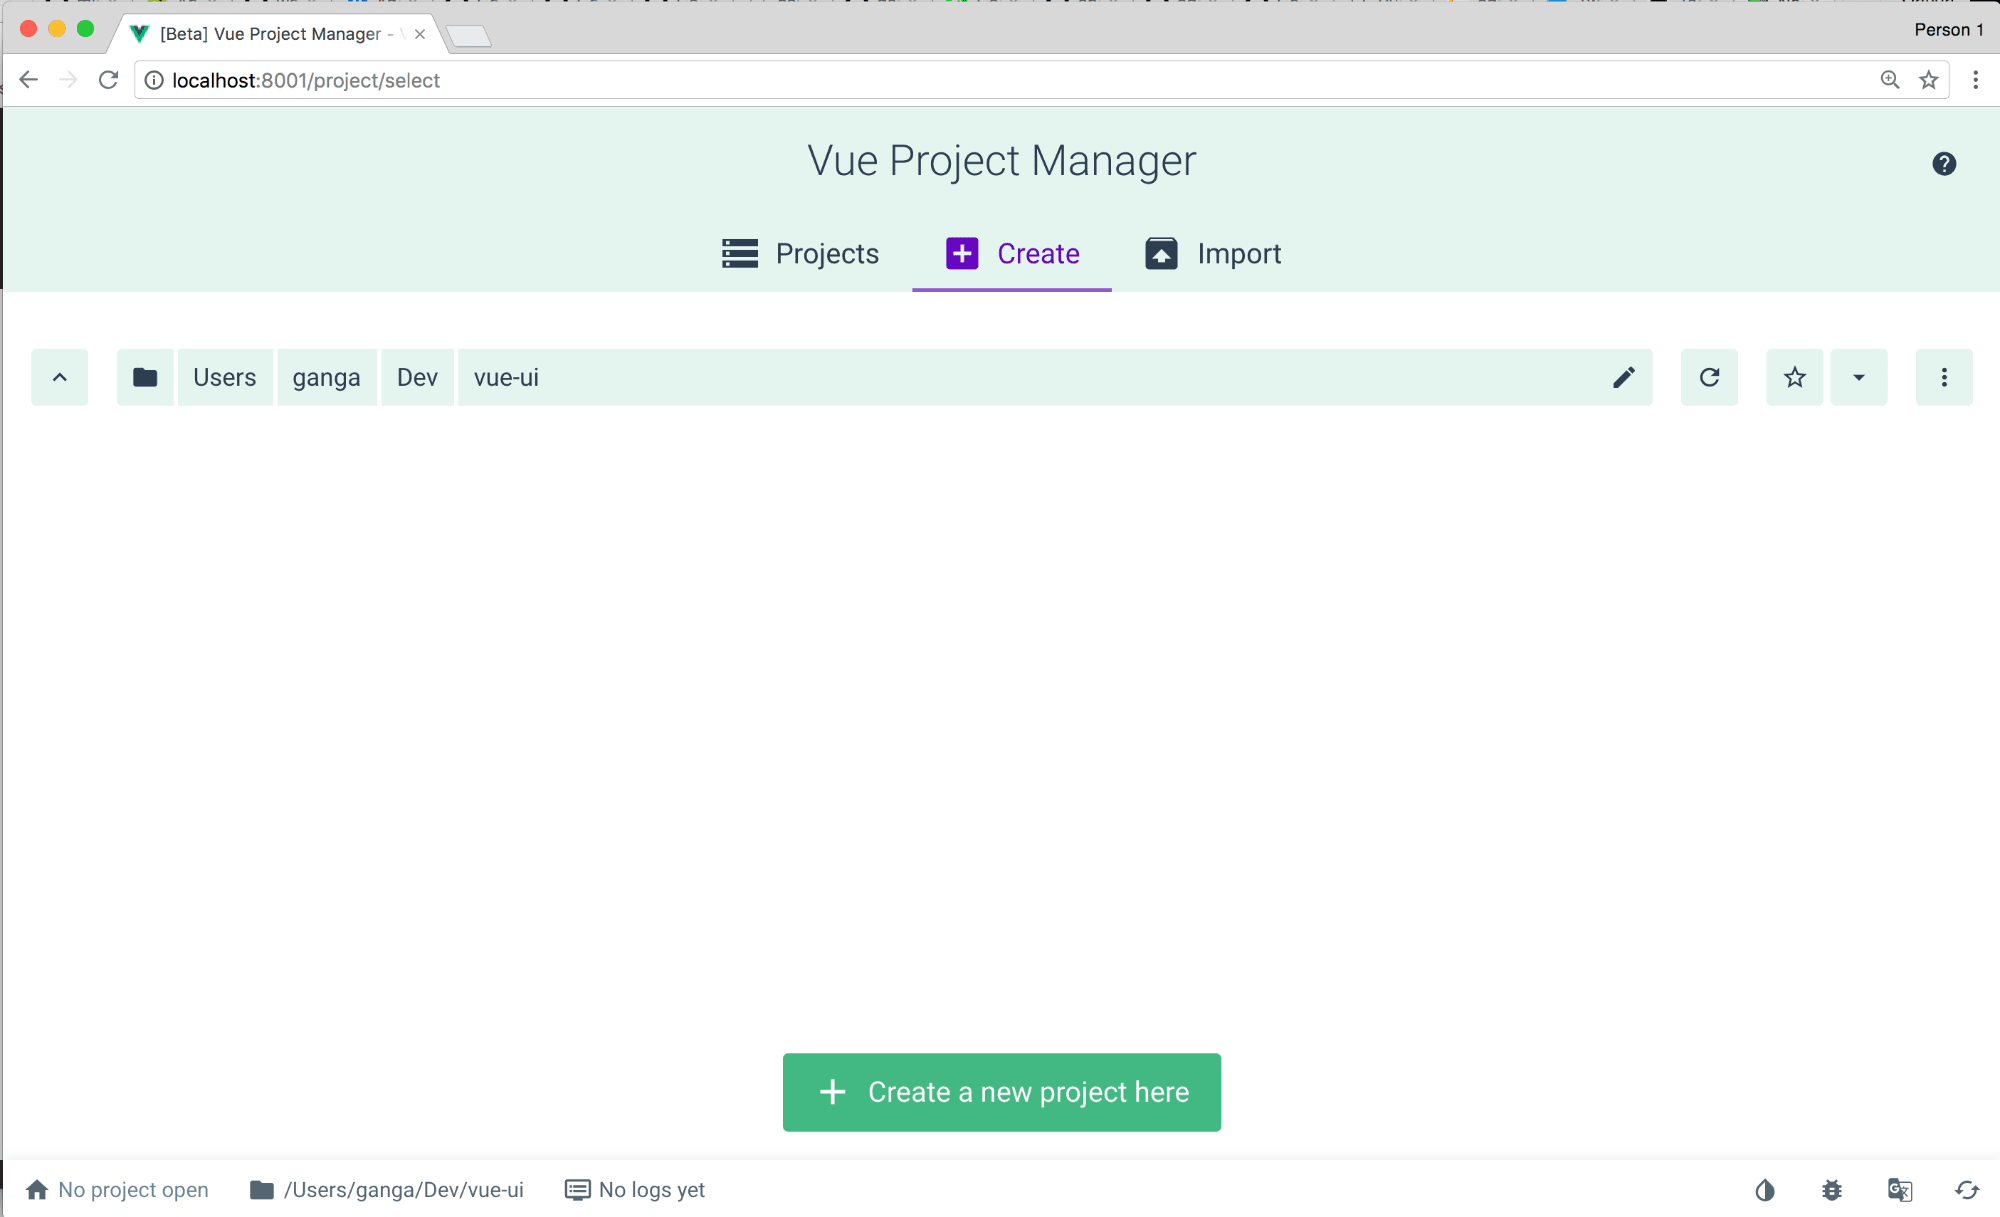
让我们创建一个项目。 单击创建选项卡,然后单击在此处创建新项目按钮。
A pop will show up. Let's fill it in with the the project name scotch-vue.
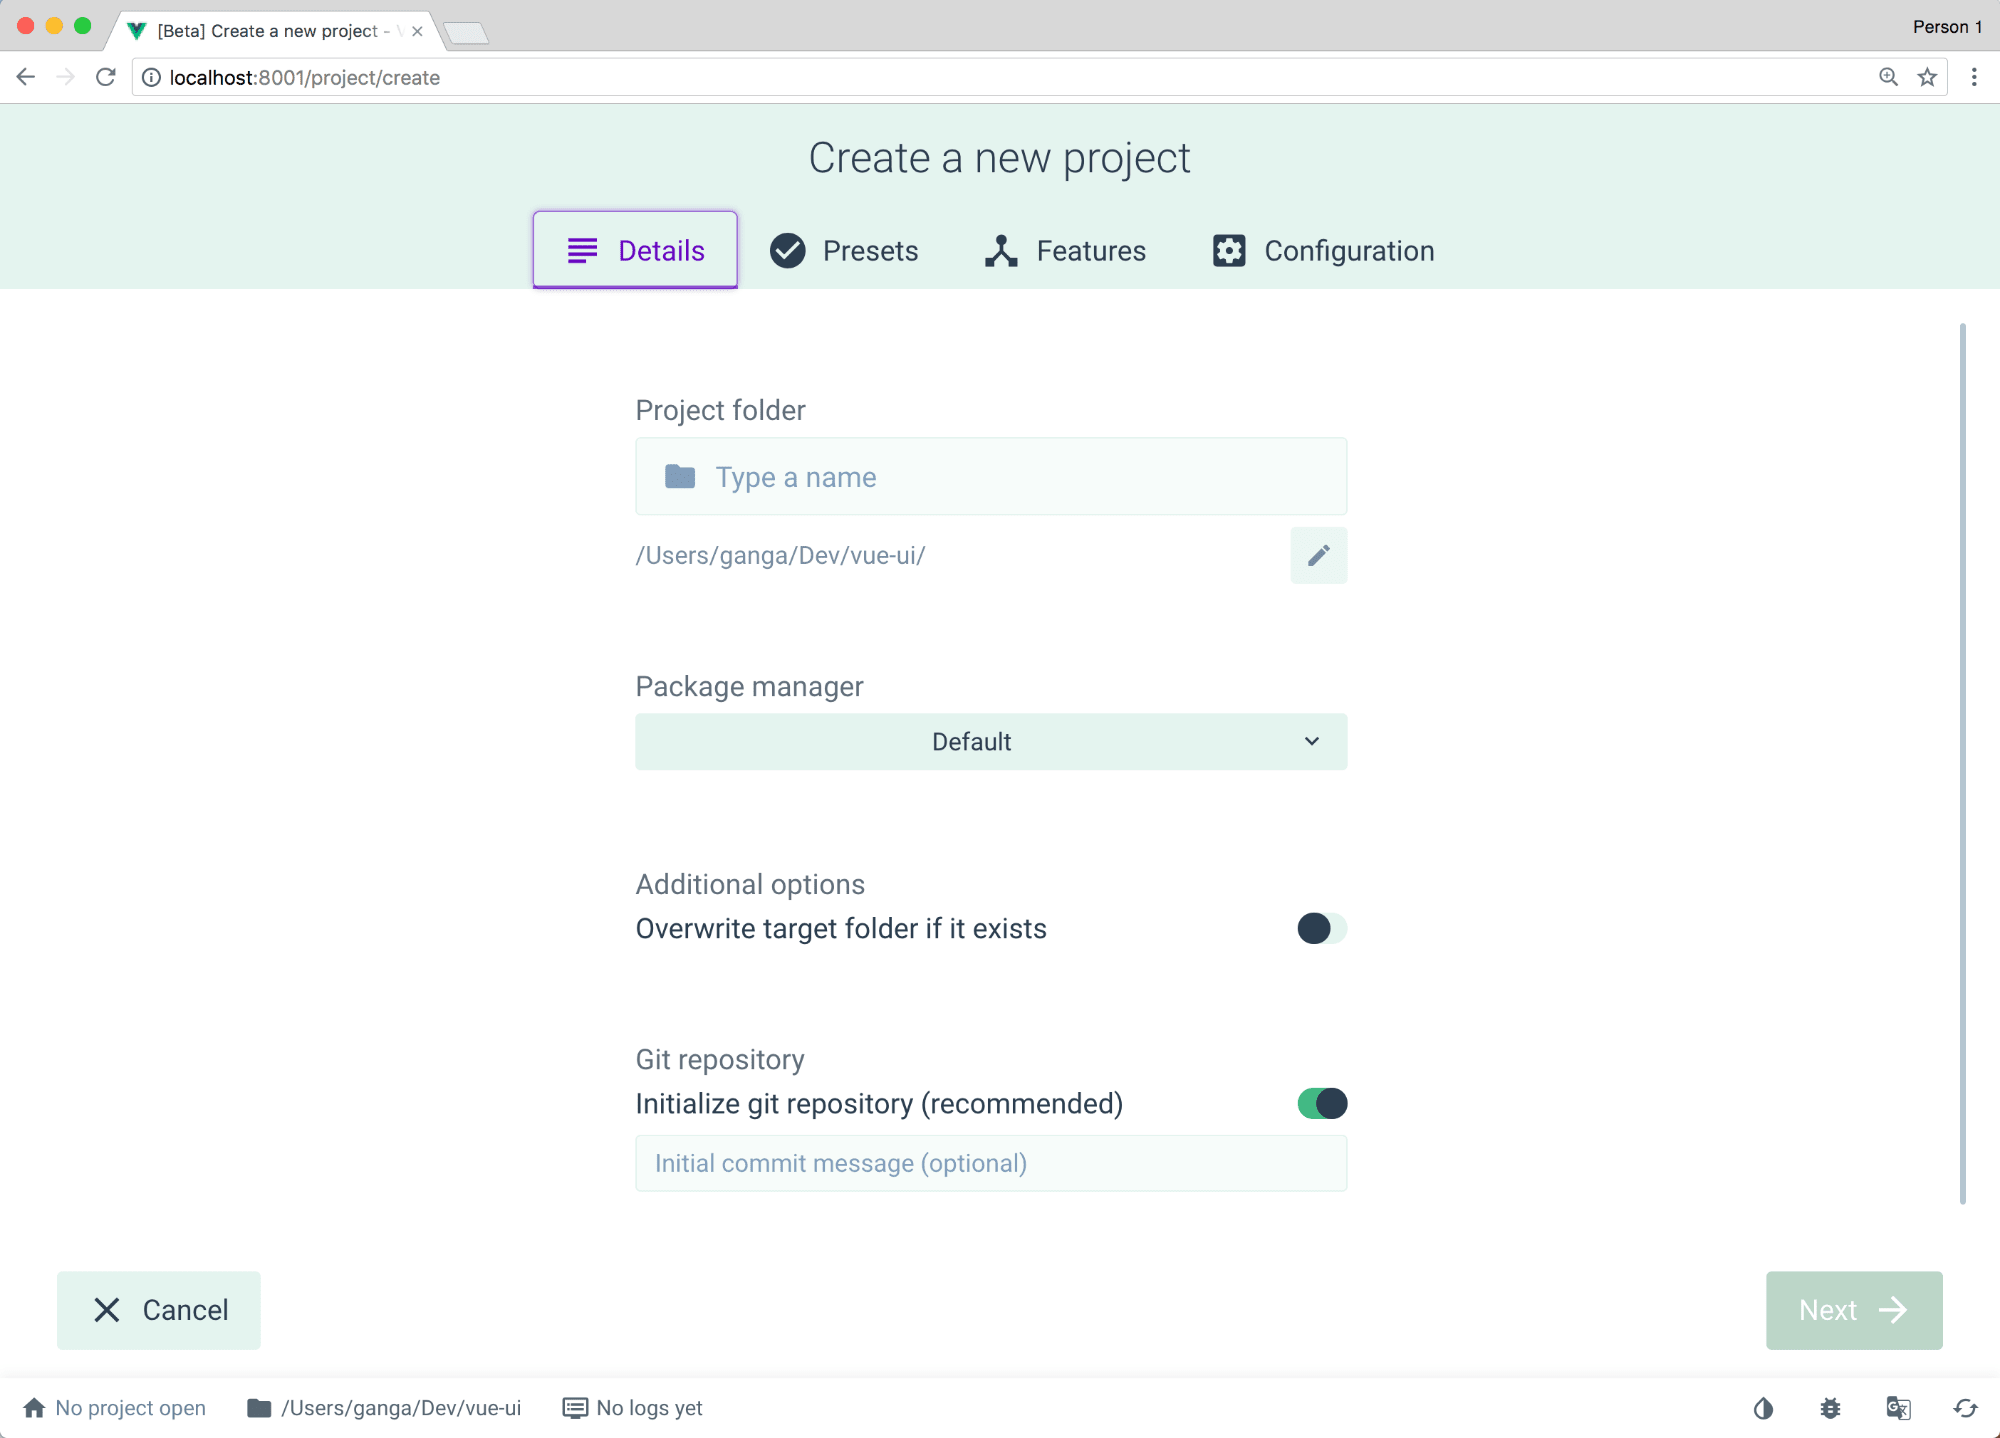
将会弹出一个弹出窗口。 让我们用项目名称scotch-vue填充它。
Select npm as the default package manager, and initialize a git repository if you want.
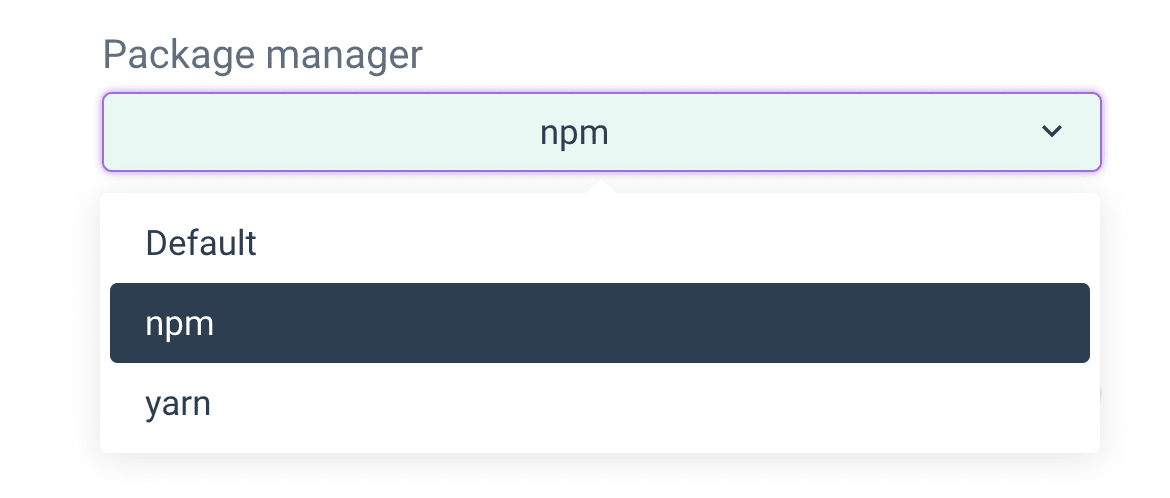
选择npm作为默认的程序包管理器,并根据需要初始化git存储库。
Press next, and you'll be taken to the presets tab. This is where we add in the configurations that are common to Vue applications. Select Manual and press next.

按下一步,您将进入预设标签。 这是我们添加Vue应用程序通用配置的地方。 选择手动 ,然后按下一步。
NOTE if you have saved presets, they will appear here, so that you can just select them instead. Below shows scotch-vue and all-settings presets I created earlier

注意如果已保存预设,它们将显示在此处,以便您可以选择它们。 下面显示了我先前创建的苏格兰式和所有设置预设
You'll be navigated to the Features page so that you can select the Plugins and Configurations you want. I went mostly with the following configurations: Babel,Router, CSS Preprocessor, Linter/Formatter, Unit Testing, Use Config Files. Scroll down to see all the configs.
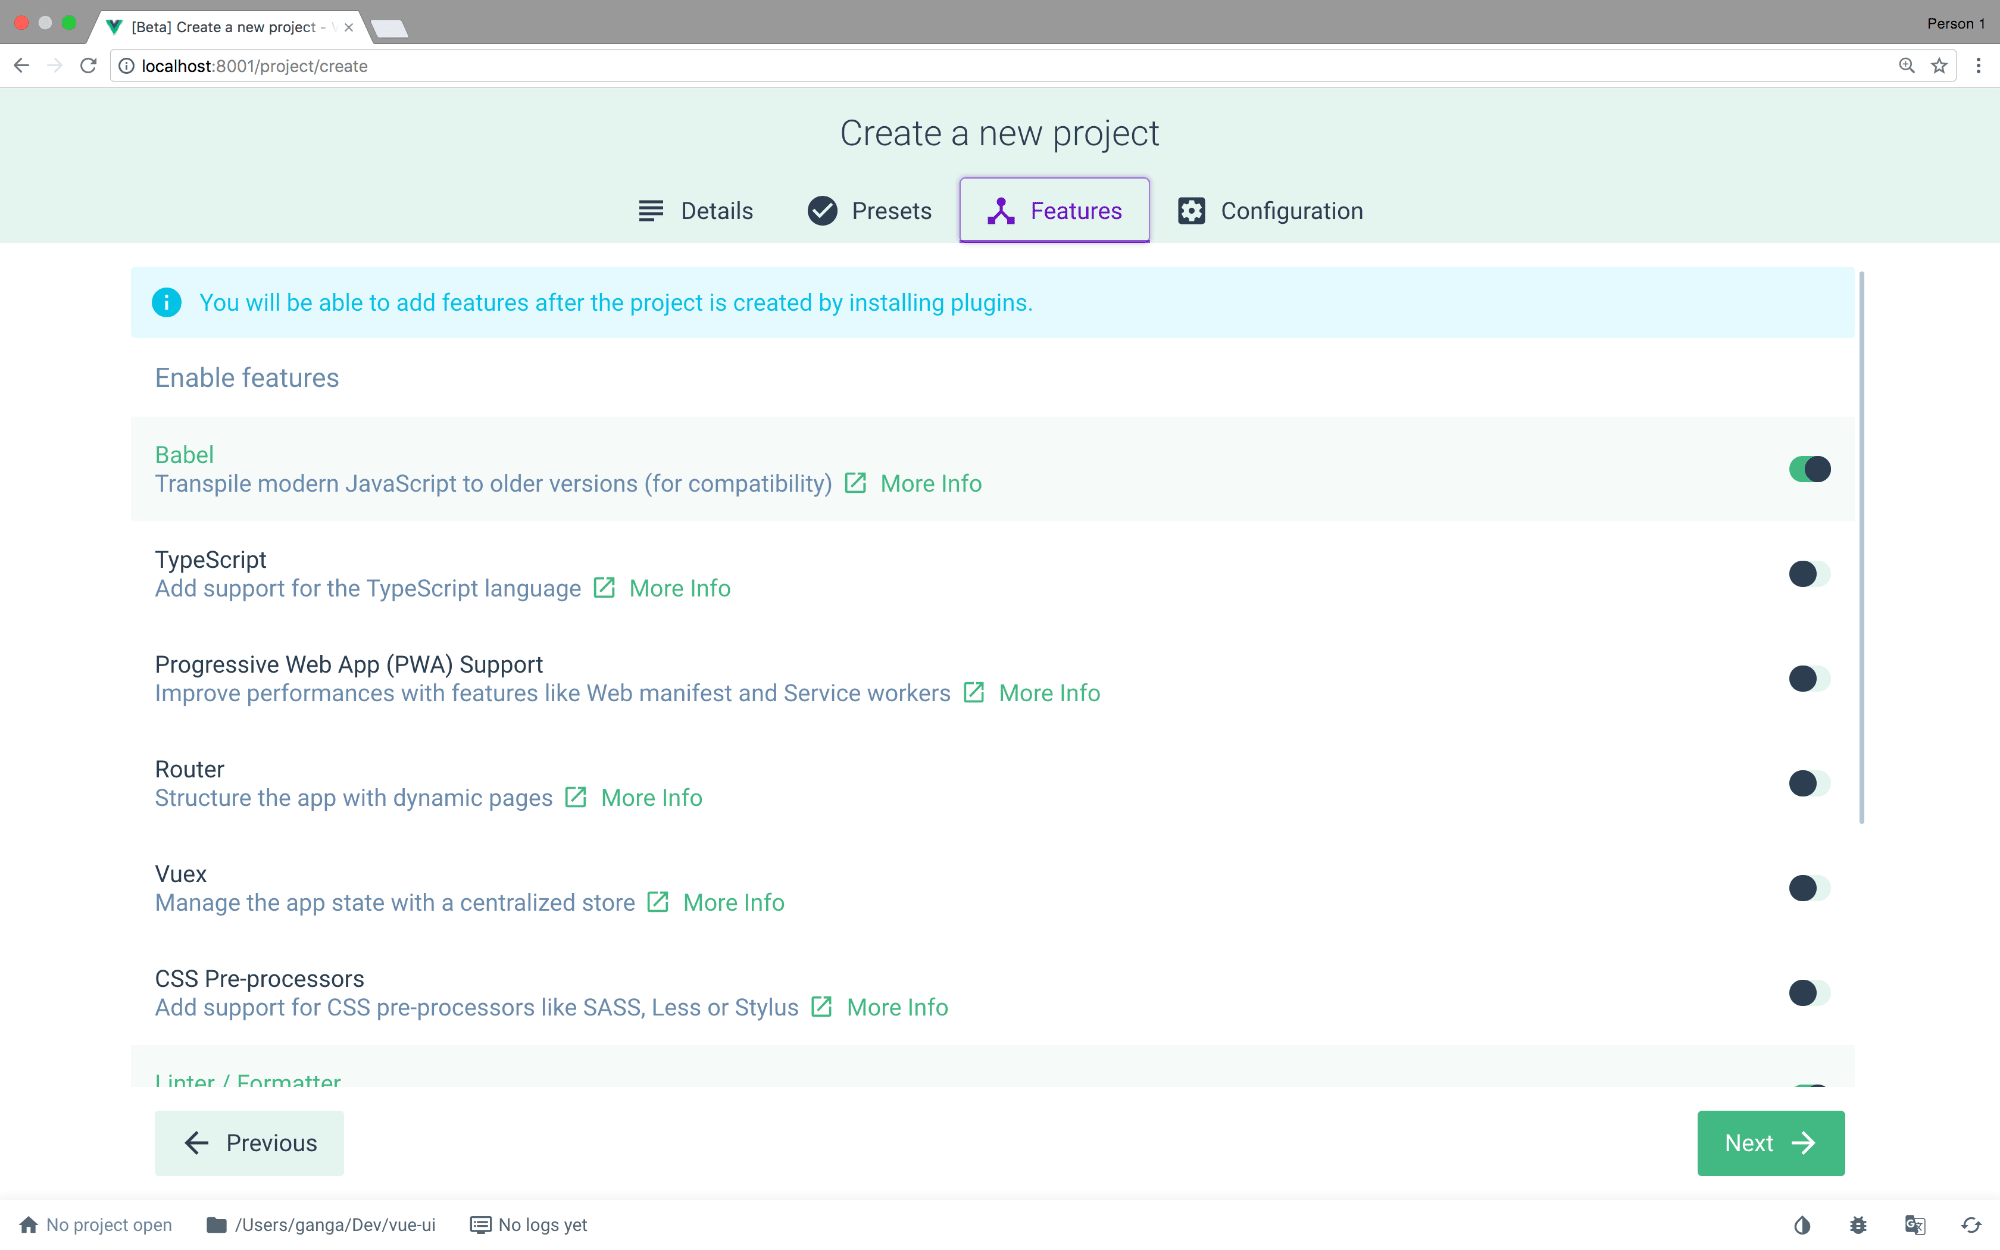
您将导航到“功能”页面,以便可以选择所需的插件和配置。 我主要使用以下配置: Babel , 路由器 , CSS预处理器 , Linter / Formatter , 单元测试 , Use Config Files 。 向下滚动以查看所有配置。
All the options have a More Info link, that opens in a new tab with the documentation on the plugins/features you are adding.
所有选项都有一个“ 更多信息”链接,该链接会在新选项卡中打开,其中包含您要添加的插件/功能的文档。
Finally, press next and you will be directed to the configurations section. Here's where you customize the configurations for the features you added in the previous section.
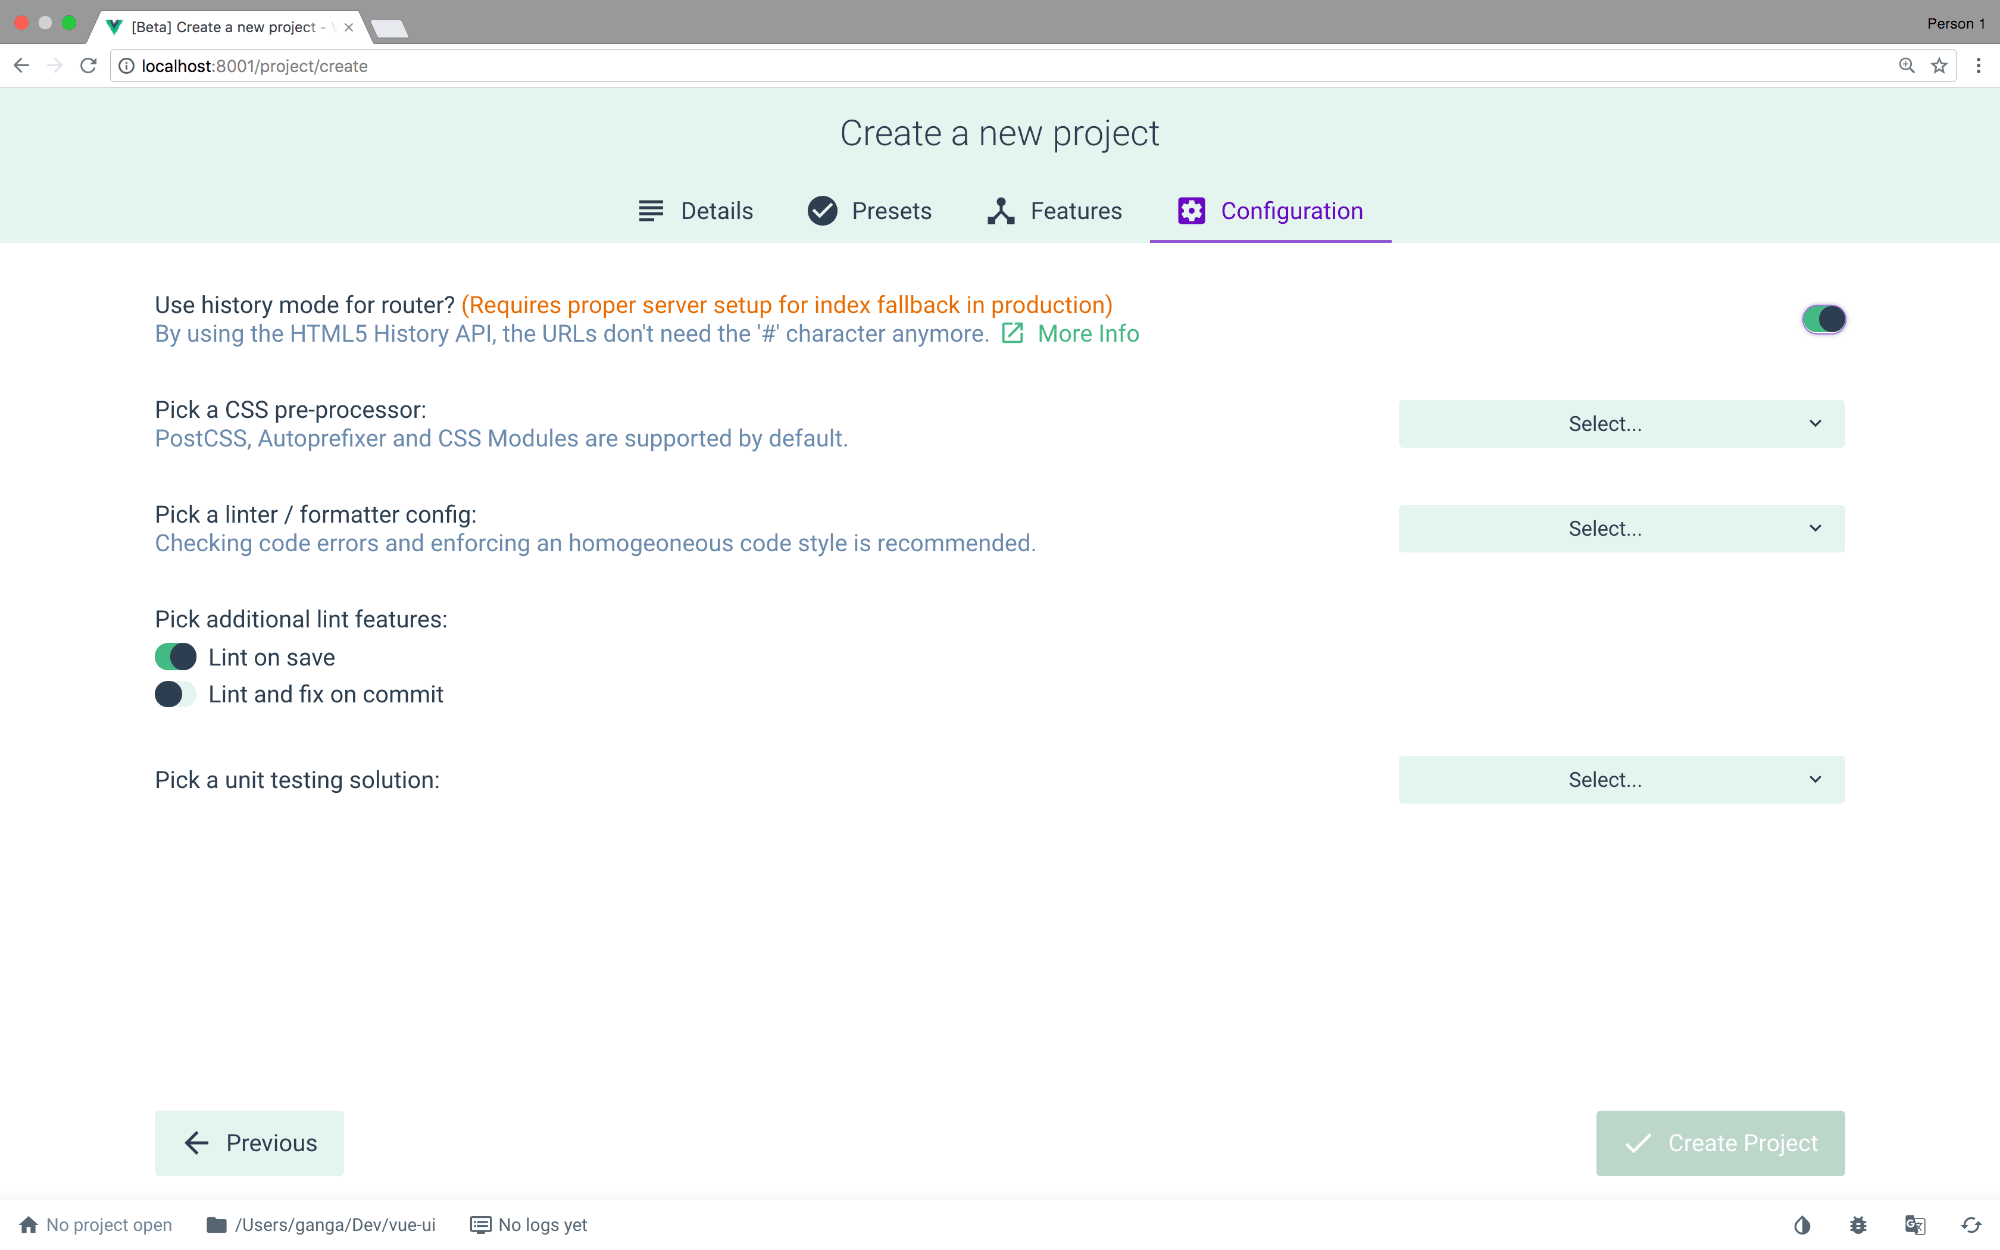
最后,按下一步,您将被带到“配置”部分。 在此处,您可以为上一节中添加的功能自定义配置。
On the CSS pre-processors, pick SCSS/SASS

在CSS预处理器上,选择SCSS / SASS
I decided to choose ESLint + Prettier, and selected lint on save.

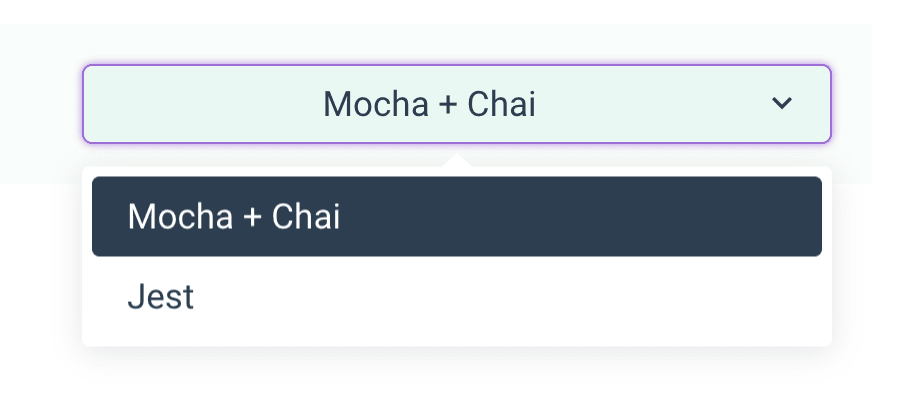
Finally pick a unit testing solution: Mocha and Chai

Click on create project. You will be asked if you want to give the settings/preset a name. I called it scotch-vue-preset. Next time, you can just scaffold a project directly from this preset.
单击创建项目。 系统将询问您是否要给设置/预设命名。 我称它为scotch-vue-preset 。 下次,您可以直接从该预设中脚手架一个项目。
Clicking on Create Project will give you a loader, telling you the progress of the project creation, and the once done, take you to the projects dashboard.

单击“ 创建项目”将为您提供一个加载器,告诉您项目创建的进度,完成后将您带到项目仪表板。
You can open the application in an editor, by clicking on the app name on the top left.

您可以通过单击左上角的应用程序名称在编辑器中打开该应用程序。
探索项目仪表板 ( Exploring the Project Dashboard )
The dashboard is divided into four parts:
仪表板分为四个部分:
1.插件 (1. Plugins)
Lists your plugins and allow you to install other plugins into your current project.
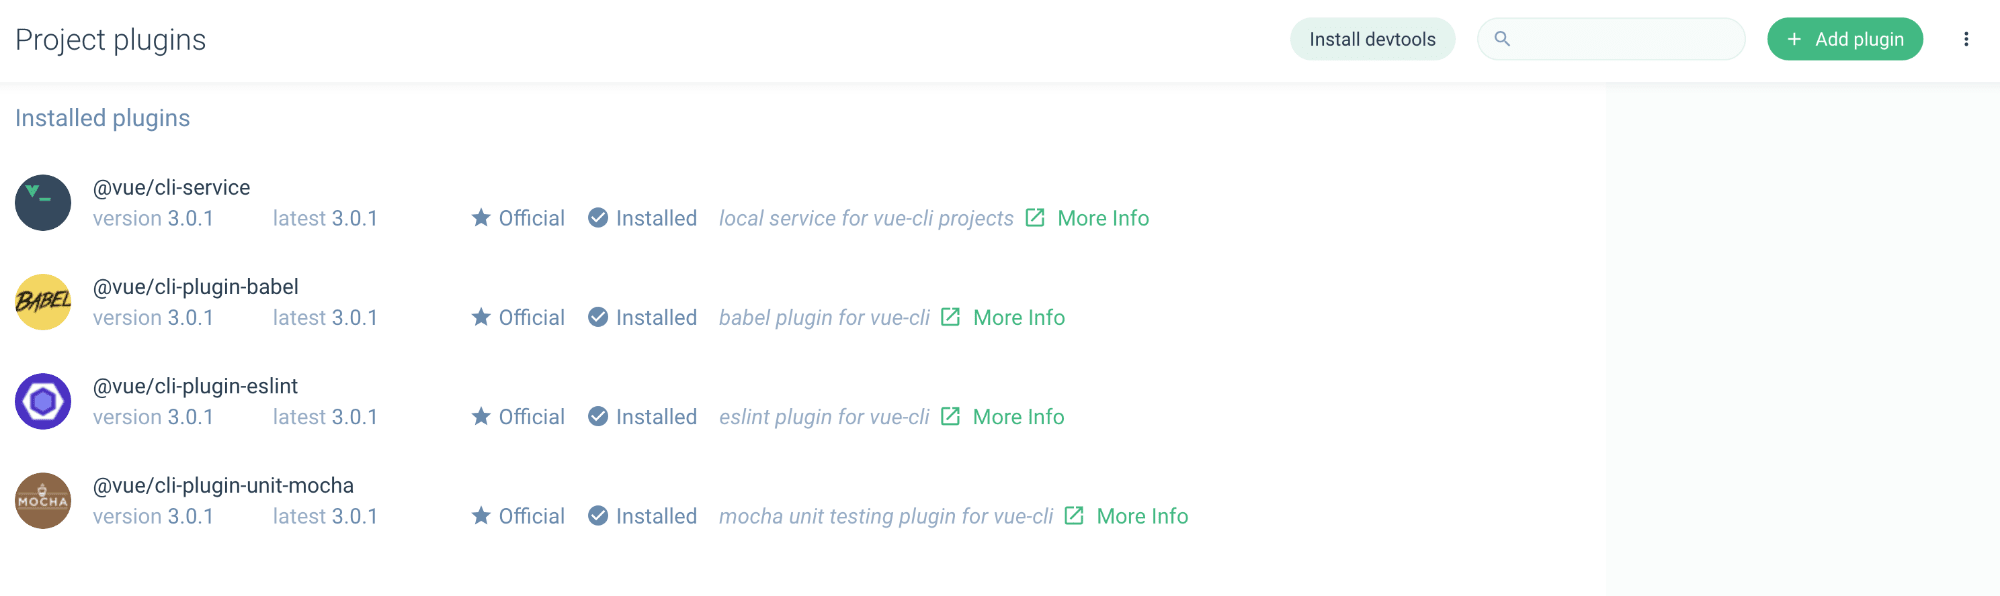
列出您的插件,并允许您将其他插件安装到当前项目中。
You can click on the Install Plugins button on the top right to enable you search and install plugins.

您可以单击右上角的“ 安装插件”按钮以搜索和安装插件。
2.依存关系 (2. Dependencies)
Lists your npm dependencies, and allows you to add/remove dependencies.

列出您的npm依赖关系,并允许您添加/删除依赖关系。
You can click in the Install Dependencies button on the top right to enable you search and install dependencies.

您可以单击右上角的“ Install Dependencies”(安装依赖项)按钮来搜索和安装依赖项。
3.配置 (3. Configurations)
Allows you to modify configurable sections of your applications. Right now, you'll see two options:-
允许您修改应用程序的可配置部分。 现在,您会看到两个选项:
Vue CLI配置 ( Vue CLI configurations )
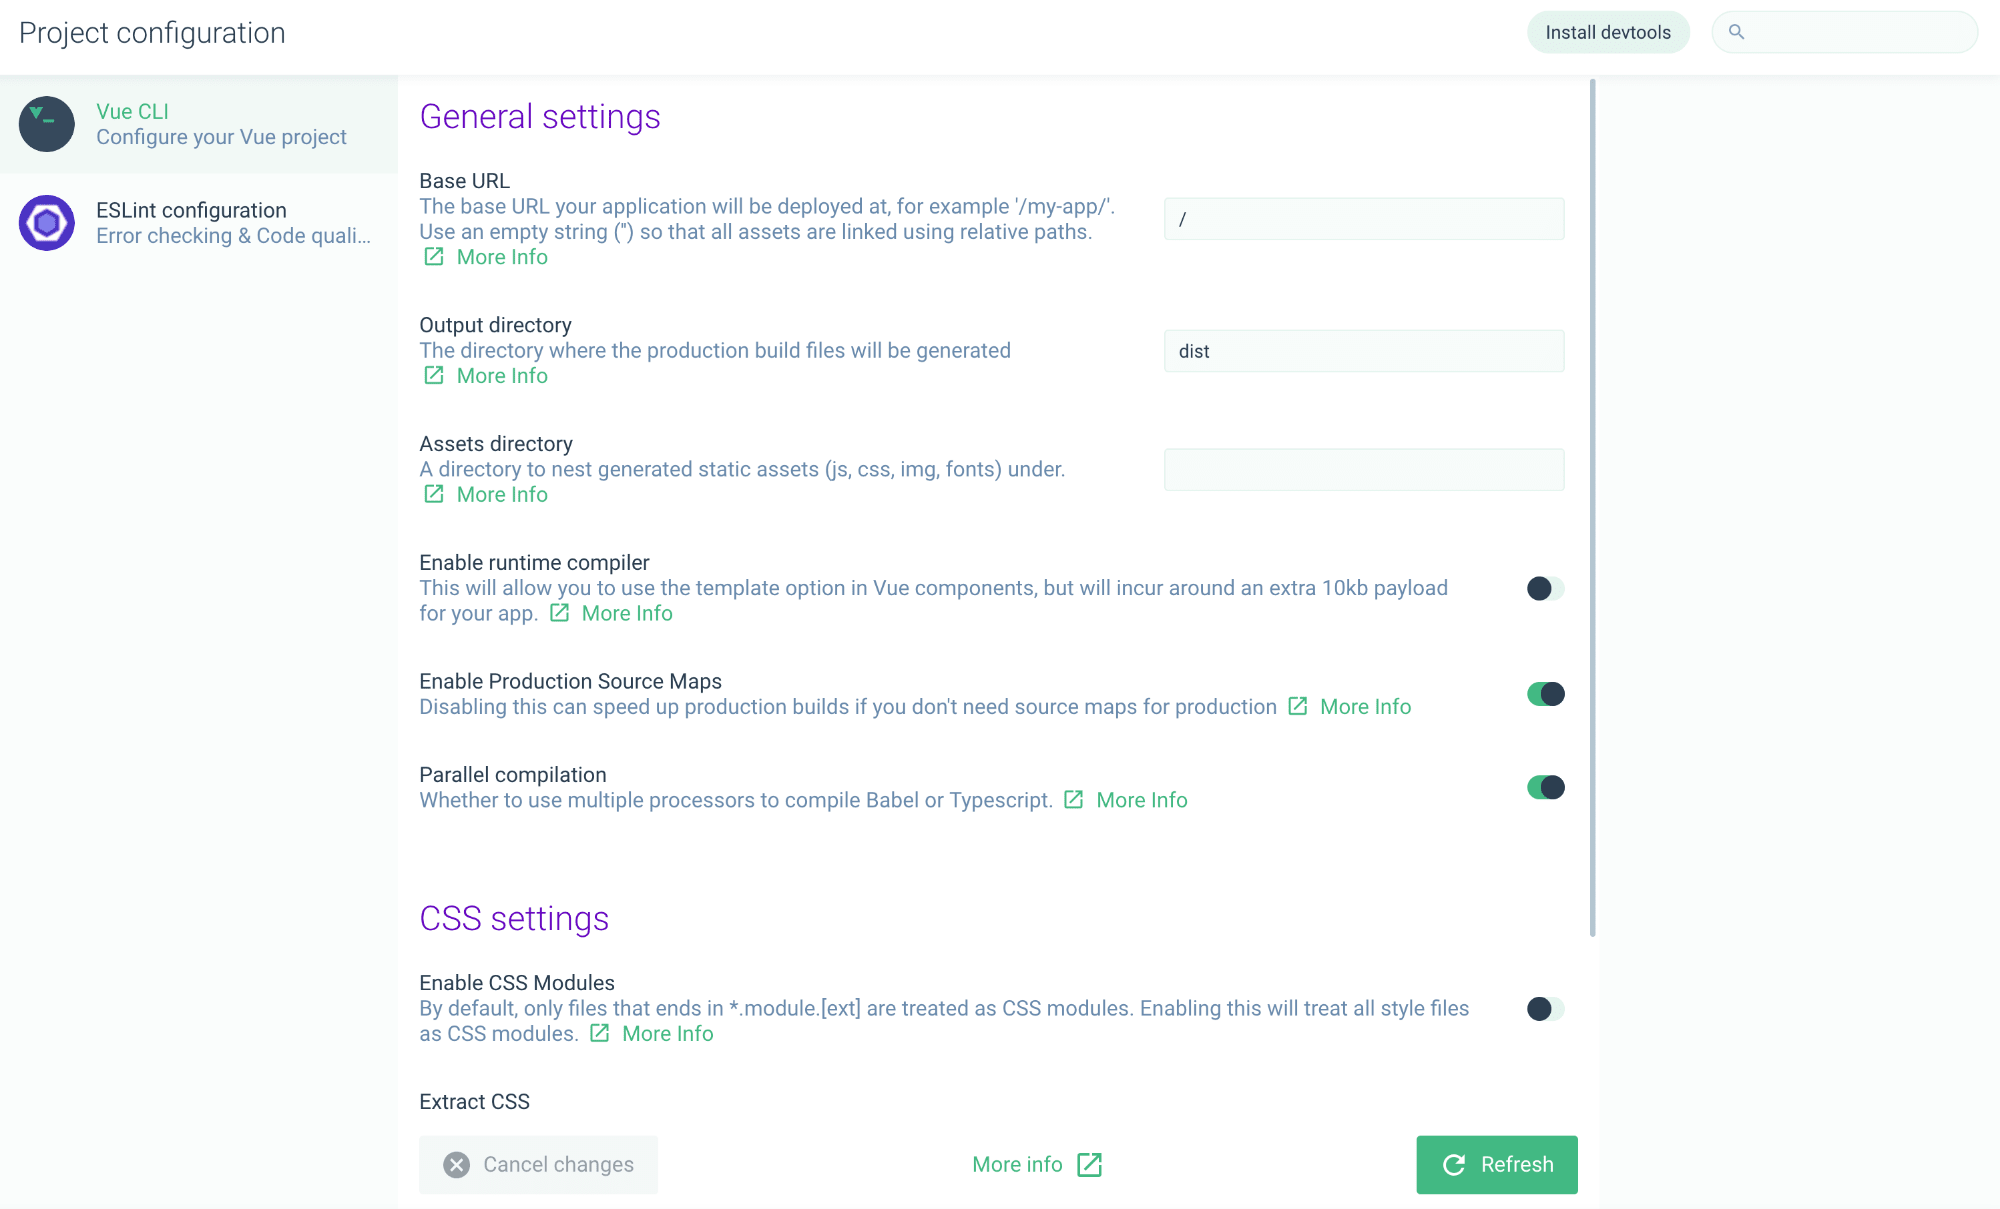
Eslint配置。 ( Eslint Configuration. )

4.任务 (4. Tasks)
Tasks allow you to perform operations on your application, that you normally do when building apps. They include the following. I've taken the descriptions directly from the UI.
任务使您可以在构建应用程序时对应用程序执行操作。 它们包括以下内容。 我直接从UI中获取了描述。
- Serve - Compiles and hot reloads your application 服务-编译并热重载您的应用程序
- Build - Compiles and minifies for production 构建-编译并最小化生产
- Lint - Lints and fixes files 皮棉-皮棉和修复文件
- Test - Run tests using Mocha 测试-使用Mocha运行测试
- Inspect - inspect the resolved webpack config. 检查-检查已解析的Webpack配置。
Note - These tasks are listed here based on our configuration. We do not have the E2E task listed for instance.
注意 -这些任务在此处根据我们的配置列出。 例如,我们没有列出E2E任务。
服务 ( Serve )
We've seen that this section compiles and hot reloads your application. The first part of the Serve section allows you to configure the serve task.
我们已经看到,本节将编译并热重载您的应用程序。 服务部分的第一部分允许您配置服务任务。
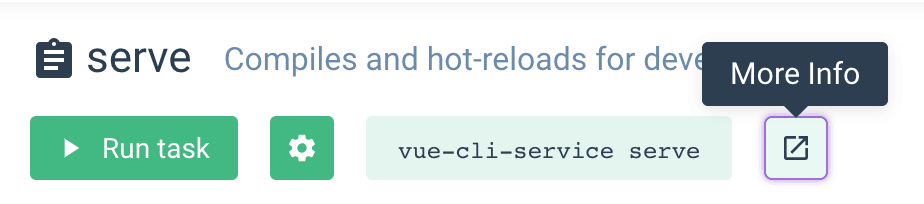
You can click on the gear icon to configure the serve task.

您可以点击齿轮图标来配置服务任务。
The more info button will open documentation regarding the vue-cli-service.
更多信息按钮将打开有关vue-cli-service的文档。
Then clicking the Run Task button will update the Dashboard Tab, and open the app in a new tab, as we specified in the serve task config. This is the tab opened, the default vue-cli app, with documentation links. The Run Task button changes to Stop Task.

然后点击“ 运行任务”按钮将更新“仪表板”标签,并按照我们在服务任务配置中指定的方式在新标签中打开应用。 这是打开的选项卡,默认的vue-cli应用程序,带有文档链接。 运行任务按钮变为停止任务。
仪表板标签 ( Dashboard Tab )
The dashboard tab shows various stats about your application bundle, you can inspect it to see file sizes, and even loading speeds for your files.
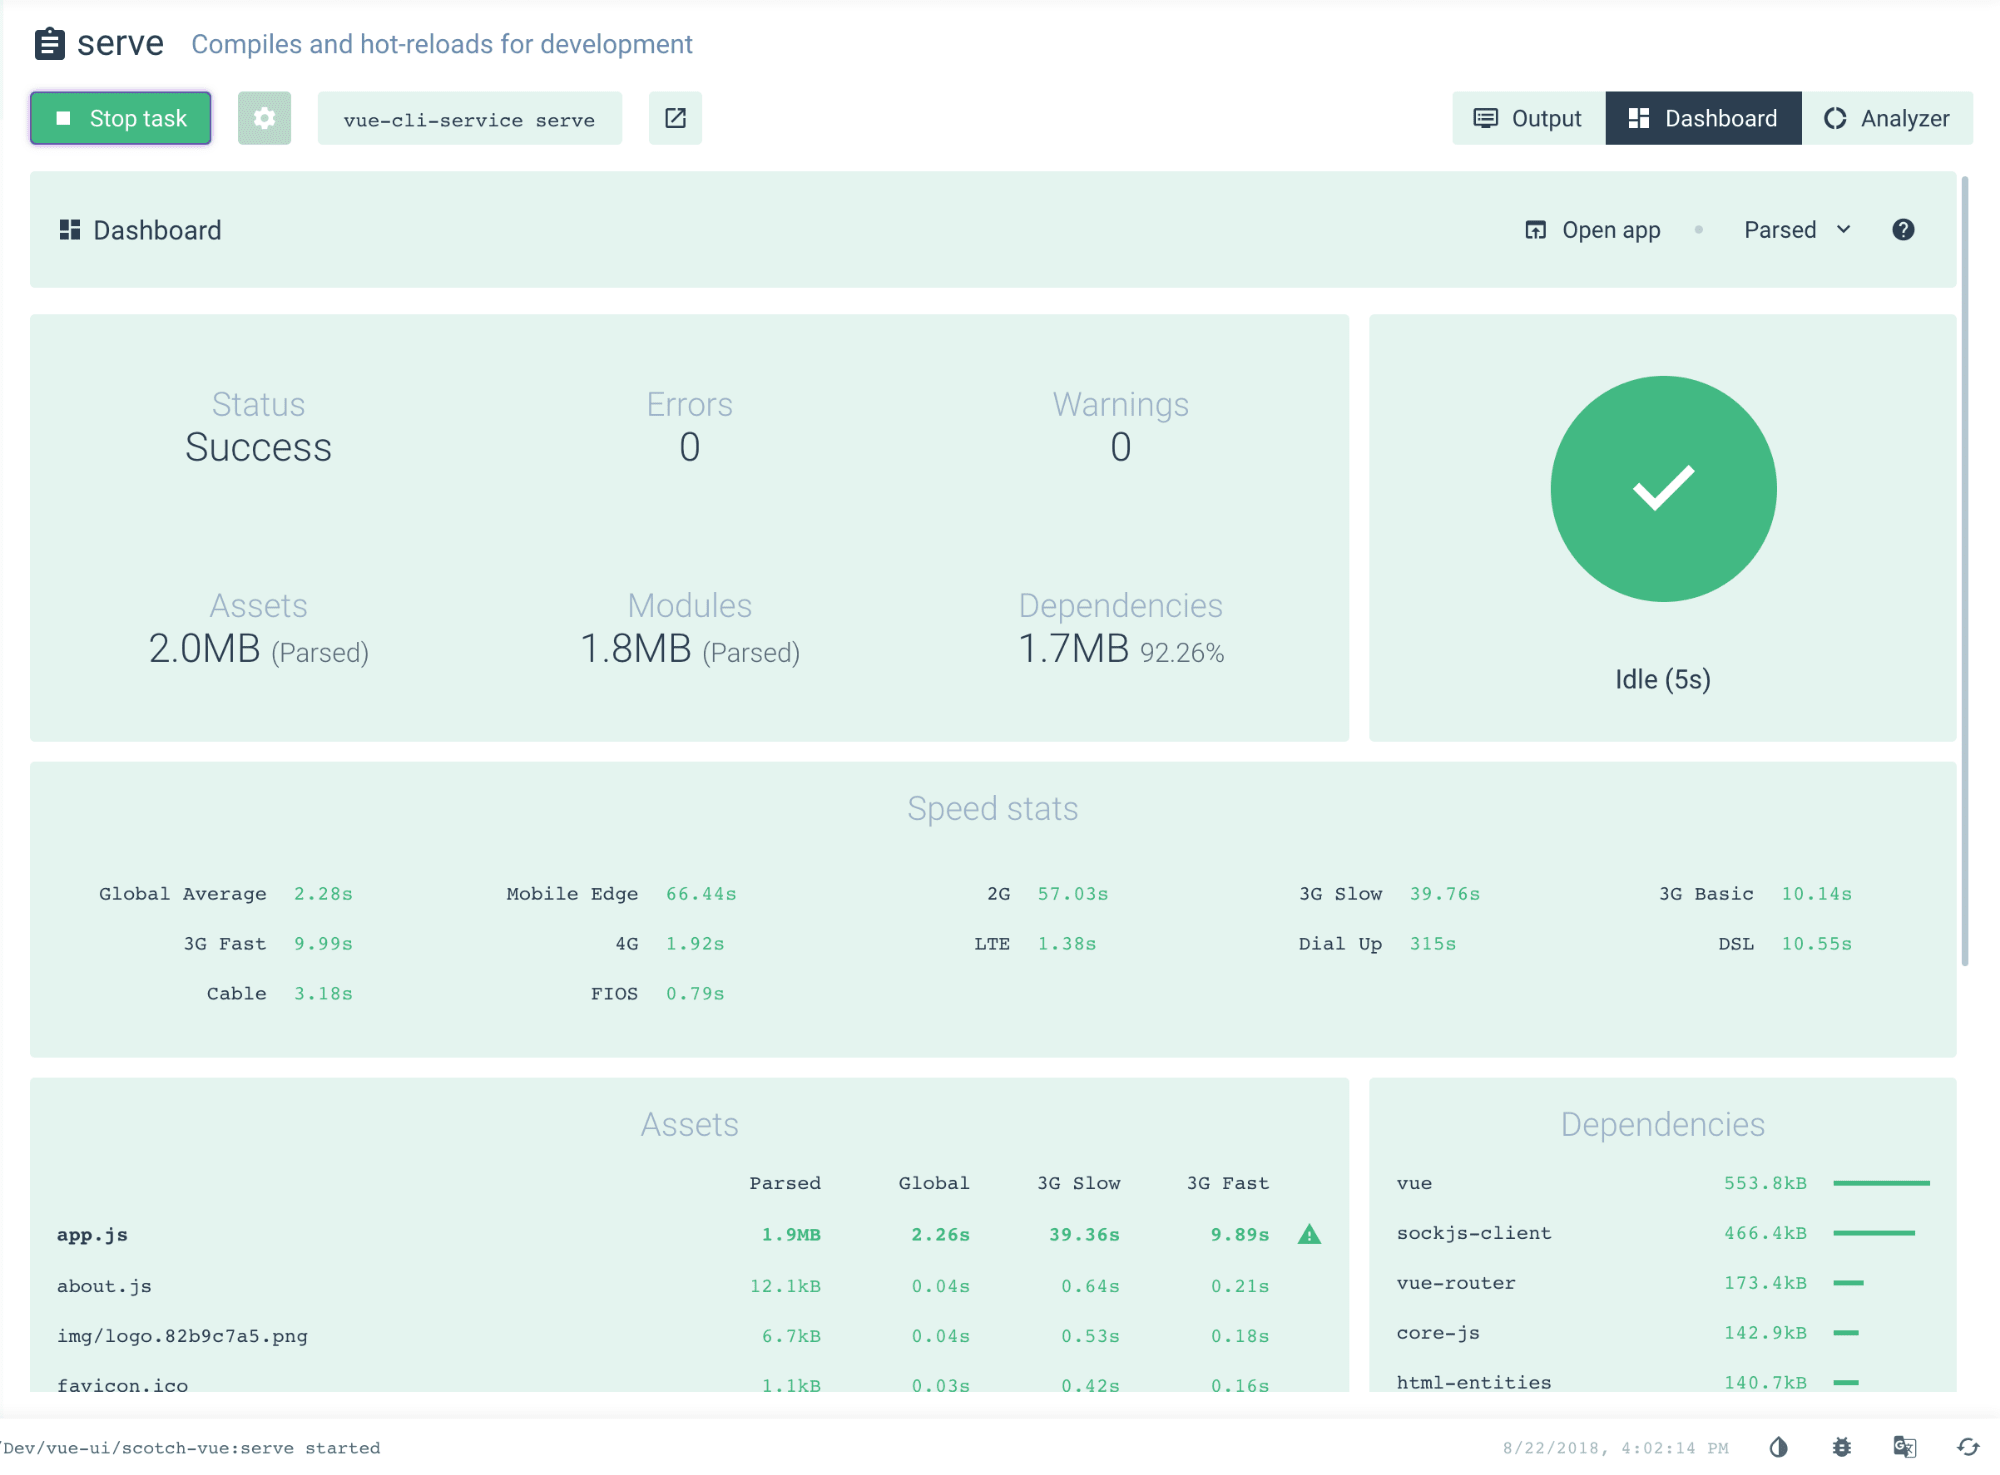
仪表板选项卡显示有关应用程序捆绑包的各种统计信息,您可以对其进行检查以查看文件大小,甚至可以查看文件的加载速度。
输出标签 ( Output Tab )
This tab shows the logs for your task process.
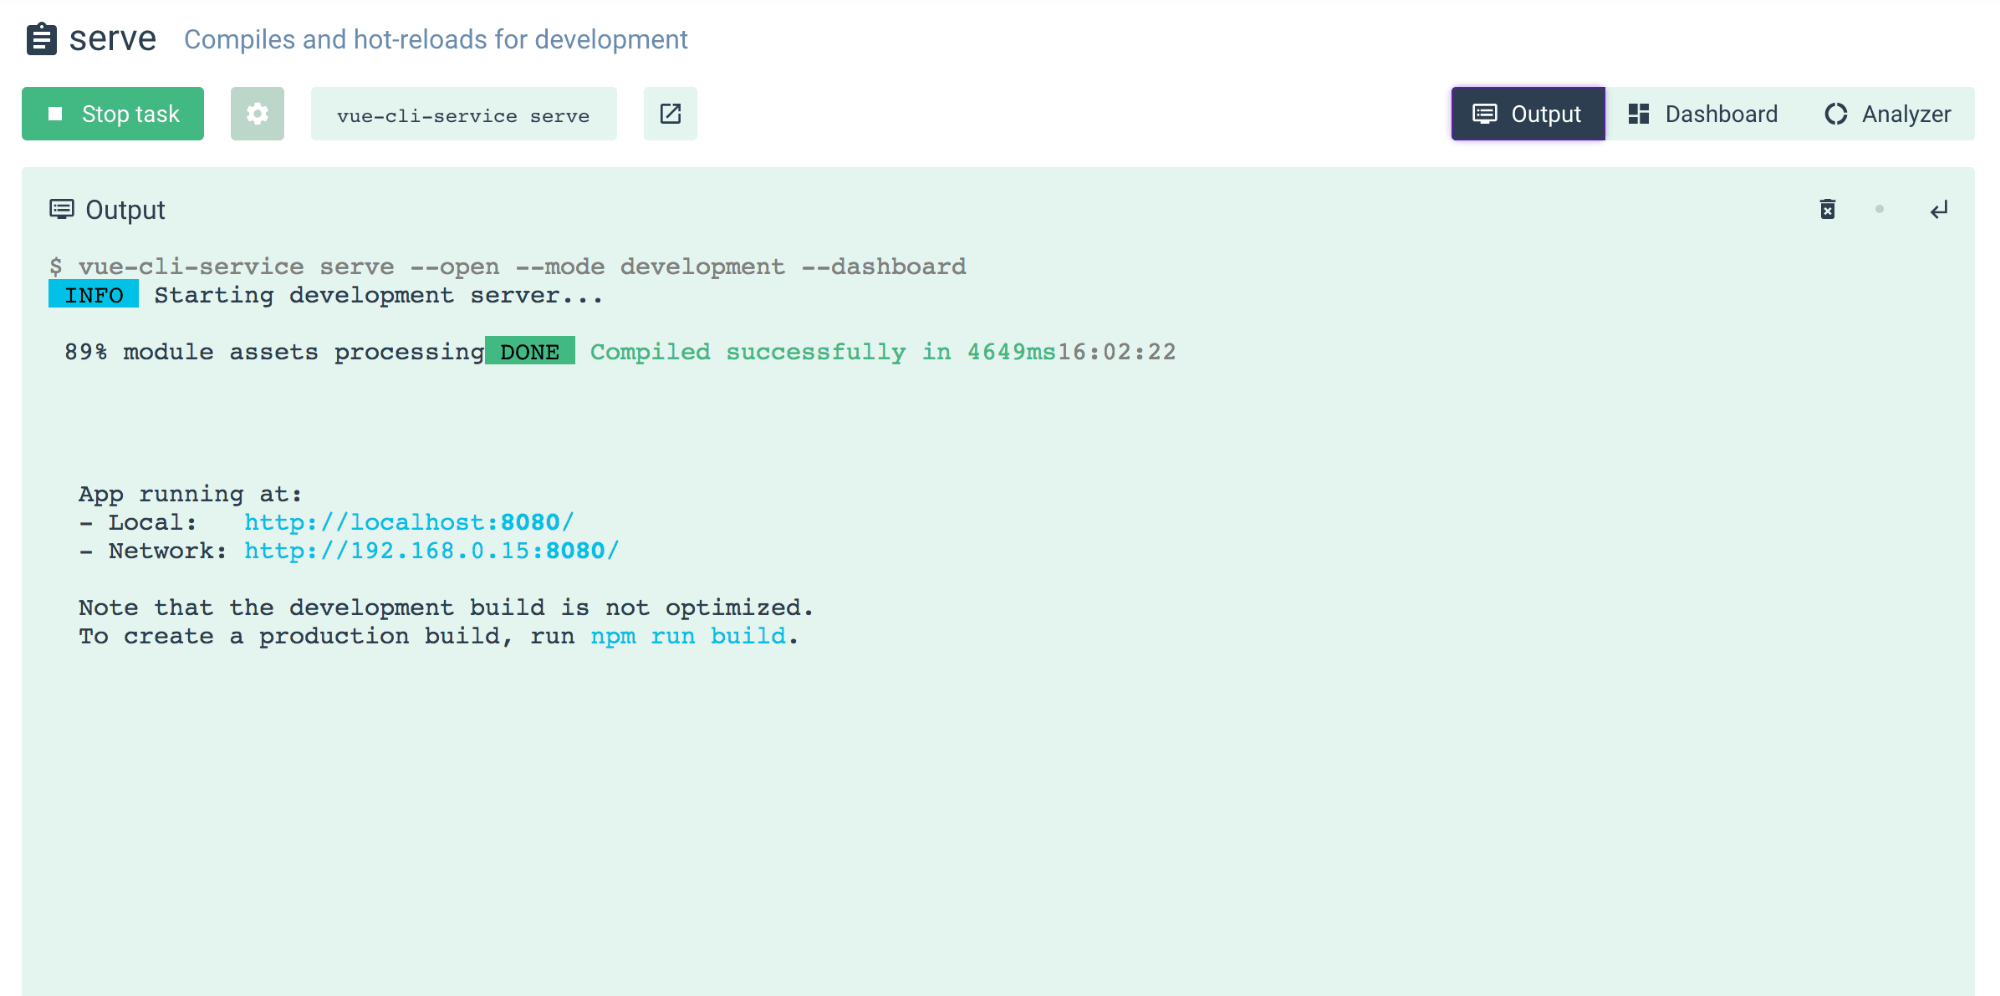
此选项卡显示您的任务过程的日志。
分析仪 ( Analyzer )
The analyzer tab, tries to analyze your code, and create a graph showing the various dependencies of your code. In the below screenshot, we see the purple part representing the code we have written(even though it's generated), and the green section represents the code that we imported from dependencies.
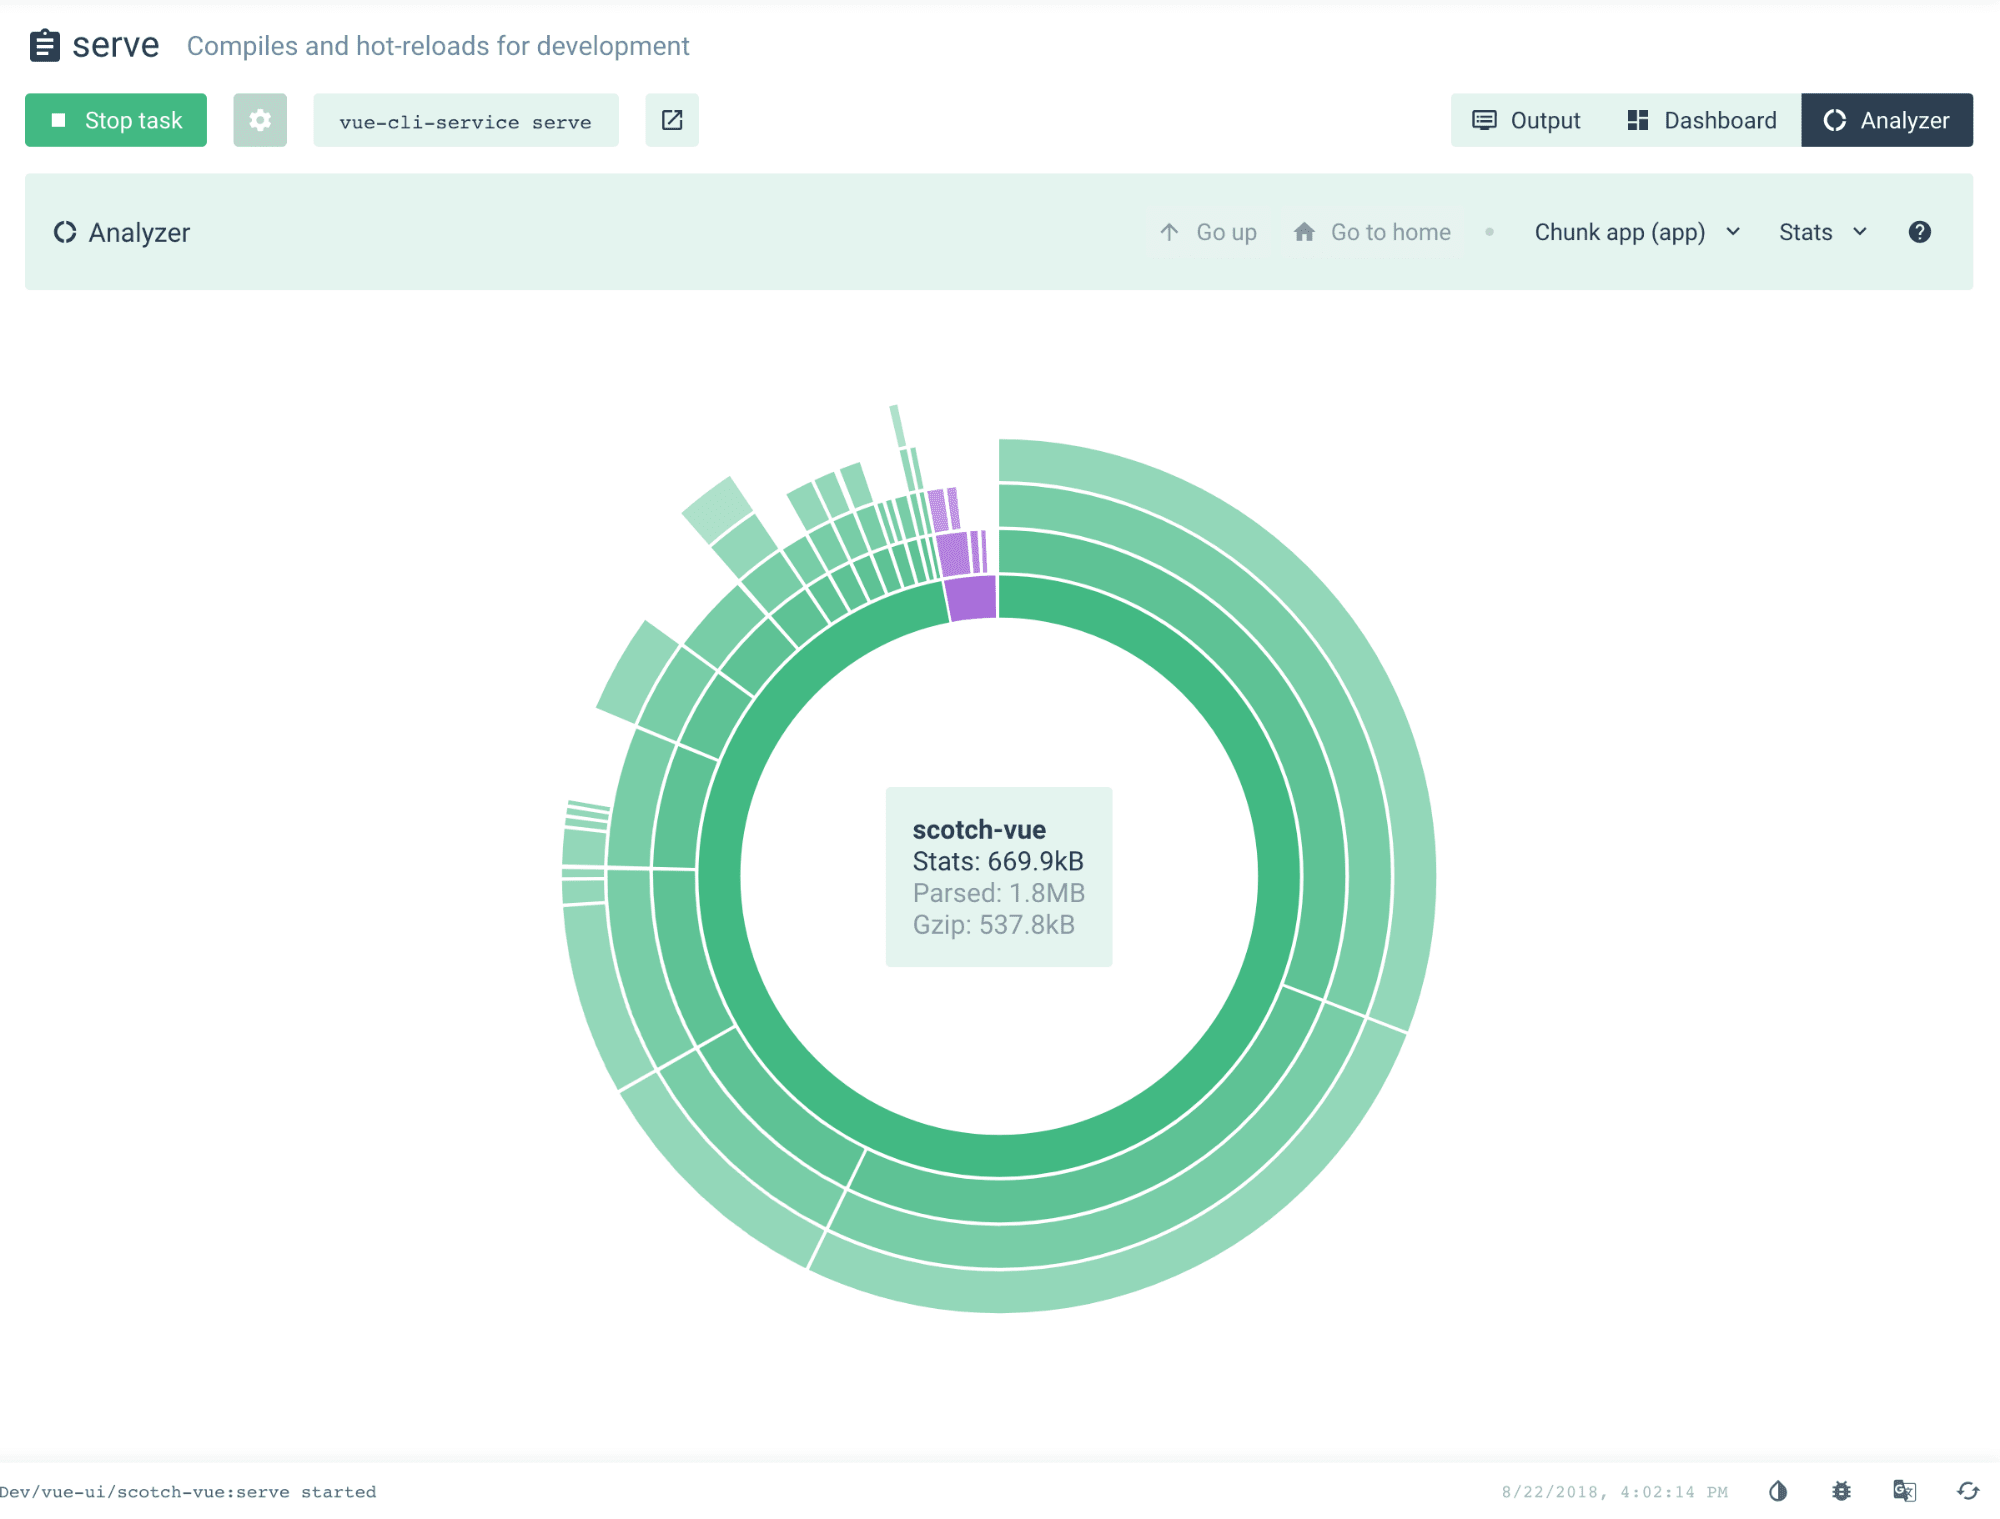
分析器选项卡,尝试分析您的代码,并创建一个图形,显示您的代码的各种依赖关系。 在下面的屏幕截图中,我们看到紫色部分代表我们编写的代码(即使已生成),绿色部分代表我们从依赖项导入的代码。
建立 ( Build )
The build section has the almost similar to the serve section, only that it produces a production bundle that can be used to deploy the application.

构建部分与服务部分几乎相似,只不过它生成了可用于部署应用程序的生产捆绑包。
Clicking on the config for build task will also open configuration to allow you specify environments, output directories and even choose whether it's a web app, library or web component.
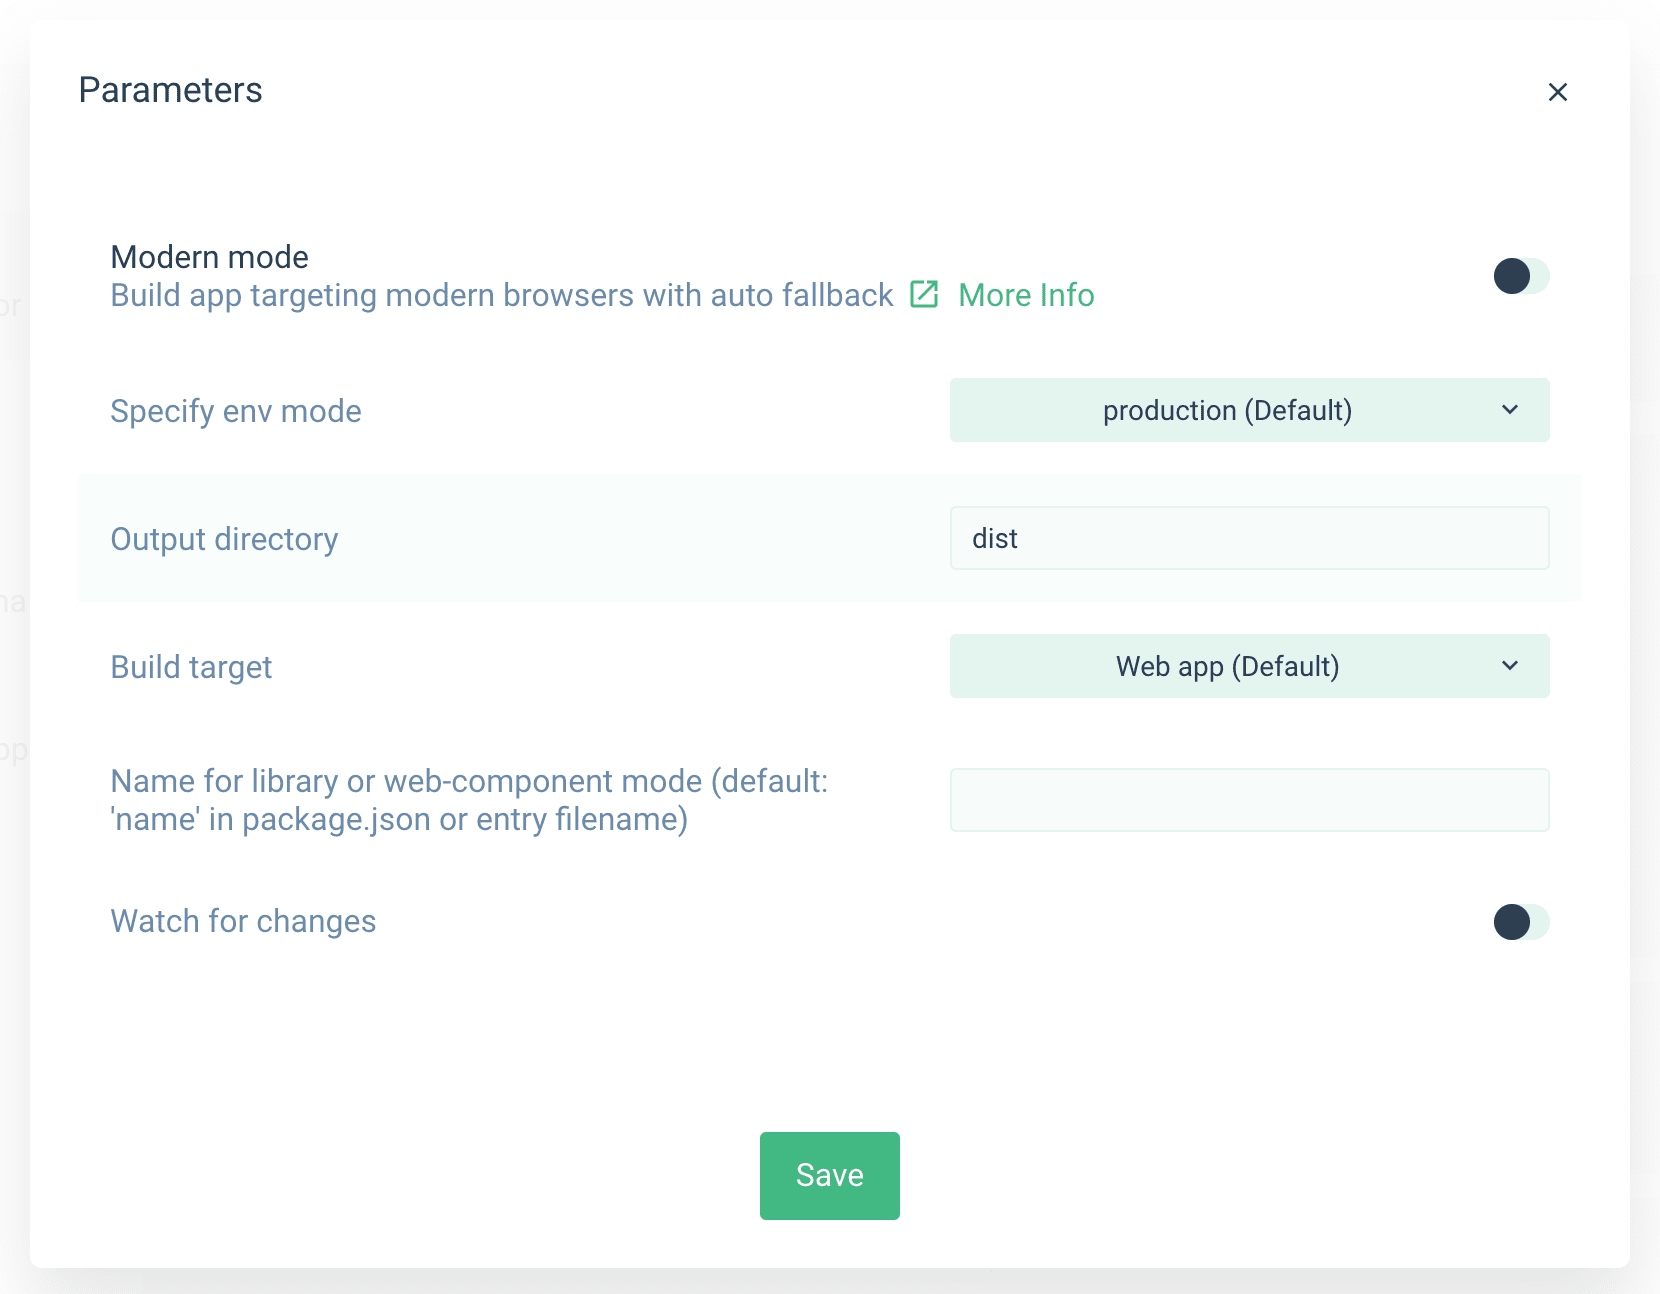
单击用于构建的配置任务还将打开配置,以允许您指定环境,输出目录,甚至选择它是Web应用程序,库还是Web组件。
We won't look at the different tabs, as we explained them in the previous section, but notice that the analyzer, under your chunked app, has changed.
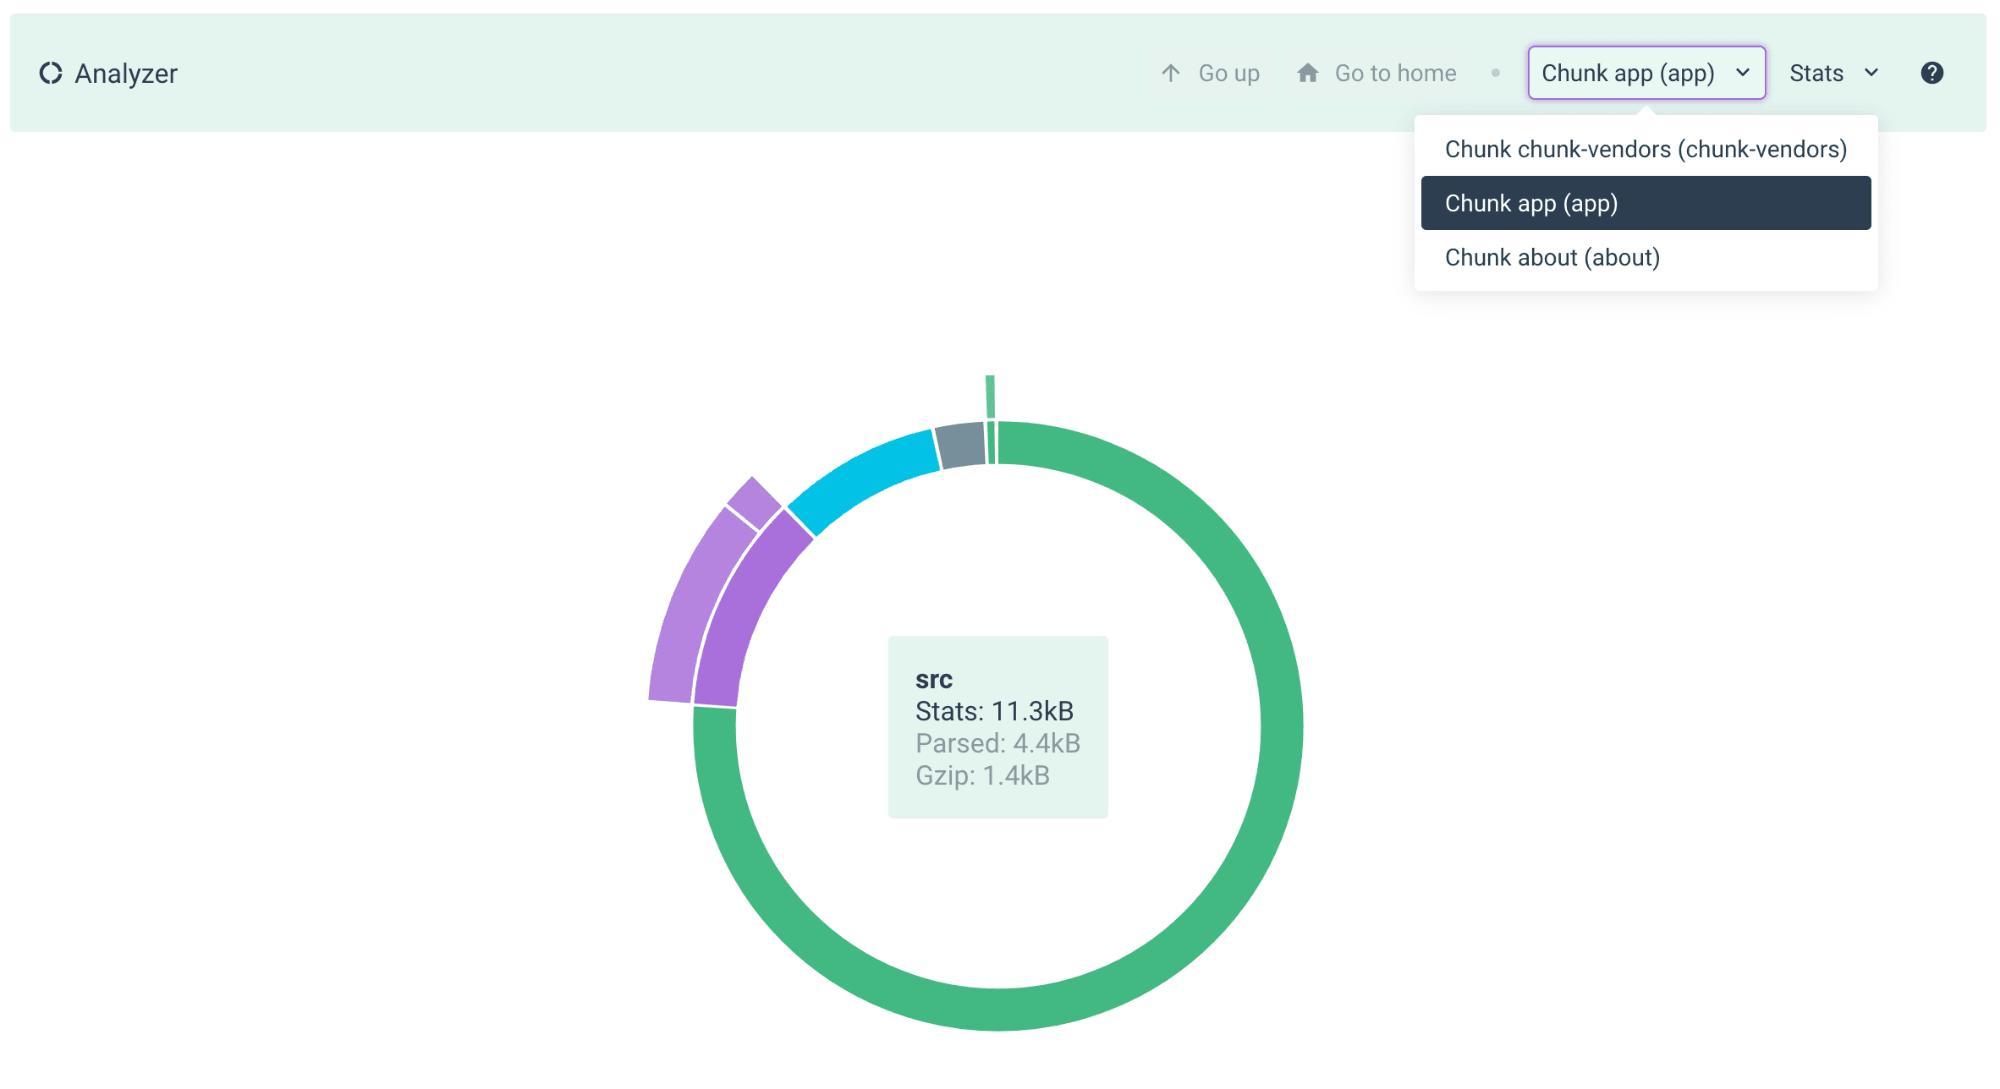
我们不会像在上一节中介绍的那样查看不同的选项卡,但是请注意,分块应用程序下的分析器已更改。
皮棉 ( Lint )
Lint should be straight forward. It will lint your code and give you an output.
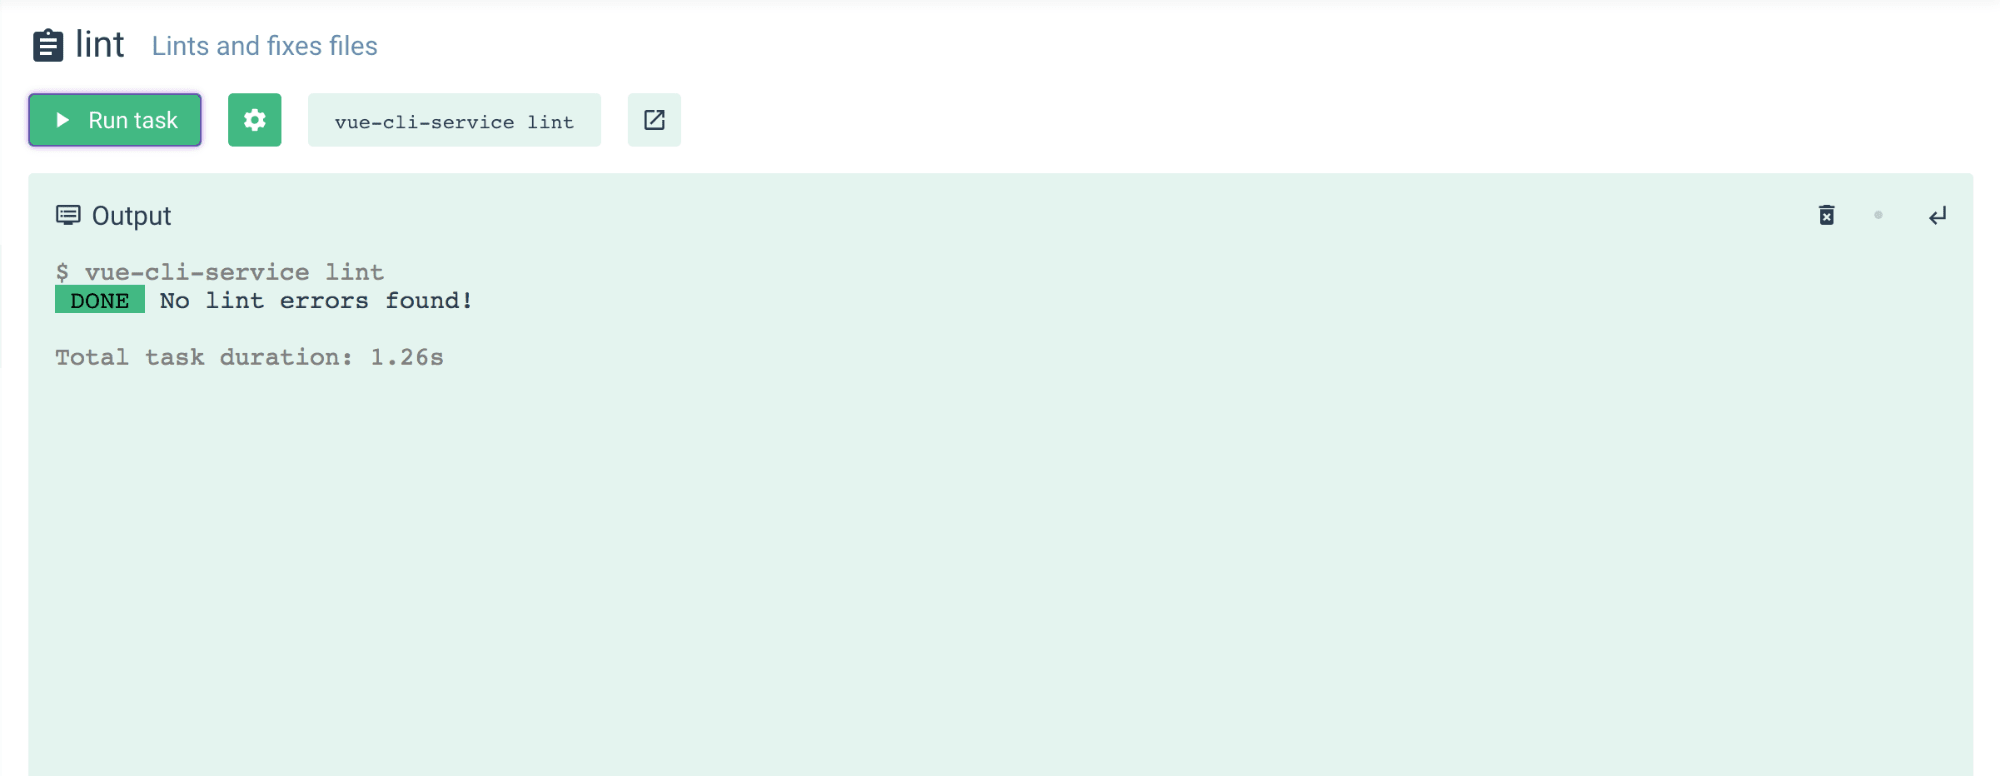
皮棉应该直截了当。 它将使您的代码更加整洁,并为您提供输出。
测试单位 ( test:unit )
This will allow us to run unit tests for our application. We just click on Run task, and see the output

这将使我们能够为应用程序运行单元测试。 我们只需单击“运行”任务,然后查看输出
检查 ( Inspect )
This will produce the configuration of your webpack, in a json file.
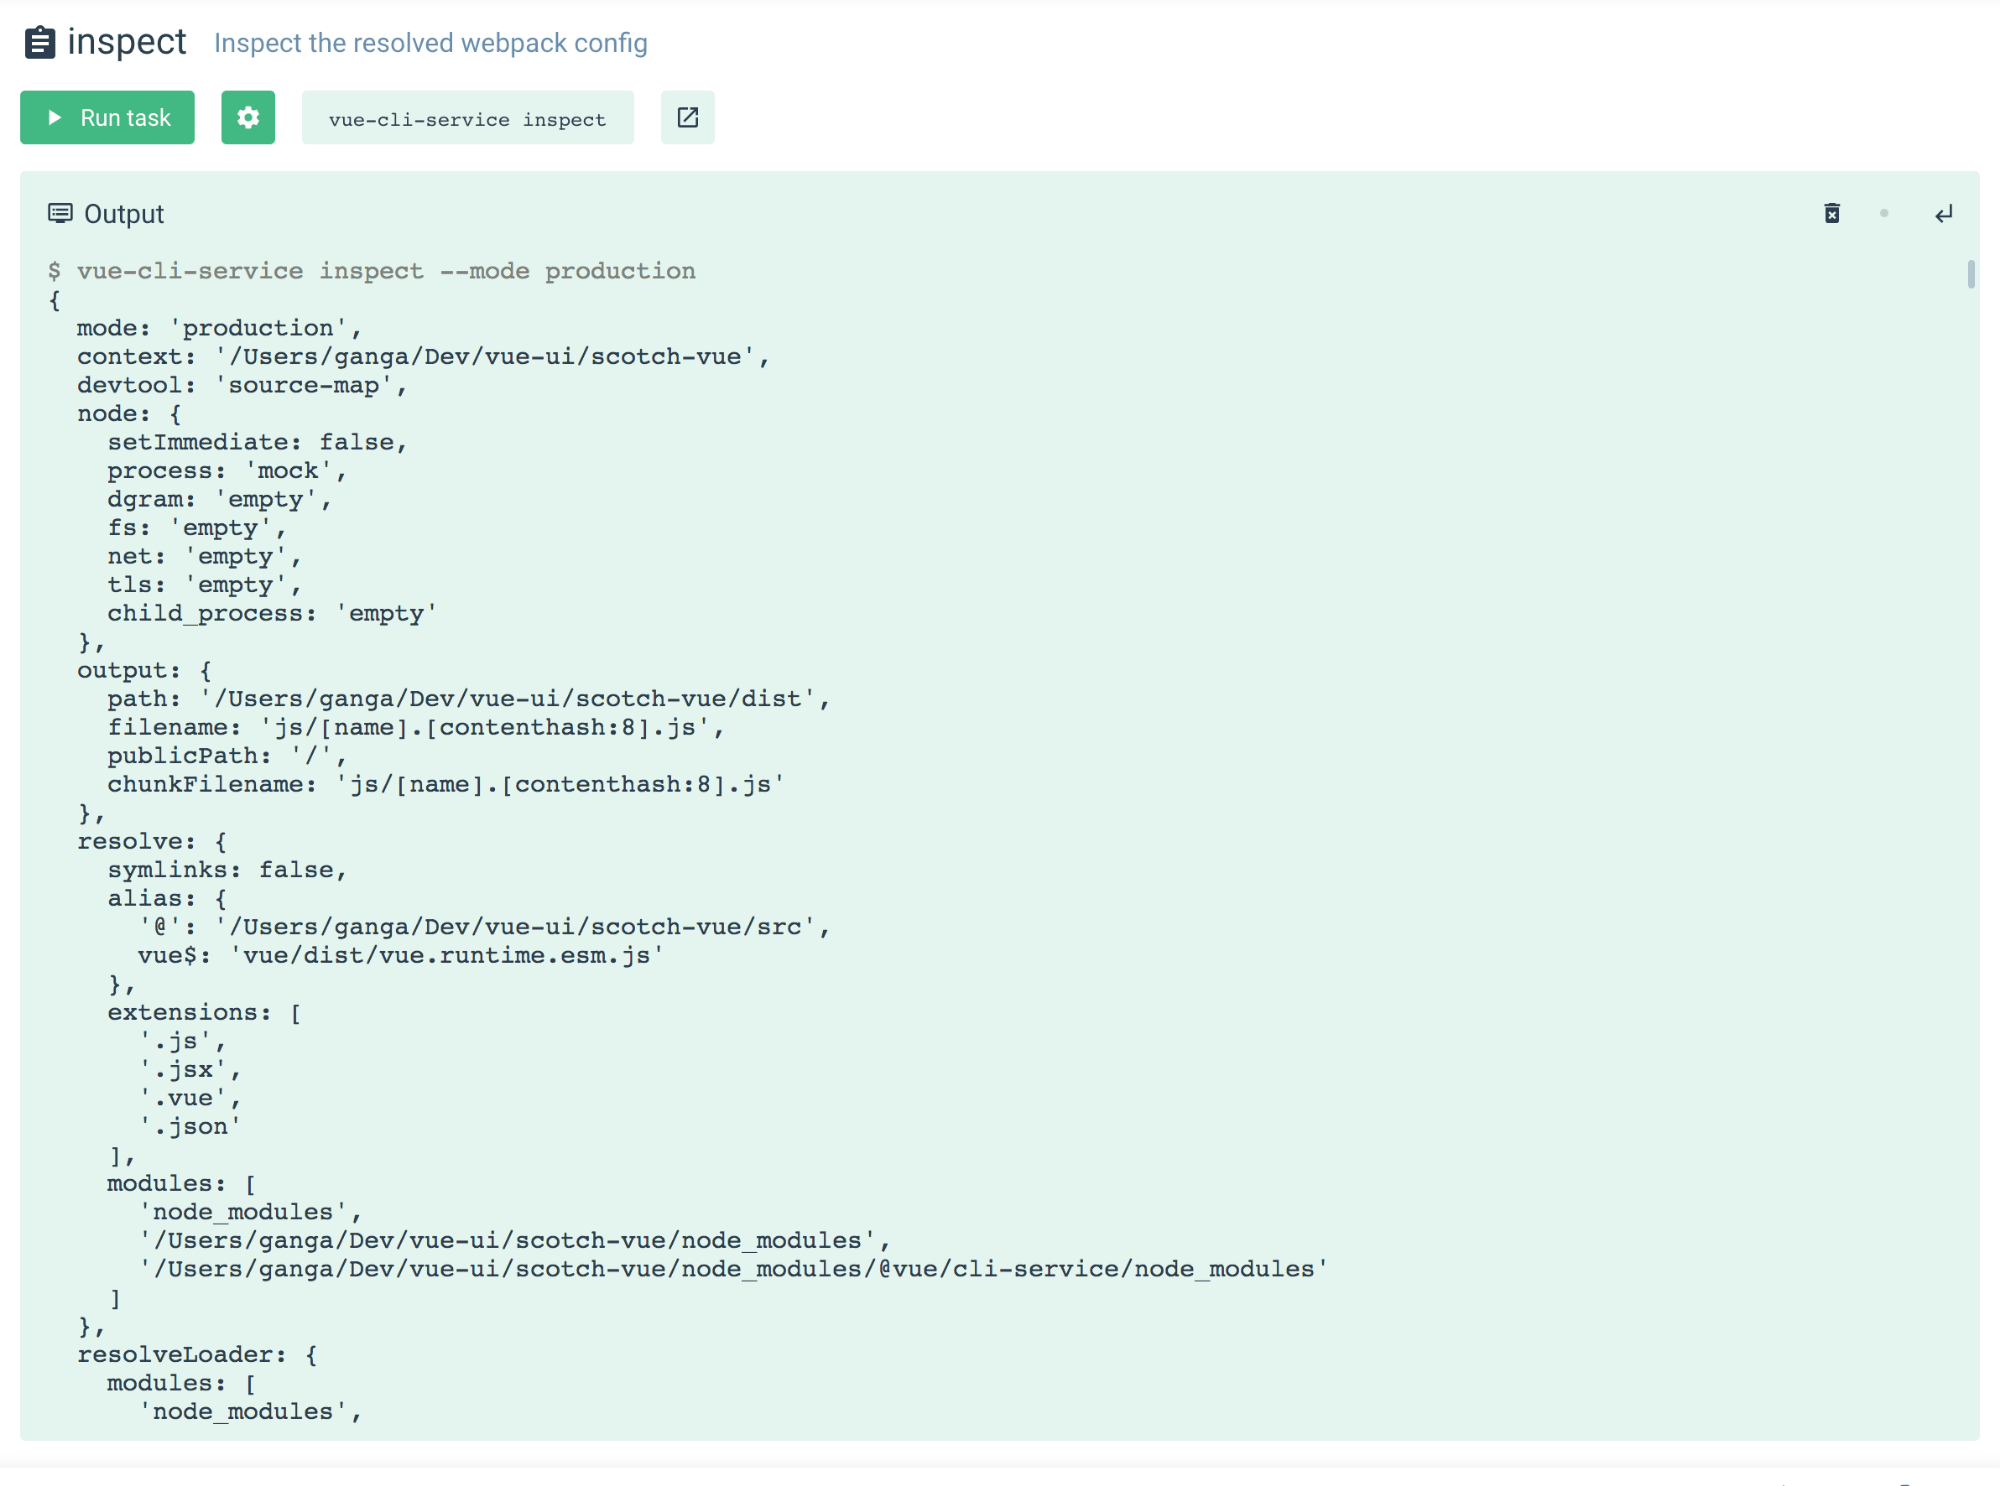
这将在json文件中生成Webpack的配置。
回顾 ( Recap )
We've seen how easy it is to scaffold a new VueJS application from scratch with the Vue UI tool. Even though still in beta, it can take you from Zero to building an App within seconds or minutes. Hope you find the tool helpful and use it more often, and watch out for new releases.
我们已经看到了使用Vue UI工具从头开始构建新的VueJS应用程序是多么容易。 即使仍处于测试阶段,它也可以让您在零秒或几分钟之内从零开始构建一个应用程序。 希望您发现该工具有用并经常使用,并注意新版本。
If you feel adventurous, you can inspect the Vue CLI UI source code.
如果您喜欢冒险,可以查看Vue CLI UI源代码 。
And just in case you are wondering why the UI is so beautiful, the library used is the Vue UI library Happy Coding.
万一您想知道为什么UI如此漂亮,可以使用Vue UI库 Happy Coding。
翻译自: https://scotch.io/tutorials/creating-vue-apps-with-the-vue-ui-tool


 1544
1544

 被折叠的 条评论
为什么被折叠?
被折叠的 条评论
为什么被折叠?
 到【灌水乐园】发言


