


File uploads is one the most commonly used features on the web. From uploading avatars to family pictures to sending documents via email, we can't do without files on the web.
文件上传是网络上最常用的功能之一。 从上传头像到家庭照片到通过电子邮件发送文档,我们离不开网络上的文件。
In today’s article will cover all the ways to handle files in Laravel. If you are new to Laravel, browse the courses or navigate to the tutorials section. After reading the article, If we left something out please let us know in the comments and we’ll update the post accordingly.
在今天的文章中,将介绍Laravel中处理文件的所有方式。 如果您不熟悉Laravel,请浏览课程或导航至教程部分 。 阅读文章后,如果我们遗漏了一些内容,请在评论中告知我们,我们将相应地更新该帖子。
Handling of files is another thing Laravel has simplified in its ecosystem. Before we get started, we’ll need a few things. First, a Laravel project. There are a few ways to create a new Laravel project, but let's stick to composer for now.
文件处理是Laravel在其生态系统中简化的另一件事。 在开始之前,我们需要一些注意事项。 首先,一个Laravel项目。 有几种方法可以创建一个新的Laravel项目 ,但现在让我们继续坚持作曲家。
composer create-project --prefer-dist laravel/laravel filesWhere files is the name of our project. After installing the app, we’ll need a few packages installed, so, let’s get them out of the way. You should note that these packages are only necessary if you intend to save images to Amazon’s s3 or manipulate images like cropping, filters etc.
files是我们项目的名称。 安装该应用程序后,我们将需要安装一些软件包,因此,让我们将其删除。 您应该注意,仅当您打算将图像保存到Amazon的s3或处理诸如裁剪,过滤器等图像时,才需要这些软件包。
composer require league/flysystem-aws-s3-v3:~1.0 intervention/image:~2.4After installing the dependencies, the final one is Mailtrap. Mailtrap is a fake SMTP server for development teams to test, view and share emails sent from the development and staging environments without spamming real customers. So head over to Mailtrap and create a new inbox for testing.
安装依赖项后,最后一个是Mailtrap 。 Mailtrap是一个伪造的SMTP服务器,供开发团队测试,查看和共享从开发和登台环境发送的电子邮件,而不会向实际客户发送垃圾邮件。 因此,转到Mailtrap并创建一个新的收件箱进行测试。
Then, in welcome.blade.php update the head tag to:
然后,在welcome.blade.php中将head标签更新为:
<meta charset="utf-8">
<meta http-equiv="X-UA-Compatible" content="IE=edge">
<meta name="viewport" content="width=device-width, initial-scale=1">
<title>File uploads</title>
<style>
  * {
    font-family: -apple-system, BlinkMacSystemFont, "Segoe UI", Roboto,
        "Helvetica Neue", Arial, sans-serif, "Apple Color Emoji",
        "Segoe UI Emoji", "Segoe UI Symbol";
  }
</style>
Modify the body contents to:
修改正文内容为:
<form action="/process" enctype="multipart/form-data" method="POST">
    <p>
        <label for="photo">
            <input type="file" name="photo" id="photo">
        </label>
    </p>
    <button>Upload</button>
    {{ csrf_field() }}
</form>
For the file upload form, the enctype="multipart/form-data" and method="POST" are extremely important as the browser will know how to properly format the request. {{ csrf_field() }} is Laravel specific and will generate a hidden input field with a token that Laravel can use to verify the form submission is legit.
对于文件上传表单, enctype="multipart/form-data"和method="POST"非常重要,因为浏览器将知道如何正确格式化请求。 {{ csrf_field() }}是Laravel专用的,它将生成一个带有令牌的隐藏输入字段,Laravel可使用该令牌来验证表单提交是否合法。
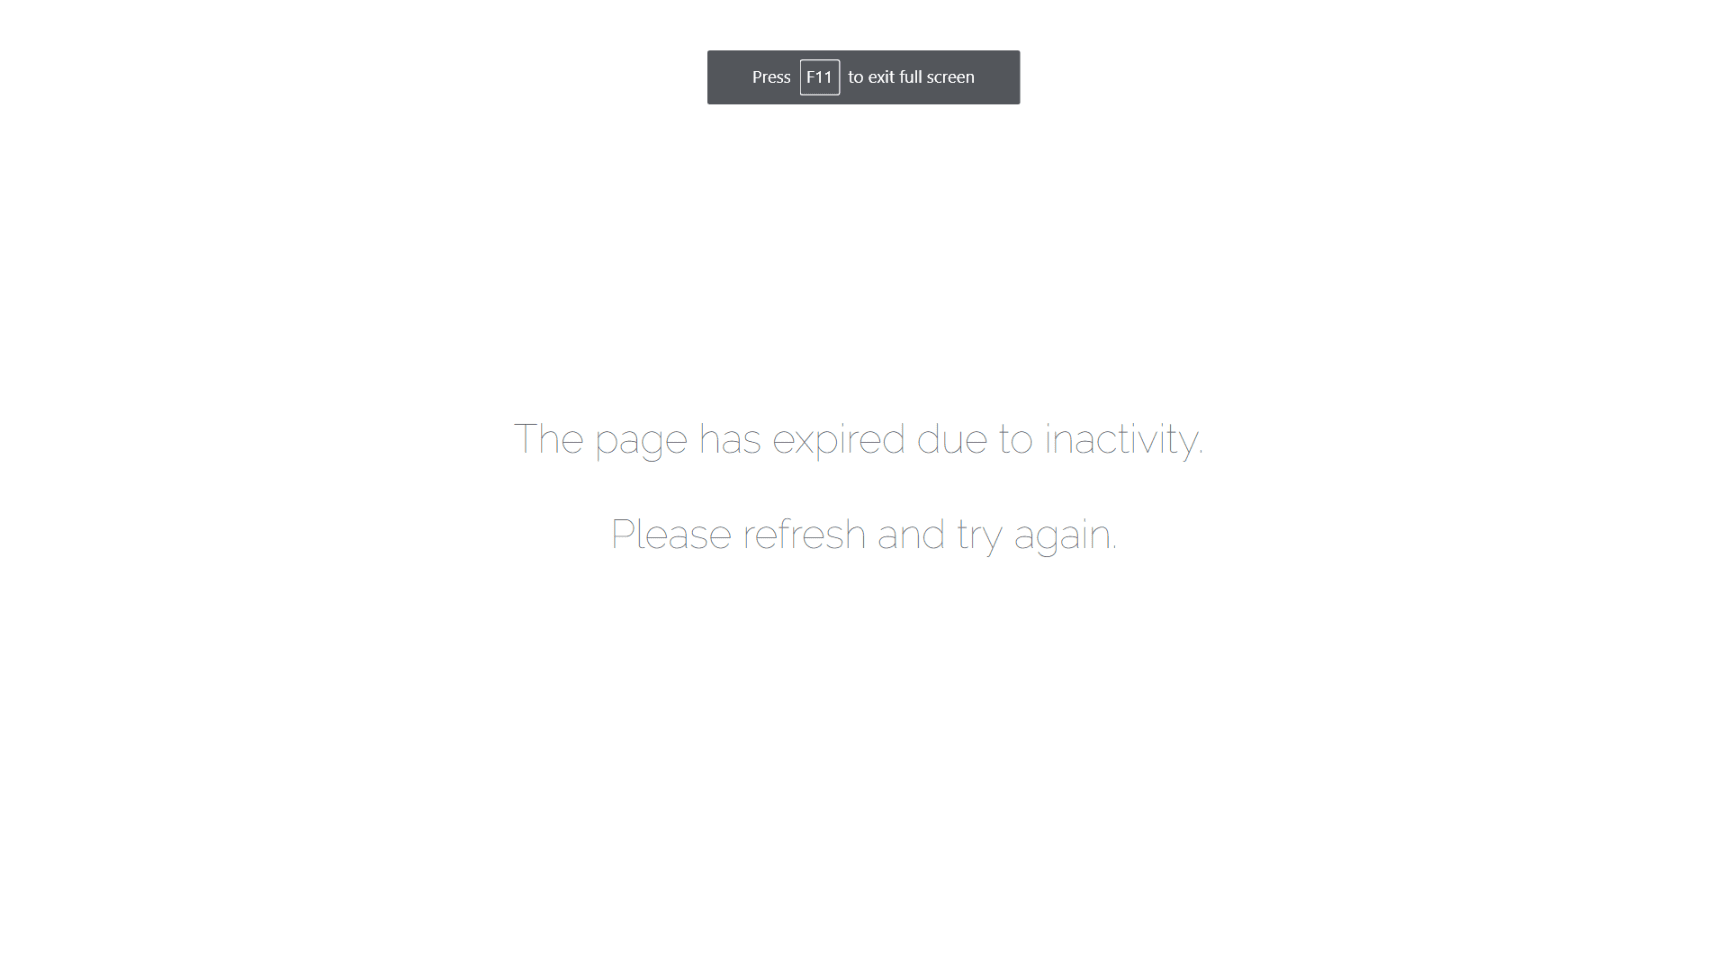
If the CSRF token does not exist on the page, Laravel will show “The page has expired due to inactivity” page.
如果页面上不存在CSRF令牌,Laravel将显示“该页面由于不活动而过期”页面。
Now that we have our dependencies out of the way, let's get started.
现在我们已经摆脱了依赖关系,让我们开始吧。
了解Laravel如何处理文件 ( Understanding How Laravel Handles Files )
Development as we know it in 2018 is growing fast, and in most cases there are many solutions to one problem. Take file hosting for example, now we have so many options to store files, the sheer number of solutions ranging from self hosted to FTP to cloud storage to GFS and many others.
我们所知道的2018年发展正在快速增长,在大多数情况下,针对一个问题有许多解决方案。 以文件托管为例,现在我们有太多存储文件的选项,从自助托管到FTP到云存储再到GFS的众多解决方案不一而足 。
Since Laravel is framework that encourages flexibility, it has a native way to handle the many file structures. Be it local, Amazon's s3, Google's Cloud, Laravel has you covered.
由于Laravel是鼓励灵活性的框架,因此它具有处理许多文件结构的本机方式。 无论是本地的,Amazon的s3,Google的Cloud,Laravel都能为您提供服务。
Laravel's solution to this problem is to call them disks. Makes sense, any file storage system you can think of can be labeled as a disk in Laravel. To this regard, Laravel comes with native support for some providers (disks). We have: local, public, s3, rackspace, FTP etc. All this is possible because of Flysystem.
Laravel解决此问题的方法是将它们称为磁盘。 有道理,您可以想到的任何文件存储系统都可以在Laravel中标记为磁盘。 为此,Laravel附带了对某些提供程序(磁盘)的本地支持。 我们有:本地,公共,S3,Rackspace公司,FTP等,这一切都是可能的,因为Flysystem 。
If you open config/filesystems.php you’ll see the available disks and their respected configuration.
如果打开config/filesystems.php ,将看到可用的磁盘及其受尊重的配置。
Laravel中的文件上传 ( File Uploads in Laravel )
From the introduction section above, we have a form with a file input ready to be processed. We can see that the form is pointed to /process. In routes/web.php, we define a new POST /process route.
在上面的简介部分,我们有一个带有文件输入的表单,可供处理。 我们可以看到该表单指向/ process。 在routes / web.php中,我们定义了一个新的POST / process路由。
use Illuminate\Http\Request;

Route::post('process', function (Request $request) {
    $path = $request->file('photo')->store('photos');

    dd($path);
});
What the above code does is grab the photo field from the request and save it to the photos folder. dd() is a Laravel function that kills the running script and dumps the argument to the page. For me, the file was saved to "photos/3hcX8yrOs2NYhpadt4Eacq4TFtpVYUCw6VTRJhfn.png". To find this file on the file system, navigate to storage/app and you’ll find the uploaded file.
上面的代码所做的是从请求中获取照片字段并将其保存到photos文件夹。 dd()是Laravel函数,它将杀死正在运行的脚本并将参数转储到页面。 对我来说,该文件已保存到“ photos / 3hcX8yrOs2NYhpadt4Eacq4TFtpVYUCw6VTRJhfn.png”。 要在文件系统上找到该文件,请导航至storage / app,您将找到上载的文件。
If you don't like the default naming pattern provided by Laravel, you can provide yours using the storeAs method.
如果您不喜欢Laravel提供的默认命名模式,则可以使用storeAs方法提供您的名称。
Route::post('process', function (Request $request) {
    // cache the file
    $file = $request->file('photo');

    // generate a new filename. getClientOriginalExtension() for the file extension
    $filename = 'profile-photo-' . time() . '.' . $file->getClientOriginalExtension();

    // save to storage/app/photos as the new $filename
    $path = $file->storeAs('photos', $filename);

    dd($path);
});
After running the above code, I got "photos/profile-photo-1517311378.png".
运行上面的代码后,我得到了“ photos / profile-photo-1517311378.png”。
本地磁盘和公用磁盘之间的差异 ( Difference Between Local and Public Disks )
In config/filesystems.php you can see the disks local and public defined. By default, Laravel uses the local disk configuration. The major difference between local and public disk is that local is private and cannot be accessed from the browser while public can be accessed from the browser.
在config / filesystems.php中,您可以看到本地和公共定义的磁盘。 默认情况下,Laravel使用本地磁盘配置。 本地磁盘和公用磁盘之间的主要区别在于,本地磁盘是私有的,无法从浏览器访问,而公用磁盘可以从浏览器访问。
Since the public disk is in storage/app/public and Laravel's server root is in public you need to link storage/app/public to Laravel's public folder. We can do that with our trusty artisan by running php artisan storage:link.
由于公用磁盘位于storage / app / public中,而Laravel的服务器根目录位于public中,因此您需要将storage / app / public链接到Laravel的public文件夹。 我们可以通过运行php artisan storage:link与值得信赖的工匠一起做到这一点。
上载多个文件 ( Uploading Multiple Files )
Since Laravel doesn't provide a function to upload multiple files, we need to do that ourselves. It’s not much different from what we’ve been doing so far, we just need a loop.
由于Laravel不提供上传多个文件的功能,因此我们需要自己做。 到目前为止,我们所做的并没有太大不同,我们只需要一个循环即可。
First, let’s update our file upload input to accept multiple files.
首先,让我们更新文件上传输入以接受多个文件。
<input type="file" name="photos[]" id="photo" multiple>When we try to process this $request->file('photos'), it's now an array of UploadedFile instances so we need to loop through the array and save each file.
当我们尝试处理此$ request-> file('photos')时,它现在是一个UploadedFile实例数组,因此我们需要遍历该数组并保存每个文件。
Route::post('process', function (Request $request) {
    $photos = $request->file('photos');
    $paths  = [];

    foreach ($photos as $photo) {
        $extension = $photo->getClientOriginalExtension();
        $filename  = 'profile-photo-' . time() . '.' . $extension;
        $paths[]   = $photo->storeAs('photos', $filename);
    }

    dd($paths);
});
After running this, I got the following array, since I uploaded a GIF and a PNG:
运行此命令后,由于上传了GIF和PNG,因此得到了以下数组:
array:2 [▼
  0 => "photos/profile-photo-1517315875.gif"
  1 => "photos/profile-photo-1517315875.png"
]
验证文件上传 ( Validating File Uploads )
Validation for file uploads is extremely important. Apart from preventing users from uploading the wrong file types, it’s also for security. Let me give an example regarding security. There's a PHP configuration option cgi.fix_pathinfo=1. What this does is when it encounters a file like https://site.com/images/evil.jpg/nonexistent.php, PHP will assume nonexistent.php is a PHP file and it will try to run it. When it discovers that nonexistent.php doesn't exists, PHP will be like "I need to fix this ASAP" and try to execute evil.jpg (a PHP file disguised as a JPEG). Because evil.jpg wasn’t validated when it was uploaded, a hacker now has a script they can freely run live on your server… Not… good.
验证文件上传极为重要。 除了防止用户上传错误的文件类型外,这还出于安全性考虑。 让我举一个关于安全性的例子。 有一个PHP配置选项cgi.fix_pathinfo = 1。 这是在遇到https://site.com/images/evil.jpg/nonexistent.php之类的文件时,PHP将假定nonexistent.php是一个PHP文件,并将尝试运行该文件。 当发现不存在的不存在的.php时,PHP将像“我需要尽快修复此问题”,并尝试执行evil.jpg(伪装为JPEGPHP文件)。 由于evil.jpg上载时未经过验证,因此黑客现在拥有可以在您的服务器上自由运行的脚本。
To validate files in Laravel, there are so many ways, but let’s stick to controller validation.
要验证Laravel中的文件,有很多方法,但是让我们坚持控制器验证。
Route::post('process', function (Request $request) {
    // validate the uploaded file
    $validation = $request->validate([
        'photo' => 'required|file|image|mimes:jpeg,png,gif,webp|max:2048'
        // for multiple file uploads
        // 'photo.*' => 'required|file|image|mimes:jpeg,png,gif,webp|max:2048'
    ]);
    $file      = $validation['photo']; // get the validated file
    $extension = $file->getClientOriginalExtension();
    $filename  = 'profile-photo-' . time() . '.' . $extension;
    $path      = $file->storeAs('photos', $filename);

    dd($path);
});
For the above snippet, we told Laravel to make sure the field with a name of photo is required, a successfully uploaded file, it’s an image, it has one of the defined mime types, and it’s a max of 2048 kilobytes ~~ 2 megabytes.
对于上面的代码段,我们告诉Laravel确保带有照片名称的字段为必填字段,一个成功上传的文件,它是图像,具有已定义的mime类型之一,最大2048 KB ~~ 2 MB 。
Now, when a malicious user uploads a disguised file, the file will fail validation and if for some weird reason you leave cgi.fix_pathinfo on, this is not a means by which you can get PWNED!!!
现在,当恶意用户上传伪装的文件时,该文件将无法通过验证,并且如果出于某些奇怪的原因而将cgi.fix_pathinfo保留为打开状态,则这不是获得PWNED的方法!
If you head over to Laravel's validation page you’ll see a whole bunch of validation rules.
如果您转到Laravel的验证页面,您将看到一大堆验证规则。
将文件移动到云 ( Moving Files to the Cloud )
Okay, your site is now an adult, it has many visitors and you decide it’s time to move to the cloud. Or maybe from the beginning, you decided your files will live on separate server. The good news is Laravel comes with support for many cloud providers, but, for this tutorial, let's stick with Amazon.
好的,您的网站现在已经成年,有很多访问者,您决定该迁移到云了。 或者,也许从一开始,您就决定文件将驻留在单独的服务器上。 好消息是Laravel附带了许多云提供商的支持,但是,对于本教程,让我们继续使用Amazon。
Earlier we installed league/flysystem-aws-s3-v3 through composer. Laravel will automatically look for it if you choose to use Amazon S3 or throw an exception.
之前我们通过作曲家安装了League / flysystem-aws-s3-v3。 如果您选择使用Amazon S3或引发异常,Laravel将自动寻找它。
To upload files to the cloud, just use:
要将文件上传到云,只需使用:
$request->file('photo')->store('photos', 's3');For multiple file uploads:
对于多个文件上传:
foreach ($photos as $photo) {
    $extension = $photo->getClientOriginalExtension();
    $filename  = 'profile-photo-' . time() . '.' . $extension;
    $paths[]   = $photo->storeAs('photos', $filename, 's3');
}
Users may have already uploaded files before you decide to switch to a cloud provider, you can check the upcoming sections for what to do when files already exist.
在您决定切换到云提供商之前,用户可能已经上传了文件,您可以在接下来的部分中检查文件已经存在时的处理方法。
Note: you’ll have to configure your Amazon s3 credentials in config/filesystems.php**.**
注意:您必须在 config / filesystems.php ** 。** 中 配置 Amazon s3凭证 。
将文件作为电子邮件附件发送 ( Sending Files as Email Attachments )
Before we do this, let's quickly configure our mail environment. In .env file you will see this section
在执行此操作之前,让我们快速配置我们的邮件环境。 在.env文件中,您将看到此部分
MAIL_DRIVER=smtp
MAIL_HOST=smtp.mailtrap.io
MAIL_PORT=2525
MAIL_USERNAME=null
MAIL_PASSWORD=null
MAIL_ENCRYPTION=null
We need a username and password which we can get at Mailtrap.io. Mailtrap is really good for testing emails during development as you don’t have to crowd your email with spam. You can also share inboxes with team members or create separate inboxes.
我们需要一个用户名和密码,可以从Mailtrap.io获得。 Mailtrap非常适合在开发过程中测试电子邮件,因为您不必在电子邮件中挤满垃圾邮件。 您还可以与团队成员共享收件箱或创建单独的收件箱。
First, create an account and login:
首先,创建一个帐户并登录:
- Create a new inbox 创建一个新的收件箱
- Click to open inbox 点击打开收件箱
- Copy username and password under SMTP section 在SMTP部分下复制用户名和密码
After copying credentials, we can modify .env to:
复制凭据后,我们可以将.env修改为:
MAIL_DRIVER=smtp
MAIL_HOST=smtp.mailtrap.io
MAIL_PORT=2525
MAIL_USERNAME=8a1d546090493b
MAIL_PASSWORD=328dd2af5aefc3
MAIL_ENCRYPTION=null
Don't bother using mine, I deleted it.
不要打扰我的,我删除了它。
Create your mailable
创建您的邮件
php artisan make:mail FileDownloadedThen, edit its build method and change it to:
然后,编辑其构建方法并将其更改为:
public function build ( )
{
    return $this - > from ( 'files@mailtrap.io' )
        - > view ( 'emails.files_downloaded' )
        - > attach ( storage_path ( 'app/file.txt' ) , [
            'as' = > 'secret.txt'
        ] ) ;
}
As you can see from the method above, we pass the absolute file path to the attach() method and pass an optional array where we can change the name of the attachment or even add custom headers. Next we need to create our email view.
从上面的方法可以看到,我们将绝对文件路径传递给attach()方法,并传递一个可选数组,在该数组中我们可以更改附件的名称甚至添加自定义标头。 接下来,我们需要创建我们的电子邮件视图。
Create a new view file in resources/views/emails/files_downloaded.blade.php and place the content below.
在resources / views / emails / files_downloaded.blade.php中创建一个新的视图文件,并将其内容放在下面。
< h1 > Only you can stop forest fires </ h1 >
< p > Lorem, ipsum dolor sit amet consectetur adipisicing elit. Labore at reiciendis consequatur, ea culpa molestiae ad minima est quibusdam ducimus laboriosam dolorem, quasi sequi! Atque dolore ullam nisi accusantium. Tenetur! </ p >
Now, in routes/web.php we can create a new route and trigger a mail when we visit it.
现在,在routes / web.php中,我们可以创建一个新路由并在访问它时触发邮件。
use App \ Mail \ FileDownloaded ;Route :: get ( 'mail' , function ( ) {
$email = 'bruce.wayne@batcave.io' ;
Mail :: to ( $email ) - > send ( new FileDownloaded ) ;
dd ( 'done' ) ;
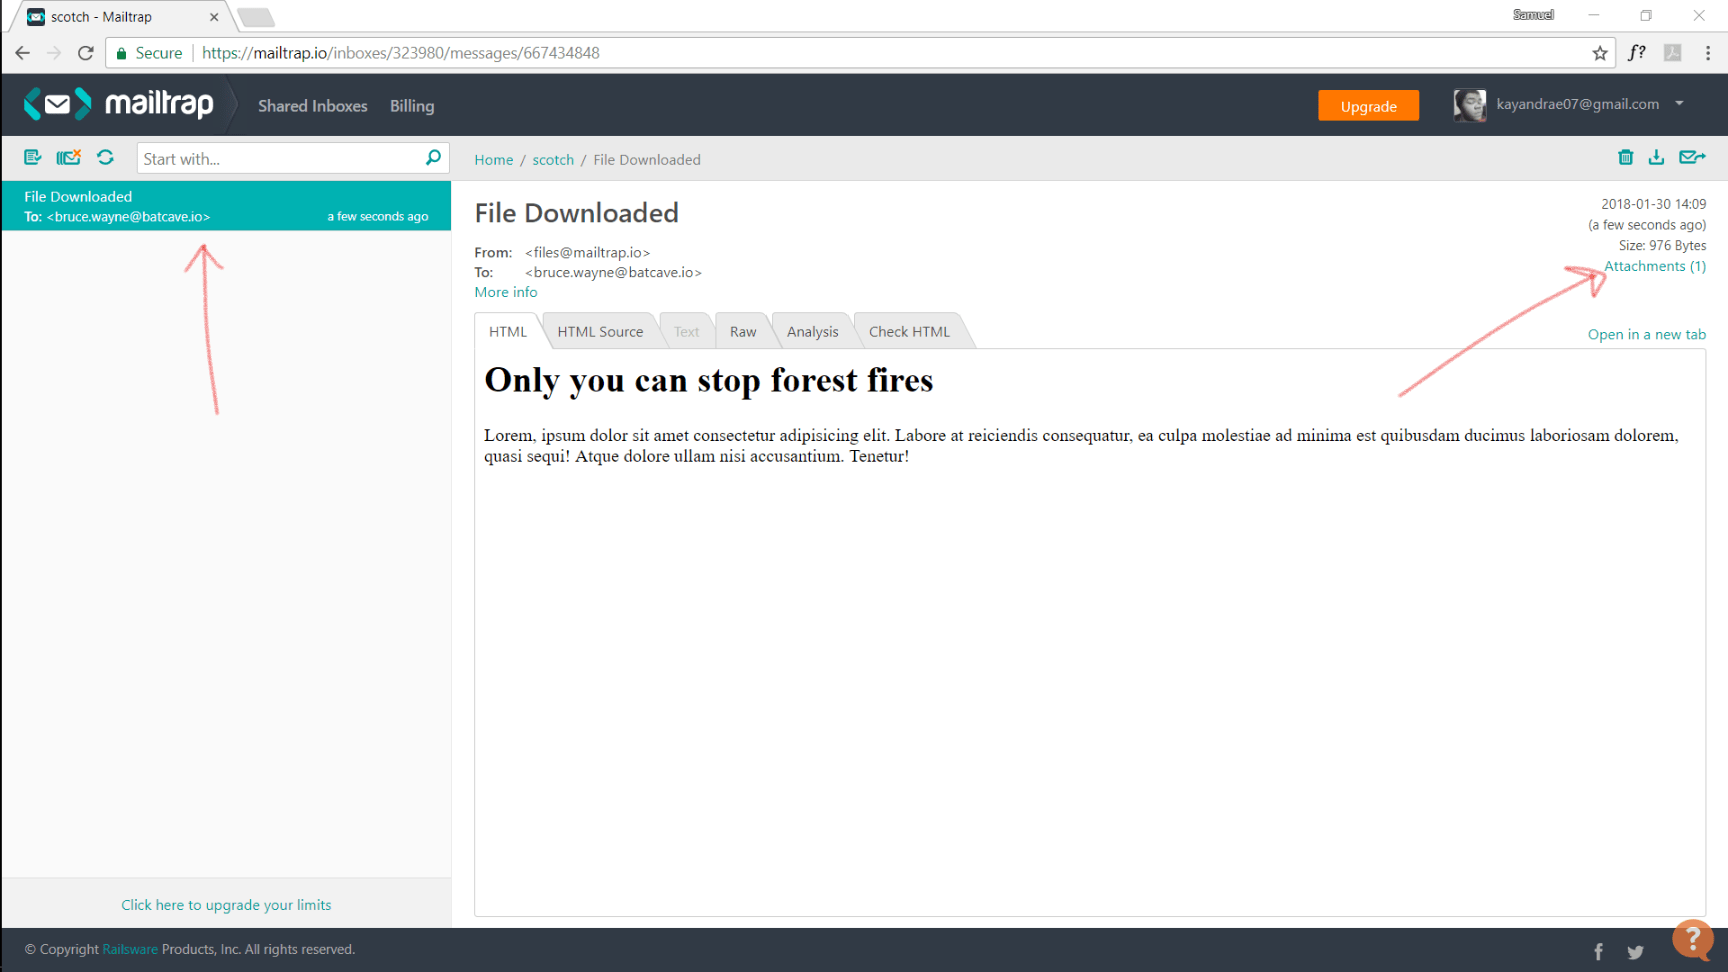
} ) ;If you head over to Mailtrap, you should see this.
如果您转到Mailtrap,应该会看到此信息。
文件已存在时的存储外观 ( Storage Facade for When Files Already Exist )
In an application, it’s not every time we process files through uploads. Sometimes, we decide to defer cloud file uploads till a certain user action is complete. Other times we have some files on disk before switching to a cloud provider. For times like this, Laravel provides a convenient Storage facade. For those who don’t know, facades in Laravel are class aliases. So instead of doing something like Symfony\File\Whatever\Long\Namespace\UploadedFile, we can do Storage instead.
在应用程序中,不是每次我们通过上传来处理文件时。 有时,我们决定将云文件上传推迟到特定的用户操作完成为止。 其他时候,在切换到云提供商之前,我们在磁盘上有一些文件。 在这种情况下,Laravel提供了便利的Storage门面。 对于那些不知道的人,Laravel中的外墙是类的别名。 因此,我们可以做存储,而不是做类似Symfony \ File \ Whatever \ Long \ Namespace \ UploadedFile的事情。
Choosing a disk to upload file. If no disk is specified, Laravel looks in config/filesystems.php and use the default disk.
选择磁盘上传文件。 如果未指定磁盘,Laravel将查找config / filesystems.php并使用默认磁盘。
Storage :: disk ( 'local' ) - > exists ( 'file.txt' ) ;use default cloud provider
使用默认的云提供商
// Storage::disk('cloud')->exists('file.txt'); will not work so do:
Storage :: cloud ( ) - > exists ( 'file.txt' ) ;
Create a new file with contents
创建一个包含内容的新文件
Storage :: put ( 'file.txt' , 'Contents' ) ;Prepend to file
前置档案
Storage :: prepend ( 'file.txt' , 'Prepended Text' ) ;Append to file
附加到文件
Storage :: append ( 'file.txt' , 'Prepended Text' ) ;Get file contents
获取文件内容
Storage :: get ( 'file.txt' )Check if file exists
检查文件是否存在
Storage :: exists ( 'file.txt' )Force file download
强制文件下载
Storage :: download ( 'file.txt' , $name , $headers ) ; // $name and $headers are optionalGenerate publicly accessible URL
生成可公开访问的URL
Storage :: url ( 'file.txt' ) ;Generate a temporary public URL (i.e files that won’t exists after a set time). This will only work for cloud providers as Laravel doesn’t yet know how to handle generation of temporary URLs for local disk.
生成一个临时的公共URL(即在设置的时间后将不存在的文件)。 这仅适用于云提供商,因为Laravel尚不知道如何处理本地磁盘的临时URL。
Storage :: temporaryUrl ( 'file . txt’ , now ( ) - > addMinutes ( 10 ) ) ;Get file size
获取文件大小
Storage :: size ( 'file.txt' ) ;Last modified date
最后修改日期
Storage :: lastModified ( 'file.txt' )Copy files
复制档案
Storage :: copy ( 'file.txt' , 'shared/file.txt' ) ;Move files
移动文件
Storage :: move ( 'file.txt' , 'secret/file.txt' ) ;Delete files
删除文件
Storage :: delete ( 'file.txt' ) ;// to delete multiple files
Storage::delete(['file1.txt', 'file2.txt']);处理文件 ( Manipulating files )
Resizing images, adding filters etc. This is where Laravel needs external help. Adding this feature natively to Laravel will only bloat the application since not installs need it. We need a package called intervention/image. We already installed this package, but for reference.
调整图像大小,添加过滤器等。这是Laravel需要外部帮助的地方。 将本机功能添加到Laravel中只会使应用程序膨胀,因为不需要安装就可以了。 我们需要一个名为干预/图像的软件包。 我们已经安装了此软件包,但仅供参考。
composer require intervention/imageSince Laravel can automatically detect packages, we don't need to register anything. If you are using a version of Laravel lesser than 5.5 read this.
由于Laravel可以自动检测软件包,因此我们不需要注册任何内容。 如果您使用的Laravel版本低于5.5, 请阅读此内容 。
To resize an image
调整图像大小
$image = Image :: make ( storage_path ( 'app/public/profile.jpg' ) ) - > resize ( 300 , 200 ) ;Even Laravel's packages are fluent.
甚至Laravel的软件包也很流利。
You can head over to their website and see all the fancy effects and filters you can add to your image.
您可以转到他们的网站 ,查看可以添加到图像的所有奇特效果和滤镜。
不要忘记目录 ( Don’t forget directories )
Laravel also provides handy helpers to work with directories. They are all based on PHP iterators so they'll provide the utmost performance.
Laravel还提供了方便的助手来处理目录。 它们全部基于PHP迭代器,因此它们将提供最大的性能。
To get all files:
要获取所有文件:
Storage :: filesTo get all files in a directory including files in sub-folders
获取目录中的所有文件,包括子文件夹中的文件
Storage :: allFiles ( $directory_name ) ;To get all directories within a directory
获取目录中的所有目录
Storage :: directories ( $directory_name ) ;To get all directories within a directory including files in sub-directories
获取目录中的所有目录,包括子目录中的文件
Storage :: allDirectories ( $directory_name ) ;Make a directory
建立目录
Storage :: makeDirectory ( $directory_name ) ;Delete a directory
删除目录
Storage :: deleteDirectory ( $directory_name ) ;结论 ( Conclusion )
If we left anything out, please let us know down in the comments. Also, checkout Mailtrap, they are really good and they will help you sail through the development phase with regards to debugging emails.
如果我们遗漏了任何内容,请在评论中告知我们。 另外,请检查Mailtrap ,它们真的很好,它们将帮助您完成调试电子邮件的开发阶段。
翻译自: https://scotch.io/tutorials/understanding-and-working-with-files-in-laravel


 4205
4205

 被折叠的 条评论
为什么被折叠?
被折叠的 条评论
为什么被折叠?
 到【灌水乐园】发言


