vscode多光标
tl;dr: A couple of years ago, just like you, I was trying to learn all these power user workflows. Today is your lucky day because I am going to teach you how to deal with lines, how to juggle with words, and how to use multiple cursors with VSCode.
tl; dr :几年前,就像您一样,我试图学习所有这些高级用户工作流程。 今天是您的幸运日,因为我将教您如何处理lines ,如何处理words以及如何在VSCode中使用多个cursors 。
About a decade or so ago, I used to watch all the pro developers code like crazy hackers. They'll be talking about how to not write a recursion and then all of a sudden there it is. Multiple cursors editing multiple things at the same time.
大约十年前,我曾经看过所有专业开发人员的代码,例如疯狂的黑客。 他们将讨论如何不编写递归,然后突然出现递归。 多个光标可同时编辑多个内容。
I'd be like wow. I need to do that. That's what brought me to the Sublime Text Editor. Then as fate would have it, I became a web dev purist. In 2017 I switched to VSCode and haven't looked back yet. VSCode is super duper powerful, especially if you are a web developer. But this post is for everyone.
我会喜欢哇。 我需要这样做。 那就是让我进入Sublime Text Editor的原因。 后来命运决定了,我成为了网络开发的纯粹主义者。 在2017年,我切换到VSCode,并且没有回头。 VSCode具有超级强大的功能,特别是如果您是Web开发人员。 但是这篇文章适合所有人。
Over the years, I have built hundreds of VSCode Power Users Workflows. In this post, I am going to share ~15 file editing workflows that will improve your development workflow many folds. You'll not only enjoy writing code more, but you'll be pen down your ideas quickly.
多年来,我已经建立了数百个VSCode Power Users工作流程 。 在这篇文章中,我将分享〜15个文件编辑工作流程,这些工作流程将使您的开发工作流程倍增。 您不仅会喜欢编写更多代码,而且会很快写下您的想法。
VSCode文件编辑高级用户工作流程 ( VSCode File Editing Power User Workflows )
I am going to share three types of power user workflows today. All of these can be used while editing lines of code, similar words , and my personal favorite; workflows of using multiple cursors.
今天,我将分享三种类型的高级用户工作流程。 所有这些都可以在编辑代码lines ,类似的words以及我个人的最爱时使用。 使用多个cursors工作流。
proceed在继续之前,您应该知道这一点…… (🤔 You Should Know this before you proceed…)
Before we start, I need to tell you that I am using macOS and when I say COMMAND (⌘) that should be CONTROL on Windows or Linux or other OS. And similarly, when I say OPTION, you should know that I mean ALT (⌥) on other OS.
在开始之前,我需要告诉您我正在使用macOS,并且当我说COMMAND (⌘) ,在Windows或Linux或其他操作系统上应使用CONTROL 。 同样,当我说OPTION ,您应该知道我在其他操作系统上的意思是ALT (⌥) 。
- OS: macOS vs Windows/Linux. 操作系统 :macOS与Windows / Linux。
- KEY: Command === Control 按键 :命令===控制
- KEY: Option/Alt === Alt 键 :Option / Alt === Alt
One last thing, I am also using Sublime Text Keymap which changes the default keyboard shortcuts for me. I definitely recommend using such a keymap since it makes switching to VSCode a breeze. I teach all about it in my VSCode.pro course. You can find your exact keyboard shortcut through the Keyboard Shortcuts Editor. Open this editor by going to the menu under Code > Preferences > Keyboard Shortcuts (File > Preferences > Keyboard Shortcuts on Windows/Linux).
最后一件事,我还在使用Sublime Text Keymap ,它为我更改了默认键盘快捷键。 我绝对建议使用这样的键盘映射,因为它使切换到VSCode变得轻而易举。 我在VSCode .pro课程中教授了所有这些内容。 您可以通过键盘快捷键编辑器找到确切的键盘快捷键。 转到代码 > 首选项 > 键盘快捷方式 (在Windows / Linux上为文件 > 首选项 > 键盘快捷方式 )下的菜单,以打开此编辑器。
📺 If you prefer a video, then watch the one below for VSCode Multi Cursors, which is part of my VSCode course.
📺如果您喜欢视频,请观看下面的VSCode多光标视频 ,这是我的VSCode课程的一部分。
Learn everything about VSCode in this five hours 200+ tips/tricks course and use all of my workflows. I have a 70% off discount for this Cyber Monday. On top of it, I support Purchasing Power Parity through which you can get up to 80% off in ~149 countries. Go ahead, become a VSCode Power User →
在这个五小时的200多个提示/技巧课程中,全面了解VSCode ,并使用我所有的工作流程。 我在本网络星期一获得了70%的折扣。 最重要的是,我支持“购买力平价”,通过它您可以在149个国家/地区享受80%的折扣。 继续,成为VSCode超级用户 →
That's about it. Let's get started.
就是这样 让我们开始吧。
工作流程1:线路迭代 ( Workflow #1: Line Iterations )
🤔 First thing first, our current workflow is line iterations. Let's say, my cursor is at the start of the line, and I want to move it to the end of the line. I have seen developers press the RIGHT key and hold it till they get to the end. That's no way to live your life.
🤔首先,我们当前的工作流程是线路迭代。 假设,我的光标位于行的开头,我想将其移至行的结尾。 我已经看到开发人员按下RIGHT键并按住直到结束。 那是没有生活的方式。
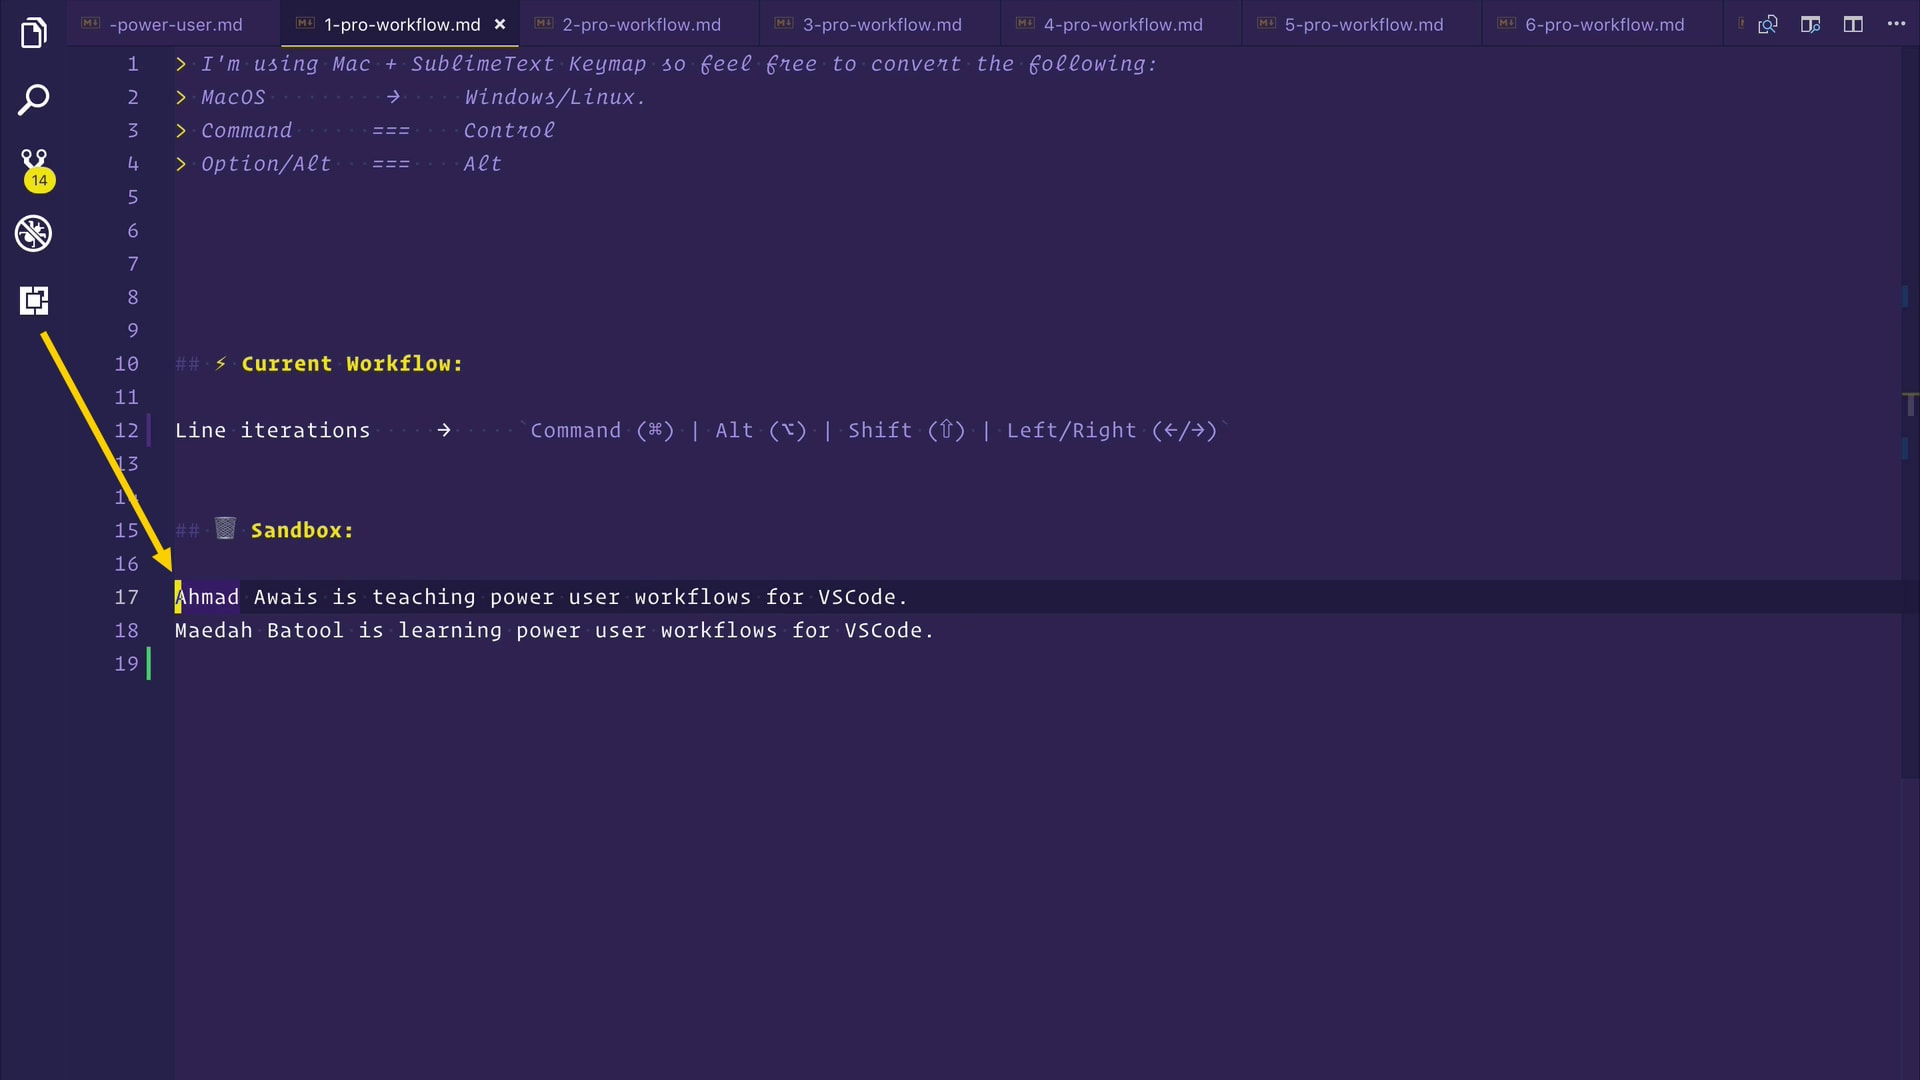
🔥 You need to use the COMMAND (⌘) or CONTROL (⌃) key. See when you press and hold COMMAND (⌘) and then press the RIGHT key, it jumps the cursor to the end of the line. Similarly, when you press & hold COMMAND (⌘) and press the LEFT key, you are at the start of the line.
🔥您需要使用COMMAND (⌘)或CONTROL (⌃)键。 查看何时按住COMMAND (⌘) ,然后按一下RIGHT键,它将光标跳到该行的末尾。 同样,当您按住COMMAND (⌘)并按LEFT键时,您就位于该行的开头。
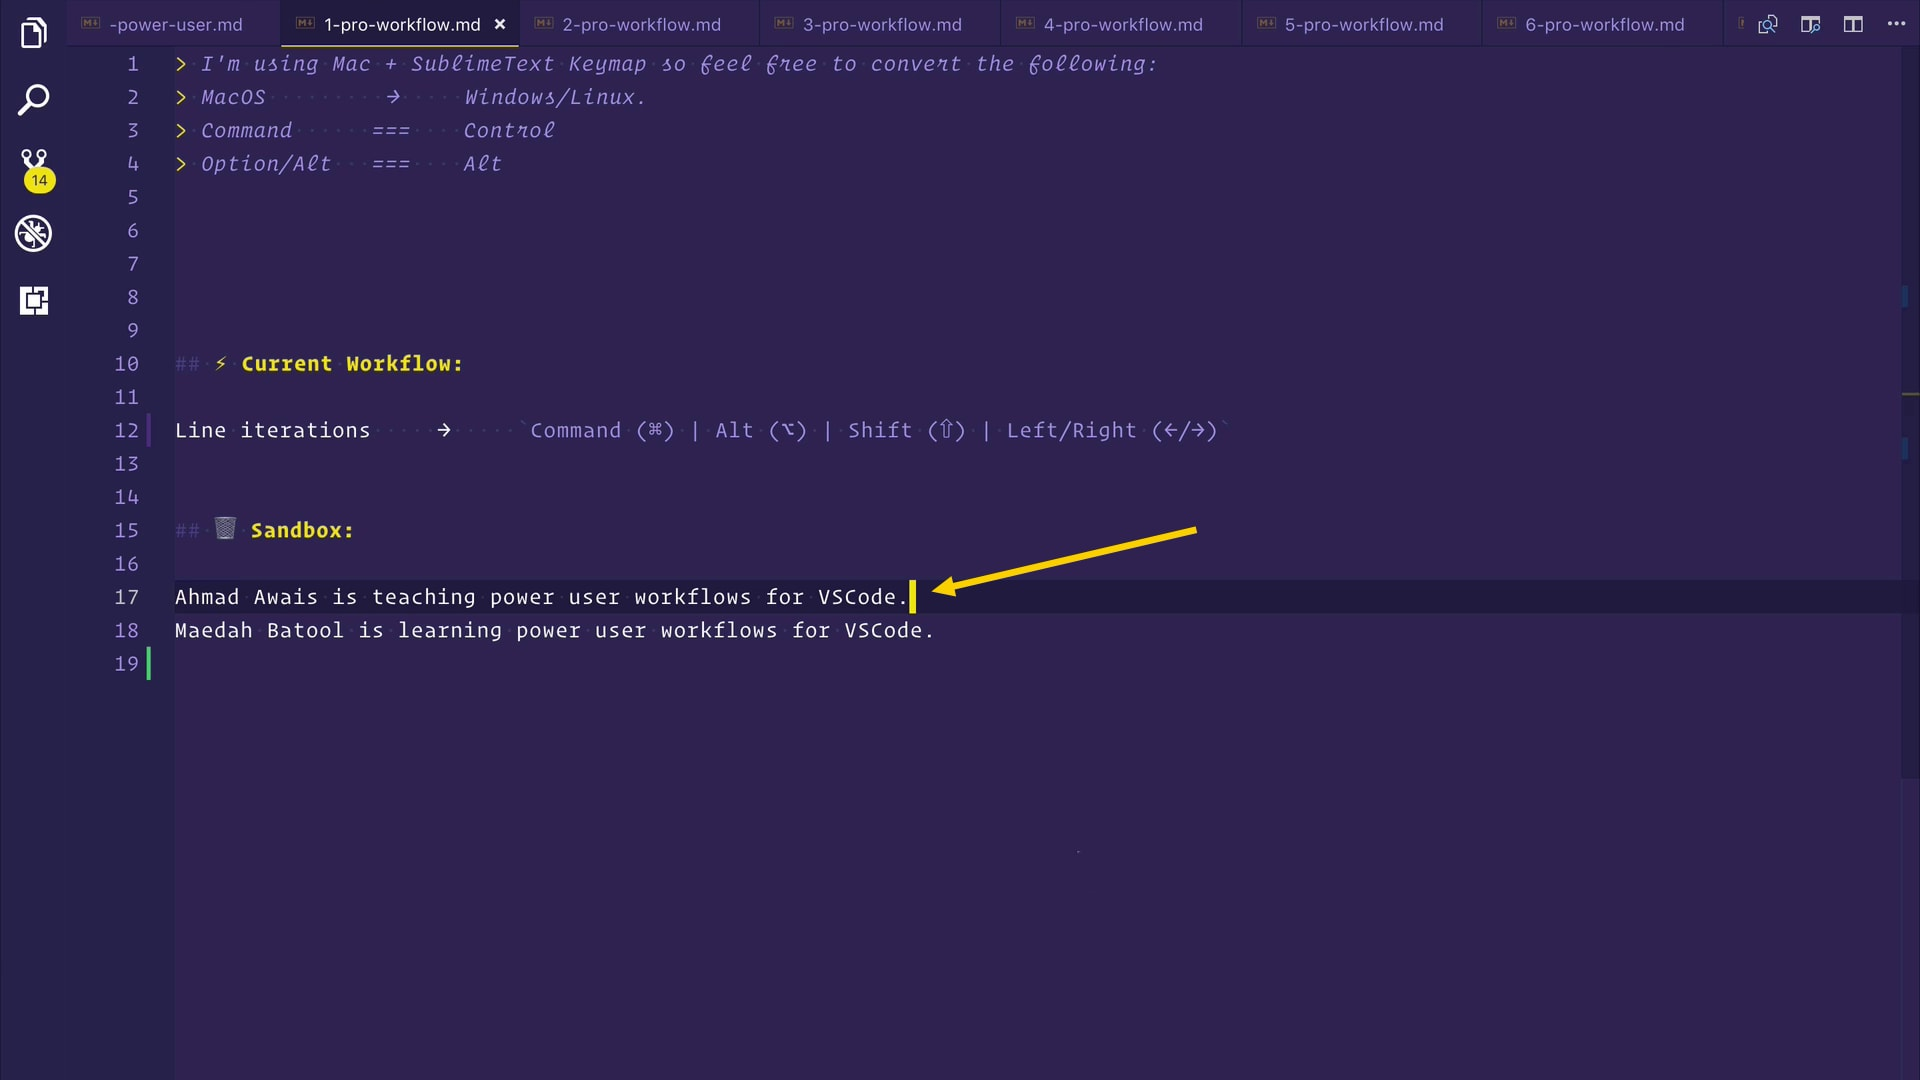
🤔 The next thing you do is how do you go word by word making your cursor go after each word, let's say, you want to add something here.
🤔接下来要做的就是如何逐个单词地移动光标,让您在每个单词之后移动光标,例如,您想在此处添加一些内容。
ALT (⌥) and then RIGHT that'll take us forward word by word. And when I press ALT (⌥) and LEFT key, the cursor moves backward in a similar word by word fashion.
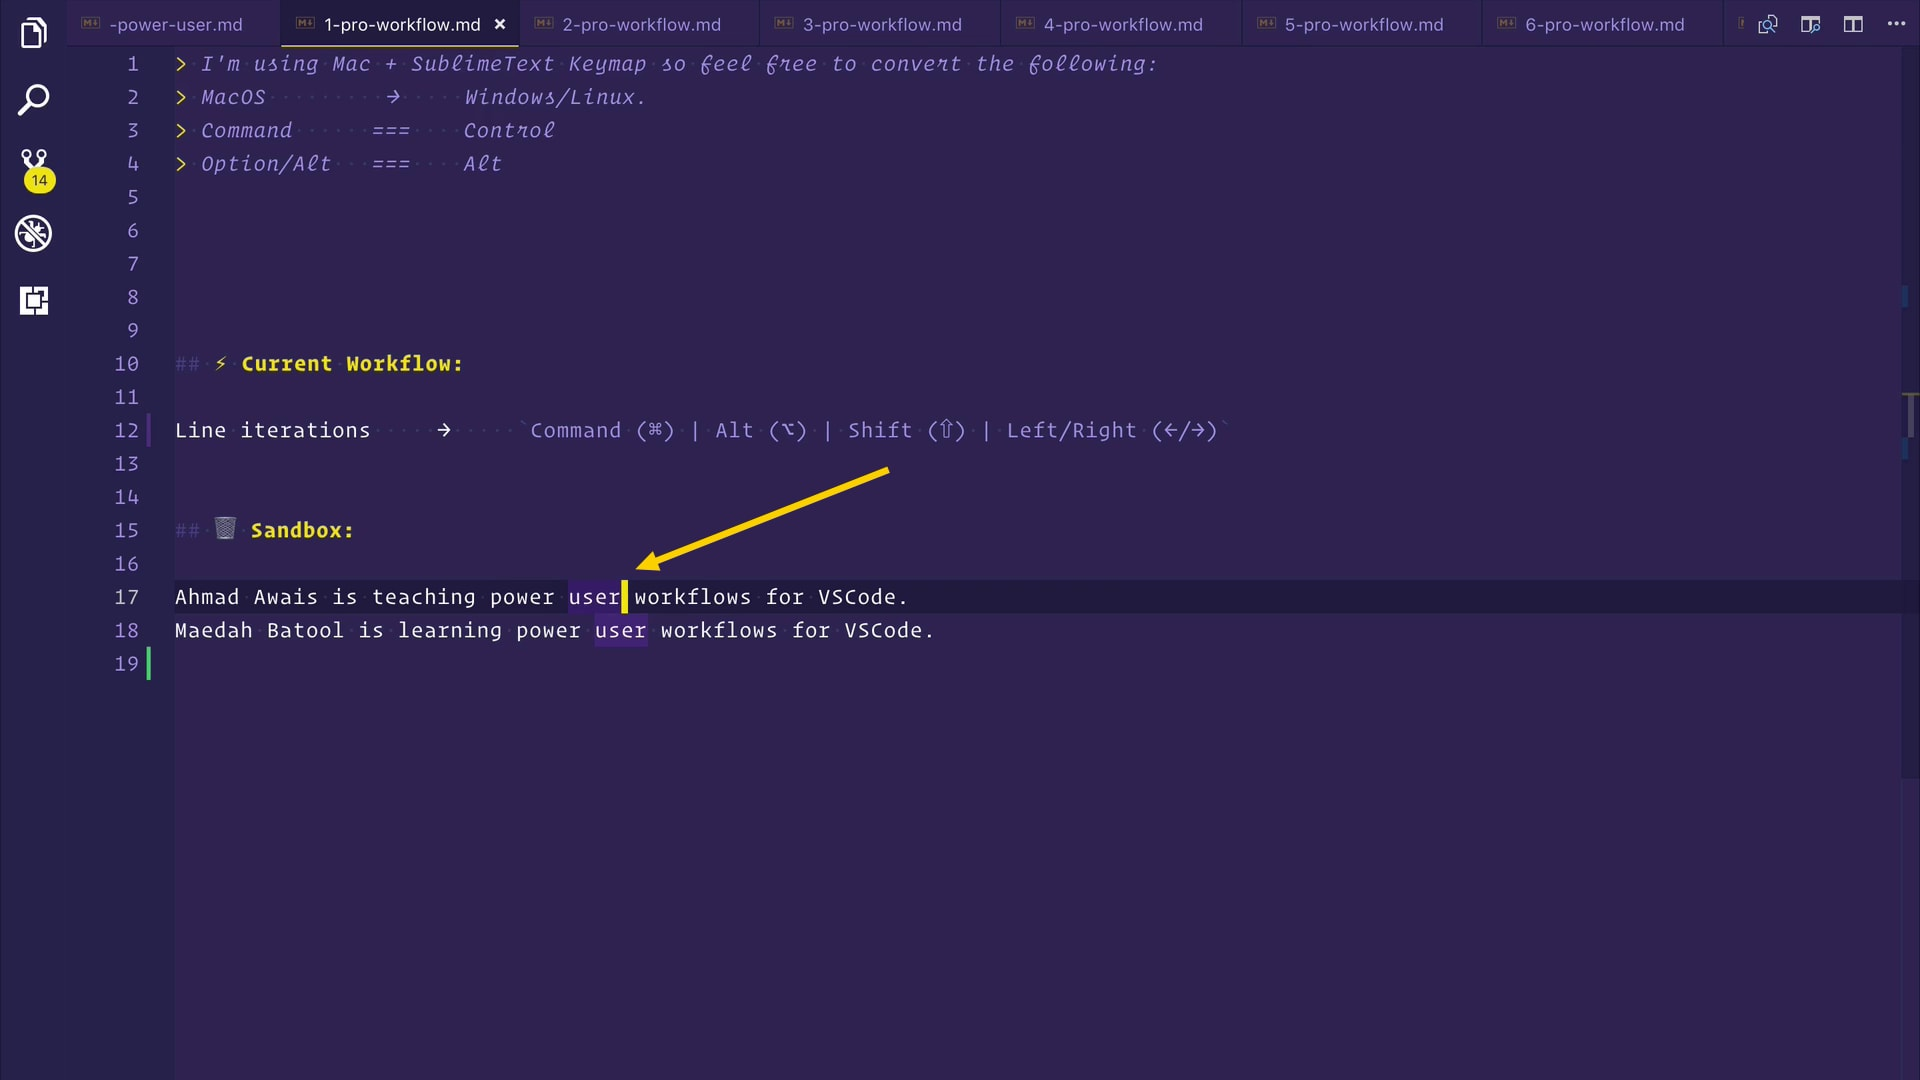 here我在这里要做的是,我先按
ALT (⌥) ,然后按
RIGHT ,这将使我们逐字逐句前进。 当我按
ALT (⌥)和
LEFT键时,光标以类似的单词逐字向后移动。
🤔 Now what if you need to select while you are iterating over this line?
SHIFT (⇧) to the mix. For example, press & hold COMMAND (⌘) along with SHIFT (⇧) and when I press the LEFT key, all of that line gets selected.
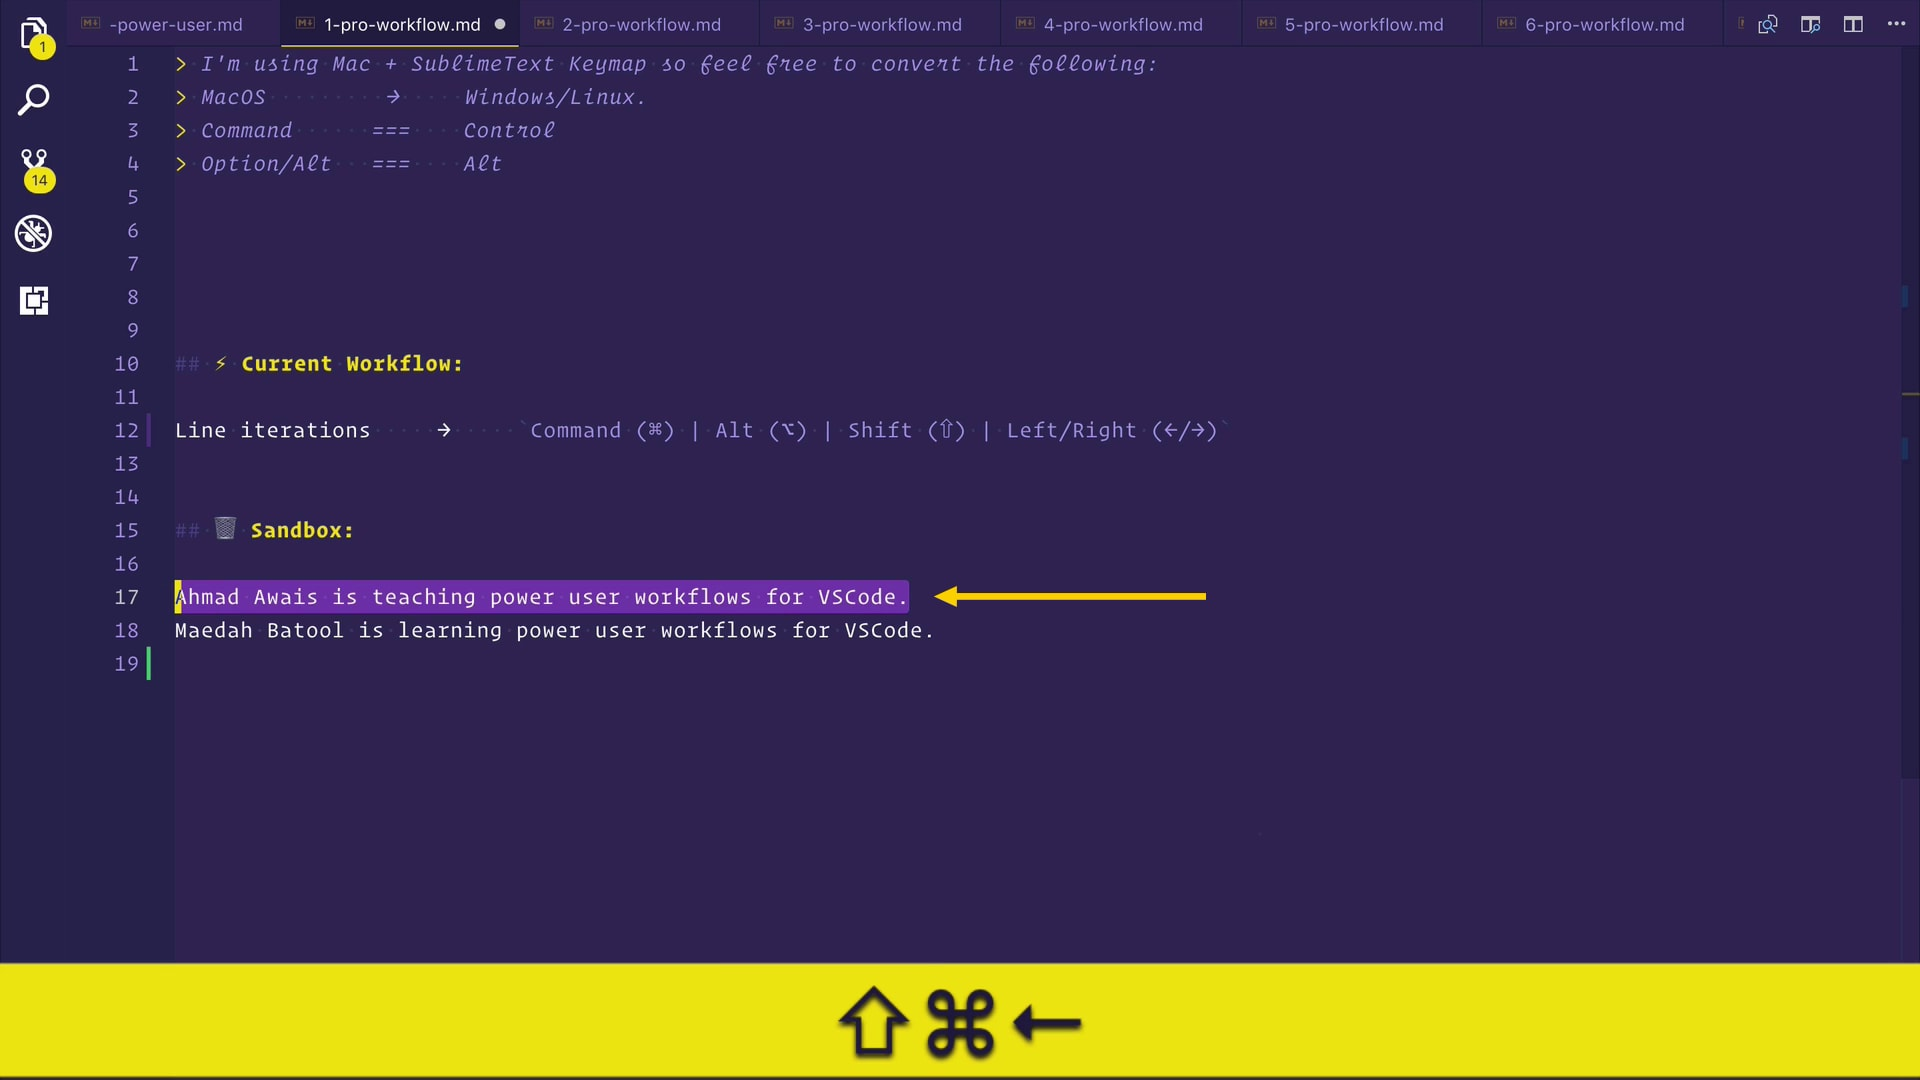 🔥为此,您可以在混合中添加
SHIFT (⇧) 。 例如,按住
COMMAND (⌘)和
SHIFT (⇧) ,然后按
LEFT键,将选中所有行。
And similarly, when I press and hold ALT (⌥) + SHIFT (⇧) and start moving to the right. I am selecting each word, one by one. I can also go back by the left key.
同样,当我按住ALT (⌥) + SHIFT (⇧)并开始向右移动时。 我正在逐个选择每个单词。 我也可以按左键返回。
工作流程2:删除行 ( Workflow #2: Delete a Line )
🤔 Now let's move to our second workflow. How do you delete a line of code? I have seen people select all the lines and then press DELETE. Or they cut that line, putting it in the clipboard for no reason at all.
🤔现在,我们进入第二个工作流程。 您如何删除一行代码? 我见过人们选择所有行,然后按DELETE 。 或者他们剪掉那条线,毫无理由地将其放入剪贴板。
COMMAND (⌘) + SHIFT (⇧) + K and the line is gone, deleted!
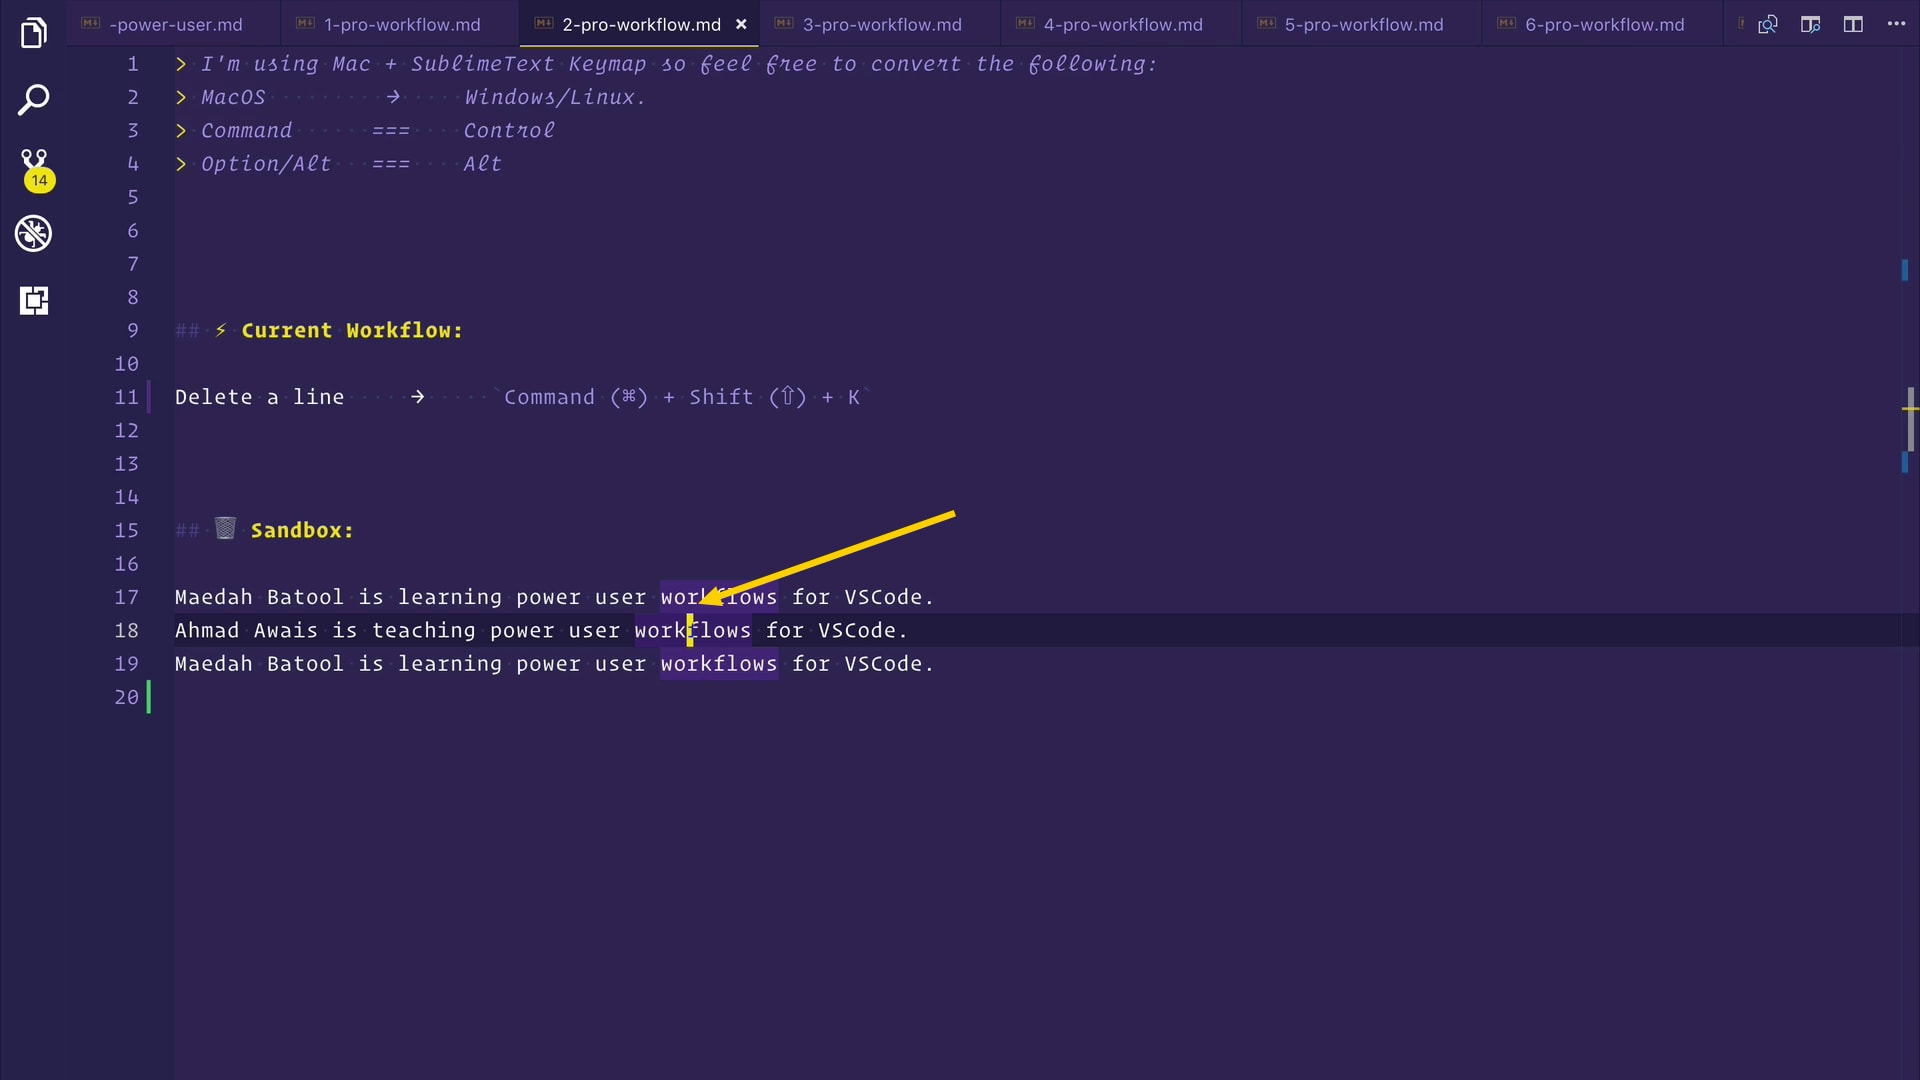 you您可以做的是,将光标放在此行的中间,例如。 您所要做的就是按
COMMAND (⌘) +
SHIFT (⇧) +
K ,该行消失,删除!
COMMAND (⌘) + Z to undo the deletion and let's delete the first line. COMMAND (⌘) + SHIFT (⇧) + K. It's not in your clipboard or anything. It's just gone. Truly deleted without polluting your clipboard.
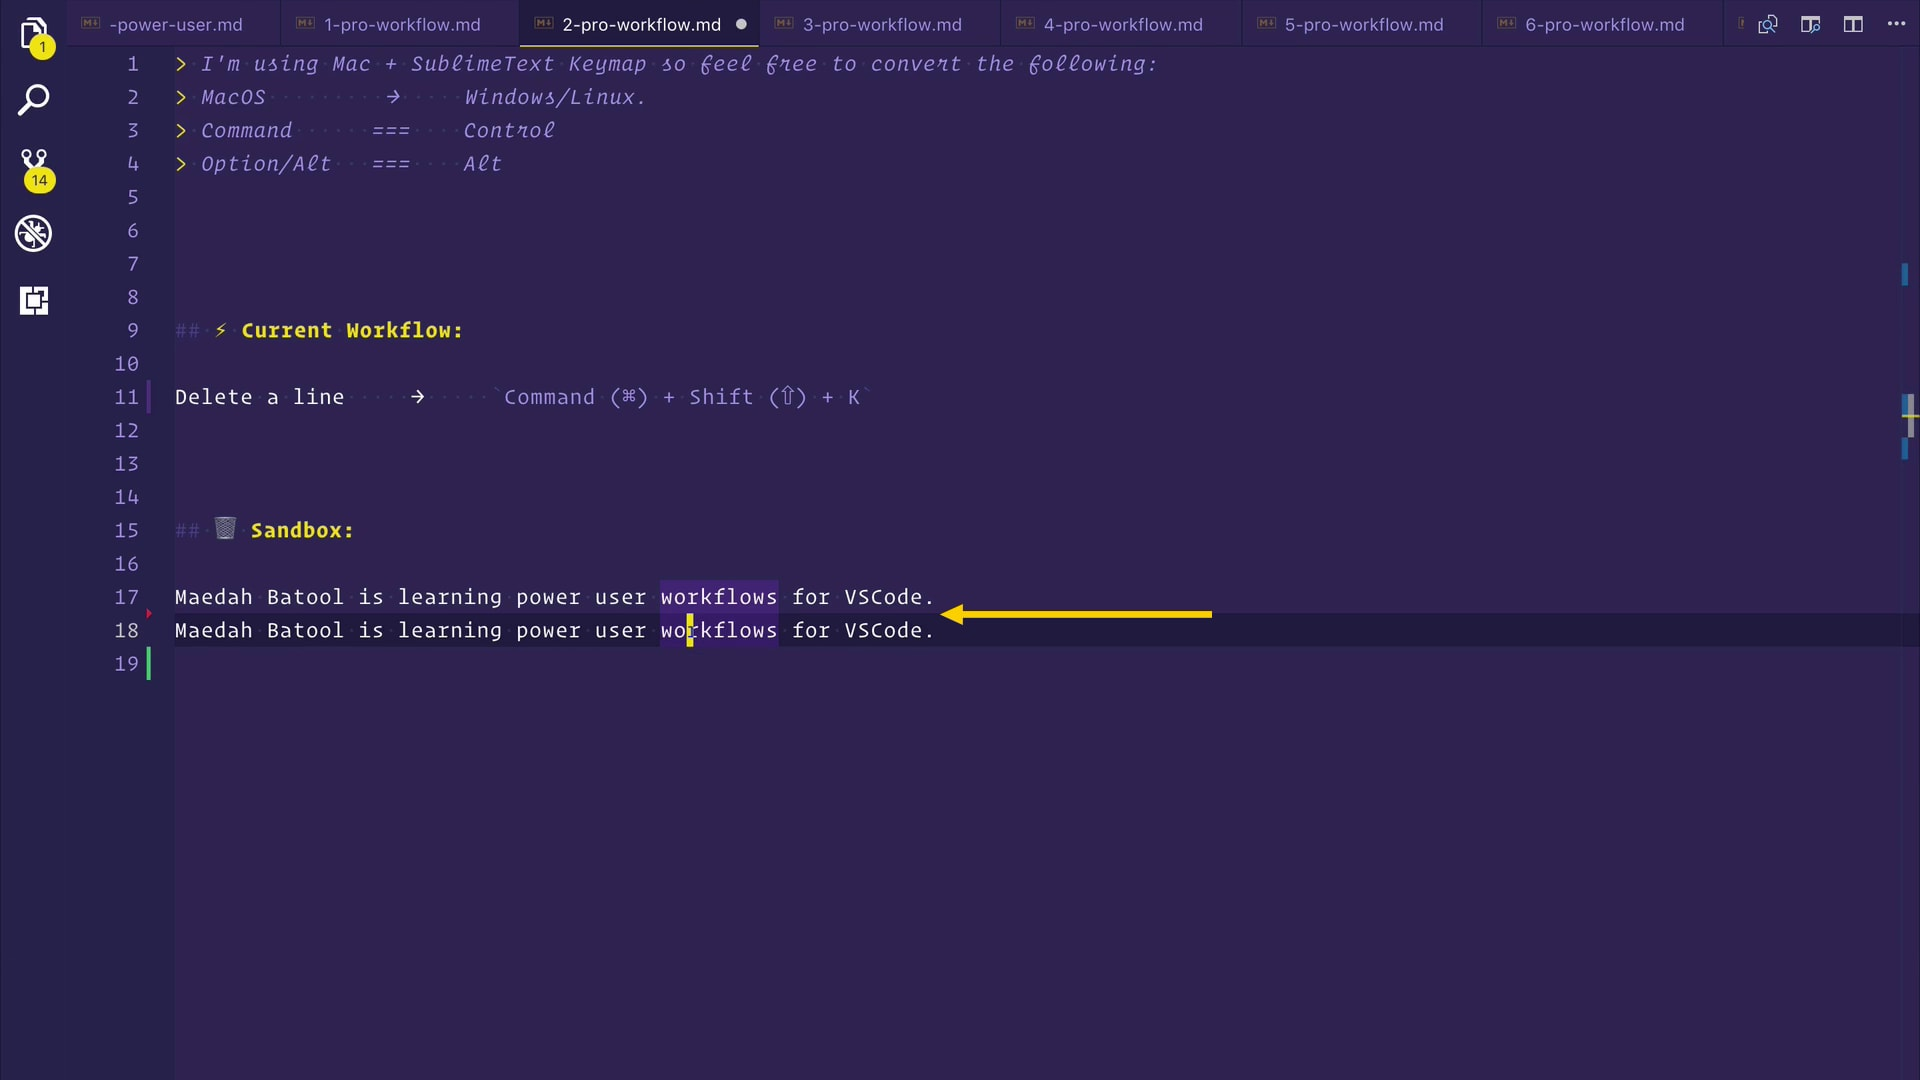 🔥让我们按
🔥让我们按
COMMAND (⌘) +
Z
撤消删除操作,然后删除第一行。
COMMAND (⌘) +
SHIFT (⇧) +
K 它不在您的剪贴板中。 没了 真正删除而不会污染剪贴板。
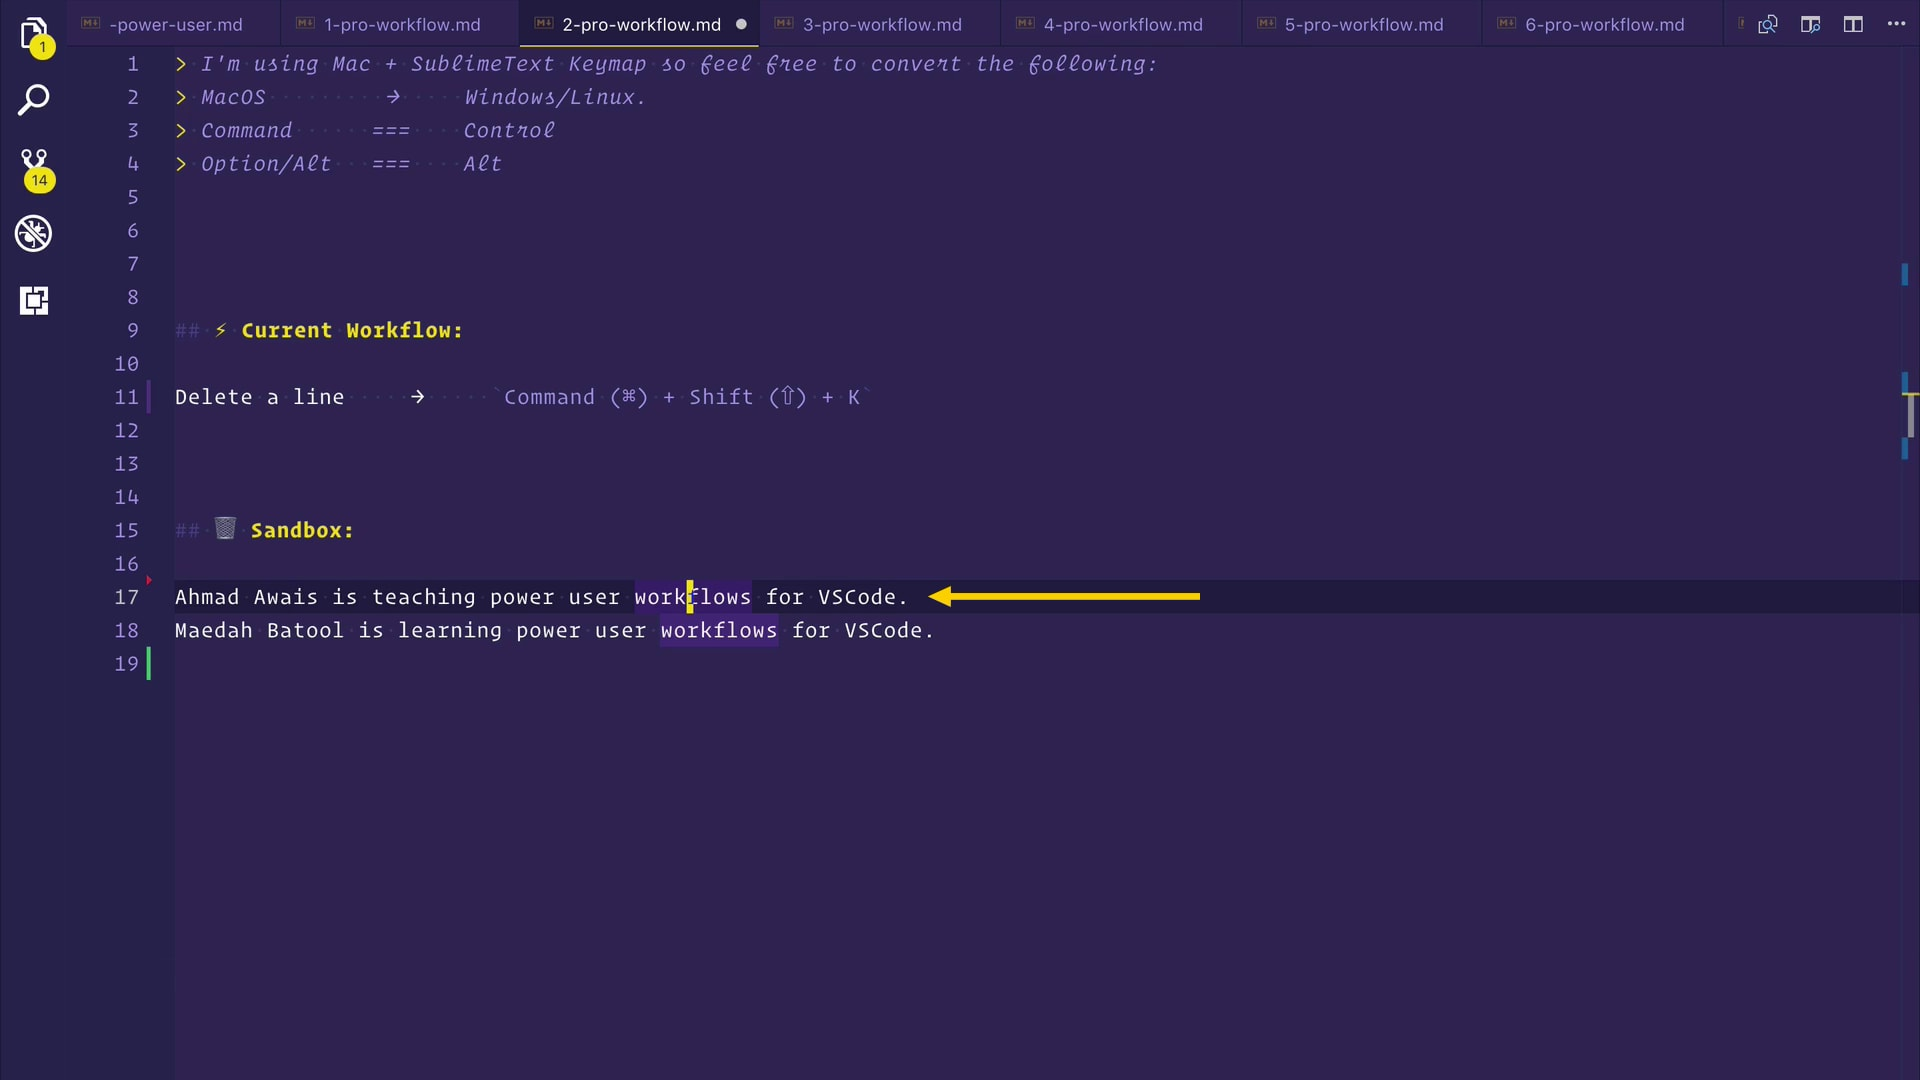
工作流程3:复制一行 ( Workflow #3: Duplicate a Line )
🤔 The next workflow here is, how can we duplicate a line. Maybe you are writing a JavaScript object and you need to duplicate a key-value pair.
here这里的下一个工作流程是,我们如何复制一行。 也许您正在编写一个JavaScript 对象,并且需要复制一个键值对。
ALT (⌥) + SHIFT (⇧) + DOWN this will duplicate this line below. Or you can also duplicate this line above by pressing ALT (⌥) + SHIFT (⇧) + UP . Easy, eh!
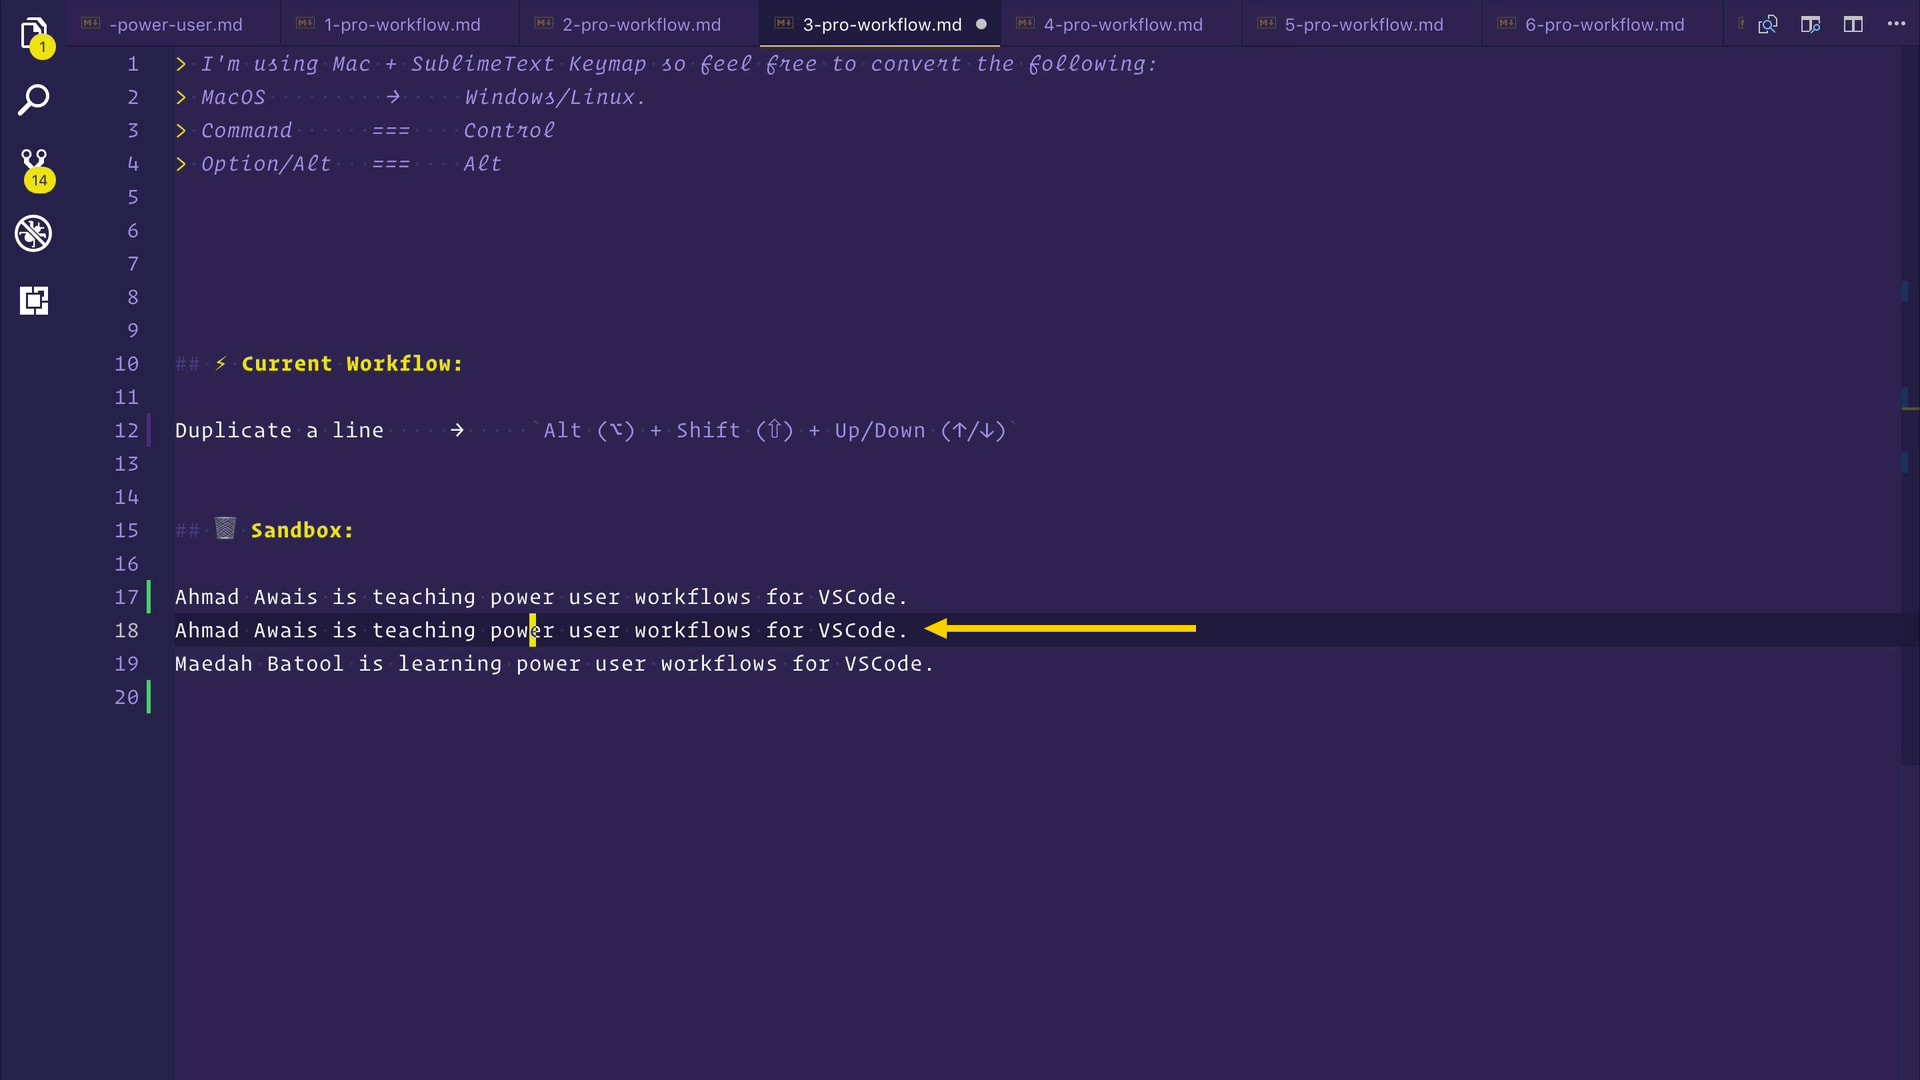 cursor您的光标可能位于该行中间的任何位置。 您所要做的就是,按
ALT (⌥) +
SHIFT (⇧) +
DOWN这将在下面重复此行。 或者你也可以通过按复制这条线
以上
ALT (⌥) +
SHIFT (⇧) +
UP 。
容易,嗯 !

工作流程4:剪切/复制/粘贴 ( Workflow #4: Cut/Copy/Paste )
🤔 This next workflow is straightforward, but I have seen developers who don't know how easy it is to cut/copy/paste a line in Visual Studio Code.
next下一个工作流程非常简单,但是我见过一些开发人员,他们不知道在Visual Studio Code中剪切/复制/粘贴行有多么容易。
COMMAND (⌘) + X and then the line will get cut. Simple!
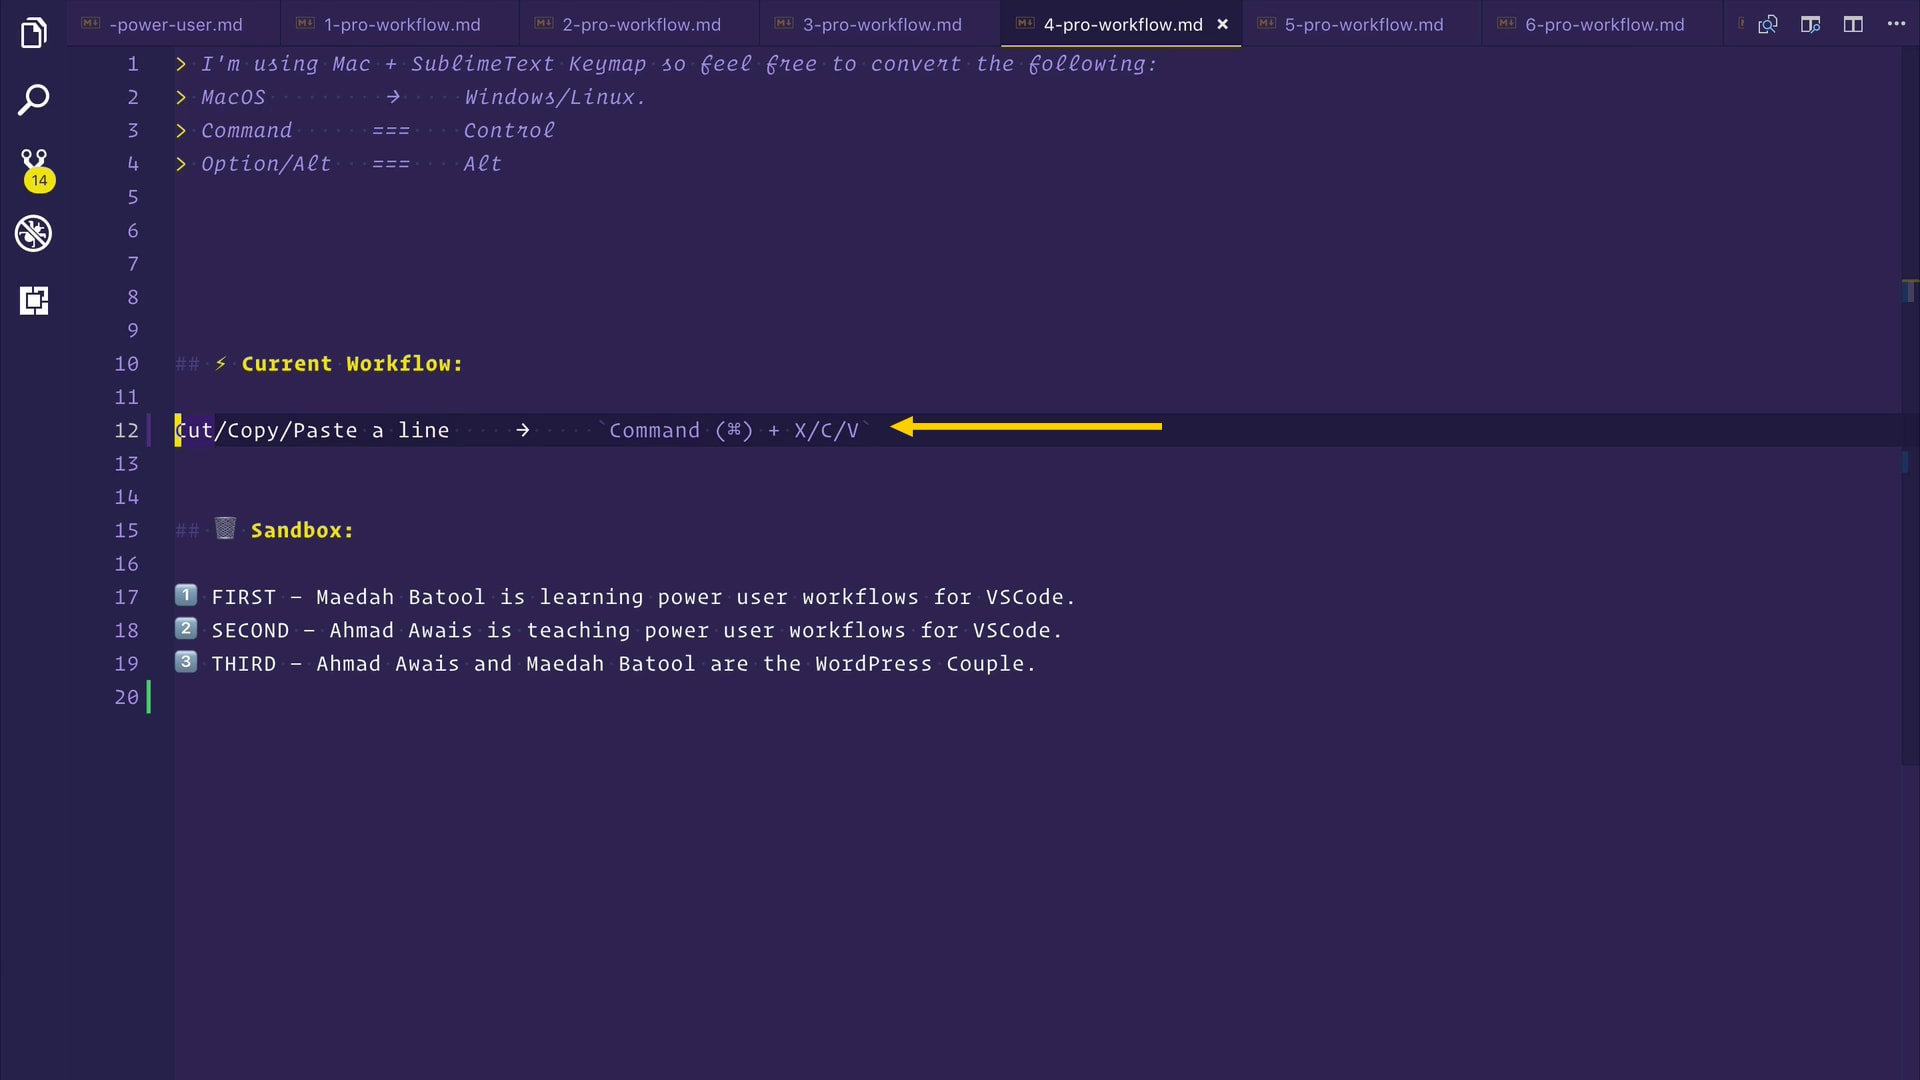 🔥同样,您可以将光标放在任何地方。 您不必位于行尾或行首。 您可以将光标放在该价位的中心位置,只需按
COMMAND (⌘) +
X ,然后该行将被
剪切 。
很简单 !
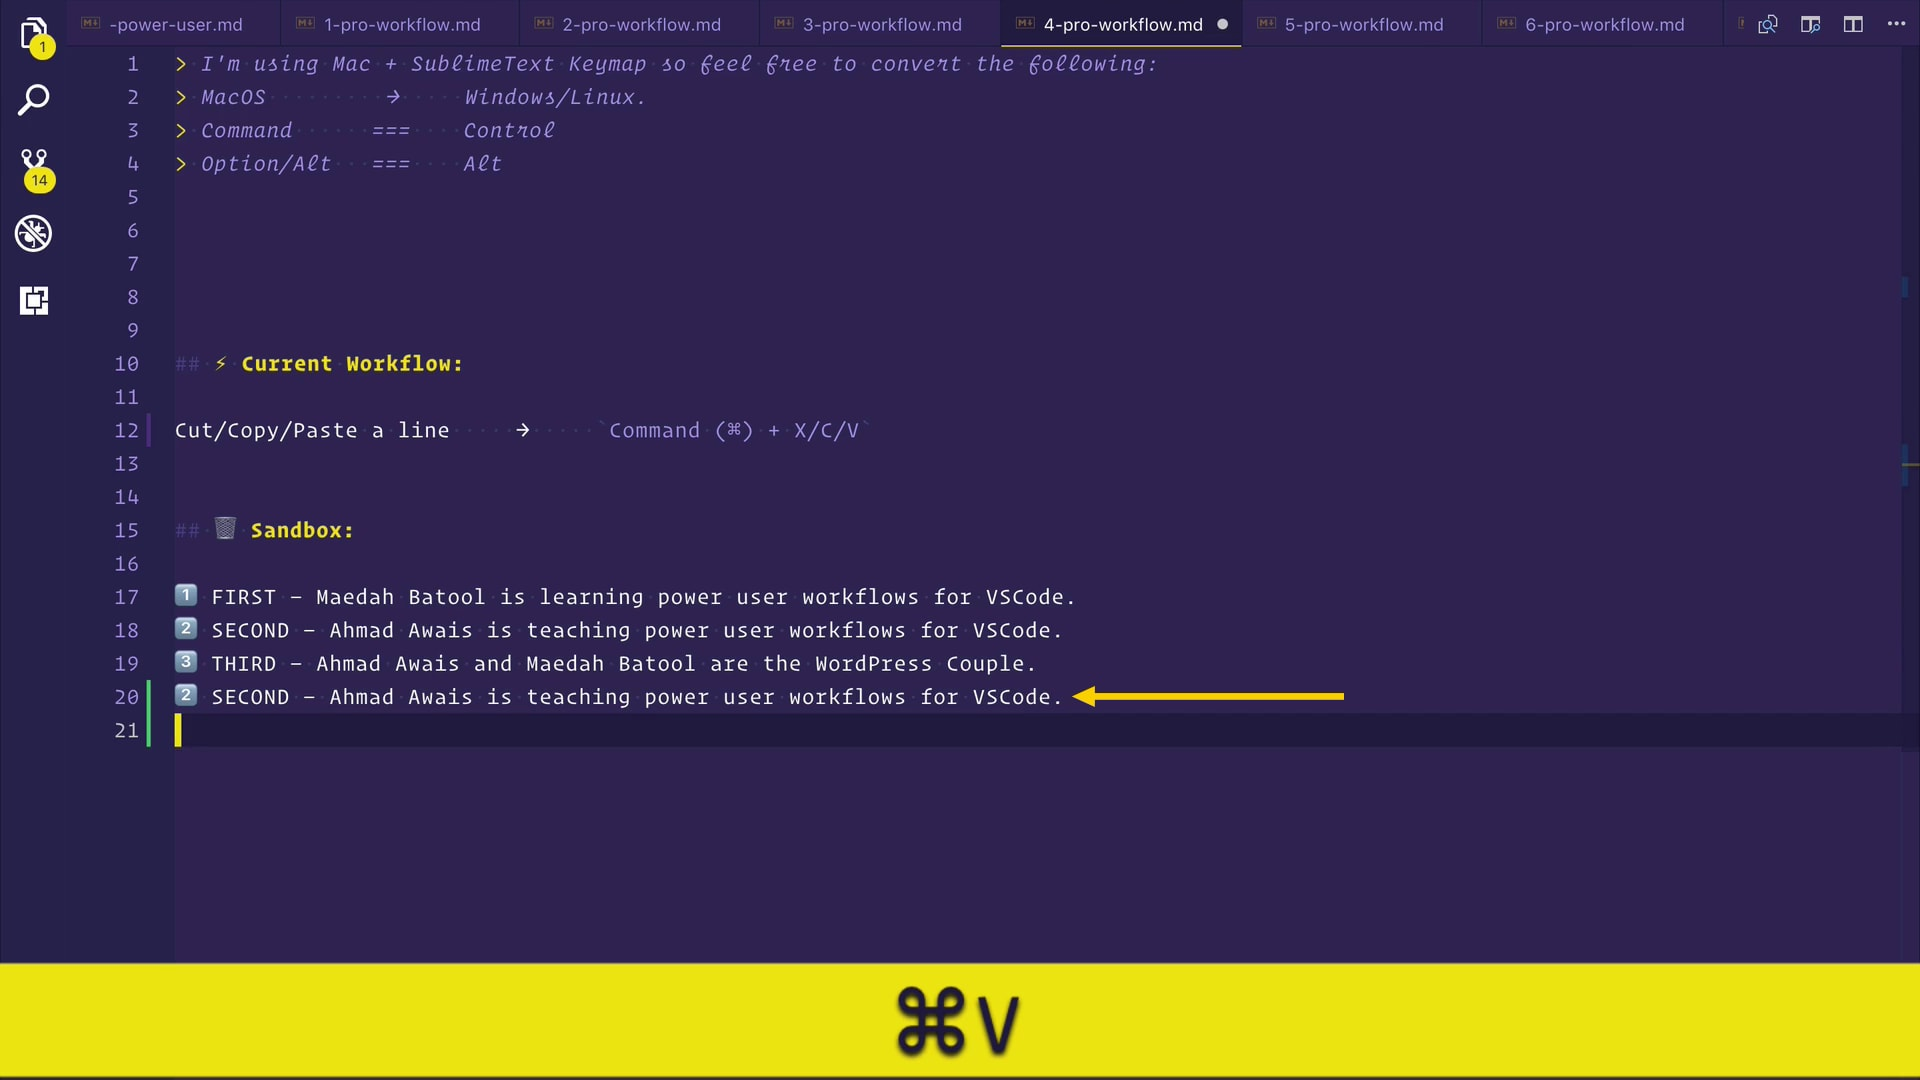
COMMAND (⌘) + C to copy this line. Go to another line and then just press COMMAND (⌘) + V. There you have it.
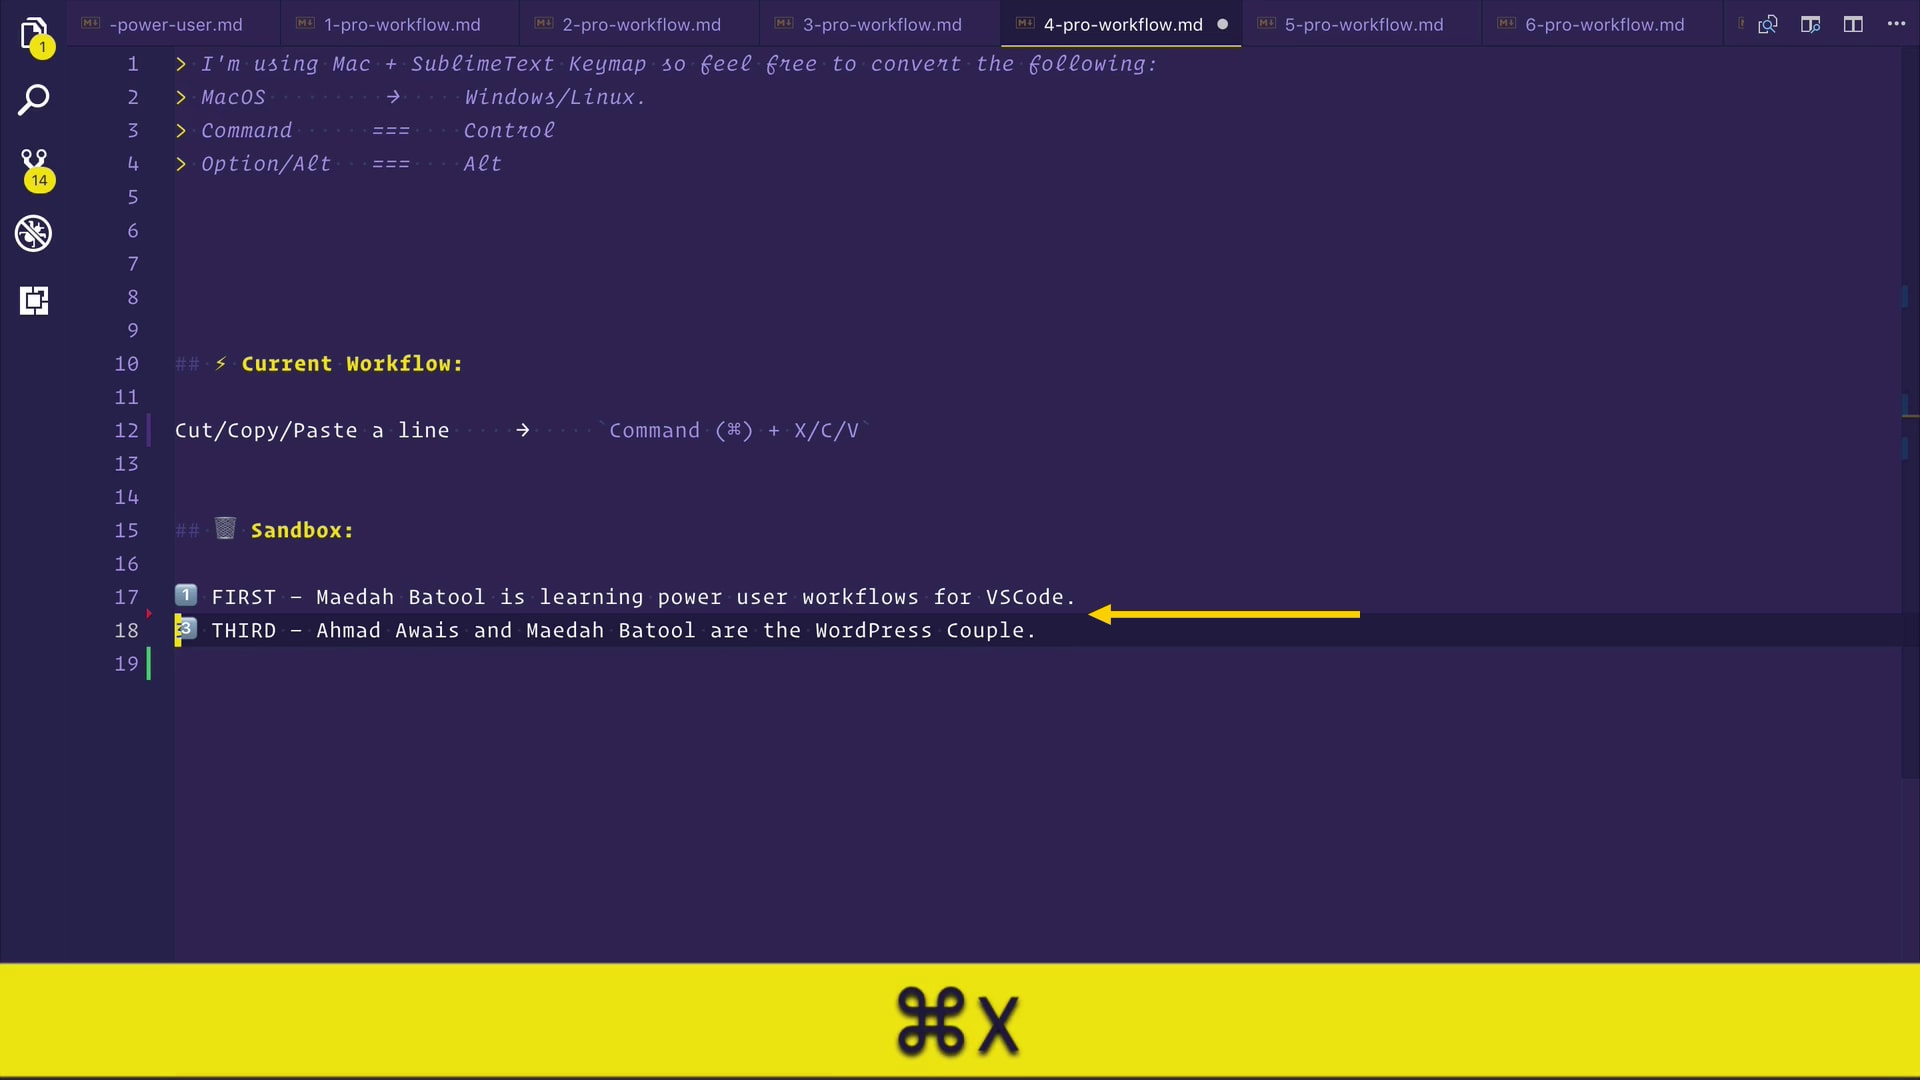 🔥或者您可以按
COMMAND (⌘) +
C
复制此行。 转到另一行,然后按
COMMAND (⌘) +
V 你有它。
paste a line.
 我发现开发人员做错的另一件事是,他们认为如果要
That is not true. For example, check the pic below, I pressed COMMAND (⌘) + C. Now I can be in the first line, and when I press COMMAND (⌘) + V you see, the first line becomes the second line, and the first line moves down.
那是不对的。 例如,查看下面的图片,我按了COMMAND (⌘) + C 现在我可以进入第一行,当我按COMMAND (⌘) + V您会看到第一行成为第二行,第一行向下移动。
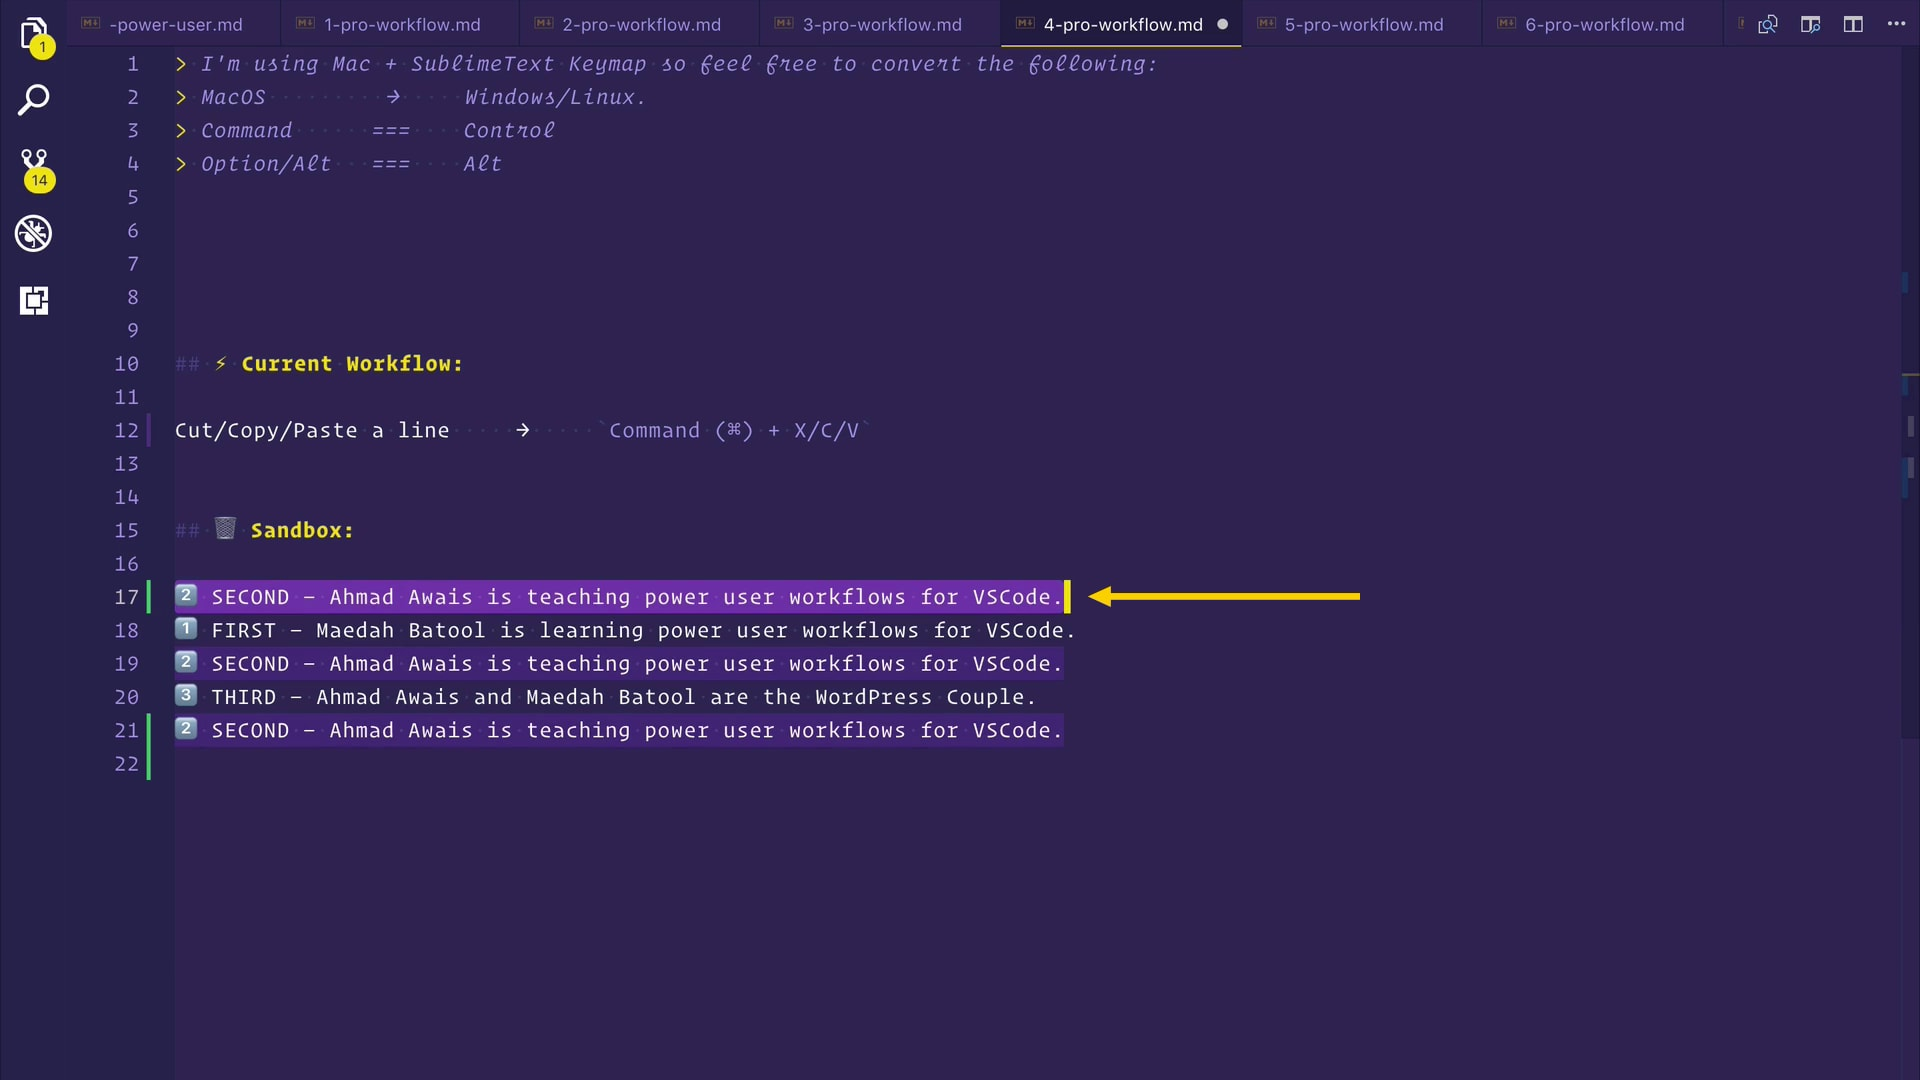 无需创建新行并在行的末尾或开头粘贴。 只需粘贴您想要的位置。
工作流程5:移动线 ( Workflow #5: Move a Line )
🤔 Let's see how easy it is to move a line up or down. For that my cursor is in the third line here. In the middle of the line really.
🤔让我们来看看它是多么容易移动线向上或者向下 。 为此,我的光标在此处的第三行。 真的在中间。
COMMAND (⌘) + CONTROL (⌃) And when I press UP arrow key my line, the entire line will go UP.
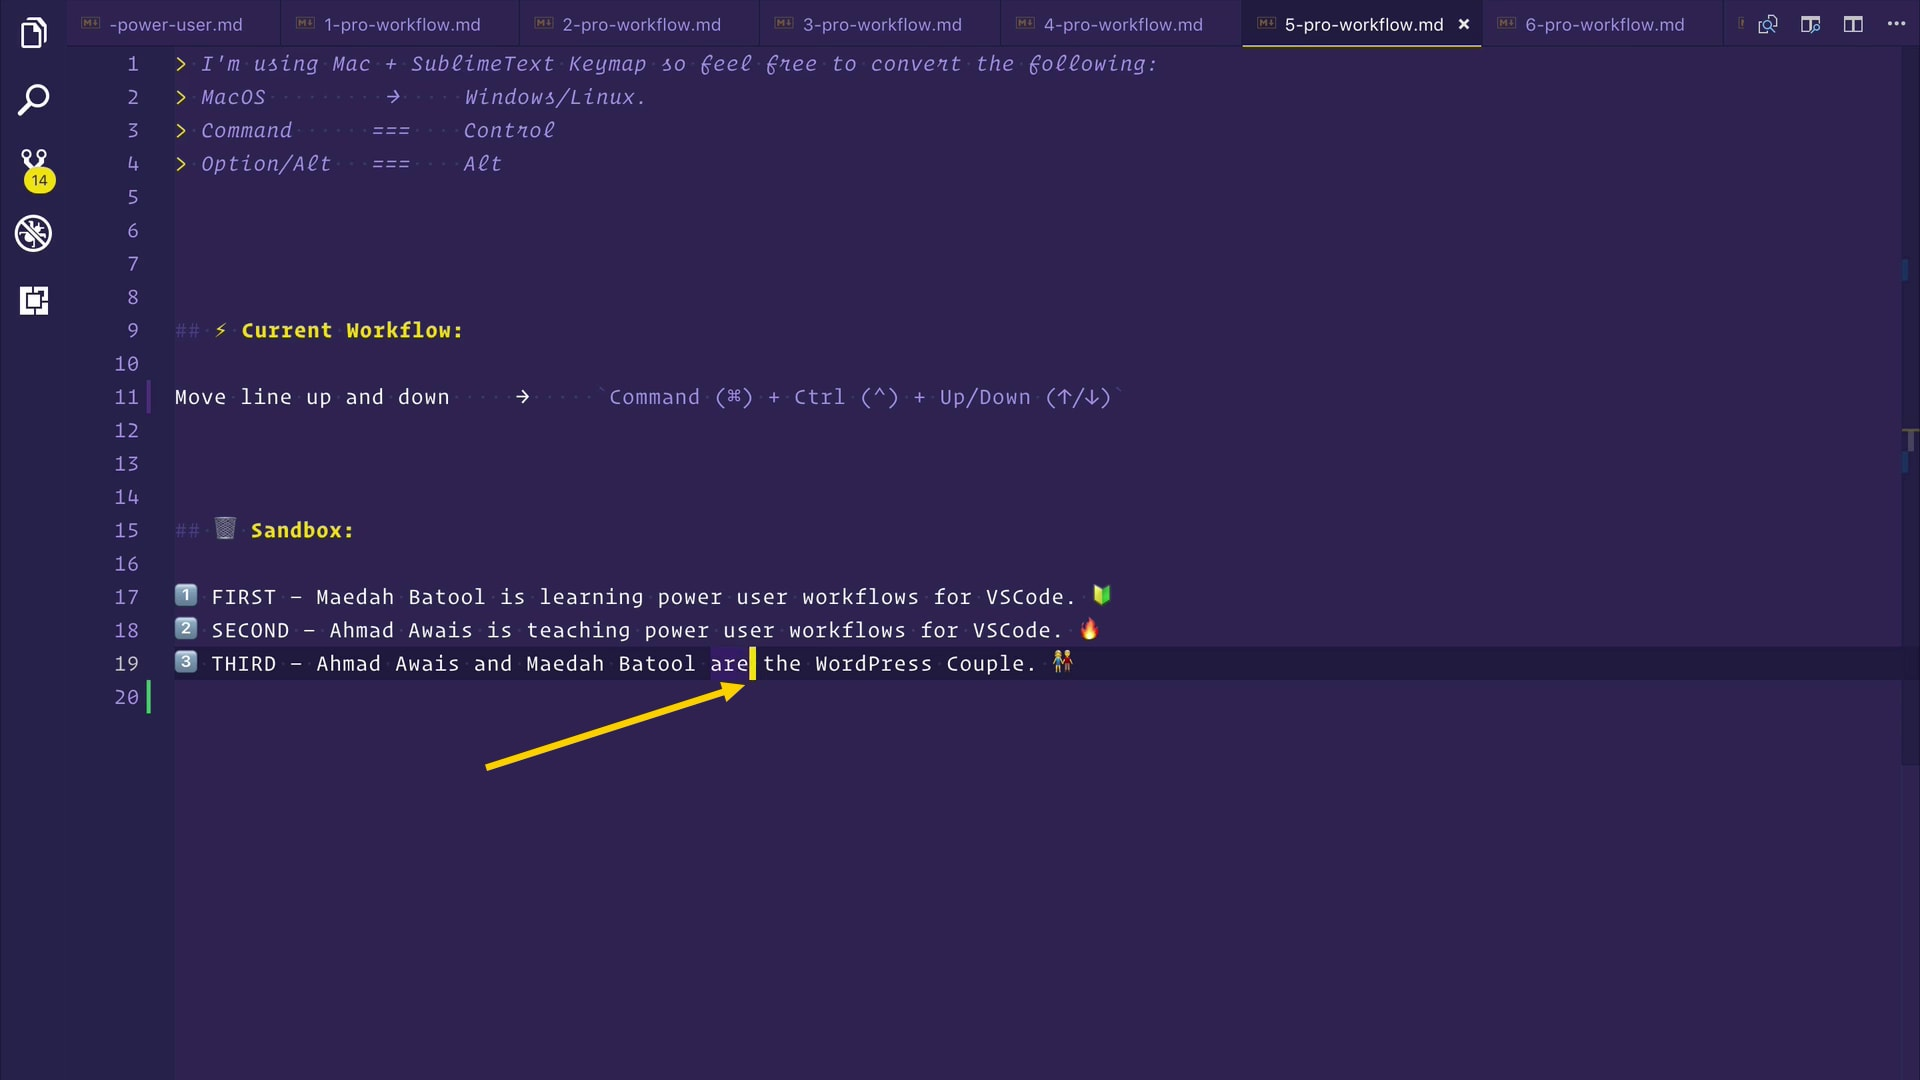 🔥我要按住
🔥我要按住
COMMAND (⌘) +
CONTROL (⌃)当我按
UP箭头键我的线,整条生产线会
UP 。
COMMAND (⌘) + CONTROL (⌃) And when I press DOWN arrow key my line, the entire line will go DOWN.
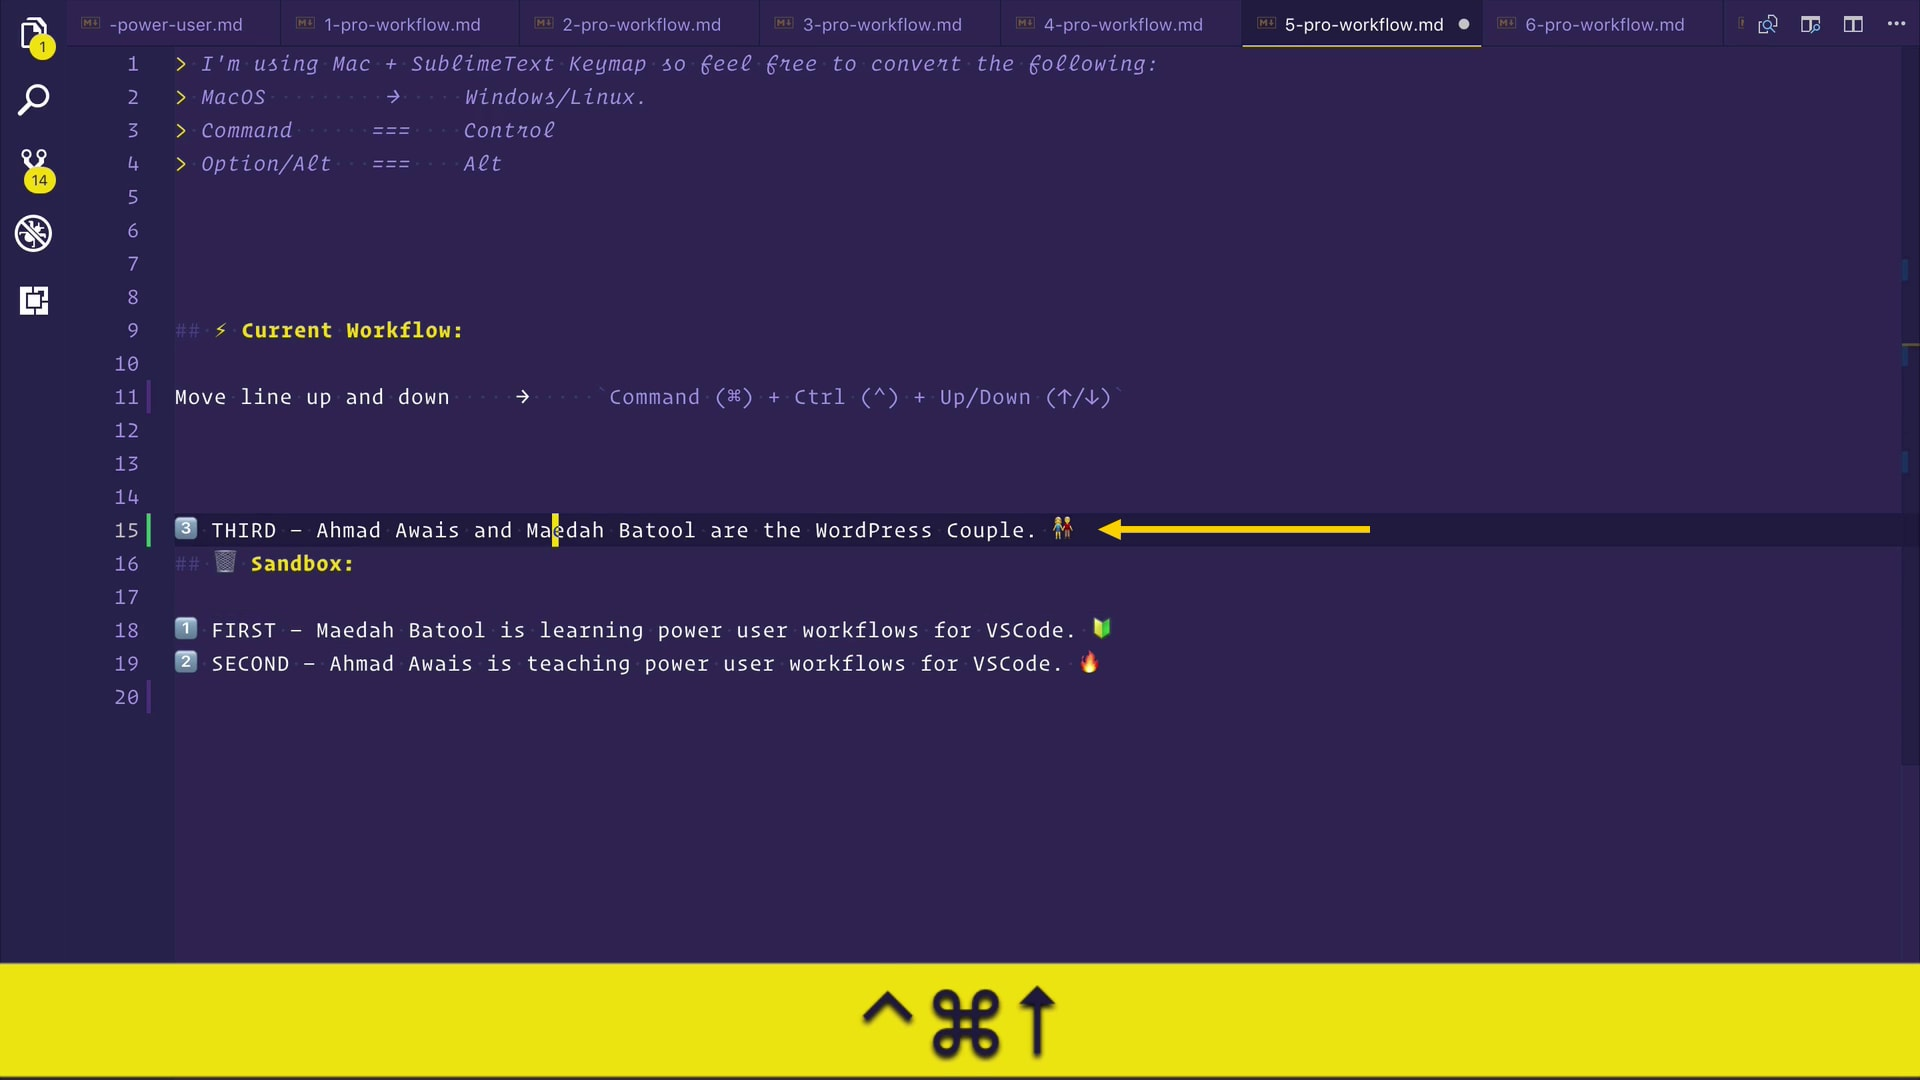 🔥然后再次按下并按住
COMMAND (⌘) +
CONTROL (⌃)然后当我按下
DOWN箭头键时,整行将
DOWN 。
COMMAND (⌘) + CONTROL (⌃) and then the UP OR DOWN keys are here to serve you well.
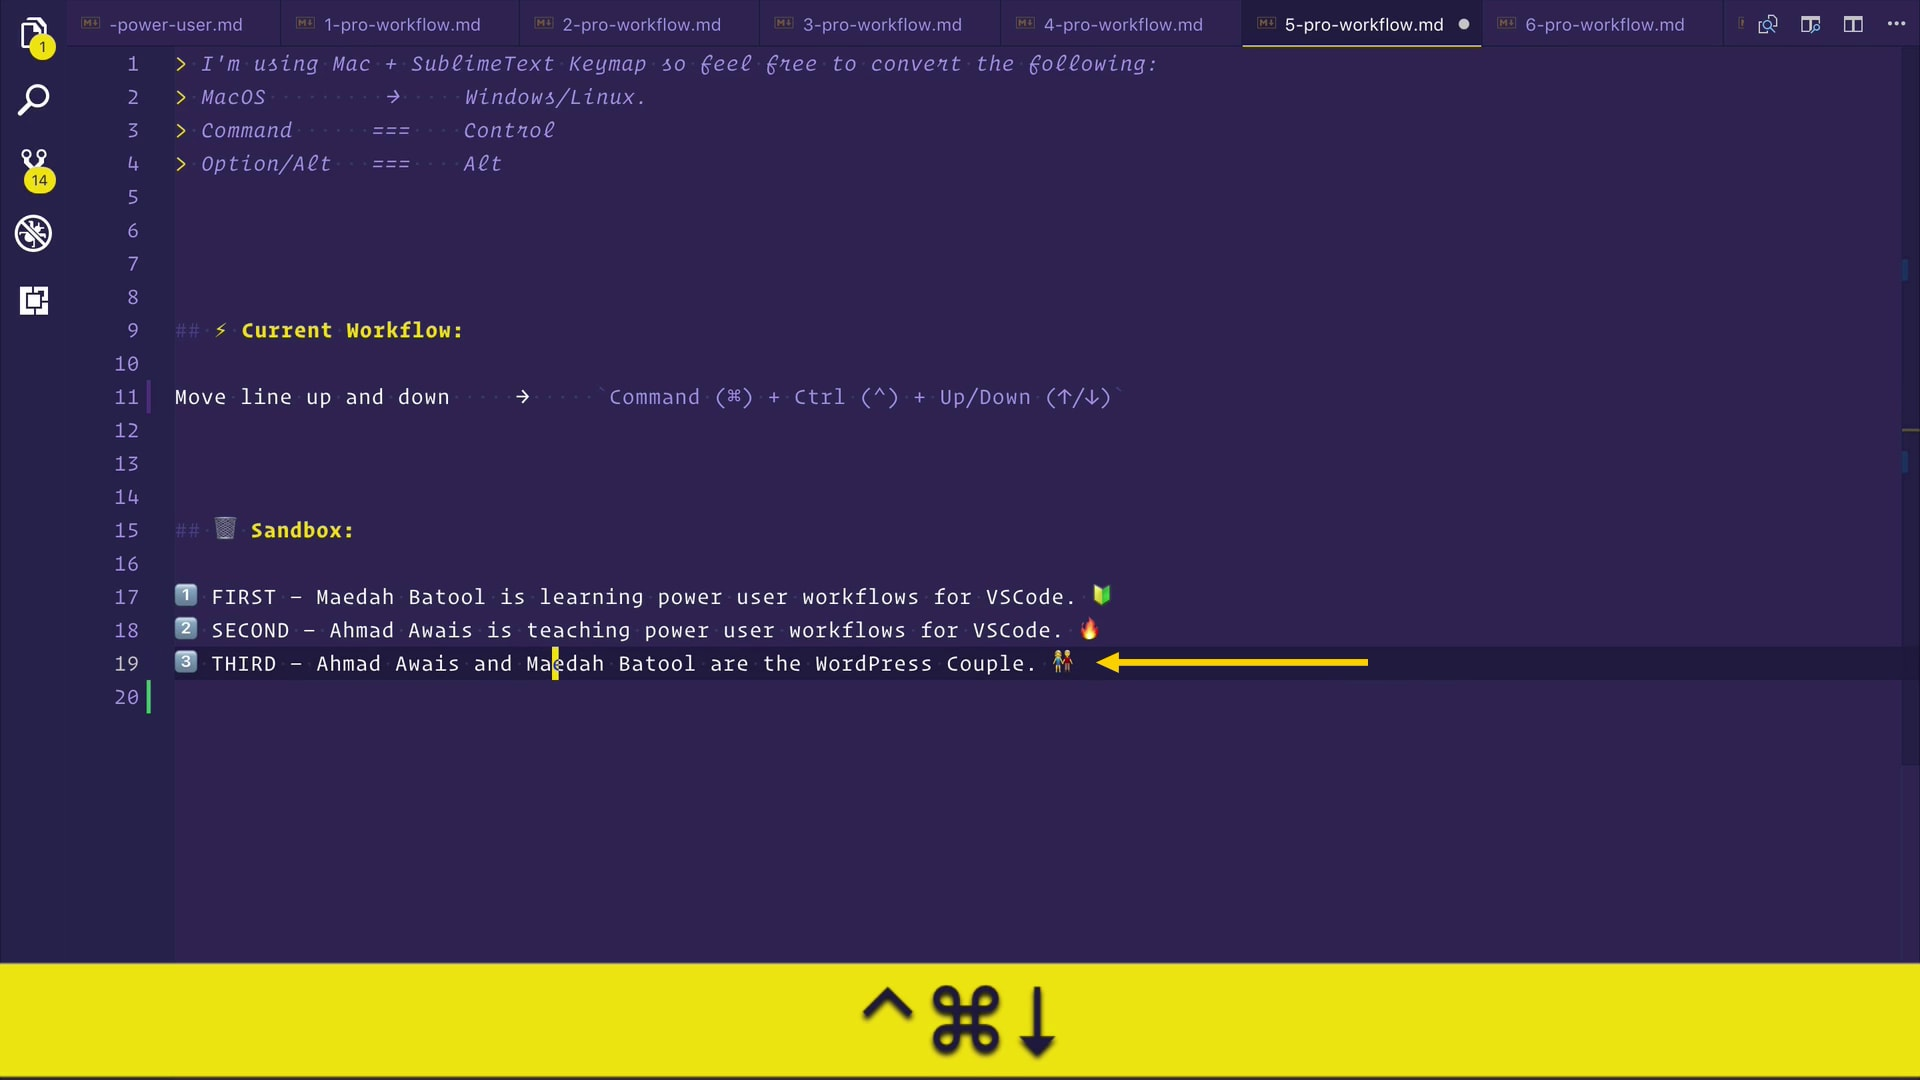 按住
按住
COMMAND (⌘) +
CONTROL (⌃) ,然后这里的
UP或
DOWN键可以为您提供良好的服务。
工作流程#6:下次发生 ( Workflow #6: Next Occurrence )
🤔 Sometimes you need to select the next occurrence of a similar word. For example, you see, there is this users word here. Check below:
🤔有时您需要选择下一个出现的相似单词。 例如,您看到,这里有这个users词。 检查以下内容:
users. So, my cursor could be anywhere inside or at the end of this users word.
 我需要更改读取
users的前三个单词。 因此,我的光标可能在该
users词的内部或结尾。
🔥 I am going to press COMMAND (⌘) + D — this users word will get selected. And when I press COMMAND (⌘) + D again, the very next iteration of that same word i.e. the next users word will get selected.
🔥我要按COMMAND (⌘) + D -该users单词将被选中 。 当我再次按COMMAND (⌘) + D时,将选择同一单词的下一个迭代 ,即下一个users单词。
COMMAND (⌘) + D again and there you have it. And let's change it to something like a new word user by removing s from the end in one go.
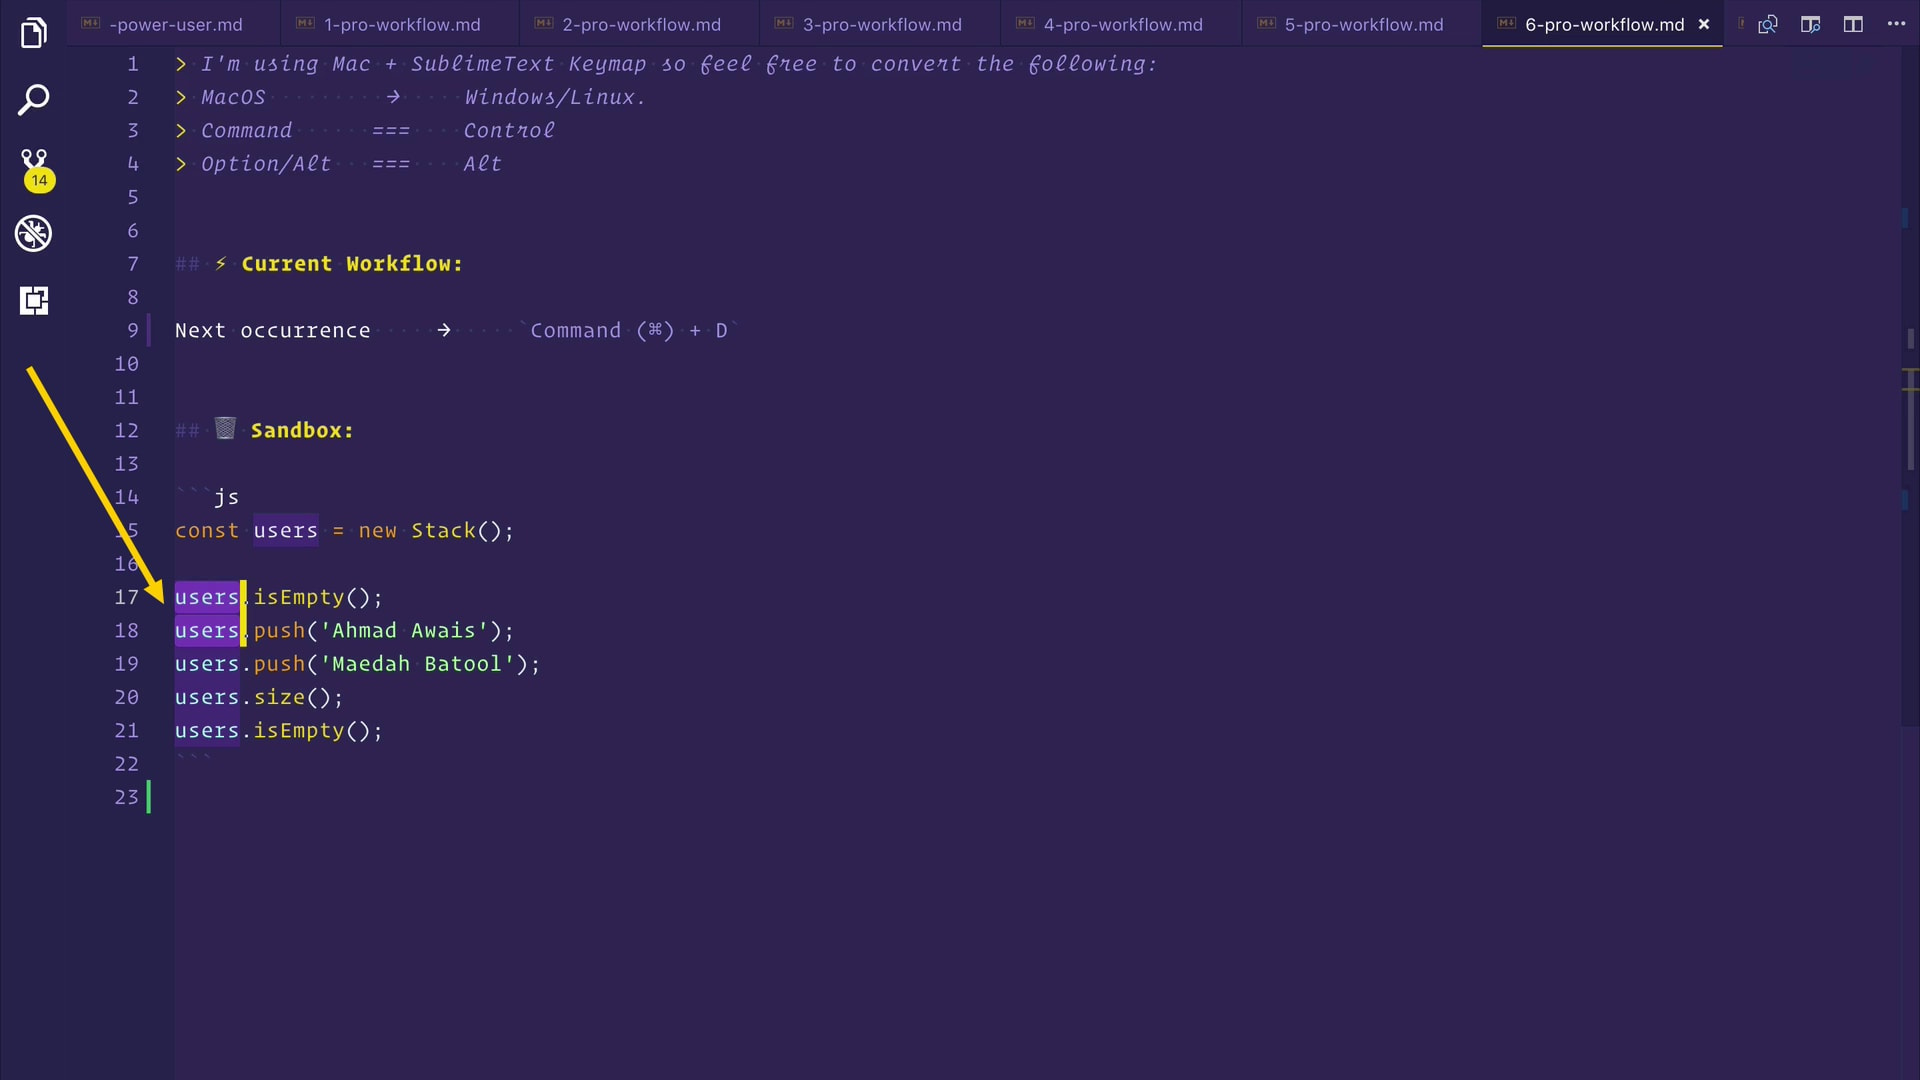 again再按一次
COMMAND (⌘) +
COMMAND (⌘) +
D ,就可以了。 然后通过一次性删除
s将其更改为新单词
user 。
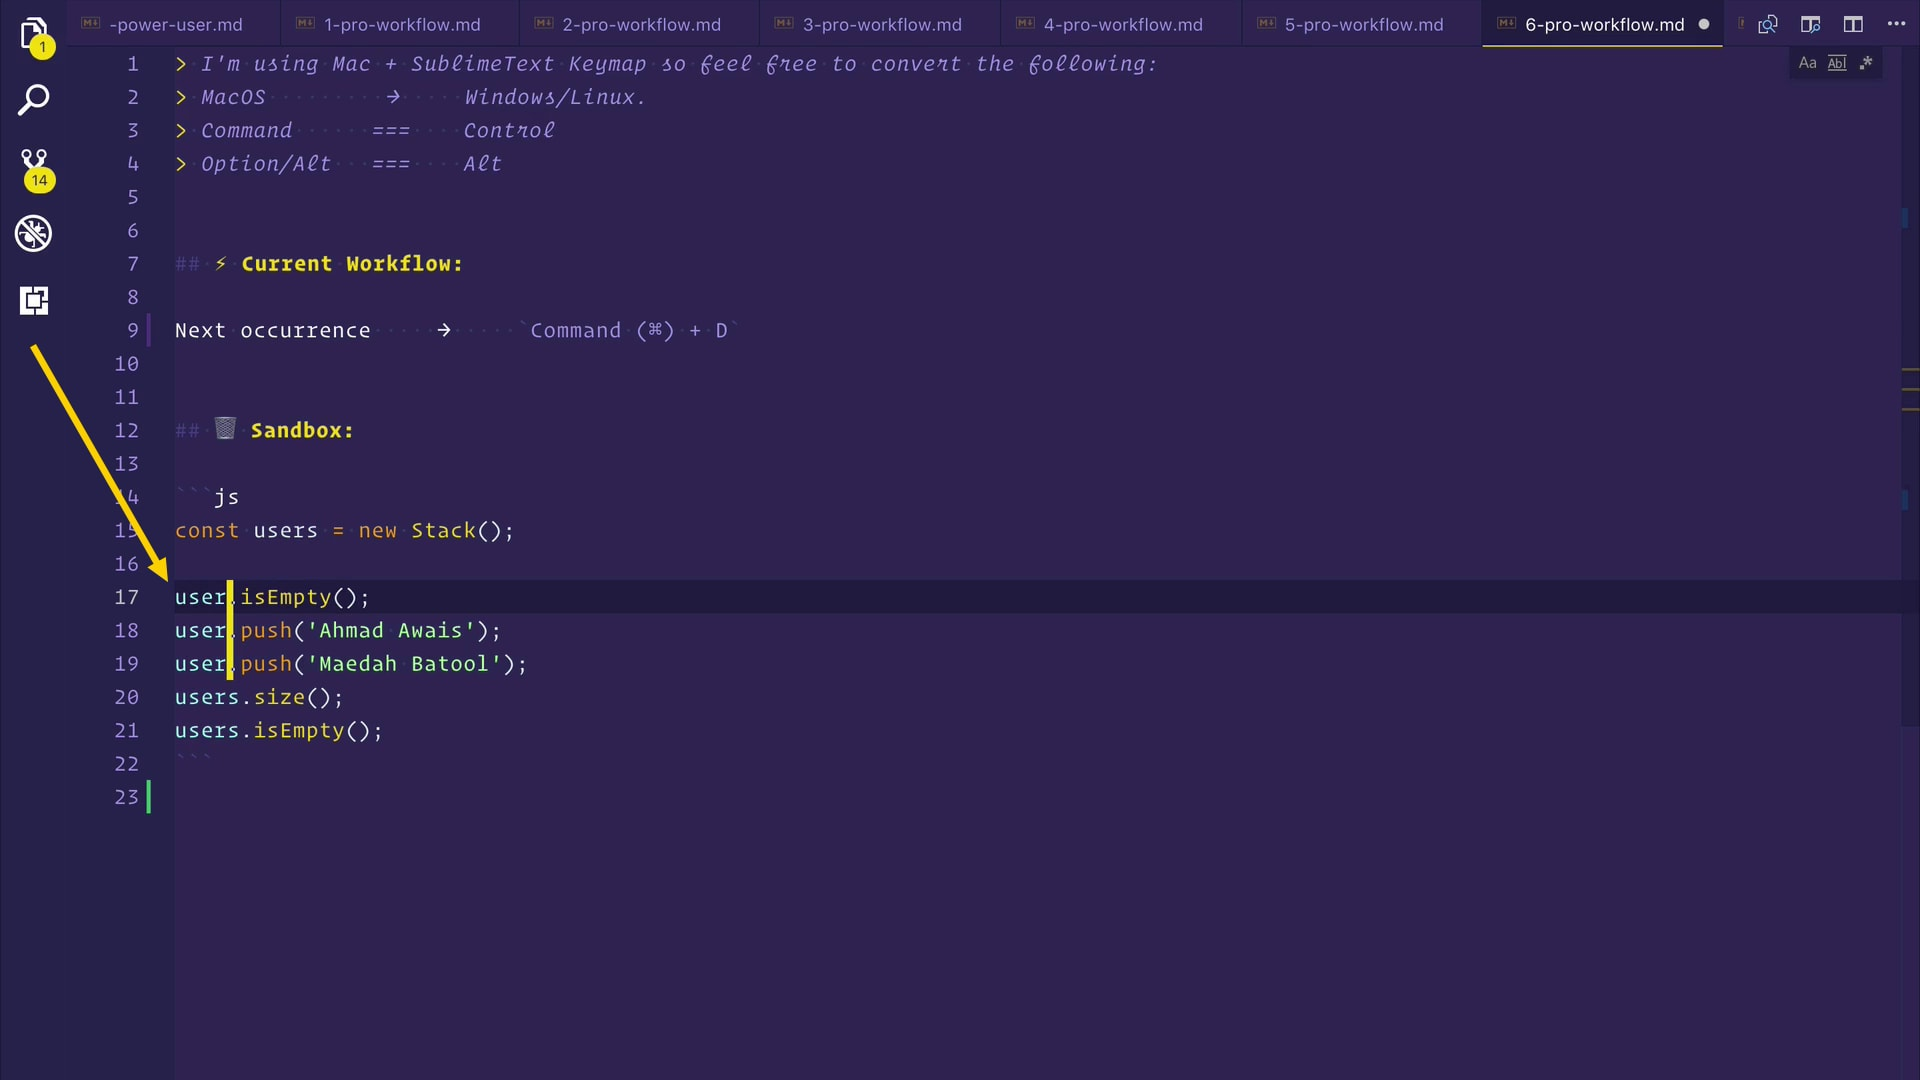 而已。 简单但非常有用。 多个光标可帮助您同时更改多个内容。 现在就试试。 感觉就像魔术。 我是认真的。 如果您以前从未这样做过,请打开VSCode编辑器并体验此多光标工作流程。 我会等。
工作流程#7:所有发生 ( Workflow #7: All Occurrences )
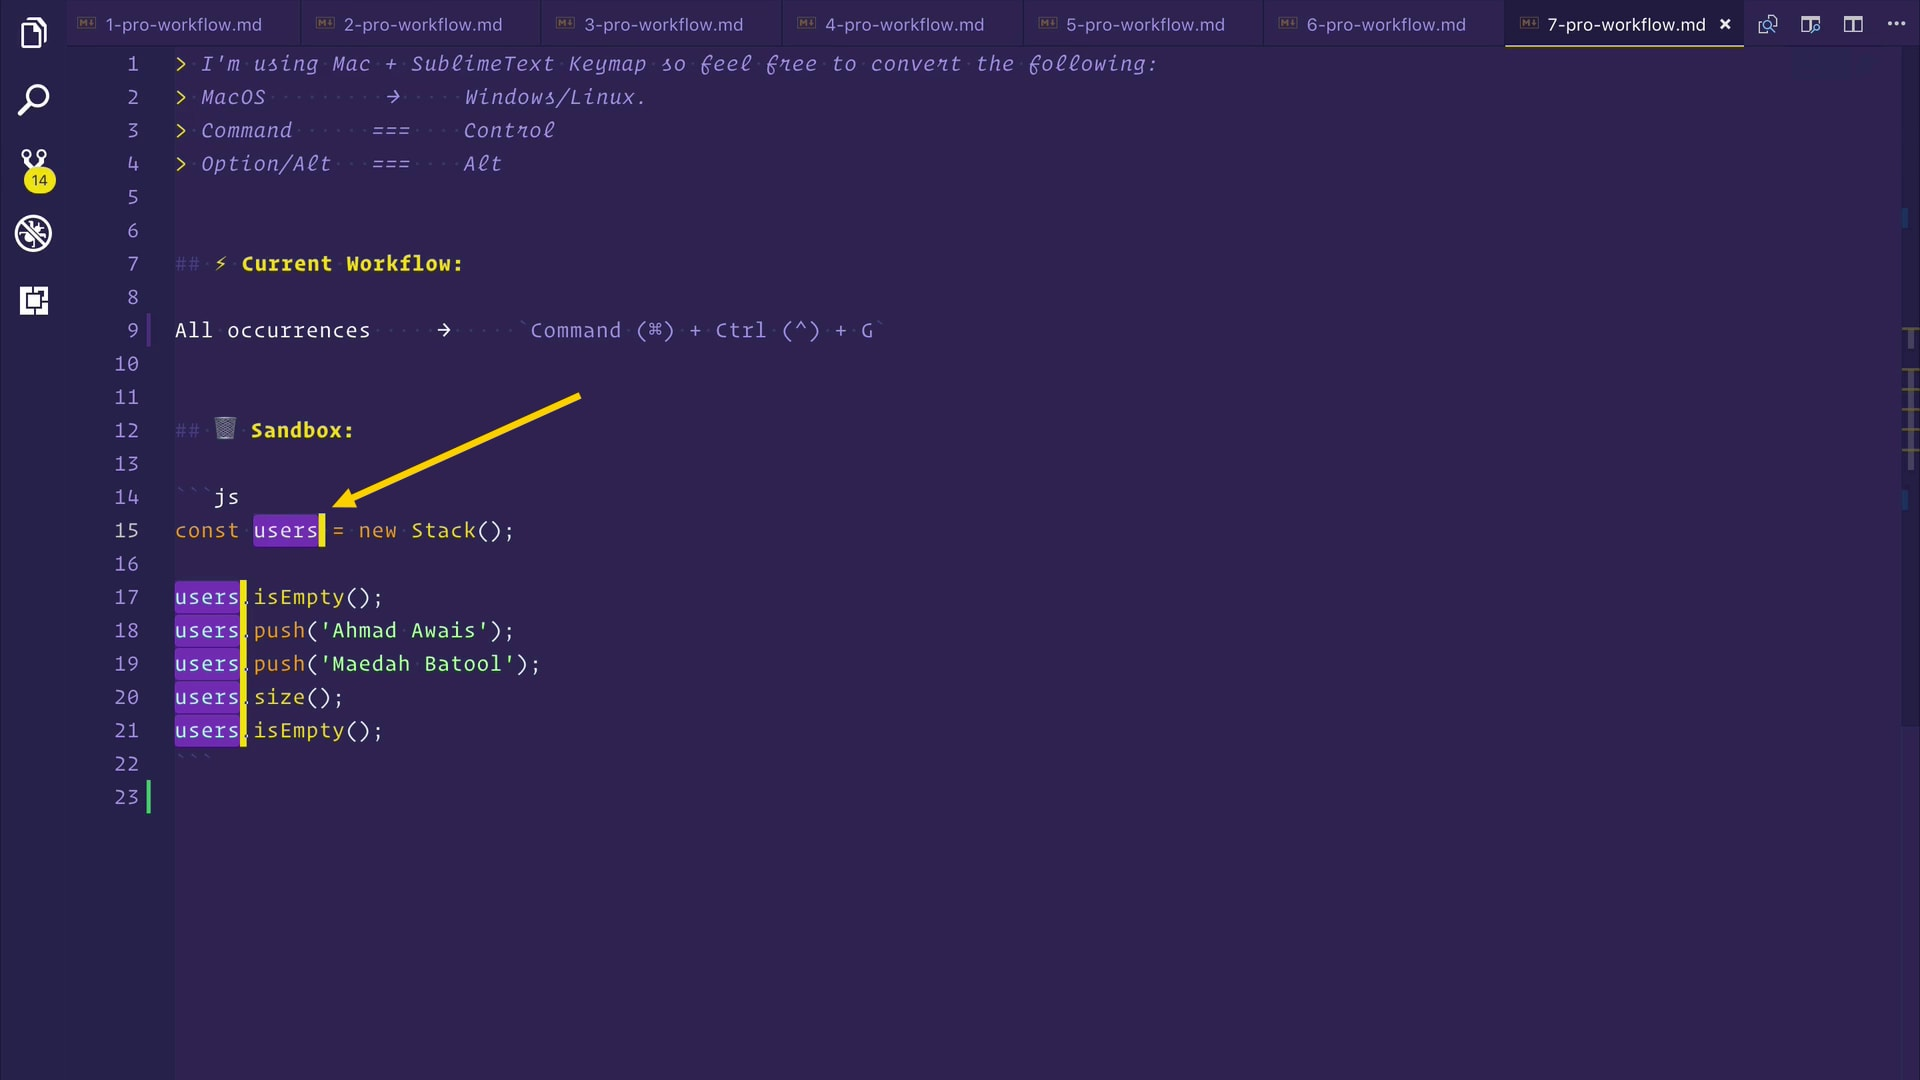
🤔 Now that you've done that, what if you want to select all occurrences of a word?! That's what you'll learn in this workflow. It's again a multi-cursor workflow. I love these simple tricks. For example, here is this word users.
🤔现在已经完成了,如果要选择所有出现的单词怎么办? 这就是您在此工作流程中将学到的。 这又是一个多光标工作流程。 我喜欢这些简单的技巧 。 例如,这是users一词。
users words. And change them to something else, for example, leads.
 我想选择所有出现的单词
users单词。 并将其更改为其他内容,例如
leads 。
🔥 Make sure your cursor is around or inside a particular word that you are about to change. Now press COMMAND (⌘) + CONTROL (⌃) + G and all of these similar words that are users in this current file will get selected.
🔥确保光标在要更改的特定单词周围或内部。 现在,按COMMAND (⌘) + CONTROL (⌃) + G而所有这些是类似的话users在当前的文件将得到选择。
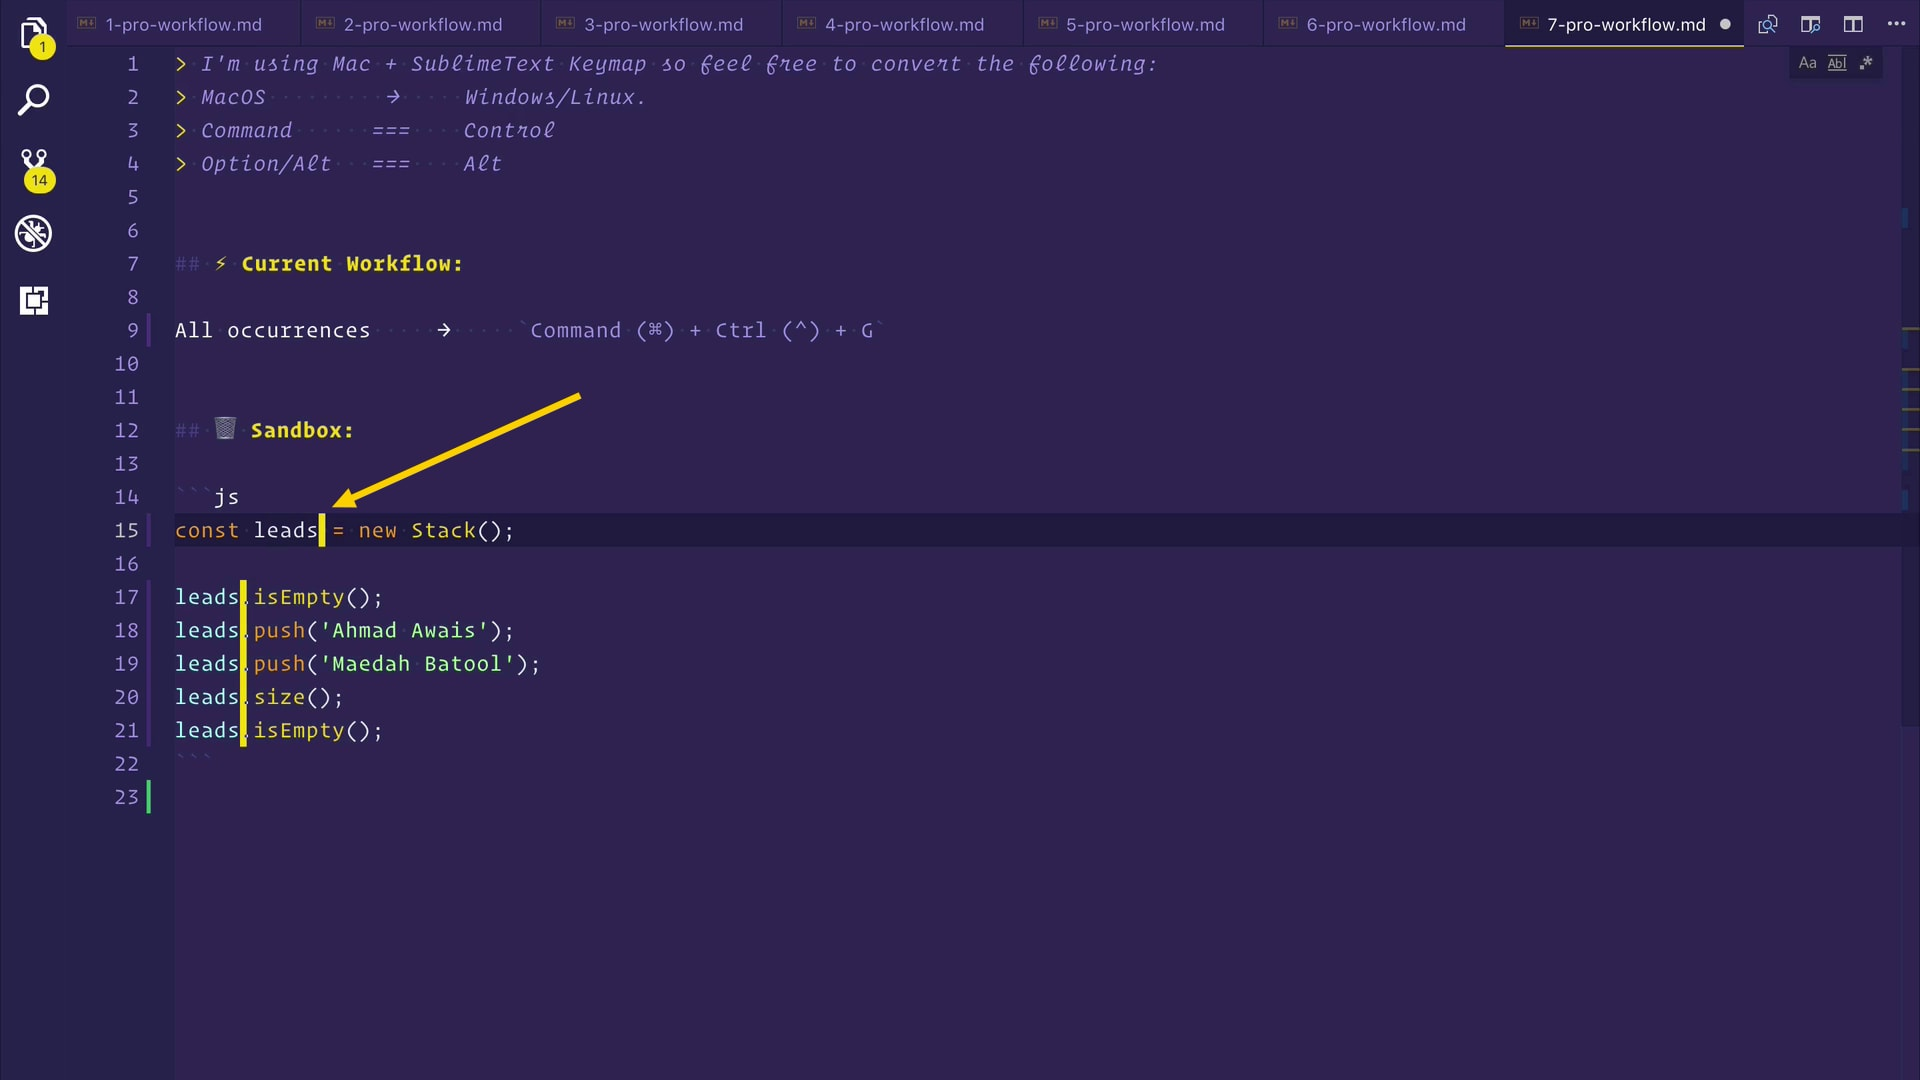
 是的,现在是时候了。 我们可以将它们全部更改为
leads 。
工作流程8:将选择移至下一个 ( Workflow #8: Move Selection to Next )
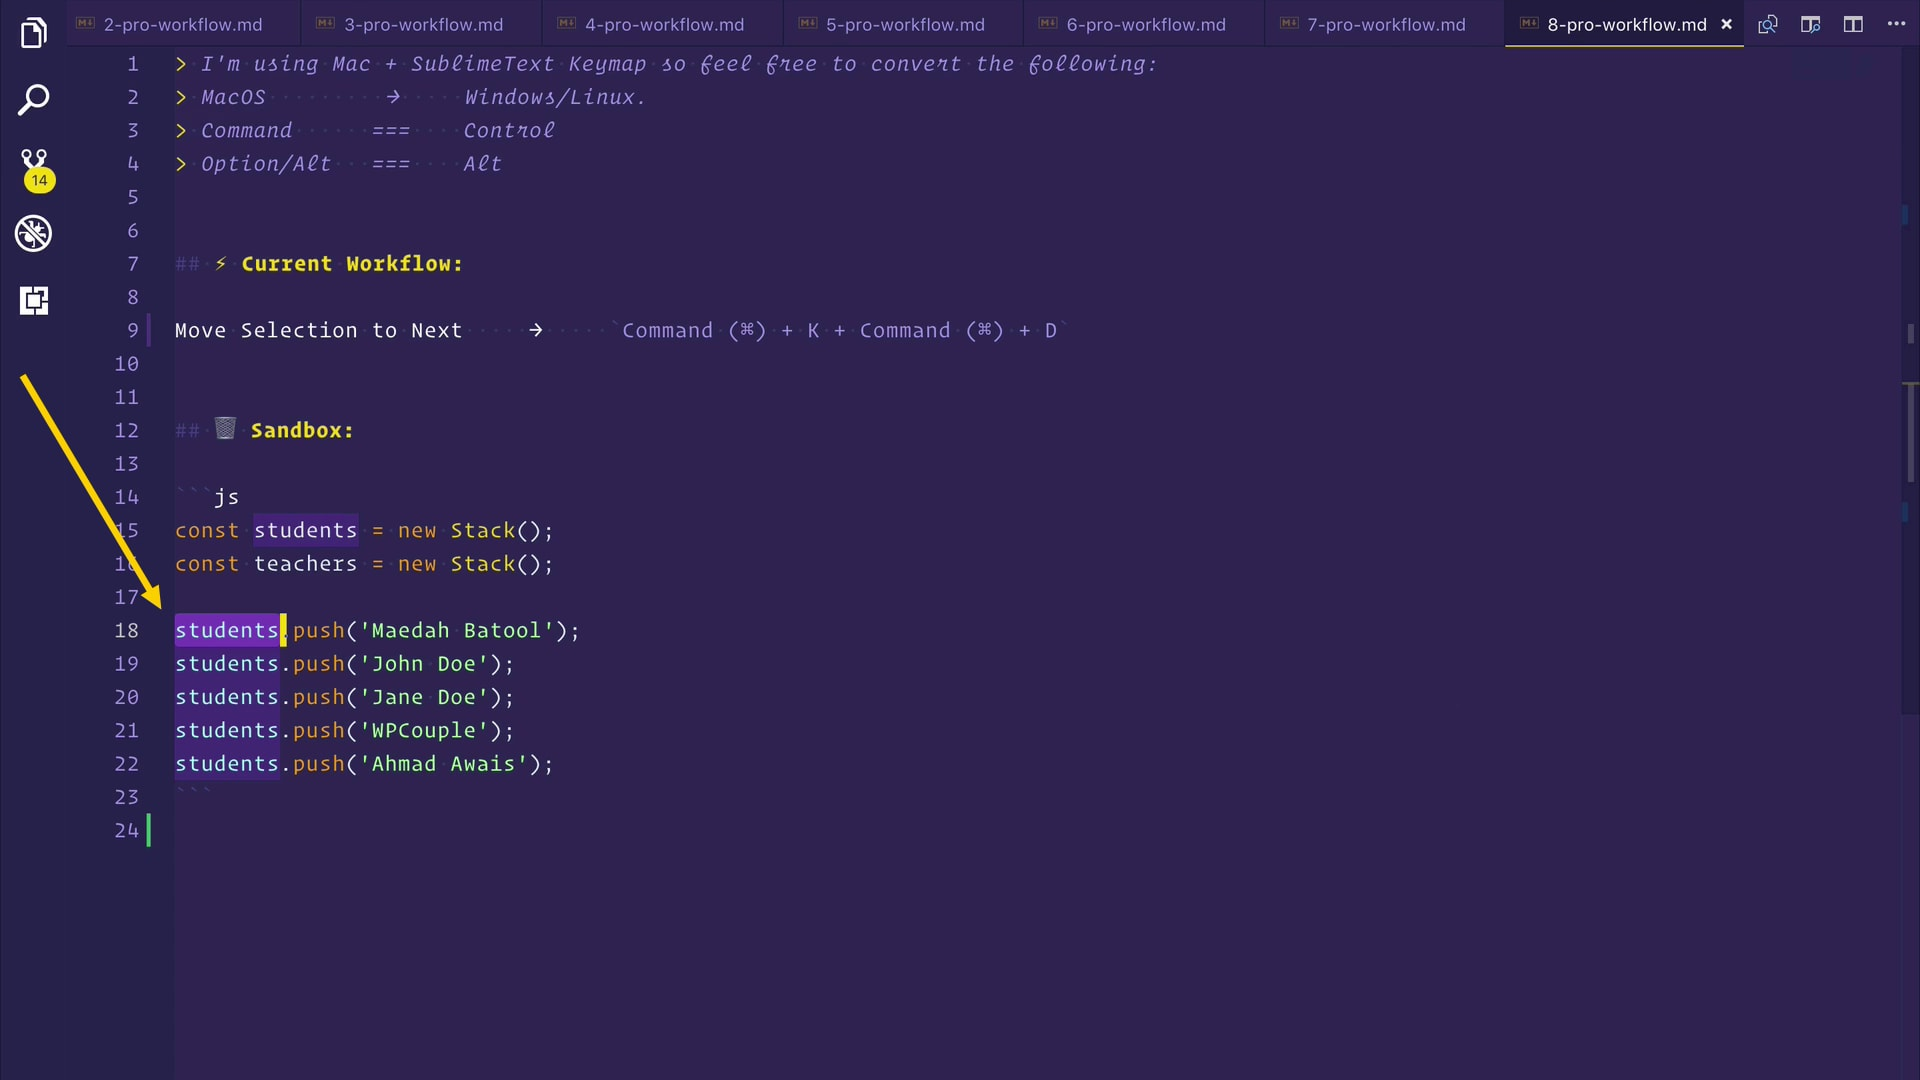
🤔 Let's learn how to move your selection to the next same word. For example, I have selected this word students. But really, what I want is to be able to select the very next students word, which could be anywhere in this file.
让我们学习如何将选择移至下一个相同的单词 。 例如,我选择了单词students 。 但实际上,我想要的是能够选择下一个students单词,该单词可以在此文件中的任何位置。
students word. Now to move my selection from this to the very next students word — what I can do is, I can press COMMAND (⌘) + K and COMMAND (⌘) + D and it will select the very next word, students.
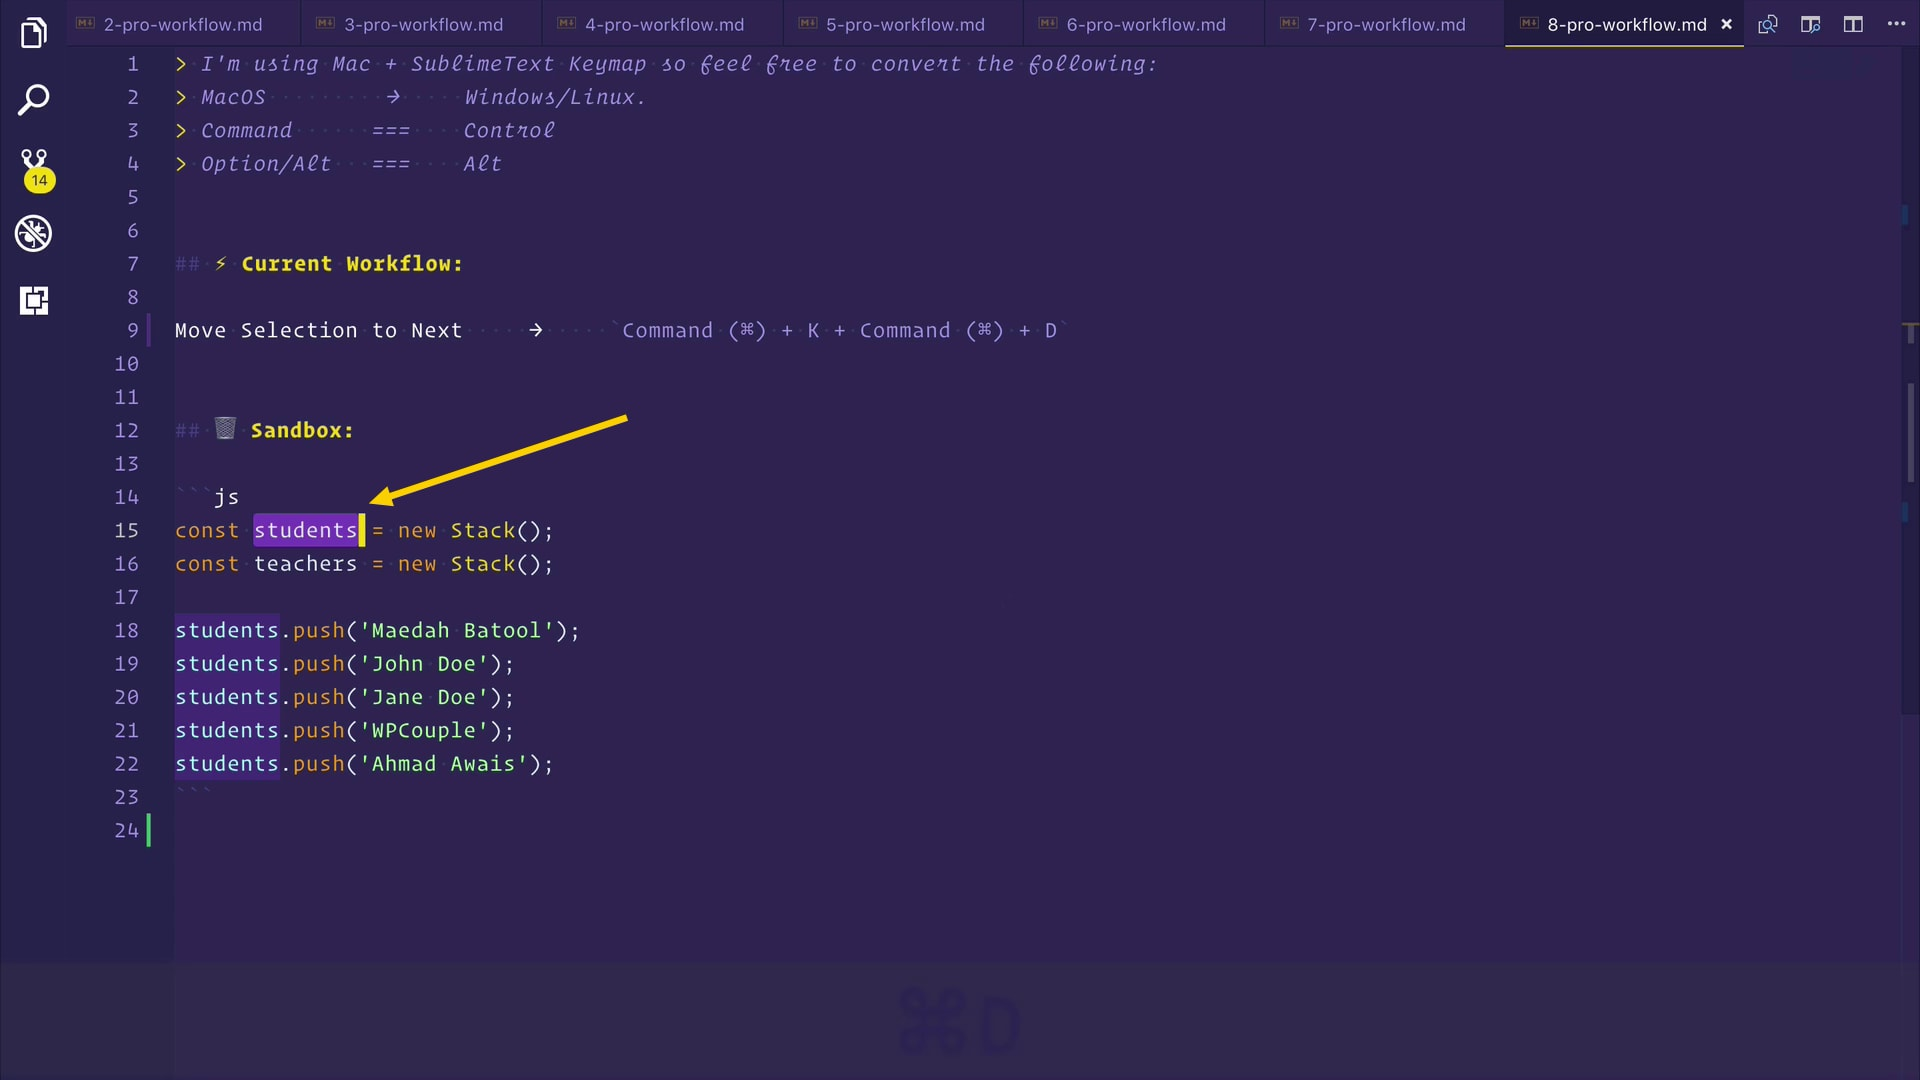 🔥因此,让我们选择这个
students单词。 现在我选择从这个移动到第二天
students字-有什么我能做的就是,我可以按
COMMAND (⌘) +
K和
COMMAND (⌘) +
D ,它会选择第二天字,
students 。
工作流程9:多光标 ( Workflow #9: Multi-Cursor )
🤔 Now let's talk about one of my favorite workflows, the multi-cursor workflows. You are going to be using the mouse or keypad for this multi-cursor workflow.
🤔现在,让我们谈谈我最喜欢的工作流程之一,即多光标工作流程。 您将在此多 光标工作流程中使用鼠标或小键盘。
SETTING: By default, VSCode ships with ALT (⌥) as the multi-cursor modifier. This is not OK with me. So, go ahead and turn it back to the COMMAND (⌘) key before someone sees you. Use the following setting in your settings.json file "editor.multiCursorModifier": "ctrlCmd". Or you can just search for multiCursorModifier in the Settings UI and change it to ctrlCmd.
设置:默认情况下,VSCode附带ALT(⌥)作为多光标修饰符。 我不能这样。 因此,在有人看到您之前,将其重新设置为COMMAND(⌘)键。 在settings.json文件“ editor.multiCursorModifier”中使用以下设置:“ ctrlCmd”。 或者,您可以仅在“设置” UI中搜索multiCursorModifier并将其更改为ctrlCmd。
OK, let's get back to our multi-cursor workflows. Say you want to change all of these background colors to a one single, similar color.
好的,让我们回到多光标工作流程。 假设您要将所有这些背景颜色更改为一种相似的颜色。
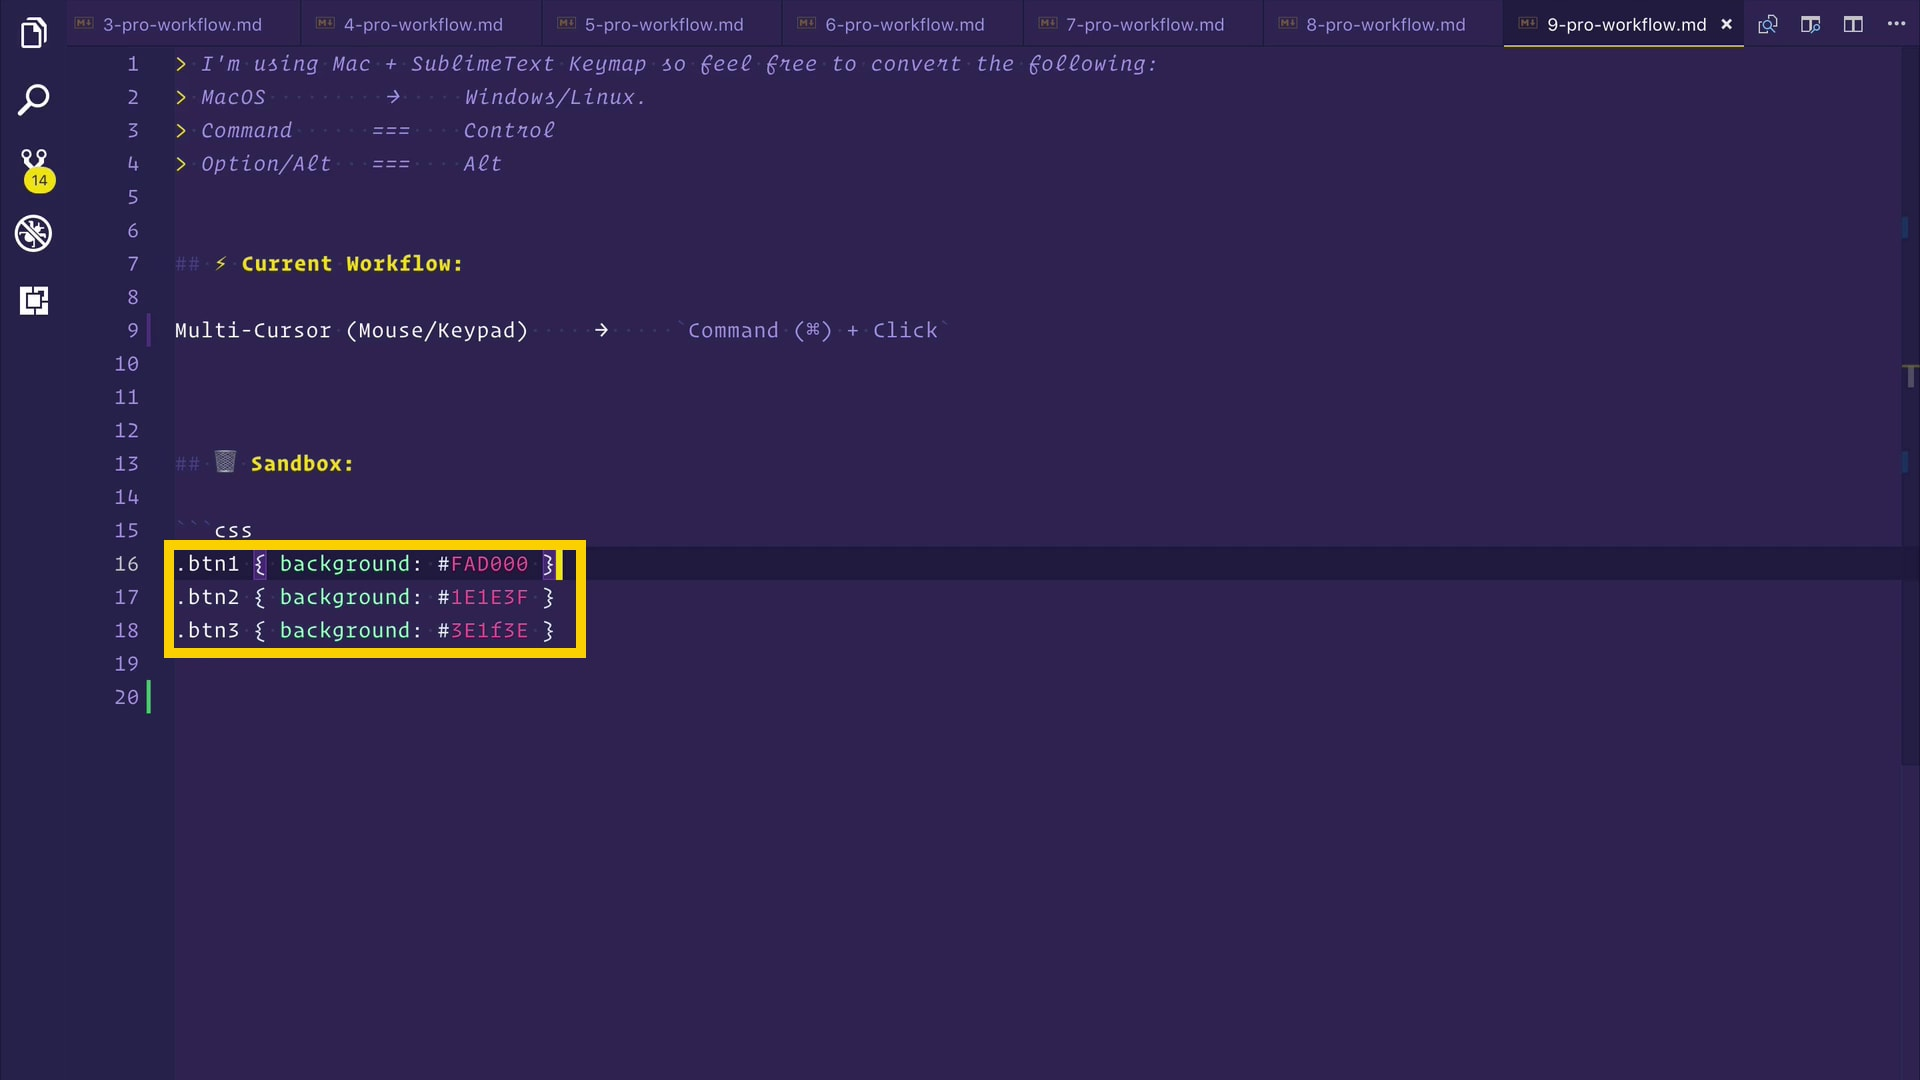
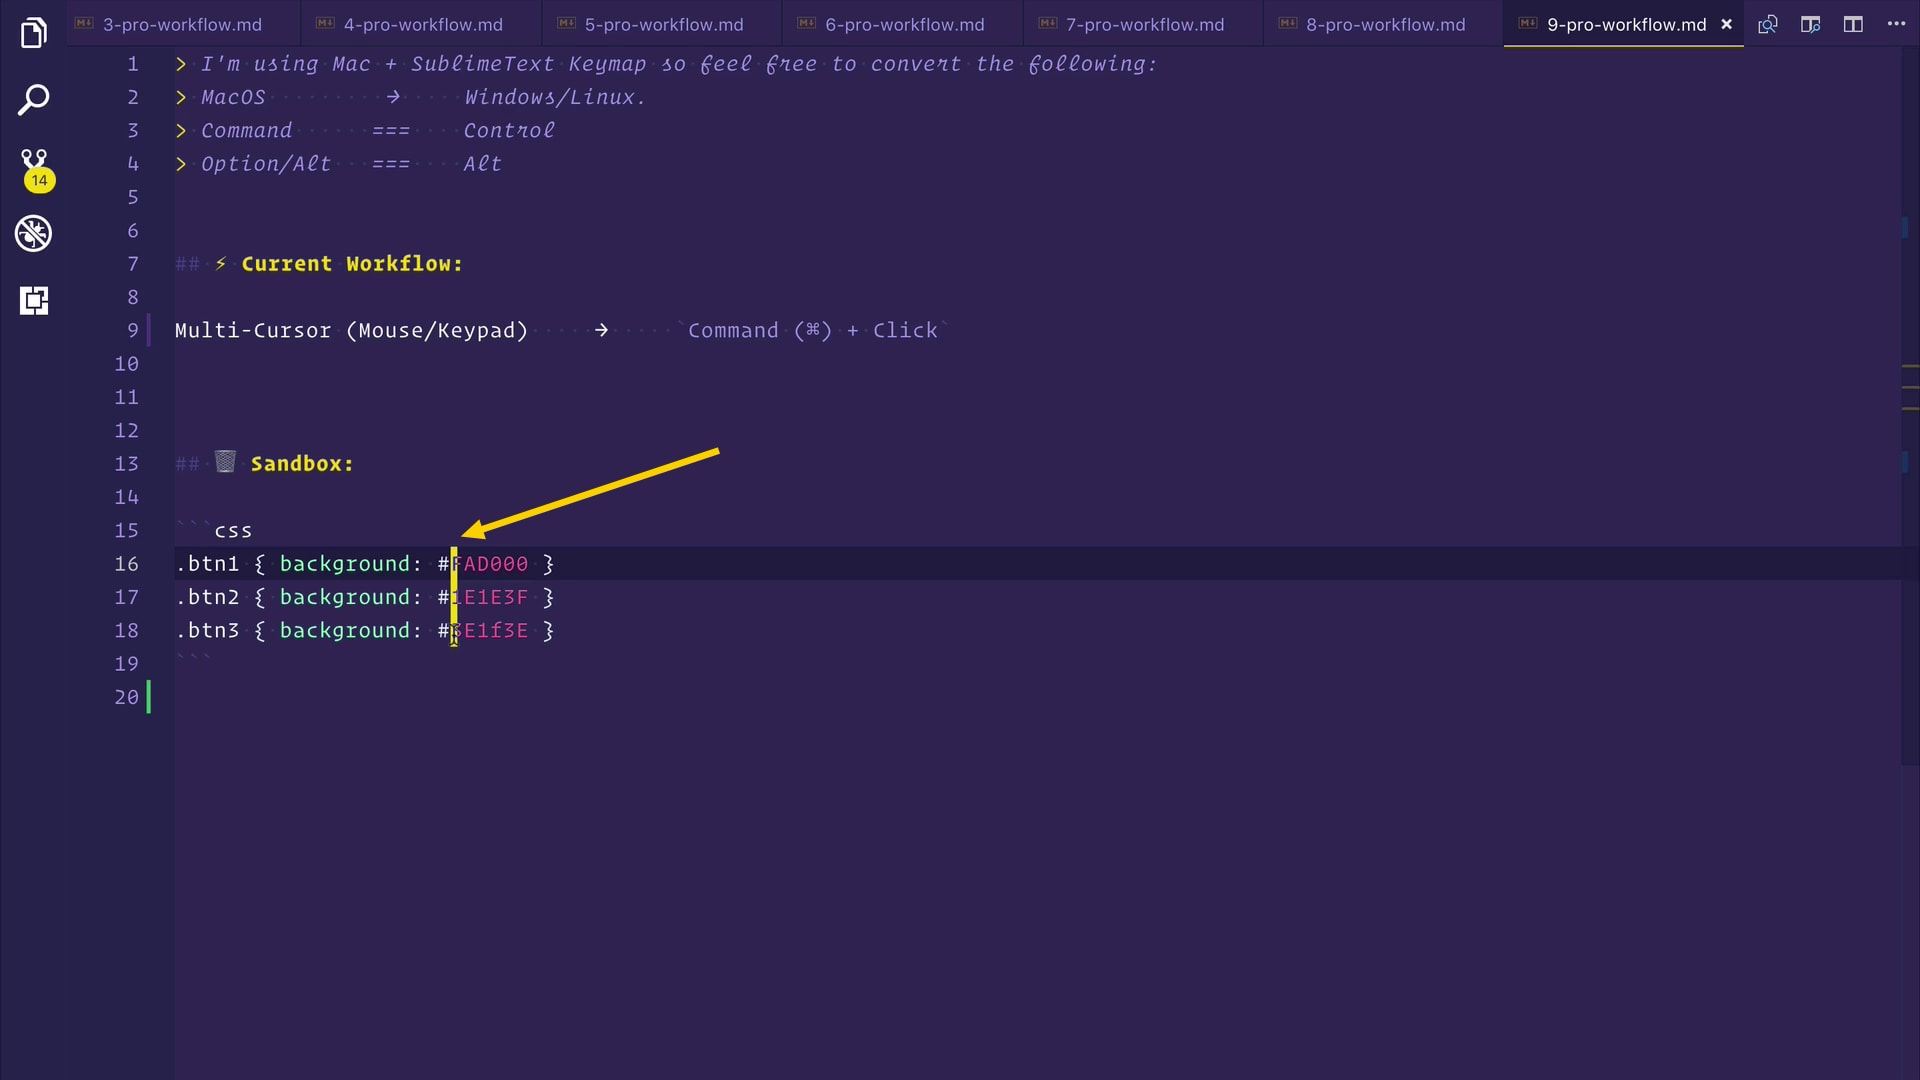
🔥 What you can do is, you can press and hold the COMMAND (⌘) key and then click wherever you want. My cursor is growing in size, and now I can select all the color codes and change them all to a new color.
can您可以做的是,可以按住COMMAND (⌘)键,然后单击所需的位置。 我的光标越来越大 ,现在我可以选择所有颜色代码并将其全部更改为新颜色。
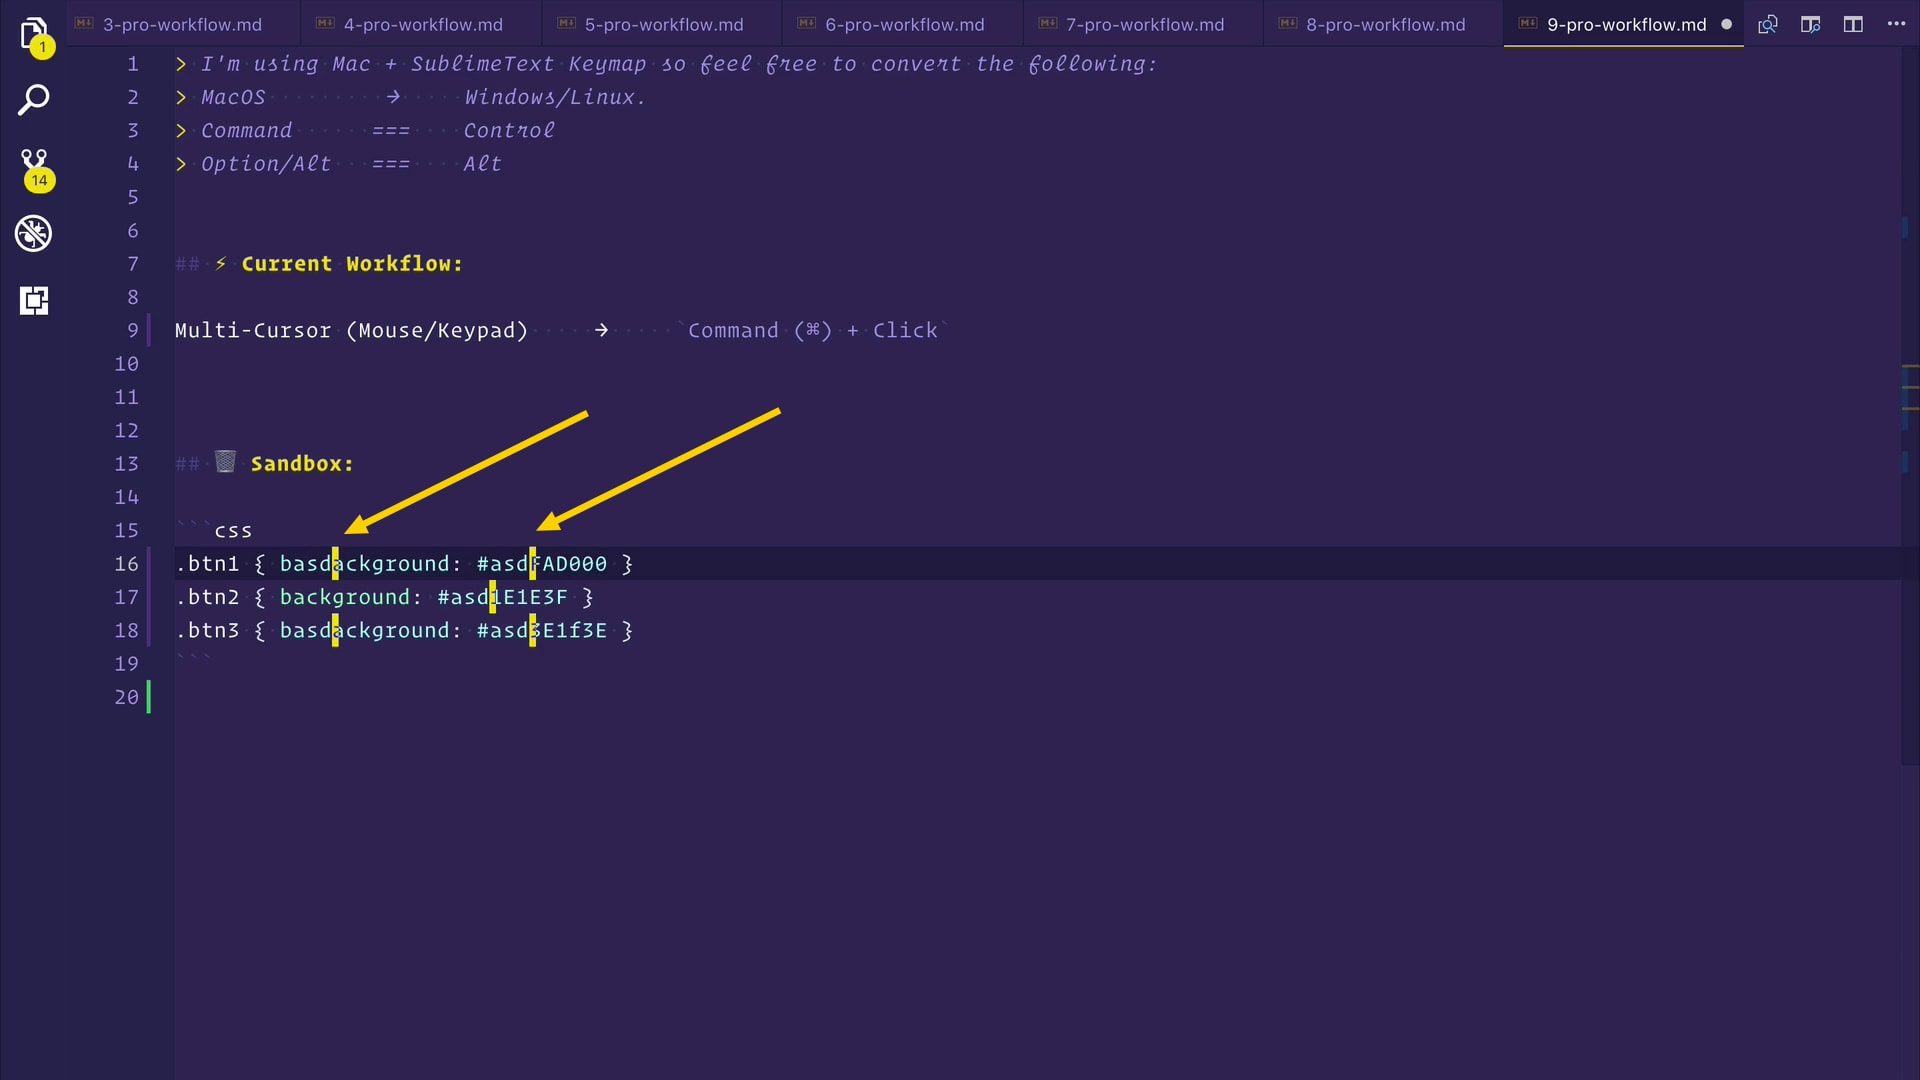
Again, press and hold COMMAND (⌘) and then click. Now all these areas are editable. See how easy is it is. At the same time, it's super useful. Go ahead and try it out before you forget.
再次按住COMMAND (⌘) ,然后单击 。 现在所有这些区域都是可编辑的。 看看这有多容易。 同时,它非常有用。 继续尝试,然后再忘记。
工作流程10:多光标拖动 ( Workflow #10: Multi-Cursor Drag )
🤔 Is there a quicker way of creating multi cursors that are meant to select consecutive lines? Oh, yes, there is. I call it the Multi-Cursor Drag.
🤔是否有更快的方法来创建用于选择连续行的多个游标? 哦,是的,有。 我称之为“多光标拖动”。
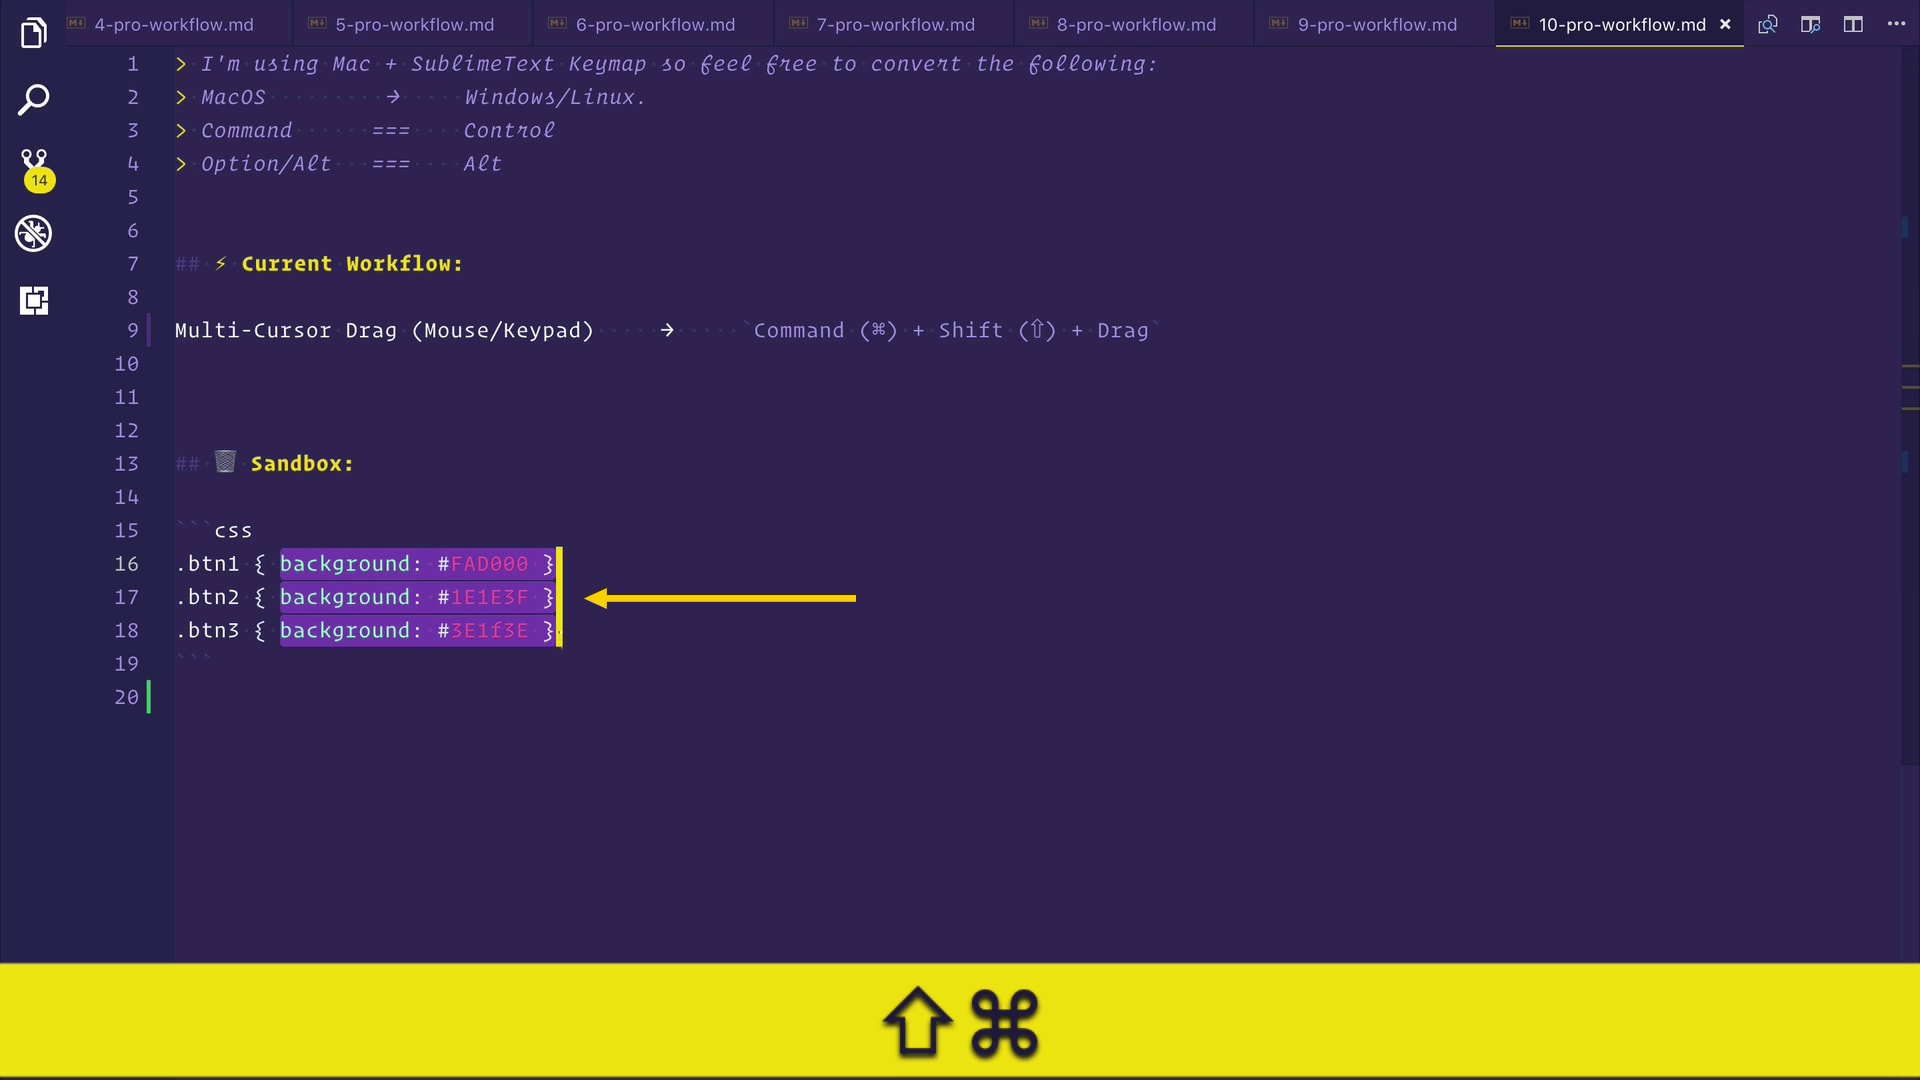
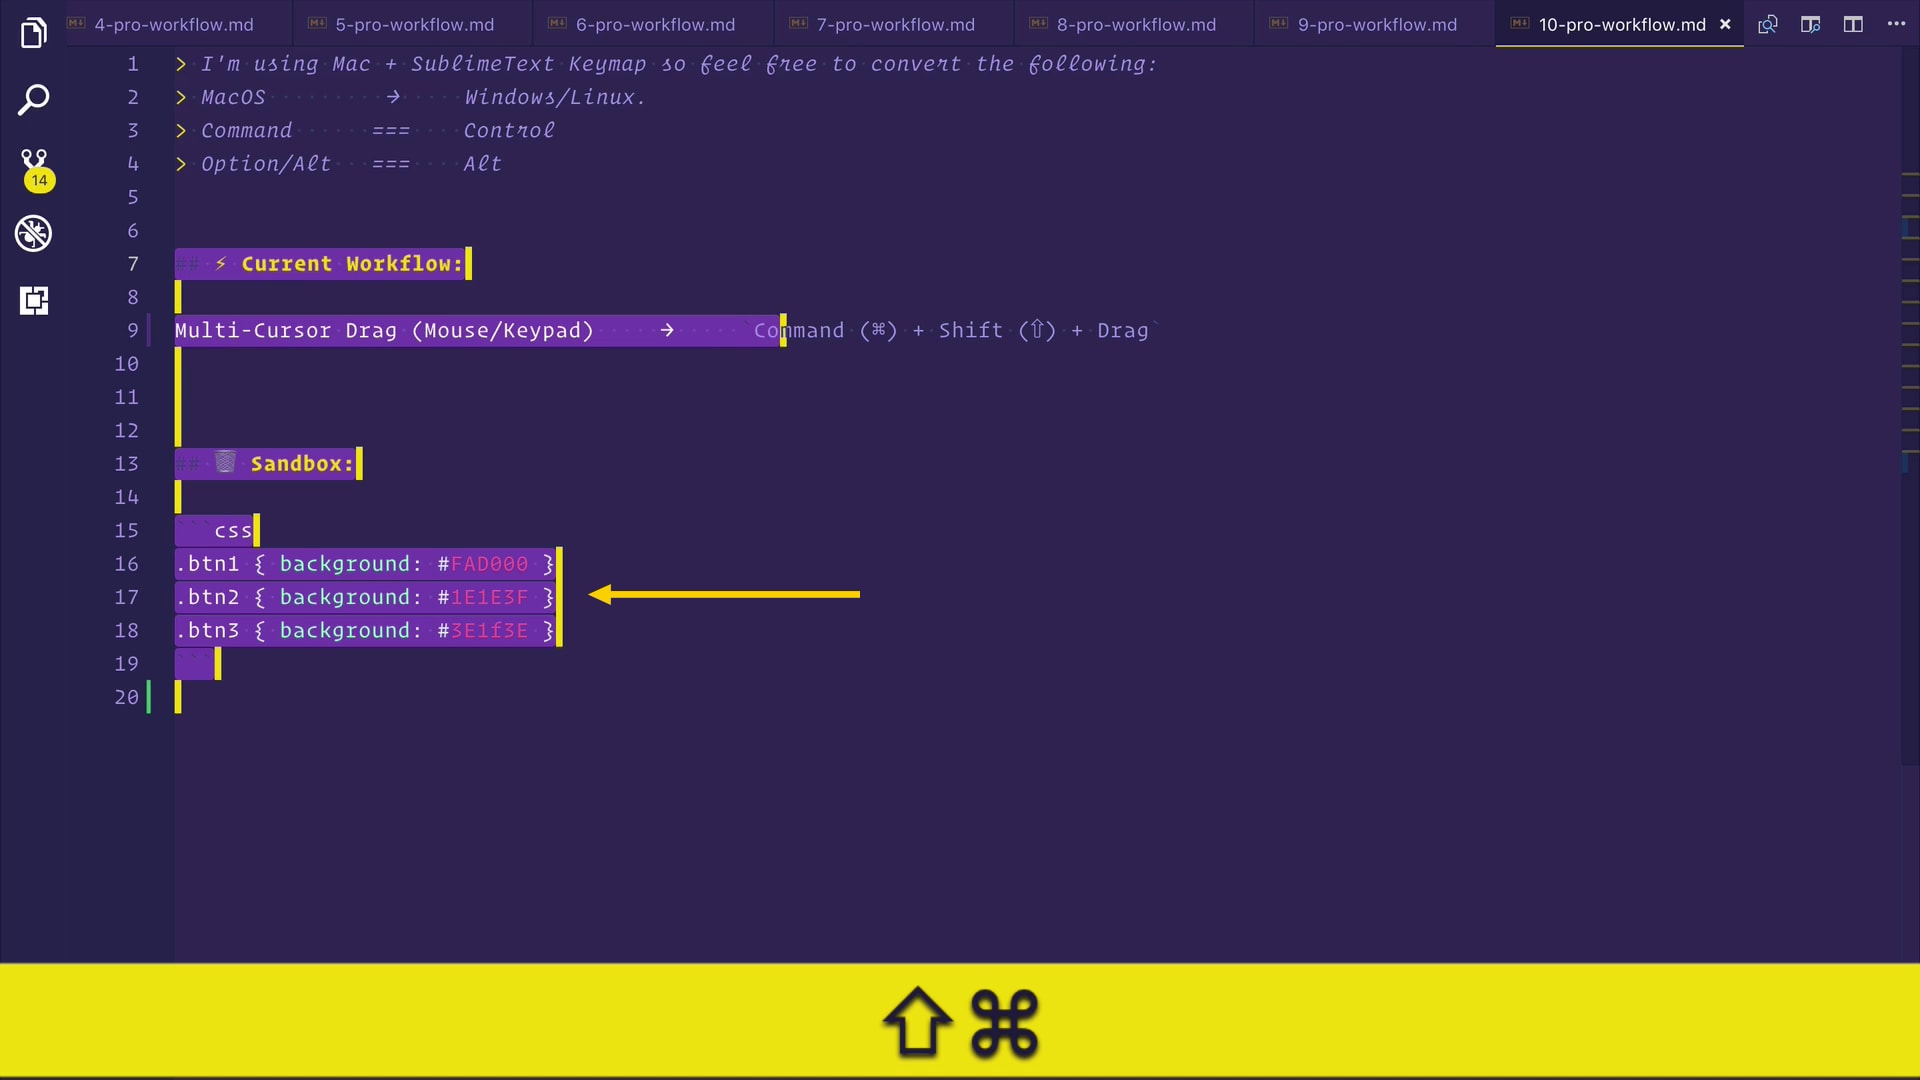
🔥 I can do it in a much larger way as well, for example, let's put our cursor at the start of line #7 and let's drag it down to the end of the file. See how many cursors we have. One cursor for every line from 7 to 20. Yay!
🔥我也可以用更大的方式来做,例如,让我们将光标放在第7行的开头,然后将其向下拖动到文件末尾。 看看我们有多少个游标。 一个光标从7到20 耶每一行!
工作流程11:多光标键盘 ( Workflow #11: Multi-Cursor Keyboard )
🤔 Can we do this with keyboard only? I hear you. You want to create multi-cursors with the keyboard without even using a mouse or this keypad thingie. We are talking about power user workflows, after all. Power developers do not like to leave the keyboard.
🤔 Can we do this with keyboard only? 我听到你了 您想使用键盘来创建多光标,甚至不使用鼠标或该键盘东西。 毕竟,我们正在谈论高级用户工作流程。 电源开发人员不喜欢离开键盘。
🔥 Well, you can do that very easily. For example, let's again do the same thing here. Change the background colors of all these buttons to white or tomato. I am going to press & hold COMMAND (⌘) + ALT (⌥) and then I am going to press the DOWN key. Just like that, I have three cursors.
🔥好吧,您可以很轻松地做到这一点。 例如,让我们在这里再次做同样的事情。 将所有这些按钮的背景色更改为白色或番茄色。 我要按住COMMAND (⌘) + ALT (⌥) ,然后按DOWN键。 就像那样,我有三个光标。
tomato is a real color in CSS, and it's pretty flippin' awesome.
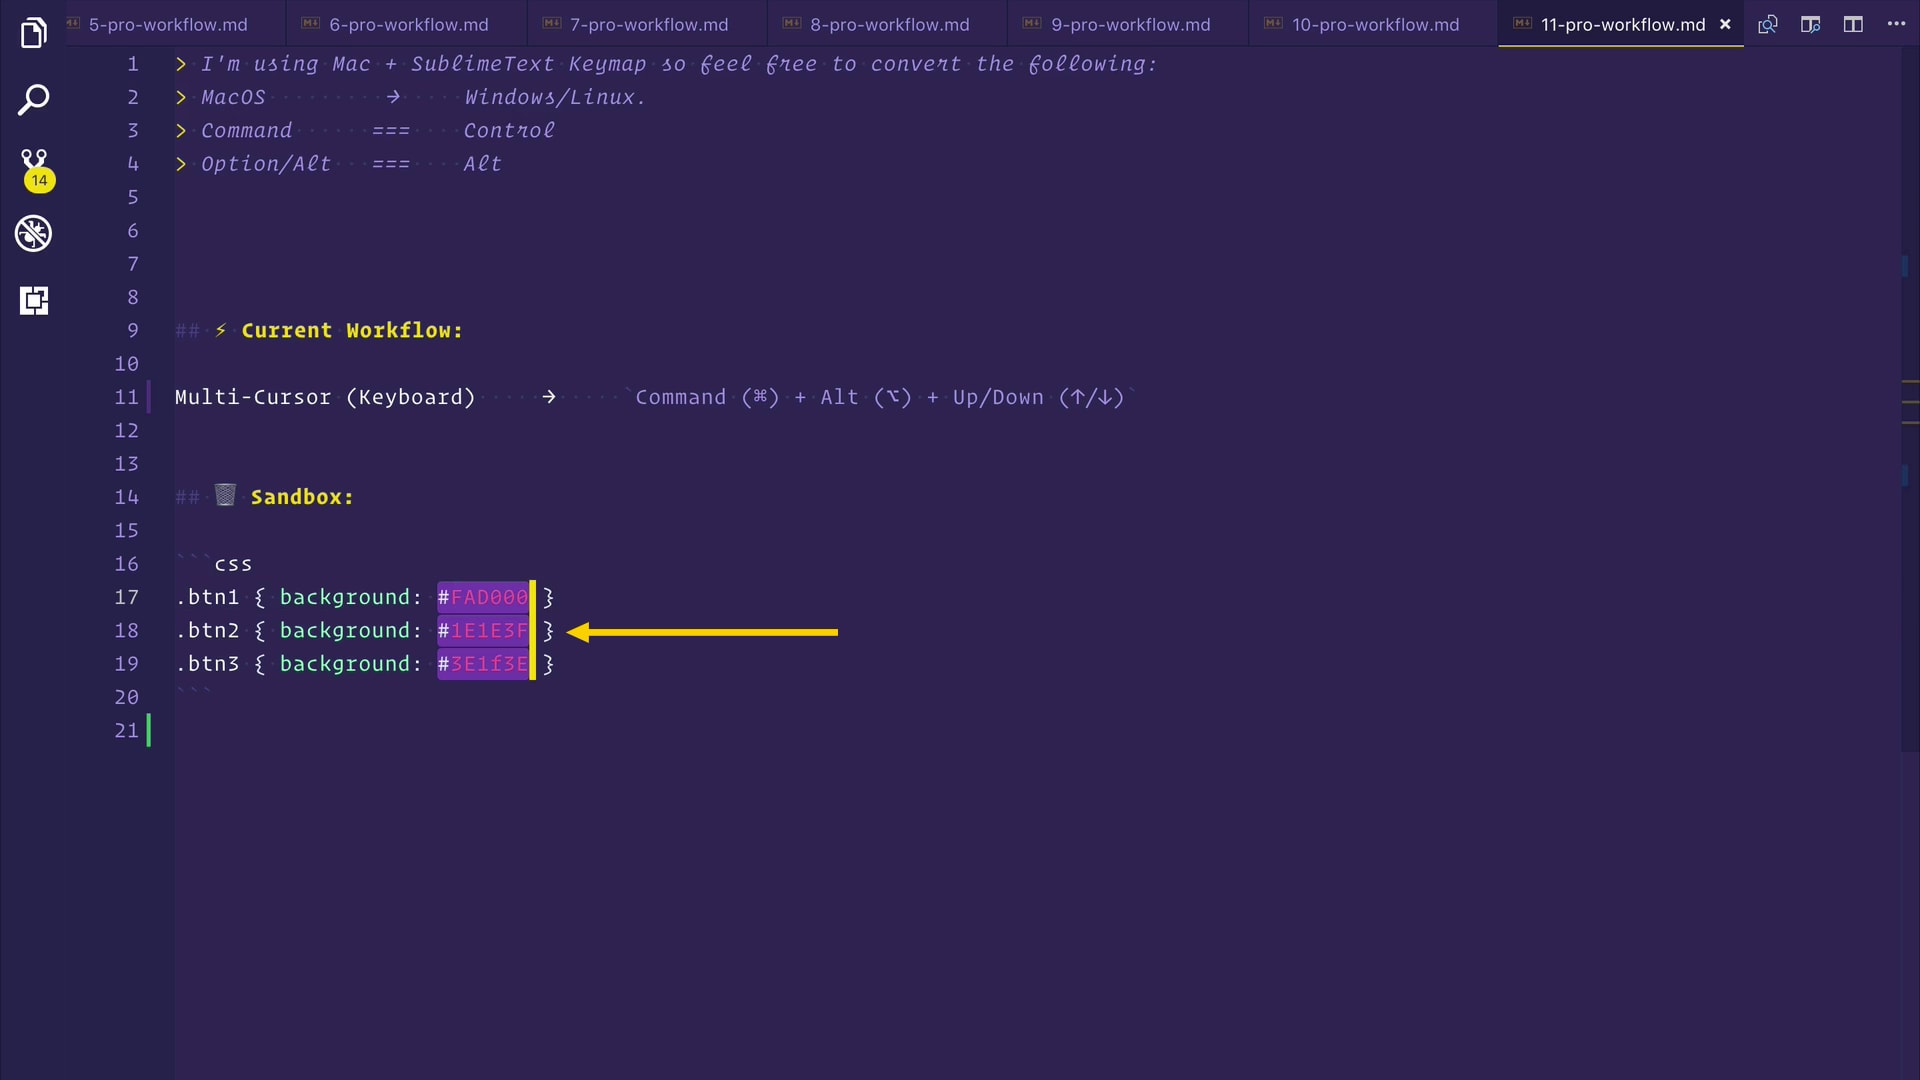 现在,我可以选择它们并在此处添加西红柿。 是的,
tomato是CSS中的真实颜色,非常漂亮。
ESCAPE to escape out of these multi-cursors. Similarly, I can go up as well. Press & hold COMMAND (⌘) + ALT (⌥) and press the UP key to create multi-cursors. There you go, edit away.
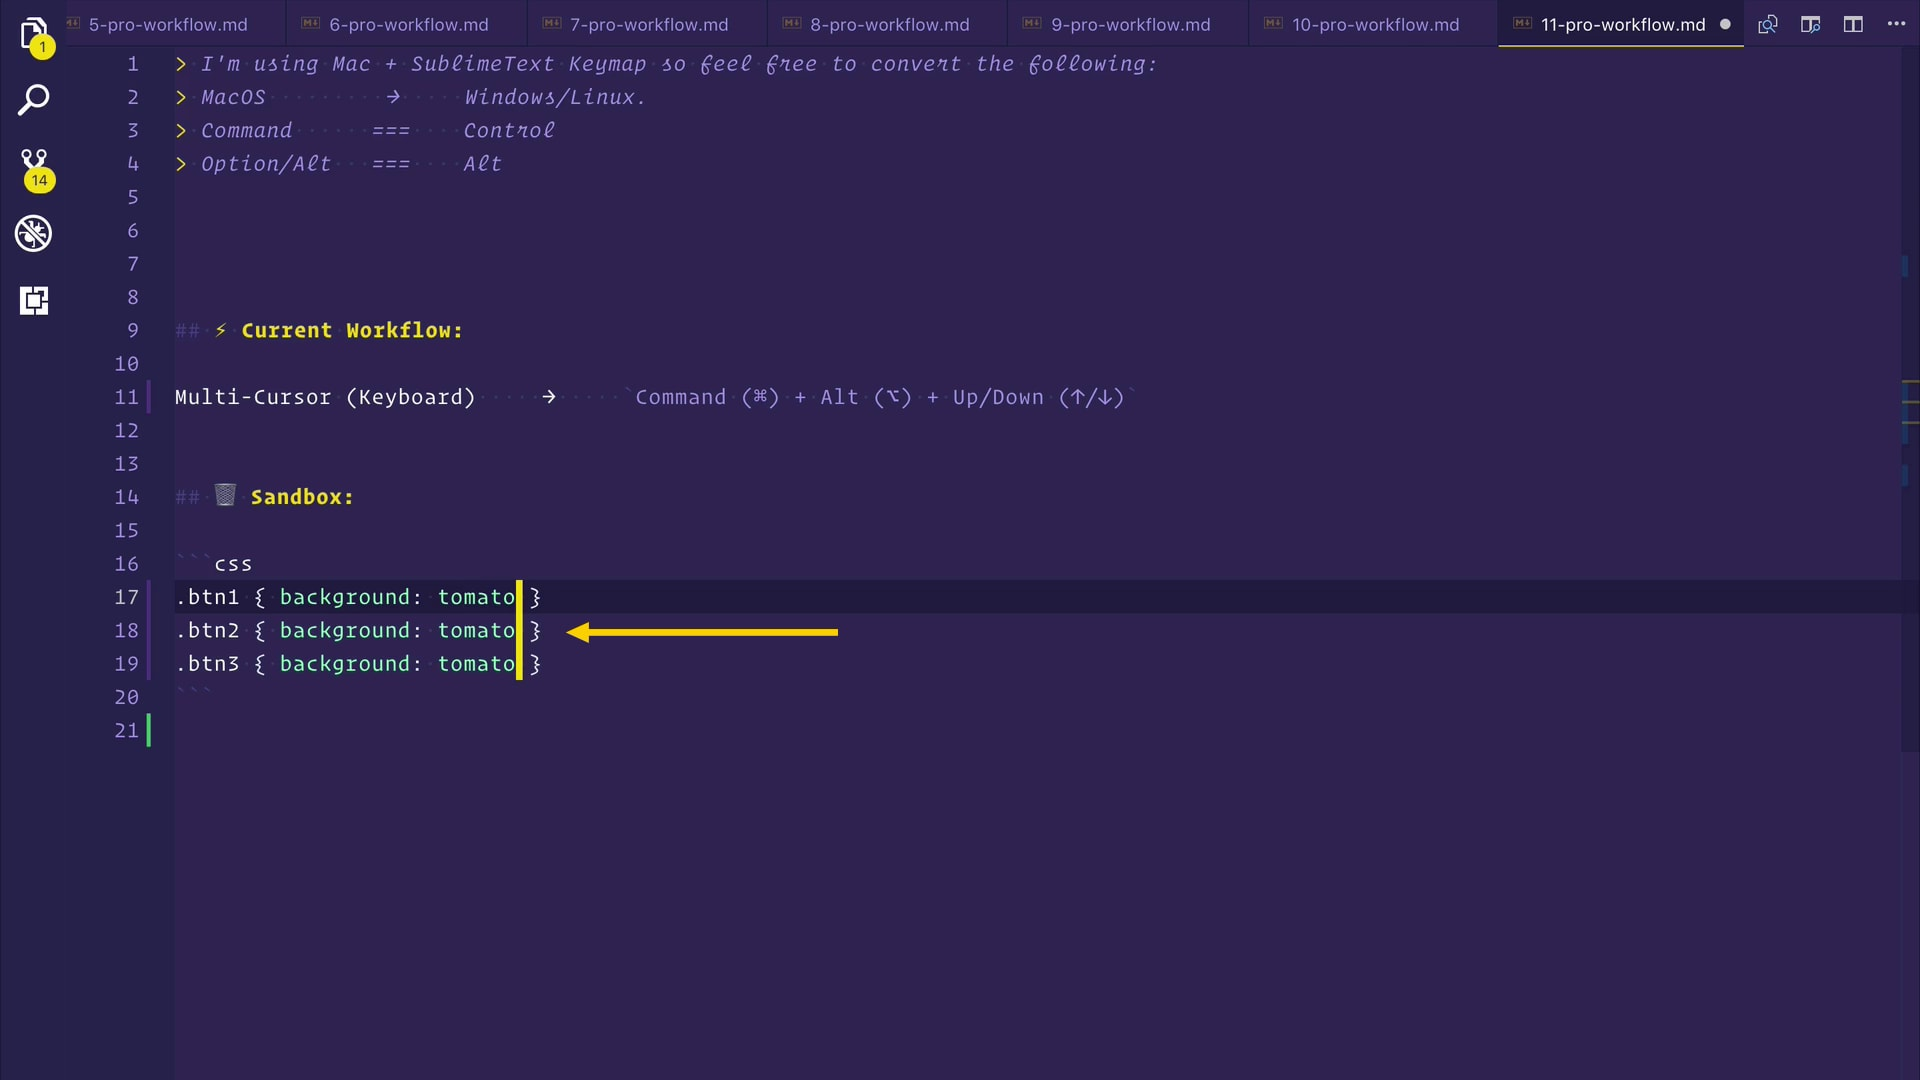 现在,我可以按
ESCAPE键脱离这些多光标。 同样,我也可以上去。 按住
COMMAND (⌘) +
ALT (⌥) ,然后按
UP键创建多光标。 到这里,编辑走。
工作流程#12:多光标选择(键盘) ( Workflow #12: Multi-Cursor Selection (Keyboard) )
🤔 But Awais, can we select a couple of lines with the keyboard and just create multi-cursors for each of the selected lines?! Now you're just mocking me, aren't you? Yes, definitely, we can do that.
🤔但是Awais,我们可以用键盘选择几行,然后为每个选定的行创建多光标吗? 现在你只是在嘲笑我,不是吗? 是的,绝对可以,我们可以做到。
Let's do the multi-cursor selection thing with just your keyboard. What I want are three cursors. I am going to use keyboard only to do this by pressing & holding SHIFT (⇧) and then DOWN to select these three lines. Just like we did in the first workflow.
让我们仅用键盘进行多光标选择。 我想要的是三个游标。 我将仅通过按住SHIFT (⇧) ,然后DOWN选择这三行来使用键盘来完成此操作。 就像我们在第一个工作流程中所做的一样。
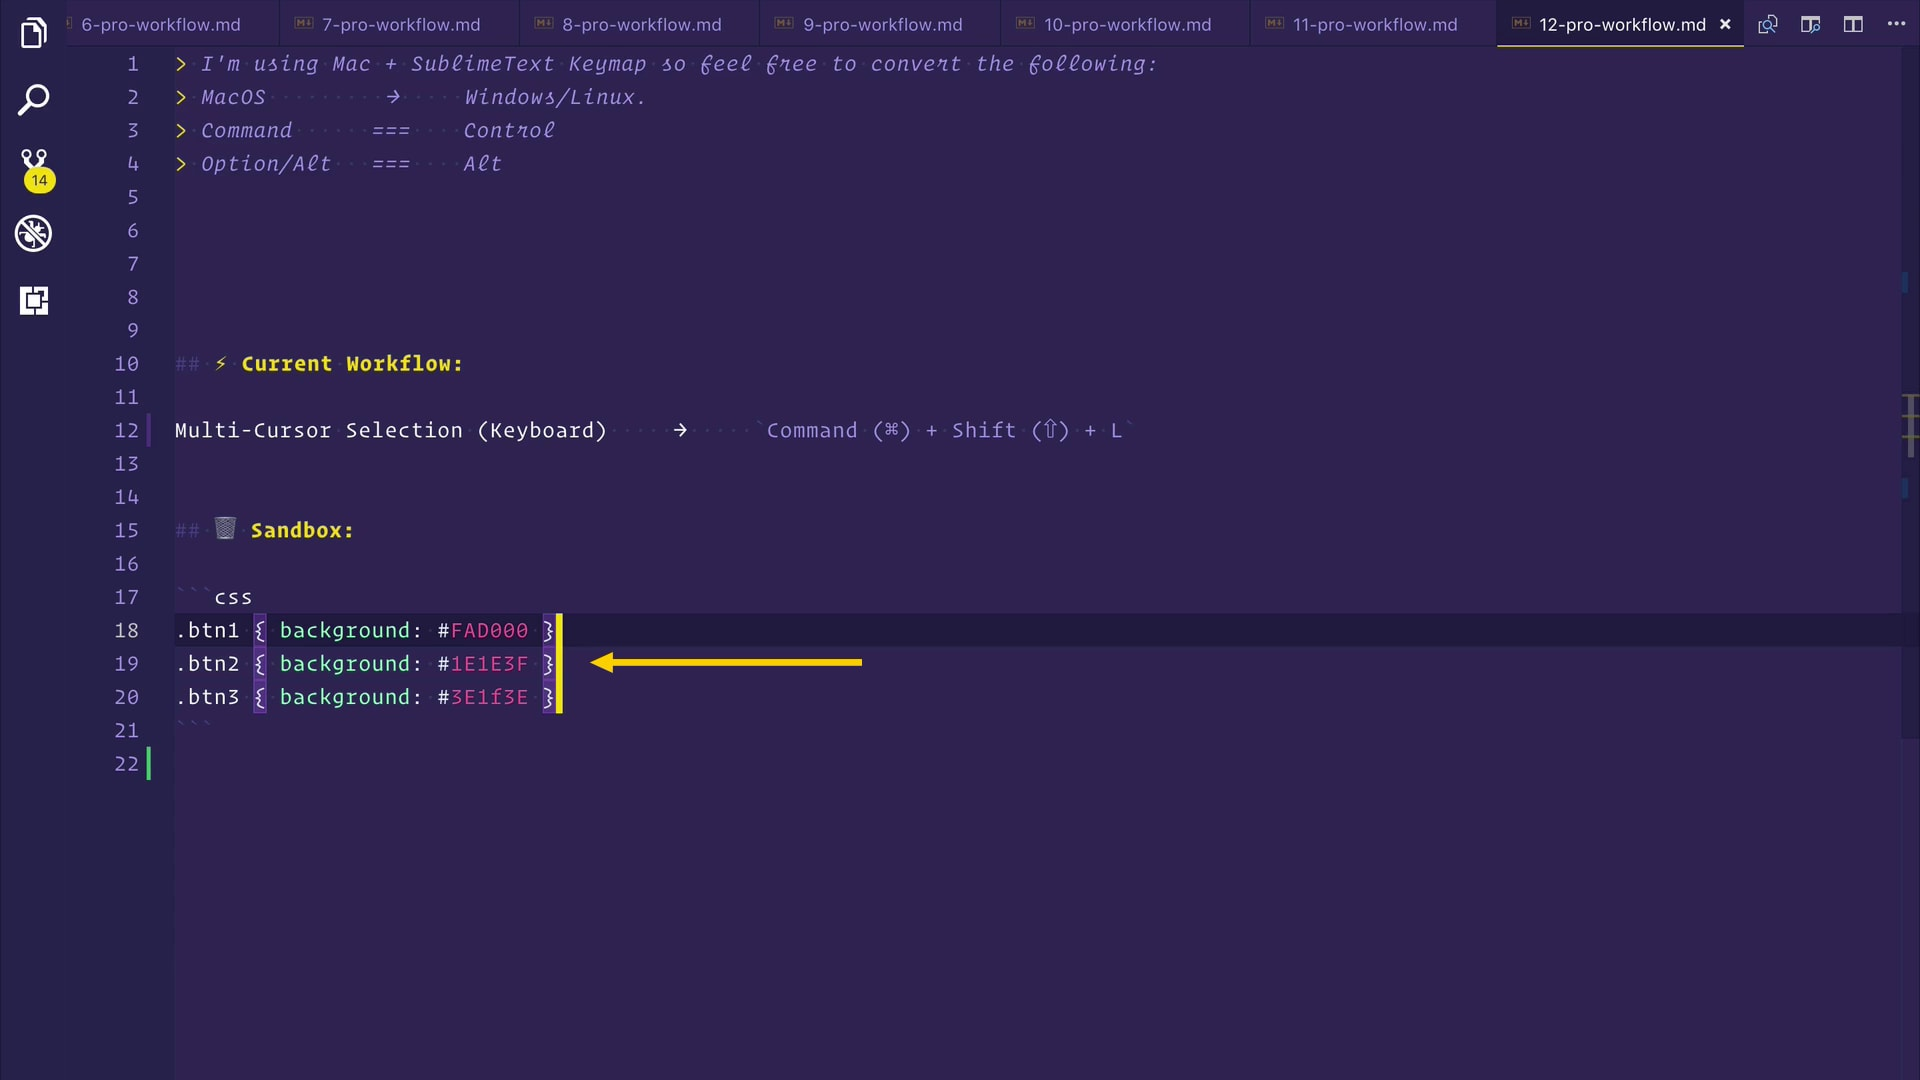
COMMAND (⌘) + SHIFT (⇧) + L — there you go, we have three cursors in front of all the three selected lines.
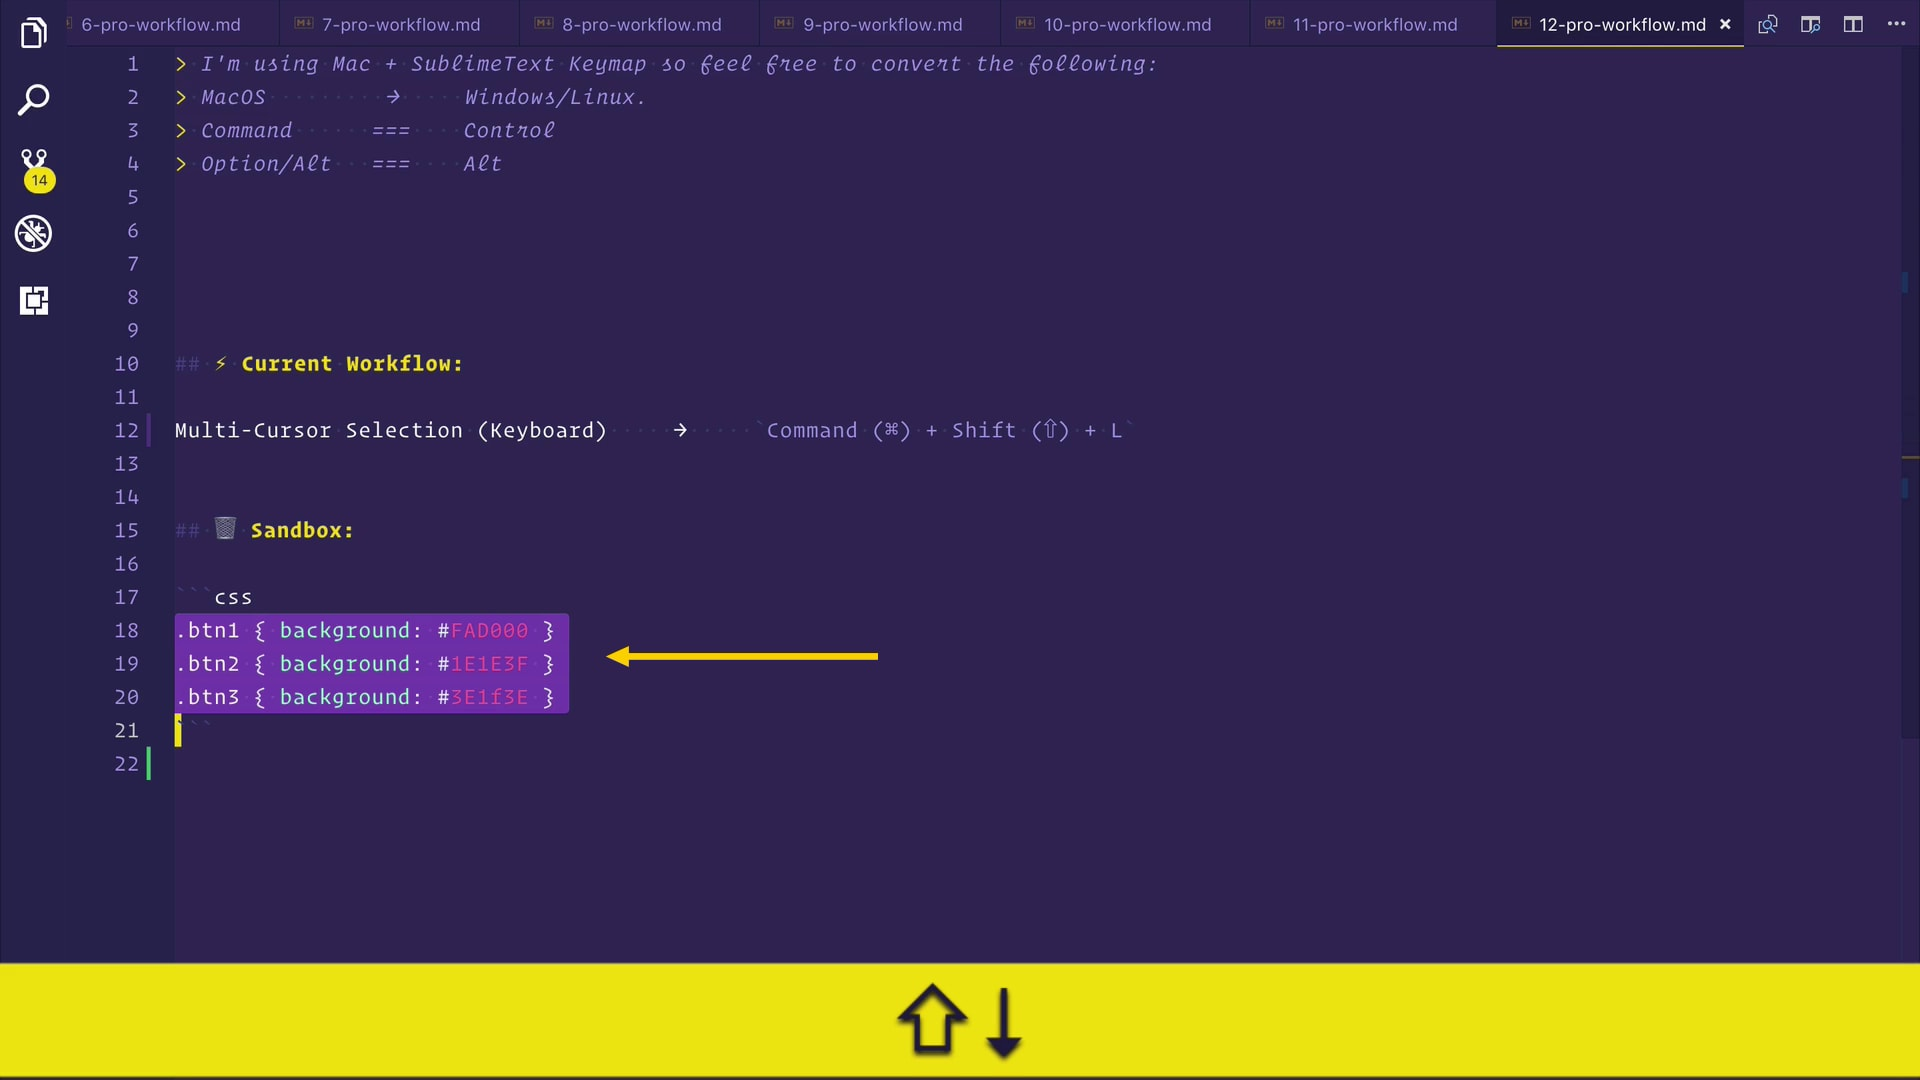 🔥现在,我要按
COMMAND (⌘) +
SHIFT (⇧) +
L到这里,在所有三个选定行的前面都有三个光标。
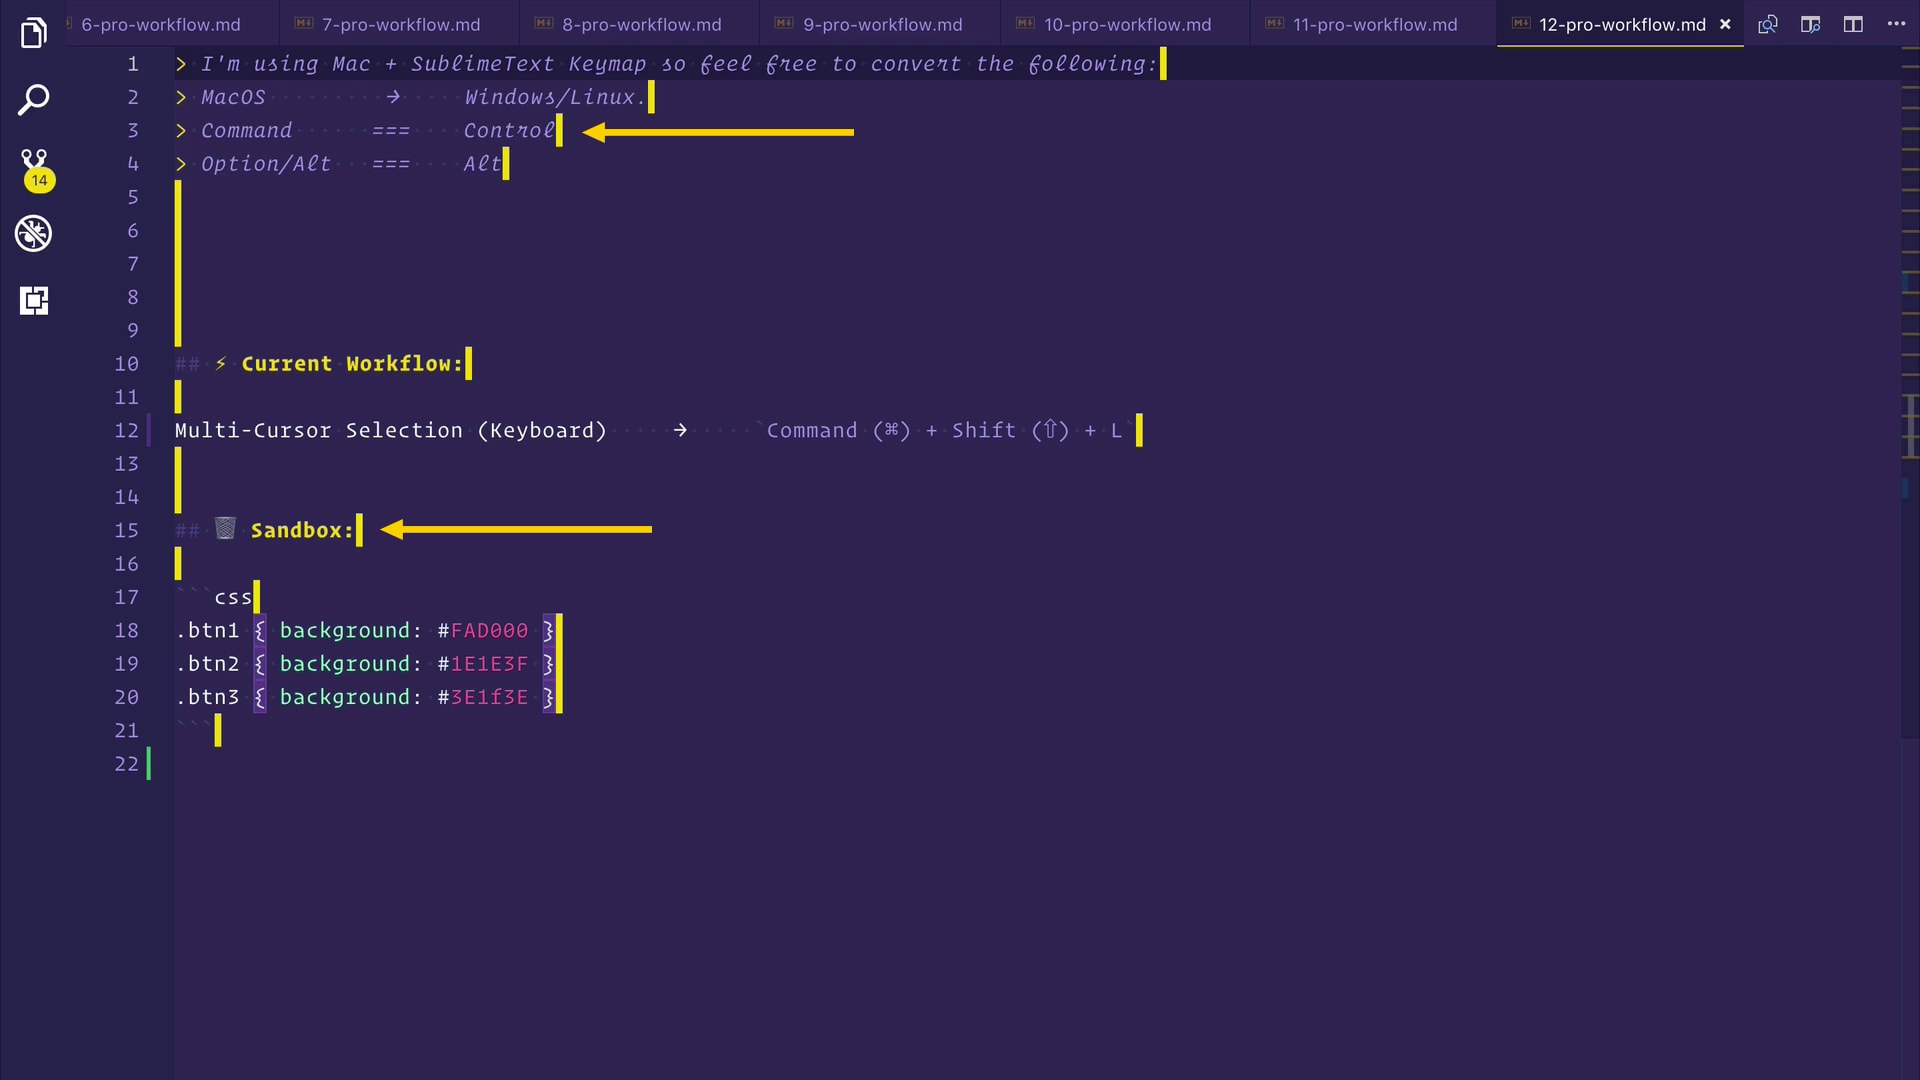
COMMAND (⌘) + A and then if you press COMMAND (⌘) + SHIFT (⇧) + L it will put cursors after every single line. But you don't need to go that crazy. Haha.
 🔥让我们使用
COMMAND (⌘) +
A选择所有文件,然后按
COMMAND (⌘) +
SHIFT (⇧) +
L ,它将把光标放在每一行之后。
但是您不必发疯。
哈哈。
工作流程13:撤消最后一个多光标 ( Workflow #13: Undo the Last Multi Cursor )
🤔 Most of the times when you go crazy while creating multi cursors you end up with one or two extra cursors that you didn't need. I have seen developers press the ESCAPE key and redo all that only to end up with another extra cursor. Guess what you can undo the cursors.
🤔大多数情况下,当您在创建多个游标时发疯时,最终会得到不必要的一两个额外游标。 我已经看到开发人员按下ESCAPE键并重做所有这些操作,最后得到另一个额外的光标。 猜猜您可以撤消光标什么。
🔥 The last one here is, how to undo the extra cursors. Imagine you wanted to change these colors. You pressed COMMAND (⌘) + ALT (⌥) and then DOWN, DOWN, and there is this extra cursor that you didn't need.
here这里的最后一个是如何撤消多余的光标。 假设您要更改这些颜色。 您按COMMAND (⌘) + ALT (⌥) ,然后按DOWN , DOWN ,这是您不需要的多余光标。
COMMAND (⌘) + U and it will undo the last cursor action.
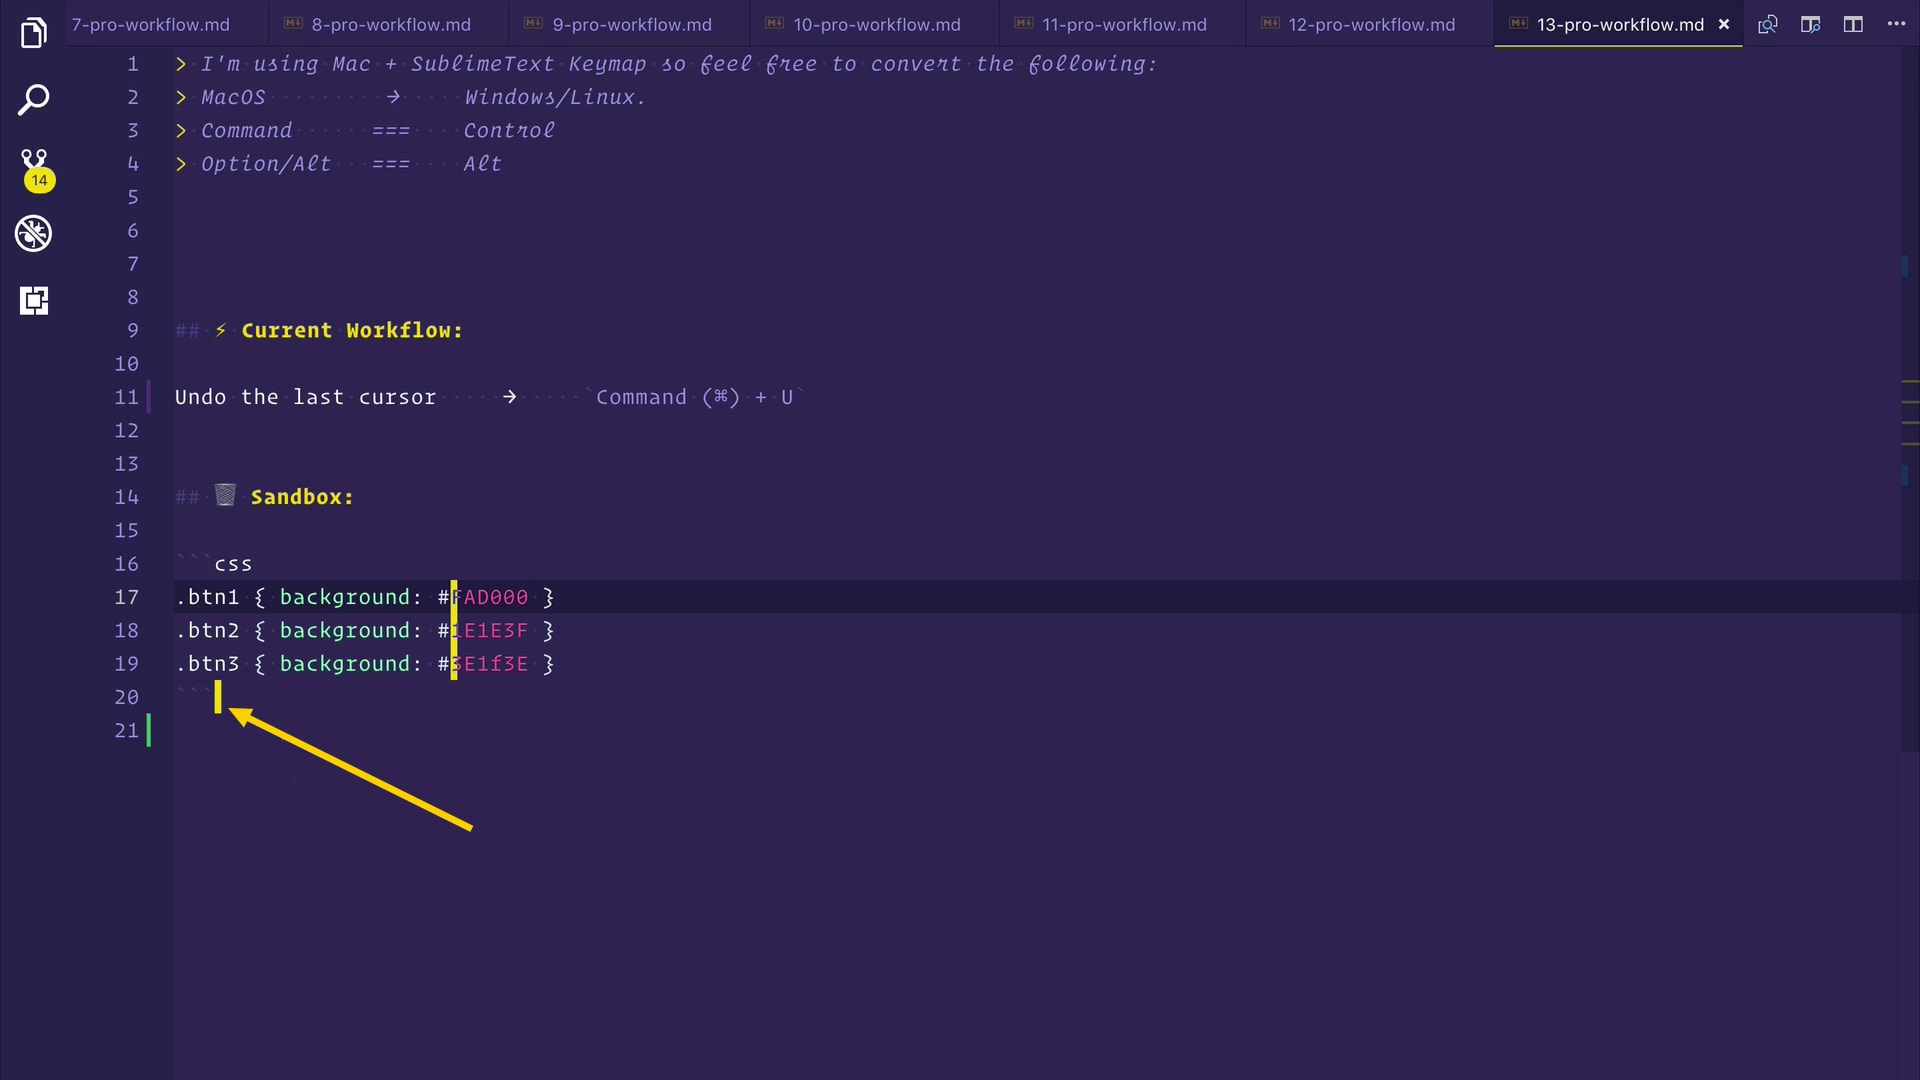 🔥按
🔥按
COMMAND (⌘) +
U ,它将撤消上一个光标动作。
COMMAND (⌘) + SHIFT (⇧) and then drag it to the end. We didn't need this last one cursor on line #20.
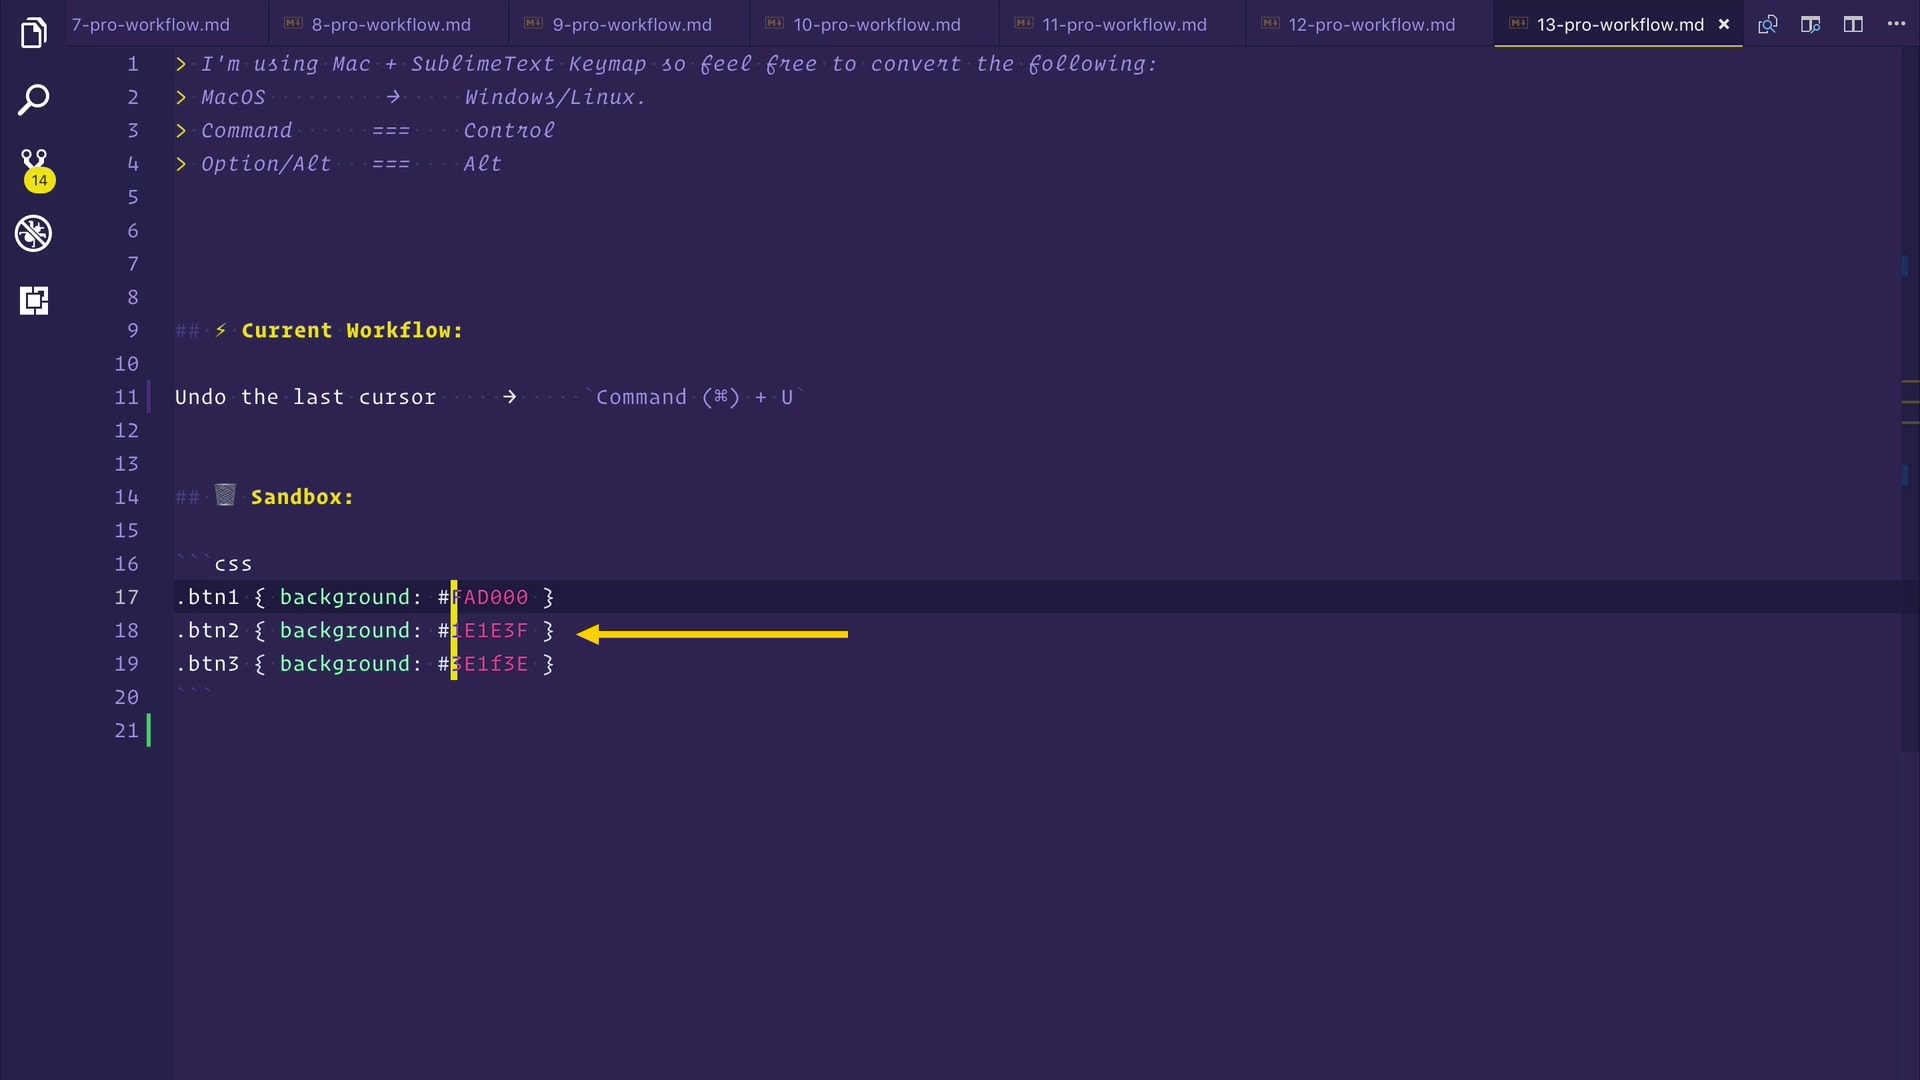 您的鼠标和键盘也是如此。 单击第17行的开头,按住
COMMAND (⌘) +
SHIFT (⇧) ,然后将其拖到末尾。 我们在第20行上不需要最后一个游标。
COMMAND (⌘) + U and there, the extra cursor is gone.
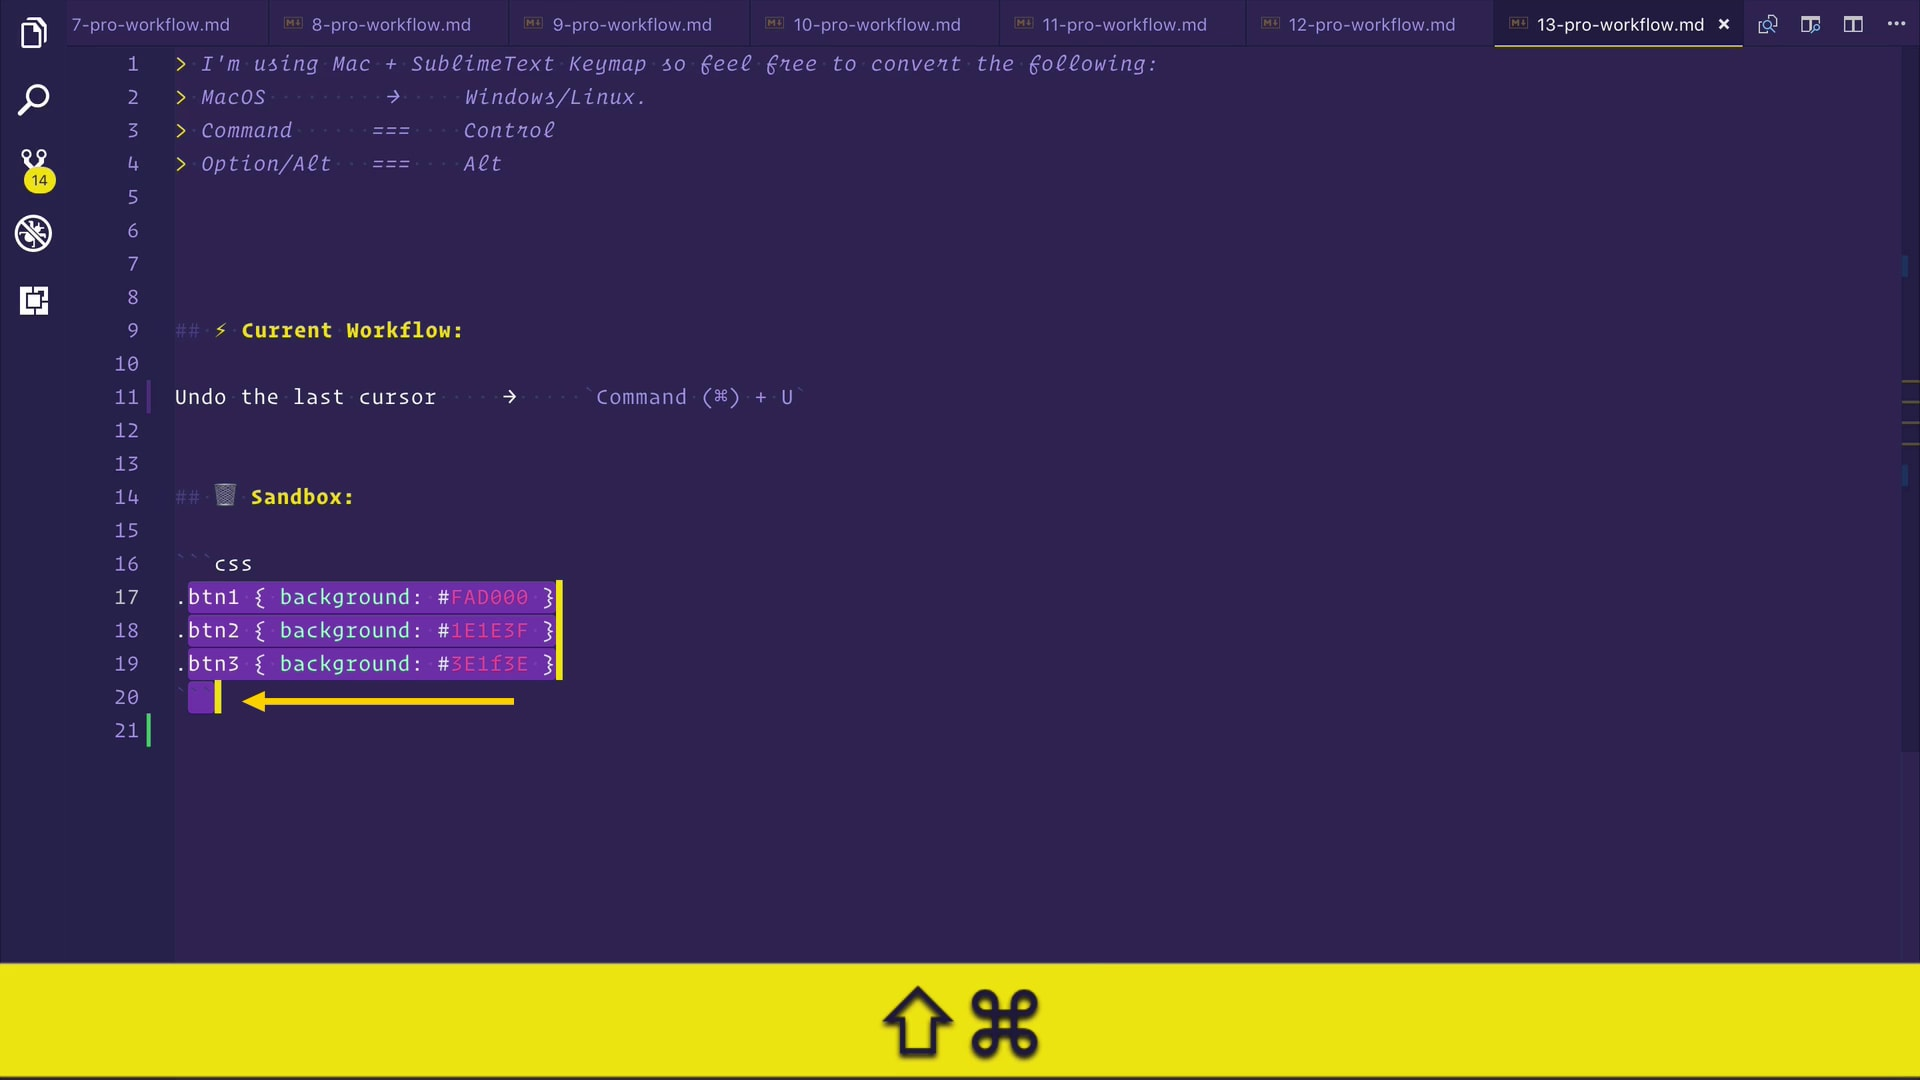 🔥再次,按
🔥再次,按
COMMAND (⌘) +
U ,然后多余的光标消失了。

VSCode工作流程更多 ( There're More VSCode Workflows )
I hope you liked the file editing power user workflows. There's a lot more where this came from. After 10 years with Sublime Text, I switched to VSCode — the new open-source, cross-platform editor everyone's talking about, and most of the developers are using nowadays.
希望您喜欢文件编辑高级用户工作流程。 这有更多的来源。 在使用Sublime Text十年后,我改用VSCode-大家都在谈论的新的开源,跨平台编辑器,如今大多数开发人员都在使用它。
I've spent over 1,000 hours perfecting my setup to help you switch today. Bring all your custom settings and learn the power user workflows for HTML/CSS, GitHub/Git & Open Source, supercharged Markdown, and everything from JavaScript to PHP, Go, Python, C++, C#, ROR & 50+ Extensions. I'm sharing it all in a five hours — 65 videos online course.
我已经花了1000多个小时完善我的设置,以帮助您今天转换 。 进行所有自定义设置,并学习HTML / CSS ,GitHub / Git和开源 ,增压Markdown以及从JavaScript到PHP ,Go,Python,C ++,C#,ROR和50+扩展的所有功能的高级用户工作流程 。 我将在五个小时内分享所有内容 -65个视频在线课程。
I have a 70% discount for this Cyber Monday. On top of it, I support Purchasing Power Parity through which you can get up to 80% off in ~149 countries. Go ahead, become a VSCode Power User → Use your code for good. Peace! ✌ ️
我在本网络星期一有70%的折扣 。 最重要的是,我支持“购买力平价”,通过它您可以在149个国家/地区享受80%的折扣。 继续,成为VSCode高级用户 → 永久使用您的代码。 和平! ️️
翻译自: https://scotch.io/tutorials/master-vscode-file-editing-multi-cursor-workflows
vscode多光标


 本文介绍了VSCode的15个工作流程,重点在于多光标操作,如线路迭代、删除行、复制行、剪切/复制/粘贴、移动行等,帮助提高开发效率。通过这些工作流程,开发者可以更加高效地编辑代码,实现快速多行操作,提升编码体验。


 5998
5998

 被折叠的 条评论
为什么被折叠?


