


node6 创建react
Today's internet users expect a personalized experience. Developers must learn to develop websites that provide that personalized experience while keeping their user's information private. Modern web applications also tend to have a server-side API and a client-side user interface. it can be challenging to get make both ends aware of the currently logged in user. In this tutorial, I will walk you through setting up a Node API that feeds a React UI, and build a user registration that keeps the user's information private and personal.
当今的互联网用户期望个性化的体验。 开发人员必须学习开发提供个性化体验的网站,同时保持用户信息的私密性。 现代的Web应用程序也倾向于具有服务器端API和客户端用户界面。 使两端都知道当前登录的用户可能是具有挑战性的。 在本教程中,我将引导您建立一个提供React UI的Node API,并建立一个用户注册,以保持用户信息的私密性。
In this tutorial, I won't use any state management libraries like Redux or ReduxThunk. In a more robust application, you'll probably want to do that, but it will be easy to wire up Redux and ReduxThunk and then add the fetch statements used here as your thunks. For the sake of simplicity, and to keep this article focused on adding user management, I'll be adding fetch statements into componentDidMount functions.
在本教程中,我不会使用任何状态管理库,例如Redux或ReduxThunk。 在一个更强大的应用程序中,您可能会想要这样做,但是将Redux和ReduxThunk连接起来,然后将此处使用的fetch语句添加为thunk很容易。 为了简单起见,并且为了使本文着重于添加用户管理,我将把fetch语句添加到componentDidMount函数中。
安装节点和React先决条件 ( Install the Node and React Prerequisites )
To set up the base application, make sure you have these basic tools installed:
要设置基本应用程序,请确保已安装以下基本工具:
- Node (8+) 节点(8个以上)
- npm (5+) npm(5岁以上)
- create-react-app (npm package) create-react-app(npm软件包)
- express-generator (npm package) 快速生成器(npm软件包)
You’ll also need an Okta developer account.
您还需要一个Okta开发人员帐户 。
To install Node and npm, you can follow the instructions for your operating system at http://nodejs.org.
要安装Node和npm,您可以在http://nodejs.org上按照您的操作系统的说明进行操作。
Then just install the two npm packages with the npm command line:
然后只需使用npm命令行安装两个npm软件包:
npm i -g create-react-app express-generatorNow you're ready to set up the basic application structure.
现在您已经准备好建立基本的应用程序结构。
脚手架基础应用 ( Scaffold the Base Application )
Go to the folder where you want your application to live and create a new folder for it:
转到要让应用程序运行的文件夹,并为其创建一个新文件夹:
mkdir MembershipSample
cd MembershipSample
express api
create-react-app client
This will create two folders in the MembershipSample folder called api and client, with a NodeJS and Express application in the api folder and a base React application in the client folder. So your folder structure will look like:
这将在MembershipSample文件夹中创建两个文件夹api和client ,在api文件夹中创建一个NodeJS和Express应用程序,在client文件夹中创建一个基础React应用程序。 因此,您的文件夹结构将如下所示:
- MembershipSample 会员资格样本
-
- api
- api
-
- client
- 客户
To make this next part easier, open two terminals or terminal tabs; one to the express app folder api and the other to the React app folder client.
为了简化下一部分,请打开两个终端或终端选项卡; 一个到express app文件夹api ,另一个到React app文件夹client 。
By default, the React app and the Node app will both run on port 3000 in development, so you'll need to get the API to run on a different port and then proxy it in the client app.
默认情况下,React应用程序和Node应用程序都将在开发中的端口3000上运行,因此您需要获取API以在其他端口上运行,然后在客户端应用程序中对其进行代理。
In the api folder, open the /bin/www file and change the port the API will be running on to 3001.
在api文件夹中,打开/bin/www文件,然后将要运行API的端口更改为3001 。
/**
 * Get port from environment and store in Express.
 */

var port = normalizePort(process.env.PORT || '3001');
app.set('port', port);
Then set up the proxy for the API in the client application so that you can still call /api/{resource} and have it proxied from port 3000 to port 3001. In the client/package.json file, add the proxy setting below name:
然后在客户端应用程序中为API设置代理,以便您仍然可以调用/api/{resource}并将其从端口3000代理到端口3001。在client/package.json文件中,在name下面添加proxy设置。 :
"name": "client",
"proxy": "http://localhost:3001"
Lastly, don’t forget to run npm install or yarn install for each subfolder (api and client) to ensure that the dependencies are installed.
最后,不要忘记为每个子文件夹( api和client )运行npm install或yarn install以确保已安装依赖项。
You can now run both applications by running npm start or yarn start in the appropriate folders for the API and the client application.
现在,您可以通过在API和客户端应用程序的相应文件夹中运行npm start或yarn start来运行这两个应用程序。
添加Okta应用程序 ( Add an Okta Application )
If you haven't already done so, create a free forever developer account at https://developer.okta.com/signup/.
如果尚未执行此操作,请访问https://developer.okta.com/signup/创建一个永久的免费开发者帐户。
Once you've registered, click on Applications in the top menu. Then click the Add Application button.
注册后,单击顶部菜单中的“ Applications ”。 然后单击Add Application按钮。

You will then be taken to the application creation wizard. Choose the Single-Page App button and click Next at the bottom.
然后,您将进入应用程序创建向导。 选择“ Single-Page App按钮,然后单击底部的“ Next ”。
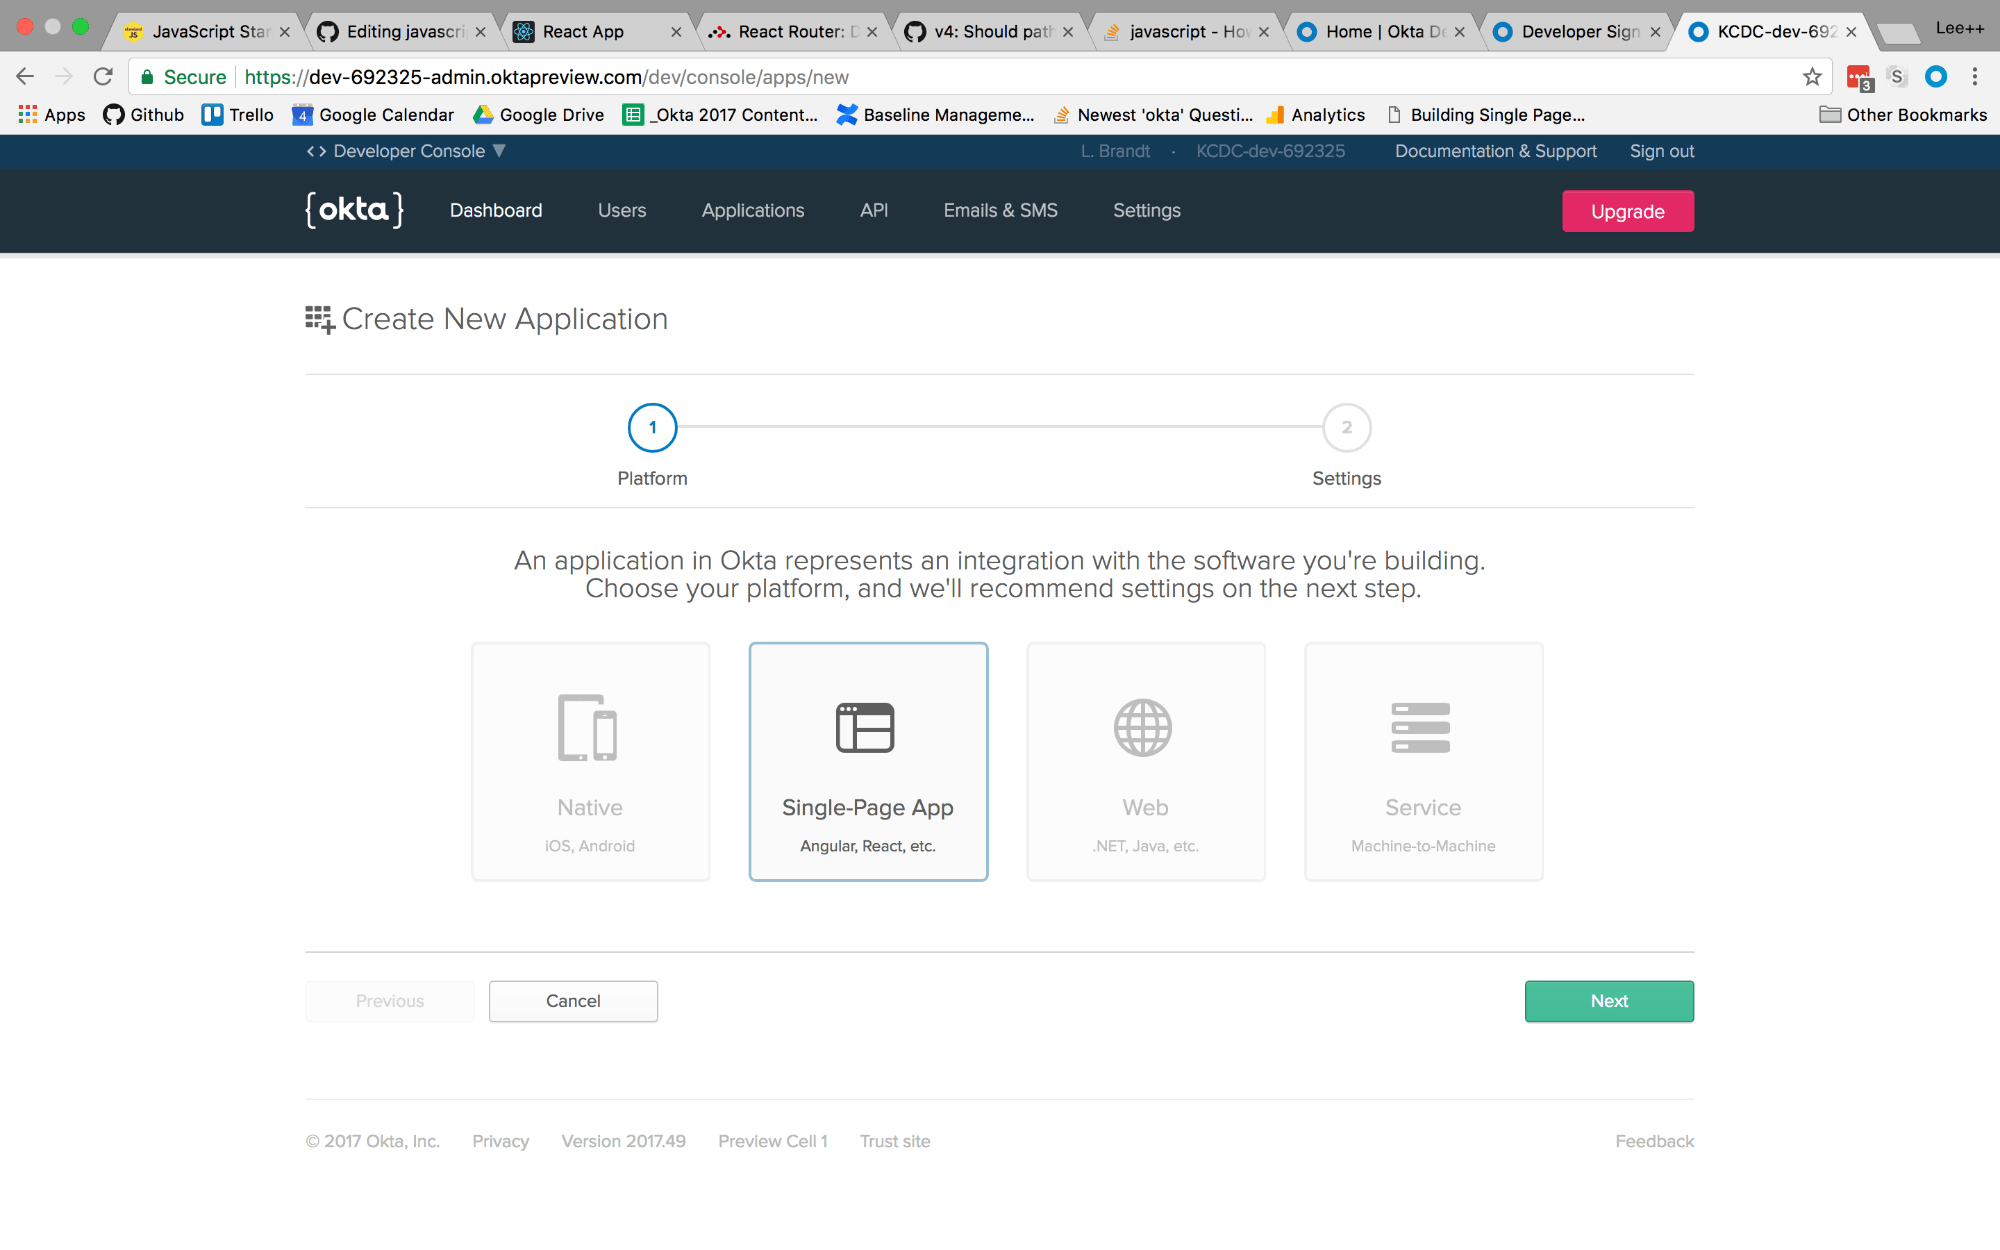
On the next screen, you will see the default settings provided by the single-page application template. Change the name of the application to something more descriptive, like "Membership Application". Also, change the base URIs and the login redirect URIs settings to use port 3000 because that is where your application will be running. The rest of the default settings are fine.
在下一个屏幕上,您将看到单页应用程序模板提供的默认设置。 将应用程序的名称更改为更具描述性的名称,例如“ Membership Application”。 另外,将基本URI和登录重定向URI设置更改为使用端口3000,因为这是应用程序将在其中运行的地方。 其余的默认设置都可以。

Then click the Done button at the bottom.
然后单击底部的Done按钮。
Once the application has been created, select it from the applications listing, and click on the general tab to view the general settings for your application.
创建应用程序后,从应用程序列表中选择它,然后单击常规选项卡以查看您的应用程序的常规设置。

At the bottom, you will see a “Client ID” setting (yours won't be blurred out, obviously). Copy this to use in your React application. You will also need your Okta organization URL, which you can find at the top left of the dashboard page. It will probably look something like “https://dev-XXXXXX.oktapreview.com”.
在底部,您将看到“客户端ID”设置(显然,您不会被模糊掉)。 复制它以在您的React应用程序中使用。 您还将需要您的Okta组织URL,您可以在仪表板页面的左上方找到该URL。 它可能看起来像“ https://dev-XXXXXX.oktapreview.com” 。
向ReactJS应用程序添加身份验证 ( Add Authentication to the ReactJS Application )
Now that the application is created, add authentication using Okta by adding a couple of npm dependencies. From the client folder run:
现在已经创建了应用程序,通过添加几个npm依赖项,使用Okta添加身份验证。 从client文件夹运行:
npm install @okta/okta-auth-js @okta/okta-react react-router-dom --saveOr, if you're using the yarn package manager:
或者,如果您使用的是纱线卷装管理器:
yarn add @okta/okta-auth-js @okta/okta-react react-router-domAdd a file to the client/src’ folder calledapp.config.js`. The contents of the file are:
将文件添加到client/src' folder called app.config.js`。 该文件的内容是:
export default {
  url: '{yourOktaOrgUrl}',
  issuer: '{yourOktaOrgUrl}/oauth2/default',
  redirect_uri: window.location.origin + '/implicit/callback',
  client_id: '{yourClientID}'
}
Then, setup the index.js file to use the React Router and Okta's React SDK. When the index.js file is complete, it will look like this:
然后,设置index.js文件以使用React Router和Okta的React SDK。 当index.js文件完成时,它将如下所示:
import React from 'react';
import ReactDOM from 'react-dom';
import { BrowserRouter as Router } from 'react-router-dom';
import { Security } from '@okta/okta-react';

import './index.css';
import config from './app.config';
import App from './App';
import registerServiceWorker from './registerServiceWorker';

function onAuthRequired({ history }) {
  history.push('/login');
}

ReactDOM.render(
  <Router>
    <Security issuer={config.issuer}
      client_id={config.client_id}
      redirect_uri={config.redirect_uri}
      onAuthRequired={onAuthRequired}>
      <App />
    </Security>
  </Router>,
  document.getElementById('root')
);
registerServiceWorker();
Once complete, you will have added the BrowserRouter component (aliased as "Router") from the React Router, and the Security component from Okta's React SDK. Also that the app.config.js file is imported as "config" so that you can use the config values in the properties required by the Security component.
完成后,您将添加来自React Router的BrowserRouter组件(别名为“ Router”),以及来自Okta的React SDK的Security组件。 另外, app.config.js文件也被导入为“ config”,以便您可以在“ Security组件所需的属性中使用config值。
You will also have surrounded the App component with the Router and Security components, passing in the values specified. The onAuthRequired method, simply tells Okta's React SDK that when somebody tries to access a secure route and they are not logged in, redirect them to the login page.
您还将用Router和Security组件包围App组件,并传入指定的值。 onAuthRequired方法只是告诉Okta的React SDK,当有人尝试访问安全路由且未登录时,将其重定向到登录页面。
Everything else will have come from the create-react-app command you ran previously.
其他所有内容都将来自您之前运行的create-react-app命令。
将页面添加到ReactJS应用 ( Add Pages to the ReactJS App )
Before adding any routes to the React app, create some components to handle the routes you want to add.
在将任何路由添加到React应用之前,请创建一些组件来处理要添加的路由。
Add a components folder to the client/src folder. This is where all your components will live and the easiest way to organize them. Then create a home folder for your home page components. For now there will be just one, but there may be more components used only for the home page later. Add a HomePage.js file to the folder with the following contents:
将一个components文件夹添加到client/src文件夹。 这是所有组件都可以使用的地方,并且是组织它们的最简单方法。 然后为您的主页组件创建一个home文件夹。 目前只有一个,但是以后可能会有更多的组件仅用于主页。 将HomePage.js文件添加到具有以下内容的文件夹中:
import React from 'react';

export default class HomePage extends React.Component{
  render(){
    return(
      <h1>Home Page</h1>
    );
  }
}
This is all you really need for the home page at the moment. The most important point is to make the HomePage component a class type. Even though right now it only contains a single h1 tag, it is meant to be a "page", meaning it will likely contain other components, so it's important that it be a container component.
这是您目前真正需要的主页。 最重要的一点是使HomePage组件成为类类型。 即使现在它仅包含一个h1标签,它也应该是一个“页面”,这意味着它可能包含其他组件,因此,将其作为容器组件很重要。
Next, create an auth folder in components. This is where all components that have to do with authentication will live. In that folder, create a LoginForm.js file.
接下来,在components创建一个auth文件夹。 这是所有与身份验证有关的组件都将存在的地方。 在该文件夹中,创建一个LoginForm.js文件。
The first thing to note is that you’ll be using the withAuth higher-order component from Okta’s React SDK to wrap the entire login form. This adds a prop to the component called auth, making it possible to access things like the isAuthenticated and redirect functions on that higher-order component.
首先要注意的是,您将使用Okta的React SDK中的withAuth高阶组件来包装整个登录表单。 这会向名为auth的组件添加一个支持,从而可以访问isAuthenticated类的东西,并redirect在该高阶组件上redirect函数。
The code for the LoginForm component is as follows:
LoginForm组件的代码如下:
import React from 'react';
import OktaAuth from '@okta/okta-auth-js';
import { withAuth } from '@okta/okta-react';

export default withAuth(class LoginForm extends React.Component {
  constructor(props) {
    super(props);
    this.state = {
      sessionToken: null,
      error: null,
      username: '',
      password: ''
    }

    this.oktaAuth = new OktaAuth({ url: props.baseUrl });

    this.handleSubmit = this.handleSubmit.bind(this);
    this.handleUsernameChange = this.handleUsernameChange.bind(this);
    this.handlePasswordChange = this.handlePasswordChange.bind(this);
  }

  handleSubmit(e) {
    e.preventDefault();
    this.oktaAuth.signIn({
      username: this.state.username,
      password: this.state.password
    })
      .then(res => this.setState({
        sessionToken: res.sessionToken
      }))
      .catch(err => {
        this.setState({error: err.message});
        console.log(err.statusCode + ' error', err)
      });
  }

  handleUsernameChange(e) {
    this.setState({ username: e.target.value });
  }

  handlePasswordChange(e) {
    this.setState({ password: e.target.value });
  }

  render() {
    if (this.state.sessionToken) {
      this.props.auth.redirect({ sessionToken: this.state.sessionToken });
      return null;
    }

    const errorMessage = this.state.error ?
    <span className="error-message">{this.state.error}</span> :
    null;

    return (
      <form onSubmit={this.handleSubmit}>
        {errorMessage}
        <div className="form-element">
          <label>Username:</label>
          <input
            id="username" type="text"
            value={this.state.username}
            onChange={this.handleUsernameChange} />
        </div>

        <div className="form-element">
          <label>Password:</label>
          <input
            id="password" type="password"
            value={this.state.password}
            onChange={this.handlePasswordChange} />
        </div>
        <input id="submit" type="submit" value="Submit" />
      </form>
    );
  }
});
The other thing of note here is the OktaAuth library being imported. This is the base library for doing things like signing in using the Okta application you created previously. You'll notice an OktaAuth object being created in the constructor that gets a property of baseUrl passed to it. This is the URL for the issuer that is in your app.config.js file. The LoginForm component is meant to be contained in another component, so you'll have to create a LoginPage.js file to contain this component. You'll use the withAuth higher-order component again, to get access to the isAuthenticated function. The contents of LoginPage.js will be:
这里要注意的另一件事是导入的OktaAuth库。 这是用于执行诸如使用您先前创建的Okta应用程序登录之类的操作的基础库。 你会发现一个OktaAuth在得到的属性构造函数创建的对象的存在baseUrl传递给它。 这是您app.config.js文件中颁发者的URL。 LoginForm组件本应包含在另一个组件中,因此您必须创建一个LoginPage.js文件才能包含此组件。 您将再次使用withAuth高阶组件,以访问isAuthenticated函数。 LoginPage.js的内容为:
import React, { Component } from 'react';
import { Redirect } from 'react-router-dom';
import LoginForm from './LoginForm';
import { withAuth } from '@okta/okta-react';

export default withAuth(class Login extends Component {
  constructor(props) {
    super(props);
    this.state = { authenticated: null };
    this.checkAuthentication = this.checkAuthentication.bind(this);
    this.checkAuthentication();
  }

  async checkAuthentication() {
    const authenticated = await this.props.auth.isAuthenticated();
    if (authenticated !== this.state.authenticated) {
      this.setState({ authenticated });
    }
  }

  componentDidUpdate() {
    this.checkAuthentication();
  }

  render() {
    if (this.state.authenticated === null) return null;
    return this.state.authenticated ?
      <Redirect to={{ pathname: '/profile' }} /> :
      <LoginForm baseUrl={this.props.baseUrl} />;
  }
});
Although it's a bit less than what's in the login form component, there are still some important pieces to point out here.
尽管它比登录表单组件中的要少一些,但这里仍有一些重要的要点。
Again, you're using the withAuth higher-order component. This will be a recurring theme for every component that needs to use Okta's authentication or authorization process. In this case, it's primarily used to get the isAuthenticated function. The checkAuthentication() method is executed in the constructor and in the componentDidUpdate lifecycle method to ensure that when the component is created it is checked and every subsequent change to the component checks again.
同样,您使用的是withAuth高阶组件。 对于需要使用Okta身份验证或授权过程的每个组件,这都是一个重复出现的主题。 在这种情况下,它主要用于获取isAuthenticated函数。 checkAuthentication()方法在构造函数中和componentDidUpdate生命周期方法中执行,以确保在创建组件时会对其进行检查,并对组件的所有后续更改都进行检查。
When isAuthenticated returns true, then it is set in the component's state. It is then checked in the render method to decide whether to show the LoginForm component, or to redirect to the user's profile page, a component you'll create next.
当isAuthenticated返回true时,则将其设置为组件的状态。 然后在render方法中对其进行检查,以决定是显示LoginForm组件,还是重定向到用户的个人资料页面(您将在下一步创建的组件)。
Now create the ProfilePage.js component inside the auth folder. The contents of the component are:
现在,在auth文件夹中创建ProfilePage.js组件。 该组件的内容是:
import React from 'react';
import { withAuth } from '@okta/okta-react';

export default withAuth(class ProfilePage extends React.Component {
  constructor(props){
    super(props);
    this.state = { user: null };
    this.getCurrentUser = this.getCurrentUser.bind(this);
  }

  async getCurrentUser(){
    this.props.auth.getUser()
      .then(user => this.setState({user}));
  }

  componentDidMount(){
    this.getCurrentUser();
  }

  render() {
    if(!this.state.user) return null;
    return (
      <section className="user-profile">
        <h1>User Profile</h1>
        <div>
          <label>Name:</label>
          <span>{this.state.user.name}</span>
        </div>
      </section>

    )
  }
});
The withAuth component here gives you access to the getUser function. Here, it's been called from componentDidMount which is a common place for pulling data that will be used in the render method. The only odd thing you might see is the first line of the render method that renders nothing until there is actually a user returned from the getUser asynchronous call. Once there is a user in the state, it then renders the profile content, which in this case is just displaying the currently logged in user's name.
使用withAuth组件可以访问getUser函数。 在这里,从componentDidMount调用了它,这是提取将在render方法中使用的数据的常用位置。 您可能会看到的唯一奇怪的事情是render方法的第一行,在实际上没有从getUser异步调用返回的用户之前,不呈现任何内容。 一旦该状态下有一个用户,它就会呈现配置文件内容,在这种情况下,该配置文件内容仅显示当前登录的用户名。
Next, you'll add a registration component. This could be done just like the login form, where there is a LoginForm component that is contained in a LoginPage component. In order to demonstrate another way to display this, you'll just create a RegistrationForm component that will be the main container component. Create a RegistrationForm.js file in the auth folder with the following content:
接下来,您将添加一个注册组件。 可以像登录表单一样完成此操作,其中LoginPage组件中包含一个LoginForm组件。 为了演示另一种显示方式,您只需创建一个RegistrationForm组件,它将成为主要的容器组件。 在auth文件夹中创建一个RegistrationForm.js文件,其内容如下:
import React from 'react';
import OktaAuth from '@okta/okta-auth-js';
import { withAuth } from '@okta/okta-react';

import config from '../../app.config';

export default withAuth(class RegistrationForm extends React.Component{
  constructor(props){
    super(props);
    this.state = {
      firstName: '',
      lastName: '',
      email: '',
      password: '',
      sessionToken: null
    };
    this.oktaAuth = new OktaAuth({ url: config.url });
    this.checkAuthentication = this.checkAuthentication.bind(this);
    this.checkAuthentication();

    this.handleSubmit = this.handleSubmit.bind(this);
    this.handleFirstNameChange = this.handleFirstNameChange.bind(this);
    this.handleLastNameChange = this.handleLastNameChange.bind(this);
    this.handleEmailChange = this.handleEmailChange.bind(this);
    this.handlePasswordChange = this.handlePasswordChange.bind(this);
  }

  async checkAuthentication() {
    const sessionToken = await this.props.auth.getIdToken();
    if (sessionToken) {
      this.setState({ sessionToken });
    }
  }

  componentDidUpdate() {
    this.checkAuthentication();
  }

  handleFirstNameChange(e){
    this.setState({firstName:e.target.value});
  }
  handleLastNameChange(e) {
    this.setState({ lastName: e.target.value });
  }
  handleEmailChange(e) {
    this.setState({ email: e.target.value });
  }
  handlePasswordChange(e) {
    this.setState({ password: e.target.value });
  }

  handleSubmit(e){
    e.preventDefault();
    fetch('/api/users', {
      method: 'POST',
      headers: {
        'Accept': 'application/json',
        'Content-Type': 'application/json',
      },
      body: JSON.stringify(this.state)
    }).then(user => {
      this.oktaAuth.signIn({
        username: this.state.email,
        password: this.state.password
      })
      .then(res => this.setState({
        sessionToken: res.sessionToken
      }));
    })
    .catch(err => console.log);
  }

  render(){
    if (this.state.sessionToken) {
      this.props.auth.redirect({ sessionToken: this.state.sessionToken });
      return null;
    }

    return(
      <form onSubmit={this.handleSubmit}>
        <div className="form-element">
          <label>Email:</label>
          <input type="email" id="email" value={this.state.email}
          onChange={this.handleEmailChange}/>
        </div>
        <div className="form-element">
          <label>First Name:</label>
          <input type="text" id="firstName" value={this.state.firstName}
          onChange={this.handleFirstNameChange} />
        </div>
        <div className="form-element">
          <label>Last Name:</label>
          <input type="text" id="lastName" value={this.state.lastName}
          onChange={this.handleLastNameChange} />
        </div>
        <div className="form-element">
          <label>Password:</label>
          <input type="password" id="password" value={this.state.password}
          onChange={this.handlePasswordChange} />
        </div>
        <input type="submit" id="submit" value="Register"/>
      </form>
    );
  }

});
This component looks a lot like the LoginForm component with the exception that it calls the Node API (that you’ll build in a moment) that will handle doing the registration. Once the registration is completed by the Node API, the component logs the newly created user in, and the render method (when it sees a session token in the state) redirects the user to the home page of the application.
该组件与LoginForm组件非常相似,不同之处在于它调用Node API(稍后将构建),该API将处理注册。 通过Node API完成注册后,该组件会将新创建的用户登录,然后render方法(当它看到状态中的会话令牌时)会将用户重定向到应用程序的主页。
You may also notice the sessionToken property on the component’s state. This is set by the handleSubmit() function for the purpose of handling the login if the registration is successful. Then it is also used by the render() method to do the redirect once the login has completed, and a token has been received.
您可能还会注意到组件状态上的sessionToken属性。 这是由handleSubmit()函数设置的,目的是在注册成功时处理登录。 然后,一旦登录完成并且已收到令牌, render()方法还使用它进行重定向。
将路线添加到React App ( Add Routes to the React App )
First, add a navigation component for the routes you’ll be adding. In the client/src/components folder, add a folder called shared. This will be the place where all components that are used in several places in the application will be located. In that new folder, add a file called Navigation.js. The file contains a basic component with links to all the pages in the app.
首先,为要添加的路线添加导航组件。 在client/src/components文件夹中,添加一个名为shared的文件夹。 在这里将放置在应用程序中多个位置使用的所有组件。 在该新文件夹中,添加一个名为Navigation.js的文件。 该文件包含一个基本组件,该组件具有指向应用程序中所有页面的链接。
You’ll need to wrap the navigation component in the withAuth higher-order component. That way, you can check to see if there is an authenticated user and display the login or logout button as appropriate.
您需要将导航组件包装在withAuth高阶组件中。 这样,您可以检查是否有经过身份验证的用户,并根据需要显示登录或注销按钮。
import React from 'react';
import { Link } from 'react-router-dom';
import { withAuth } from '@okta/okta-react';

export default withAuth(class Navigation extends React.Component {
  constructor(props) {
    super(props);
    this.state = { authenticated: null };
    this.checkAuthentication = this.checkAuthentication.bind(this);
    this.checkAuthentication();
  }

  async checkAuthentication() {
    const authenticated = await this.props.auth.isAuthenticated();
    if (authenticated !== this.state.authenticated) {
      this.setState({ authenticated });
    }
  }

  componentDidUpdate() {
    this.checkAuthentication();
  }

  render() {
    if (this.state.authenticated === null) return null;
    const authNav = this.state.authenticated ?
      <ul className="auth-nav">
        <li><a href="javascript:void(0)" onClick={this.props.auth.logout}>Logout</a></li>
        <li><Link to="/profile">Profile</Link></li>
      </ul> :
      <ul className="auth-nav">
        <li><a href="javascript:void(0)" onClick={this.props.auth.login}>Login</a></li>
        <li><Link to="/register">Register</Link></li>
      </ul>;
    return (
      <nav>
        <ul>
          <li><Link to="/">Home</Link></li>
          {authNav}
        </ul>
      </nav>
    )
  }
});
Now that you have components available to handle all the routes, create the routes to go with them. Update the App.js file so that the final version looks like:
现在,您已经具有处理所有路线的组件,请创建与之配套的路线。 更新App.js文件,以使最终版本如下所示:
import React, { Component } from 'react';
import { Route } from 'react-router-dom';
import { SecureRoute, ImplicitCallback } from '@okta/okta-react';

import Navigation from './components/shared/Navigation';
import HomePage from './components/home/HomePage';
import RegistrationForm from './components/auth/RegistrationForm';
import config from './app.config';
import LoginPage from './components/auth/LoginPage';
import ProfilePage from './components/auth/ProfilePage';
import './App.css';

export default class App extends Component {
  render() {
    return (
      <div className="App">
        <Navigation />
        <main>
          <Route path="/" exact component={HomePage} />
          <Route path="/login" render={() => <LoginPage baseUrl={config.url} />} />
          <Route path="/implicit/callback" component={ImplicitCallback} />
          <Route path="/register" component={RegistrationForm} />
          <SecureRoute path="/profile" component={ProfilePage} />
        </main>
      </div>
    );
  }
}
There are a couple of things of note here. The import of the SecureRoute and ImplicitCallback components from Okta's React SDK. The ImplicitCallback component handles the callback from the authentication flow to ensure there is an endpoint within the React application to catch the return call from Okta. The SecureRoute component allows you to secure any route and redirect unauthenticated users to the login page.
这里有一些注意事项。 从Okta的React SDK导入SecureRoute和ImplicitCallback组件。 ImplicitCallback组件处理来自身份验证流的回调,以确保React应用程序中存在一个端点来捕获来自Okta的返回调用。 SecureRoute组件使您能够保护任何路由,并将未经身份验证的用户重定向到登录页面。
The Route component from React Router does exactly what you'd expect: it takes a path that the user has navigated to and sets a component to handle that route. The SecureRoute component does an extra check to ensure the user is logged in before allowing access to that route. If they are not then the onAuthRequired function in index.js will be called to force the user to the login page.
React Router的Route组件完全符合您的期望:它采用用户导航到的路径并设置一个组件来处理该路由。 SecureRoute组件会进行额外的检查,以确保在允许访问该路由之前,用户已登录。 如果不是, onAuthRequired调用index.js的onAuthRequired函数,以强制用户进入登录页面。
The only other really odd-looking thing here is the route for the login path. Instead of simply setting a component to handle the path, it runs a render method that renders the LoginPage component and sets the baseUrl from the configuration.
唯一看起来很奇怪的是登录路径的路由。 它运行简单的render方法来渲染LoginPage组件并从配置中设置baseUrl,而不是简单地设置用于处理路径的组件。
将API端点添加到Node App ( Add API Endpoints to the Node App )
You may remember that the Node API is doing the registration, so you'll need to add the endpoint to the Node app to handle that call. To do that, you'll need to add Okta's Node SDK. From the ‘api’ folder run:
您可能还记得Node API正在注册,因此您需要将端点添加到Node应用程序以处理该调用。 为此,您需要添加Okta的Node SDK。 从“ api”文件夹运行:
npm install @okta/okta-sdk-nodejs --saveThen, you'll change the users.js file in api/routes. The file will look like:
然后,您将在api/routes更改users.js文件。 该文件将如下所示:
const express = require('express');
const router = express.Router();
const oktaClient = require('../lib/oktaClient');

/* Create a new User (register). */
router.post('/', (req, res, next) => {
  if (!req.body) return res.sendStatus(400);
  const newUser = {
    profile: {
      firstName: req.body.firstName,
      lastName: req.body.lastName,
      email: req.body.email,
      login: req.body.email
    },
    credentials: {
      password: {
        value: req.body.password
      }
    }
  };
  oktaClient.createUser(newUser)
    .then(user => {
      res.status(201);
      res.send(user);
    })
    .catch(err => {
      res.status(400);
      res.send(err);
    })
});

module.exports = router;
The biggest things of note here are the importing of the lib/oktaClient (which you'll add in a moment), the call to the createUser function on oktaClient, and the shape of the newUser object. The shape of the newUser object is documented in Okta's API documentation.
这里最大的注意事项是lib/oktaClient的导入(稍后将添加),对oktaClient的createUser函数的调用以及newUser对象的形状。 newUser 的API文档中记录了newUser对象的形状。
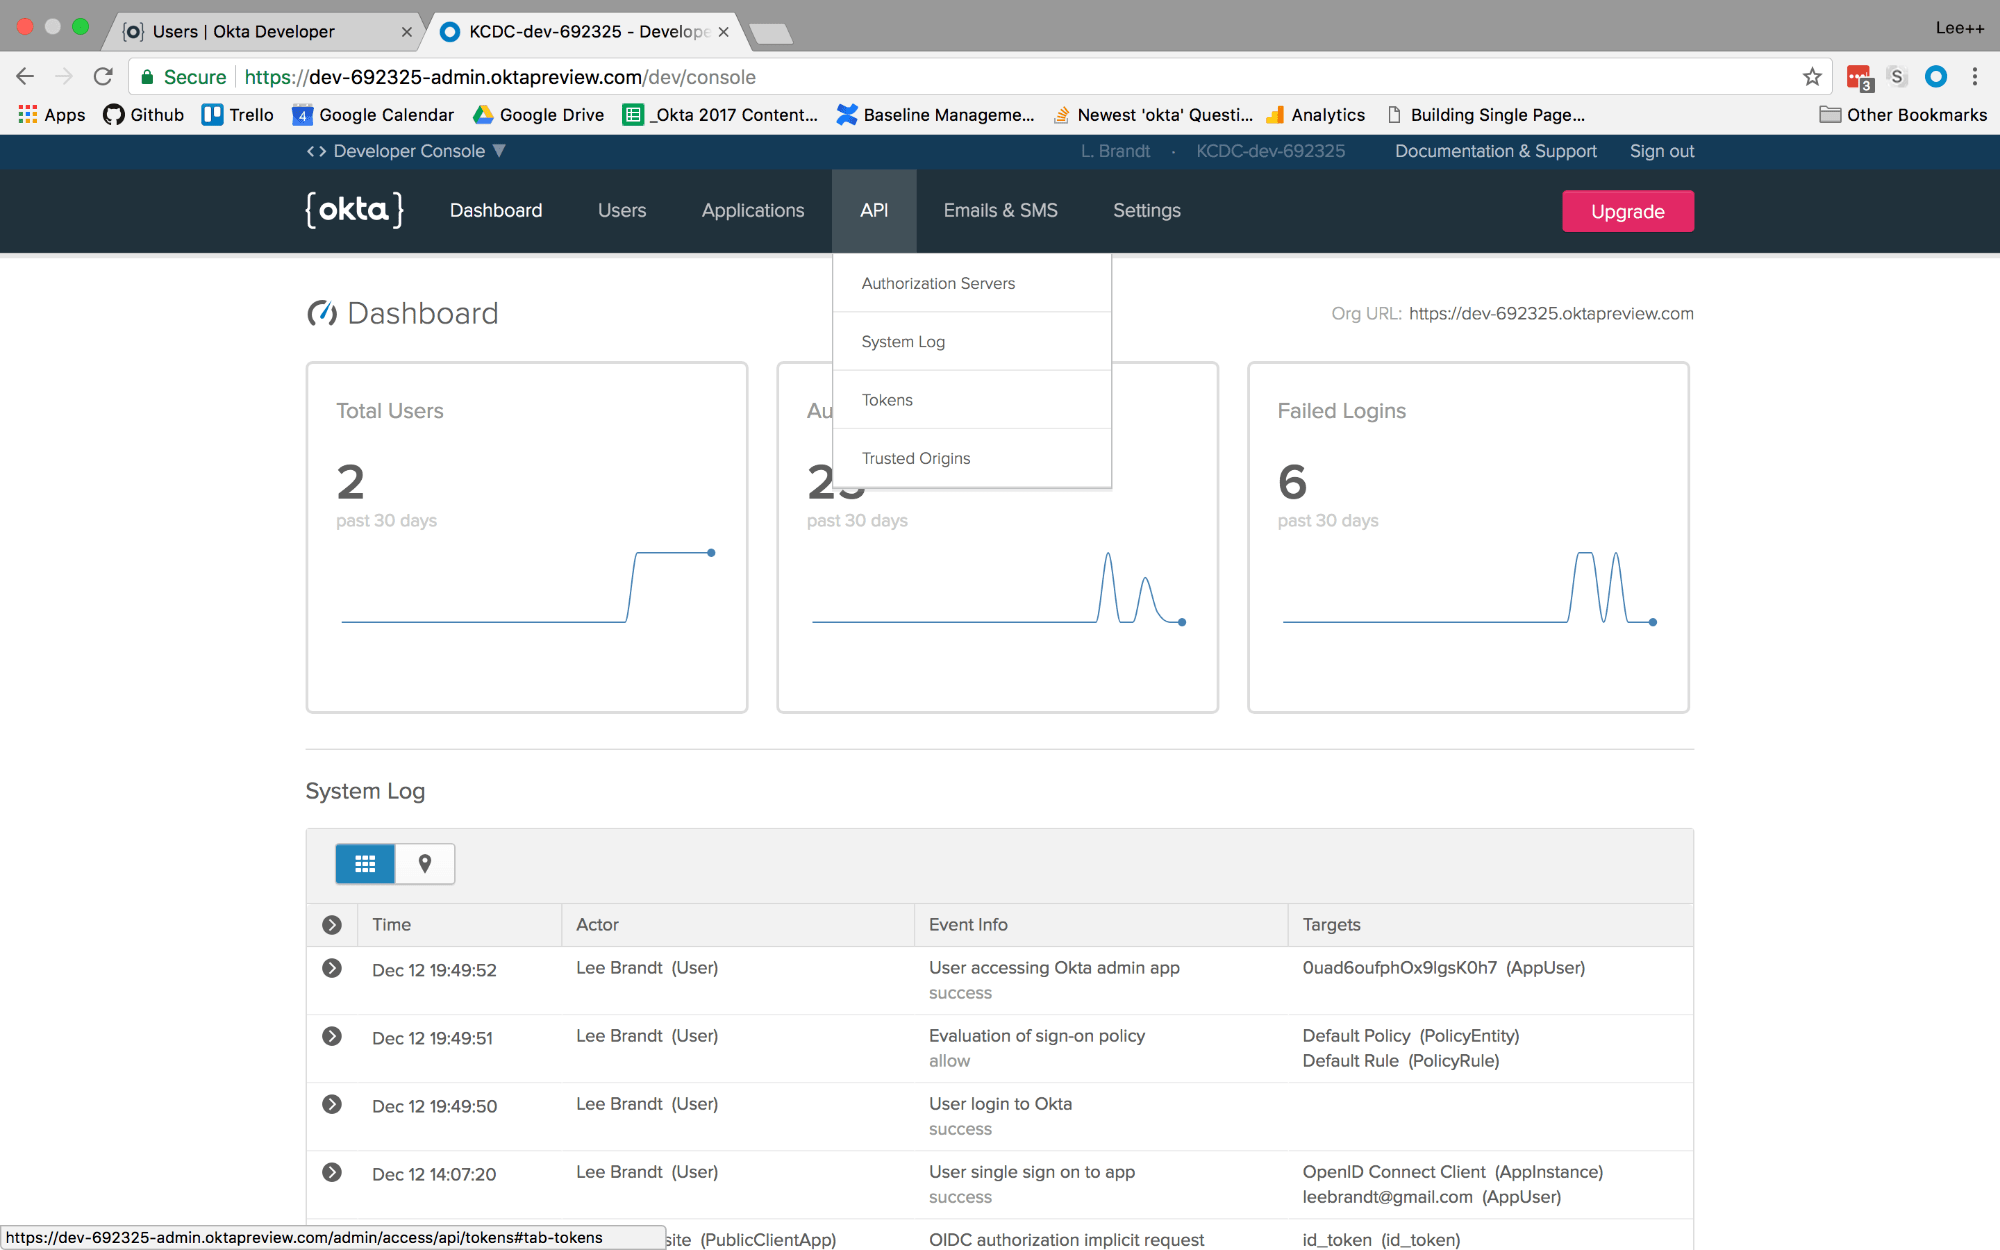
For your Node application to make calls to your Okta application, it will need an API token. To create one, go into your Okta developer dashboard, hover over the API menu option and click on Tokens.
为了使您的Node应用程序能够调用Okta应用程序,它需要一个API令牌。 要创建一个,请进入Okta开发人员仪表板,将鼠标悬停在API菜单选项上,然后单击“令牌”。
From there click Create Token. Give the token a name like "Membership" and click Create Token.
在此处单击创建令牌。 给令牌命名,例如“ Membership”,然后单击“创建令牌”。

Copy the token to a safe location for use later.
将令牌复制到安全位置,以备后用。
Create a file called oktaClient.js in a new folder called lib in the Node application. The file will configure a Client object from Okta's Node SDK using the API token you just created like this:
在Node应用程序中名为lib的新文件夹中创建一个名为oktaClient.js的文件。 该文件将使用您刚刚创建的API令牌从Okta的Node SDK配置Client对象,如下所示:
const okta = require('@okta/okta-sdk-nodejs');

const client = new okta.Client({
  orgUrl: '{yourOktaOrgUrl}',
  token: '{yourApiToken}'
});

module.exports = client;
In the app.js file at the root of the Node app, update the file to have all calls route to /api/<something>. You'll see a section below the block of app.use statements. Change the route set up so that it looks like this:
在Node应用程序根目录下的app.js文件中,更新文件以使所有调用都路由到/api/<something> 。 您将在app.use语句块下方看到一个部分。 更改路由设置,使其如下所示:
app.use('/api', index);
app.use('/api/users', users);
If your Node app is still running, you will need to stop the app (with CTRL+C) and rerun it (with npm start) for the updates to take effect.
如果您的Node应用程序仍在运行,则需要停止该应用程序(使用CTRL + C)并重新运行它(使用npm start ),以使更新生效。
Even though the site still needs some serious style love, you will now be able to register users, log in with the newly created user and get the logged in user's profile for display on the profile page!
即使该站点仍然需要认真的样式风格,您现在也可以注册用户,使用新创建的用户登录并获得登录用户的个人资料,以显示在个人资料页面上!

学到更多 ( Learn More )
If you want to learn more about the technologies used in this articles, you can check out the documentation for:
如果您想了解有关本文中使用的技术的更多信息,可以查看以下文档:
Also, check out other articles using Okta for authentication:
另外,请查看其他使用Okta进行身份验证的文章:
- Randall Degges’s article on Okta in a Simple Node Website Randall Degges在简单节点网站上关于Okta的文章
- My article using the Okta Sign-In Widget in React 我的文章在React中使用Okta登录小部件
- Matt Raible’s Article on Progressive Web Apps Matt Raible的渐进式Web应用程序文章
As always, if you have questions, comments, or concerns about the article you can post a comment below, email me at lee.brandt@okta.com or post your questions to the developer forums. For more articles and tutorials, follow us on Twitter @OktaDev.
与往常一样,如果您对文章有任何疑问,评论或疑虑,可以在下面发表评论,给我发电子邮件lee.brandt@okta.com或将您的问题发布到开发者论坛 。 有关更多文章和教程,请在Twitter @OktaDev上关注我们。
翻译自: https://scotch.io/tutorials/add-user-registration-to-your-site-with-node-react-and-okta
node6 创建react


 356
356

 被折叠的 条评论
为什么被折叠?
被折叠的 条评论
为什么被折叠?
 到【灌水乐园】发言


