


 本文介绍了如何使用Node.js、Express.js、OpenID Connect协议和Okta来构建一个支持用户注册、登录、密码重置和电子邮件验证的网站。通过使用oidc-middleware、express-session和Pug模板库,简化了Web身份验证的实现。文章详细介绍了设置授权服务器、配置会话管理、创建Express.js视图和路由的过程,以及身份验证的工作原理。
node.js 验证码
Building websites with user authentication and management (login, registration, password reset, etc.), can be a huge pain. As a developer there are a million little things you need to worry about:
使用用户身份验证和管理(登录,注册,密码重置等)来构建网站可能会非常麻烦。 作为开发人员,您需要担心一百万件事:
- Storing the users in your database 将用户存储在数据库中
- Making sure you have the right user attributes defined 确保定义了正确的用户属性
- Forcing users to be logged in to view a page 强制用户登录以查看页面
- Building registration and login forms 建筑物注册和登录表格
- Creating password reset workflows that email users a link 创建用于向用户发送电子邮件链接的密码重置工作流程
- Verifying new users when they sign up via email 在新用户通过电子邮件注册时验证他们
- Etc… 等等…
The list goes on and on.
这个清单不胜枚举。
Today I'm not only going to show you how to quickly build a Node.js website that supports all those things above, I'm going to teach you exactly what's going on behind the scenes so you fully understand how web authentication works.
今天,我不仅要向您展示如何快速构建一个支持以上所有功能的Node.js网站,而且还要教给您幕后的确切情况,以便您充分了解 Web身份验证的工作原理。
If you've ever been curious about how web authentication and user security works, you will enjoy this. =)
如果您一直对Web身份验证和用户安全性的工作方式感到好奇,那么您会喜欢的。 =)
我们正在建设什么 ( What We're Building )
As I mentioned above, today we'll be building a simple Node.js site that supports a few key user flows:
如上所述,今天我们将构建一个简单的Node.js网站,该网站支持一些关键的用户流:
- User registration 用户注册
- User login 用户登录
- Password reset 重设密码
- Email verification 电子邮件验证
The end product of this article looks like this:
本文的最终产品如下所示:

If you want to see a preview of this project live, you can do so here: https://okta-express-login-portal.herokuapp.com/.
如果您想实时查看该项目的预览,可以在这里进行: https : //okta-express-login-portal.herokuapp.com/ 。
The site will be built using a few different tools (you don't need to know them already):
该网站将使用一些不同的工具来构建(您不需要已经知道它们):
- Express.js, the most popular web framework in the Node.js ecosystem. Express.js ,Node.js生态系统中最流行的Web框架。
- express-session, a popular session management library. This is what will allow us to create and store cookies that remember who a user is. express-session ,一个流行的会话管理库。 这就是使我们能够创建和存储记住用户身份的cookie的原因。
- Pug, a popular templating language that makes writing HTML a bit simpler. Pug是一种流行的模板语言,使编写HTML变得更加简单。
- oidc-middleware, a popular developer library that makes handling authentication using the OpenID Connect protocol simple oidc-middleware ,一个流行的开发人员库,使使用OpenID Connect协议处理身份验证变得简单
安装工具 ( Install the Tools )
The first thing you need to do is install all the open source tools we'll be using to build this Node.js site.
您需要做的第一件事是安装将用于构建此Node.js站点的所有开源工具。
PS: If you don't already have Node.js setup and working on your computer, you can go checkout this link which shows you the best way to get it working regardless of what operating system you're using.
PS :如果您尚未安装Node.js并在计算机上工作,则可以查看此链接 , 该链接为您显示了使其最佳运行的最佳方法,而无论使用什么操作系统。
Next, install the express-generator tool, which is the officially supported bootstrapping tool for quickly getting started with Express.js.
接下来,安装express-generator工具,这是官方支持的引导工具,用于快速开始使用Express.js。
npm install express-generator@4.16.0Once that's done, you'll want to scaffold your new Express.js site using express-generator.
完成后,您将需要使用express-generator搭建新的Express.js网站。
express --view pug login-portalcd login-portal
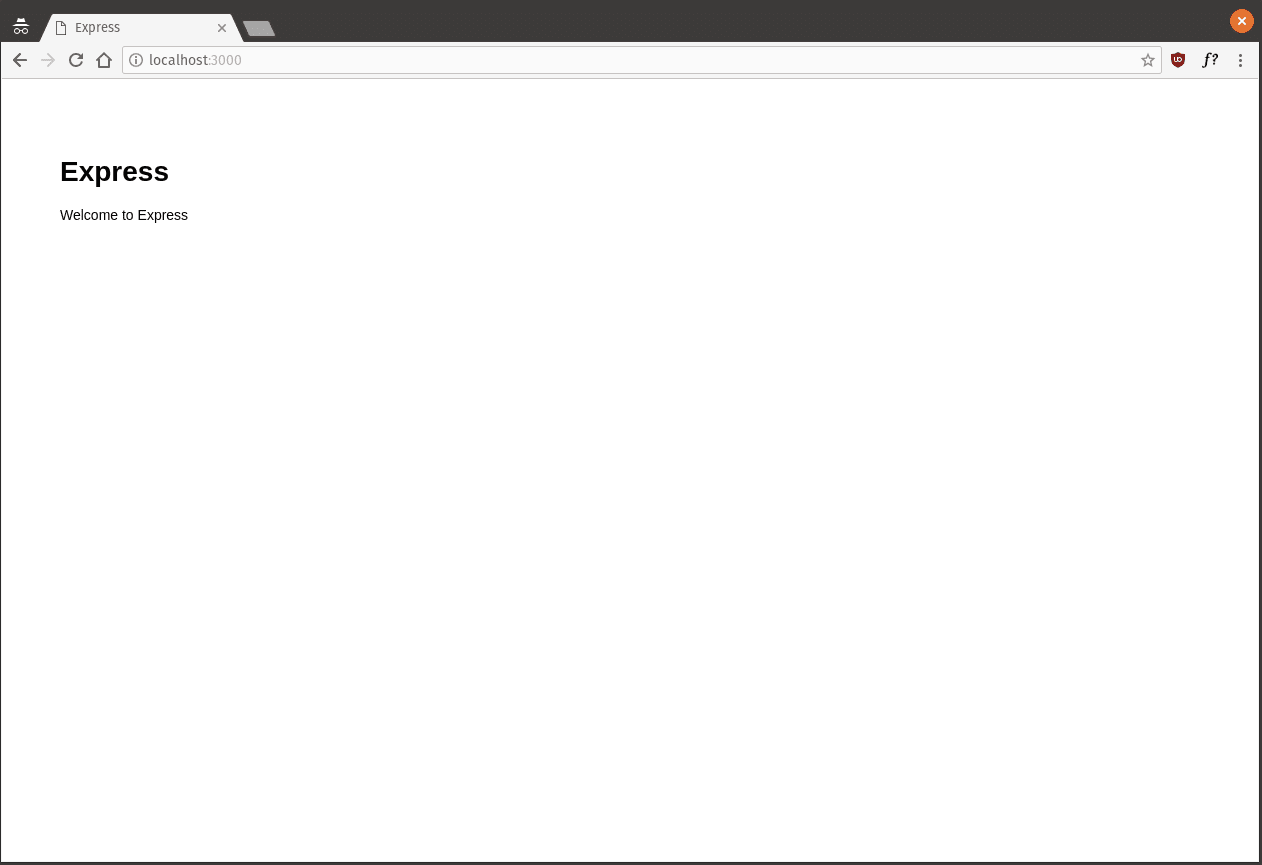
npm installYou now have a simple Express.js website that you can run and test out. Start up your new web server by running npm start then go visit http://localhost:3000 in your browser to make sure everything is working OK. If all is well, you should see a page like the one below.
您现在有了一个简单的Express.js网站,可以运行和测试该网站。 通过运行npm start新的Web服务器,然后在浏览器中访问http://localhost:3000 ,以确保一切正常。 如果一切顺利,您应该会看到类似下面的页面。
Next, install some additional packages. We'll use these packages through the rest of the tutorial. Getting them installed and out of the way upfront will make it simpler later on.
接下来,安装一些其他软件包。 在本教程的其余部分中,我们将使用这些软件包。 先安装它们,然后再进行安装,以后再简化。
To install all the extra dependencies, run the following commands in your terminal.
要安装所有其他依赖项,请在终端中运行以下命令。
npm install express-session@1.15.6
npm install @okta/oidc-middleware@0.1.3
npm install @okta/okta-sdk-nodejs@1.1.0
Now, on with the show!
现在,继续表演!
设置您的授权服务器 ( Setup Your Authorization Server )
Historically, implementing web authentication has been a bit of a mess. Everyone used to implement authentication patterns in different, arbitrary ways. Over the last few years, however, the game has changed quite a bit with the introduction and growing popularity of the OpenID Connect protocol. If you want to read up on OpenID Connect, I recommend [this series]](https://developer.okta.com/blog/2017/07/25/oidc-primer-part-1).
从历史上看,实施Web身份验证有点混乱。 每个人过去都以不同的,任意的方式来实现认证模式。 但是,在过去的几年中,随着OpenID Connect协议的引入和日益普及,游戏发生了很大变化。 如果您想阅读OpenID Connect,我建议[本系列]]( https://developer.okta.com/blog/2017/07/25/oidc-primer-part-1 )。
One of the core tenants of OpenID Connect is the authorization server. An authorization server is a one-stop shop that handles all of the user login flows for your applications. The idea is that your application redirects to the authorization server to process user logins and the authorization server then redirects the user back to your website once the user has been authenticated.
授权服务器是OpenID Connect的核心租户之一。 授权服务器是一站式服务,处理应用程序的所有用户登录流程。 这个想法是,您的应用程序重定向到授权服务器以处理用户登录,一旦用户通过身份验证,授权服务器便将用户重定向回您的网站。
Authorization servers make handling user management a significantly simpler, less risky task — so that's what we'll be doing today: using an authorization server provider (Okta) to make the process simple and secure.
授权服务器使处理用户管理变得更加简单,风险更低—这就是我们今天要做的事情:使用授权服务器提供程序( Okta )使流程简单和安全。
Okta is free to use and allows you to create and manage users, authorization servers, and lots of other tasks that make handling web authentication simple.
Okta免费使用,可让您创建和管理用户,授权服务器以及许多其他任务,这些任务使处理Web身份验证变得简单。
To get started with the authorization server setup, you first need to go create a free Okta developer account: https://developer.okta.com/signup/. Once you've created your account and logged in, follow the steps below configure Okta and then you'll be ready to write some code!
要开始安装授权服务器,您首先需要创建一个免费的Okta开发人员帐户: https : //developer.okta.com/signup/ 。 创建帐户并登录后,请按照以下步骤配置Okta,然后就可以编写一些代码了!
步骤1:储存您的机构网址 (Step 1: Store Your Org URL)
The first thing you need to do is copy down the Org URL from the top-right portion of your Okta dashboard page. This URL will be used to route to your authorization server, communicate with it, and much more. You'll need this value later, so don't forget it.
您需要做的第一件事是从Okta仪表板页面的右上方复制组织URL 。 此URL将用于路由到您的授权服务器,与其进行通信等等。 稍后您将需要此值,所以不要忘记它。

步骤2:建立OpenID Connect应用程式 (Step 2: Create an OpenID Connect Application)
Okta allows you to store and manage users for multiple applications you might be creating. This means that before we can go any further, you need to create a new OpenID Connect application for this project.
Okta允许您存储和管理可能正在创建的多个应用程序的用户。 这意味着,在我们进行进一步操作之前,您需要为此项目创建一个新的OpenID Connect应用程序。
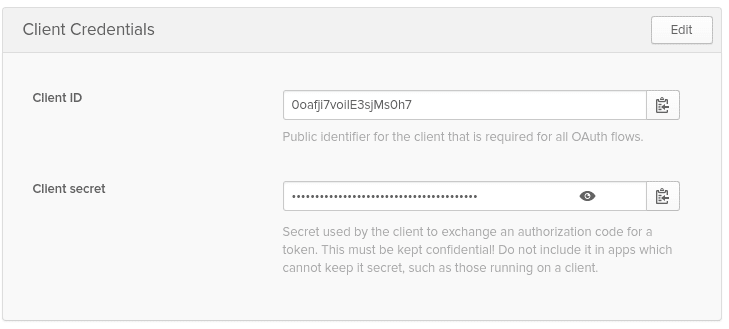
Applications in OpenID Connect have a username and password (referred to as a client ID and client secret) that allow your authorization server to recognize which application is talking to it at any given time.
OpenID Connect中的应用程序具有用户名和密码(称为客户端ID和客户端密钥),使您的授权服务器可以在任何给定时间识别正在与之通信的应用程序。
To create a new application browse to the Applications tab and click Add Application.
要创建新的应用程序,请浏览至“ 应用程序”选项卡,然后单击“ 添加应用程序” 。

Next, click the Web platform option (since this project is a web app).
接下来,单击“ Web平台”选项(因为该项目是一个Web应用程序)。

On the settings page, enter the following values:
在设置页面上,输入以下值:
- Name: login-portal 名称 :登录门户
- Base URIs:
http://localhost:3000基本URI :http://localhost:3000 - Login redirect URIs:
http://localhost:3000/users/callback登录重定向URI :http://localhost:3000/users/callback
You can leave all the other values unchanged.
您可以保留所有其他值不变。

Now that your application has been created, copy down the Client ID and Client secret values on the following page, you'll need them later when we start writing code.
现在,您的应用程序已创建,请在下一页上复制“ 客户端ID”和“ 客户端密码”值,稍后在开始编写代码时将需要它们。
步骤3:建立验证凭证 (Step 3: Create an Authentication Token)
In order to access the Okta APIs and be able to manage your user accounts with a great deal of granularity, you'll also need to create an Okta authentication token. This is an API key that will be used later on communicate with the Okta APIs and allows you to do things like:
为了访问Okta API并能够以大量粒度管理用户帐户,您还需要创建Okta身份验证令牌。 这是一个API密钥,将在以后与Okta API进行通信时使用,并允许您执行以下操作:
- Create, update, and delete users 创建,更新和删除用户
- Create, update, and delete groups 创建,更新和删除组
- Manage application settings 管理应用程序设置
- Etc. 等等。
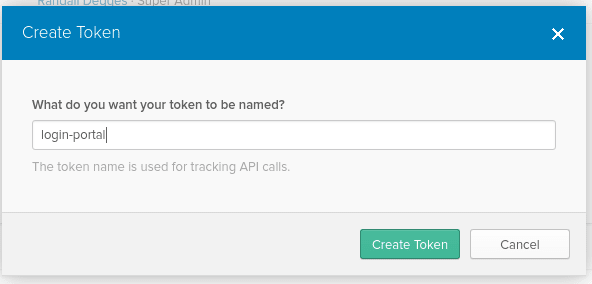
To create an authentication token click the API tab at the top of the page followed by the Create Token button. Give your token a name, preferably the same name as your application, then click Create Token. Once your token has been created, copy down the token value as you will need it later.
要创建身份验证令牌,请点击页面顶部的API标签,然后点击创建令牌按钮。 为您的令牌命名,最好与您的应用程序名称相同,然后点击创建令牌 。 创建令牌后,请复制令牌值,以备日后使用。
步骤4:启用用户注册 (Step 4: Enable User Registration)
The last piece of setup you need to complete is to enable user registration functionality for the authorization server. Normally, authorization servers only support login, logout, and stuff like that. But Okta's authorization server also supports self-service registration, so that users can create accounts, log into them, reset passwords, and basically do everything without you writing any code for it.
您需要完成的最后一步设置是为授权服务器启用用户注册功能。 通常,授权服务器仅支持登录,注销和类似的东西。 但是Okta的授权服务器还支持自助服务注册,以便用户可以创建帐户,登录帐户,重置密码,并且基本上不需要您编写任何代码即可完成所有操作。
In your Okta dashboard, you'll notice a small button labeled < > Developer Console at the top-left of your page. Hover over that button and select the Classic UI menu option that appears.
在Okta仪表板中,您会注意到页面左上角有一个标记为<>开发者控制台的小按钮。 将鼠标悬停在该按钮上,然后选择显示的“ 经典UI”菜单选项。

Next, hover over the Directory tab at the top of the page then select the Self-Service Registration menu item. On this page click the Enable Registration button.
接下来,将鼠标悬停在页面顶部的“ 目录”选项卡上,然后选择“ 自助服务注册”菜单项。 在此页面上,单击“ 启用注册”按钮。
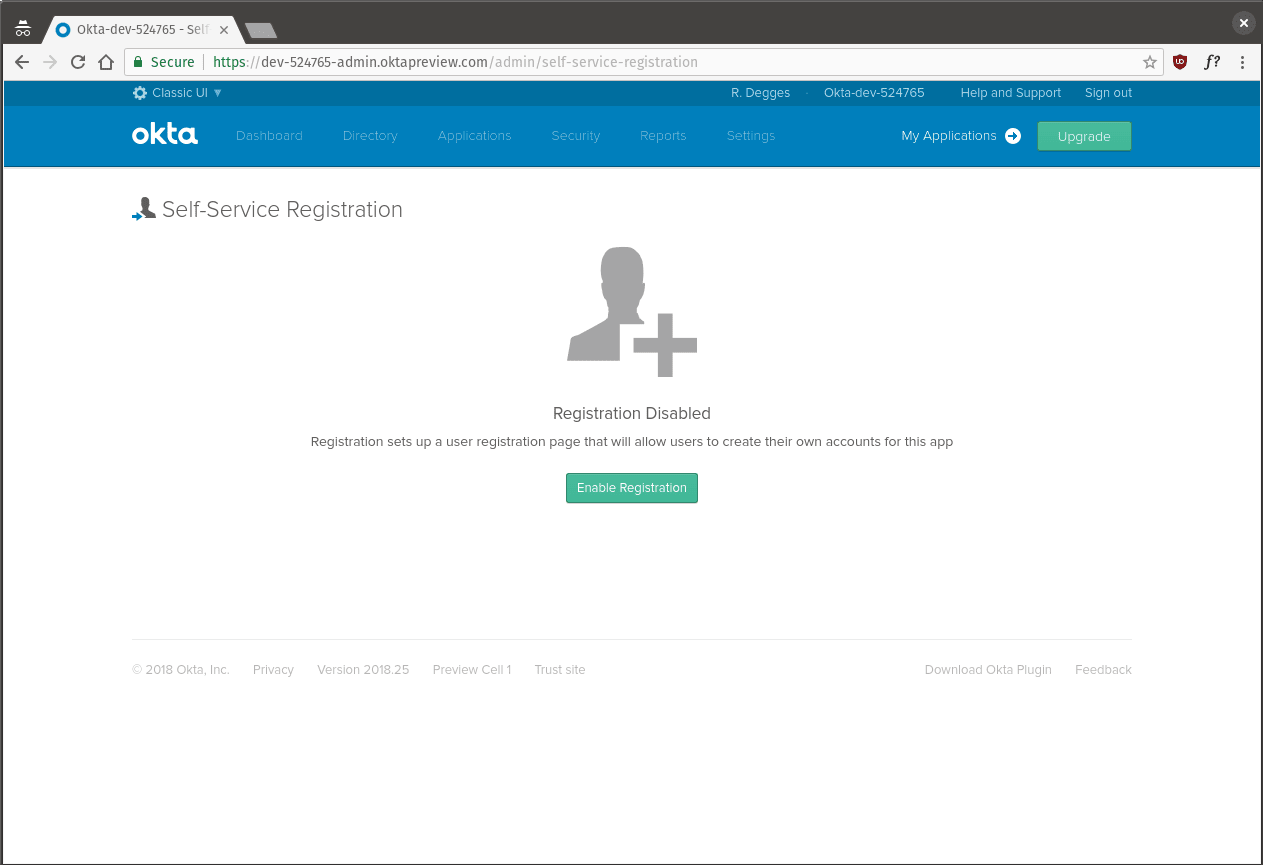
On the configuration page, leave all the settings as their default values, except for the Default redirect option. For this option, click the Custom URL radiobox and enter http://localhost:3000/dashboard as the value.
在“配置”页面上,将所有设置保留为默认值,“ 默认重定向”选项除外。 对于此选项,单击“ 自定义URL”单选框,然后输入http://localhost:3000/dashboard作为值。
This setting essentially tells the authorization server where to redirect users after they've successfully created a new account on your site.
此设置实际上告诉授权服务器在用户在您的站点上成功创建新帐户后将用户重定向到何处。
Once you've clicked Save, the last thing you need to is switch back to the developer console.
单击保存后 ,您需要做的最后一件事是切换回开发人员控制台。

Hover over the Classic UI button at the top right of the page and select the < > Developer Console menu item from the dropdown.
将鼠标悬停在页面右上方的Classic UI按钮上,然后从下拉菜单中选择<>开发者控制台菜单项。
配置会话管理 ( Configure Session Management )
Now that all the setup work is done, let's write some code!
现在所有的设置工作都完成了,让我们编写一些代码!
The first thing we'll add to this basic Express.js site is support for sessions using the express-session library.
我们要添加到基本Express.js网站的第一件事是使用express-session库支持会话。
Session management is the core of any authentication system. It's what allows a user to stay logged into your site and not have to re-enter their credentials before viewing each page. The most secure way to handle user sessions is via server-side cookies, which is why we'll be using the express-session library: it allows us to create and manage server-side cookies.
会话管理是任何身份验证系统的核心。 它使用户可以保持登录到您的站点,而不必在查看每个页面之前重新输入其凭据。 处理用户会话的最安全方法是通过服务器端Cookie,这就是为什么我们将使用express-session库:它使我们可以创建和管理服务器端Cookie。
To start, open up the ./app.js file in your favorite editor (I prefer neovim), and import the session library at the top of the file alongside the other import statements. The app.js file is the heart of your Express.js site. It initializes the Express.js web server, contains the site settings, etc.
首先,在您喜欢的编辑器(我更喜欢neovim )中打开./app.js文件,并将会话库与其他import语句一起导入文件顶部。 app.js文件是Express.js网站的核心。 它会初始化Express.js Web服务器,包含站点设置等。
var createError = require('http-errors');
var express = require('express');
var path = require('path');
var cookieParser = require('cookie-parser');
var logger = require('morgan');
var session = require("express-session");
Next, you need to remove the cookie-parser library that express-generator included by default, since we won't be using it. In the ./app.js file delete the following two lines of code.
接下来,您将需要删除默认情况下express-generator包含的cookie-parser库,因为我们不会使用它。 在./app.js文件中,删除以下两行代码。
var cookieParser = require('cookie-parser');

// and…

app.use(cookieParser());
Now all you need to do is plug the express-session library into the ./app.js file along with the other middlewares.
现在,您需要做的就是将快速会话库与其他中间件一起插入./app.js文件。
app.use(logger('dev'));
app.use(express.json());
app.use(express.urlencoded({ extended: false }));
app.use(cookieParser());
app.use(express.static(path.join(__dirname, 'public')));
app.use(session({
  secret: 'LONG_RANDOM_STRING_HERE',
  resave: true,
  saveUninitialized: false
}));
Make sure to replace LONG_RANDOM_STRING_HERE with an actual random string you type. This string is what will keep your user's cookies safe from compromise. I personally like to bash my hands around on the keyboard for a second to generate something random.
确保将LONG_RANDOM_STRING_HERE替换为您键入的实际随机字符串。 该字符串将使用户的Cookie免受威胁。 我个人喜欢在键盘上ash手一秒钟以产生随机的声音。

This session library handles a lot of work behind the scenes:
该会话库处理了许多幕后工作:
- It creates secure, cryptographically signed cookies so you can store data in a user's browser. Cryptographic signing is a technique that allows your server to tell whether or not a user has tried to "modify" their cookies to make it look as if they're someone they're not. 它创建安全的,经过密码签名的cookie,因此您可以将数据存储在用户的浏览器中。 加密签名是一种技术,它允许您的服务器告知用户是否试图“修改”其cookie,以使其看起来像是不是他们的人。
- It gives you a simple API for creating and removing cookies 它为您提供了一个用于创建和删除Cookie的简单API
- It allows you to tweak and configure cookie settings based on what you need to do 它允许您根据需要进行调整和配置Cookie设置
As you'll see in a moment, this library is used by the oidc-middleware library behind the scenes to make user authentication magical.
稍后您将看到,oidc-中间件库在后台使用此库,使用户身份验证变得神奇。
创建Express.js视图 ( Create Express.js Views )
The next thing we're going to do is create our Express.js views. Views in Express.js are nothing more than HTML templates (web pages) that we want to display to a user. But unlike normal HTML, we'll be using the Pug templating language to create our views.
我们要做的下一件事是创建Express.js视图。 Express.js中的视图不过是我们要显示给用户HTML模板(网页)。 但是与普通HTML不同,我们将使用Pug模板语言创建视图。
Pug is one of the most popular templating languages in the Node.js ecosystem because it allows you more concisely write HTML, use variables, and things like that.
Pug是Node.js生态系统中最流行的模板语言之一,因为它使您可以更简洁地编写HTML,使用变量以及类似的东西。
创建布局视图 (Create the Layout View)
The first (and most important!) view we're going to create is the ./views/layout.pug view. This is the "base" view that all our other views will extend.
我们要创建的第一个(也是最重要的!)视图是./views/layout.pug视图。 这是我们所有其他视图将扩展的“基本”视图。
In this view we'll define the basic layout of all the pages, the navbar, and stuff like that. Open up the ./views/layout.pug and replace whatever is in the file with the following.
在此视图中,我们将定义所有页面,导航栏和类似内容的基本布局。 打开./views/layout.pug并将文件中的内容替换为以下内容。
block variables

doctype html
html(lang="en")
  head
    meta(charset="utf-8")
    meta(name="viewport" content="width=device-width, initial-scale=1, shrink-to-fit=no")
    link(rel="stylesheet" href="https://maxcdn.bootstrapcdn.com/bootstrap/4.0.0/css/bootstrap.min.css" integrity="sha384-Gn5384xqQ1aoWXA+058RXPxPg6fy4IWvTNh0E263XmFcJlSAwiGgFAW/dAiS6JXm" crossorigin="anonymous")
    link(rel="stylesheet", href="/stylesheets/style.css")
    title okta-express-login-portal: #{title}
  body
    div.top-bar.d-flex.flex-column.flex-md-row.align-items-center.p-3.px-md-4.mb-3.bg-white.border-bottom.box-shadow
      h5.my-0.mr-md-auto.font-weight-normal
        a(href="/", title="Expresso") okta-express-login-portal
      nav.my-2.my-md-0.mr-md-3
        a.p-2.text-dark(href="/", title="Home") Home

        if user == undefined
          a.p-2.text-dark(href="/users/login") Log In / Register
        else
          a.p-2.text-dark(href="/dashboard") Dashboard
          a.p-2.text-dark(href="/users/logout") Logout
    .container
      block content

    footer.
      Built with #[a(href="https://expressjs.com/") Express.js], login powered by #[a(href="https://developer.okta.com/") Okta].
As you can probably figure out if you're at all familiar with HTML, pug is very similar to HTML but uses whitespace instead of closing tags (like the Python programming language).
您可能会发现,如果您完全熟悉HTML,pug与HTML非常相似,但是使用空格而不是结束标记(例如Python编程语言)。
This layout view doesn't do anything except render a simple page with a navbar at the top, a footer at the bottom, and two special constructs, block variables and block content.
该布局视图除了渲染一个简单的页面(顶部导航栏,底部的页脚和两个特殊的构造,即block variables和block content之外,什么也不做。
The block variables line at the top of the file means that any of the templates that inherit from this one will be able to inject some variables into the page. You might have noticed that the title tag contains a variable: #{title} — this is one of the variables that a child template can overwrite later on.
文件顶部的block variables行表示从此模板继承的任何模板都将能够向页面注入一些变量。 您可能已经注意到title标记包含一个变量: #{title} -这是子模板以后可以覆盖的变量之一。
Did you notice the block content line right above the footer? This block allows a child template to inject HTML into our layout template at just the right spot — this way our child templates don't need to re-define a navbar, page header, etc.
您是否注意到页脚上方的block content行? 此块允许子模板在正确的位置将HTML注入我们的布局模板中-这样,我们的子模板就无需重新定义导航栏,页面标题等。
By using these two blocks: variables and content, our child templates can build full web pages with nothing more than a title and some body content. Pretty nifty.
通过使用这两个块: variables和content ,我们的子模板可以构建完整的网页,仅包含标题和一些正文内容。 很漂亮
创建主页视图 (Create the Homepage View)
The next view we'll create is the ./views/index.pug view. Open that file and insert the following code.
我们将创建的下一个视图是./views/index.pug视图。 打开该文件并插入以下代码。
extends layout

block variables
  - var title = "Home"

block content
  h2.text-center Express App

  .row
    .offset-sm-2.col-sm-8
      .jumbotron.text-center.
        Welcome to your new Express app! Please visit the
        #[a(href="https://github.com/rdegges/okta-express-login-portal", title="okkta-express-login-portal on GitHub") GitHub page] to learn more.
Notice the extends layout line at the top. This is what tells pug that this template is a child of the layout template we created earlier.
注意顶部的extends layout线。 这就是告诉pug这个模板是我们之前创建的layout模板的子级。
In the block variables section we then define our title variable which will be used in the layout template to output the page title, and in the block content section we insert the HTML for the rest of the page.
然后在block variables部分中定义title变量,该变量将在布局模板中用于输出页面标题,在block content部分中,我们插入页面其余部分HTML。
As you can hopefully see by now, template inheritance in Pug is pretty straightforward.
如您现在所希望看到的那样,Pug中的模板继承非常简单。
创建仪表盘视图 (Create the Dashboard View)
The next view to create is the dashboard view. This is the page users will see once they've logged into the site. Open up the ./views/dashboard.pug file and insert the following code.
下一个要创建的视图是仪表板视图。 用户登录该网站后将看到的页面。 打开./views/dashboard.pug文件,然后插入以下代码。
extends layout

block variables
  - var title = "Dashboard"

block content
  h2.text-center Dashboard

  .row
    .offset-sm-2.col-sm-8
      .jumbotron.text-center.
        Welcome to your dashboard page, #{user.profile.firstName}.
You'll notice that in this template there's a new variable being used: #{user}. This will eventually refer to the currently logged in user as you'll see later on.
您会注意到,在此模板中使用了一个新变量: #{user} 。 最终,这将指向当前登录的用户,您将在稍后看到。
创建错误视图 (Create the Error Views)
The last two views you need to create are for handling errors.
您需要创建的最后两个视图用于处理错误。
Open up the ./views/error.pug view and insert the following code.
打开./views/error.pug视图并插入以下代码。
extends layout

block content
  h1= message
  h2= error.status
  pre #{error.stack}
This view will be rendered when the user hits a URL that doesn't exist (404), or when the web server has a problem (5XX).
当用户点击不存在的URL(404)或Web服务器出现问题(5XX)时,将呈现此视图。
You'll also need to create a file named ./views/unauthenticated.pug and insert the following code. This view will be displayed to a user if they visit a page that requires them to be logged in.
您还需要创建一个名为./views/unauthenticated.pug的文件,并插入以下代码。 如果用户访问要求他们登录的页面,则会向用户显示此视图。
extends layout

block variables
  - var title = "Unauthenticated"

block content
  h2.text-center You Must Log In to View This Page
  p.text-center.
    You must be signed in to view this page. Please #[a(href="/users/login", title="Login") login or register] to view this page.
创建公共路线 ( Create Public Routes )
Routes in Express.js are the place where you define application logic. They dictate what code runs when a particular URL is hit by a user, and what response is sent back.
Express.js中的路由是您定义应用程序逻辑的地方。 它们规定了当用户点击特定的URL时将运行什么代码,以及将什么响应发送回去。
To get started, let's remove the default routes that express-generator created for you. Run the following command to remove them.
首先,让我们删除express-generator为您创建的默认路由。 运行以下命令将其删除。
rm routes/*Next, create a file named ./routes/public.js and insert the following code.
接下来,创建一个名为./routes/public.js的文件,并插入以下代码。
const express = require("express");


const router = express.Router();

// Home page
router.get("/", (req, res) => {
  res.render("index");
});


module.exports = router;
In this module we're creating a new Express.js Router and telling it that if a user makes a GET request to the / URL, then we're going to run a function that renders the index.pug view file we created earlier and returns it to the user.
在此模块中,我们将创建一个新的Express.js路由器,并告诉它,如果用户向/ URL发出GET请求,那么我们将运行一个函数,该函数呈现我们先前创建的index.pug视图文件和将其返回给用户。
Now this won't take effect just yet (for reasons you'll learn about later on), but once this router is "enabled", every time a user makes a request for the homepage of the site, eg: http://localhost:3000, this code will run and the index.pug view will be shown.
现在这还不会生效(出于稍后将要学习的原因),但是一旦该路由器“启用”,则每次用户请求网站首页时,例如: http://localhost:3000 ,此代码将运行并显示index.pug视图。
Pretty neat, right?
很整洁吧?
Next, create a file named ./routes/dashboard.js and insert the following code.
接下来,创建一个名为./routes/dashboard.js的文件,并插入以下代码。
const express = require("express");


const router = express.Router();

// Display the dashboard page
router.get("/", (req, res) => {
  res.render("dashboard");
});


module.exports = router;
This router acts similarly to the homepage router above, except it is rendering our dashboard page. While it doesn't make sense just yet, if a user eventually visits the /dashboard URL, this function will run which will render the dashboard.pug defined earlier.
该路由器的作用类似于上面的主页路由器,只是它正在渲染我们的仪表板页面。 尽管这还没有任何意义,但是如果用户最终访问了/dashboard URL,则此函数将运行,它将呈现先前定义的dashboard.pug 。
If you were to go into this file and define another route, for example:
如果要进入此文件并定义另一条路线,例如:
router.get("/test", (req, res) => {
  res.render("test");
});
… You would find that a user would need to visit /dashboard/test to trigger the function to run. Again: don't worry about this not adding up just yet, we'll get to that down below.
…您会发现用户需要访问/dashboard/test才能触发该函数运行。 再说一遍:不要担心这还不算总和,我们将在下面进行讨论。
启用路线 ( Enable the Routes )
Now that you've created some routes for public pages, let's enable them with Express.js so we can actually see them in action!
现在,您已经为公共页面创建了一些路由,让我们使用Express.js 启用它们,这样我们就可以实际看到它们了!
To do this, open up the ./app.js file and delete the following two lines.
为此,请打开./app.js文件并删除以下两行。
var indexRouter = require('./routes/index');
var usersRouter = require('./routes/users');
Replace those two lines with the two lines of code below.
用下面的两行代码替换这两行。
const dashboardRouter = require("./routes/dashboard");
const publicRouter = require("./routes/public");
Now we're importing the correct route files we just defined above.
现在,我们将导入上面刚刚定义的正确的路由文件。
Next, scroll down until you see the following two lines of code and delete them.
接下来,向下滚动,直到看到以下两行代码并将其删除。
app.use('/', indexRouter);
app.use('/users', usersRouter);
Those lines of code were loading up the old routes we just deleted. Now you need to change those lines of code to look like this.
这些代码行正在加载我们刚刚删除的旧路由。 现在,您需要更改这些代码行,使其看起来像这样。
app.use('/', publicRouter);
app.use('/dashboard', dashboardRouter);
Is it starting to make sense now? These app.use lines of code tell Express.js that if a user visits the / URL, it should look into the ./routes/public.js file and start matching URLs there to run against. So if a user visits the homepage, eg: /, Express.js will look in the ./routes/public.js file, find the route that serves the / URL, then run the associated function.
现在开始有意义了吗? 这些app.use代码行告诉Express.js,如果用户访问/ URL,则应查看./routes/public.js文件,然后在./routes/public.js文件中开始运行匹配的URL。 因此,如果用户访问主页,例如: / ,Express.js将在./routes/public.js文件中查找,找到服务于/ URL的路由,然后运行相关功能。
The same thing happens with the dashboardRouter below. If a user visits /dashboard, then Express.js will look in the ./routes/dashboard.js file for a function that runs when the / URL is called, because /dashboard + / is the path the user is visiting!
下面的dashboardRouter也会发生相同的情况。 如果用户访问/dashboard ,则Express.js将在./routes/dashboard.js文件中查找在调用/ URL时运行的功能,因为/dashboard + /是用户正在访问的路径!
Routes in Express.js make it easy to compose complex sites with lots of nested URLs without a lot of work.
Express.js中的路由使创建带有许多嵌套URL的复杂站点变得很容易,而无需进行大量工作。
Now that you've enabled your routes, go test them out. Start your web server by running the command below.
现在,您已经启用了路由,请对其进行测试。 通过运行以下命令来启动Web服务器。
npm startThen visit http://localhost:3000 in your browser. You should see the following page rendered.
然后在浏览器中访问http://localhost:3000 。 您应该看到呈现以下页面。
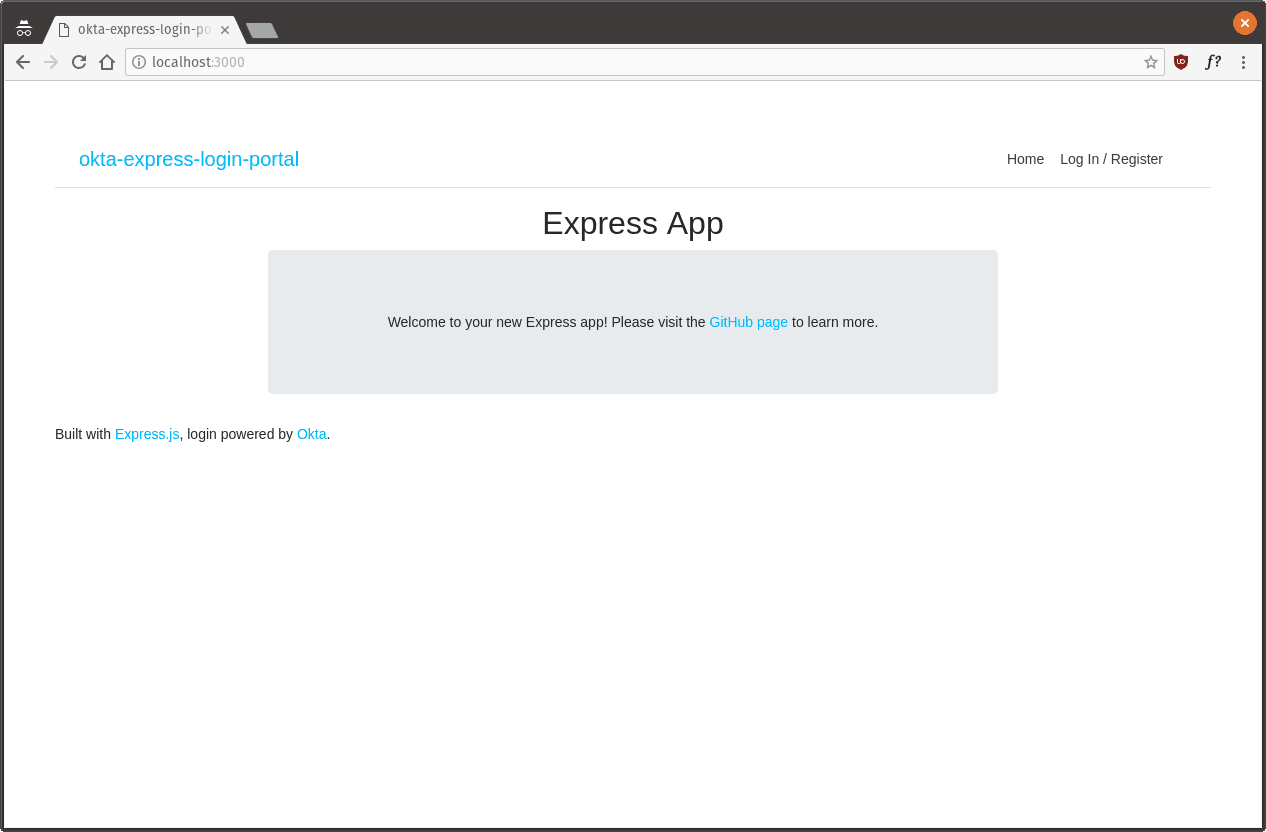
NOTE: This page doesn't look just right yet because we haven't created any CSS yet. We'll do that last.
注意 :此页面看起来不正确,因为我们尚未创建任何CSS。 我们将继续这样做。
If you now go visit the dashboard page you created, http://localhost:3000/dashboard, you'll notice you get an error. That is because that Pug view refers to the #{user} variable we haven't yet defined. We'll get to that soon.
如果现在访问创建的仪表板页面http://localhost:3000/dashboard ,则会注意到出现错误。 这是因为Pug视图引用了我们尚未定义的#{user}变量。 我们将尽快解决。
配置用户身份验证 ( Configure User Authentication )
Now that our Express.js site is starting to become functional, let's dive deeper into user authentication.
现在,我们的Express.js网站开始启用,让我们更深入地研究用户身份验证。
The first thing you need to do is open up ./app.js and import the following two libraries at the top of the file.
您需要做的第一件事是打开./app.js并在文件顶部导入以下两个库。
var createError = require('http-errors');
var express = require('express');
var path = require('path');
var cookieParser = require('cookie-parser');
var logger = require('morgan');
var session = require('express-session');
var okta = require("@okta/okta-sdk-nodejs");
var ExpressOIDC = require("@okta/oidc-middleware").ExpressOIDC;
The two libraries we just added are at the bottom of the list: @okta/okta-sdk-nodejs and @okta/oidc-middleware. These two libraries handle all of the OpenID Connect communication and routing.
我们刚刚添加的两个库位于列表的底部: @okta/okta-sdk-nodejs @okta/oidc-middleware @okta/okta-sdk-nodejs和@okta/oidc-middleware 。 这两个库处理所有OpenID Connect通信和路由。
The next thing we need to do is create an oktaClient object as well as an ExpressOIDC object. These will be used in a moment once we've configured them and given them the right credentials.
接下来需要做的是创建一个oktaClient对象以及一个ExpressOIDC对象。 一旦我们配置了它们并为其提供了正确的凭据,它们将在稍后使用。
To do this, open up your ./app.js file again, find the line that reads var app = express();, and insert the following code immediately beneath it.
为此,请再次打开您的./app.js文件,找到读var app = express(); ,并在其下方插入以下代码。
var oktaClient = new okta.Client({
  orgUrl: '{yourOktaOrgUrl}',
  token: '{yourOktaToken}'
});
const oidc = new ExpressOIDC({
  issuer: "{yourOktaOrgUrl}/oauth2/default",
  client_id: {yourClientId},
  client_secret: {yourClientSecret},
  redirect_uri: 'http://localhost:3000/users/callback',
  scope: "openid profile",
  routes: {
    login: {
      path: "/users/login"
    },
    callback: {
      path: "/users/callback",
      defaultRedirect: "/dashboard"
    }
  }
});
Now, remember those values I told you to write down way back at the beginning of this post? Now you need them! Make sure you substitute out the following variables above for the proper values: {yourOktaOrgUrl}, {yourOktaToken}, {yourClientId}, and {yourClientSecret}.
现在,还记得我在这篇文章开始时曾告诉您的那些价值观吗? 现在您需要它们! 确保用上面的变量替换为正确的值: {yourOktaOrgUrl} , {yourOktaToken} , {yourClientId}和{yourClientSecret} 。
The oidc object created handles 100% of the OpenID Connect protocol support. It handles router the users to the authorization server to handle user registration, login, password reset, etc. It handles logging the users into your application using secure cookies (powered by express-session), and it also handles everything else.
创建的oidc对象处理100%的OpenID Connect协议支持。 它处理将用户路由到授权服务器的路由,以处理用户注册,登录,密码重置等。它处理使用安全cookie(由express-session支持)将用户登录到您的应用程序中,并且还处理其他所有内容。
The oktaClient object is merely used to retrieve user data from the Okta API service.
oktaClient对象仅用于从Okta API服务检索用户数据。
Now that our OpenID Connect support is ready to be used, let's enable it. To do this, open up the ./app.js and find the session middleware from earlier, then add the following line beneath it.
现在我们的OpenID Connect支持已准备就绪,可以启用它。 为此,请打开./app.js并查找较早版本的会话中间件,然后在其下面添加以下行。
app.use(session({
  secret: 'asdf;lkjh3lkjh235l23h5l235kjh',
  resave: true,
  saveUninitialized: false
}));
app.use(oidc.router);
The app.use(oidc.router); call is all that's needed to tell Express.js to enable the routes that ship with the oidc-middleware library to handle all of the OpenID Connect support. You might have noticed above that when we created the oidc object we specified some routes in the configuration. These settings dictate what URLs we want to use to handle user login, and what URLs we want to redirect users to after they've been logged in.
app.use(oidc.router); 告诉Express.js启用oidc-middleware库附带的路由以处理所有OpenID Connect支持仅需进行调用。 上面您可能已经注意到,当我们创建oidc对象时,我们在配置中指定了一些routes 。 这些设置决定了我们要用于处理用户登录的URL,以及在用户登录后要将用户重定向到的URL。
One benefit of this router being enabled is that from this point forward, in any of our route code, we'll have access to a special variable, req.userinfo, which contains some of the currently logged in user's basic profile information (pulled from Okta).
启用此路由器的一个好处是,从现在开始,在我们的任何路由代码中,我们都可以访问特殊变量req.userinfo ,其中包含一些当前登录的用户的基本配置文件信息(从Okta)。
And while req.userinfo is nice, it'd be a lot nicer if we could get any data about the currently logged in user that we want.
尽管req.userinfo很好,但是如果我们可以获取有关所需的当前登录用户的任何数据,那就更好了。
So let's go ahead and define another middleware to help us with that. Immediately below the app.use(oidc.router); code, insert the following:
因此,让我们继续定义另一个中间件来帮助我们。 在app.use(oidc.router);下方app.use(oidc.router); 代码,插入以下内容:
app.use((req, res, next) => {
  if (!req.userinfo) {
    return next();
  }

  oktaClient.getUser(req.userinfo.sub)
    .then(user => {
      req.user = user;
      res.locals.user = user;
      next();
    }).catch(err => {
      next(err);
    });
});
This middleware will run on every user request, and does the following:
该中间件将在每个用户请求上运行,并执行以下操作:
- It checks to see if there is a currently logged in user or not by looking at the
req.userinfoobject. If there is no user logged in, it will do nothing (return next();). 它通过查看req.userinfo对象来检查是否有当前登录的用户。 如果没有用户登录,则将不执行任何操作(return next();)。 - If there IS a user logged in, this middleware will then use the Okta Node SDK library to retrieve the user object from the Okta API. 如果有用户登录,则该中间件将使用Okta Node SDK库从Okta API中检索用户对象。
- Finally, it will create two new values:
req.userandres.locals.userwhich point to the user object directly. 最后,它将创建两个新值:req.user和res.locals.user,它们直接指向用户对象。
This means that in any route we define later on, we could access the req.user object directly to view the user's information, edit it, or even delete it.
这意味着在以后定义的任何路由中,我们都可以直接访问req.user对象以查看,编辑甚至删除用户的信息。
For example, you could create the following route below to display the user's profile information each time a user visits the /test URL:
例如,您可以在下面创建以下路由,以在每次用户访问/test URL时显示用户的个人资料信息:
app.get('/test', (req, res) => {
  res.json({ profile: req.user ? req.user.profile : null });
});
Let's also go ahead and create one additional middleware, loginRequired, that will only allow a user to visit a route if they've been logged in already. This will come in handy if you want to build pages that only logged in users can access (a dashboard, etc.).
我们还继续创建另外一个中间件loginRequired ,该中间件仅允许用户在已经登录的情况下访问路线。 如果您要构建只有登录用户才能访问的页面(仪表板等),这将很方便。
Below the code above, go ahead and define the function below.
在上面的代码下面,继续并在下面定义函数。
function loginRequired(req, res, next) {
  if (!req.user) {
    return res.status(401).render("unauthenticated");
  }

  next();
}
Since we want to ensure only logged in users can view our dashboard page, let's also go back and modify our route code for the dashboard.
因为我们要确保只有登录的用户才能查看我们的仪表板页面,所以我们也返回并修改我们的仪表板路线代码。
Find the line of code that enabled the dashboard route in your ./app.js.
在./app.js找到启用仪表板路由的代码行。
app.use('/dashboard', dashboardRouter); Now modify it to look like this.
现在修改它看起来像这样。
app.use('/dashboard', loginRequired, dashboardRouter);By injecting the loginRequired function immediately after the URL pattern, Express.js will first run our loginRequired middleware BEFORE the dashboardRouter is processed. This way, if a user visits any page that starts with the URL /dashboard they'll be required to log in before they can access it!
通过在URL模式之后立即注入loginRequired函数,Express.js将在处理dashboardRouter之前首先运行我们的loginRequired中间件。 这样,如果用户访问以URL /dashboard开头的任何页面,则需要先登录才能访问它!
The final thing we need to do to finish up our authentication component is define a logout route. The oidc-middleware library provides logout functionality, but doesn't automatically generate a route for it.
完成身份验证组件所需完成的最后一件事是定义注销路径。 oidc-中间件库提供注销功能,但不会自动为其生成路由。
To do this, create a new file named ./routes/users.js and put the following code inside of it.
为此,请创建一个名为./routes/users.js的新文件,并将以下代码放入其中。
const express = require("express");


const router = express.Router();

// Log a user out
router.get("/logout", (req, res) => {
  req.logout();
  res.redirect("/");
});


module.exports = router;
As you can probably tell, this route will log a user out of their account if they send a POST request to the /users/logout URL. The only thing we need to do now is enable this route in our ./app.js.
如您所知,如果用户向/users/logout URL发送POST请求,则该路由会将用户从其帐户中/users/logout 。 现在我们唯一需要做的就是在./app.js启用此路由。
Open up ./app.js, and import this new route file alongside the others at the top of the file.
打开./app.js ,然后将此新路由文件与其他文件一起导入文件顶部。
const dashboardRouter = require("./routes/dashboard");
const publicRouter = require("./routes/public");
const usersRouter = require("./routes/users");
Next, scroll down until you see your other routers being enabled, and enable this router as well.
接下来,向下滚动,直到看到其他路由器已启用,并同时启用该路由器。
app.use('/', publicRouter);
app.use('/dashboard', loginRequired, dashboardRouter);
app.use('/users', usersRouter);
Congratulations, you've now got user management and authentication fully configured for your website! And you didn't even have to write any code, manage any passwords, store anything in a database, etc!
恭喜,您现在已经为网站完全配置了用户管理和身份验证! 您甚至不必编写任何代码,管理任何密码,将任何内容存储在数据库中,等等!
身份验证的工作方式 ( How Authentication Works )
Now that you've seen how to successfully setup authentication for your Node.js websites, let's talk a bit more about how it works and explore the full authentication flow.
既然您已经了解了如何为Node.js网站成功设置身份验证,那么让我们再谈谈它如何工作并探索完整的身份验证流程。
In order to explain each component, let's assume that you're visiting this website and are not currently logged into your account.
为了解释每个组成部分,我们假设您正在访问该网站并且当前未登录到您的帐户。
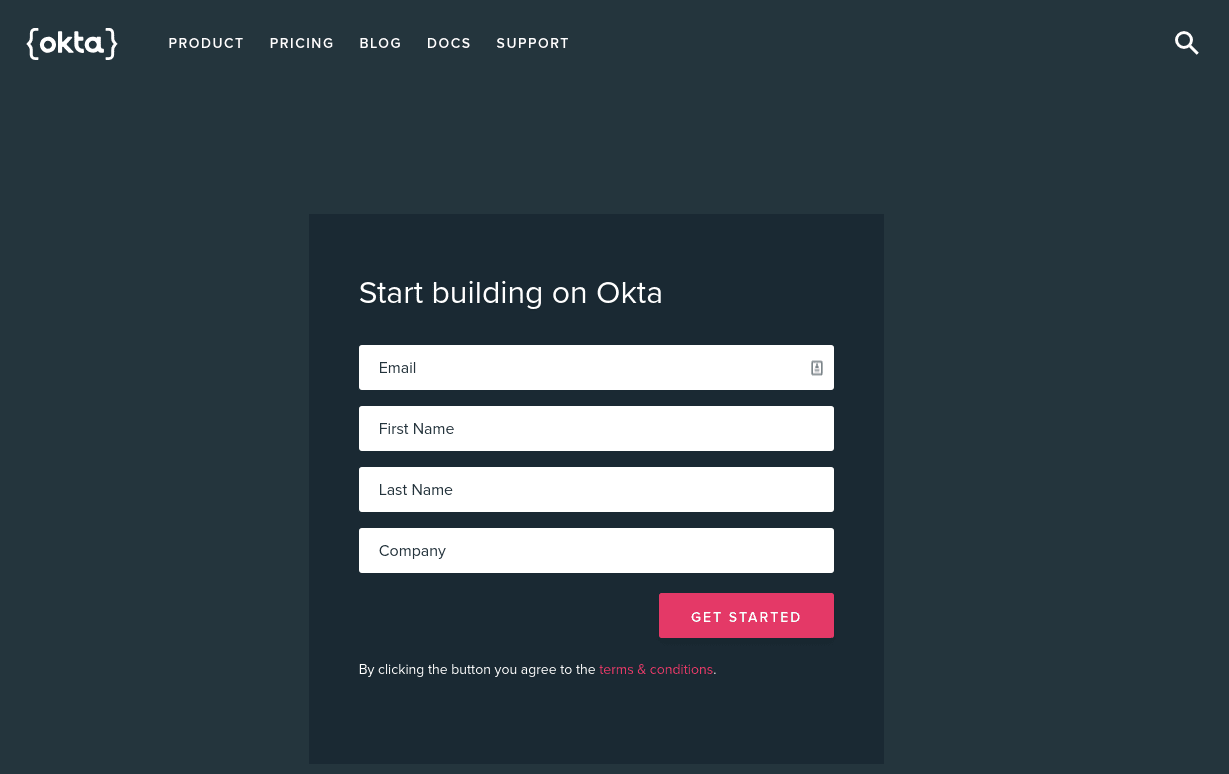
When you first click the Log In / Register button at the top of the page, the oidc-middleware library is going to redirect you to an Okta hosted domain (the authorization server). Here's the sort of URL you'll be redirected to:
当您首次单击页面顶部的Log In / Register按钮时,oidc-中间件库会将您重定向到Okta托管的域(授权服务器)。 这是您将重定向到的URL:
https://dev-842917.oktapreview.com/login/login.htm?fromURI=/oauth2/v1/authorize/redirect?okta_key=qBpZVCpQIJlxUALtybnI9oajmFSOmWJNKL9pDpGtZRUNOTE: You can fully customize this domain name, look, and feel using Okta.
注意 :您可以使用Okta完全自定义此域名,外观和风格。
Once you've landed on the authorization server page, you can either enter your account credentials and login immediately or create a new account. This functionality is handled by the authorization server completely.
进入授权服务器页面后,您可以输入帐户凭据并立即登录或创建新帐户。 此功能由授权服务器完全处理。
If you enter your credentials and click the Sign In button on the authorization server, what happens behind the scenes is:
如果输入凭据并单击授权服务器上的“ 登录”按钮,则幕后发生的事情是:
- Your password is hashed and your credentials are checked against the Okta user database to determine whether or not they are correct 您的密码被散列,并根据Okta用户数据库检查您的凭据,以确定它们是否正确
- If your credentials are correct, a new session cookie is created for you on the Okta hosted domain (eg:
dev-842917.oktapreview.com, in this case), and you are redirected to theredirect_urisetting you provided earlier when defining theExpressOIDCobject. In this case, you'd be redirected tohttp://localhost:3000/users/callback. When you're redirected to this URL, the authorization server will also pass along a specialcodetoken. This is part of the OpenID Connect Authorization Code flow. 如果您的凭据正确,则会在Okta托管域上为您创建一个新的会话cookie(例如,在这种情况下,例如dev-842917.oktapreview.com),并且您将被重定向到先前在定义ExpressOIDC时提供的redirect_uri设置。目的。 在这种情况下,您将被重定向到http://localhost:3000/users/callback。 当您重定向到该URL时,授权服务器还将传递一个特殊的code令牌。 这是OpenID Connect授权代码流的一部分 。 - Your Express.js app will receive the request to
/users/callbackand service the request automatically using the oidc-middleware library's built-in routes. The route servicing this URL will intercept the request and exchange thecodetoken for anaccessandidtoken. This process of exchanging the code token is part of the OpenID Connect authorization code flow and is detailed more here: https://developer.okta.com/authentication-guide/implementing-authentication/auth-code#3-exchanging-the-code-for-tokens. 您的Express.js应用将接收到/users/callback的请求,并使用oidc-middleware库的内置路由自动为请求提供服务。 服务于该URL的路由将拦截请求,并将code令牌交换为access和id令牌。 交换代码令牌的过程是OpenID Connect授权代码流的一部分,并在此处进行了详细说明: https : //developer.okta.com/authentication-guide/implementing-authentication/auth-code#3-exchanging-the-令牌代码 。 - Once these tokens have been retrieved, the oidc-middleware library takes the user's basic information embedded in the id token and stores it in a session cookie. 检索到这些令牌后,oidc-中间件库将获取嵌入在id令牌中的用户基本信息,并将其存储在会话cookie中。
- Then, the oidc-middleware library redirects you to the dashboard page as a fully logged-in user. 然后,oidc-中间件库将您作为完全登录的用户重定向到仪表板页面。
- From this point on, each time your browser makes a request to the Express.js website, the cookie containing your profile information will be sent back to Express.js, so that the oidc-middleware library can recognize who you are and populate a
req.userinfoobject with your account data. 从这以后,每次这个时候你的浏览器向Express.js网站的请求,包括您的个人资料信息的cookie将被送回Express.js,使OIDC中间件库可以识别你是谁,填充req.userinfo对象以及您的帐户数据。
Once your session cookies have expired (or have been wiped via a logout procedure), the process starts all over again.
一旦您的会话Cookie过期(或已通过注销过程清除),该过程将重新开始。
创建样式 ( Create Styles )
I'm not a professional designer, but even I can make this website look a little better.
我不是专业设计师,但是即使我可以使该网站看起来更好一点。
Create a file named ./public/stylesheets/style.css and put the following CSS into it.
创建一个名为./public/stylesheets/style.css的文件,并将以下CSS放入其中。
.top-bar a {
  text-decoration: none;
  color: inherit;
}

footer {
  border-top: 1px solid rgba(0,0,0,.1);
  margin-top: 4em !important;
  padding-top: 1em;
  text-align: center;
  margin-top: 1em;
}

h2 {
  margin-bottom: 2em;
}

.container {
  padding-top: 2em;
}
This will make the page styles look a little nicer.
这将使页面样式看起来更好一些。
测试您的新登录门户 ( Test Out Your New Login Portal )
Now that your Express.js website is built, why not take it for a test drive? Start up your web server by running the npm start command, visit http://localhost:3000, and test things out!
现在,您的Express.js网站已建立,为什么不将其用于试驾呢? 通过运行npm start命令npm start Web服务器,访问http://localhost:3000 ,然后进行测试!

You'll notice a few things:
您会注意到一些事情:
- If you click the
Log In / Registerbutton at the top of the page, you can either create a new user account OR log into an existing one. This functionality is all provided by Okta's authorization server automatically. 如果单击页面顶部的“Log In / Register按钮,则可以创建一个新的用户帐户,也可以登录到现有帐户。 Okta的授权服务器会自动提供所有此功能。 - Once you're logged in, you'll be redirected to the
/dashboardpage, which will greet you by your first name. Remember that#{user.profile.firstName}variable in the./views/dashboard.pugfile earlier? That variable is now you actual user account since you've now plugged in all the appropriate middleware. 登录后,您将被重定向到/dashboard页面,该页面会以您的名字打招呼。 还记得./views/dashboard.pug文件中的#{user.profile.firstName}变量吗? 该变量现在是您的实际用户帐户,因为您已经插入了所有适当的中间件。 - If you log out, then immediately click the
Log In / Registerbutton again, you'll be instantly logged in without needing to re-enter your username and password. This is a feature of OpenID Connect — the authorization server remembers who you are for a set amount of time. This is the same way that Google Login and Facebook Login work! 如果注销,则立即再次单击“Log In / Register按钮,您将立即登录,而无需重新输入用户名和密码。 这是OpenID Connect的一项功能-授权服务器会在设定的时间内记住您的身份。 这与Google登录和Facebook登录的工作方式相同!
If you're already logged into your Okta account and instantly get logged into the dashboard, don't worry. Just open a new incognito window in your browser and go through the flow there.
如果您已经登录到Okta帐户并立即登录到仪表板,请不要担心。 只需在浏览器中打开一个新的隐身窗口,然后浏览那里的流程即可。
了解有关Node.js和身份验证的更多信息 ( Learn More About Node.js and Authentication )
I hope you enjoyed seeing how authentication works with OpenID Connect and Node.js. Building websites with user management can be a pain, but new protocols like OpenID Connect alongside providers like Okta make the process much simpler.
我希望您喜欢看到身份验证如何与OpenID Connect和Node.js一起使用。 使用用户管理来构建网站可能会很痛苦,但是像OpenID Connect这样的新协议与Okta这样的提供者使该过程变得更加简单。
If you'd like to learn more about building web apps in Node, you might want to check out these other great posts:
如果您想了解有关在Node中构建Web应用程序的更多信息,则可能需要查看以下其他精彩文章:
- Build Secure Node Authentication with Passport.js and OpenID Connect 使用Passport.js和OpenID Connect构建安全节点身份验证
- Build User Registration with Node, React, and Okta 使用Node,React和Okta建立用户注册
- Simple Node Authentication 简单节点认证
- Build a Basic CRUD App with Vue.js and Node 使用Vue.js和Node构建基本的CRUD应用
Finally, please follow us on Twitter to find more great resources like this, request other topics for us to write about, and follow along with our new open source libraries and projects!
最后,请在Twitter上关注我们,以找到更多类似的出色资源,要求其他主题供我们撰写,以及关注我们的新开源库和项目!
PS: If you liked this project and want to see the source code in one place, please go checkout and star the GitHub repository.
PS :如果您喜欢这个项目,并且想要在一个地方看到源代码,请结帐并为GitHub存储库加注星标。
And… If you have any questions, please leave a comment below!
如果您有任何疑问,请在下面发表评论!
翻译自: https://scotch.io/tutorials/build-and-understand-a-simple-nodejs-website-with-user-authentication
node.js 验证码


 被折叠的 条评论
为什么被折叠?
被折叠的 条评论
为什么被折叠?
 到【灌水乐园】发言


