


This is the last part of a three-part tutorial to build an employee management web app, named Project Dream Team. In Part Two of the tutorial, we built out the CRUD functionality of the app.
这是由三部分组成的教程的最后一部分,该教程用于构建名为Project Dream Team的员工管理Web应用程序。 在本教程的第二部分中,我们构建了该应用程序的CRUD功能。
We created forms, views, and templates to list, add, edit and delete departments and roles. By the end of Part Two, we could assign (and re-assign) departments and roles to employees.
我们创建了表单,视图和模板,以列出,添加,编辑和删除部门和角色。 在第二部分结束之前,我们可以为员工分配(和重新分配)部门和角色。
In Part Three, we will cover:
在第三部分中,我们将介绍:
- Custom error pages 自定义错误页面
- Unit tests 单元测试
- Deployment on PythonAnywhere 在PythonAnywhere上部署
自定义错误页面 ( Custom Error Pages )
Web applications make use of HTTP errors to let users know that something has gone wrong. Default error pages are usually quite plain, so we will create our own custom ones for the following common HTTP errors:
Web应用程序利用HTTP错误来使用户知道出了点问题。 默认错误页面通常很简单,因此我们将为以下常见的HTTP错误创建自己的自定义页面:
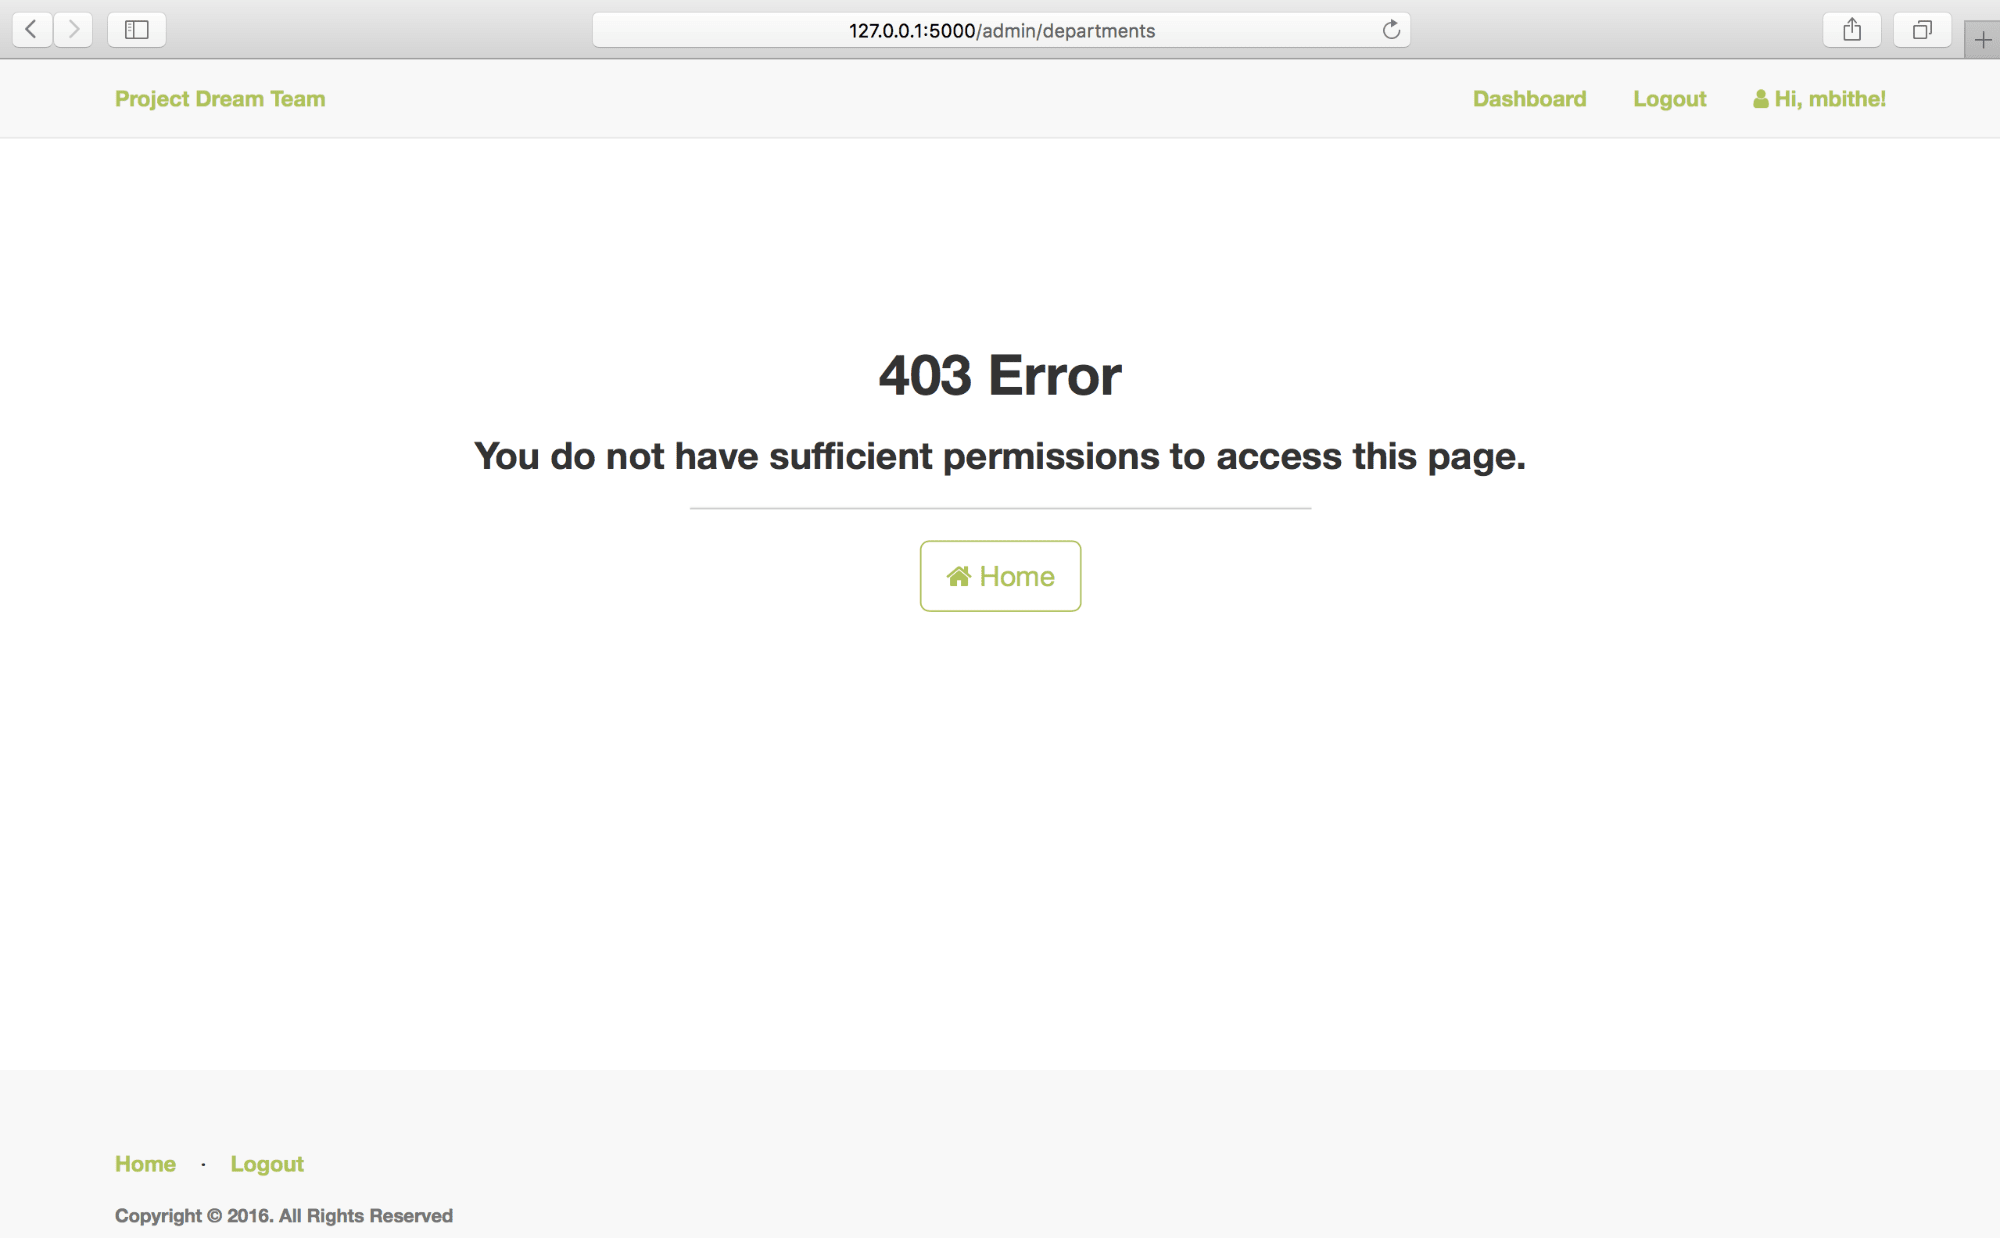
- 403 Forbidden: this occurs when a user is logged in (authenticated), but does not have sufficient permissions to access the resource. This is the error we have been throwing when non-admins attempt to access an admin view. 403禁止访问:当用户登录(通过身份验证)但没有足够的权限访问资源时,会发生这种情况。 这是非管理员尝试访问管理员视图时引发的错误。
- 404 Not Found: this occurs when a user attempts to access a non-existent resource such as an invalid URL, e.g
http://127.0.0.1:5000/nothinghere. 找不到404:当用户尝试访问不存在的资源(例如无效的URL)时会发生这种情况,例如http://127.0.0.1:5000/nothinghere。 - 500 Internal Server Error: this is a general error thrown when a more specific error cannot be determined. It means that for some reason, the server cannot process the request. 500 Internal Server Error:这是无法确定更具体的错误时引发的一般错误。 这意味着由于某种原因,服务器无法处理该请求。
We'll start by writing the views for the custom error pages. In your app/__init__.py file, add the following code:
我们将从编写自定义错误页面的视图开始。 在您的app/__init__.py文件中,添加以下代码:
# app/__init__.py

# update imports
from flask import Flask, render_template

# existing code remains

def create_app(config_name):

    # existing code remains

    @app.errorhandler(403)
    def forbidden(error):
        return render_template('errors/403.html', title='Forbidden'), 403

    @app.errorhandler(404)
    def page_not_found(error):
        return render_template('errors/404.html', title='Page Not Found'), 404

    @app.errorhandler(500)
    def internal_server_error(error):
        return render_template('errors/500.html', title='Server Error'), 500

    return app
We make use of Flask's @app.errorhandler decorator to define the error page views, where we pass in the status code as a parameter.
我们使用Flask的@app.errorhandler装饰器来定义错误页面视图,然后在其中传递状态代码作为参数。
Next, we'll create the template files. Create a app/templates/errors directory, and in it, create 403.html, 404.html, and 500.html.
接下来,我们将创建模板文件。 创建一个app/templates/errors目录,并在其中创建403.html , 404.html和500.html 。
<!-- app/templates/errors/403.html -->

{% extends "base.html" %}
{% block title %}Forbidden{% endblock %}
{% block body %}
<div class="content-section">
  <div class="outer">
    <div class="middle">
      <div class="inner">
        <div style="text-align: center">
            <h1> 403 Error </h1>
            <h3> You do not have sufficient permissions to access this page. </h3>
            <hr class="intro-divider">
            <a href="{{ url_for('home.homepage') }}" class="btn btn-default btn-lg">
                <i class="fa fa-home"></i>
                Home
            </a>
        </div>
      </div>
    </div>
  </div>
</div>
{% endblock %}
<!-- app/templates/errors/404.html -->
{% extends "base.html" %}
{% block title %}Page Not Found{% endblock %}
{% block body %}
<div class="content-section">
<div class="outer">
<div class="middle">
<div class="inner">
<div style="text-align: center">
<h1> 404 Error </h1>
<h3> The page you're looking for doesn't exist. </h3>
<hr class="intro-divider">
<a href="{{ url_for('home.homepage') }}" class="btn btn-default btn-lg">
<i class="fa fa-home"></i>
Home
</a>
</div>
</div>
</div>
</div>
</div>
{% endblock %}<!-- app/templates/errors/500.html -->
{% extends "base.html" %}
{% block title %}Internal Server Error{% endblock %}
{% block body %}
<div class="content-section">
<div class="outer">
<div class="middle">
<div class="inner">
<div style="text-align: center">
<h1> 500 Error </h1>
<h3> The server encountered an internal error. That's all we know. </h3>
<hr class="intro-divider">
<a href="{{ url_for('home.homepage') }}" class="btn btn-default btn-lg">
<i class="fa fa-home"></i>
Home
</a>
</div>
</div>
</div>
</div>
</div>
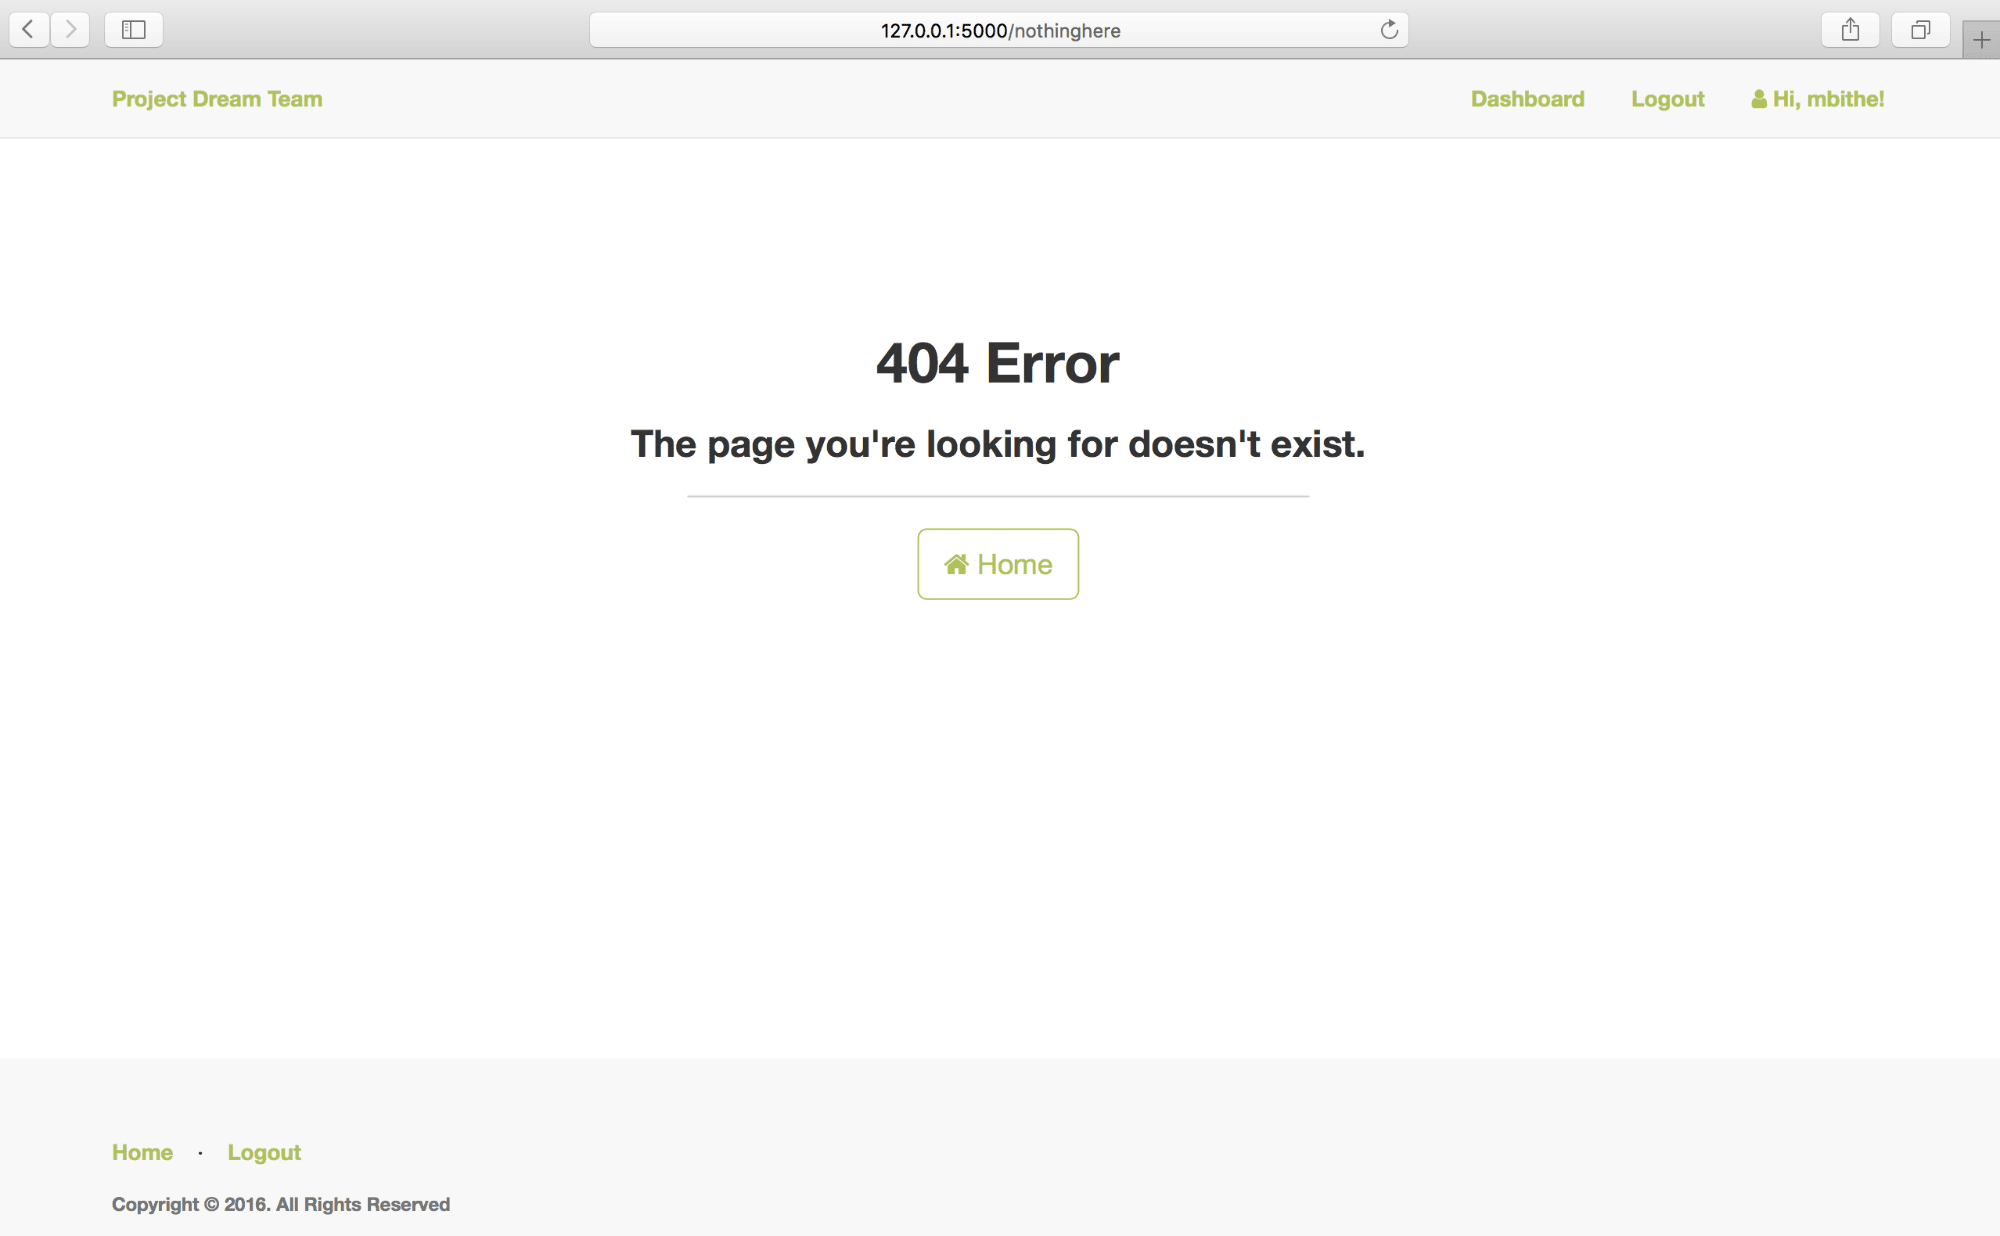
{% endblock %}All the templates give a brief description of the error, and a button that links to the homepage.
所有模板都提供了对该错误的简短描述,以及一个链接到主页的按钮。
Run the app and log in as a non-admin user, then attempt to access http://127.0.0.1:5000/admin/departments. You should get the following page:
运行该应用程序并以非管理员用户身份登录,然后尝试访问http://127.0.0.1:5000/admin/departments 。 您应该获得以下页面:
Now attempt to access this non-existent page: http://127.0.0.1:5000/nothinghere. You should see:
现在尝试访问此不存在的页面: http://127.0.0.1:5000/nothinghere : http://127.0.0.1:5000/nothinghere : http://127.0.0.1:5000/nothinghere 。 您应该看到:
To view the internal server error page, we'll create a temporary route where we'll use Flask's abort() function to raise a 500 error. In the app/__init__.py file, add the following:
要查看内部服务器错误页面,我们将创建一条临时路由,在其中我们将使用Flask的abort()函数引发500错误。 在app/__init__.py文件中,添加以下内容:
# app/__init__.py

# update imports
from flask import abort, Flask, render_template

# existing code remains

def create_app(config_name):
   # existing code remains

    @app.route('/500')
    def error():
        abort(500)

    return app
Go to http://127.0.0.1:5000/500; you should see the following page:
转到http://127.0.0.1:5000/500 ; 您应该看到以下页面:

Now you can remove the temporary route we just created for the internal server error.
现在,您可以删除我们刚刚为内部服务器错误创建的临时路由。
测验 ( Tests )
Now, let's write some tests for the app. The importance of testing software can't be overstated. Tests help ensure that your app is working as expected, without the need for you to manually test all of your app's functionality.
现在,让我们为该应用程序编写一些测试。 测试软件的重要性不可高估。 测试有助于确保您的应用程序能够按预期运行,而无需您手动测试所有应用程序功能。
We'll begin by creating a test database, and give the database user we created in Part One all privileges on it:
我们将首先创建一个测试数据库,并为在第一部分中创建的数据库用户提供所有特权:
$ mysql -u root

mysql> CREATE DATABASE dreamteam_test;
Query OK, 1 row affected (0.00 sec)

mysql> GRANT ALL PRIVILEGES ON dreamteam_test . * TO 'dt_admin'@'localhost';
Query OK, 0 rows affected (0.00 sec)
Now we need to edit the config.py file to add configurations for testing. Delete the current contents and replace them with the following code:
现在,我们需要编辑config.py文件以添加测试配置。 删除当前内容,并将其替换为以下代码:
# config.py

class Config(object):
    """
    Common configurations
    """

    DEBUG = True


class DevelopmentConfig(Config):
    """
    Development configurations
    """

    SQLALCHEMY_ECHO = True


class ProductionConfig(Config):
    """
    Production configurations
    """

    DEBUG = False


class TestingConfig(Config):
    """
    Testing configurations
    """

    TESTING = True

app_config = {
    'development': DevelopmentConfig,
    'production': ProductionConfig,
    'testing': TestingConfig
}
We have put DEBUG = True in the base class, Config, so that it is the default setting. We override this in the ProductionConfig class. In the TestingConfig class, we set the TESTING configuration variable to True.
我们在基类Config放置了DEBUG = True ,因此它是默认设置。 我们在ProductionConfig类中覆盖它。 在TestingConfig类中,我们将TESTING配置变量设置为True 。
We will be writing unit tests. Unit tests are written to test small, individual, and fairly isolated units of code, such as functions. We will make use of Flask-Testing, an extension that provides unit testing utilities for Flask.
我们将编写单元测试。 编写单元测试是为了测试小的,单独的且相当隔离的代码单元,例如功能。 我们将使用Flask-Testing ,这是为Flask提供单元测试实用程序的扩展。
$ pipinstall Flask-TestingNext, create a tests.py file in the root directory of your app. In it, add the following code:
接下来,在应用程序的根目录中创建一个tests.py文件。 在其中添加以下代码:
# tests.py

import unittest

from flask_testing import TestCase

from app import create_app, db
from app.models import Employee


class TestBase(TestCase):

    def create_app(self):

        # pass in test configurations
        config_name = 'testing'
        app = create_app(config_name)
        app.config.update(
            SQLALCHEMY_DATABASE_URI='mysql://dt_admin:dt2016@localhost/dreamteam_test'
        )
        return app

    def setUp(self):
        """
        Will be called before every test
        """

        db.create_all()

        # create test admin user
        admin = Employee(username="admin", password="admin2016", is_admin=True)

        # create test non-admin user
        employee = Employee(username="test_user", password="test2016")

        # save users to database
        db.session.add(admin)
        db.session.add(employee)
        db.session.commit()

    def tearDown(self):
        """
        Will be called after every test
        """

        db.session.remove()
        db.drop_all()

if __name__ == '__main__':
    unittest.main()
In the base class above, TestBase, we have a create_app method, where we pass in the configurations for testing.
在上面的基类TestBase ,我们有一个create_app方法,我们在其中传递配置以进行测试。
We also have two other methods: setUp and tearDown. The setUp method will be called automatically before every test we run. In it, we create two test users, one admin and one non-admin, and save them to the database. The tearDown method will be called automatically after every test. In it, we remove the database session and drop all database tables.
我们还有另外两种方法: setUp和tearDown 。 在每次运行测试之前,都会自动调用setUp方法。 在其中,我们创建了两个测试用户,一个管理员和一个非管理员,并将它们保存到数据库中。 每次测试后, tearDown方法将自动调用。 在其中,我们删除数据库会话并删除所有数据库表。
To run the tests, we will run the tests.py file:
要运行测试,我们将运行tests.py文件:
$ python tests.py

----------------------------------------------------------------------
Ran 0 testsin 0.000s

OK
The output above lets us know that our test setup is OK. Now let's write some tests.
上面的输出使我们知道我们的测试设置正确。 现在让我们编写一些测试。
# tests.py

# update imports

import os

from flask import abort, url_for

from app.models import Department, Employee, Role

# add the following after the TestBase class

class TestModels(TestBase):

    def test_employee_model(self):
        """
        Test number of records in Employee table
        """
        self.assertEqual(Employee.query.count(), 2)

    def test_department_model(self):
        """
        Test number of records in Department table
        """

        # create test department
        department = Department(name="IT", description="The IT Department")

        # save department to database
        db.session.add(department)
        db.session.commit()

        self.assertEqual(Department.query.count(), 1)

    def test_role_model(self):
        """
        Test number of records in Role table
        """

        # create test role
        role = Role(name="CEO", description="Run the whole company")

        # save role to database
        db.session.add(role)
        db.session.commit()

        self.assertEqual(Role.query.count(), 1)


class TestViews(TestBase):

    def test_homepage_view(self):
        """
        Test that homepage is accessible without login
        """
        response = self.client.get(url_for('home.homepage'))
        self.assertEqual(response.status_code, 200)

    def test_login_view(self):
        """
        Test that login page is accessible without login
        """
        response = self.client.get(url_for('auth.login'))
        self.assertEqual(response.status_code, 200)

    def test_logout_view(self):
        """
        Test that logout link is inaccessible without login
        and redirects to login page then to logout
        """
        target_url = url_for('auth.logout')
        redirect_url = url_for('auth.login', next=target_url)
        response = self.client.get(target_url)
        self.assertEqual(response.status_code, 302)
        self.assertRedirects(response, redirect_url)

    def test_dashboard_view(self):
        """
        Test that dashboard is inaccessible without login
        and redirects to login page then to dashboard
        """
        target_url = url_for('home.dashboard')
        redirect_url = url_for('auth.login', next=target_url)
        response = self.client.get(target_url)
        self.assertEqual(response.status_code, 302)
        self.assertRedirects(response, redirect_url)

    def test_admin_dashboard_view(self):
        """
        Test that dashboard is inaccessible without login
        and redirects to login page then to dashboard
        """
        target_url = url_for('home.admin_dashboard')
        redirect_url = url_for('auth.login', next=target_url)
        response = self.client.get(target_url)
        self.assertEqual(response.status_code, 302)
        self.assertRedirects(response, redirect_url)

    def test_departments_view(self):
        """
        Test that departments page is inaccessible without login
        and redirects to login page then to departments page
        """
        target_url = url_for('admin.list_departments')
        redirect_url = url_for('auth.login', next=target_url)
        response = self.client.get(target_url)
        self.assertEqual(response.status_code, 302)
        self.assertRedirects(response, redirect_url)

    def test_roles_view(self):
        """
        Test that roles page is inaccessible without login
        and redirects to login page then to roles page
        """
        target_url = url_for('admin.list_roles')
        redirect_url = url_for('auth.login', next=target_url)
        response = self.client.get(target_url)
        self.assertEqual(response.status_code, 302)
        self.assertRedirects(response, redirect_url)

    def test_employees_view(self):
        """
        Test that employees page is inaccessible without login
        and redirects to login page then to employees page
        """
        target_url = url_for('admin.list_employees')
        redirect_url = url_for('auth.login', next=target_url)
        response = self.client.get(target_url)
        self.assertEqual(response.status_code, 302)
        self.assertRedirects(response, redirect_url)


class TestErrorPages(TestBase):

    def test_403_forbidden(self):
        # create route to abort the request with the 403 Error
        @self.app.route('/403')
        def forbidden_error():
            abort(403)

        response = self.client.get('/403')
        self.assertEqual(response.status_code, 403)
        self.assertTrue("403 Error" in response.data)

    def test_404_not_found(self):
        response = self.client.get('/nothinghere')
        self.assertEqual(response.status_code, 404)
        self.assertTrue("404 Error" in response.data)

    def test_500_internal_server_error(self):
        # create route to abort the request with the 500 Error
        @self.app.route('/500')
        def internal_server_error():
            abort(500)

        response = self.client.get('/500')
        self.assertEqual(response.status_code, 500)
        self.assertTrue("500 Error" in response.data)


if __name__ == '__main__':
    unittest.main()
We've added three classes: TestModels, TestViews and TestErrorPages.
我们添加了三个类: TestModels , TestViews和TestErrorPages 。
The first class has methods to test that each of the models in the app are working as expected. This is done by querying the database to check that the correct number of records exist in each table.
第一类具有测试应用程序中每个模型是否按预期工作的方法。 这是通过查询数据库以检查每个表中是否存在正确的记录数来完成的。
The second class has methods that test the views in the app to ensure the expected status code is returned. For non-restricted views, such as the homepage and the login page, the 200 OK code should be returned; this means that everything is OK and the request has succeeded. For restricted views that require authenticated access, a 302 Found code is returned. This means that the page is redirected to an existing resource, in this case, the login page. We test both that the 302 Found code is returned and that the page redirects to the login page.
第二类具有测试应用程序中的视图以确保返回预期状态代码的方法。 对于非受限视图,例如主页和登录页面,应返回200 OK代码;否则,返回200 OK代码。 这意味着一切正常,请求成功。 对于需要身份验证访问的受限视图,将返回302 Found代码。 这意味着该页面将重定向到现有资源,在这种情况下为登录页面。 我们测试返回了302 Found代码,并且页面重定向到登录页面。
The third class has methods to ensure that the error pages we created earlier are shown when the respective error occurs.
第三类具有确保当发生相应错误时显示我们先前创建的错误页面的方法。
Note that each test method begins with test. This is deliberate, because unittest, the Python unit testing framework, uses the test prefix to automatically identify test methods. Also note that we have not written tests for the front-end to ensure users can register and login, and to ensure administrators can create departments and roles and assign them to employees. This can be done using a tool like Selenium Webdriver; however this is outside the scope of this tutorial.
请注意,每种测试方法均以test开头。 这是有意的,因为Python单元测试框架unittest使用test前缀自动识别测试方法。 另请注意,我们尚未为前端编写测试以确保用户可以注册和登录,以及确保管理员可以创建部门和角色并将其分配给员工。 这可以使用Selenium Webdriver之类的工具完成; 但是,这超出了本教程的范围。
Run the tests again:
再次运行测试:
$ python tests.py..............
----------------------------------------------------------------------
Ran 14 tests in 2.313s

OK
Success! The tests are passing.
成功! 测试通过了。
部署! ( Deploy! )
Now for the final part of the tutorial: deployment. So far, we've been running the app locally. In this stage, we will publish the application on the internet so that other people can use it. We will use PythonAnywhere, a Platform as a Service (PaaS) that is easy to set up, secure, and scalable, not to mention free for basic accounts!
现在是本教程的最后一部分:部署。 到目前为止,我们一直在本地运行该应用程序。 在此阶段,我们将在Internet上发布该应用程序,以便其他人可以使用它。 我们将使用PythonAnywhere ,它是易于设置,安全和可扩展的平台即服务(PaaS),更不用说基本帐户免费了!
PythonAnywhere设置 (PythonAnywhere Set-Up)
Create a free PythonAnywhere account here if you don't already have one. Be sure to select your username carefully since the app will be accessible at your-username.pythonanywhere.com.
如果您还没有一个免费的PythonAnywhere帐户,请在此处创建一个。 请确保仔细选择您的用户名,因为可以在your-username.pythonanywhere.com上访问该应用程序。
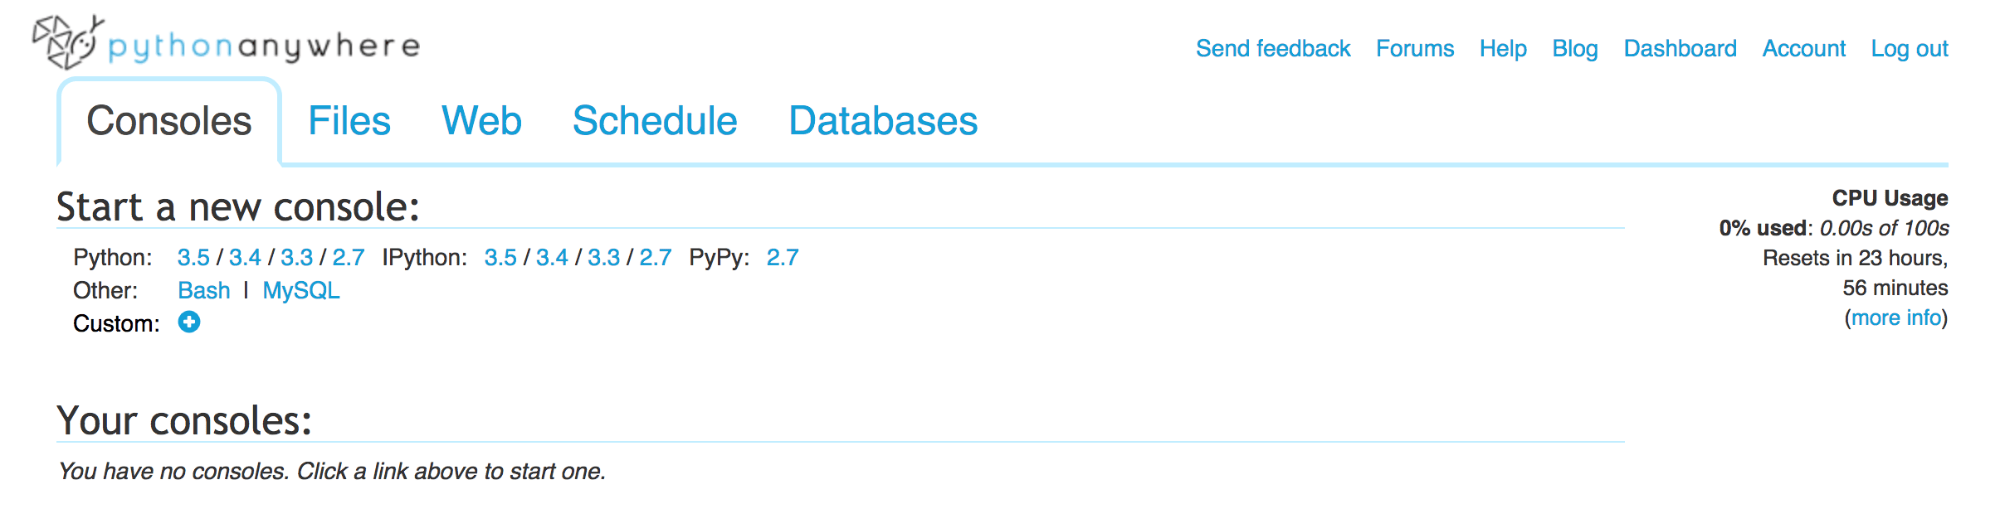
Once you've signed up, your-username.pythonanywhere.com should show this page:
注册后, your-username.pythonanywhere.com应该显示此页面:

We will use git to upload the app to PythonAnywhere. If you've been pushing your code to cloud repository management systems like Bitbucket, Gitlab or Github, that's great! If not, now's the time to do it. Remember that we won't be pushing the instance directory, so be sure to include it in your .gitignore file, like so:
我们将使用git将应用程序上传到PythonAnywhere。 如果您一直在将代码推送到Bitbucket , Gitlab或Github之类的云存储库管理系统, 那就太好了! 如果没有,现在是时候这样做了。 请记住,我们不会推送instance目录,因此请确保将其包含在您的.gitignore文件中,如下所示:
# .gitignore

*.pyc
instance/
Also, ensure that your requirements.txt file is up to date using the pip freeze command before pushing your code:
另外,在推送代码之前,请使用pip freeze命令确保您的requirements.txt文件是最新的:
$ pip freeze> requirements.txtNow, log in to your PythonAnywhere account. In your dashboard, there's a Consoles tab; use it to start a new Bash console.
现在,登录到您的PythonAnywhere帐户。 在您的仪表板中,有一个“ Consoles选项卡; 使用它来启动新的Bash控制台。
In the PythonAnywhere Bash console, clone your repository.
在PythonAnywhere Bash控制台中,克隆您的存储库。
$git clone https://github.com/andela-mnzomo/project-dream-team-threeNext we will create a virtualenv, then install the dependencies from the requirements.txt file. Because PythonAnywhere installs virtualenvwrapper for all users by default, we can use its commands:
接下来,我们将创建一个virtualenv,然后从requirements.txt文件安装依赖项。 由于PythonAnywhere默认为所有用户安装virtualenvwrapper ,因此我们可以使用其命令:
$ mkvirtualenv dream-team
$cd project-dream-team-three
$ pip install -r requirements.txt
We've created a virtualenv called dream-team. The virtualenv is automatically activated. We then entered the project directory and installed the dependencies.
我们创建了一个称为dream-team的virtualenv。 virtualenv将自动激活。 然后,我们进入项目目录并安装依赖项。
Now, in the Web tab on your dashboard, create a new web app.
现在,在仪表板上的“ Web”选项卡中,创建一个新的Web应用程序。

Select the Manual Configuration option (not the Flask option), and choose Python 2.7 as your Python version. Once the web app is created, its configurations will be loaded. Scroll down to the Virtualenv section, and enter the name of the virtualenv you just created:
选择“手动配置”选项( 不是 “烧瓶”选项),然后选择Python 2.7作为Python版本。 创建Web应用程序后,将加载其配置。 向下滚动到Virtualenv部分,然后输入刚创建的virtualenv的名称:

数据库配置 (Database Configuration)
Next, we will set up the MySQL production database. In the Databases tab of your PythonAnywhere dashboard, set a new password and then initialize a MySQL server:
接下来,我们将建立MySQL生产数据库。 在PythonAnywhere仪表板的“数据库”选项卡中,设置一个新密码,然后初始化一个MySQL服务器:

The password above will be your database user password. Next, create a new database if you wish. PythonAnywhere already has a default database which you can use.
上面的密码将是您的数据库用户密码。 接下来,根据需要创建一个新的数据库。 PythonAnywhere已经具有您可以使用的默认数据库。
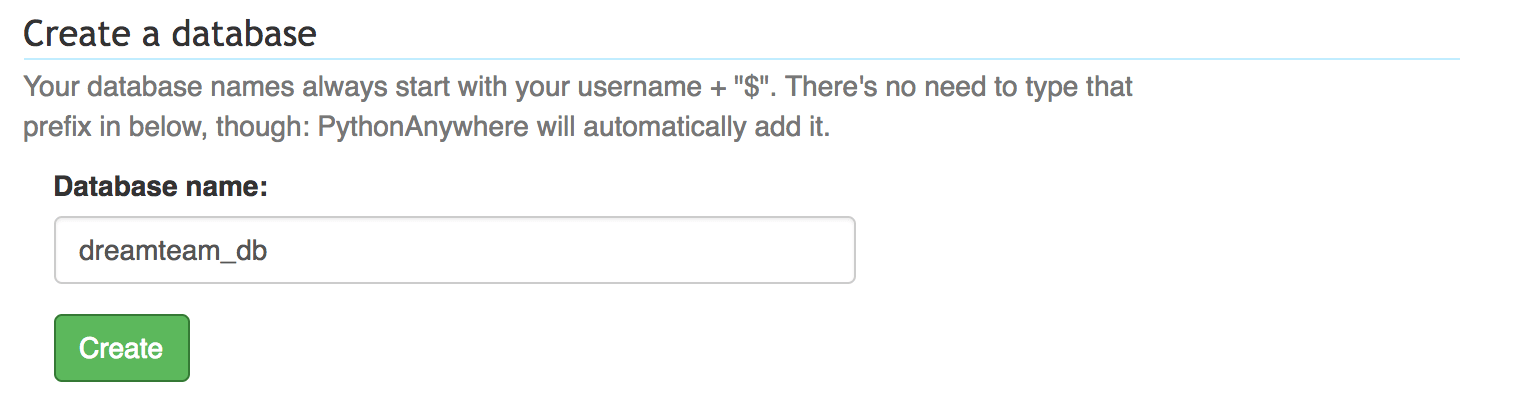
By default, the database user is your username, and has all privileges granted on any databases created. Now, we need to migrate the database and populate it with the tables. In a Bash console on PythonAnywhere, we will run the flask db upgrade command, since we already have the migrations directory that we created locally. Before running the commands, ensure you are in your virtualenv as well as in the project directory.
默认情况下,数据库用户是您的用户名,并具有对创建的任何数据库授予的所有特权。 现在,我们需要迁移数据库并用表填充它。 在PythonAnywhere上的Bash控制台中,我们将运行flask db upgrade命令,因为我们已经有了在本地创建的迁移目录。 在运行命令之前,请确保您位于virtualenv以及项目目录中。
$export FLASK_CONFIG=production
$ export FLASK_APP=run.py
$ export SQLALCHEMY_DATABASE_URI='mysql://your-username:your-password@your-host-address/your-database-name'
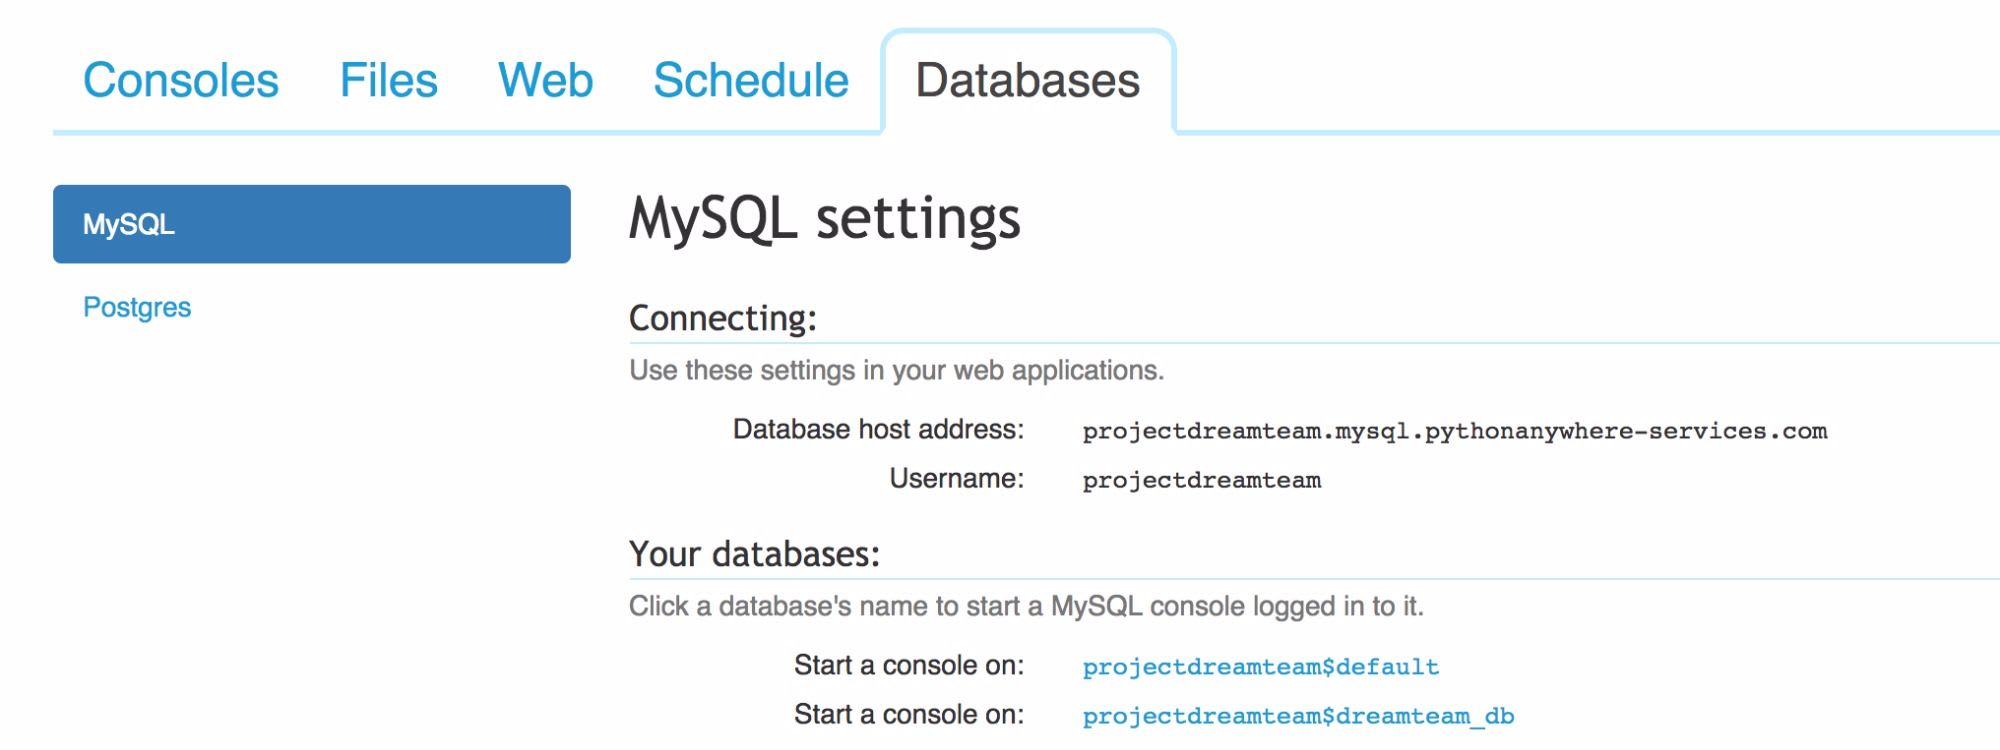
$ flask db upgradeWhen setting the SQLALCHEMY_DATABASE_URI environment variable, remember to replace your-username, your-password, your-host-address and your-database-name with their correct values. The username, host address and database name can be found in the MySQL settings in the Databases tab on your dashboard. For example, using the information below, my database URI is: mysql://projectdreamteam:password@projectdreamteam.mysql.pythonanywhere-services.com/projectdreamteam$dreamteam_db
设置SQLALCHEMY_DATABASE_URI环境变量时,请记住用正确的值替换your-username , your-password , your-host-address和your-database-name 。 用户名,主机地址和数据库名称可在仪表板上“数据库”选项卡的“ MySQL”设置中找到。 例如,使用以下信息,我的数据库URI是: mysql://projectdreamteam:password@projectdreamteam.mysql.pythonanywhere-services.com/projectdreamteam$dreamteam_db
WSGI文件 (WSGI File)
Now we will edit the WSGI file, which PythonAnywhere uses to serve the app. Remember that we are not pushing the instance directory to version control. We therefore need to configure the environment variables for production, which we will do in the WSGI file.
现在,我们将编辑WSGI文件,PythonAnywhere会使用该文件为应用提供服务。 请记住,我们没有将instance目录推送到版本控制中。 因此,我们需要为生产配置环境变量,这将在WSGI文件中进行。
In the Code section of the Web tab on your dashboard, click on the link to the WSGI configuration file.
在仪表板上“ Web”选项卡的“代码”部分,单击WSGI配置文件的链接。

Delete all the current contents of the file, and replace them with the following:
删除文件的所有当前内容,并将其替换为以下内容:
import os
import sys

path = '/home/your-username/your-project-directory-name'
if path not in sys.path:
    sys.path.append(path)

os.environ['FLASK_CONFIG'] = 'production'
os.environ['SECRET_KEY'] = 'p9Bv<3Eid9%$i01'
os.environ['SQLALCHEMY_DATABASE_URI'] = 'mysql://your-username:your-password@your-host-address/your-database-name'

from run import app as application
In the file above, we tell PythonAnywhere to get the variable app from the run.py file, and serve it as the application. We also set the FLASK_CONFIG, SECRET_KEY and SQLALCHEMY_DATABASE_URI environment variables. Feel free to alter the secret key. Note that the path variable should contain your username and project directory name, so be sure to replace it with the correct values. The same applies for the database URI environment variable.
在上面的文件中,我们告诉PythonAnywhere从run.py文件获取变量app ,并将其用作应用程序。 我们还设置了FLASK_CONFIG , SECRET_KEY和SQLALCHEMY_DATABASE_URI环境变量。 随意更改密钥。 请注意, path变量应包含您的用户名和项目目录名称,因此请确保将其替换为正确的值。 数据库URI环境变量也是如此。
We also need to edit our local app/__init__py file to prevent it from loading the instance/config.py file in production, as well as to load the configuration variables we've set:
我们还需要编辑本地app/__init__py文件,以防止它在生产环境中加载instance/config.py文件,以及加载我们设置的配置变量:
# app/__init__.py

# update imports

import os

# existing code remains

def create_app(config_name):
    if os.getenv('FLASK_CONFIG') == "production":
        app = Flask(__name__)
        app.config.update(
            SECRET_KEY=os.getenv('SECRET_KEY'),
            SQLALCHEMY_DATABASE_URI=os.getenv('SQLALCHEMY_DATABASE_URI')
        )
    else:
        app = Flask(__name__, instance_relative_config=True)
        app.config.from_object(app_config[config_name])
        app.config.from_pyfile('config.py')

    # existing code remains
Push your changes to version control, and pull them on the PythonAnywhere Bash console:
将您的更改推送到版本控制,并在PythonAnywhere Bash控制台上将其拉出:
$git pull origin masterNow let's try loading the app on PythonAnywhere. First, we need to reload the app on the Web tab in the dashboard:
现在,让我们尝试在PythonAnywhere上加载应用程序。 首先,我们需要在仪表板的“ Web”选项卡上重新加载应用程序:

Now go to your app URL:
现在转到您的应用程序URL:

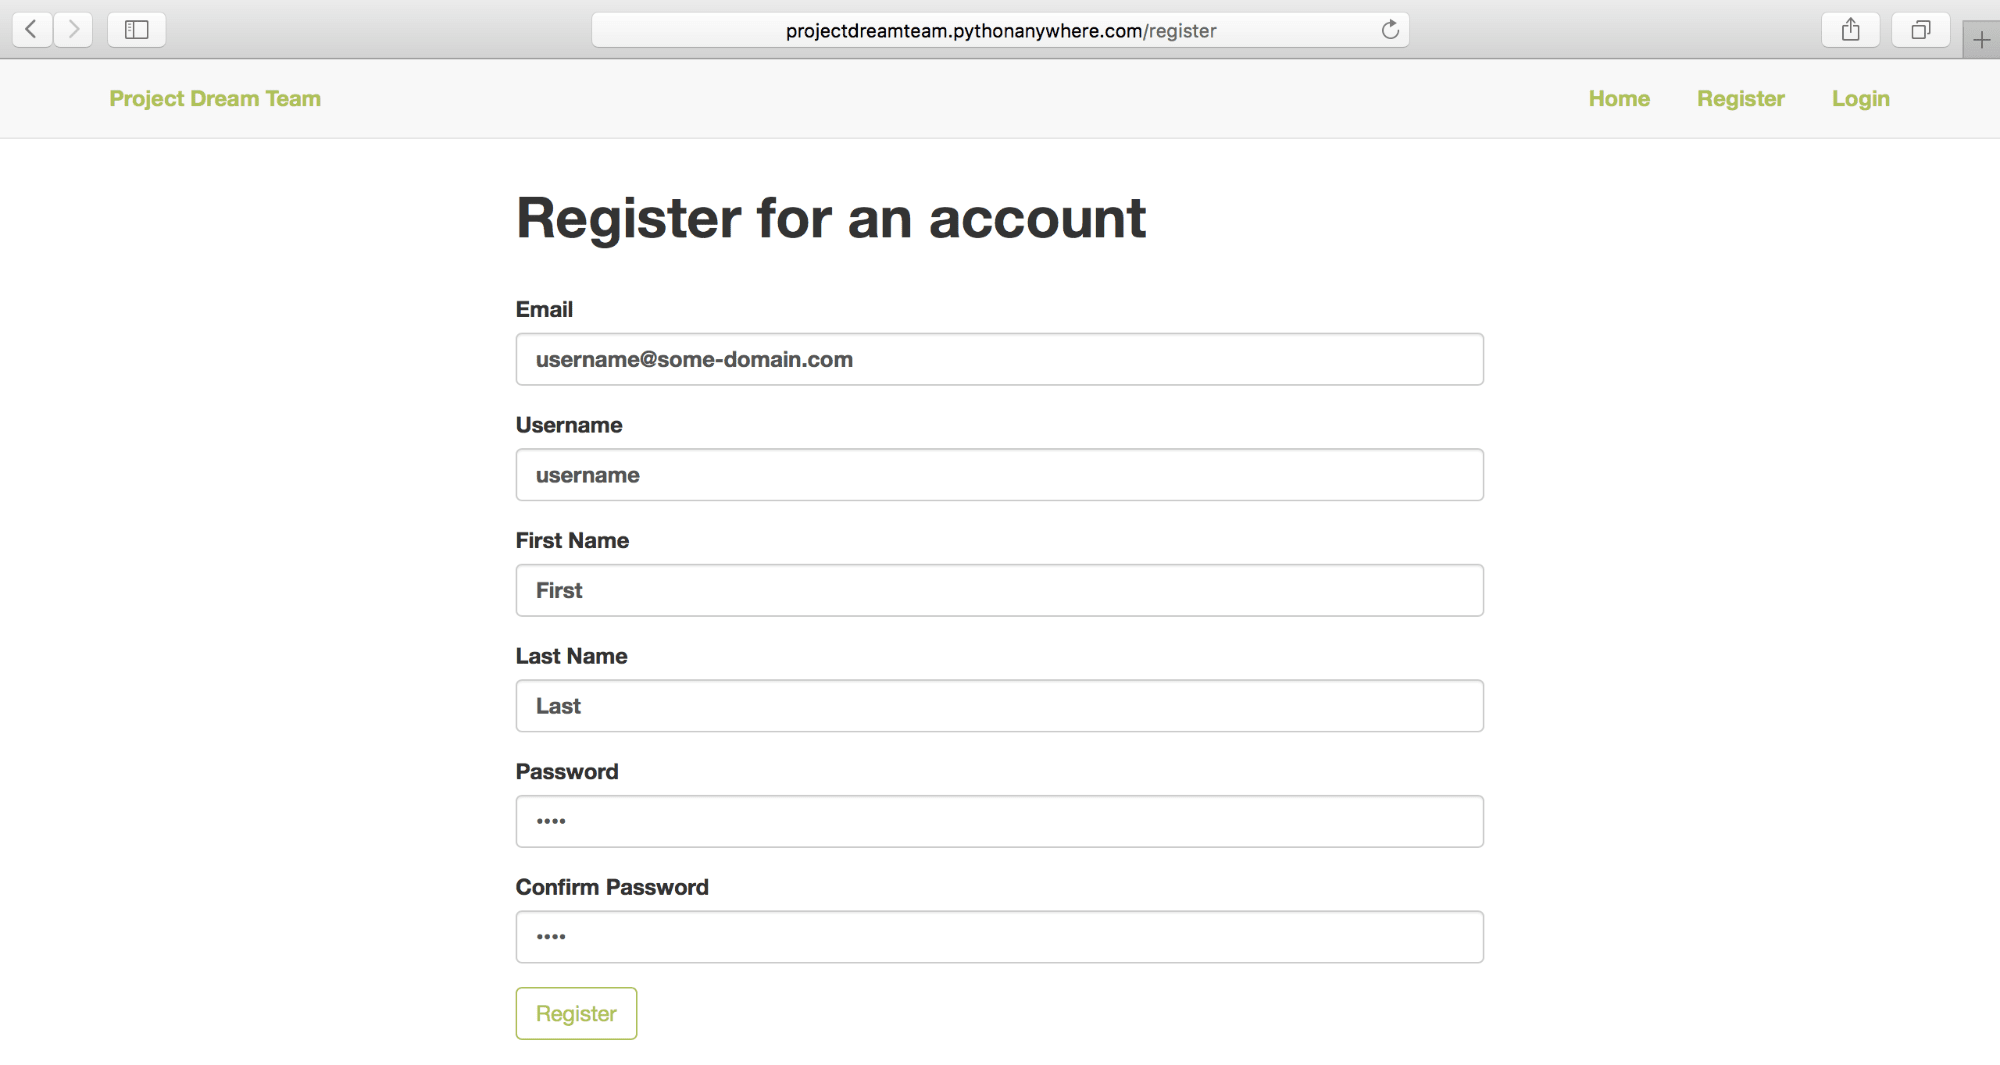
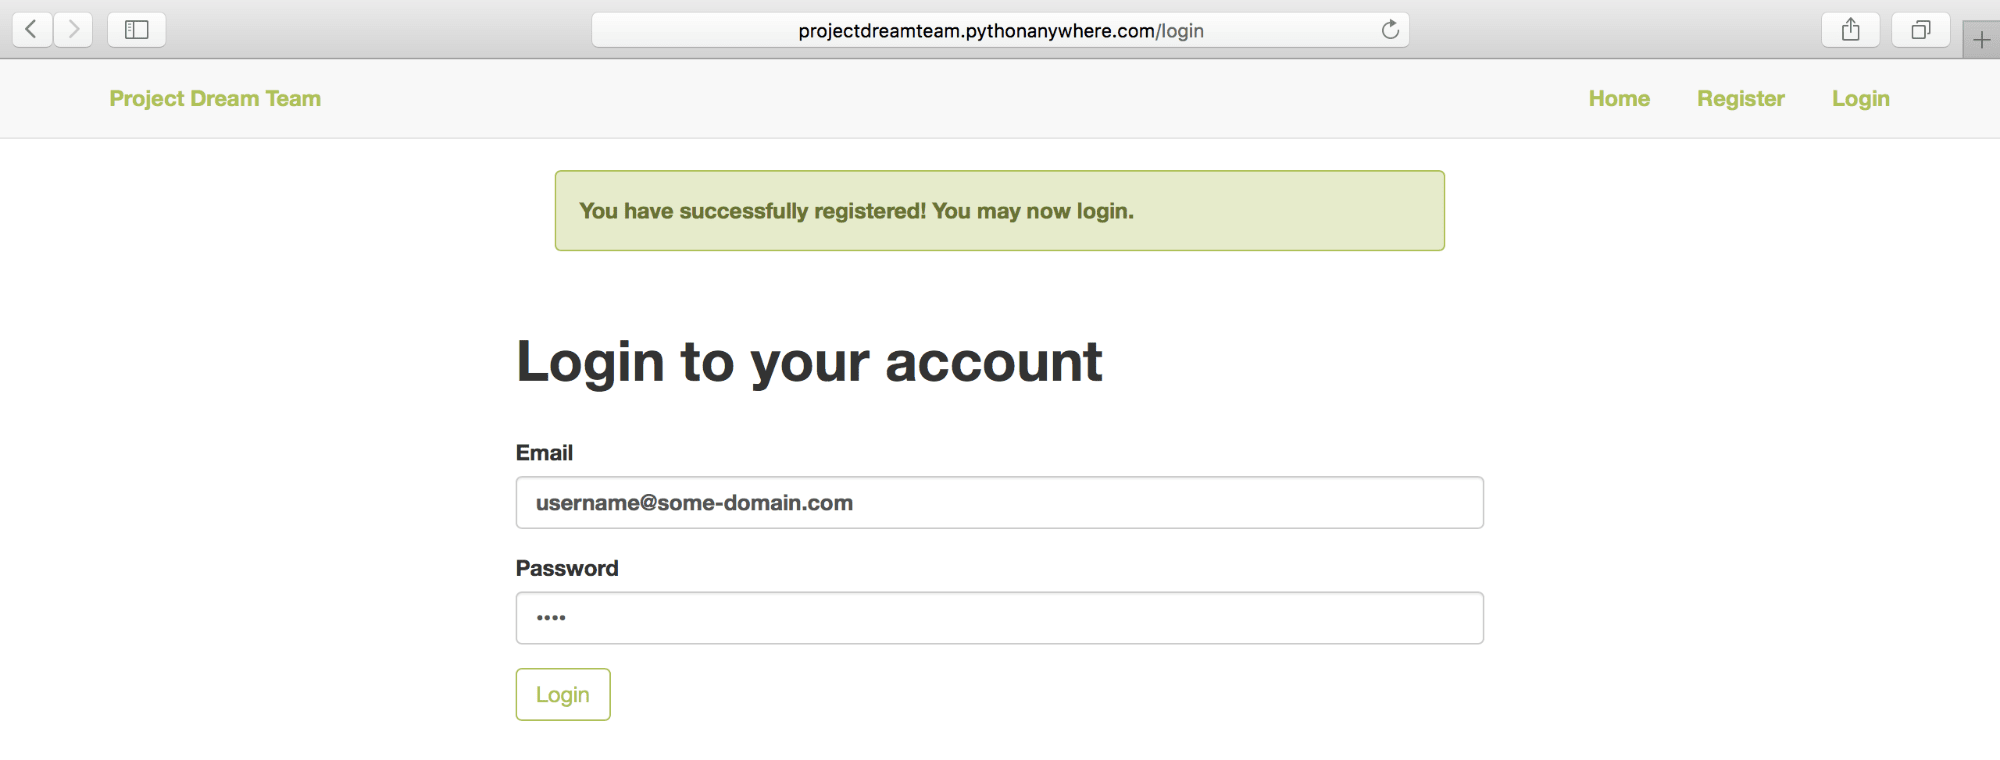
Great, it works! Try registering a new user and logging in. This should work just as it did locally.
太好了! 尝试注册一个新用户并登录。这应该与本地操作相同。

管理员用户 (Admin User)
We will now create an admin user the same way we did locally. Open the Bash console, and run the following commands:
现在,我们将以与本地相同的方式创建一个管理员用户。 打开Bash控制台,然后运行以下命令:
$ flask shell>>> from app.models import Employee
>>> from app import db
>>> admin = Employee(email="admin@admin.com",username="admin",password="admin2016",is_admin=True)
>>> db.session.add(admin)
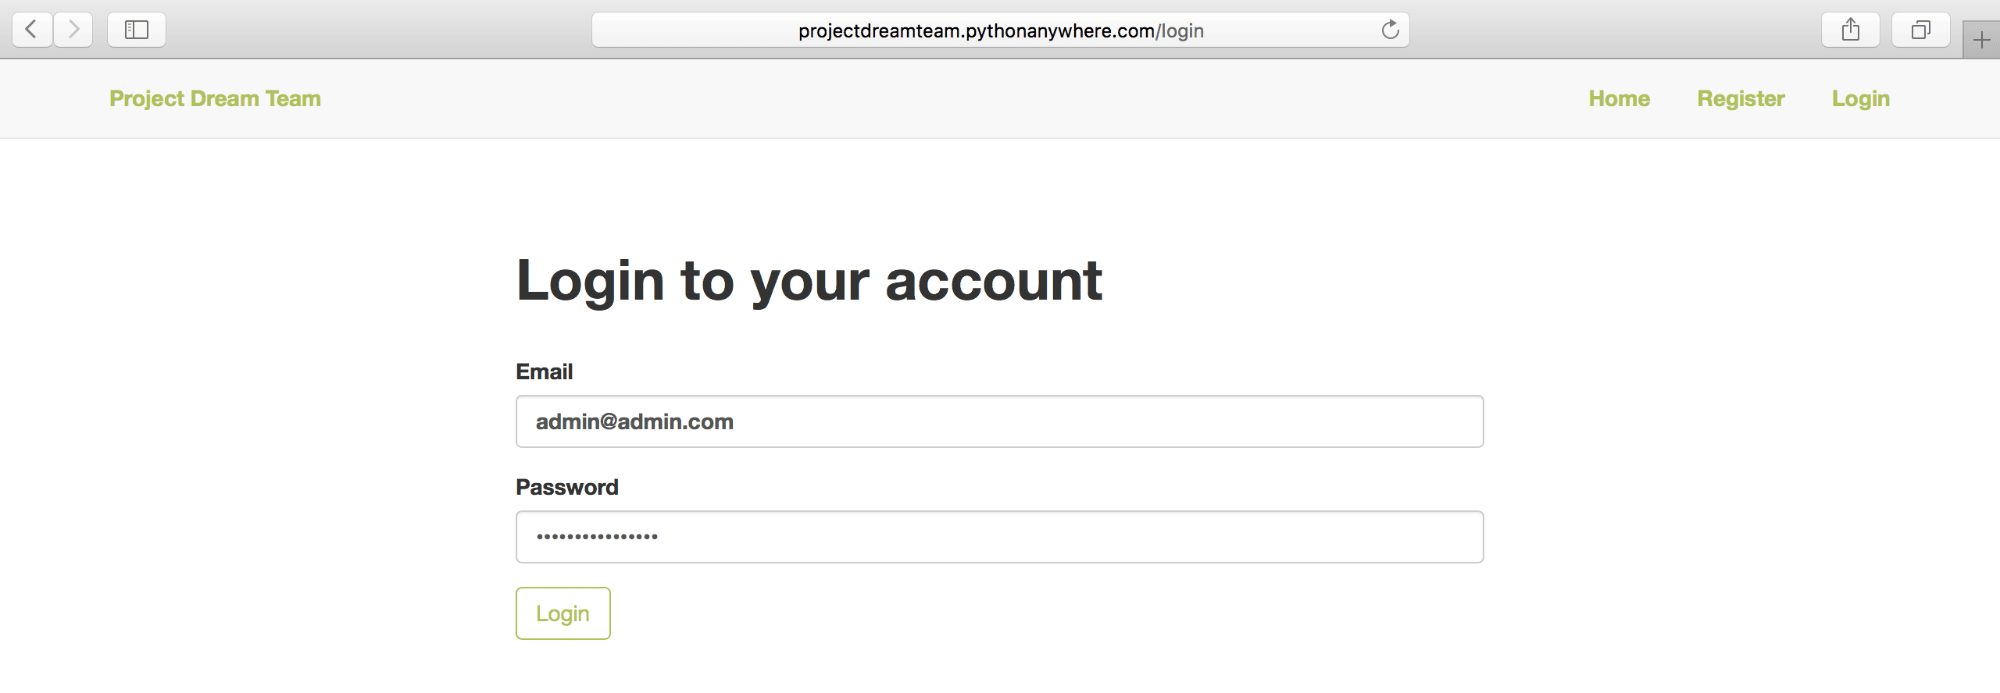
>>> db.session.commit()Now you can login as an admin user and add departments and roles, and assign them to employees.
现在,您可以以管理员用户身份登录并添加部门和角色,并将其分配给员工。


结论 ( Conclusion )
Congratulations on successfully deploying your first Flask CRUD web app! From setting up a MySQL database, to creating models, blueprints (with forms and views), templates, custom error pages, tests, and finally deploying the app on PythonAnywhere, you now have a strong foundation in web development with Flask. I hope this has been as fun and educational for you as it has for me! I'm looking forward to hearing about your experiences in the comments below.
恭喜您成功部署了第一个Flask CRUD Web应用程序! 从设置MySQL数据库到创建模型,蓝图(带有表单和视图),模板,自定义错误页面,测试,最后在PythonAnywhere上部署该应用程序,您现在已经拥有使用Flask进行Web开发的坚实基础。 希望对您来说,这对我来说既有趣又具有教育意义! 我期待在下面的评论中听到您的经历。
翻译自: https://scotch.io/tutorials/build-a-crud-web-app-with-python-and-flask-part-three


 315
315

 被折叠的 条评论
为什么被折叠?
被折叠的 条评论
为什么被折叠?
 到【灌水乐园】发言


