


angular2 延迟加载
Application performance is an important part of web development. We always want our users to have the quickest and most performant experience when they visit our apps.
应用程序性能是Web开发的重要组成部分。 我们始终希望用户在访问我们的应用程序时获得最快,最高效的体验。
Lazy loading is one of the features we can add to our app to improve performance. What exactly is lazy loading?
延迟加载是我们可以添加到应用中以提高性能的功能之一。 延迟加载到底是什么?
Lazy loading is the act of only loading parts of our app when they are needed.
延迟加载是仅在需要时加载我们应用程序的某些部分的行为。
The benefits are:
好处是:
- Keep the initial payload small 保持初始有效载荷较小
- Smaller payloads lead to faster download speeds 较小的有效载荷导致更快的下载速度
- Lower resource costs especially on mobile networks 降低资源成本,尤其是在移动网络上
- If a user doesn't visit a section of our app, they won't ever download those resources 如果用户不访问我们应用程序的某个部分,他们将永远不会下载这些资源
The Angular router provides a simple and easy way to add lazy loading to our application. Let's take a look at how we can add it.
Angular路由器提供了一种简单的方法来向我们的应用程序添加延迟加载。 让我们看一下如何添加它。
概述和设置 ( Overview and Setup )
Lazy loading in Angular requires us to format our application a certain way. All the assets that you want to be lazy loaded should be added to its own module.
Angular中的延迟加载要求我们以某种方式格式化应用程序。 您要延迟加载的所有资产应添加到其自己的模块中。
For instance, if we wanted to lazy load our entire dashboard/ section, we would need to have all those assets/components in their own DashboardModule.
例如,如果我们要延迟加载整个dashboard/部分,则需要将所有这些资产/组件放在自己的DashboardModule 。
Rules for lazy loading:
延迟加载的规则:
- Move components and assets into their own module 将组件和资产移动到自己的模块中
- DO NOT load the module in the main
AppModule不要将模块加载到主AppModule - Lazy loading will be setup in the main routing file 延迟加载将在主路由文件中设置
TLDR:添加延迟加载 ( TLDR: Adding Lazy Loading )
Once you have a module you want to lazy load to (let's say a DashboardModule), we can add it to our writing file.
一旦有了要延迟加载的模块(例如DashboardModule ),我们就可以将其添加到写入文件中。
Here is the route to use for a DashboardModule:
这是用于DashboardModule的路由:
const routes: Routes = [
  {
    path: 'dashboard',
    loadChildren: 'app/dashboard/dashboard.module#DashboardModule',
  }
];
We're using the loadChildren parameter to pass a string that points to our module. Make sure you reference from the root src/ folder. Notice we started the string at app/.
我们正在使用loadChildren参数传递一个指向我们模块的字符串 。 确保从根src/文件夹引用。 注意,我们在app/处开始了字符串。
The dashboard module will most likely have its own routes. We add the path: dashboard here in the main router and the child router will be set to path: ''.
仪表板模块将很可能具有自己的路线。 我们在主路由器的此处添加path: dashboard ,并将子路由器设置为path: ''
Now when you visit your dashboard section, you
现在,当您访问仪表板部分时,您将
生成延迟加载的应用 ( Building a Lazy Loaded App )
Let's build a quick lazy loaded app to see exactly how this would work. We'll be using the Angular CLI. You don't need to using the CLI. Just make sure you have a module and route to it using loadChildren.
让我们构建一个快速延迟加载的应用程序,以确切了解其工作方式。 我们将使用Angular CLI 。 您不需要使用CLI。 只要确保您有一个模块并使用loadChildren路由至该模块loadChildren 。
We'll create an app with a dashboard section. This dashboard section will be lazy loaded. Not all users will visit the dashboard.
我们将创建一个带有仪表板部分的应用程序。 此仪表板部分将被延迟加载。 并非所有用户都将访问仪表板。
Here's the overview of our app:
这是我们应用程序的概述:
- Home route | '' | HomeComponent 本地路线| ''| 家庭组件
- Dashboard section | 'dashboard' | DashboardHomeComponent 仪表板部分| “仪表板” | DashboardHomeComponent
We'll use the CLI to create the entire app with routing:
我们将使用CLI通过路由创建整个应用程序:
# create the app
ng new lazyload-app --routing

# create the home component
ng g component home

# create the dashboard module
ng g module dashboard --routing

# create the dashboard home page
ng g component dashboard/dashboard-home
We now have a clean app setup:
现在,我们有了一个干净的应用程序设置:
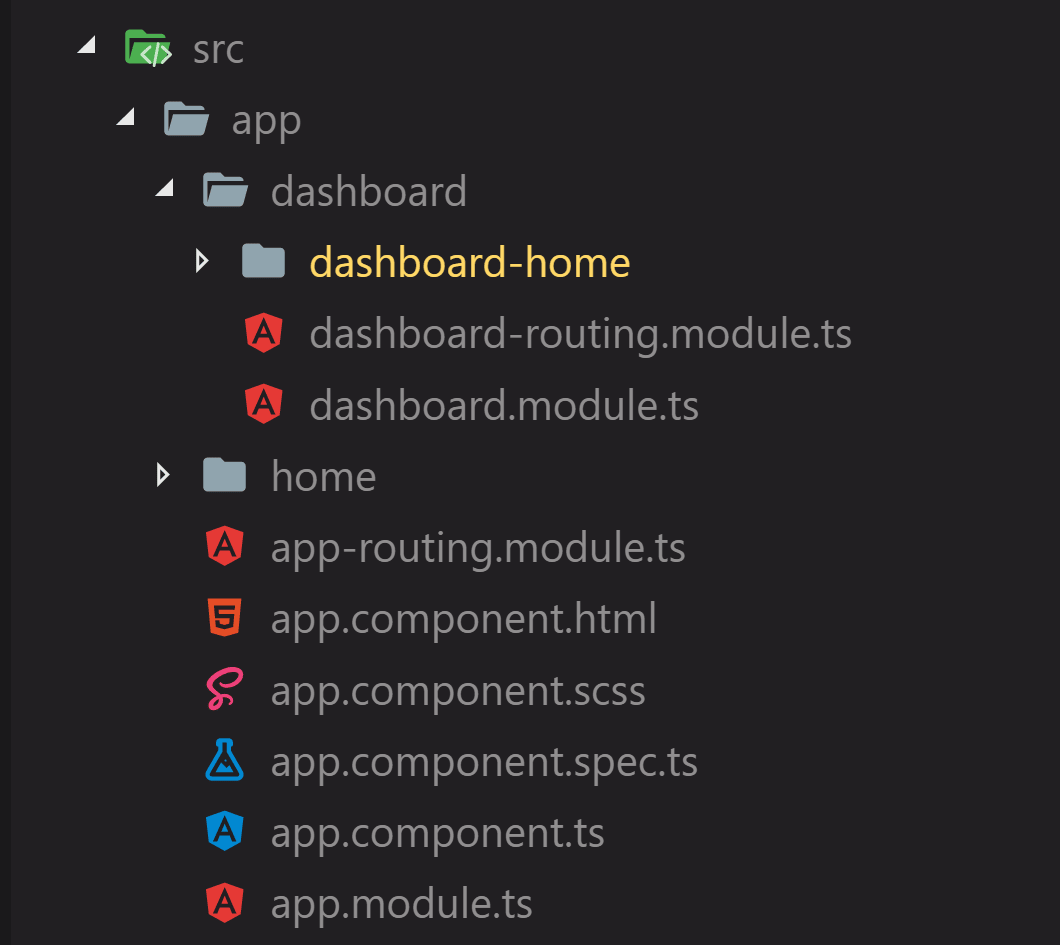
The cool thing about creating a component with the CLI is that the CLI will automatically register the component in its respective module. We don't have to go write the import and add it to the declarations array.
使用CLI创建组件的很酷的事情是CLI会自动在其各自的模块中注册该组件。 我们不必去编写import并将其添加到declarations数组。
设置仪表板路线 ( Setup Dashboard Routes )
We have our new dashboard module with a new dashboard-routing.module.ts file. This is where we'll define routes. Any routes defined here will be lazy loaded!
我们有了带有新的dashboard-routing.module.ts文件的新的dashboard-routing.module.ts板模块。 这是我们定义路线的地方。 这里定义的任何路由都会被延迟加载!
Let's update our dashboard-routing.module.ts:
让我们更新我们的dashboard-routing.module.ts :
import { NgModule } from '@angular/core';
import { Routes, RouterModule } from '@angular/router';
import { DashboardHomeComponent } from './dashboard-home/dashboard-home.component';

const routes: Routes = [
  {
    path: '',
    component: DashboardHomeComponent
  }
];

@NgModule({
  imports: [RouterModule.forChild(routes)],
  exports: [RouterModule]
})
export class DashboardRoutingModule { }
We added path: '' because we'll define the dashboard route in the main router.
我们添加了path: ''因为我们将在主路由器中定义dashboard路由。
设置主延迟加载路由 ( Setup Main Lazy Loaded Route )
Let's update the main router now to point our dashboard section to this new DashboardModule. We'll also be setting up lazy loading!
现在让我们更新主路由器,将我们的仪表板部分指向这个新的DashboardModule 。 我们还将设置延迟加载!
// app-routing.module.ts

import { NgModule } from '@angular/core';
import { Routes, RouterModule } from '@angular/router';
import { HomeComponent } from './home/home.component';

const routes: Routes = [
  {
    path: '',
    component: HomeComponent
  },
  {
    path: 'dashboard',
    loadChildren: 'app/dashboard/dashboard.module#DashboardModule'
  }
];

@NgModule({
  imports: [RouterModule.forRoot(routes)],
  exports: [RouterModule]
})
export class AppRoutingModule { }
The loadChildren parameter is how we tell Angular to lazy load that section. Remember that we don't have to load the DashboardModule into the main AppModule.
loadChildren参数是我们告诉Angular延迟加载该部分的方式。 请记住,我们不必将DashboardModule加载到主AppModule 。
测试我们的应用 ( Testing Our App )
Now this is all looking good. How do we actually test to see if lazy loading is working? Let's do one last thing before we can test.
现在,一切看起来都很好。 我们如何实际测试以查看延迟加载是否正常工作? 在测试之前,让我们做最后一件事。
创建仪表板链接 (Creating a Dashboard Link)
To test lazy loading, we'll need a link that points to the dashboard. We need a way to get to our new section we just created.
要测试延迟加载,我们需要一个指向仪表板的链接。 我们需要一种方法来进入我们刚刚创建的新部分。
Open up app.component.html and add the following to the top:
打开app.component.html并将以下内容添加到顶部:
<a routerLink="/dashboard">Dashboard</a>启动应用 (Starting the App)
Now we can start up our app and find out if lazy loading is working.
现在,我们可以启动我们的应用程序,并确定延迟加载是否正常工作。
ng serve --open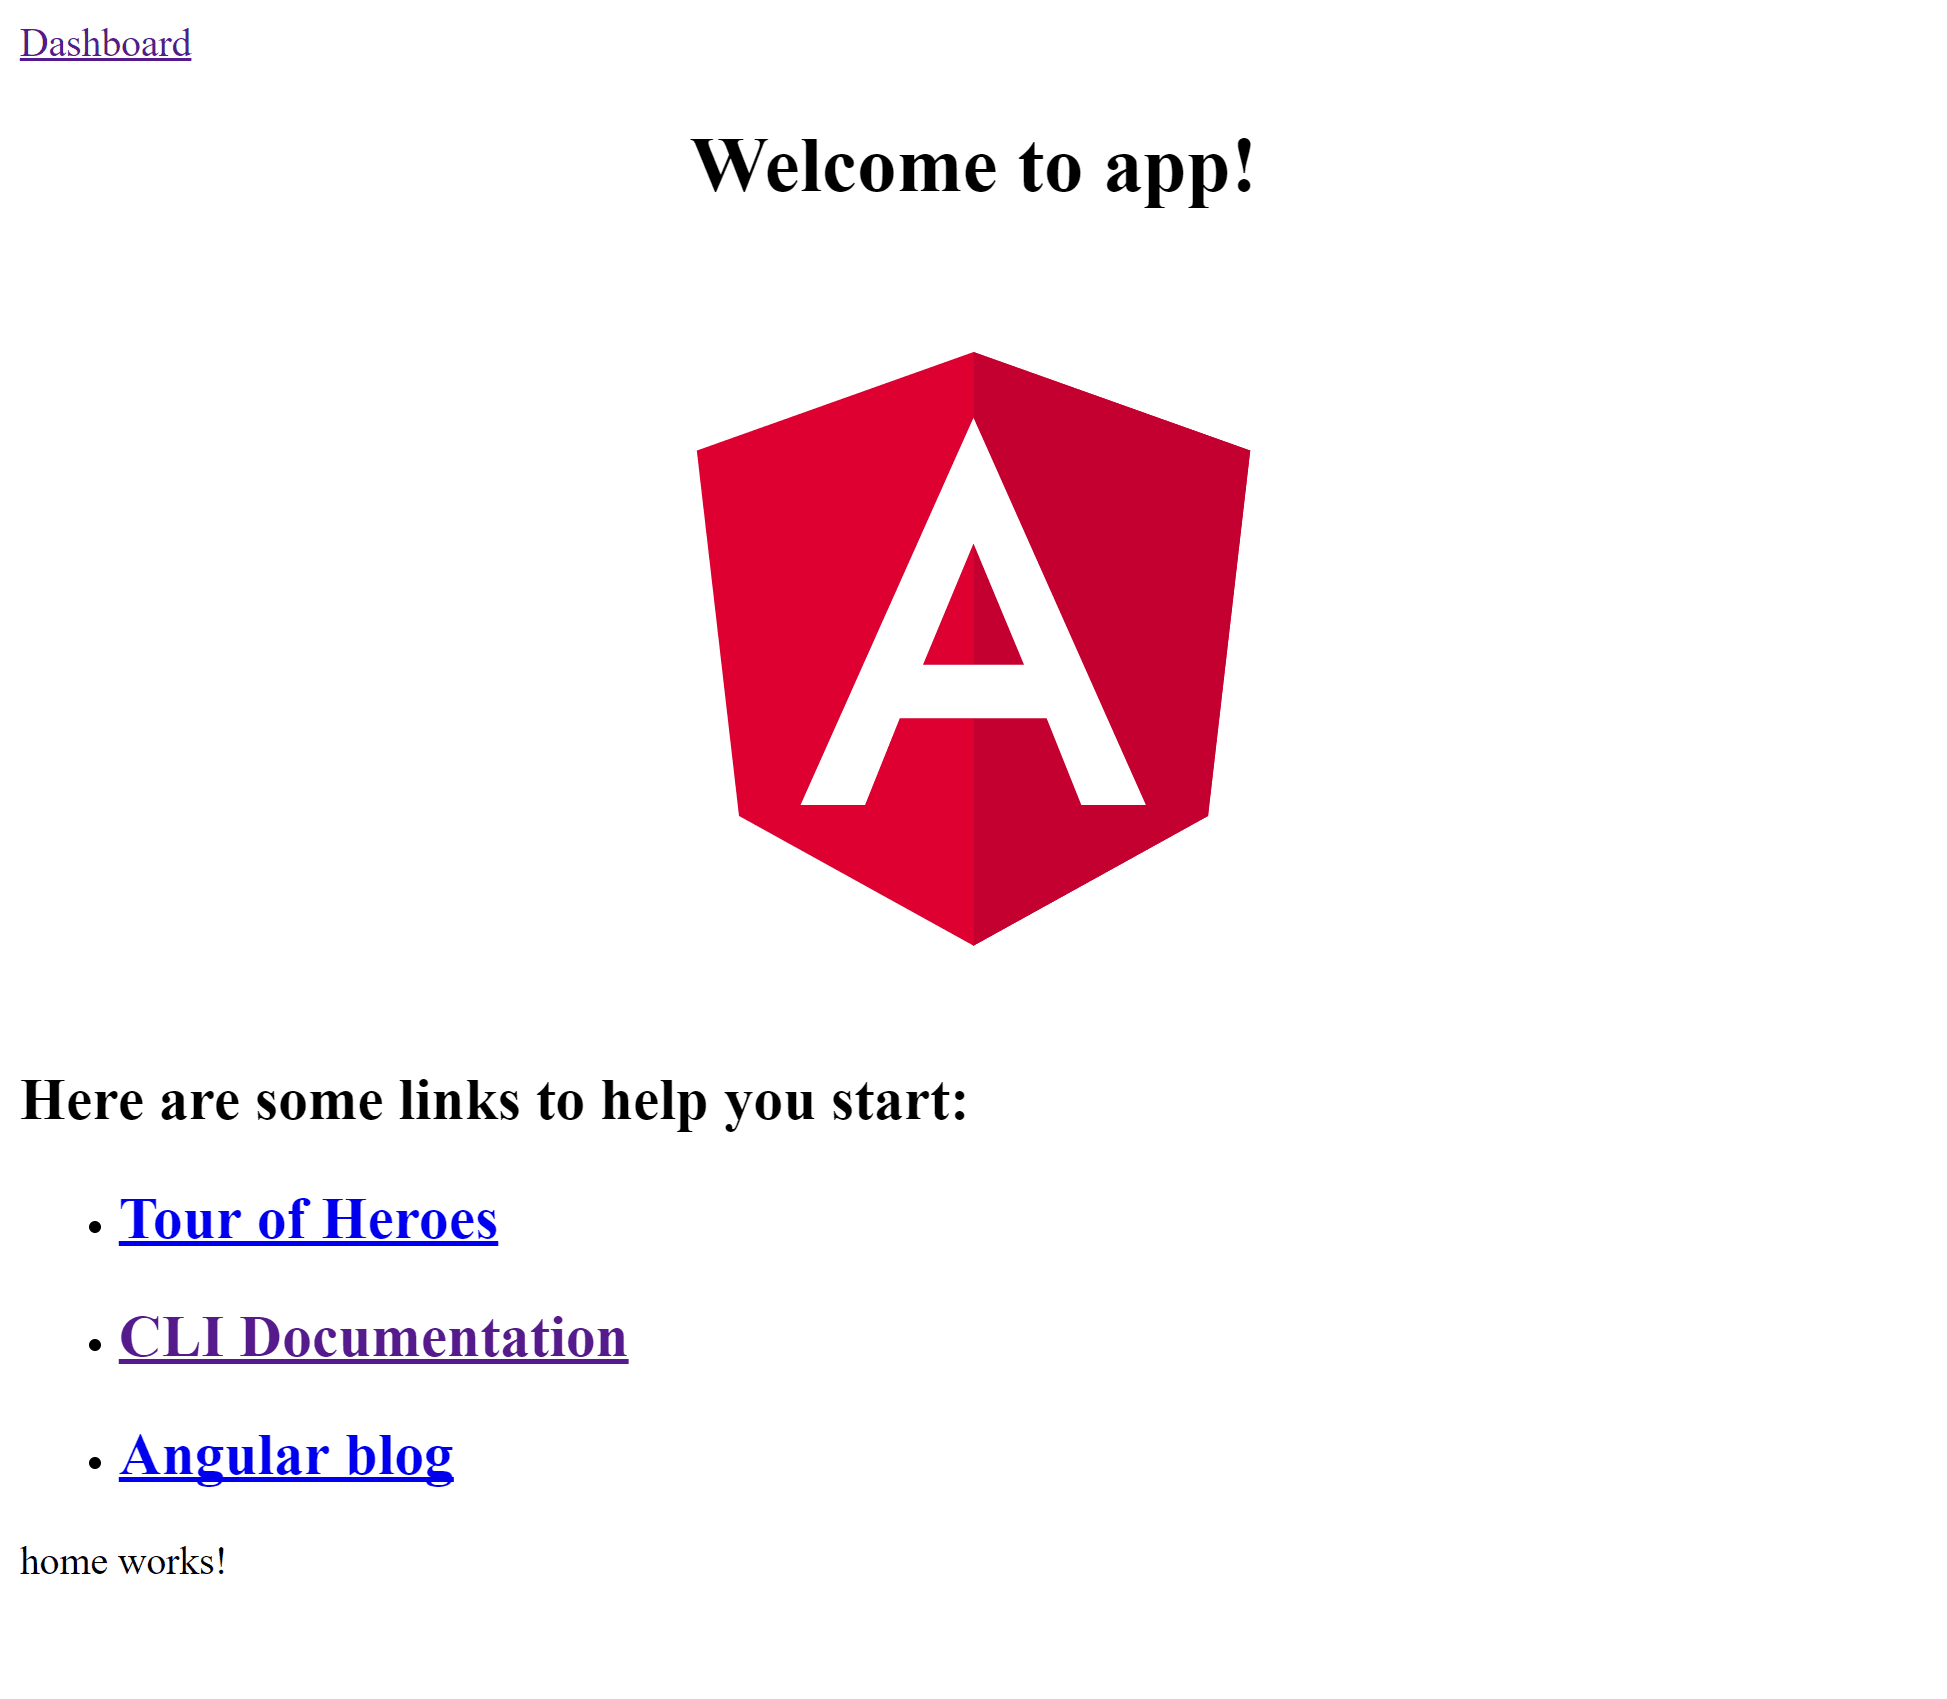
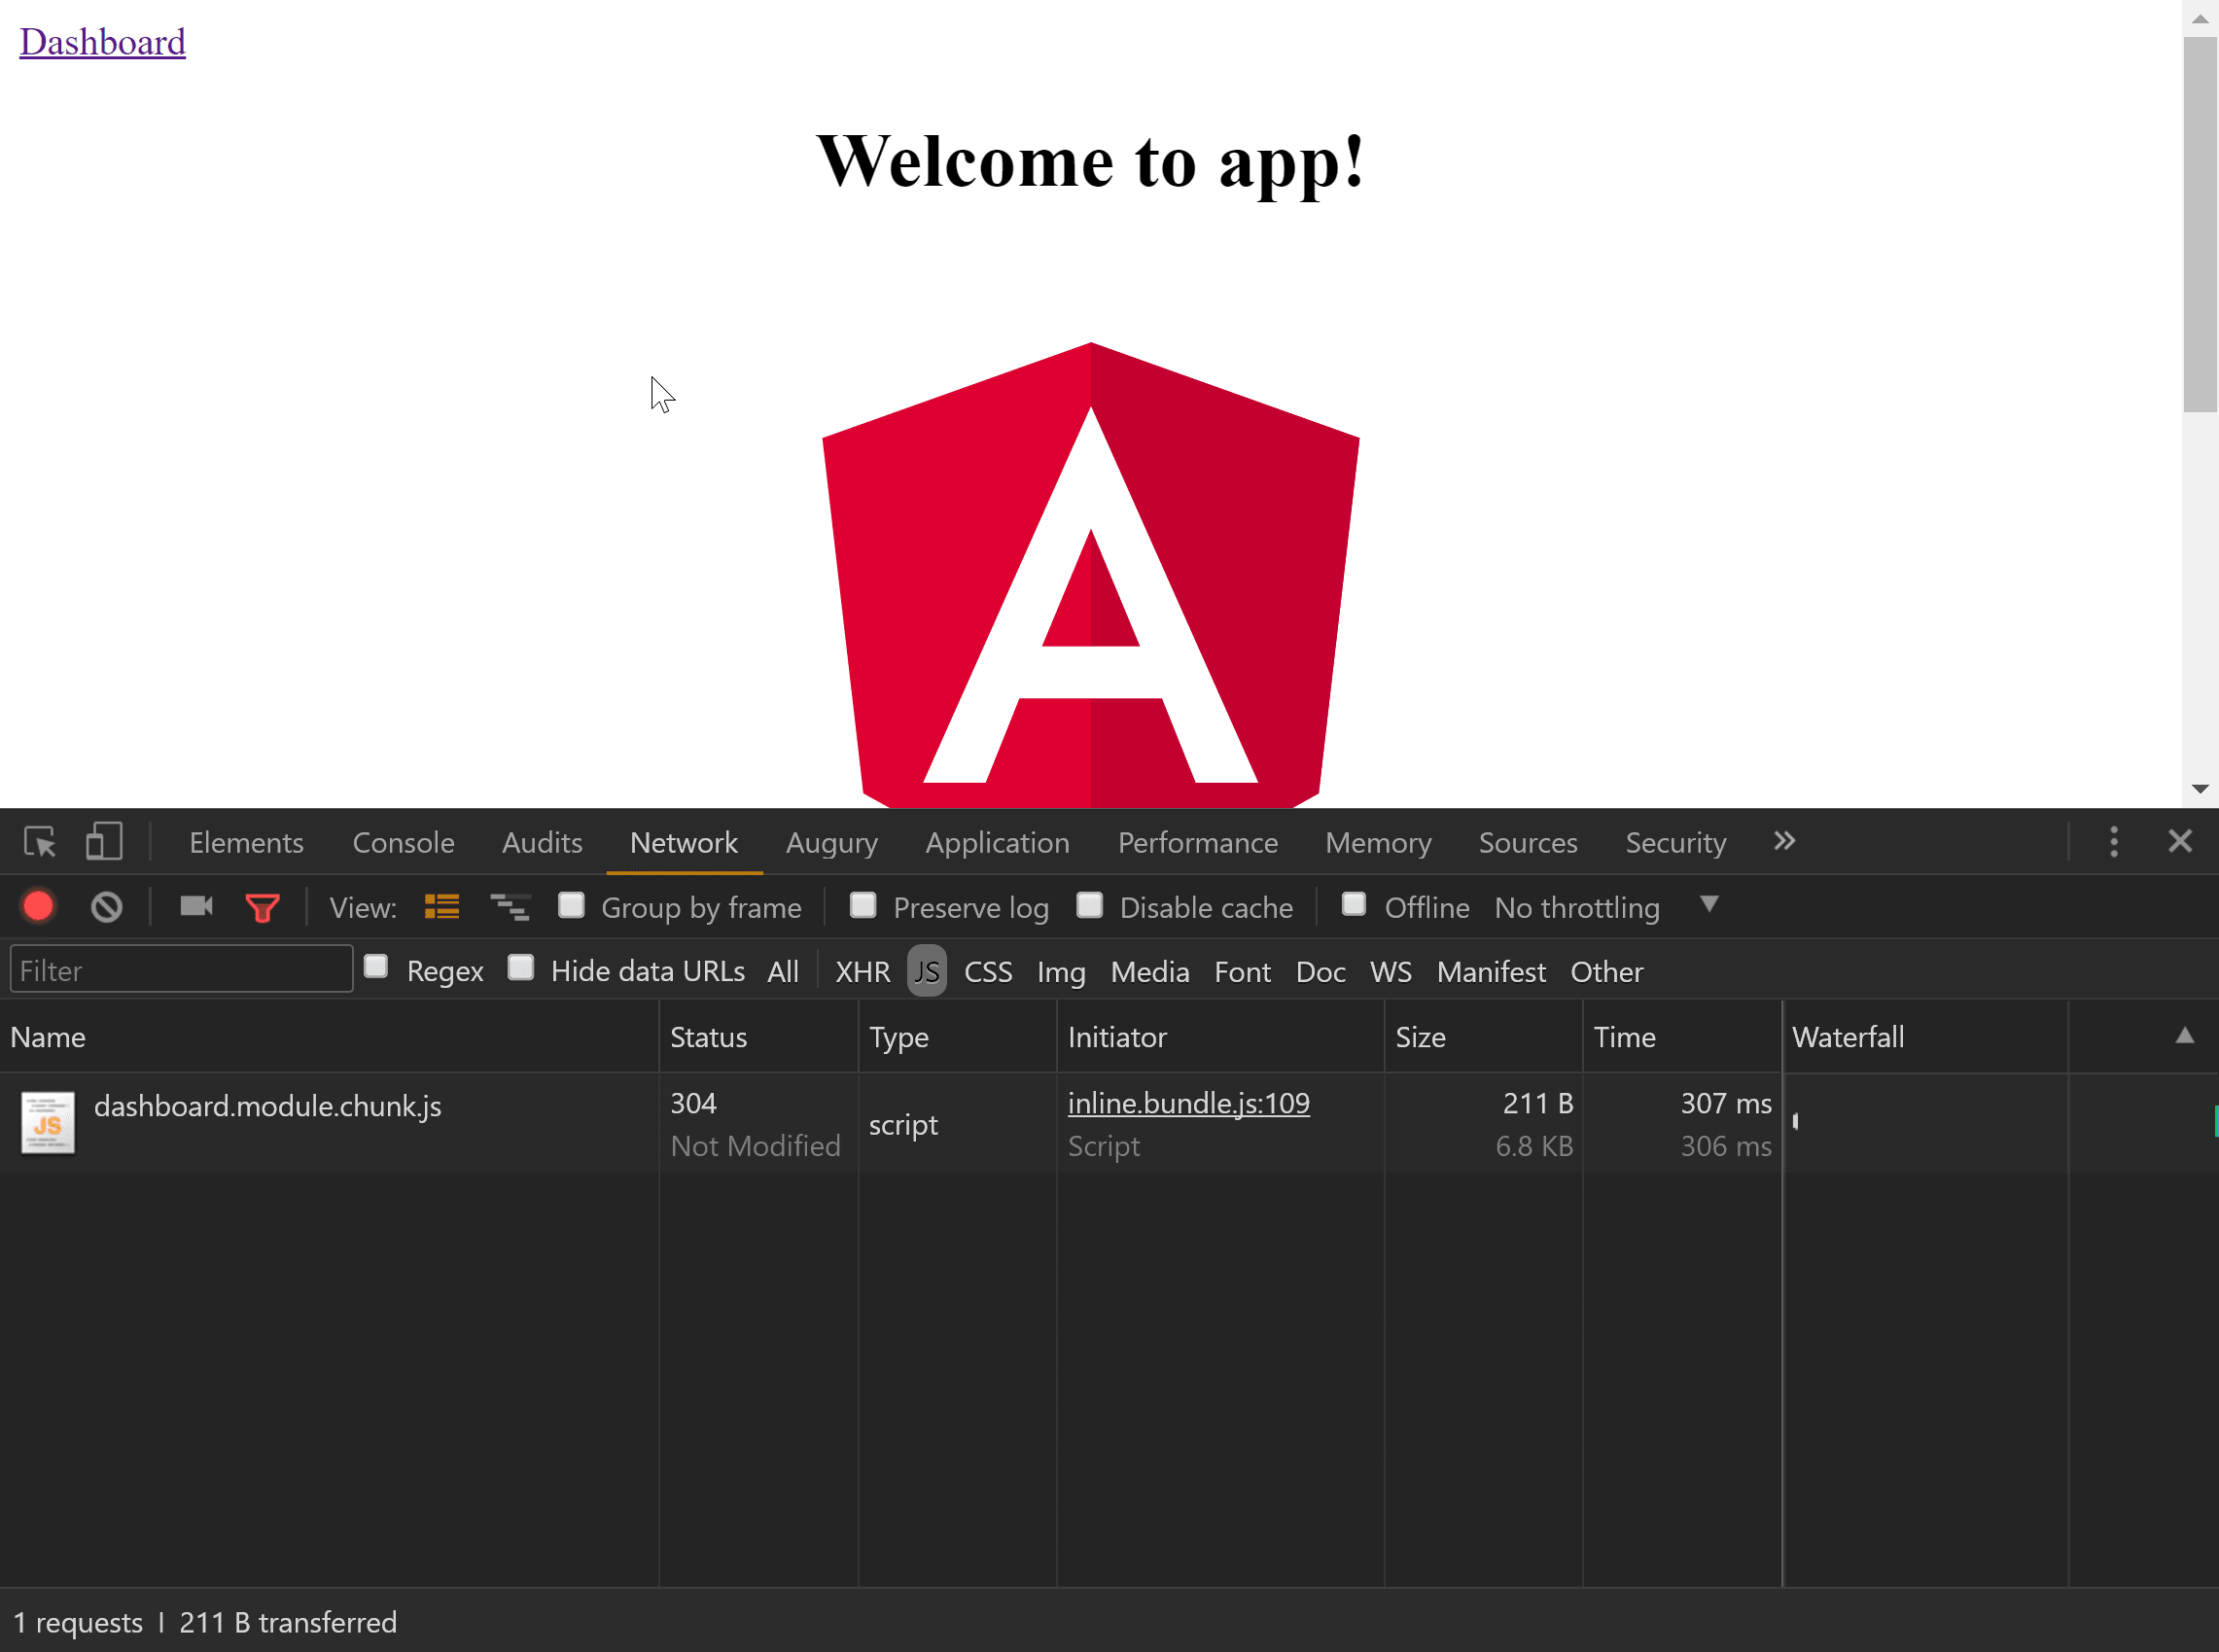
Open up dev tools and go to the Network -> JS tab.
打开开发工具,然后转到网络-> JS标签。
As soon as you click the Dashboard link, you'll see the dashboard module get loaded!
单击“ 仪表板”链接后,您将看到仪表板模块已加载!
结论 ( Conclusion )
Just by adding all our code to a module and adding the loadChildren parameter, the Angular router makes it easy to lazy load sections of our application.
只需将我们所有的代码添加到模块中并添加loadChildren参数,Angular路由器就可以轻松延迟应用程序的加载部分。
angular2 延迟加载


 138
138

 被折叠的 条评论
为什么被折叠?
被折叠的 条评论
为什么被折叠?
 到【灌水乐园】发言


