


angular4前后端分离
With the release of Angular v4.3 in July, some new features where introduced. Among them was a new HttpClientModule, @angular/common/http replacing @angular/http. It is smaller, easier and a more powerful library for making HTTP requests.
随着7月Angular v4.3的发布,引入了一些新功能。 其中包括一个新的HttpClientModule, @angular/common/http替换了@angular/http 。 它更小,更容易且功能更强大,可以发出HTTP请求。
A new HttpClient service was also included in the HttpClientModule and it can be used to initiate HTTP request. In this tutorial I would show you how to implement this new client and examine some of its features.
HttpClientModule中还包含一个新的HttpClient服务,可用于启动HTTP请求。 在本教程中,我将向您展示如何实现此新客户端并检查其某些功能。
We've talked about the HTTP Client in depth in a previous article: Angular 2 HTTP Requests with Observables
在上一篇文章中我们已经深入讨论了HTTP客户端: 带有Observables的Angular 2 HTTP请求
TLDR ( TLDR )
Here's the changes you'll need to make from the old (pre-v4) to the new (v4+)
这是您需要从旧版(v4之前)到新版(v4 +)进行的更改
For importing into an NgModule:
导入到NgModule中:
// below v4 ==========================================
import { HttpModule } from '@angular/http';

...
@NgModule({
    imports: [
        HttpModule
    ]
})
...

// v4+ ===============================================
import { HttpClientModule } from '@angular/common/http';

...
@NgModule({
    imports: [
        HttpClientModule
    ]
})
...
And for using inside of a service:
对于在服务内部使用:
// below v4 ==========================================
import { Http } from '@angular/http';

...
constructor(private http: Http) {}
...

// v4+ ===============================================
import { HttpClient } from '@angular/common/http';

...
constructor(private http: HttpClient) {}
...
With that quick look out of the way, let's take a deeper dive.
快速浏览后,让我们进行更深入的探讨。
安装Angular v4 ( Installing Angular v4 )
To get started install the Angular CLI using Node and npm if you do not have it installed already.
首先,使用Node和npm(如果尚未安装)安装Angular CLI 。
npm install -g @angular/cli@latestThe -g switch for installing it globally and @latest for the latest version. After the installation is complete run the following command to scarfold a new application
-g开关用于全局安装, @latest用于最新版本。 安装完成后,运行以下命令来启动新应用程序
ng new httptutorial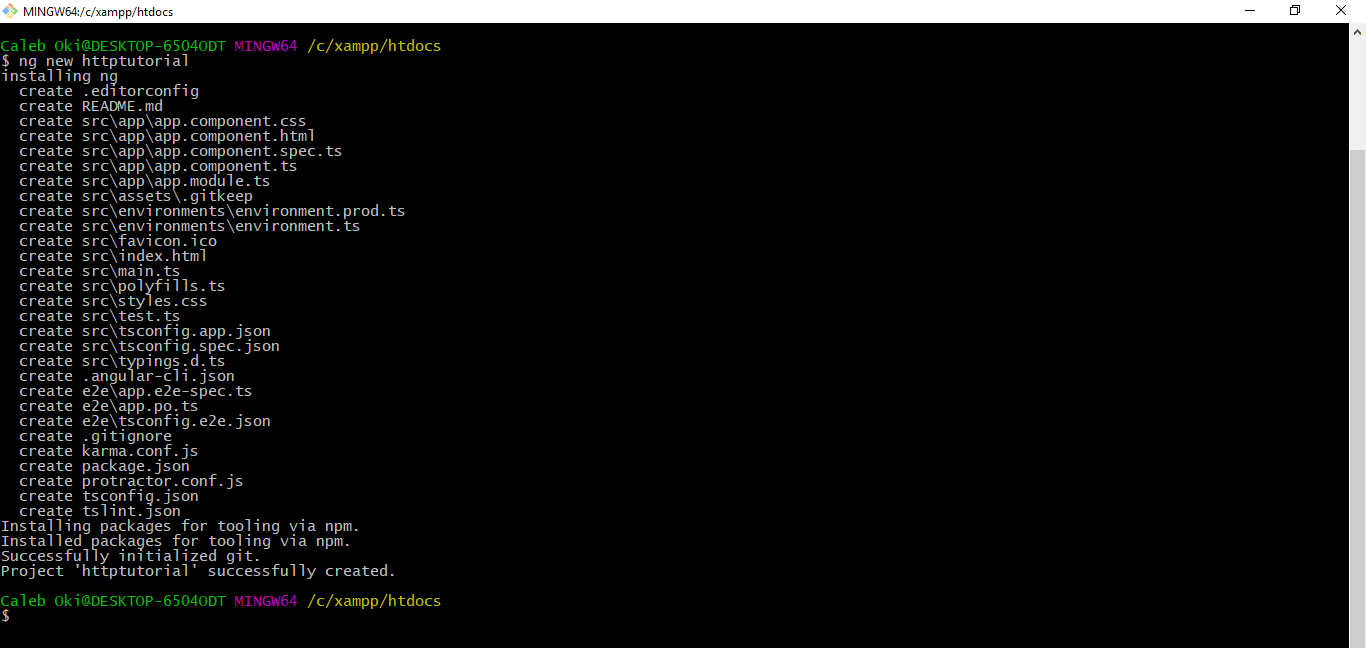
This downloads the project's template and installs all dependences. The project directory structure should look like this
这将下载项目的模板并安装所有依赖项。 项目目录结构应如下所示
// end-to-end-tests
|- e2e/
  |----- app.e2e-spec.ts
  |----- app.po.ts
  |----- tsconfig.e2e.json

// npm dependencies
|- node_modules/

// public facing app. built things go here. this wont show until we run a build
|- dist/

// where most of the work will be done
|- src/
  |----- app/
      |----- app.component.css|html|spec.ts|ts
      |----- app.module.ts
  |----- assets/
  |----- environments/
      |----- environment.prod.ts|ts
  |----- favicon.ico
  |----- index.html
  |----- main.ts
  |----- polyfills.ts
  |----- styles.css
  |----- test.ts
  |----- tsconfig.app.json
  |----- tsconfig.spec.json
  |----- typings.d.ts

// overall configuration
|- .angular-cli.json  // the main configuration file
|- .editorconfig      // editorconfig which is used in some VS Code setups
|- .gitignore
|- karma.conf.js
|- package.json
|- protractor.conf.js
|- README.md
|- tsconfig.json
|- tslint.json
Open the package.json file and update the angular dependences to version 4.3.6. So the dependencies and devDependenciessection of the file should look like this:
打开package.json文件,并将角度相关性更新到版本4.3.6 。 因此,文件的dependencies和devDependencies部分应如下所示:
"dependencies": {
    "@angular/animations": "^4.3.6",
    "@angular/common": "^4.3.6",
    "@angular/compiler": "^4.3.6",
    "@angular/core": "^4.3.6",
    "@angular/forms": "^4.3.6",
    "@angular/http": "^4.3.6",
    "@angular/platform-browser": "^4.3.6",
    "@angular/platform-browser-dynamic": "^4.3.6",
    "@angular/router": "^4.3.6",
    "core-js": "^2.4.1",
    "rxjs": "^5.4.2",
    "zone.js": "^0.8.14"
  },
  "devDependencies": {
    "@angular/cli": "1.3.2",
    "@angular/compiler-cli": "^4.3.6",
    "@angular/language-service": "^4.3.6",
    "@types/jasmine": "~2.5.53",
    "@types/jasminewd2": "~2.0.2",
    "@types/node": "~6.0.60",
    "codelyzer": "~3.1.1",
    "jasmine-core": "~2.6.2",
    "jasmine-spec-reporter": "~4.1.0",
    "karma": "~1.7.0",
    "karma-chrome-launcher": "~2.1.1",
    "karma-cli": "~1.0.1",
    "karma-coverage-istanbul-reporter": "^1.2.1",
    "karma-jasmine": "~1.1.0",
    "karma-jasmine-html-reporter": "^0.2.2",
    "protractor": "~5.1.2",
    "ts-node": "~3.2.0",
    "tslint": "~5.3.2",
    "typescript": "~2.3.3"
  }
Then within the project directory run
然后在项目目录中运行
npm installThis would pull in the dependences in the package.json file. To see if everything works correctly, start the development web server running:
这将拉入package.json文件中的依赖项。 要查看一切是否正常,请启动运行中的开发Web服务器:
ng serve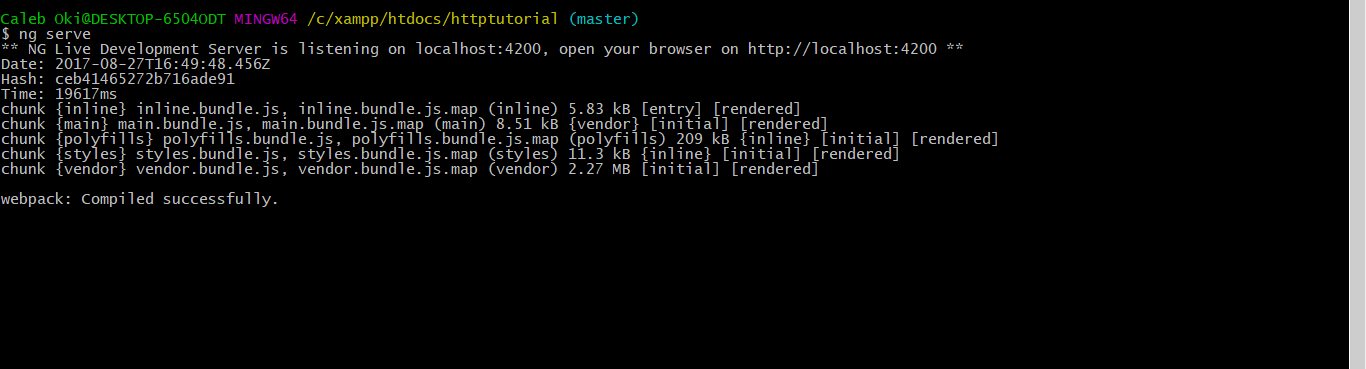
This starts the development web server at http://localhost:4200. Visit this url, and you should see something like this:
这将在http://localhost:4200启动开发Web服务器。 访问此URL,您应该看到类似以下内容的内容:

安装HTTP模块 ( Installing the HTTP module )
Next import the HttpClientModule in the application's root module that is the src/app/app.module.ts file and add it in the imports property. So the file should look like this:
接下来,将HttpClientModule导入应用程序的根模块(即src/app/app.module.ts文件)中,并将其添加到imports属性中。 因此文件应如下所示:
import { BrowserModule } from '@angular/platform-browser';
import { NgModule } from '@angular/core';

import { HttpClientModule } from '@angular/common/http';

import { AppComponent } from './app.component';

@NgModule({
  declarations: [
    AppComponent
  ],
  imports: [
    BrowserModule,
    HttpClientModule
  ],
  providers: [],
  bootstrap: [AppComponent]
})
export class AppModule { }
Now for the HttpClient to be used in your components, it needs to be injected into the class constructor. In src/app/app.component.ts import the HttpClient then inject it into the constructor as shown below:
现在,要在组件中使用HttpClient,就需要将其注入到类构造函数中。 在src/app/app.component.ts导入HttpClient然后将其注入到构造函数中,如下所示:
import { Component } from '@angular/core';

import { HttpClient } from '@angular/common/http';

@Component({
  selector: 'app-root',
  templateUrl: './app.component.html',
  styleUrls: ['./app.component.css']
})
export class AppComponent {
  title = 'app';

  constructor( private http: HttpClient ) { //dependency injection, creating an instance of HttpClient called http

  }
}
Now you would be able to make CRUD operations and execute HTTP requests. The HTTP methods available are post, put, delete, patch, head and jsonp.
现在,您将可以进行CRUD操作并执行HTTP请求。 可用的HTTP方法是post,put,delete,patch,head和jsonp。
HTTP GET ( HTTP GET )
To demostrate the get method, we would be quering a fake REST API. Head over to http://jsonplaceholder.typicode.com/ and scroll down to Resources. You should see a page like this:
 Then under Resources click on
/posts
userId,
id,
title and
body. So when we hit the url:
http://jsonplaceholder.typicode.com/posts from our Angular app, we would get the above result. The other HTTP methods also work as expected.
为了演示get方法,我们将查询一个伪造的REST API。 转到http://jsonplaceholder.typicode.com/并向下滚动到Resources。 您应该看到这样的页面:
然后在参考资料下单击
/posts
userId ,
id ,
title和
body 。 因此,当我们从Angular应用程序中访问URL:
http :
//jsonplaceholder.typicode.com/posts时 ,我们将得到以上结果。 其他HTTP方法也可以按预期工作。
Now edit the src/app/app.component.ts to look like this:
现在,将src/app/app.component.ts编辑为如下所示:
import { Component, OnInit } from '@angular/core'; // importing the OnInit interface

import { HttpClient } from '@angular/common/http';

@Component({
  selector: 'app-root',
  templateUrl: './app.component.html',
  styleUrls: ['./app.component.css']
})
export class AppComponent implements OnInit { // implementing OnInit
  title = 'app';

  constructor( private http: HttpClient ) {

  }
  ngOnInit(): void { // adding the lifecycle hook ngOnInit
    this.http.get('http://jsonplaceholder.typicode.com/posts').subscribe(data => {
      console.log(data); // using the HttpClient instance, http to call the API then subscribe to the data and display to console
    });
  }

}
Here we are calling the API endpoint in the ngOnInit lifecycle hook. This hook is invoked when our component has been initialized. First we import the OnInit interface, then implement this interface in the class definition. Then we call the ngOnInit method, inside which we call the HttpClient instance http, which we created earlier in the constructor.
在这里,我们在ngOnInit生命周期挂钩中调用API端点。 当我们的组件已经初始化时,这个钩子被调用。 首先,我们导入OnInit接口,然后在类定义中实现此接口。 然后,我们调用ngOnInit方法,在其中我们称为HttpClient实例http ,该实例是我们先前在构造函数中创建的。
We call the get method from this instance which expects the URL of the API endpoint we are interested in. The get method returns an observable so we need to subscribe to this observable so as to be informed when the response arrives, this is done by calling the subscribe method. In the subscribe method we define an event handler which gets the data, which we can then print into the console. The output which is displayed in the browser console should look like the following:
我们从这个实例中调用get方法,该实例期望我们感兴趣的API端点的get方法返回一个observable,因此我们需要订阅该observable,以便在响应到达时得到通知,这是通过调用subscribe方法。 在subscribe方法中,我们定义了一个事件处理程序,该处理程序获取数据,然后可以将其打印到控制台中。 浏览器控制台中显示的输出应如下所示:
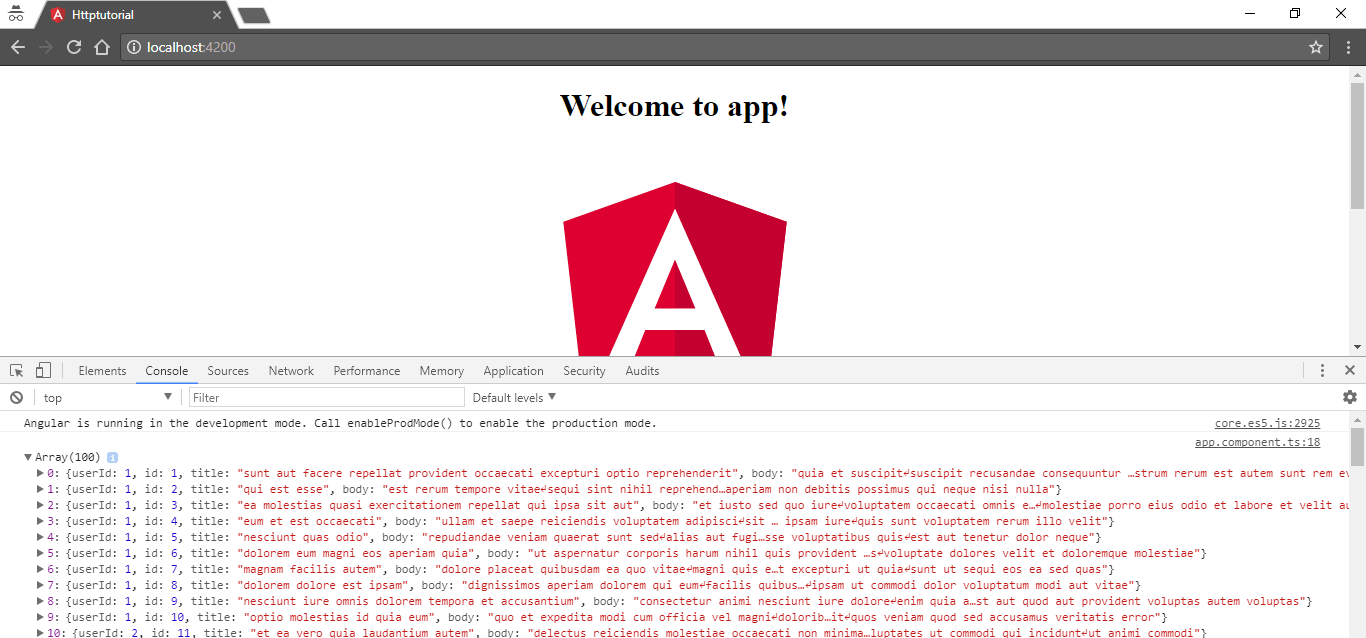
These are the json objects pulled from the url: http://jsonplaceholder.typicode.com/posts.
这些是从url中提取的json对象: http : //jsonplaceholder.typicode.com/posts 。
To access each one of the properties of the response object, for example the data.userId property, we need to cast the response object to a type which is containing the corresponding properties. To do this, let's define an interface. Enter the following in the src/app/app.component.ts file just after the import statements:
要访问响应对象的data.userId属性,例如data.userId属性,我们需要将响应对象转换为包含相应属性的类型。 为此,我们定义一个接口。 在import语句之后,在src/app/app.component.ts文件中输入以下内容:
interface DataResponse {
  userId: string;
  id: string;
  title: string;
}
Next, edit the get call to make use of the DataResponse interface:
接下来,编辑get调用以使用DataResponse接口:
this.http.get<DataResponse>('http://jsonplaceholder.typicode.com/posts/1').subscribe(data => {
console.log('UserId: ' + data.userId);
console.log('Id: ' + data.id);
console.log('Title: ' + data.title);
console.log('Body: ' + data.body);
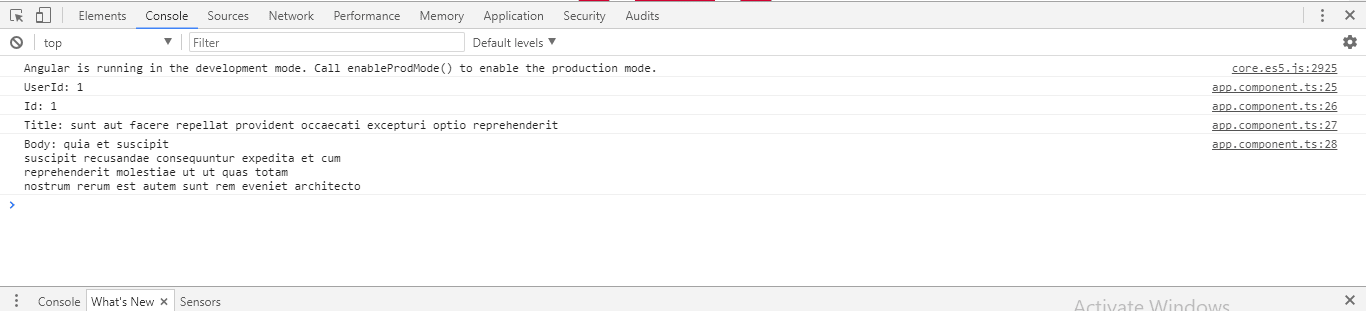
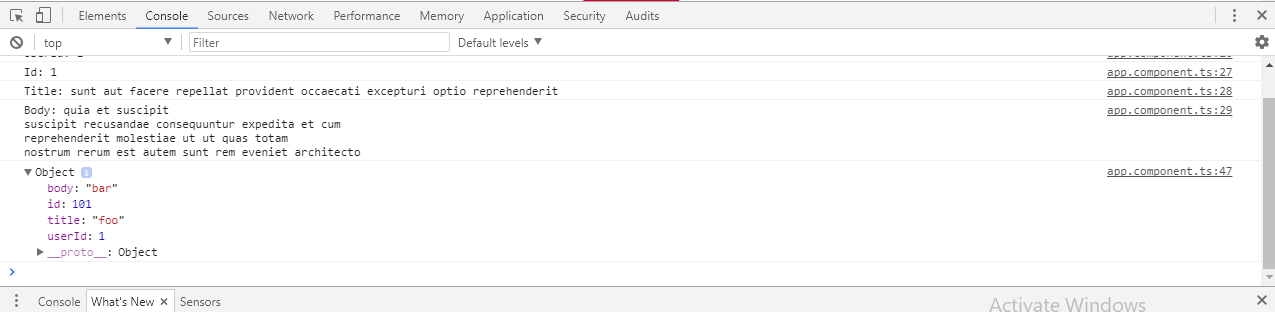
});Now we can access the properties userId,* title* and* body* individually. The output at the console should look like this:
现在,我们可以分别访问属性userId ,* title *和* body *。 控制台上的输出应如下所示:
We might want to display an error message when the http request fails. To do this, first import HttpErrorResponse from* @angular/common/http* then create a error handler function by adding a callback to the subscribe method, then define a parameter of type HttpErrorResponse for the error handler function:
当http请求失败时,我们可能想显示一条错误消息。 为此,请首先从* @ angular / common / http *导入HttpErrorResponse ,然后通过向subscription方法添加回调来创建错误处理函数,然后为错误处理函数定义HttpErrorResponse类型的参数:
import { HttpClient, HttpErrorResponse } from '@angular/common/http';

// ...

this.http.get<DataResponse>('https://jsonplaceholder.typicode.com/posts/1').subscribe(data => {
      console.log('UserId: ' + data.userId);
      console.log('Id: ' + data.id);
      console.log('Title: ' + data.title);
      console.log('Body: ' + data.body);
    },
    (err: HttpErrorResponse) => {
      if (err.error instanceof Error) {
        console.log('Client-side error occured.');
      } else {
        console.log('Server-side error occured.');
      }
    }
  );
HTTP POST ( HTTP POST )
Just as before, we would use the JSONPlaceholder service to demostrate HTTP POST. Note however that as this is a fake service, data is not persistent but the API responds as if a real API is called. The endpoint of the POST request is http://jsonplaceholder.typicode.com/posts. If you visit this url you will see that we have four properties available to us: userId, id, title and body. To use this endpoint to create a new record, add a second call inside the ngOnInit lifecycle:
和以前一样,我们将使用JSONPlaceholder服务演示HTTP POST。 但是请注意,由于这是伪造的服务,因此数据不是持久性的,但API会像调用真实API一样进行响应。 POST请求的端点是http://jsonplaceholder.typicode.com/posts 。 如果您访问此url,则会看到我们有四个可用属性: userId , id , title和body 。 要使用此端点创建新记录,请在ngOnInit生命周期内添加第二个调用:
this.http.post('http://jsonplaceholder.typicode.com/posts', {
      title: 'foo',
      body: 'bar',
      userId: 1
    })
      .subscribe(
        res => {
          console.log(res);
        },
        err => {
          console.log('Error occured');
        }
      );
The post method is again returning an observable so we need to subscribe to this observable as before, this is done by calling the subscribe method. In the subscribe method we define an event handler which gets the data, which we can then print into the console. Then we add the error handler to print of information if an error occured. The output displayed in the browser console should look like the following:
post方法再次返回一个可观察对象,因此我们需要像以前一样订阅该可观察对象,这是通过调用subscribe方法来完成的。 在subscription方法中,我们定义了一个事件处理程序,该处理程序获取数据,然后可以将其打印到控制台中。 然后,如果发生错误,我们将添加错误处理程序以打印信息。 浏览器控制台中显示的输出应如下所示:
HTTP拦截器 ( HTTP Interceptors )
Another new feature of the HTTP Client module are interceptors. An interceptor sits between the application and a backend API. With interceptors we can manipulate a request coming from our application before it is actually submitted and sent to the backend. The converse is also true, that is a response arriving from the backend can be altered before it is submitted and processed by our application. To demostrate this, we would intercept the header information coming from the get request to http://jsonplaceholder.typicode.com/posts/1. The header field we would be altering is the Accept-Language field coming from the API. Create a new file src/app/typicode.interceptor.ts and enter the following code:
HTTP客户端模块的另一个新功能是拦截器。 拦截器位于应用程序和后端API之间。 使用拦截器,我们可以在实际提交并发送给后端之前处理来自我们应用程序的请求。 反之亦然,那就是从后端到达的响应可以在我们的应用程序提交和处理之前进行更改。 为了说明这一点,我们将拦截来自get请求的标头信息,该标头信息来自http://jsonplaceholder.typicode.com/posts/1 。 我们将要更改的标头字段是来自API的Accept-Language字段。 创建一个新文件src/app/typicode.interceptor.ts并输入以下代码:
import { Injectable } from '@angular/core';
import { HttpEvent, HttpInterceptor, HttpHandler, HttpRequest } from '@angular/common/http';
import { Observable } from 'rxjs/observable';
@Injectable()
export class TypicodeInterceptor implements HttpInterceptor {
  intercept (req: HttpRequest<any>, next: HttpHandler): Observable<HttpEvent<any>> {
    const authReq = req.clone({
      headers: req.headers.set('Accept-Language', 'Test')
    });
    return next.handle(authReq);
  }
}
First we are importing injectable from @angular/core then we import HttpEvent, HttpInterceptor, HttpHandler from @angular/common/http. Finally the Observable package is imported from rxjs/observable.
首先我们从@angular/core导入injectable ,然后从@angular/common/http导入HttpEvent , HttpInterceptor和HttpHandler 。 最后, Observable包从rxjs/observable导入。
Next we add the @injectable decorator, then create the TypicodeInterceptor class which implements the HttpInterceptor interface. We then add the interceptor method within the class implementation.
接下来,我们添加@injectable装饰器,然后创建实现HttpInterceptor接口的TypicodeInterceptor类。 然后,在类实现中添加interceptor方法。
This method takes a request, alters it, before passing it on for further processing to our application. Hence we are passing two parameters into this method; the request itself of type HttpRequest<any> and a parameter called next which is of type HttpHandler. The method returns an observable of type HttpEvent<any>
此方法接受请求,对其进行更改,然后再将其传递给我们的应用程序进行进一步处理。 因此,我们将两个参数传递给此方法; 类型为HttpRequest<any>的请求本身,以及名为HttpHandler类型的next参数。 该方法返回HttpEvent<any>类型的可观察HttpEvent<any>
Next we call the req.clone() method to clone the original HTTP request. Inside this method we alter the header field which is done by calling the req.headers.set() method. Here we altering the Accept-Language field changing it's value to Test.
接下来,我们调用req.clone()方法来克隆原始HTTP请求。 在此方法内部,我们通过调用req.headers.set()方法来更改标头字段。 在这里,我们更改了Accept-Language字段,将其值更改为Test 。
Finally the newly created request object (with the header included) is passed on for further processing by using the next.handle method.
最后,使用next.handle方法将新创建的请求对象(包括标头)传递给进一步处理。
拦截器提供者 ( Interceptor Provider )
To get the interceptor to work for our application, we need to edit src/app/app.module.ts file.
为了使拦截器适用于我们的应用程序,我们需要编辑src/app/app.module.ts文件。
import { BrowserModule } from '@angular/platform-browser';
import { NgModule } from '@angular/core';
import { HttpClientModule } from '@angular/common/http';
import { HTTP_INTERCEPTORS } from '@angular/common/http';
import { AppComponent } from './app.component';
import { TypicodeInterceptor } from './typicode.interceptor';
@NgModule({
  declarations: [
    AppComponent
  ],
  imports: [
    BrowserModule,
    HttpClientModule
  ],
  providers: [{
    provide: HTTP_INTERCEPTORS,
    useClass: TypicodeInterceptor,
    multi: true
  }],
  bootstrap: [AppComponent]
})
export class AppModule { }
Here we have imported HTTP_INTERCEPTORS from @angular/common/http and the TypicodeInterceptor class we created earlier in src/app/typicode.interceptor.ts. Next we’re inserting a new object to the array which is assigned to the providers property of @NgModule. This object contains three properties:
在这里,我们有进口HTTP_INTERCEPTORS从@angular/common/http和TypicodeInterceptor我们在前面创建的类src/app/typicode.interceptor.ts 。 接下来,我们将一个新对象插入到分配给@NgModule的providers属性的数组中。 该对象包含三个属性:
- provide: needs to be set to HTTP_INTERCEPTORS in order to specify that a HTTP interceptor is provided 提供:需要设置为HTTP_INTERCEPTORS以指定提供了HTTP拦截器
- useClass: needs to be set to our interceptor class type useClass:需要设置为我们的拦截器类类型
- multi: needs to be set to multi to tell Angular that HTTP_INTERCEPTORS is an array of values, rather than a single value multi:需要设置为multi以告知Angular HTTP_INTERCEPTORS是值的数组,而不是单个值
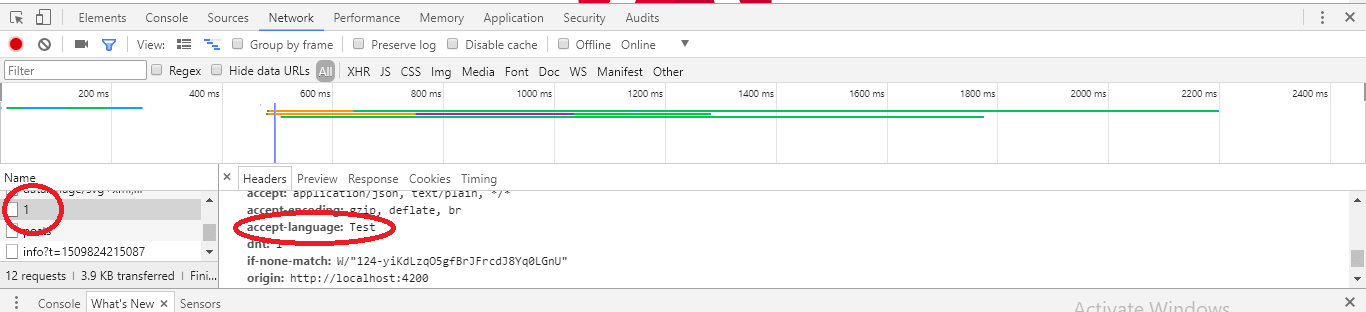
To see this interception in action click on the network tab, reload the page then select the HTTP request on the left panel, and the HTTP headers will be displayed on the right panel. The request we are interested in is the get request which calls the url: http://jsonplaceholder.typicode.com/posts/1.
要查看这种拦截的实际效果,请点击“网络”标签,重新加载页面,然后在左侧面板上选择HTTP请求,HTTP标头将显示在右侧面板上。 我们感兴趣的请求是调用URL的get请求: http : //jsonplaceholder.typicode.com/posts/1 。
结论 ( Conclusion )
The new HTTP client module makes it easier to deal with HTTP backend interfaces like REST API's. To recap we have covered the basic setup of the HttpClientModule, demostrated how to use the get and post method and shown how to use the new interceptor feature. You can think of a few use cases were these features would be required. Also take a look at this project on Github. If you have any questions or comments do not hesitate to post them below.
新的HTTP客户端模块使处理REST API之类的HTTP后端接口更加容易。 回顾一下,我们介绍了HttpClientModule的基本设置,演示了如何使用get和post方法,并展示了如何使用新的拦截器功能。 您可能会想到一些需要这些功能的用例。 还可以在Github上查看该项目。 如果您有任何问题或意见,请随时在下面发布。
翻译自: https://scotch.io/tutorials/using-angular-v4s-new-http-client
angular4前后端分离


 119
119

 被折叠的 条评论
为什么被折叠?
被折叠的 条评论
为什么被折叠?
 到【灌水乐园】发言


