


animate.css使用
Cool animations and clever microinteractions are all the rage right now. However, most developers know how long and tedious it can be to constantly write and rewrite CSS animations. It can start to feel like you're reinventing the wheel. Wouldn't it be nice to have a library of common animations that you can pull from anytime for any of your projects?
酷炫的动画和巧妙的微交互功能如今风行一时。 但是,大多数开发人员都知道不断编写和重写CSS动画可能要花多长时间。 好像开始重新发明轮子一样。 拥有可以随时从任何项目中提取的常见动画库,这不是很好吗?
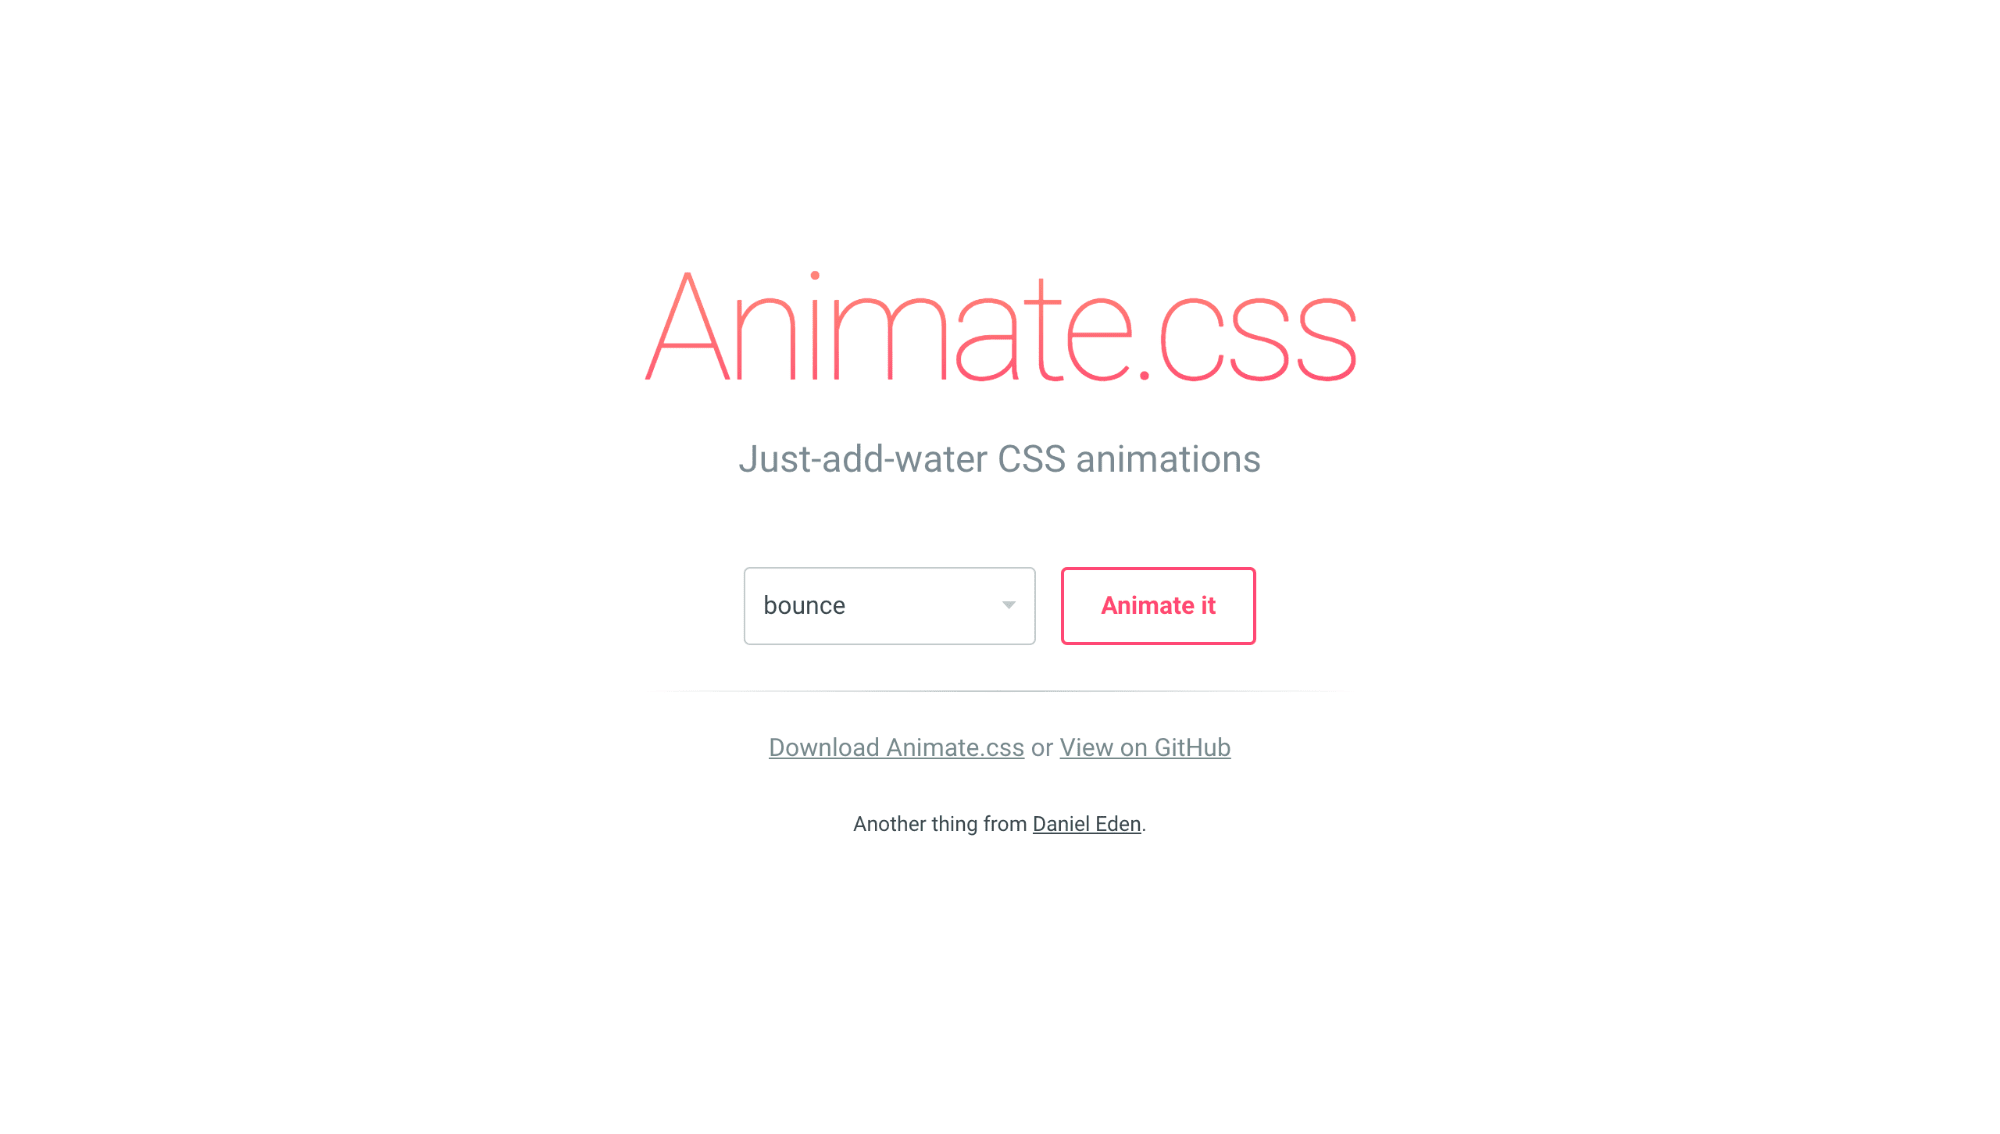
Enter Animate.cssA collection of "just-add-water CSS animations" created by Daniel Eden
输入Animate.css由Daniel Eden创建的“添加了CSS动画”的集合
With Animate.css, you can easily animate any element with only one line of code. But, if you need to get a little more fancy, it also offers quite a few customization options. In this tutorial, we'll learn how to use Animate.css by building a one page website. Let's get started!
使用Animate.css,您可以仅用一行代码即可轻松为任何元素设置动画。 但是,如果您需要更多一些知识,它还提供了许多自定义选项。 在本教程中,我们将通过构建一页网站来学习如何使用Animate.css。 让我们开始吧!
入门 ( Getting Started )
There are two ways to get up and running with Animate.css. The first way is to download it from the official website. Once you've done this, all you have to do is add it to your project folder and link to it in your HTML.
有两种方法可以启动和运行Animate.css。 第一种方法是从官方网站下载它。 完成此操作后,您要做的就是将其添加到您的项目文件夹中并链接到您HTML中。
*Note: Animate.css contains only one file! This minimizes load time and keeps everything simple.*
* 注意: Animate.css仅包含一个文件! 这样可以最大程度地减少加载时间,并使一切保持简单。*
<head>
  <link rel="stylesheet" type="text/css" href="animate.css">
</head>
The second option for getting started is to use a CDN. You can find this here. Once you've got it, you can link to it just like before:
入门的第二个选项是使用CDN。 你可以在这里找到。 一旦获得它,就可以像以前一样链接到它:
<head>
  <link rel="stylesheet" type="text/css" href="https://cdnjs.cloudflare.com/ajax/libs/animate.css/3.5.2/animate.css">
</head>
And, that's it! No more setup is necessary to begin using all the awesome animations that come with Animate.css. All we have to do now is add some water...
而且,就是这样! 无需更多设置即可开始使用Animate.css附带的所有出色动画。 我们现在要做的就是加一些水...
静态动画 ( Static Animations )
The first thing we will do is a simple static animation that activates right when the page loads. Obviously, this animation will have to be at the top of the page - unless it repeats over and over. So, we'll start off with a full screen hero element and animate the text inside when the page is loaded. Here's the basic HTML we need:
我们要做的第一件事是一个简单的静态动画,该动画会在页面加载时立即激活。 显然,此动画必须位于页面顶部-除非反复重复。 因此,我们将从全屏英雄元素开始,并在加载页面时为其中的文本设置动画。 这是我们需要的基本HTML:
<header>
  <h1>Animate.css</h1>
  <h2>Level Up Your Websites with Animate.css</h2>
</header>
Now, all we need to do to animate the two headings is give them the animated and bounceInDown classes. The first class is necessary to use any Animate.css animation. But, the second class is just one of many options we could use here. The official Github docs have a full list of animations you can use.
现在,为两个标题制作动画所需要做的就是为它们赋予animated类和bounceInDown类。 要使用任何Animate.css动画,第一类都是必需的。 但是,第二类只是我们可以在此处使用的许多选项之一。 Github官方文档提供了您可以使用的完整动画列表。
<header>
  <h1 class="animated bounceInDown">Animate.css</h1>
  <h2 class="animated bounceInDown">Level Up Your Websites with Animate.css</h2>
</header>
This is nice, but we can definitely expand on it. Let's add an arrow at the bottom of our hero that bounces continuously to let the user know they can scroll down. We'll give this element two classes: animated and bounce.
很好,但是我们绝对可以扩展。 让我们在英雄的底部添加一个不断反弹的箭头,以使用户知道他们可以向下滚动。 我们将为该元素提供两个类: animated和bounce 。
<header>
  <h1 class="animated bounceInDown">Animate.css</h1>
  <h2 class="animated bounceInDown">Level Up Your Websites with Animate.css</h2>
  <span class="animated bounce"></span>
</header>
As we have it right now, this animation will only happen once. However, there are three CSS properties you can use to control this animation. They are:
正如我们现在所拥有的,此动画只会发生一次。 但是,可以使用三个CSS属性来控制此动画。 他们是:
animation-durationanimation-durationanimation-delayanimation-delayanimation-iteration-countanimation-iteration-count
For our purposes, we only need to use the first and the third to slow down the animation and make it infinite. Thus, our final markup for the first section look's like this:
为了我们的目的,我们只需要使用第一个和第三个来减慢动画的速度并使动画无限。 因此,第一部分的最终标记如下所示:
*Note: Most of the CSS in these examples has been omitted for the sake of clarity. Check out the full demo for the arrow styles, etc.*
* 注意:为了清楚起见,这些示例中的大多数CSS已被省略。 查看完整的演示 ,了解箭头样式等。*
<header>
  <h1 class="animated bounceInDown">Animate.css</h1>
  <h2 class="animated bounceInDown">Level Up Your Websites with Animate.css</h2>
  <span class="animated bounce"></span>
</header>
And, here's the CSS that makes the magic happen ad infinitum:
而且,这是使魔术无限发生CSS:
/_ Make sure to use the animated class in your selector. Otherwise, the animation-duration won't work _/
header span.animated {
  animation-duration: 2.5s;
  animation-iteration-count: infinite;
}
And, here's a pen showing it all in action:
而且,这是一支笔,展示了所有功能:
As you can see, it's super simple to do these static animations. In the next section, we'll add some complexity by using jQuery to dynamically trigger Animate.css.
如您所见,执行这些静态动画非常简单。 在下一节中,我们将通过使用jQuery动态触发Animate.css来增加一些复杂性。
滚动动画 ( Scroll Animations )
The first type of dynamic animation we'll look at is a scroll animation. With a little bit of jQuery we can check to see if an element is in the viewport. Then, all we have to do is add our Animate.css classes to it. We'll use three blocks of text, each with an icon, to demonstrate this. Here's the markup:
我们将要看的第一类动态动画是滚动动画。 使用jQuery一点,我们可以检查视口中是否有元素。 然后,我们要做的就是向其中添加Animate.css类。 我们将使用三个文本块(每个文本块带有一个图标)进行演示。 这是标记:
< h2 class = " new-section " > Scroll Animations </ h2 >
< div class = " scroll-animations " >
  < div class = " animated " >
    < span > ☎ </ span >
    < h3 > Number One </ h3 >
    < p > Lorem ipsum dolor sit amet, consectetur adipiscing elit. Vestibulum quis lacinia est. Nulla malesuada massa orci, vitae placerat lorem pharetra a. </ p >
  </ div >
  < div class = " animated " >
    < span > ♫ </ span >
    < h3 > Number Two </ h3 >
    < p > Lorem ipsum dolor sit amet, consectetur adipiscing elit. Vestibulum quis lacinia est. Nulla malesuada massa orci, vitae placerat lorem pharetra a. </ p >
  </ div >
  < div class = " animated " >
    < span > ☂ </ span >
    < h3 > Number Three </ h3 >
    < p > Lorem ipsum dolor sit amet, consectetur adipiscing elit. Vestibulum quis lacinia est. Nulla malesuada massa orci, vitae placerat lorem pharetra a. </ p >
  </ div >
</ div >
Now we can use jQuery to check see if the elements have been scrolled into view. In the code below, we are using the distance a user has scrolled, the height of the window, and the element's offset from the top to calculate this. For further explanation, you can look at this question on Stackoverflow. We then use the scroll event and this function to add the class fadeInLeft to our elements.
现在,我们可以使用jQuery检查元素是否已滚动到视图中。 在下面的代码中,我们使用用户滚动的距离,窗口的高度以及元素与顶部的偏移量来计算该值。 为了进一步解释,您可以在Stackoverflow上查看此问题。 然后,我们使用scroll事件和此函数将class fadeInLeft类fadeInLeft到元素中。
// Scroll function courtesy of Scott Dowding; http://stackoverflow.com/questions/487073/check-if-element-is-visible-after-scrolling

$ ( document ) . ready ( function ( ) {
  // Check if element is scrolled into view
  function isScrolledIntoView ( elem ) {
    var docViewTop = $ ( window ) . scrollTop ( ) ;
    var docViewBottom = docViewTop + $ ( window ) . height ( ) ;

    var elemTop = $ ( elem ) . offset ( ) . top ;
    var elemBottom = elemTop + $ ( elem ) . height ( ) ;

    return ( ( elemBottom <= docViewBottom ) && ( elemTop >= docViewTop ) ) ;
  }
  // If element is scrolled into view, fade it in
  $ ( window ) . scroll ( function ( ) {
    $ ( '.scroll-animations .animated' ) . each ( function ( ) {
      if ( isScrolledIntoView ( this ) === true ) {
        $ ( this ) . addClass ( 'fadeInLeft' ) ;
      }
    } ) ;
  } ) ;
} ) ;
Once again, that's all there is to it! All we need is a simple scrolling function to add our classes to the text blocks to create slick scroll animations. And, Animate.css does the rest. Here's our updated pen with the static and scroll animations:
再一次,仅此而已! 我们需要的只是一个简单的滚动功能,即可将我们的类添加到文本块中,以创建平滑的滚动动画。 并且,Animate.css完成其余的工作。 这是我们更新后的带有静态和滚动动画的笔:
Now let's turn to animations triggered by a click event.
现在,让我们来看一下由click事件触发的动画。
点击动画 ( Click Animations )
To illustrate click animation with Animate.css we'll create a contact form. When the form is submitted, we'll use some jQuery to check it for empty inputs. If any of these are empty, we'll give them a red border and shake them to let the user know they missed something. Here's the basic markup for form:
为了说明使用Animate.css的点击动画,我们将创建一个联系表单。 提交表单后,我们将使用一些jQuery检查表单是否为空。 如果其中任何一个为空,我们将为他们提供一个红色边框并摇晃它们,以使用户知道他们错过了一些东西。 这是表单的基本标记:
<div class="click-animations">
  <h2 class="new-section">Click Animations</h2>
  <form>
    <input type="text" placeholder="Name" id="name" />
    <input type="text" placeholder="Email" id="email" />
    <textarea rows="7" placeholder="Message" id="message"></textarea>
  </form>
  <button>Send</button>
</div>
Now many of you might be thinking, "Wow, this painfully easy! All we have to do is add the classes we want when the button is clicked just like with the scroll animations!" However, in this situation there's a little bit of a caveat. With the scroll animations, we only needed them to run once after they had been scrolled into view. They don't keep fading in every time they're scrolled in. But, in our present situation, we want our inputs to shake every time the button is clicked. Here's an example of this problem:
现在,您中的许多人可能会想:“哇,这非常容易!!我们要做的就是添加单击按钮时想要的类,就像滚动动画一样!” 但是,在这种情况下,有一些警告。 使用滚动动画时,我们只需要它们滚动到视图中后即可运行一次。 它们不会在每次滚动时都保持淡入淡出。但是,在目前的情况下,我们希望每次单击按钮时 ,输入都可以摇动。 这是此问题的示例:
 Notice how the inputs don't shake after the first time. This is because they already have the classes
animated and
shake. So, we need some way to remove these classes after the animation ends. Then, we'll be able to re-add them later. Once again, Animate.css to the rescue! With the following JavaScript, we can check for the end of our animation and then do something about it.
animated和shake 。 因此,我们需要某种方法在动画结束后删除这些类。 然后,我们稍后便可以重新添加它们。 再次,Animate.css进行救援! 使用以下JavaScript,我们可以检查动画的结尾,然后对其进行处理。
*Note: The .one() method is essentially identical to the .on() method. You can read more about its nuances here.*
* 注意: .one()方法与.on()方法基本相同。 您可以在此处详细了解其细微差别。*
$('#myElement').one('webkitAnimationEnd mozAnimationEnd MSAnimationEnd oanimationend animationend', function() {
    // do something
});
Now that we have this nifty jQuery method, let's go through the logic of what we need to happen.
现在,我们有了这个漂亮的jQuery方法,让我们看一下需要发生的逻辑。
- We need to check for empty
inputswhen the submit button is clicked. 单击提交按钮时,我们需要检查是否有空inputs。 - If an
inputis empty, we need to give it the classes.animated,.shake, and.form-error(this last one is for styling theinputborder). 如果input为空,则需要给它提供.animated,.shake和.form-error(最后一个用于设置input边框的样式)。 - Finally, we need to remove these classes when the animation ends. 最后,我们需要在动画结束时删除这些类。
To accomplish these three goals, we'll create an 'on click' function with if statements to validate each form element. We'll also use our event listener, so the animations can be run over and over again. Putting it all together, our JavaScript will look something like this:
为了实现这三个目标,我们将创建一个带有if语句的“单击”功能,以验证每个表单元素。 我们还将使用事件监听器,以便动画可以一遍又一遍地运行。 综上所述,我们JavaScript将如下所示:
// Click Animations
$('button').on('click', function() {
    /_
    If any input is empty make it's border red and shake it. After the animation is complete, remove the shake and animated classes so that the animation can repeat.
    _/

    // Check name input
    if ($('#name').val() === '') {
        $('#name').addClass('form-error animated shake')
                  .one('webkitAnimationEnd mozAnimationEnd MSAnimationEnd oanimationend animationend', function() {
                        $(this).removeClass('animated shake');
        });
    } else {
        $('#name').removeClass('form-error');
    }

    // Check email input
    if ($('#email').val() === '') {
        $('#email').addClass('form-error animated shake')
                   .one('webkitAnimationEnd mozAnimationEnd MSAnimationEnd oanimationend animationend', function() {
                        $(this).removeClass('animated shake');
        });
    } else {
        $('#email').removeClass('form-error');
    }

    // Check message textarea
    if ($('#message').val() === '') {
        $('#message').addClass('form-error animated shake')
                     .one('webkitAnimationEnd mozAnimationEnd MSAnimationEnd oanimationend animationend', function() {
                        $(this).removeClass('animated shake');
        });
    } else {
        $('#message').removeClass('form-error');
    }
});
Bear in mind that the class .form-error just creates red borders around the input boxes. You can check out the live demo to see this in action. And, that's about it for click animations with Animate.css. Obviously, we've only scratched the surface of what you can do with JavaScript and these awesome animations, but I'm sure your head is already buzzing with ideas for upcoming projects. Here's an updated codepen showing what we have so far:
请记住,类.form-error只会在输入框周围创建红色边框。 您可以查看现场演示以查看实际操作。 并且,关于使用Animate.css的单击动画,就是这样。 显然,我们只是从头开始介绍了JavaScript和这些超棒的动画的功能,但是我敢肯定,您的头脑已经在为即将到来的项目构想。 这是更新的代码笔,显示了到目前为止的内容:
As a final bonus section, I'd like to take a quick look at some really funky animations that Animate.css has in its library. I'm honestly not sure if these could ever be used in a production site, but they're kind of fun to tinker with!
作为最后的奖励部分,我想快速浏览Animate.css库中包含的一些非常时髦的动画。 老实说,我不确定这些产品是否可以在生产现场使用,但是它们很有趣!
时髦的动画 ( Funky Animations )
If you navigate to the official Animate.css site, you'll notice there's a category of animations labeled "special." There are several effects in this category, but right now, I want to take a look at hinge in particular. You can use this animation just like any other one in the Animate.css library, but it's definitely unique. It's probably easier to show rather than explain what exactly it does. So, check out the GIF below:
如果导航到Animate.css官方网站 ,您会注意到那里有一个动画类别,标记为“特殊”。 此类别中有几种效果,但是现在,我想特别看看hinge 。 您可以像使用Animate.css库中的任何其他动画一样使用此动画,但是它绝对是唯一的。 显示而不是确切解释它可能更容易。 因此,请查看以下GIF:

In the example above, all I've done is add an animation for each time the text is clicked - just like before. It's also worth noting that using this animation takes some extra code to use properly. This is because the hinge effect uses its parent container as a reference for the swinging motion. Thus, if you leave the element you want to animate "out in space," part of the animation may happen off screen. Here's the last bit of code.
在上面的示例中,我所做的就是每次单击文本时都添加一个动画-就像以前一样。 还值得注意的是,使用此动画需要一些额外的代码才能正确使用。 这是因为hinge效果将其父容器用作摆动运动的参考。 因此,如果将要动画的元素留在“空间中”,则动画的一部分可能会在屏幕外发生。 这是最后的代码。
*Note: This code is pretty much identical to our other "on click" animations.*
* 注意:此代码与我们的其他“点击时”动画几乎相同。*
// Activate hinge effect when h4 is click in last section
$ ( '.funky-animations h4' ) . on ( 'click' , function ( ) {
    $ ( this ) . addClass ( 'animated hinge' ) . one ( 'webkitAnimationEnd mozAnimationEnd MSAnimationEnd oanimationend animationend' , function ( ) {
        $ ( this ) . removeClass ( 'animated hinge' ) ;
    } ) ;
} ) ;
Here's a link to the finished project with all the bell and whistles:
这是所有完成的项目的链接:
结论 ( Conclusion )
And, that about wraps it up for our tour Animate.css! Let's recap what we've gone over:
并且,这将结束我们的Animate.css之旅! 让我们回顾一下已经过的事情:
- First, we learned how to get up and running with Animate.css 首先,我们学习了如何使用Animate.css来启动和运行
- Then, we took an in-depth look at three different types of animations: static, scroll, and click 然后,我们深入研究了三种不同类型的动画: static , scroll和click
- Finally, we experimented with some of this library's funkier (and significantly less useful) effects - just for giggles 最后,我们尝试了该库的一些funkier(且效果明显较差)效果-仅用于咯咯笑
I hope you enjoyed this guide (my first!) and are beginning to see all the clever ways this library can be implemented in web design. If you have any questions or comments please feel free to leave me a note in the comments.
希望您喜欢本指南(我的第一本!),并开始看到可以在Web设计中实现该库的所有巧妙方法。 如果您有任何疑问或评论,请随时在评论中给我留下笔记。
翻译自: https://scotch.io/tutorials/level-up-your-websites-with-animatecss
animate.css使用


 5486
5486

 被折叠的 条评论
为什么被折叠?
被折叠的 条评论
为什么被折叠?
 到【灌水乐园】发言


