


flux react
The React ecosystem is huge, and there are many options for modules which aim to solve the tricky parts of making React work well. Most real-world React apps share some common requirements, and these requirements revolve around state management and routing. Arguably the most common options for these needs are Flux and React Router.
React生态系统非常庞大,模块有很多选项,旨在解决使React正常工作的棘手部分。 大多数现实世界中的React应用程序都有一些共同的要求,这些要求围绕状态管理和路由。 可以说,满足这些需求的最常见的选择是Flux和React Router。
Ken has an awesome series on React and Flux here at Scotch, and there's certainly no shortage of instruction on these topics around the web. However, there are some other things we need to think about when it comes to building a real-world React app that aren't covered as often: how to call a remote API and how to authenticate users.
Ken在Scotch上有一个关于React和Flux的精彩系列 ,当然在网络上也不乏关于这些主题的指导。 但是,在构建现实世界中的React应用程序时,我们还需要考虑其他一些事情,这些事情并不经常涉及:如何调用远程API以及如何对用户进行身份验证。
In this tutorial we'll build a simple contacts application that receives data from an API. We'll use an Express (NodeJS) server for this, but it should be noted early on that it isn't necessary to use Node. Rather, we can use any kind of server we want, as long as it can output JSON data.
在本教程中,我们将构建一个简单的联系人应用程序,该应用程序从API接收数据。 我们将为此使用Express(NodeJS)服务器,但应尽早注意,不必使用Node。 相反,我们可以使用任何需要的服务器,只要它可以输出JSON数据即可。
The best way to do user authentication for any single page app is with JSON Web Tokens (JWT). There are a lot of details involved with setting up JWT authentication from scratch, so instead we'll use Auth0.
对任何单页应用程序进行用户身份验证的最佳方法是使用JSON Web令牌(JWT) 。 从头开始设置JWT身份验证涉及很多细节,因此我们将使用Auth0 。
With Auth0, we can just drop in a script tag and we get immediate access to a login box and features like social login, multifactor authentication, and more.
使用Auth0,我们只需放入一个脚本标签,就可以立即访问登录框和诸如社交登录 , 多因素身份验证等功能。
When we sign up for Auth0, we get a free account that gives us 7,000 free users and two social identity providers. The best part is that this account is production-ready, so we have everything we need to get going with a real-world app.
当我们注册 Auth0时,我们将获得一个免费帐户,该帐户为我们提供7,000个免费用户和两个社交身份提供商 。 最好的部分是该帐户已可以投入生产,因此我们拥有使用真实应用程序所需的一切。

Let's get started!
让我们开始吧!
设置一个新的React项目 ( Set Up a New React Project )
In this tutorial we're going to use React with ES2015, and this means that we'll need a transpiler to make sure we get all the features we expect and that it will work across all browsers. We'll use webpack for this, and the easiest way to get started with new React + Webpack project is to use a generator such as Yeoman.
在本教程中,我们将React与ES2015一起使用,这意味着我们将需要一个编译器来确保获得所需的所有功能,并且可以在所有浏览器中使用。 我们将为此使用webpack,并且开始使用新的React + Webpack项目的最简单方法是使用生成器,例如Yeoman。
npm install -g yo
npm install -g generator-react-webpack
mkdir react-auth && cd react-auth
yo react-webpack
We get some prompts to follow, and at the end of it we should have a new React project wired up with webpack.
我们会得到一些提示,最后,我们应该有一个与webpack相连的新React项目。
We'll need some extra dependencies that don't come with a Yeoman installation, so let's grab those now.
我们将需要一些与Yeoman安装无关的其他依赖项,所以现在就来抓住它们。
npm install flux react-router bootstrap react-bootstrap keymirror superagentWe need to tweak our url-loader in our webpack config slightly so that we can make use of React Bootstrap.
我们需要在webpack配置中稍微调整url-loader ,以便我们可以使用React Bootstrap。
// cfg/defaults.js

...

{
  test: /\.(png|woff|woff2|eot|ttf|svg)$/,
  loader: 'url-loader?limit=8192'
},

...
Another thing we should do right off the bat is make a change to the route that webpack uses to serve the project, or else we'll get some issues with React Router. Open up server.js and down at the bottom, change:
我们应该立即做的另一件事是更改webpack用于服务项目的路由,否则我们将在React Router中遇到一些问题。 打开server.js ,然后在底部进行更改:
open('http://localhost:' + config.port + '/webpack-dev-server/');to
至
open('http://localhost:' + config.port);创建一个Express服务器 ( Create an Express Server )
Let's create our Express server right as we get started so it will be ready to be consumed by our React app. This is actually a rather simple server and we just need a few modules to support it.
让我们在开始时就创建Express服务器,以便它可以被React应用程序使用。 这实际上是一个相当简单的服务器,我们只需要几个模块即可支持它。
mkdir react-auth-server && cd react-auth-server
npm init
npm install express express-jwt cors
touch server.js
The express-jwt package that we're bringing in will be used to create our authentication middleware to protect any API endpoints we want.
我们将引入的express-jwt软件包将用于创建身份验证中间件,以保护所需的任何API端点。
// server.js

const express = require('express');
const app = express();
const jwt = require('express-jwt');
const cors = require('cors');

app.use(cors());

// Authentication middleware provided by express-jwt.
// This middleware will check incoming requests for a valid
// JWT on any routes that it is applied to.
const authCheck = jwt({
  secret: new Buffer('YOUR_AUTH0_SECRET', 'base64'),
  audience: 'YOUR_AUTH0_CLIENT_ID'
});

var contacts = [
  {
    id: 1,
    name: 'Chris Sevilleja',
    email: 'chris@scotch.io',
    image: '//gravatar.com/avatar/8a8bf3a2c952984defbd6bb48304b38e?s=200'
  },
  {
    id: 2,
    name: 'Nick Cerminara',
    email: 'nick@scotch.io',
    image: '//gravatar.com/avatar/5d0008252214234c609144ff3adf62cf?s=200'
  },
  {
    id: 3,
    name: 'Ado Kukic',
    email: 'ado@scotch.io',
    image: '//gravatar.com/avatar/99c4080f412ccf46b9b564db7f482907?s=200'
  },
  {
    id: 4,
    name: 'Holly Lloyd',
    email: 'holly@scotch.io',
    image: '//gravatar.com/avatar/5e074956ee8ba1fea26e30d28c190495?s=200'
  },
  {
    id: 5,
    name: 'Ryan Chenkie',
    email: 'ryan@scotch.io',
    image: '//gravatar.com/avatar/7f4ec37467f2f7db6fffc7b4d2cc8dc2?s=200'
  }
];

app.get('/api/contacts', (req, res) => {
  const allContacts = contacts.map(contact => {
    return { id: contact.id, name: contact.name}
  });
  res.json(allContacts);
});

app.get('/api/contacts/:id', authCheck, (req, res) => {
  res.json(contacts.filter(contact => contact.id === parseInt(req.params.id)));
});

app.listen(3001);
console.log('Listening on http://localhost:3001');
We've got an array of contacts data here that is being returned in some fashion at our two endpoints. For the /api/contacts endpoint, we're using map to pick out just the id and name fields from the objects in the array. For the /api/contacts/:id endpoint, we're looking for the contact with a specific id and returning the whole object for just that contact. For the sake of simplicity, we're just mocking out data retrieval here. In an actual application, this data would be queried from a database.
我们这里有一系列联系人数据,这些数据以某种方式在我们的两个端点处返回。 对于/api/contacts端点,我们正在使用map从数组中的对象中仅选择id和name字段。 对于/api/contacts/:id端点,我们正在寻找具有特定id的联系人,并仅返回该联系人的整个对象。 为了简单起见,我们在这里仅模拟数据检索。 在实际的应用程序中,将从数据库中查询此数据。
注册Auth0 ( Sign Up for Auth0 )
You'll likely have noticed the authCheck that we set up near the top in our Express server. This is the middleware that is applied to the /api/contacts/:id route, and it requires some identifying information from us. Most notably, we need to give it a secret key which will be checked against the decoded JWTs that come to the API to verify validity. When we use Auth0, all we need to do is provide the middleware our secret key and client ID.
您可能已经注意到我们在Express服务器顶部附近设置的authCheck 。 这是应用于/api/contacts/:id路由的中间件,它需要我们提供一些识别信息。 最值得注意的是,我们需要为它提供一个秘密密钥,该密钥将根据API中已解码的JWT进行检查以验证有效性。 当我们使用Auth0时,我们要做的就是向中间件提供我们的密钥和客户端ID。
If you haven't already signed up for Auth0, head over and do that now. After you sign up, you'll find your application's client secret and client ID in the management area. Once you grab those keys, you can place them in the appropriate spots in the middleware, and you'll be good to go.
如果您尚未注册Auth0 ,请立即进行操作。 注册后,您将在管理区域中找到应用程序的客户端密钥和客户端ID。 抓住这些密钥后,您可以将它们放置在中间件中的适当位置,这将是您的最佳选择。
Be sure to put your localhost domain and port in the "Allowed Origins" textarea so that Auth0 will allow requests from your test domain.
确保将本地主机域和端口放在“允许的来源”文本区域中,以便Auth0允许来自您的测试域的请求。

设置索引和路由 ( Set Up the Index and Routing )
Let's start by setting up our index.js file. We'll need to modify the file that was provided by the Yeoman generator to work for our app.
让我们从设置index.js文件开始。 我们需要修改Yeoman生成器提供的文件才能适用于我们的应用。
// src/index.js

import 'core-js/fn/object/assign';
import React from 'react';
import ReactDOM from 'react-dom';
import { browserHistory } from 'react-router';
import Root from './Root';

// Render the main component into the dom
ReactDOM.render(<Root history={browserHistory} />, document.getElementById('app'));
We're rendering a component called Root, which is passed a prop called browserHistory, against a DOM element called app.
我们正在针对名为app的DOM元素渲染一个名为Root的组件,该组件传递了一个名为browserHistory的道具。
To finish out the routing setup, we'll need to create a Root.js file to handle our routes.
要完成路由设置,我们需要创建一个Root.js文件来处理我们的路由。
// Root.js

import React, { Component } from 'react';
import { Router, Route, IndexRoute } from 'react-router';
import Index from './components/Index';
import ContactDetail from './components/ContactDetail';

import App from './components/App';

class Root extends Component {

  // We need to provide a list of routes
  // for our app, and in this case we are
  // doing so from a Root component
  render() {
    return (
      <Router history={this.props.history}>
        <Route path='/' component={App}>
          <IndexRoute component={Index}/>
          <Route path='/contact/:id' component={ContactDetail} />
        </Route>
      </Router>
    );
  }
}

export default Root;
With React Router we can wrap individual Routes within a top Router and point them to specific paths and components. The Router uses a parameter called history which is used to parse the URL bar and construct location objects. We're passing down a prop called history from index.js for this, which we saw previously.
使用React Router,我们可以将单个Route包装在顶部Router ,并将它们指向特定的路径和组件。 Router使用称为history的参数,该参数用于解析URL栏并构造位置对象。 为此,我们从index.js传递了一个名为history的道具,这是我们先前看到的。
We should also take this opportunity to include the Lock widget. We can either install this with npm and include it in our webpack build, or we can include it as a script tag. Let's bring it in as a script tag for now, just for the sake of simplicity.
我们还应该借此机会包括Lock小部件。 我们可以使用npm安装它并将其包含在我们的webpack构建中,也可以将其包含为脚本标签。 为了简单起见,现在将它作为脚本标签引入。
<!-- src/index.html -->
    ...

    <!-- Auth0Lock script -->
    <script src="//cdn.auth0.com/js/lock-9.1.min.js"></script>

    <!-- Setting the right viewport -->
    <meta name="viewport" content="width=device-width, initial-scale=1.0, maximum-scale=1.0, user-scalable=no" />
      ...
设置应用程序组件 ( Set Up the App Component )
The first component that we set up shoud be our top-level App component. Go ahead and rename Main.js to App.js and bring in some of the components from React Bootstrap.
我们应该设置的第一个组件是顶级App组件。 继续,将Main.js重命名为App.js并从React Bootstrap中引入一些组件。
// src/components/App.js

import 'normalize.css/normalize.css';
import 'bootstrap/dist/css/bootstrap.min.css';

import React, { Component } from 'react';
import Header from './Header';
import Sidebar from './Sidebar';
import { Grid, Row, Col } from 'react-bootstrap';

class AppComponent extends Component {

  componentWillMount() {
    this.lock = new Auth0Lock('YOUR_AUTH0_CLIENT_ID', 'YOUR_AUTH0_DOMAIN);
  }

  render() {
    return (
      <div>
        <Header lock={this.lock}></Header>
        <Grid>
          <Row>
            <Col xs={12} md={3}>
              <Sidebar />
            </Col>
            <Col xs={12} md={9}>
              {this.props.children}
            </Col>
          </Row>
        </Grid>
      </div>
    );
  }
}

export default AppComponent;
We've got some other components that we're calling, namely Header and Sidebar. We'll create those components next, but for now, let's focus on what's happening in componentWillMount. This is where we can set up our Auth0Lock instance, and to do so, we just need to call a new Auth0Lock and pass in our client ID and client domain. As a reminder, these two items can be retrieved from your Auth0 management area.
我们还有其他一些要调用的组件,即Header和Sidebar 。 接下来,我们将创建这些组件,但是现在,让我们集中讨论componentWillMount发生的事情。 这是我们可以设置Auth0Lock实例的地方,为此,我们只需要调用一个new Auth0Lock并传入我们的客户端ID和客户端域即可。 提醒一下,可以从Auth0管理区域中检索这两项。
One important thing to note here is that we're calling {this.props.children} in the second Col. This will allow us to display child routes from React Router in this area, and in this way we can have a fixed sidebar with a dynamic view in the main portion of the app.
这里要注意的一件事是我们在第二个Col调用{this.props.children} 。 这将使我们能够在此区域显示来自React Router的子路由,这样我们就可以在应用程序的主要部分中使用带有动态视图的固定侧边栏。
We're also passing down the Auth0Lock instance as a prop into Header, so let's create that next.
我们还将Auth0Lock实例作为道具传递给Header ,因此让我们接下来创建它。
创建标题组件 ( Create the Header Component )
Let's put in a navbar header which will also serve as the location for some buttons for allowing users to log in and log out of the app.
让我们放入导航栏标题,该标题栏还将用作某些按钮的位置,以允许用户登录和注销应用程序。
// src/components/Header.js

import React, { Component } from 'react';
import { Nav, Navbar, NavItem, Header, Brand } from 'react-bootstrap';
// import AuthActions from '../actions/AuthActions';
// import AuthStore from '../stores/AuthStore';

class HeaderComponent extends Component {

  constructor() {
    super();
    this.state = {
      authenticated: false
    }
    this.login = this.login.bind(this);
    this.logout = this.logout.bind(this);
  }

  login() {
    // We can call the show method from Auth0Lock,
    // which is passed down as a prop, to allow
    // the user to log in
    this.props.lock.show((err, profile, token) => {
      if (err) {
        alert(err);
        return;
      }
      this.setState({authenticated: true});
    });
  }

  logout() {
    // AuthActions.logUserOut();
    this.setState({authenticated: false});
  }

  render() {
    return (
      <Navbar>
        <Navbar.Header>
          <Navbar.Brand>
            <a href="#">React Contacts</a>
          </Navbar.Brand>
        </Navbar.Header>
        <Nav>
          <NavItem onClick={this.login}>Login</NavItem>
          <NavItem onClick={this.logout}>Logout</NavItem>
        </Nav>
      </Navbar>
    );
  }
}

export default HeaderComponent;
We're admittedly skimping a bit on the authentication details for the time being since we don't yet have our actions and stores set up; however, this is fine to see how things work for now. The login method is where we are popping up the Lock widget and this is controlled by the "Login" NavItem. For now we are simply setting the authenticated state to be either true or false, but we'll later see how this can be determined by the presence of a JWT for the user.
由于我们尚未设置操作和存储,因此我们暂时不在身份验证详细信息上花了一点功夫。 但是,现在看看情况如何很好。 login方法是我们弹出Lock小部件的位置,该方法由“ Login” NavItem 。 现在,我们仅将authenticated状态设置为true或false ,但是稍后将看到如何通过用户的JWT存在来确定此状态。
Before we can see something on the screen we need to put in our Sidebar and Index components.
在屏幕上看到某些内容之前,我们需要放入Sidebar和Index组件。
创建边栏和索引组件 ( Create the Sidebar and Index Components )
// src/components/Sidebar.js
import React, { Component } from 'react';
class SidebarComponent extends Component {
render() {
return (
<h1>Hello from the sidebar</h1>
);
}
}
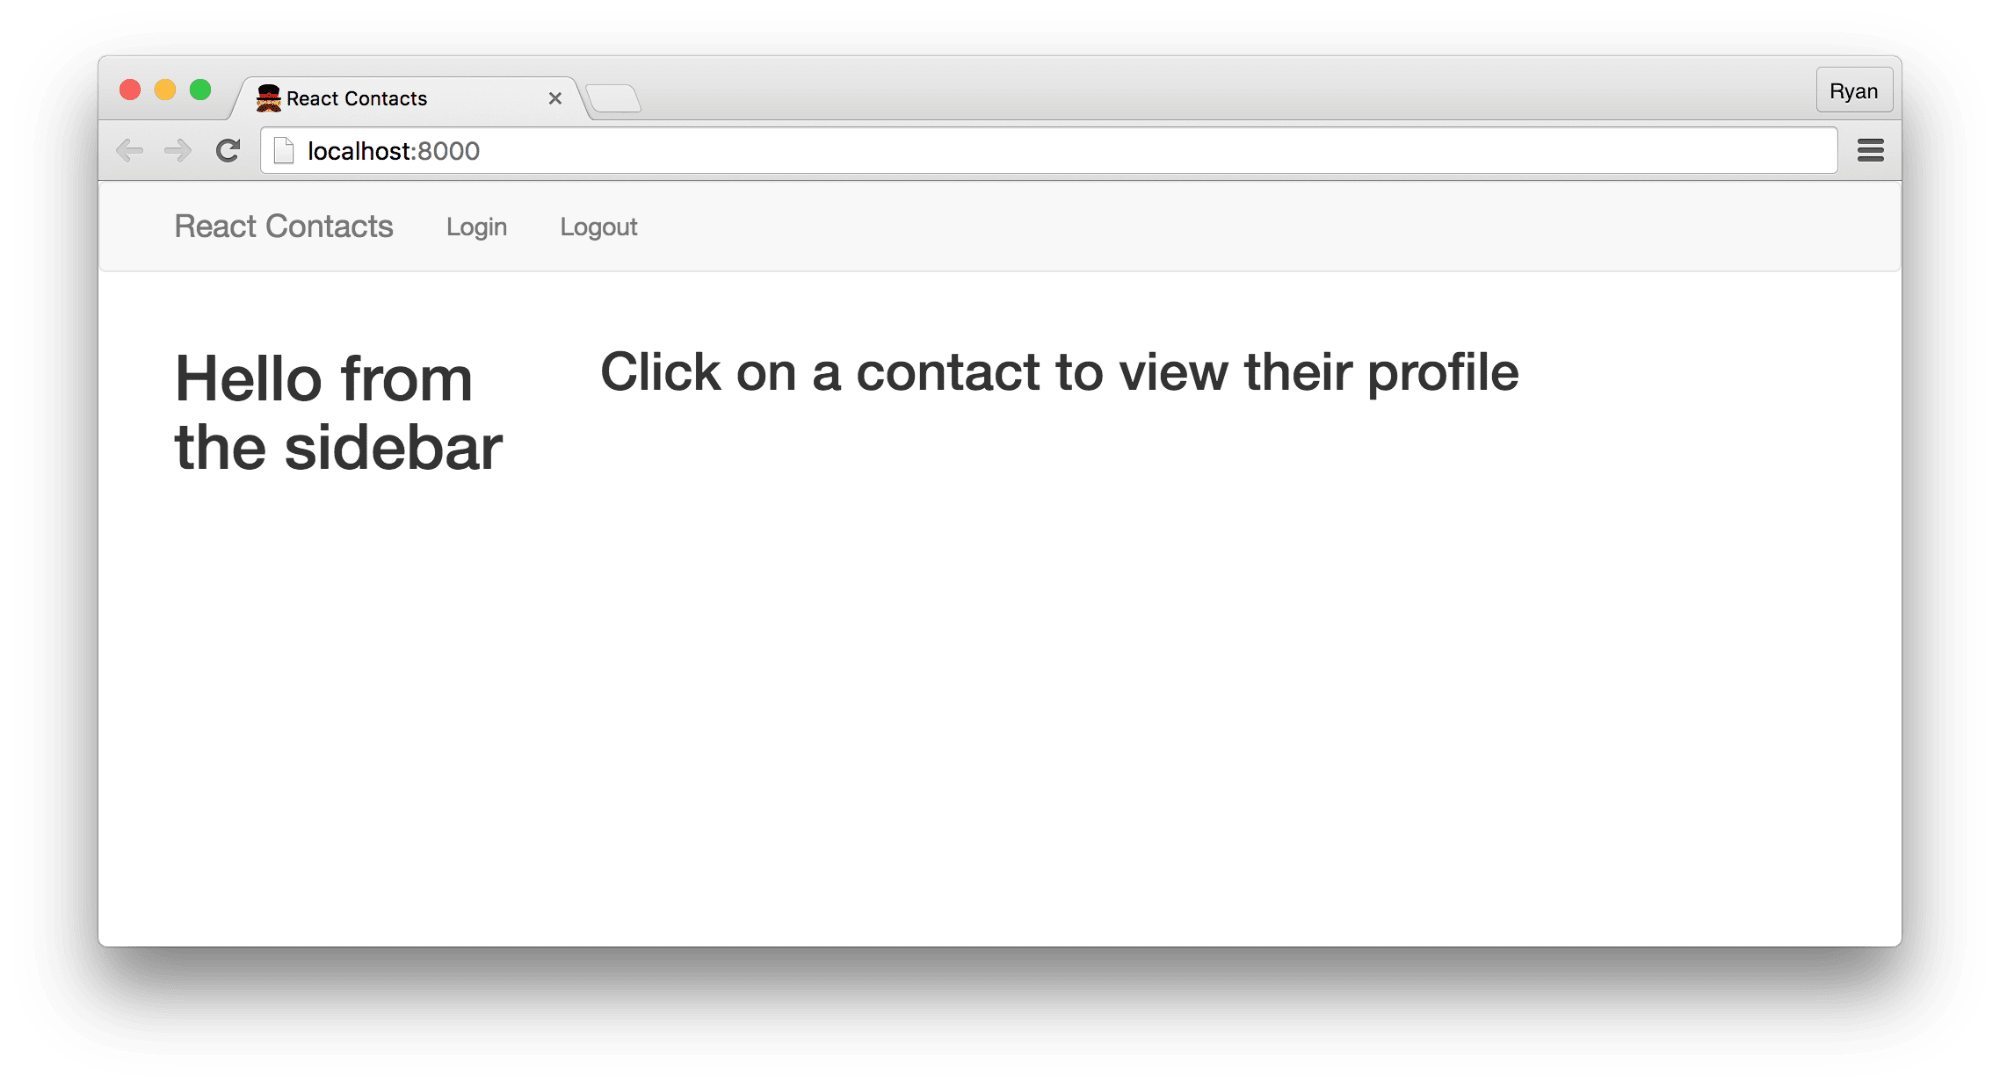
export default SidebarComponent;This will eventually be the spot where we render our list of contacts that comes back from the server, but for now we just display a simple message.
最终,这将是我们渲染从服务器返回的联系人列表的地方,但是现在我们仅显示一条简单的消息。
We also have an Index component which is being used by the router as the IndexRoute. We can simply have this component show a message about clicking on a contact to view their profile.
我们还有一个Index组件,路由器正在将它用作IndexRoute 。 我们可以简单地使该组件显示有关单击联系人以查看其个人资料的消息。
// src/components/Index.js

import React, { Component } from 'react';

class IndexComponent extends Component {

  constructor() {
    super();
  }
  render() {
    return (
      <h2>Click on a contact to view their profile</h2>
    );
  }
}

export default IndexComponent;
We're now ready to view our app for the first time! But first, let's quickly remove or comment out a couple things in Root.js. We don't yet have a ConactDetail component, so let's temporarily remove the import and Route for this component.
现在,我们准备第一次查看我们的应用程序! 但是首先,让我们快速删除或注释掉Root.js的几件事。 我们还没有ConactDetail组件,因此让我们暂时删除该组件的import和Route 。
If everything worked out, we should see the app rendered.
如果一切顺利,我们应该看到该应用已渲染。
We should also see the Lock widget pop up when we click Login.
当我们单击Login时,我们还应该看到Lock小部件弹出。

实施助焊剂 ( Implementing Flux )
Flux is great for state management, but one of its downsides is that it requires a lot of code, which means this section will be a little lengthy. To keep it as trim as possible, we won't go into too much detail on what Flux is and how it works, but you can read Ken's article on the subject for a thorough overview.
Flux对于状态管理非常有用,但是其缺点之一是它需要大量代码,这意味着本节将有些冗长。 为了使它尽可能的小巧,我们将不对Flux是什么以及它如何工作进行过多的详细介绍,但是您可以阅读Ken关于该主题的文章以进行全面的概述。
To be brief about Flux, it's an architecture that helps us handle unidirectional data flow in our apps. Having an architecture where data can only flow in one direction is important as applications become large, because it's much easier to reason about things if we can avoid the tangled mess of two-way data flow.
简而言之,它是一种架构,可以帮助我们处理应用程序中的单向数据流。 当应用程序变大时,拥有一种数据只能沿一个方向流动的体系结构非常重要,因为如果我们能够避免双向数据流的混乱局面,那么就可以很容易地对事物进行推理。
To make this happen, Flux relies on actions, a dispatcher, and stores.
为了实现这一目标,Flux依靠动作 , 调度程序和商店 。
创建分派器 (Create the Dispatcher)
Let's start by creating our dispatcher.
让我们从创建调度程序开始。
// src/dispatcher/AppDispatcher.js

import { Dispatcher } from 'flux';

const AppDispatcher = new Dispatcher();

export default AppDispatcher;
There is only ever one dispatcher for a given React + Flux application, and it's created by simply calling new Dispatcher().
给定的React + Flux应用程序只有一个调度程序,它是通过简单地调用new Dispatcher()创建的。
创建动作 (Create the Actions)
Next, let's put in the actions for retrieving our contacts data from the API.
接下来,让我们进行一些操作,以从API检索联系人数据。
// src/actions/ContactActions.js

import AppDispatcher from '../dispatcher/AppDispatcher';
import ContactConstants from '../constants/ContactConstants';
import ContactsAPI from '../utils/ContactsAPI';

export default {

  recieveContacts: () => {
    ContactsAPI
      .getContacts('http://localhost:3001/api/contacts')
      .then(contacts => {
        AppDispatcher.dispatch({
          actionType: ContactConstants.RECIEVE_CONTACTS,
          contacts: contacts
        });
      })
      .catch(message => {
        AppDispatcher.dispatch({
          actionType: ContactConstants.RECIEVE_CONTACTS_ERROR,
          message: message
        });
      });
  },

  getContact: (id) => {
    ContactsAPI
      .getContact('http://localhost:3001/api/contacts/' + id)
      .then(contact => {
        AppDispatcher.dispatch({
          actionType: ContactConstants.RECIEVE_CONTACT,
          contact: contact
        });
      })
      .catch(message => {
        AppDispatcher.dispatch({
          actionType: ContactConstants.RECIEVE_CONTACT_ERROR,
          message: message
        });
      });
  }

}
In a Flux architecture, actions need to dispatch an action type and a payload. The payload is normally the data associated with the action, and this data is picked up by the associated store to be dealt with down the line.
在Flux架构中,动作需要dispatch动作类型和有效负载。 有效负载通常是与动作相关联的数据,并且该数据由关联的存储区拾取并下线处理。
There are differing opinions on whether or not actions are a good place to be doing things like API calls, and some feel that anything like this should be reserved for stores. Ultimately, the setup you choose comes down to whatever works well for your app, and putting API calls in the actions provides us a good way to work with remote data.
关于操作是否适合执行API调用之类的事情,存在不同的意见,并且有些人认为应该将此类内容保留给商店。 最终,您选择的设置将取决于适合您的应用程序的一切,并且将API调用置于操作中为我们提供了一种处理远程数据的好方法。
We're relying on a ContactsAPI and ContactConstants which we have yet to create, so let's do that now.
我们依赖尚未创建的ContactsAPI和ContactConstants ,所以现在就开始做。
创建接触常数 (Create the Contact Constants)
// src/constants/ContactConstants.js

import keyMirror from 'keymirror';

export default keyMirror({
  RECIEVE_CONTACT: null,
  RECIEVE_CONTACTS: null,
  RECIEVE_CONTACT_ERROR: null,
  RECIEVE_CONTACTS_ERROR: null
});
Constants give us something to identify our action types by and they are useful for syncing up our actions and stores, as we'll see later. We're using keyMirror to make the values of our constants match the keys themselves.
常量为我们提供了一些标识操作类型的依据,它们对于同步操作和存储非常有用,我们将在后面看到。 我们正在使用keyMirror使常量的值与键本身匹配。
创建联系人API (Create the Contacts API)
We've already got a sense of how our ContactsAPI should look from our ContactActions. We want to expose some methods for sending XHR requests to the server to retrieve the data and return a Promise to handle the result. For the XHR requests themselves, we'll use superagent which is a library that wraps XHR nicely and provides a clean way of doing HTTP requests.
我们已经从ContactActions中了解了ContactsAPI外观。 我们想要公开一些用于向服务器发送XHR请求以检索数据并返回Promise来处理结果的方法。 对于XHR请求本身,我们将使用superagent ,这是一个很好地包装XHR并提供一种执行HTTP请求的干净方法的库。
// src/utils/ContactsAPI.js

import request from 'superagent/lib/client';

export default {

  // We want to get a list of all the contacts
  // from the API. This list contains reduced info
  // and will be be used in the sidebar
  getContacts: (url) => {
    return new Promise((resolve, reject) => {
      request
        .get(url)
        .end((err, response) => {
          if (err) reject(err);
          resolve(JSON.parse(response.text));
        })
    });
  },

  getContact: (url) => {
    return new Promise((resolve, reject) => {
      request
        .get(url)
        .end((err, response) => {
          if (err) reject(err);
          resolve(JSON.parse(response.text));
        })
    });
  }
}
With superagent, we can call methods like get for a GET request. In the end method we have callback that either gives us an error or a response, and we can do whatever we want with these.
使用superagent,我们可以为GET请求调用诸如get方法。 在end方法中,我们有一个回调,该回调可以给我们一个错误或一个响应,并且我们可以对它们进行任何所需的操作。
If we encounter any errors in our requests, we reject right away with the error. This rejection is picked up in the catch method in our actions. Otherwise, we resolve with the data from the API.
如果我们在请求中遇到任何错误,我们将立即reject该错误。 在我们的动作的catch方法中可以找到这种拒绝。 否则,我们将使用API中的数据进行resolve 。
创建联系人存储 (Create the Contact Store)
Before we can render any of the contacts data to the screen, we need to create the store that it will use.
在将任何联系人数据呈现到屏幕之前,我们需要创建它将使用的商店。
// src/stores/ContactStore.js

import AppDispatcher from '../dispatcher/AppDispatcher';
import ContactConstants from '../constants/ContactConstants';
import { EventEmitter } from 'events';

const CHANGE_EVENT = 'change';

let _contacts = [];
let _contact = {};

function setContacts(contacts) {
  _contacts = contacts;
}

function setContact(contact) {
  _contact = contact;
}

class ContactStoreClass extends EventEmitter {

  emitChange() {
    this.emit(CHANGE_EVENT);
  }

  addChangeListener(callback) {
    this.on(CHANGE_EVENT, callback)
  }

  removeChangeListener(callback) {
    this.removeListener(CHANGE_EVENT, callback)
  }

  getContacts() {
    return _contacts;
  }

  getContact() {
    return _contact;
  }

}

const ContactStore = new ContactStoreClass();

// Here we register a callback for the dispatcher
// and look for our various action types so we can
// respond appropriately
ContactStore.dispatchToken = AppDispatcher.register(action => {

  switch(action.actionType) {
    case ContactConstants.RECIEVE_CONTACTS:
      setContacts(action.contacts);
      // We need to call emitChange so the event listener
      // knows that a change has been made
      ContactStore.emitChange();
      break

    case ContactConstants.RECIEVE_CONTACT:
      setContact(action.contact);
      ContactStore.emitChange();
      break

    case ContactConstants.RECIEVE_CONTACT_ERROR:
      alert(action.message);
      ContactStore.emitChange();
      break

    case ContactConstants.RECIEVE_CONTACTS_ERROR:
      alert(action.message);
      ContactStore.emitChange();
      break

    default:
  }

});

export default ContactStore;
As most stores do, we're registering a switch statement on the AppDispatcher so we can respond to the various actions that are dispatched in the app. When the RECIEVE_CONTACTS action is dispatched, it means that we're getting some contacts data from the API, and in this case we want to set the contacts onto an array. This is done in the setContacts function, after which we tell the EventListener to emit a change so that the app can know a change has been made.
像大多数商店一样,我们在AppDispatcher上注册了switch语句,因此我们可以响应应用程序中分派的各种操作。 调度RECIEVE_CONTACTS操作时,这意味着我们从API中获取了一些联系人数据,在这种情况下,我们希望将联系人设置为数组。 这是在setContacts函数中完成的,然后我们告诉EventListener发出更改,以便应用程序可以知道已进行更改。
We've also got logic in place for getting either a single contact or the full list of them, and these methods will be used in our components.
我们还拥有逻辑,可以获取单个联系人或完整联系人列表,这些方法将在我们的组件中使用。
Before we can view our contacts, we need to create a couple components to deal specifically with our list.
在查看我们的联系人之前,我们需要创建几个组件来专门处理我们的列表。
设置联系人组件 ( Set Up the Contacts Component )
The Contacts component will be used in the sidebar to display a list of our contacts. We'll set up a Link in the list so we can later show more detail on them.
Contacts组件将在边栏中用于显示我们的联系人列表。 我们将在列表中设置一个Link ,以便稍后可以在它们上显示更多详细信息。
// src/components/Contacts.js

import React, { Component } from 'react';
import { ListGroup } from 'react-bootstrap';
// import { Link } from 'react-router';
import ContactActions from '../actions/ContactActions';
import ContactStore from '../stores/ContactStore';
import ContactListItem from './ContactListItem';

// We'll use this function to get a contact
// list item for each of the contacts in our list
function getContactListItem(contact) {
  return (
    <ContactListItem
      key={contact.id}
      contact={contact}
    />
  );
}
class ContactsComponent extends Component {

  constructor() {
    super();
    // For our initial state, we just want
    // an empty array of contacts
    this.state = {
      contacts: []
    }
    // We need to bind this to onChange so we can have
    // the proper this reference inside the method
    this.onChange = this.onChange.bind(this);
  }

  componentWillMount() {
    ContactStore.addChangeListener(this.onChange);
  }

  componentDidMount() {
    ContactActions.recieveContacts();
  }

  componentWillUnmount() {
    ContactStore.removeChangeListener(this.onChange);
  }

  onChange() {
    this.setState({
      contacts: ContactStore.getContacts()
    });
  }

  render() {
    let contactListItems;
    if (this.state.contacts) {
      // Map over the contacts and get an element for each of them
      contactListItems = this.state.contacts.map(contact => getContactListItem(contact));
    }
    return (
      <div>
        <ListGroup>
          {contactListItems}
        </ListGroup>
      </div>
    );
  }
}

export default ContactsComponent;
We need to start with an initial state, and when we use ES2015, this can be done using this.state in the constructor. We're binding the onChange method to this so that we can get the proper this context in our methods. This is crucial when we go to do things like this.setState in any of our component methods.
我们需要从初始状态开始,当我们使用ES2015时,可以在构造函数中使用this.state来完成。 我们将onChange方法绑定this以便我们可以在方法中获得正确的this上下文。 当我们在任何组件方法中执行诸如this.setState类的this.setState时,这一点至关重要。
When the component mounts, we're asking for the initial list of contacts by calling our ContactActions.recieveContacts action directly. This will send an XHR request to the server (as we've specified in ContactsAPI) and will trigger the ContactStore to handle the data. We need to add a change listener in the componentWillMount lifecycle method which uses the onChange method as its callback. The onChange method is responsible for setting the state with the current list of contacts from the store.
在安装组件时,我们通过直接调用ContactActions.recieveContacts操作来请求联系人的初始列表。 这将向服务器发送XHR请求(如我们在ContactsAPI所指定),并将触发ContactStore处理数据。 我们需要在componentWillMount生命周期方法中添加一个更改侦听器,该方法使用onChange方法作为其回调。 onChange方法负责使用商店中的当前联系人列表来设置状态。
We're mapping over the contacts data that is set on state and creating list items out of each of them so that we can nicely display it in a ListGroup, which is a component that comes from React Bootstrap. We need another component for this called ContactListItem, so let's put that in now.
我们正在映射设置为状态的contacts数据,并从其中的每个列表中创建列表项,以便我们可以在ListGroup很好地显示它,它是React Bootstrap的组件。 我们需要另一个名为ContactListItem组件,因此现在将其放入。
创建联系人列表项组件 (Create the Contact List Item Component)
The ContactListItem component needs to create a ListGroupItem (another React Bootstrap component) with a React Router Link inside which will eventually take us to the listed contact's details.
ContactListItem组件需要创建一个带有React Router Link的ListGroupItem (另一个React Bootstrap组件),最终将带我们进入列出的联系人的详细信息。
// src/components/ContactListItem.js

import React, { Component } from 'react';
import { ListGroupItem } from 'react-bootstrap';
import { Link } from 'react-router';

class ContactListItem extends Component {
  render() {
    const { contact } = this.props;
    return (
      <ListGroupItem>
        <Link to={`/contact/${contact.id}`}>
          <h4>{contact.name}</h4>
        </Link>
      </ListGroupItem>
    );
  }
}

export default ContactListItem;
Here we're receiving the contact as a prop and simply rendering out the name property.
在这里,我们将接收联系人作为prop并简单地渲染name属性。
固定侧栏 (Fixing the Sidebar)
Let's make one final adjustment before we view the app, which is to fix the Sidebar so that it shows the list of contacts instead of the message we had before.
在查看应用程序之前,让我们进行最后一次调整,即修复Sidebar ,使其显示联系人列表而不是之前的消息。
// src/components/Sidebar.js

import React, { Component } from 'react';
import Contacts from './Contacts';

class SidebarComponent extends Component {
  render() {
    return (
      <Contacts />
    );
  }
}

export default SidebarComponent;
With this in place, we should now be able to view our list of contacts.
有了这个,我们现在应该能够查看我们的联系人列表。

创建联系人详细信息组件 ( Create the Contact Detail Component )
One of the last pieces of the application we'll need is the contact detail area which is meant to take up the main part of the page. When a contact name is clicked, a request should be made to the server to retrieve that contact's details which can then be displayed.
我们需要的应用程序的最后一部分是联系细节区域,该区域将占据页面的主要部分。 单击联系人姓名后,应向服务器发出请求以检索该联系人的详细信息,然后可以显示该详细信息。
You may have noticed when we set up our Express app that we immediately applied the JWT middleware (authCheck) to the /contacts/:id route, meaning that without a valid JWT, we won't be able to access the resource. While this may or may not be a realistic scenario for your app, restricting just the user's details to authenticated users will give us a good way of seeing how to work with parts of our app that require authentication for this demo.
您可能已经注意到,当我们设置Express应用程序时,我们立即将JWT中间件( authCheck )应用于/contacts/:id路由,这意味着如果没有有效的JWT,我们将无法访问该资源。 尽管这对于您的应用程序来说可能是现实的情况,也可能不是现实的情况,但仅将用户的详细信息限制为经过身份验证的用户,将为我们提供一种很好的方式,以了解如何处理需要对此演示进行身份验证的应用程序部分。
We've already got our action and store set up to handle a single contact, so let's get right to implementing the component.
我们已经采取了行动,并设置存储来处理单个联系人,因此让我们开始实现该组件。
// src/components/ContactDetail.js

import React, { Component } from 'react';
import ContactActions from '../actions/ContactActions';
import ContactStore from '../stores/ContactStore';

class ContactDetailComponent extends Component {

  constructor() {
    super();
    this.state = {
      contact: {}
    }
    this.onChange = this.onChange.bind(this);
  }

  componentWillMount() {
    ContactStore.addChangeListener(this.onChange);
  }

  componentDidMount() {
    ContactActions.getContact(this.props.params.id);
  }

  componentWillUnmount() {
    ContactStore.removeChangeListener(this.onChange);
  }

  componentWillReceiveProps(nextProps) {
    this.setState({
      contact: ContactActions.getContact(nextProps.params.id)
    });
  }

  onChange() {
    this.setState({
      contact: ContactStore.getContact(this.props.params.id)
    });
  }

  render() {
    let contact;
    if (this.state.contact) {
      contact = this.state.contact;
    }
    return (
      <div>
        { this.state.contact &&
          <div>
            <img src={contact.image} width="150" />
            <h1>{contact.name}</h1>
            <h3>{contact.email}</h3>
          </div>
        }
      </div>
    );
  }
}

export default ContactDetailComponent;
This component looks very similar to our Contacts component, but it's now only dealing with a single contact object. Notice that we're passing an id argument to the getContact method on ContactActions and ContactStore. This id comes from React Router and is provided by the params. The componentWillReceiveProps method is used to bring out the id from params when we move between contacts in the list, or in other words, when we want to view the "next" contact.
该组件看起来与我们的“ Contacts组件非常相似,但是现在只处理单个联系人对象。 注意,我们正在将id参数传递给ContactActions和ContactStore的getContact方法。 该id来自React Router,由params提供。 当我们在列表中的联系人之间移动时,换句话说,当我们要查看“下一个”联系人时, componentWillReceiveProps方法用于从params带出id 。
恢复联系方式 (Bring back the Contact Detail Route)
Before we can view this, we need to bring back the ContactDetail route in our Root.js file.
在查看之前,我们需要在Root.js文件中恢复ContactDetail路由。
// src/Root.js

...

render() {
    return (
      <Router history={this.props.history}>
        <Route path='/' component={App}>
          <IndexRoute component={Index}/>
          <Route path='/contact/:id' component={ContactDetail} />
        </Route>
      </Router>
    );
  }

  ...
We can now click on a contact to view their details, but we're not yet able to get through.
现在,我们可以单击联系人以查看其详细信息,但我们尚无法接通。

The reason for this unauthorized error is that we have middleware protecting the contact detail resource on the server. We need to provide the server with a valid JWT before it will allow our requests to get through, and to make that happen, we first need to authenticate our user. Let's finish out the authentication pieces now.
发生此未经授权的错误的原因是我们拥有中间件来保护服务器上的联系人详细信息资源。 我们需要为服务器提供有效的JWT,然后它才能允许我们的请求通过,要实现这一点,我们首先需要对用户进行身份验证。 现在让我们完成身份验证。
完成认证 ( Finish Out Authentication )
So what exactly happens when a user logs in with Auth0? There are a number of items that are returned in the callback, and the most important one for our concerns today is the id_token, which is a JWT. We also get a number of other items, like the user's profile, an access token, a refresh token, and others.
那么,当用户使用Auth0登录时会发生什么呢? 回调中返回了许多项,而今天我们最关心的一项是id_token ,它是一个JWT。 我们还获得了许多其他项目,例如用户的个人资料, 访问令牌 , 刷新令牌等。
The good news is that we're almost all the way there with authentication already since most of the work is done for us out of the box with Auth0. All we need to do to finish out the authentication piece is provide some logic to handle the user's profile data and JWT that get returned on a successful login.
好消息是,我们几乎已经完成了身份验证,因为大多数工作都是通过Auth0开箱即用的。 完成身份验证部分所需要做的就是提供一些逻辑,以处理成功登录后返回的用户配置文件数据和JWT。
We'll follow Flux architecture for this and create a set of actions, constants, and a store for authentication.
为此,我们将遵循Flux架构,并创建一组操作,常量和用于身份验证的存储。
创建AuthAction (Create the AuthActions)
// src/actions/AuthActions.js

import AppDispatcher from '../dispatcher/AppDispatcher';
import AuthConstants from '../constants/AuthConstants';

export default {

  logUserIn: (profile, token) => {
    AppDispatcher.dispatch({
      actionType: AuthConstants.LOGIN_USER,
      profile: profile,
      token: token
    });
  },

  logUserOut: () => {
    AppDispatcher.dispatch({
      actionType: AuthConstants.LOGOUT_USER
    });
  }

}
The setup is similar to our ContactActions, except that here we're concerned with user login and logout. In the logUserIn method, we're dispatching the profile and the token that will come through from our Header component when we call the action.
设置与我们的ContactActions相似,除了这里我们关注的是用户登录和注销。 在logUserIn方法中,我们调度调用该动作时将来自Header组件的profile和token 。
创建身份验证常量 (Create the Auth Constants)
We need some new constants for authentication.
我们需要一些新的常量进行身份验证。
// src/constants/AuthConstants.js

import keyMirror from 'keymirror';

export default keyMirror({
  LOGIN_USER: null,
  LOGOUT_USER: null
});
创建身份验证存储 (Create the Auth Store)
The AuthStore is where we are eventually handling the profile and JWT that come through after a successful login. So what do we need to do with them exactly? The easiest way to work with the profile and token is to save them in local storage so that they can be recalled and used later.
AuthStore是我们最终处理成功登录后通过的配置文件和JWT的地方。 那么,我们到底需要与他们做什么? 使用配置文件和令牌的最简单方法是将它们保存在本地存储中,以便以后可以调用和使用它们。
// src/stores/AuthStore.js

import AppDispatcher from '../dispatcher/AppDispatcher';
import AuthConstants from '../constants/AuthConstants';
import { EventEmitter } from 'events';

const CHANGE_EVENT = 'change';

function setUser(profile, token) {
  if (!localStorage.getItem('id_token')) {
    localStorage.setItem('profile', JSON.stringify(profile));
    localStorage.setItem('id_token', token);
  }
}

function removeUser() {
  localStorage.removeItem('profile');
  localStorage.removeItem('id_token');
}

class AuthStoreClass extends EventEmitter {
  emitChange() {
    this.emit(CHANGE_EVENT);
  }

  addChangeListener(callback) {
    this.on(CHANGE_EVENT, callback)
  }

  removeChangeListener(callback) {
    this.removeListener(CHANGE_EVENT, callback)
  }

  isAuthenticated() {
    if (localStorage.getItem('id_token')) {
      return true;
    }
    return false;
  }

  getUser() {
    return localStorage.getItem('profile');
  }

  getJwt() {
    return localStorage.getItem('id_token');
  }
}

const AuthStore = new AuthStoreClass();

// Here we register a callback for the dispatcher
// and look for our various action types so we can
// respond appropriately
AuthStore.dispatchToken = AppDispatcher.register(action => {

  switch(action.actionType) {

    case AuthConstants.LOGIN_USER:
      setUser(action.profile, action.token);
      AuthStore.emitChange();
      break

    case AuthConstants.LOGOUT_USER:
      removeUser();
      AuthStore.emitChange();
      break

    default:
  }


});

export default AuthStore;
The setUser function is what we use when a successful login comes through and it's responsible for saving the profile and token in local storage. We've also got some utility methods that will help us in our components. Among them is an isAuthenticated method which can be used to conditionally hide and show various elements depending on whether or not the user is currently authenticated.
setUser函数是成功登录后使用的函数,它负责将配置文件和令牌保存在本地存储中。 我们还提供了一些实用程序方法,这些方法将对我们的组件有所帮助。 其中包括一个isAuthenticated方法,该方法可用于根据用户当前是否通过身份验证来有条件地隐藏和显示各种元素。
But let's think about this for a second. In a traditional authentication setup, when the user successfully logs in, we get a session on the server, and this session is later used to say whether or not the user is currently authenticated. However, JWT authentication is stateless, and it works by having the server check the token it receives in a request against a secret key. No session or state necessary. This is great for all sorts of reasons, but it leaves us wondering how we can determine if a user is authenticated or not for the purposes of our front end app.
但是,让我们考虑一下。 在传统的身份验证设置中,当用户成功登录时,我们在服务器上获得一个会话,该会话稍后用于说明用户当前是否已通过身份验证。 但是,JWT身份验证是无状态的,它通过让服务器根据密钥检查请求中接收到的令牌来工作。 无需会话或状态。 出于各种原因 ,这都很棒,但这使我们想知道如何才能为前端应用程序确定用户是否通过了身份验证。
The good news is that all we really need to do is check whether a token is saved in local storage. If the token is invalid, the request is going to be rejected anyway and the user will need to log back in. We could take things a step further and check whether the token has expired or not, but for now just checking for the presence of a JWT is fine.
好消息是,我们真正需要做的就是检查令牌是否保存在本地存储中。 如果令牌无效,则无论如何该请求都将被拒绝,并且用户将需要重新登录。我们可以更进一步,检查令牌是否已过期,但现在仅检查是否存在令牌。 JWT很好。
修复标题组件 (Fix the Header Component)
Let's quicky modify the header component so that it uses the AuthActions and AuthStore to actually dispatch the proper actions.
让我们快速修改标头组件,以便它使用AuthActions和AuthStore实际调度适当的操作。
// src/components/Header.js

...

import AuthActions from '../actions/AuthActions';
import AuthStore from '../stores/AuthStore';

class HeaderComponent extends Component {

  ...

  login() {
    this.props.lock.show((err, profile, token) => {
      if (err) {
        alert(err);
        return;
      }
      AuthActions.logUserIn(profile, token);
      this.setState({authenticated: true});
    });
  }

  logout() {
    AuthActions.logUserOut();
    this.setState({authenticated: false});
  }

  ...
With all of these changes in place, we can now log in and have the user's profile and JWT saved.
完成所有这些更改后,我们现在可以登录并保存用户的个人资料和JWT。

发出验证请求 ( Make an Authenticated Request )
So our contact detail resource is protected by JWT authentication, and now we have a valid JWT for our user. Now all we need to do is attach it as an Authorization header when we make a request. With superagent, it's easy to set this up in the request.
因此,我们的联系人详细信息资源受JWT身份验证的保护,现在我们为用户提供了有效的JWT。 现在,我们要做的就是在发出请求时将其附加为Authorization标头。 使用superagent,可以轻松地在请求中进行设置。
// src/utils/ContactsAPI.js

import AuthStore from '../stores/AuthStore';

...

  getContact: (url) => {
    return new Promise((resolve, reject) => {
      request
        .get(url)
        .set('Authorization', 'Bearer ' + AuthStore.getJwt())
        .end((err, response) => {
          if (err) reject(err);
          resolve(JSON.parse(response.text));
        })
    });
  }
}
We setup the Authorization header with the Bearer scheme and get our JWT from the store to be attached. With this in place, we should now be able to access the protected content.
我们使用Bearer方案设置了Authorization标头,并从商店获取JWT进行附加。 有了这个,我们现在应该能够访问受保护的内容。

最后的修饰:有条件地显示和隐藏元素 ( Final Touches: Conditionally Show and Hide Elements )
We're pretty much there with our app! To finish things out, let's conditionally show and hide some of the elements. We're going to want to show the "Login" nav item when the user isn't authenticated, and hide it when they are. The opposite is true for the "Logout" nav item.
我们的应用程序几乎在那里! 最后,让我们有条件地显示和隐藏一些元素。 我们将要在用户未通过身份验证时显示“登录”导航项,并在用户通过身份验证时将其隐藏。 对于“注销”导航项则相反。
// src/components/Header.js

...

constructor() {
    super();
    this.state = {
      authenticated: AuthStore.isAuthenticated()
    }
    ...
  }

  ...

  render() {
    return (
      <Navbar>
        <Navbar.Header>
          <Navbar.Brand>
            <a href="#">React Contacts</a>
          </Navbar.Brand>
        </Navbar.Header>
        <Nav>
          { !this.state.authenticated ? (
            <NavItem onClick={this.login}>Login</NavItem>
          ) : (
            <NavItem onClick={this.logout}>Logout</NavItem>
          )}
        </Nav>
      </Navbar>
    );
  }

  ...
Here we are getting the user's authentication state from the store as the component loads up. We then use this authenticated state to conditionally show and hide the NavItems.
在这里,当组件加载时,我们将从商店中获取用户的身份验证状态。 然后,我们使用此authenticated状态有条件地显示和隐藏NavItem 。
We can do something similar for the message in our Index component.
我们可以对Index组件中的消息执行类似的操作。
// src/components/Index.js

...

constructor() {
    super();
    this.state = {
      authenticated: AuthStore.isAuthenticated()
    }
  }
  render() {
    return (
      <div>
        { !this.state.authenticated ? (
          <h2>Log in to view contact details</h2>
        ) : (
          <h2>Click on a contact to view their profile</h2>
        )}
      </div>
    );
  }

...
结语 ( Wrapping Up )
If you've followed along, you've now got a React + Flux app that calls an API and has user authentication implemented with Auth0. Great job!
如果您一直遵循,那么您现在已经有了一个React + Flux应用程序,该应用程序调用API,并使用Auth0实现了用户身份验证。 很好!
There's no doubt about it: a ton of code is involved with creating a React + Flux app and it can be hard to see the benefits of it when building small projects. However, the unidirectional data flow and app structure that Flux allows becomes really important as applications grow. Removing the mess of two-way data flow is essential for being able to reason about your app as it gets larger and larger.
毫无疑问:创建React + Flux应用程序涉及大量代码,在构建小型项目时很难看到它的好处。 但是,随着应用程序的增长,Flux允许的单向数据流和应用程序结构变得非常重要。 随着应用程序越来越大,消除混乱的双向数据流至关重要。
Fortunately, the authentication part--which can often be tricky--is easy with Auth0. If you're using a backend other than Node for your app, be sure to check out the Auth0 SDK that applies to you. There are integrations almost all popular languages and frameworks, including:
幸运的是,使用Auth0可以很容易地完成身份验证部分(通常很棘手)。 如果您的应用使用Node以外的后端,请确保签出适用于您的Auth0 SDK。 几乎所有流行的语言和框架都有集成,包括:
翻译自: https://scotch.io/tutorials/build-a-react-flux-app-with-user-authentication
flux react


 822
822

 被折叠的 条评论
为什么被折叠?
被折叠的 条评论
为什么被折叠?
 到【灌水乐园】发言


