


git 缓存清除缓存
In the previous article, we attempted to use service workers, and it was a success. We were also able to use it to cache some assets for our app. What we are yet to see is how service workers and caches work together to give users a fantastic offline experience. This is what we will be digging in this part.
在上一篇文章中,我们尝试使用服务工作者,这是成功的。 我们还能够使用它为我们的应用程序缓存一些资产。 我们尚未看到的是服务工作者和缓存如何协同工作,从而为用户提供出色的离线体验。 这就是我们将在本部分中探讨的内容。
Browsers have a storage called Cache Storage which we saw while debugging in the previous chapter. When we mention caching, we are not just referring to that storage but to whatever in-browser persistence mechanism that we employ to keep hold of data for offline use.
浏览器有一个称为“缓存存储”的存储,我们在上一章的调试中看到了该存储。 当我们提到缓存时,我们不仅指该存储,还指我们用来保留数据以供脱机使用的任何浏览器内持久性机制。
In summary, we are going to:
总而言之,我们将要:
- Explore the unofficial standard caching strategies. 探索非官方的标准缓存策略。
- Explore the available storage we can use for caching. 探索可用于缓存的可用存储。
- Build a demo to show trending projects on Github. 构建演示以在Github上显示趋势项目。
- Implement caching on the demo for offline experience. 在演示中实施缓存以获取脱机体验。
缓存策略 ( Caching Strategies )
Just like every other theory in software engineering, it just takes some time to put some patterns together and make those patterns popular for solving certain kind of problems. Caching for PWA is no difference. Jake Archibald had compiled a lot of these patterns and we will just throw more lights on the most used ones:
就像软件工程中的所有其他理论一样,将一些模式放在一起并使其流行于解决某些类型的问题也需要花费一些时间。 缓存PWA没什么区别。 杰克·阿奇博尔德(Jake Archibald )编译了很多这样的模式 ,我们将为最常用的模式提供更多信息:
安装时缓存 (Cache on Install)
This is the pattern we saw in the previous post where you cache all the items needed for an app shell to be displayed:
这是我们在上一篇文章中看到的模式,其中缓存了显示应用程序外壳所需的所有项目:
self.addEventListener('install', function(e) {
  console.log('[ServiceWorker] Install');
  e.waitUntil(
    caches.open(cacheName).then(function(cache) {
      console.log('[ServiceWorker] Caching app shell');
      return cache.addAll(filesToCache);
    })
  );
});
The items cached here include your HTML templates, CSS files, JavaScript, fonts, few images.
此处缓存的项目包括HTML模板,CSS文件,JavaScript,字体, 少量图像。
在网络响应上兑现 (Cashe on Network Response)
This strategy checks if a network request has been previously cached and updates the page with the cache. If the cache is not available, it goes straight to the network to fetch the item. When the network request returns successfully, it updates the page and caches the item returned:
此策略检查以前是否已缓存网络请求,并使用缓存更新页面。 如果缓存不可用,它将直接进入网络以获取项目。 当网络请求成功返回时,它将更新页面并缓存返回的项目:
self.addEventListener('fetch', function(event) {
  event.respondWith(
    caches.open(cacheName).then(function(cache) {
      return cache.match(event.request).then(function (response) {
        return response || fetch(event.request).then(function(response) {
          cache.put(event.request, response.clone());
          return response;
        });
      });
    })
  );
});
This strategy is mostly applied to frequently updating contents like feeds.
此策略主要用于频繁更新提要之类的内容。
缓存,回退到网络 (Cache, Falling Back To network)
This strategy is more like "it's either it's cached, or it isn't." When items are not in the cache, we don't try to cache, rather we just fetch it from the network:
这种策略更像是“要么被缓存,要么没有缓存”。 当项目不在缓存中时,我们不会尝试缓存,而只是从网络中获取它:
self.addEventListener('fetch', function(event) {
  event.respondWith(
    caches.match(event.request).then(function(response) {
      return response || fetch(event.request);
    })
  );
});
缓存,然后网络 (Cache, Then network)
This request fires both arequest to the cache and another to the network. If an item exists in the cache, that's fine, serve it to the page. When the network request comes back overwrite the page's content with what you got from the network:
此请求将arequest激发到高速缓存,并将另一个激发到网络。 如果缓存中存在某个项目,则可以将其提供给页面。 当网络请求返回时,用您从网络获得的内容覆盖页面的内容:
const networkReturned = false;
if ('caches' in window) {
  caches.match(app.apiURL).then(function(response) {
    if (response) {
      response.json().then(function(trends) {
        console.log('From cache...')
        if(!networkReturned) {
          app.updateTrends(trends);
        }
      });
    }
  });
}

fetch(app.apiURL)
.then(response => response.json())
.then(function(trends) {
  console.log('From server...')
  networkReturned = true;
  app.updateTrends(trends.items)
}).catch(function(err) {
  // Error
});
In rare cases, the cache will come back before the network. Meaning that if the network returns with data, the cache data will be replaced with the network data. In, rare cases, I mentioned. It's the web; anything goes, hence, network data might come back before cached data. That's why you need a flag like networkReturned in the code sample above to keep things in check.
在极少数情况下,缓存将在网络之前返回。 这意味着如果网络返回数据,则缓存数据将被网络数据替换。 我提到过,在极少数情况下。 这是网络; 任何事情都会发生,因此,网络数据可能会在缓存数据之前返回。 这就是为什么在上面的代码示例中需要使用networkReturned之类的标志来检查情况的原因。
存储技术 ( Storage Techniques )
There are two recommended data persistence storage for service workers -- Cache Storage and Index DB (IDB).
为服务工作者提供了两个建议的数据持久性存储-缓存存储和索引数据库(IDB)。
Cache Storage: Sometimes, in the past, we relied on AppCache for caching. This wasn't flexible because we needed an API that was more interactive. The Cache API, baked right in service workers allows you to persist data more interactively. The good thing about this API is that it's both available in service workers and also in your web pages. We have seen this storage in action already.
缓存存储 :过去,有时我们依靠AppCache进行缓存。 这并不灵活,因为我们需要一个更具交互性的API。 在服务工作者中使用的Cache API,使您可以更交互地持久化数据。 关于此API的好处是,它既可以在服务工作者中使用,也可以在您的网页中使用。 我们已经看到了这种存储的作用。
Index DB: Index DB is an asynchronous data storage solution. It's API is love-level and quite a pain to work with, but wrapper libraries like localForage simplify the API with a localStorage-like interface.
索引数据库 :索引数据库是异步数据存储解决方案。 它的API是爱情级别的,使用起来很痛苦,但是包装器库(如localForage)使用类似于localStorage的接口简化了API。
Service worker supports these two storage options. The question becomes, when should we use which? According to Addy Osmani's post:
服务人员支持这两个存储选项。 问题变成了,我们什么时候应该使用哪个? 根据Addy Osmani的帖子 :
For URL addressable resources, use the Cache API (part of Service Worker). For all other data, use IndexedDB (with a Promises wrapper).
对于URL可寻址资源,请使用Cache API(Service Worker的一部分)。 对于所有其他数据,请使用IndexedDB(带有Promises包装器)。
软件预缓存 ( SW Precache )
Now that we have discussed caching strategies and data storage techniques. It's time to put it them to use. Before doing that, it would be nice to meet SW Precahce from Google.
现在,我们已经讨论了缓存策略和数据存储技术。 是时候使用它们了。 在此之前,很高兴认识Google的SW Precahce 。
This tool goes the extra mile to simplify the repeated pattern we have discussed into just a configuration object. Hence, all you need do is define you cacheable items in an array.
该工具付出了更多努力,将我们已经讨论过的重复模式简化为一个配置对象。 因此,您要做的就是在数组中定义可缓存的项目。
Let's add precache and use it to generate our service-worker.js automatically. Start with adding a package.json file to the pwa-demo project folder:
让我们添加预缓存并使用它来自动生成我们的service-worker.js 。 首先将package.json文件添加到pwa-demo项目文件夹:
npm init -yInstall sw-precache:
安装sw-precache:
npm install --save-dev sw-precacheCreate a configuration file:
创建一个配置文件:
// ./tools/precache.js

const name = 'scotchPWA-v1'
module.exports = {
  staticFileGlobs: [
    './index.html',
    './images/*.{png,svg,gif,jpg}',
    './fonts/**/*.{woff,woff2}',
    './js/*.js',
    './css/*.css',
    'https://fonts.googleapis.com/icon?family=Material+Icons'
  ],
  stripPrefix: '.'
};
staticFileGlobs takes an array of file patterns which we want to cache. This is simpler because we don't have to list all the files, but the patterns.
staticFileGlobs采用了我们要缓存的文件模式数组。 这比较简单,因为我们不必列出所有文件,而是列出所有模式。
Add a script to generate the service worker file to the package.json:
添加一个脚本以将service worker文件生成到package.json :
"scripts": {
    "sw": "sw-precache --config=tools/precache.js --verbose"
  },
Generate a service worker file by running:
通过运行以下命令生成服务工作者文件:
npm run swThis should generate a ./service-worker.js. A close look into that file should feel familiar.
这应该生成一个./service-worker.js 。 仔细查看该文件应该会感到很熟悉。
完整示范 ( Complete Demo )
Let's flesh out the app first before we can see how to use what we have learned to take the app offline.
让我们先充实该应用程序,然后才能了解如何使用我们学到的使该应用程序脱机。
Back to the app.js file; listen to the page loaded event and try to get a list of GitHub trending projects:
回到app.js文件; 侦听页面加载事件,并尝试获取GitHub趋势项目列表:
(function() {
  const app = {
    apiURL: `https://api.github.com/search/repositories?q=created:%22${dates.startDate()}+..+${dates.endDate()}%22%20language:javascript&sort=stars&order=desc`
  }

  app.getTrends = function() {
    fetch(app.apiURL)
    .then(response => response.json())
    .then(function(trends) {
      console.log('From server...')
      app.updateTrends(trends.items)
    }).catch(function(err) {
      // Error
    });
  }

  document.addEventListener('DOMContentLoaded', function() {
    app.getTrends()
  })

  if ('serviceWorker' in navigator) {
    navigator.serviceWorker
     .register('/service-worker.js')
     .then(function() {
        console.log('Service Worker Registered');
      });
  }
})()
When the page is ready, we call the getTrends method which uses the API URL to fetch trending GitHub projects. This is decided by sorting them with the stars in descending order.
页面准备就绪后,我们调用getTrends方法,该方法使用API URL来获取趋势GitHub项目。 这是通过将星星与星星按降序排序来决定的。
Notice the dates in the API URL string. Here is how they were constructed:
请注意API URL字符串中的日期。 这是它们的构造方式:
Date.prototype.yyyymmdd = function() {
  // getMonth is zero based,
  // so we increment by 1
  let mm = this.getMonth() + 1;
  let dd = this.getDate();

  return [this.getFullYear(),
          (mm>9 ? '' : '0') + mm,
          (dd>9 ? '' : '0') + dd
        ].join('-');
};

const dates = {
  startDate: function() {
     const startDate = new Date();
     startDate.setDate(startDate.getDate() - 7);
     return startDate.yyyymmdd();
   },
   endDate: function() {
     const endDate = new Date();
     return endDate.yyyymmdd();
   }
 }
yyyymmdd just helps us format the date in a way that the GitHub API wants it (yyyy-mm-dd).
yyyymmdd只是帮助我们以GitHub API想要的日期格式( yyyy-mm-dd )格式化日期。
When getTrends fetches data, it calls updateTrends with the fetched items. Le's see what that method does:
当getTrends获取数据时,它将使用获取的项目调用updateTrends 。 Le看该方法的作用:
app.updateTrends = function(trends) {
 const trendsRow = document.querySelector('.trends');
  for(let i = 0; i < trends.length; i++) {
    const trend = trends[i];
    trendsRow.appendChild(app.createCard(trend));
  }
}
It iterates over all the items from the request and uses createCard to build a DOM template and appends this template to the .trends element:
它遍历请求中的所有项目,并使用createCard构建DOM模板并将此模板附加到.trends元素:
<!-- ./index.html -->

<div class="row trends">
 <!-- append here -->
</div>
The createCard method just clones a template from the DOM as found in the index.html file. It used this cloned template to build a card:
createCard方法只是从index.html文件中找到的DOM中克隆一个模板。 它使用此克隆模板来构建卡:
const app = {
  apiURL: `...`,
  cardTemplate: document.querySelector('.card-template')
}

app.createCard = function(trend) {
  const card = app.cardTemplate.cloneNode(true);
  card.classList.remove('card-template')
  card.querySelector('.card-title').textContent = trend.full_name
  card.querySelector('.card-lang').textContent = trend.language
  card.querySelector('.card-stars').textContent = trend.stargazers_count
  card.querySelector('.card-forks').textContent = trend.forks
  card.querySelector('.card-link').setAttribute('href', trend.html_url)
  card.querySelector('.card-link').setAttribute('target', '_blank')
  return card;
}
The following is the HTML content from the index.html from which the card is cloned and created:
以下是从中克隆和创建卡的index.htmlHTML内容:
<div class="row trends">
  <divclass="col s12 m4 card-template">
    <div class="card horizontal">
      <div class="card-stacked">
        <div class="card-content white-text">
          <span class="card-title">Card Title</span>
          <div class="card-sub grey-text text-lighten-2">
            <i class="material-icons">info</i><span class="card-lang"> JavaScript</span>
            <i class="material-icons">star</i><span class="card-stars"> 299</span>
            <i class="material-icons">assessment</i><span class="card-forks"> 100</span>
          </div>
          <p>A set of best practices for JavaScript projects</p>
        </div>
        <div class="card-action">
          <a href="#" class="card-link">Visit Repo</a>
        </div>
      </div>
    </div>
  </div>
</div>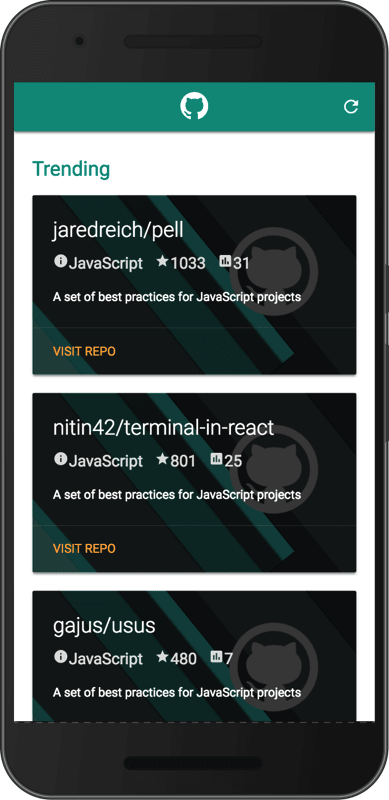
运行时缓存 ( Runtime Caching )
Runtime caching are those dynamic items that you need to serve from the cache for using during the app usage. Not the app shell now, but the actual content that the user will consume.
运行时缓存是您需要从缓存中提供的动态项目,以便在应用程序使用期间使用。 现在不是应用程序外壳,而是用户将使用的实际内容。
We need to tell service worker which resource we at runtime in the precache configuration:
我们需要在预缓存配置中告诉服务工作者我们在运行时需要哪些资源:
// ./tools/precache.js
const name = 'scotchPWA-v1'
module.exports = {
  staticFileGlobs: [
    // ...
  ],
  stripPrefix: '.',
  // Run time cache
  runtimeCaching: [{
    urlPattern: /https:\/\/api\.github\.com\/search\/repositories/,
    handler: 'networkFirst',
    options: {
      cache: {
        name: name
      }
    }
  }]
};
We define a URL pattern that when matched, we intend to cache it's payload. The pattern matches all GitHub Search API requests. This will cache the app but does not mean our request will not be sent to the network. We need to implement one of the caching strategy, "Cache, Then network."
我们定义一个URL模式,当匹配时,我们打算缓存它的有效负载。 该模式匹配所有GitHub Search API请求。 这将缓存该应用程序,但这并不意味着我们的请求将不会发送到网络。 我们需要实现一种缓存策略,即“缓存,然后是网络”。
With that strategy, when a request is made, we first serve the cache version and update with network if there is connectivity:
使用该策略,在发出请求时,我们首先提供缓存版本,并在存在连接的情况下通过网络进行更新:
app.getTrends = function() {
 const networkReturned = false;
  if ('caches' in window) {
    caches.match(app.apiURL).then(function(response) {
      if (response) {
        response.json().then(function(trends) {
          console.log('From cache...')
          if(!networkReturned) {
            app.updateTrends(trends);
          }
        });
      }
    });
  }

  fetch(app.apiURL)
  .then(response => response.json())
  .then(function(trends) {
    console.log('From server...')
    app.updateTrends(trends.items)
    networkReturned = true;
  }).catch(function(err) {
    // Error
  });
}
Update the version in precache.js and regenerate the service work:
更新precache.js的版本并重新生成服务工作:
const name = 'scotchPWA-v2'npm run swWhen you run the app, try to refresh it again, pull out the debug console and take the app offline. After doing, so refresh again and see some magic:
运行应用程序时,请尝试再次刷新它,拔出调试控制台并使应用程序脱机。 完成后,再次刷新并查看一些魔术:
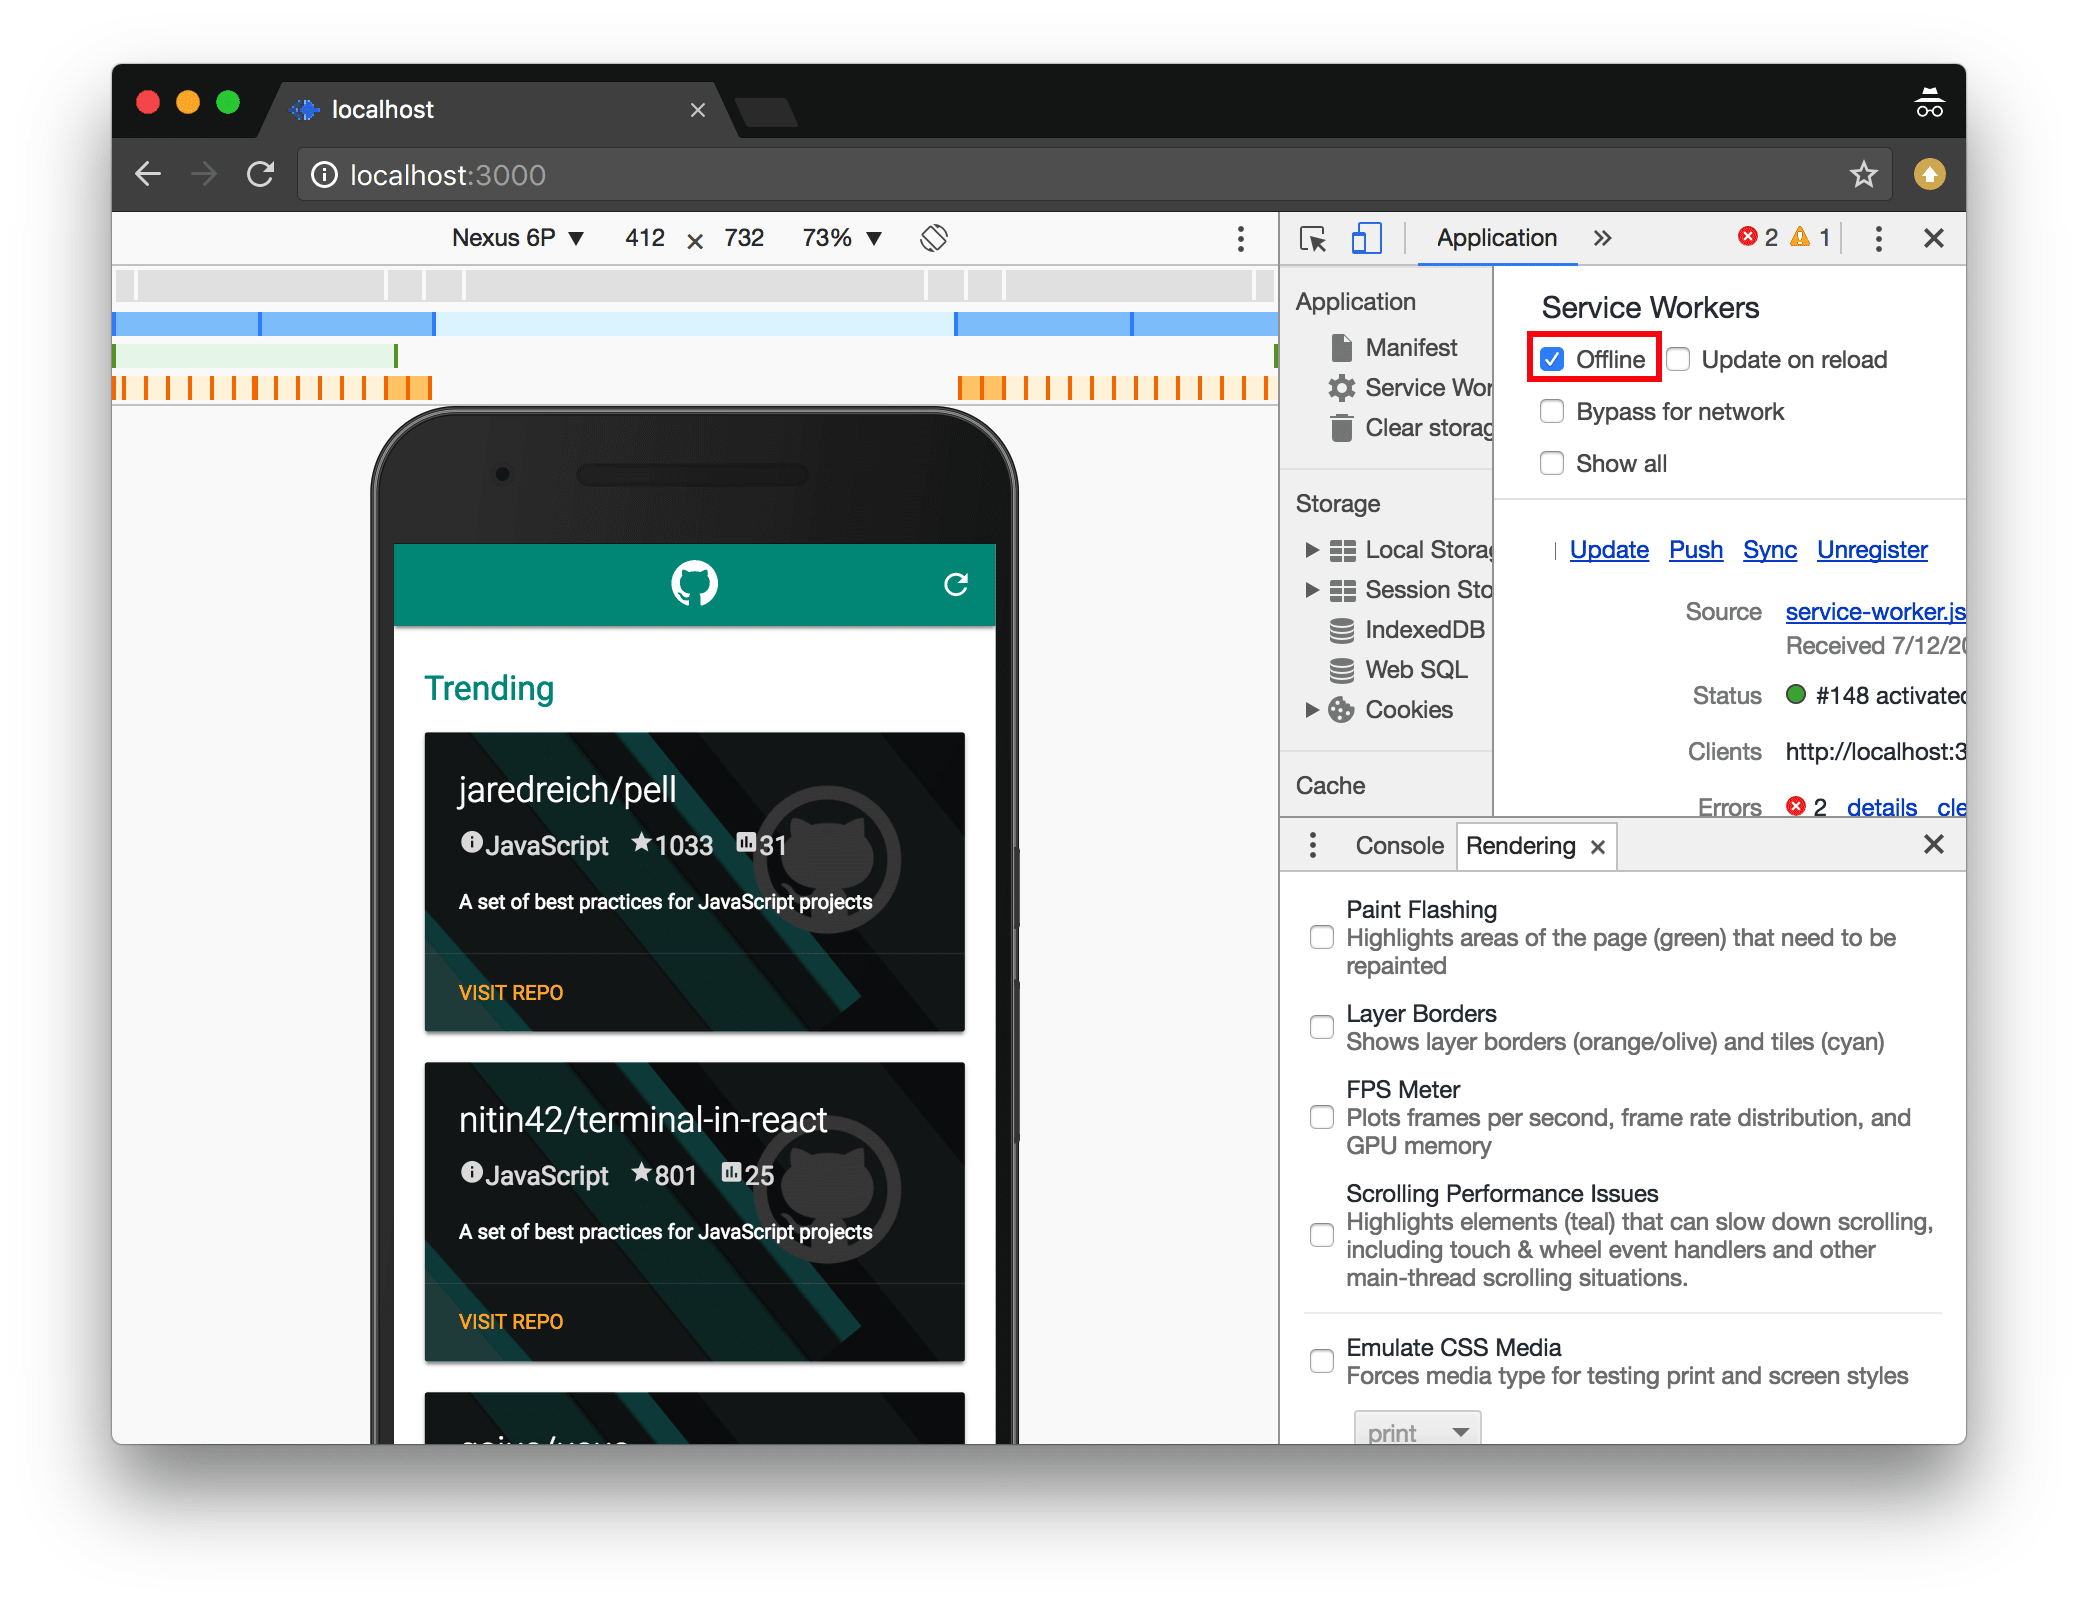
清爽 ( Refreshing )
Once the user starts sensing that the app is behaving like a mobile app, she might want to update contents manually when there is a better connection. You need to give them the chance to refresh. Let's add an event to the refresh button and call getTrends when it's called:
一旦用户开始感觉到该应用程序的行为类似于移动应用程序,则她可能想在存在更好的连接时手动更新内容。 您需要给他们刷新的机会。 让我们向刷新按钮添加一个事件,并在调用getTrends时调用getTrends :
document.addEventListener('DOMContentLoaded', function() {
 app.getTrends()

 // Event listener for refresh button
 const refreshButton = document.querySelector('.refresh');
 refreshButton.addEventListener('click', app.getTrends)
})
接下来是什么? ( What Next? )
Hope this one was not such a mouthful? In summary, you now know how to build apps that work offline or flaky connections; welcome to the gang. We are done with the boring parts of service workers, in the next (and last) post, we will discuss what's fun about this technology. Some of which include push notifications, home screen icons, and splash screen.
希望这不是那么满口吗? 总而言之,您现在知道如何构建可脱机或不稳定连接的应用程序。 欢迎来到帮派。 我们已经完成了无聊的服务人员工作,在下一个(也是最后一个)中,我们将讨论该技术的有趣之处。 其中一些包括推送通知,主屏幕图标和初始屏幕。
翻译自: https://scotch.io/tutorials/build-an-offline-git-trending-pwa-part-2-caching-and-offline
git 缓存清除缓存


 1万+
1万+

 被折叠的 条评论
为什么被折叠?
被折叠的 条评论
为什么被折叠?
 到【灌水乐园】发言


