


laravel scout
Today, we are going to learn how to build a simple search functionality using Laravel Scout and Vue.js. If you don't know what Laravel Scout is, here is what the Laravel documentation says:
今天,我们将学习如何使用Laravel Scout和Vue.js构建简单的搜索功能。 如果您不知道什么是Laravel Scout,这是Laravel文档所说的内容:
Laravel Scout provides a simple, driver based solution for adding full-text search to your Eloquent models. Using model observers, Scout will automatically keep your search indexes in sync with your Eloquent records.
Laravel Scout提供了一个简单的基于驱动程序的解决方案,用于向Eloquent模型添加全文搜索。 通过使用模型观察器,Scout将自动使您的搜索索引与您的口才记录保持同步。
It's an official package, not included in Laravel by default but you can still pull it in with Composer and use in your Laravel apps. It is shipped with Algolia driver, but you can swipe drivers easily as the documentation says:
这是一个官方软件包,默认情况下不包含在Laravel中,但您仍然可以将其与Composer一起拉入并在Laravel应用中使用。 它与Algolia驱动程序一起提供,但是您可以按照文档中的说明轻扫驱动程序:
Currently, Scout ships with an Algolia driver; however, writing custom drivers is simple and you are free to extend Scout with your own search implementations.
目前,Scout配备了阿尔及利亚司机。 但是,编写自定义驱动程序很简单,您可以使用自己的搜索实现自由扩展Scout。
Before diving into the code, let's take a look at what we are going to be building:
在深入研究代码之前,让我们看一下要构建的内容:

安装Laravel: ( Installing Laravel: )
To install Laravel, open your terminal and cd into your folder and run this command:
要安装Laravel,请打开终端,然后将cd插入文件夹并运行以下命令:
composer create-project --prefer-dist laravel/laravel searchAfter executing the command, change your document root to point to the public folder and make sure directories within the storage and the bootstrap/cache directories are writable by your web server.
执行命令后,将文档根目录更改为指向公用文件夹,并确保Web服务器可写存储中的目录和引导程序/缓存目录。
Last step in installing Laravel is generating an application key which is used to encrypt your user sessions and other data, and you can do that by running:
安装Laravel的最后一步是生成一个应用程序密钥,该密钥用于加密用户会话和其他数据,您可以通过运行以下命令来完成:
php artisan key:generateIf you open your website in the browser you should see this exact same page:
如果您在浏览器中打开网站,则应该看到完全相同的页面:
数据库配置: ( Database configuration: )
Rename the .env.example file to .env and add your database name, user and password.
将.env.example文件重命名为.env并添加数据库名称,用户和密码。
I will be using SQLite for this demo, feel free to use MySQL or any database management system you prefer.
我将在此演示中使用SQLite,请随时使用MySQL或您喜欢的任何数据库管理系统。
DB_CONNECTION=sqliteIf you don't specify a database name, Laravel assumes it is located in database/database.sqlite.
如果您未指定数据库名称,那么Laravel会假定它位于database / database.sqlite中 。
模型和迁移: ( Models and migrations: )
For this small app we will only be needing a Product model and a products table.
对于这个小应用程序,我们只需要一个产品模型和一个产品表。
Go ahead and generate those two:
继续生成这两个:
php artisan make:model Product -mWhen passing the -m flag to the php artisan make:model command a migration will be generated for you. That's a cool trick to know!
当将-m标志传递给php artisan make:model命令时,将为您生成一个迁移。 这是一个很酷的窍门!
These are the fields we are currently interested in:
这些是我们当前感兴趣的领域:
class CreateProductsTable extends Migration
{
/**
* Run the migrations.
*
* @return void
*/
public function up()
{
Schema::create('products', function (Blueprint $table) {
$table->increments('id');
$table->string('title');
$table->string('image');
$table->integer('price');
$table->text('description');
$table->timestamps();
});
}
/**
* Reverse the migrations.
*
* @return void
*/
public function down()
{
Schema::dropIfExists('products');
}
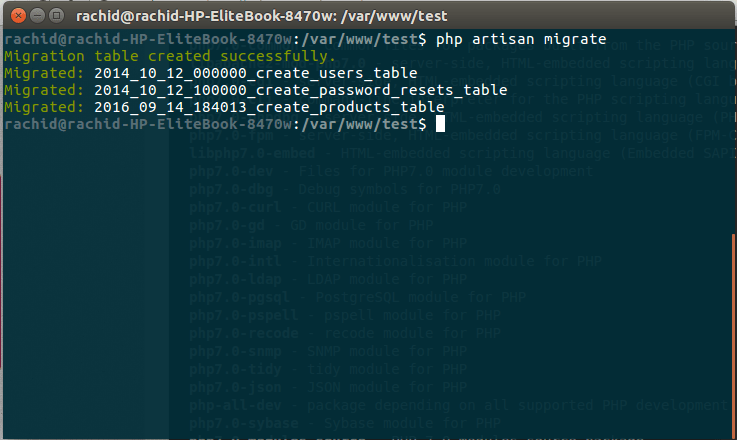
}Save your file and migrate your tables: php artisan migrate
保存文件并迁移表: php artisan migrate
虚拟数据: ( Dummy data: )
Using Laravel Model Factories we will be generating some fake data to test with. add these lines to database/factories/ModelFactory.php:
使用Laravel模型工厂,我们将生成一些假数据进行测试。 将这些行添加到database / factories / ModelFactory.php中 :
$factory->define(App\Product::class, function (Faker\Generator $faker) {
    return [
        'title' => $faker->sentence(),
        'image' => 'http://loremflickr.com/400/300?random='.rand(1, 100),
        'price' => $faker->numberBetween(3, 100),
        'description' => $faker->paragraph(2)
    ];
});
Our model factory is ready, let's create some data. In your command line run: php artisan tinker and then: factory(App\Product::class, 100)->create();. You can create as many records as you want, 100 sounds perfect to me.
我们的模型工厂已经准备好,让我们创建一些数据。 在您的命令行中运行: php artisan tinker ,然后: factory(App\Product::class, 100)->create(); 。 您可以创建任意数量的记录,对我来说100种声音是完美的。
路线和控制器: ( Routes and Controllers: )
These two routes are all what we need for this app, so let's go ahead and create them.
这两条路线都是我们为此应用程序所需的,所以让我们继续创建它们。
- GET : / the home route, this route will render our website home page. GET: /主页路线,此路线将呈现我们的网站主页。
routes/web.php:
路线/web.php:
Route::get('/', function () {
    return view('home');
});
You can use a controller, but I really don't think it's necessary for this route.
您可以使用控制器,但我真的不认为这条路线是必需的。
- GET : api/search this route is responsible for handling search requests. GET: api / search这条路线负责处理搜索请求。
routes/api.php
路线/api.php
Route::get('/search', [
    'as' => 'api.search',
    'uses' => 'Api\SearchController@search'
]);
To create the SearchController class, simply run: php artisan make:controller Api\SearchController. If you didn't already know, when adding a namespace to your controller's class name Laravel will automatically create the folder for you and put the generated controller inside it.
要创建SearchController类,只需运行: php artisan make:controller Api\SearchController 。 如果您还不知道,在向控制器的类名添加名称空间时,Laravel将自动为您创建文件夹并将生成的控制器放入其中。
class SearchController extends Controller
{
    public function search(Request $request)
    {
        // we will be back to this soon!
    }
}
安装Laravel Scout: ( Installing Laravel Scout: )
Installing and configuring Laravel Scout is a breeze, you can pull the package using: composer require laravel/scout. When composer is done doing its thing add the ScoutServiceProvider to the providers array of your config/app.php configuration file:
安装和配置Laravel Scout轻而易举,您可以使用以下方法拉包: composer require laravel/scout 。 完成作曲家的工作后,将ScoutServiceProvider添加到config / app.php配置文件的providers数组中:
Laravel\Scout\ScoutServiceProvider::class,Next, you should publish the Scout configuration using the vendor:publish Artisan command. This command will publish the scout.php configuration file to your config directory:
接下来,您应该使用vendor:publish Artisan命令发布Scout配置。 此命令会将scout.php配置文件发布到您的config目录中:
php artisan vendor:publish --provider="Laravel\Scout\ScoutServiceProvider"Finally, add the Laravel\Scout\Searchable trait to the Product to make it searchable:
最后,将Laravel \ Scout \ Searchable特性添加到Product使其可搜索:
<?php

namespace App;

use Laravel\Scout\Searchable;
use Illuminate\Database\Eloquent\Model;

class Product extends Model
{
    use Searchable;
}
将数据导入阿尔戈利亚 ( Importing data to Algolia )
Now that Laravel Scout is installed and ready, it's time to install the Algolia driver
现在,Laravel Scout已安装并准备就绪,是时候安装Algolia驱动程序了
composer require algolia/algoliasearch-client-phpall we need to do now is to import the data we generated earlier to Algolia, You can create a free account ( No credit card is required ) if you want to follow up with this tutorial.
现在我们要做的就是将我们之前生成的数据导入Algolia ,如果您想继续学习本教程,可以创建一个免费帐户(不需要信用卡)。
When you are done creating your account browse to https://www.algolia.com/api-keys and copy your Application ID and Admin API Key and put them in your .env file like this:
创建完帐户后,浏览至https://www.algolia.com/api-keys并复制您的应用程序ID和Admin API密钥 ,并将其放入.env文件中,如下所示:
ALGOLIA_APP_ID=J4YK3E00YT
ALGOLIA_SECRET=9088241f69034ee7db231e67bc2cb0b4
In your terminal run
在您的终端运行中
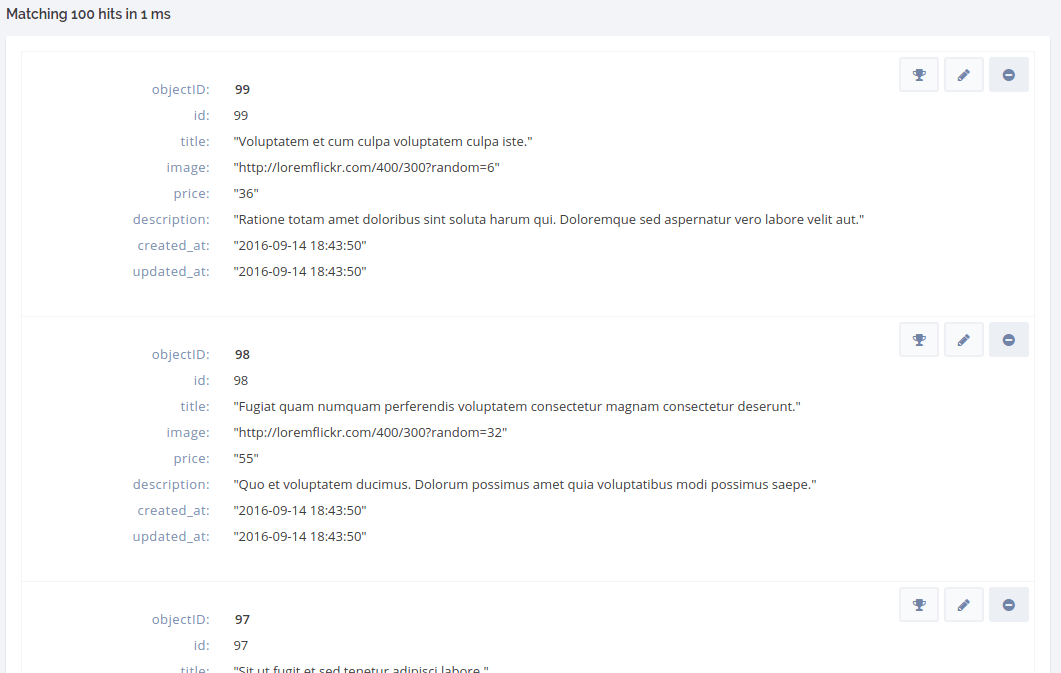
php artisan scout:import "App\Product"If you did everything correctly, you should see this message, which means that all your products table data got copied to Algolia's servers.
如果一切操作正确,您应该会看到此消息,这意味着所有产品表数据都已复制到Algolia的服务器上。

You can verify that by browsing to the Indices page in your account.
您可以通过浏览到帐户中的“ 索引”页面来进行验证。
编写搜索方法: ( Writing the search method: )
Back to the search method in app\Http\Controllers\Api\SearchController.php.
返回到app \ Http \ Controllers \ Api \ SearchController.php中的搜索方法。
/**
     * Search the products table.
     *
     * @param  Request $request
     * @return mixed
     */
    public function search(Request $request)
    {
        // First we define the error message we are going to show if no keywords
        // existed or if no results found.
        $error = ['error' => 'No results found, please try with different keywords.'];

        // Making sure the user entered a keyword.
        if($request->has('q')) {

            // Using the Laravel Scout syntax to search the products table.
            $posts = Product::search($request->get('q'))->get();

            // If there are results return them, if none, return the error message.
            return $posts->count() ? $posts : $error;

        }

        // Return the error message if no keywords existed
        return $error;
    }
Don't forget to import the Product model use App\Product; Now, browsing to http://example.com/api/search?q=code should return a JSON representation of your data.
不要忘记use App\Product;导入Product模型use App\Product; 现在,浏览到http://example.com/api/search?q=code应该返回数据的JSON表示形式。

前端设置: ( The frontend setup: )
We won't focus too much on the design in this tutorial, so here is the template we will be working with, copy/past it in your resources/home.blade.php file.
在本教程中,我们不会过多地关注设计,因此这是我们将要使用的模板,将其复制/粘贴到您的resources / home.blade.php文件中。
<!DOCTYPE html>
<html lang="en">
    <head>
        <meta charset="utf-8">
        <meta http-equiv="X-UA-Compatible" content="IE=edge">
        <meta name="viewport" content="width=device-width, initial-scale=1">

        <link rel="stylesheet" href="https://maxcdn.bootstrapcdn.com/bootstrap/3.3.7/css/bootstrap.min.css">
        <title>Search with Laravel Scout and Vue.js!</title>
    </head>
    <body>
        <div class="container">
            <div class="well well-sm">
                <div class="form-group">
                    <div class="input-group input-group-md">
                        <div class="icon-addon addon-md">
                            <input type="text" placeholder="What are you looking for?" class="form-control">
                        </div>
                        <span class="input-group-btn">
                            <button class="btn btn-default" type="button">Search!</button>
                        </span>
                    </div>
                </div>
            </div>
            <div id="products" class="row list-group">
            </div>
        </div>
    </body>
</html>
You can see that all I have done is setup some boilerplate and import Twitter Bootstrap, you shouldn't be using the CDN for your real life apps, but since this is just a quick demo it's fine.
您可以看到我所做的只是设置一些样板并导入Twitter Bootstrap ,您不应该将CDN用于您的现实应用程序,但是因为这只是一个快速演示,所以很好。
导入Vue.js和vue-resource: ( Importing Vue.js and vue-resource: )
Add these lines before the body closing tag </body>:
在正文结束标记</body>之前添加以下行:
<script src="https://cdnjs.cloudflare.com/ajax/libs/vue/1.0.26/vue.min.js"></script>
<script src="https://cdnjs.cloudflare.com/ajax/libs/vue-resource/1.0.1/vue-resource.min.js"></script>
<script src="/js/app.js"></script>
Again, you should use a dependency manager for these kinds of things but it's beyond the scope of this tutorial so it is fine for now.
同样,您应该对此类事情使用依赖项管理器,但这超出了本教程的范围,因此现在就可以了。
Next step is creating the app.js file inside public/js/ folder ( delete it if does already exist ) and this is what it will hold for now:
下一步是在public / js /文件夹中创建app.js文件(如果已经存在,请将其删除),这就是现在的内容:
new Vue({
    el: 'body',
});
What this means is we are binding the Vue instance to the HTML body tag making our JavaScript only recognized between the HTML body tags.
这意味着我们将Vue实例绑定到HTML主体标签,从而使我们JavaScript仅在HTML主体标签之间被识别。
Vue.js数据和绑定: ( Vue.js data and bindings: )
To capture what the user wrote in the search input, display the results, show the error message or display the searching button we will need to add these lines just under the el property:
要捕获用户在搜索输入中写的内容,显示结果,显示错误消息或显示搜索按钮,我们需要在el属性下添加以下行:
data: {
    products: [],
    loading: false,
    error: false,
    query: ''
},
This will force us to change our HTML a little bit, here is what we need to do:
这将迫使我们稍微更改HTML,这是我们需要做的:
- Add the v-model attribute to the search input to bind it to the query property in our data object 将v-model属性添加到搜索输入,以将其绑定到数据对象中的query属性
<input type="text" placeholder="What are you looking for?" class="form-control" v-model="query">- Display the Searching... button when an action is being performed and show the normal search button if not. 当执行某项操作时,显示“ 正在搜索...”按钮,否则显示正常的搜索按钮。
<button class="btn btn-default" type="button" v-if="!loading">Search!</button>
<button class="btn btn-default" type="button" disabled="disabled" v-if="loading">Searching...</button>- Same as above for the error message, we will add this under the closing tag of the div with the class of "well well-sm" 与上面的错误消息相同,我们将其添加到div的关闭标签下,类别为“ well well-sm ”
<div class="alert alert-danger" role="alert" v-if="error">
    <span class="glyphicon glyphicon-exclamation-sign" aria-hidden="true"></span>
    @{{ error }}
</div>
To display data with Vue.js we use the moustache syntax {{ }}, but since Laravel is using the same syntax we need to tell not to parse it by adding the @ at its beginning.
要使用Vue.js显示数据,我们使用小胡子语法{{ }} ,但是由于Laravel使用相同的语法,我们需要通过在其开头添加@来告知不要解析它。
提取和显示数据: ( Fetching and displaying data: )
The remaining and most important step is to fetch the data. We will start by attaching an event listener to our search button and we do that by adding the @click attribute to it:
剩下的也是最重要的步骤是获取数据。 首先,将事件侦听器附加到我们的搜索按钮上,然后在其上添加@click属性:
<button class="btn btn-default" type="button" @click="search()" v-if="!loading">Search!</button>Let's create the search function and insert it under the data object:
让我们创建搜索功能并将其插入到数据对象下:
methods: {
    search: function() {
        // Clear the error message.
        this.error = '';
        // Empty the products array so we can fill it with the new products.
        this.products = [];
        // Set the loading property to true, this will display the "Searching..." button.
        this.loading = true;

        // Making a get request to our API and passing the query to it.
        this.$http.get('/api/search?q=' + this.query).then((response) => {
            // If there was an error set the error message, if not fill the products array.
            response.body.error ? this.error = response.body.error : this.products = response.body;
            // The request is finished, change the loading to false again.
            this.loading = false;
            // Clear the query.
            this.query = '';
        });
    }
}
Finally, the HTML for the product, should go bellow the div with the ID of products.
最后,产品HTML应该在div下加上产品 ID。
<div class="item col-xs-4 col-lg-4" v-for="product in products">
    <div class="thumbnail">
        <img class="group list-group-image" :src="product.image" alt="@{{ product.title }}" />
        <div class="caption">
            <h4 class="group inner list-group-item-heading">@{{ product.title }}</h4>
            <p class="group inner list-group-item-text">@{{ product.description }}</p>
            <div class="row">
                <div class="col-xs-12 col-md-6">
                    <p class="lead">$@{{ product.price }}</p>
                </div>
                <div class="col-xs-12 col-md-6">
                    <a class="btn btn-success" href="#">Add to cart</a>
                </div>
            </div>
        </div>
    </div>
</div>
What we did there is we created a loop using the v-for directive and displayed the data just like we did before using the moustache syntax.
我们在这里所做的就是使用v-for指令创建了一个循环,并像使用小胡子语法之前一样显示了数据。
And with that, you should have this same exact website running in your server:
因此,您应该在服务器中运行相同的网站:

结束语: ( Final word: )
If you reached this part, it means you completed the tutorial and you have built or ready to build your own search system. The code source of this tutorial is available here. If you have any problems or questions, please feel free to write a comment down in the comments section and I will be happy to help.
如果您达到了这一部分,则意味着您已经完成了本教程,并且已经构建或准备构建自己的搜索系统。 本教程的代码源在此处提供 。 如果您有任何问题或疑问,请随时在评论部分写下评论,我们将竭诚为您服务。
翻译自: https://scotch.io/tutorials/build-search-functionality-with-laravel-scout-and-vue-js
laravel scout


 1208
1208

 被折叠的 条评论
为什么被折叠?
被折叠的 条评论
为什么被折叠?
 到【灌水乐园】发言


