


ruby on rails
Update (August 14, 2016): Removed unnecessary space that resulted in an error.
更新(2016年8月14日) :删除了导致错误的不必要空间。
介绍: ( Introduction: )
Ruby on Rails is an awesome framework for quickly and easily setting up a web application. In this tutorial I will show you how to build a blog platform using Ruby on Rails, we will make use of the gem ckeditor which is an integration gem for Ckeditor.
Ruby on Rails是一个很棒的框架,用于快速轻松地设置Web应用程序。 在本教程中我将告诉你如何建立使用Ruby on Rails的一个博客平台,我们将利用创业板ckeditor这是一个集成的宝石CKEDITOR 。
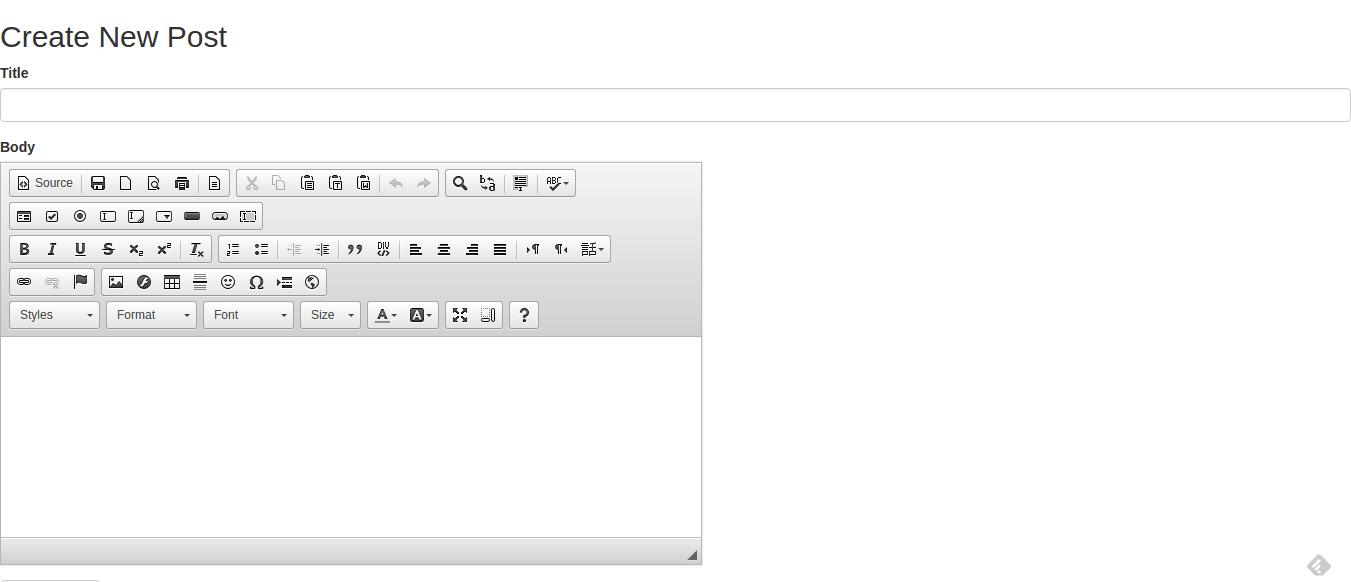
This will be a two part tutorial. In this post, we will focus on ensuring that posts can be created, edited, destroyed and ** viewed** on the index and show page. In the part 2 we will integrate authentication so that only admins will be able to create posts. For the first part we want to be able to create a post using ckeditor, therefore our new post page will look like this:
这将是一个分为两部分的教程。 在这篇文章中,我们将集中精力确保可以在索引和显示页面上创建 , 编辑 , 销毁和**查看帖子。 在第2部分中,我们将集成身份验证,以便只有管理员才能创建帖子。 对于第一部分,我们希望能够使用ckeditor创建一个帖子,因此我们的新帖子页面将如下所示:
Your post should be beautifully formatted to suit your options, like this:
您的帖子应采用精美的格式,以适合您的选择,例如:

By the end of this tutorial you will know how to create a basic
CRUDapplication with Ruby on Rails, and also make use ofDevisefor authentication.在本教程结束时,您将了解如何使用Ruby on Rails创建基本的
CRUD应用程序,以及如何使用Devise进行身份验证。
Let's get started!
让我们开始吧!
The source code for the blog created can be found on Github.
可以在Github上找到创建的博客的源代码。
Rails应用 ( Rails Application )
Using your terminal navigate to your working directory and generate your new rails application. I am calling mine scotch-blog.
使用终端导航到工作目录并生成新的Rails应用程序。 我打电话给我的scotch-blog 。
rails new scotch-blog -TThis will generate for you a new Rails application and install a couple of gems for you. The -T flag tells Rails to generate the new application without a test suite. When you generate a new Rails application, by default some gems are added for you to work with. Gems are like plugins or libraries with some functionality, installed to satisfy specific needs. There is almost a gem for everything you may want to do. Later on, I'll write an article that explains what gems are.
这将为您生成一个新的Rails应用程序,并为您安装几个gem。 -T标志告诉Rails生成没有测试套件的新应用程序。 当您生成一个新的Rails应用程序时,默认情况下会添加一些宝石供您使用。 宝石就像具有某些功能的插件或库一样,可以安装以满足特定需求。 您可能想做的所有事情几乎都有一颗宝石。 稍后,我将写一篇文章解释什么是宝石。
Now we generate our Post model. Before doing that let us understand how the Post will work. For every created Post we want to be able to add a title and body of text. This should be saved to the database whenever the Submit button is clicked. Thus we need a posts table with title and body columns. That should do for a basic blog system.
现在,我们生成Post模型。 在此之前,让我们了解该Post将如何工作。 对于每一个创建的文章中,我们希望能够添加title和body文字。 每当单击“ Submit按钮时,都应将其保存到database 。 因此,我们需要一个带有title和body列的posts表。 这应该对基本的博客系统有用。
Open your terminal and let's generate our model:
打开您的终端,让我们生成模型:
rails g model Post title:string body:textThat command created some files in our application. One of the files created is a migration file, you can see that in the directory; db/migrate. Now we need to migrate our database.
该命令在我们的应用程序中创建了一些文件。 创建的文件之一是迁移文件,您可以在目录中看到该文件; db/migrate 。 现在我们需要迁移database 。
Run the command:
运行命令:
rake db:migrateAnd that should do the magic.
那应该做魔术。
安装简单表单和Bootstrap-Sass ( Installing Simple Form and Bootstrap-Sass )
Before we move forward, let's install simple_form and bootstrap-sass. Go to your Gemfile and paste in the following lines:
在继续前进之前,让我们安装simple_form和bootstrap-sass 。 转到您的Gemfile并粘贴以下行:
#Gemfile

gem 'simple_form', '~> 3.2'
gem 'bootstrap-sass', '~> 3.3'
From your terminal run bundle install.
在终端上运行bundle install 。
Now let's set up bootstrap-sass. Move to app/assets/javascripts/application.js and add the line below:
现在,让我们设置bootstrap-sass 。 移至app/assets/javascripts/application.js并添加以下行:
#app/assets/javascripts/application.js

//= require bootstrap-sprockets
Just below the line that requires jquery.
就在需要jquery的行的下面。
Rename app/assets/stylesheets/application.css to app/assets/stylesheets/application.scss to create our Sass file. Paste in the following and save:
将app/assets/stylesheets/application.css重命名为app/assets/stylesheets/application.scss以创建我们的Sass文件。 粘贴以下内容并保存:
#app/assets/stylesheets/application.scss

@import "bootstrap-sprockets";
@import "bootstrap";
Let us generate simple_form, we do so by running the command below:
让我们生成simple_form ,我们通过运行以下命令来实现:
rails generate simple_form:install --bootstrapThis will generate some files and directories for us to make simple_form work.
这将为我们生成一些文件和目录,以使simple_form工作。
设置帖子控制器和视图 ( Setting up the Posts Controller and Views )
Let's create our PostsController before moving on to our model.
在继续进行模型之前,让我们创建PostsController 。
rails g controller PostsThat will generate some files and directories for our Post controller, but more on that later. For now let us set up our controller for creating a post.
这将为我们的Post控制器生成一些文件和目录,但稍后会更多。 现在,让我们设置用于创建帖子的controller 。
Copy and paste the code below into app/controllers/posts_controller.rb:
将以下代码复制并粘贴到app/controllers/posts_controller.rb :
#app/controllers/posts_controller.rb

class PostsController < ApplicationController
  before_action :find_post, only: [:edit, :update, :show, :delete]

  # Index action to render all posts
  def index
    @posts = Post.all
  end

  # New action for creating post
  def new
    @post = Post.new
  end

  # Create action saves the post into database
  def create
    @post = Post.new
    if @post.save(post_params)
      flash[:notice] = "Successfully created post!"
      redirect_to post_path(@post)
    else
      flash[:alert] = "Error creating new post!"
      render :new
    end
  end

  # Edit action retrives the post and renders the edit page
  def edit
  end

  # Update action updates the post with the new information
  def update
    if @post.update_attributes(post_params)
      flash[:notice] = "Successfully updated post!"
      redirect_to post_path(@posts)
    else
      flash[:alert] = "Error updating post!"
      render :edit
    end
  end

  # The show action renders the individual post after retrieving the the id
  def show
  end

  # The destroy action removes the post permanently from the database
  def destroy
    if @post.destroy
      flash[:notice] = "Successfully deleted post!"
      redirect_to posts_path
    else
      flash[:alert] = "Error updating post!"
    end
  end

  private

  def post_params
    params.require(:post).permit(:title, :body)
  end

  def find_post
    @post = Post.find(params[:id])
  end
end
Now we have our actions all geared up for the creation of new posts, but that is not all we need to do. We still need our views. Let's handle that now.
现在,我们已经为准备新职位做好了一切准备,但这不是我们要做的全部。 我们仍然需要我们的意见。 让我们现在处理。
创建我们的观点 (Creating our Views)
Go ahead and create the following files in app/views/posts directory:
继续在app/views/posts目录中创建以下文件:
index.html.erbindex.html.erbedit.html.erbedit.html.erbnew.html.erbnew.html.erbshow.html.erbshow.html.erb_form.html.erb_form.html.erb
We need a form that will be rendered whenever a post is to be created. We will create a partial so that we can share the form across the new and edit pages.
我们需要一个将在创建帖子时呈现的表单。 我们将创建一个partial以便我们可以在new页面和edit页面之间共享表单。
A partial allows us to reuse our layouts across multiple pages. It starts with the underscore _ symbol. Here is the form partial we will be using.
部分允许我们在多个页面上重用我们的布局。 它以下划线_符号开头。 这是我们将要使用的部分表格。
#app/views/posts/_form.html.erb

<%= simple_form_for @post do |f| %>
  <% if @post.errors.any? %>
    <div id="error_explanation">
      <h2>
        <%= "#{pluralize(@post.errors.count, "error")} prohibited this post from being saved:" %>
      </h2>
      <ul>
        <% @post.errors.full_messages.each do |msg| %>
          <li>
            <%= msg %>
          </li>
          <% end %>
      </ul>
    </div>
  <% end %>

  <div class="form-group">
    <%= f.input :title, class: "form-control" %>
  </div>

  <div class="form-group">
    <%= f.input :body, :as => :ckeditor, input_html: {:ckeditor => {:toolbar => 'FULL'}}, class: "form-control" %>
  </div>

  <div class="form-group">
    <%= f.button :submit %>
  </div>
<% end %>
With that done we can just render the form in our new and edit pages as I stated earlier. This is how you do it for new.html.erb
完成此操作后,我们就可以如我之前所述在new页面和edit页面中呈现表单。 这是您为new.html.erb
查看新帖子 (View for New Post)
#app/views/posts/new.html.erb

<h2>Create New Post</h2>

<%= render "posts/form" %>
用于编辑帖子的视图 (View for Editing a Post)
And edit.html.erb
然后edit.html.erb
#app/views/posts/edit.html.erb
<h2>Edit Post</h2>

<%= render "posts/form" %>
查看索引 (View for Index)
Let's set up our index page:
让我们建立index页面:
#app/views/posts/index.html.erb

<div class="container">
  <div class="col-sm-10 col-sm-offset-1 col-xs-12 blog-content">
    <% @posts.each do |post| %>
    <div class="col-xs-12">
      <div class="text-center">
        <h2><%= post.title %></h2>
        <h6><%= post.created_at.strftime('%b %d, %Y') %></h6>
      </div>

      <div>
        <%= raw(post.body).truncate(358) %>
      </div>

      <div class="text-center">
        <%= link_to "READ MORE", post_path(post) %>
      </div>
      <br>
    </div>
    <% end %>
  </div>
</div>
显示帖子的视图 (View for Displaying Posts)
And our show page:
和我们的show页面:
#app/views/posts/show.html.erb

<div class="col-sm-11 col-xs-12 blog-content">
  <h2 class="text-center"><%= @post.title %></h2>
  <h5 class="text-center"><%= @post.created_at.strftime('%b %d, %Y') %></h5>
  <div><%= raw @post.body %></div>
</div>
Now we have created the necessary view files for creating, editing and viewing a posts, but there's still more to do. For a post to be created we need to set up our routes.
现在,我们已经创建了用于创建,编辑和查看帖子的必要视图文件,但是还有更多工作要做。 要创建帖子,我们需要设置路线。
From your text editor navigate to config/routes.rb and paste in the following codes:
在文本编辑器中,导航到config/routes.rb并粘贴以下代码:
#config/routes.rb

Rails.application.routes.draw do
  root to: "posts#index"

  resources :posts
end
Can you guess what we are doing above?
您能猜出我们在做什么吗?
We set the root of our application as posts/index, so whenever a visitor points her browser to the root of our application, she will be presented with the index page of our post.
我们将应用程序的根目录设置为posts/index ,因此,每当访问者将浏览器指向我们应用程序的根目录时,就会向她展示我们帖子的索引页。
The resources line provides us with all of the actions available, and the include: new, index, create, show, edit, update and destroy.
resources行为我们提供了所有可用的操作,包括: new , index , create , show , edit , update和destroy 。
安装CKeditor ( Installing CKeditor )
Next let's install ckeditor and use its editor for the creation and updating of a post, as it is a better option compared to what we already have.
接下来,让我们安装ckeditor并使用其编辑器来创建和更新帖子,因为与我们现有的相比,这是一个更好的选择。
First let us install the gem, open up your Gemfile and paste in the line below and save.
首先让我们安装gem,打开您的Gemfile并粘贴在下面的行中并保存。
#Gemfile

gem 'ckeditor', '~> 4.1',
Go to your terminal and install:
转到终端并安装:
bundle installIn future we will enable image uploading in our blog, but let us go ahead and generate the necessary files for ckeditor to work with. Run the command below from your terminal:
将来,我们将在博客中启用图像上传功能,但是让我们继续并生成必要的文件供ckeditor使用。 从终端运行以下命令:
rails generate ckeditor:install --orm=active_record --backend=carrierwaveThis will create some directories and files. You can go ahead and check them out according to the output shown on your terminal.
这将创建一些目录和文件。 您可以根据终端上显示的输出继续进行检查。
Now migrate your database.
现在迁移您的数据库。
rake db:migrateWe need to load ckeditor, go to app/assets/javascripts/application.js and the line below just above the tree line.
我们需要加载ckeditor ,转到app/assets/javascripts/application.js以及tree线上方的下面一行。
#app/assets/javascripts/application.js

...
//= require ckeditor/init
...
Create a directory called ckeditor in app/assets/javascripts, then create a new file called config.js in the directory you just created. Paste in the code below:
在app/assets/javascripts创建一个名为ckeditor的目录,然后在刚刚创建的目录中创建一个名为config.js的新文件。 粘贴以下代码:
CKEDITOR.editorConfig = function(config) {
  config.language = 'en';
  config.width = '700';
  config.filebrowserBrowseUrl = "/ckeditor/attachment_files";
  config.filebrowserImageBrowseLinkUrl = "/ckeditor/pictures";
  config.filebrowserImageBrowseUrl = "/ckeditor/pictures";
  config.filebrowserImageUploadUrl = "/ckeditor/pictures";
  config.filebrowserUploadUrl = "/ckeditor/attachment_files";

  config.toolbar_Pure = [
    '/', {
      name: 'basicstyles',
      items: ['Bold', 'Italic', 'Underline', 'Strike', 'Subscript', 'Superscript', '-', 'RemoveFormat']
    }, {
      name: 'paragraph',
      items: ['NumberedList', 'BulletedList', '-', 'Outdent', 'Indent', '-', 'Blockquote', '-', 'JustifyLeft', 'JustifyCenter', 'JustifyRight', 'JustifyBlock', '-', 'BidiLtr', 'BidiRtl']
    }, {
      name: 'links',
      items: ['Link', 'Unlink']
    }, '/', {
      name: 'styles',
      items: ['Styles', 'Format', 'Font', 'FontSize']
    }, {
      name: 'colors',
      items: ['TextColor', 'BGColor']
    }, {
      name: 'insert',
      items: ['Image', 'Table', 'HorizontalRule', 'PageBreak']
    }
  ];
  config.toolbar = 'Pure';
  return true;
};
Start up your rails server:
启动Rails服务器:
rails serverOpen your browser and navigate to http://localhost:3000/posts/new to see your new blog.
打开浏览器并导航到http://localhost:3000/posts/new以查看新博客。
结论 ( Conclusion )
At this point we have been able to create a working blog with a super cool editor. In the next part of this tutorial we will tie authentication around it so only the admin can create post. I hope you enjoyed yourself.
至此,我们已经能够使用超酷的编辑器创建一个工作博客。 在本教程的下一部分中,我们将围绕认证进行绑定,以便只有管理员才能创建帖子。 我希望你过得愉快。
翻译自: https://scotch.io/tutorials/build-a-blog-with-ruby-on-rails-part-1
ruby on rails


 1万+
1万+

 被折叠的 条评论
为什么被折叠?
被折叠的 条评论
为什么被折叠?
 到【灌水乐园】发言


