


express路由子路由器
Routing is hard.
路由很难。
That's a little too broad of a statement. What I really mean is "organizing routing in large applications and APIs so that it's easy to find and maintain in the future" is hard.
这个说法有点太宽泛了。 我真正的意思是“组织大型应用程序和API中的路由,以便将来轻松查找和维护”。
As code bases get more mature and complex, they grow in size. (You have unit tests, right?) One place where things get hairy is with the organization of the code that handles your routing.
随着代码库变得越来越成熟和复杂,它们的规模也越来越大。 (您有单元测试,对吗?)麻烦的地方之一就是处理您的路由的代码的组织。
Routing is extremely important. It defines the URL structure that someone uses to interact with your web application. If it's not organized well, it can be hard to find the logic for "that one route that never seems to work and all our customers are complaining about. What the hell was the original developer thinking anyway!"
路由非常重要。 它定义了有人用来与您的Web应用程序交互的URL结构。 如果组织得不好,可能很难找到“一条路线似乎永远行不通,所有客户都在抱怨的逻辑。原始开发人员到底在想什么!”
\takes breath**
\呼吸**
There's light at the end of the tunnel, folks. Express apps utilize routers that are essentially containers for a set of middleware. We can put this middleware holder only on a certain route, which allows us to keep our logic in separate files and bring them together on our terms! We are going to build a very simple car API. We will be implementing the following routes in the application.
伙计们,隧道尽头有光。 Express应用程序利用路由器,这些路由器本质上是一组中间件的容器。 我们只能将此中间件持有者放在特定的路径上,这使我们可以将逻辑保存在单独的文件中,并根据我们的条件将它们放在一起! 我们将构建一个非常简单的汽车API。 我们将在应用程序中实现以下路线。
GET /models
GET /models/:modelId
GET /models/:modelId/cars
GET /cars
GET /cars/:carId
Let's get started by creating a project directory and downloading the dependencies we will use.
让我们开始创建一个项目目录并下载我们将使用的依赖项。
mkdir car-api
cd car-api
npm init -y
npm i -S express
npm i -D nodemon
Also, let's add an npm script to our package.json to start our application.
另外,让我们在package.json添加一个npm脚本来启动我们的应用程序。
"start": "nodemon app.js"Now let's create a file that will hold our JSON data for this API. Put the following in a file at the root called data.json.
现在,让我们创建一个文件,该文件将保存此API的JSON数据。 将以下内容放在名为data.json的根文件中。
{
  "models": [
    {
      "id": 1,
      "name": "Toyota"
    },
    {
      "id": 2,
      "name": "Mazda"
    }
  ],
  "cars": [
    {
      "id": 1,
      "name": "Corolla",
      "modelId": 1
    },
    {
      "id": 2,
      "name": "Mazda3",
      "modelId": 2
    },
    {
      "id": 3,
      "name": "Mazda6",
      "modelId": 2
    },
    {
      "id": 4,
      "name": "Miata",
      "modelId": 2
    },
    {
      "id": 5,
      "name": "Camry",
      "modelId": 1
    },
    {
      "id": 6,
      "name": "CX-9",
      "modelId": 2
    }
  ]
}
Create a file in the root of our project called app.js and put the following into it.
在我们项目的根目录中创建一个名为app.js ,并将以下文件放入其中。
// Bring in our dependencies
const app = require('express')();
const routes = require('./routes');

//  Connect all our routes to our application
app.use('/', routes);

// Turn on that server!
app.listen(3000, () => {
  console.log('App listening on port 3000');
});
Nothing crazy is happening here. We are bringing in Express and our routes. We are connecting our routes to our application using .use. Lastly, we are turning the server on. Let's create those routes now. Create a file at routes/index.js and put the following in it.
这里没有疯狂的事情发生。 我们引入了Express和我们的路线。 我们正在使用.use将路线连接到我们的应用程序。 最后,我们打开服务器。 现在创建这些路线。 在routes/index.js创建一个文件,并将以下内容放入其中。
const routes = require('express').Router();
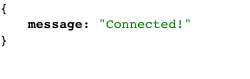
routes.get('/', (req, res) => {
res.status(200).json({ message: 'Connected!' });
});
module.exports = routes;This is a pattern you will see throughout this tutorial. First, we are requiring Express and creating a new instance of Router on it. We are holding that in a variable called routes. Then we are creating a route at the root path of this Router that sends back a simple message. Then we export the Router.
您将在本教程中看到这种模式。 首先,我们需要Express并在其上创建Router的新实例。 我们将其保存在名为routes的变量中。 然后,我们在此Router的根路径上创建一条路由,以发送回一条简单消息。 然后我们导出Router 。
This Router is the "container" for the middleware on this route. Notice in app.js that we imported this module, which exports a Router, and attaches it at the root path of our API.
该Router是此路由上中间件的“容器”。 注意,在app.js ,我们导入了此模块,该模块导出Router ,并将其附加到我们API的根路径。
That means the middleware and routes attached to this Router will be run as long as we are accessing a route that starts at the root path, which always happens! And since we added a route at the root of this router, that means it will be hit when someone visits our root path.
这意味着只要我们访问从根路径开始的路由,该Router附带的中间件和路由就会一直运行! 并且由于我们在此路由器的根部添加了一条路由,这意味着当有人访问我们的根路径时,它将被命中。
Start up the server with npm start and view localhost:3000 in your browser. You should see our message popup. We will follow a similar pattern for the rest of the API.
使用npm start服务器,并在浏览器中查看localhost:3000 。 您应该会看到我们的消息弹出窗口。 对于其余的API,我们将遵循类似的模式。
Let's create our model routes now. Create a file at routes/models/index.js. Put the code below in it.
现在创建模型路线。 在routes/models/index.js创建一个文件。 将代码放在下面。
const models = require('express').Router();
const all = require('./all');

models.get('/', all);

module.exports = models;
This should look almost dead on the previous one we created. This time we are bringing in a route from a file in the same directory called all.js. Let's create that next. Put the following in a file at routes/models/all.js.
对于我们创建的上一个,这应该看起来几乎是死的。 这次,我们从一个名为all.js目录中的文件引入路由。 接下来创建它。 将以下内容放在routes/models/all.js的文件中。
const data = require('../../data.json');

module.exports = (req, res) => {
  const models = data.models;

  res.status(200).json({ models });
};
We are importing our data. Then grabbing all the models and returning them in the response. Our server should be restarting on its own.
我们正在导入数据。 然后获取所有模型并在响应中返回它们。 我们的服务器应自行重启。
So visit localhost:3000/models in the browser...yeah. We get an error. Why doesn't it know about our new route? It's because we never connected the models Router to our routes Router. Add the following into routes/index.js.
因此,在浏览器中访问localhost:3000/models ...是的。 我们得到一个错误。 为什么不知道我们的新路线? 这是因为我们从未将模型Router连接到路由Router 。 将以下内容添加到routes/index.js 。
const models = require('./models');

routes.use('/models', models);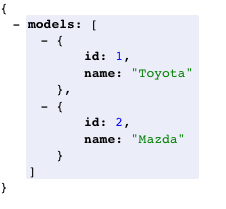
This imports all our model routes and attaches them to the main router of our application. Now you should be able to see all our models in the browser. Let's make the next route so we can get only one model. Put the following in routes/models/single.js.
这将导入我们所有的模型路由,并将它们附加到应用程序的主路由器。 现在您应该可以在浏览器中看到我们所有的模型。 让我们进行下一步,这样我们就只能得到一个模型。 将以下内容放入routes/models/single.js 。
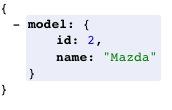
const data = require('../../data.json');

module.exports = (req, res) => {
  const modelId = req.params.modelId * 1;
  const model = data.models.find(m => m.id === modelId);

  res.status(200).json({ model });
};
We are finding the model and returning it. The line req.params.modelId * 1 simply coerces our modelId from a string into an integer. We need it as an integer since that is how it's stored in our data file. Add the following to routes/models/index.js to connect this route to our application.
我们正在寻找模型并返回它。 req.params.modelId * 1仅将我们的modelId从字符串modelId为整数。 我们需要将其作为整数,因为这是将其存储在数据文件中的方式。 将以下内容添加到routes/models/index.js以将该路由连接到我们的应用程序。
const single = require('./single');

models.get('/:modelId', single);
Now try going to localhost:3000/models/2 in your browser. You'll see information about Mazda. Excellent!
现在尝试在浏览器中转到localhost:3000/models/2 。 您将看到有关马自达的信息。 优秀的!
We need to add cars as a nested resource of models. We can do this by simply creating another Router and attaching it to our models Router. First, add the following to routes/models/index.js.
我们需要将cars添加为模型的嵌套资源。 我们可以通过简单地创建另一个Router并将其附加到模型Router 。 首先,将以下内容添加到routes/models/index.js 。
const cars = require('./cars');

models.use('/:modelId/cars', cars);
Notice how we are putting this next router behind a route that starts with a model ID and ends with cars. That means anything on this next router will have to start with that plus anything this current router had to start with to be hit (/models/:modelId/cars). Next, create a file at routes/models/cars/index.js and put the following in it.
注意,我们如何将下一个路由器放置在以模型ID开头并以汽车结尾的路线后面。 这意味着该下一个路由器上的所有内容都必须以该开头,再加上当前路由器要开始命中的所有内容( /models/:modelId/cars )。 接下来,在routes/models/cars/index.js创建一个文件,并将以下内容放入其中。
const cars = require('express').Router({ mergeParams: true });
const all = require('./all');

cars.get('/', all);

module.exports = cars;
This should look very familiar by now! The only new thing here is the mergeParams: true option passed when creating the Router. This tells the Router to merge parameters that are created on this set of routes with the ones from its parents. Without this, we wouldn't have access to the modelId from any of the routes connected to this Router.
现在看起来应该很熟悉! 唯一的新东西是在创建Router时传递的mergeParams: true选项。 这告诉Router将在这组路由上创建的参数与来自其父路由的参数合并。 没有这个,我们将无法从连接到此Router任何路由访问modelId 。
Now we just need to create the logic for our all route. Create a file at /routes/models/cars/all.js, and put the following in it:
现在,我们只需要为all路线创建逻辑即可。 在/routes/models/cars/all.js创建一个文件,并将以下内容放入其中:
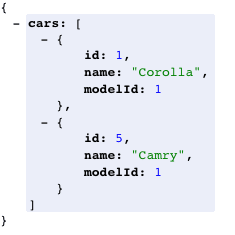
const data = require('../../../data.json');

module.exports = (req, res) => {
  const modelId = req.params.modelId * 1;
  const cars = data.cars.filter(c => c.modelId === modelId);

  res.status(200).json({ cars });
};
Pretty simple. Just getting all the cars that have a modelId matching the one in the URL. Try it out in the browser. Check out localhost:3000/models/1/cars. You should see all cars in our "database" made by Toyota.
很简单 只需获取所有具有modelId与URL中的modelId匹配的汽车。 在浏览器中尝试一下。 检出localhost:3000/models/1/cars 。 您应该在丰田制造的“数据库”中看到所有汽车。
Now, we need to make routes for cars, but they need to be at the top level, not behind models. Because of the way we have organized things, this is a cinch. Add the following to routes/index.js.
现在,我们需要确定汽车路线,但它们必须位于顶层,而不是落后于models 。 由于我们组织事情的方式,这很麻烦。 将以下内容添加到routes/index.js 。
const cars = require('./cars');

routes.use('/cars', cars);
Here were simply attaching a new Router to our main Router. Let's create it now. Create a file at /routes/cars/index.js and put the following in it.
这里简单地安装一个新的Router ,以我们的主Router 。 现在创建它。 在/routes/cars/index.js创建一个文件,并将以下内容放入其中。
const cars = require('express').Router();
const all = require('./all');
const single = require('./single');

cars.get('/', all);
cars.get('/:carId', single);

module.exports = cars;
This should look extremely familiar, so I won't bore you with another explanation. Put the following in a file at routes/cars/all.js.
这看起来应该非常熟悉,所以我不会为您带来其他麻烦。 将以下内容放在routes/cars/all.js的文件中。
const data = require('../../data.json');

module.exports = (req, res) => {
  const cars = data.cars;

  res.status(200).json({ cars });
};
Lastly, insert the following into a file at routes/cars/single.js.
最后,将以下内容插入到routes/cars/single.js的文件中。
const data = require('../../data.json');

module.exports = (req, res) => {
  const carId = req.params.carId * 1;
  const car = data.cars.find(c => c.id === carId);

  res.status(200).json({ car });
};
Go to the browser and check out our new route. You should be able to see all the cars in our database at localhost:3000/cars and see data about the Mazda6 at localhost:3000/cars/3. Pretty sweet!
转到浏览器并查看我们的新路线。 您应该能够在localhost:3000/cars查看数据库中的所有汽车,并在localhost:3000/cars/3查看有关Mazda6的数据。 真可爱!


Now we have a working API, but there is something bothering me. When we try to see data about a model that doesn't exist, like /models/200, we should get a 404 error, but we don't. We get an empty object. That's not cool with me. Let's fix this.
现在我们有一个可以正常使用的API,但是有些困扰我。 当我们尝试查看关于不存在的模型的数据时,例如/models/200 ,我们应该会收到404错误,但事实并非如此。 我们得到一个空对象。 这对我来说不是很酷。 让我们解决这个问题。
Instead of implementing this in every single route handler we have, let's create some middleware that will do it for us. We can add some middleware onto our routers that will only get called when those routes are hit. Let's add a param middleware to our models Router to make sure the model exists. If it doesn't, we want to return a 404.
与其在我们拥有的每个路由处理程序中实现,不如让我们创建一些中间件来为我们做。 我们可以在路由器上添加一些中间件,这些中间件只有在这些路由被点击时才会被调用。 让我们在模型Router添加param中间件,以确保模型存在。 如果不是,我们要返回404 。
Add the following to routes/models/index.js:
将以下内容添加到routes/models/index.js :
const data = require('../../data.json');

models.param('modelId', (req, res, next, value) => {
  const model = data.models.find(m => m.id === (value * 1));

  if (model) {
    req['model'] = model;
    next();
  } else {
    res.status(404).send('Invalid model ID');
  }
});
We are importing our data. Then we add a param middleware to the Router. This middleware will be called whenever modelId is present in the URL. This is perfect since this is what we want to validate! We are finding the model, and if it doesn't exist, we return a 404. If it does exist, we put it on the request for later usage, and then move on to the next piece of middleware.
我们正在导入data 。 然后我们向Router添加一个param中间件。 只要modelId中存在modelId就会调用此中间件。 这是完美的,因为这是我们要验证的内容! 我们正在寻找模型,如果不存在,则返回404 。 如果确实存在,我们将其放在请求中以供以后使用,然后继续进行下一个中间件。
Now try viewing a model that doesn't exist in the browser, say localhost:3000/models/200. You can see we now get a 404 error. Yay! Also notice that if you try to access any routes nested behind this route, it will 404 also. Try going to localhost:3000/models/200/cars. You get a 404? Boom!
现在尝试查看浏览器中不存在的模型,例如localhost:3000/models/200 。 您可以看到我们现在收到404错误。 好极了! 另请注意,如果您尝试访问嵌套在此路由之后的任何路由,则也会访问404 。 尝试转到localhost:3000/models/200/cars 。 您得到404吗? 繁荣!
Now let's add it to our cars routes. Add the following to routes/cars/index.js.
现在,将其添加到我们的汽车路线中。 将以下内容添加到routes/cars/index.js 。
const data = require('../../data.json');

cars.param('carId', (req, res, next, value) => {
  const car = data.cars.find(c => c.id === (value * 1));

  if (car) {
    req['car'] = car;
    next();
  } else {
    res.status(404).send('Invalid car ID');
  }
});
Give it a shot at localhost:3000/cars/200. I've never been so happy to see a 404. :)
在localhost:3000/cars/200试一下。 我从未如此高兴地看到404 。 :)
Now we have some pretty sweet stuff going on here, but I'm still not satisfied. The code we just added to each of those index files looks waaaaaay too similar. Refactoring to the rescue!
现在,我们这里发生了一些非常可爱的事情,但我仍然不满意。 我们刚刚添加到每个索引文件中的代码看起来非常相似。 重构救援!
Create a file at utils/findObject.js and put the following in it.
在utils/findObject.js创建一个文件,并将以下内容放入其中。
const data = require('../data.json');

module.exports = type => {
  return (req, res, next, value) => {
    const typePlural = `${type}s`;
    const obj = data[typePlural].find(t => t.id === (value * 1));

    if (obj) {
      req[type] = obj;
      next();
    } else {
      res.status(404).send(`Invalid ${type} ID`);
    }
  };
};
This should look very familiar. This code here is a function that, when called, returns our middleware function that we used in the previous two files. Our function takes a type. In our case, this type will be either "car" or "model." We use this type to make sure we search through the correct piece of data for our object and then to make sure we add the correct piece of data to the request. Now we can use this to clean up our files from before. Replace the code we just added to the following in each of the given files.
这看起来应该很熟悉。 此处的代码是一个函数,该函数在调用时将返回我们在前两个文件中使用的中间件函数。 我们的函数具有type 。 在我们的情况下,该type将是“汽车”或“模型”。 我们使用这种类型来确保我们搜索对象的正确数据,然后确保将正确的数据添加到请求中。 现在,我们可以使用它来清理以前的文件。 替换我们在每个给定文件中添加到以下代码的代码。
// routes/models/index.js
const findObject = require('../../utils/findObject');

models.param('modelId', findObject('model'));

// routes/cars/index.js
const findObject = require('../../utils/findObject');

cars.param('carId', findObject('car'));
So. Much. Cleaner! If you view things in the browser, you will see that things still work the same, yet the code is cleaner and more modularized. We can also clean up some of our route handlers since we have access to that object in the request by the time the handler is hit.
所以。 许多。 清洁器! 如果在浏览器中查看内容,您会发现它们仍然可以正常工作,但是代码更简洁,模块化程度更高。 我们还可以清理一些路由处理程序,因为我们可以在命中处理程序时访问请求中的该对象。
// routes/models/single.js
module.exports = (req, res) => {
  const model = req.model;

  res.status(200).json({ model });
};

// routes/cars/single.js
module.exports = (req, res) => {
  const car = req.car;

  res.status(200).json({ car });
};
If you try this in your browser, it still works! Beautiful!
如果您在浏览器中尝试此操作,仍然可以使用! 美丽!
Routing is super important once apps start getting bigger and more complex. Having a good base for your routes will help you out in the future. Using this technique will make sure that you never have to spend a ton of time looking for a route handler. Just make sure the file structure follows the URL structure, and you're good to go! Please leave any comments, feedback, or favorite comic book hero in the comments below!
一旦应用开始变得越来越大和越来越复杂,路由就显得尤为重要。 为您的路线奠定良好的基础将在将来为您提供帮助。 使用此技术将确保您不必花费大量时间寻找路由处理程序。 只要确保文件结构遵循URL结构,就可以了! 请在下面的评论中留下任何评论,反馈或喜欢的漫画英雄!
翻译自: https://scotch.io/tutorials/keeping-api-routing-clean-using-express-routers
express路由子路由器


 1497
1497

 被折叠的 条评论
为什么被折叠?
被折叠的 条评论
为什么被折叠?
 到【灌水乐园】发言


