


Spring Boot makes it fun and easy to build rich Java webapps. It allows you to rapidly develop, test, run and deploy Spring applications. Plus with over 100 starters, Spring Boot provides a huge amount of out-of-the-box functionality that traditionally you had to build yourself.
Spring Boot使构建丰富的Java Webapp 变得轻松有趣。 它使您可以快速开发,测试,运行和部署Spring应用程序。 加上100多个启动器,Spring Boot提供了许多开箱即用的功能,而这些功能通常是您必须自己构建的。
While Spring Boot makes it easier to build Java applications, authentication and authorization protocols can still be one of the biggest pain points for any application developer. Good news though! This 15-minute tutorial shows you how to build a fully-operational Spring Boot webapp that protects user access to restricted paths with Spring Security and Stormpath.
尽管Spring Boot使构建Java应用程序变得更加容易,但是对于任何应用程序开发人员来说,身份验证和授权协议仍然是最大的难题之一。 好消息! 这个15分钟的教程向您展示了如何构建可完全操作的Spring Boot Webapp,该应用程序可保护用户使用Spring Security和Stormpath访问受限路径。
You never have to build auth again with Stormpath's Spring Boot integration, which offers out-of-the-box identity management that you can implement in minutes. You'll see how easy it is to roll out a simple Spring Boot web application, with a complete user registration and login system, with these features:
您再也不必通过Stormpath的Spring Boot集成来再次构建身份验证,该集成提供了现成的身份管理,您可以在几分钟内实现。 您将看到推出一个简单的Spring Boot Web应用程序(具有完整的用户注册和登录系统)并具有以下功能是多么容易:
- Login and registration pages 登录和注册页面
- Password reset workflows 密码重置工作流程
- Access control based on Group membership 基于组成员身份的访问控制
- Additional configurable features from the Stormpath Java library, including API authentication, SSO, social login, and more Stormpath Java库中的其他可配置功能,包括API身份验证,SSO,社交登录等
This demo uses the stormpath-default-spring-boot-starter. The modular design of this starter encompasses Spring Boot 1.3.6 and Spring Security 4.1.1 as well as Spring Boot WebMVC, and the Thymeleaf templating engine. I will be using my Mac, the Terminal app, and the IntelliJ IDE.
本演示使用stormpath-default-spring-boot-starter 。 该启动程序的模块化设计包括Spring Boot 1.3.6和Spring Security 4.1.1以及Spring Boot WebMVC和Thymeleaf模板引擎。 我将使用Mac,终端应用程序和IntelliJ IDE。
Grab the code for this tutorial here, and follow along!
在此处获取本教程的代码,然后继续!
Also, throughout this post you can see the example code in action by clicking on the Deploy to Heroku button. All you need to do is register for a free Heroku account.
另外,在本文中,您都可以通过单击Deploy to Heroku按钮来查看示例代码。 您需要做的就是注册一个免费的Heroku帐户。
获取风暴之路 ( Get Stormpath )
Stormpath is an Identity Management API that enables you to:
Stormpath是一种身份管理API,使您能够:
- Authenticate and authorize your users 验证和授权您的用户
- Store data about your users 存储有关您的用户的数据
- Perform password and social based login 执行密码和基于社交的登录
- Send password reset messages 发送密码重置消息
- Issue API keys for API-based web apps 发行基于API的Web应用程序的API密钥
- And much more! Check out detailed Product Documentation 以及更多! 查看详细的产品文档
In short, Stormpath makes user account management a lot easier, more secure, and more scalable.
简而言之,Stormpath使用户帐户管理变得更加轻松,安全和可扩展。
The first step in this tutorial is to register for a free developer account here, if you don't already have one!
本教程中的第一个步骤是一个免费的开发者注册帐户在这里 ,如果您还没有一个!
设置您的Spring Boot项目 ( Set up Your Spring Boot Project )
Whether you are a Maven maven or Gradle great, getting your project setup is a snap.
无论你是一个Maven Maven的或巨大的Gradle,让您的项目设置是一个单元。
For Maven, start with this pom.xml file:
对于Maven,从以下pom.xml文件开始:
<project xmlns="http://maven.apache.org/POM/4.0.0" xmlns:xsi="http://www.w3.org/2001/XMLSchema-instance" xsi:schemaLocation="http://maven.apache.org/POM/4.0.0 http://maven.apache.org/maven-v4_0_0.xsd">

    <modelVersion>4.0.0</modelVersion>

    <groupId>com.stormpath.sample</groupId>
    <artifactId>stormpath-spring-boot-spring-security-tutorial</artifactId>
    <version>0.1.0</version>
    <name>Spring Boot Spring Security Stormpath Tutorial</name>
    <description>A simple Spring Boot Web MVC application with Spring Security and out-of-the-box login and self-service screens!</description>

    <dependencies>
        <dependency>
            <groupId>com.stormpath.spring</groupId>
            <artifactId>stormpath-default-spring-boot-starter</artifactId>
            <version>1.0.RC9.2</version>
        </dependency>
    </dependencies>

    <build>
        <plugins>
            <plugin>
                <groupId>org.springframework.boot</groupId>
                <artifactId>spring-boot-maven-plugin</artifactId>
                <version>1.3.6.RELEASE</version>
                <executions>
                    <execution>
                        <goals>
                            <goal>repackage</goal>
                        </goals>
                    </execution>
                </executions>
            </plugin>
        </plugins>
    </build>

</project>
Or, here's a build.gradle file, if you prefer:
或者,如果您愿意,这是一个build.gradle文件:
buildscript{
    repositories {
        mavenCentral()
    }
    dependencies {
        classpath("org.springframework.boot:spring-boot-gradle-plugin:1.3.6.RELEASE")
    }
}

apply plugin: 'java'
apply plugin: 'maven'
apply plugin: 'spring-boot'

group = 'com.stormpath'
version = '0.1.0'

repositories {
    mavenCentral()
}

dependencies {
    compile group: 'com.stormpath.spring', name: 'stormpath-default-spring-boot-starter', version:'1.0.RC9.2'
}
You may notice that we're working with a single dependency, regardless of whether you're using Maven or Gradle: stormpath-default-spring-boot-starter.
您可能会注意到,无论您使用的是Maven还是Gradle,我们都在处理单个依赖项: stormpath-default-spring-boot-starter 。
That one dependency gives you all of the Spring Boot, Spring Security and Stormpath magic at once, which we'll demonstrate as we progress through the tutorial.
这种依赖关系可以一次为您提供所有的Spring Boot,Spring Security和Stormpath魔术,我们将在本教程中逐步演示这些魔术。
收集您的API凭证和应用程序href ( Gather Your API Credentials and Application href )
The connection between your webapp and Stormpath is secured with an API key pair which your webapp will use when it communicates with Stormpath. Download your API key pair (it'll be the apiKey.properties file) from the Admin Console.
webapp和Stormpath之间的连接由一个API密钥对保护,该密钥对将在webapp与Stormpath通信时使用。 从管理控制台下载您的API密钥对(将是apiKey.properties文件)。
Also in the Admin Console, you'll want to get the href for your default Stormpath Application. In Stormpath, an Application object is used to link your web app to your user stores inside Stormpath. All new developer accounts have an app called "My Application." Click on "Applications" in the Admin Console, then click on "My Application." On that page you will see the href for the Application. Copy this -- we will need it later.
同样在管理控制台中,您将需要获取默认Stormpath应用程序的href。 在Stormpath中,Application对象用于将Web应用程序链接到Stormpath中的用户存储。 所有新的开发人员帐户都有一个名为“我的应用程序”的应用程序。 在管理控制台中单击“应用程序”,然后单击“我的应用程序”。 在该页面上,您将看到该应用程序的href。 复制它-我们稍后将需要它。
编写Spring Boot应用程序 ( Write the Spring Boot Application )
The code for this section can be found in the LockedDown tag of the code repo.

该部分的代码可以在代码存储库的LockedDown标记中找到。
We need three small Java classes and an html template to fire up the first version of our webapp. Let's get to it!
我们需要三个小的Java类和一个html模板来启动我们的webapp的第一个版本。 让我们开始吧!
Spring Boot应用程序入口点 (Spring Boot Application Entry Point)
All Spring Boot applications have an entry point that works just like an ordinary Java program, main method and everything.
所有的Spring Boot应用程序都有一个入口点,该入口点的作用就像普通的Java程序, main方法以及所有其他东西一样。
Here's Application.java:
这是Application.java :
@SpringBootApplication
public class Application  {
    public static void main(String[] args) {
        SpringApplication.run(Application.class, args);
    }
}
It's just six little lines of code, including the @SpringBootApplication annotation that kicks off the party.
仅有六行代码,包括启动聚会的@SpringBootApplication批注。
Spring安全配置 (Spring Security Configuration)
Spring Security's default is to lock down your entire application. While this conforms to industry-standard best security practices, it's not terribly useful by itself. Additionally, we need to hook Spring Security and Stormpath together. That brings us to our SpringSecurityWebAppConfig.java:
Spring Security的默认设置是锁定整个应用程序。 尽管这符合行业标准的最佳安全性做法,但它本身并不是十分有用。 此外,我们需要将Spring Security和Stormpath挂钩。 这将我们带到我们的SpringSecurityWebAppConfig.java :
@Configuration
public class SpringSecurityWebAppConfig extends WebSecurityConfigurerAdapter {
    @Override
    protected void configure(HttpSecurity http) throws Exception {
        http.apply(stormpath());
    }
}
The @Configuration annotation causes Spring Boot to instantiate this class as a configuration and .apply(stormpath()) hooks all of the Stormpath authentication and authorization workflows into Spring Security.
@Configuration批注使Spring Boot将该类实例化为配置,并且.apply(stormpath())将所有Stormpath身份验证和授权工作流挂接到Spring Security中。
Because there is no further configuration in the configure method, we maintain the best practice behavior of having everything locked down. However, instead of the default Spring Security authentication flows, we will see the default Stormpath flows. Attempting to browse to any path in the application will result in a redirect to the Stormpath login page.
因为configure方法中没有进一步的配置,所以我们保持了将所有内容都锁定的最佳实践行为。 但是,我们将看到默认的Stormpath流程,而不是默认的Spring Security身份验证流程。 尝试浏览到应用程序中的任何路径都将导致重定向到Stormpath login页面。
Yep, you saw it happen. A one-line method call and we've got security!
是的,您看到了它的发生。 一线方法调用,我们已经安全了!
与Spring WebMVC紧密结合 (Tie It All Together With Spring WebMVC)
Our security configuration above ensures that all paths in the application will be secured.
我们上面的安全配置确保了应用程序中的所有路径都将得到保护。
A Controller determines how requested paths get directed to display which templates.
控制器确定请求的路径如何定向以显示哪些模板。
Here's our HelloController.java:
这是我们的HelloController.java :
@Controller
public class HelloController {
    @RequestMapping("/")
    String home() {
        return "home";
    }
}
The @Controller annotation signals Spring Boot that this is a controller. We have one path defined on line 3, /. Line 5 returns the Thymeleaf template named home. Welcome to MVC routing!
@Controller注释@Controller Spring Boot这是一个控制器。 我们在第3行/上定义了一个路径。 第5行返回Thymeleaf模板,命名为home 。 欢迎使用MVC路由!
带我们home.html (Bring Us home.html)
By default, the Thymeleaf templating engine will look for templates returned from controllers in a folder called templates in your classpath. It will also look for the default extension of .html.
默认情况下,Thymeleaf模板引擎将在类路径中名为templates的文件夹中查找从控制器返回的templates 。 它还将寻找.html的默认扩展名。
When when the controller we just built returns "home", Thymeleaf will find the template in resources/templates/home.html.
当我们刚刚构建的控制器返回"home" ,Thymeleaf将在resources/templates/home.html找到模板。
Let's take a look at the home.html file:
让我们看一下home.html文件:
<html xmlns:th="http://www.thymeleaf.org">
    <head>
        <!--/*/ <th:block th:include="fragments/head :: head"/> /*/-->
    </head>
    <body>
        <div class="container-fluid">
            <div class="row">
                <div class="box col-md-6 col-md-offset-3">
                    <div class="stormpath-header">
                        <img src="http://stormpath.com/images/template/logo-nav.png"/>
                    </div>

                    <h1 th:inline="text">Hello, [[${account.fullName}]]!</h1>
                    <a th:href="@{/logout}" class="btn btn-danger">Logout</a>
                </div>
            </div>
        </div>
    </body>
</html>
Line 1 sets up the th namespace for Thymeleaf.
第1行为Thymeleaf设置了th名称空间。
Line 3 looks like an html/xml comment. However, this is a directive that Thymeleaf picks up on to include a fragment in this template. The fragment is found at: resources/templates/fragments/head.html and contains all the setup needed to hook in Bootstrap styling for our views.
第3行看起来像html / xml注释。 但是,这是Thymeleaf接受的指令,以在此模板中包含片段。 该片段位于: resources/templates/fragments/head.html ,其中包含挂钩到我们的视图的Bootstrap样式所需的所有设置。
Lines 13 and 14 are where the action happens. Since every pathway in our application is locked down, we know that we can only access this page post-login. Part of the Stormpath magic is that once logged in, an account object is always in scope to your views. Line 13 shows the logged in user's full name. Line 14 provides a link to log out when clicked.
第13和14行是执行操作的地方。 由于应用程序中的每个途径都被锁定,因此我们知道我们只能在登录后访问此页面。 Stormpath魔术的一部分是,登录后, account对象始终在您的视图范围内。 第13行显示已登录用户的全名。 第14行提供了单击后注销的链接。
启动您的Spring Boot应用程序 (Fire up Your Spring Boot Application)
So that's 1 Stormpath account, 15 lines of Java code, and 19 lines of html template code (3 of which are significant) to bring us to the point of a fully functional Spring Boot WebMVC app protected by Spring Security and backed by Stormpath.
因此,这就是1个Stormpath帐户,15行Java代码和19行html模板代码(其中3行非常重要),使我们达到了受Spring Security保护并受Stormpath支持的功能齐全的Spring Boot WebMVC应用程序的地步。
Wow.
哇。
If you stored your apiKey.properties file from before in the standard location: ~/.stormpath/apiKey.properties and if you have only the default Stormpath Application that was created for you, no other configuration is necessary to start up the application.
如果您以前将apiKey.properties文件存储在标准位置: ~/.stormpath/apiKey.properties并且只有为您创建的默认Stormpath应用程序,则无需其他配置即可启动该应用程序。
Here's the Maven way:
这是Maven的方式:
mvn clean package
mvn spring-boot:run
Note: The spring-boot-maven-plugin also creates an uber-jar due to the presence of the repackage execution. You can exercise the same code by just running Java:
注意:由于存在repackage执行, spring-boot-maven-plugin还会创建一个uber-jar。 您可以通过运行Java来执行相同的代码:
mvn clean package
java -jar target/*.jar
And, here's the Gradle way:
而且,这是Gradle的方式:
gradle clean build
java -jar build/libs/*.jar
You can browse to http://localhost:8080/ and see it in action:
您可以浏览到http:// localhost:8080 /并查看其运行情况:
But wait! What if you stored your apiKey.properties file somewhere else or you have other Stormpath Applications defined? Totally not a problem!
可是等等! 如果您将apiKey.properties文件存储在其他位置或定义了其他Stormpath应用程序怎么办? 完全没有问题!
Remember that Application href you saved earlier? Go grab it.
还记得您之前保存的Application href吗? 去抓吧
Maven:
Maven:
mvn clean package
STORMPATH_API_KEY_FILE=~/.stormpath/apiKey.properties \
STORMPATH_APPLICATION_HREF=https://api.stormpath.com/v1/applications/4YHCurbtcaFC4TKKsd3AYQ \
mvn spring-boot:run
Gradle:
Gradle:
gradle clean build
STORMPATH_API_KEY_FILE=~/.stormpath/apiKey.properties \
STORMPATH_APPLICATION_HREF=https://api.stormpath.com/v1/applications/4YHCurbtcaFC4TKKsd3AYQ \
java -jar build/libs/*.jar
By adding STORMPATH_API_KEY_FILE and STORMPATH_APPLICATION_HREF environment variables to the command line, we can easily tell our app where to find the API key pairs and which Stormpath Application to use.
通过将STORMPATH_API_KEY_FILE和STORMPATH_APPLICATION_HREF环境变量添加到命令行,我们可以轻松地告诉我们的应用程序在哪里可以找到API密钥对以及要使用的Stormpath应用程序。
The Stormpath Java SDK has an extremely flexible configuration mechanism. We will see more of that below when we get to restricting access to your application by Group membership.
Stormpath Java SDK具有极其灵活的配置机制。 当我们要限制组成员对您的应用程序的访问时,我们将在下面看到更多内容。
使用Spring Security完善的访问控制 ( Refined Access Control With Spring Security )
The code for this section can be found under the BasicAccessControl tag of the code repo.
该部分的代码可以在代码库的BasicAccessControl标记下找到。
So, in the last section we created a webapp that was locked up tight. Every path, including /, required login.
因此,在上一节中,我们创建了一个被严格锁定的webapp。 每个路径(包括/ )都需要登录。
But, maybe you need a publicly accessible home page. Or some areas of the site that any authenticated user can access and other areas restricted to members based on their Group.
但是,也许您需要一个可公开访问的主页。 或任何经过身份验证的用户都可以访问的网站的某些区域,以及根据他们的组限于成员的其他区域。
Stormpath makes those kinds of fine-grained controls possible, and simple.
Stormpath使这些细粒度的控制成为可能, 并且非常简单 。
Spring安全:门口的保镖 (Spring Security: Your Bouncer at the Door)
We'll start by allowing public access to the home page. Users will still have to authenticate to access any another page. Remember our empty SpringSecurityWebAppConfig.java from before? We are going to add a little something to it now:
我们将从允许公众访问主页开始。 用户仍然必须进行身份验证才能访问任何其他页面。 还记得以前的空SpringSecurityWebAppConfig.java吗? 我们现在将添加一些东西:
@Configuration
public class SpringSecurityWebAppConfig extends WebSecurityConfigurerAdapter {
    @Override
    protected void configure(HttpSecurity http) throws Exception {
        http
            .apply(stormpath()).and()
            .authorizeRequests()
            .antMatchers("/").permitAll();
    }
}
Spring Security provides a fluent interface for providing access rules.
Spring Security提供了一个流畅的界面来提供访问规则。
On Lines 5 - 8 above, we are building a rule set for how Spring Security will allow access to our application.
在上面的第5-8行中,我们正在建立一个规则集,该规则集用于Spring Security如何允许访问我们的应用程序。
You might state it like this in plain English:
您可以用简单的英语来表示:
Permit anyone to go to the front door
Ensure that they've authenticated for anything else
The rules we are specifying take precedence before the default behavior of locking everything down.
我们指定的规则优先于锁定所有内容的默认行为。
Let's update our home.html template as well:
让我们也更新我们的home.html模板:
<html xmlns:th="http://www.thymeleaf.org">
    <head>
        <!--/*/ <th:block th:include="fragments/head :: head"/> /*/-->
    </head>
    <body>
        <div class="container-fluid">
            <div class="row">
                <div class="box col-md-6 col-md-offset-3">
                    <div class="stormpath-header">
                        <img src="http://stormpath.com/images/template/logo-nav.png"/>
                    </div>

                    <!--/* displayed if account IS NOT null, indicating that the user IS logged in */-->
                    <div th:if="${account}">
                        <h1 th:inline="text">Hello, [[${account.fullName}]]!</h1>
                        <a href="/restricted" class="btn btn-primary">Restricted</a>
                        <a th:href="@{/logout}" class="btn btn-danger">Logout</a>
                    </div>

                    <!--/* displayed if account IS null, indicating that the user IS NOT logged in */-->
                    <div th:unless="${account}">
                        <h1>Who are you?</h1>
                        <a href="/restricted" class="btn btn-primary">Restricted</a>
                    </div>
                </div>
            </div>
        </div>
    </body>
</html>
Notice how we now have two distinct sections. The first starts on line 13 and is displayed if the user is logged in. The second section starting on line 20 is displayed if the user is not logged in.
请注意,我们现在有两个不同的部分。 第一部分从第13行开始,如果用户已登录,则显示该部分。第二部分从第20行开始,如果用户未登录,则显示该部分。
Here you're seeing Thymeleaf templates in action! Thymeleaf provides very powerful controls for conditionally showing parts of a template.
在这里,您将看到Thymeleaf模板的实际效果! Thymeleaf提供了非常强大的控件,可有条件地显示模板的各个部分。
Before we make any additional changes, let's pause and start up the app.
在进行任何其他更改之前,让我们暂停并启动该应用程序。
When you browse to http://localhost:8080, you should see the unauthenticated version of the home template.
当浏览到http:// localhost:8080时 ,应该看到home模板的未经身份验证的版本。
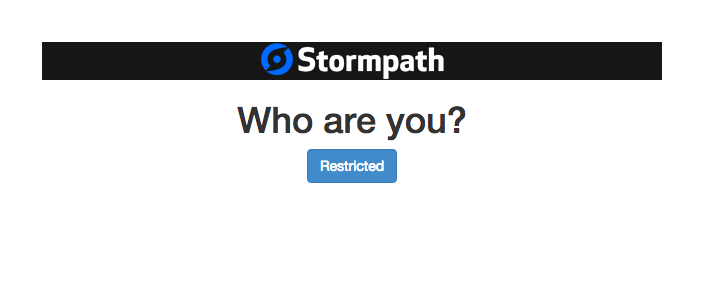
Click the Restricted button, and you'll be redirected to the login form, as expected. After you authenticate, you'll end up at a 404 page, because we haven't defined the restricted page yet.
单击“ Restricted按钮,将按预期将您重定向到login表单。 验证之后,您将进入404页面,因为我们尚未定义受限页面。
Defining the restricted page is as easy as adding a route in our controller and creating a template to show. Here's the updated HelloController.java:
定义受限页面就像在我们的控制器中添加路线并创建要显示的模板一样容易。 这是更新的HelloController.java :
@Controller
public class HelloController {

    @RequestMapping("/")
    String home() {
        return "home";
    }

    @RequestMapping("/restricted")
    String restricted() {
        return "restricted";
    }
}
And, here's a new restricted.html template:
而且,这是一个新的restricted.html模板:
<html xmlns:th="http://www.thymeleaf.org">
    <head>
        <!--/*/ <th:block th:include="fragments/head :: head"/> /*/-->
    </head>
    <body>
        <div class="container-fluid">
            <div class="row">
                <div class="box col-md-6 col-md-offset-3">
                    <div class="stormpath-header">
                        <img src="http://stormpath.com/images/template/logo-nav.png"/>
                    </div>

                    <h1 th:inline="text">[[${account.fullName}]], You are allowed here.</h1>
                    <a href="/" class="btn btn-primary">Go Home</a>

                </div>
            </div>
        </div>
    </body>
</html>
Notice how we re-use the head fragment to provide Bootstrap styling for this template.
注意我们如何重新使用head片段为该模板提供Bootstrap样式。
Re-start the app again, and you will get the full experience of the home page changing depending on whether or not you are logged in.
再次重新启动该应用程序,您将获得完整的主页体验,具体取决于您是否登录。

通过组成员身份进行Spring Security访问控制 ( Spring Security Access Control By Group Membership )
The code for this section can be found in the GroupAccessControl tag of the code repo.
该部分的代码可以在代码存储库的GroupAccessControl标记中找到。
Spring Security provides a set of annotations and a rich expression language for controlling access to methods in your application. Among the most commonly used Spring Security annotations is @PreAuthorize. And, among the most commonly used SpringEL expressions is hasRole.
Spring Security提供了一组注释和一种丰富的表达语言,用于控制对应用程序中方法的访问。 在最常用的Spring Security批注中,有@PreAuthorize 。 并且,最常用的SpringEL表达式包括hasRole 。
We integrate with this mechanism, connecting Stormpath Groups to Spring Security roles.
我们与该机制集成,将Stormpath组连接到Spring Security角色。
Let's break down this code by adding a new service that restricts access by Group membership. Here's AdminService:
让我们通过添加一个新服务来分解此代码,该服务可以通过组成员身份限制访问。 这是AdminService :
@Service
public class AdminService {
    @PreAuthorize("hasRole(@roles.ADMIN)")
    public boolean ensureAdmin() {
        return true;
    }
}
Line 3 above is the key. The annotation along with the SpringEL expression could be stated in plain English as:
上面的第3行是关键。 注释和SpringEL表达式可以用简单的英语表示为:
Before this method is even entered,
check to see that user is authenticated and
is a member of the ADMIN group
The check to see that user is authenticated part of this may not be obvious. What's going on is that a @PreAuthorize check can only be done on an authenticated user. Spring Security is smart enough to check that the user is logged in before checking to see if they are a member of the specified group.
check to see that user is authenticated的check to see that user is authenticated可能并不明显。 发生的是, @PreAuthorize检查只能在经过身份验证的用户上执行。 Spring Security非常聪明,可以在检查用户是否是指定组的成员之前检查用户是否已登录。
Let's dig in to the Spring Expression Language above. Where is Spring Security looking for @roles.ADMIN? The @ symbol is special - it identifies a Java bean, in this case named roles. Defined inside that bean we expect to find a constant named ADMIN.
让我们深入上面的Spring Expression Language。 Spring Security在哪里寻找@roles.ADMIN ? @符号是特殊的-它标识一个Java bean,在这种情况下,它称为roles 。 我们希望在该bean内定义一个名为ADMIN的常量。
Ultimately, hasRole needs to be checking against a unique href representing a Stormpath Group. So, our ADMIN constant needs to be a Java string that holds the href to our Stormpath Group used for admin.
最终, hasRole需要检查代表Stormpath组的唯一href。 因此,我们的ADMIN常数必须是一个Java string ,其中包含用于管理员的Stormpath组的href。
To complete this configuration and to make it awesomely dynamic, we need a new class called Roles.java:
为了完成此配置并使其具有Roles.java动态性,我们需要一个名为Roles.java的新类:
@Component
public class Roles {
    public final String ADMIN;

    @Autowired
    public Roles(Environment env) {
        ADMIN = env.getProperty("stormpath.authorized.group.admin");
    }
}
These 9 lines are so amazingly powerful, I'm geeking out over here! Are you seeing it yet?
这9条线是如此强大,我在这里一览无余! 你看到了吗?
By annotating this class with @Component on line 1, Spring will instantiate it and expose it as a bean. Guess what the name of the bean is? Spring will take the name of the class and camel-case it to derive the bean name by default. So, the bean name is roles. Sweet!
通过在第1行用@Component注释此类,Spring将实例化它并将其公开为bean。 猜猜豆子的名字是什么? Spring将采用该类的名称,并以驼峰式大小写以默认情况下派生Bean名称。 因此,bean的名称是roles 。 甜!
The @Autowired annotation on line 5 causes the Spring Environment object to be passed into the constructor. Inside the constructor, we have our only opportunity to set ADMIN since it's declared final - a requirement to be able to use it inside the hasRoles clause.
第5 @Autowired上的@Autowired注释使Spring Environment对象传递到构造函数中。 在构造函数中,由于ADMIN被声明为final ,因此我们唯一的机会是设置hasRoles要求能够在hasRoles子句中使用它。
The last piece of the puzzle utilizes some Spring configuration magic. Notice that we are setting the value of ADMIN to whatever the environment property named stormpath.authorized.group.admin is set to. This is standard Spring. If you have a property in your application.properties file with this name, it will be available in the Spring Environment.
难题的最后一部分利用了一些Spring配置魔术。 请注意,我们正在将ADMIN的值设置为名为stormpath.authorized.group.admin的环境属性。 这是标准的Spring。 如果您的application.properties文件中有一个具有该名称的属性,那么它将在Spring Environment中可用。
Spring also supports the ability to set this as a system environment variable, alleviating the need to have the value - a Stormpath Group href in this case - hardcoded anywhere in your application.
Spring还支持将其设置为系统环境变量的功能,从而无需在应用程序中的任何位置硬编码该值(在这种情况下为Stormpath Group href)。
Typically, system environment variables are ALL_CAPS_WITH_WORDS_SEPARATED_BY_UNDERSCORES. Spring automatically converts these system variables into the lowercase.dotted.notation.
通常,系统环境变量为ALL_CAPS_WITH_WORDS_SEPARATED_BY_UNDERSCORES 。 Spring自动将这些系统变量转换为lowercase.dotted.notation 。
Dig this:
挖这个:
STORMPATH_AUTHORIZED_GROUP_ADMIN=https://api.stormpath.com/v1/groups/1wcsYMUZhzytUH5GmdaFXC \
java -jar build/libs/spring-boot-spring-security-tutorial-0.1.0.jar
Behind the scenes, Spring will convert the STORMPATH_AUTHORIZED_GROUP_ADMIN system environment variable to a Spring env variable named stormpath.authorized.group.admin. That will get picked up by our code above.
在幕后,Spring会将STORMPATH_AUTHORIZED_GROUP_ADMIN系统环境变量转换为一个名为stormpath.authorized.group.admin的Spring环境变量。 这将被我们上面的代码处理。
Now, we need to wire the AdminService to our Controller. Here are the relevant parts of our updated HelloController.java:
现在,我们需要将AdminService到我们的控制器。 这是我们更新的HelloController.java的相关部分:
@Controller
public class HelloController {

    @Autowired
    AdminService adminService;

    ...

    @RequestMapping("/admin")
    String admin() {
        adminService.ensureAdmin();
        return "admin";
    }
}
AdminService is Autowired in on lines 4 & 5. Notice on line 11, we are calling the adminService.ensureAdmin method. If the logged in user is NOT in the ADMIN group, a 403 (forbidden) response will be generated.
在第4行和第5行中自动adminService.ensureAdmin AdminService 。请注意,在第11行中,我们正在调用adminService.ensureAdmin方法。 如果已登录的用户ADMIN组中,则将生成403 (禁止)响应。
The last bit of code housekeeping to do here is to create an admin.html template. In the code that is associated with this post, there's a simple admin.html template that shows a nicely formatted message confirming that you are, indeed, an admin.
在此执行的代码整理工作的最后一部分是创建admin.html模板。 在与此帖子相关的代码中,有一个简单的admin.html模板,该模板显示了格式正确的消息,确认您确实是管理员。
Now, to see this in action, you'll need to do a little bit of Stormpath housekeeping in the admin console.
现在,要执行此操作,您需要在管理控制台中进行一些Stormpath内务处理。
Here are the steps:
步骤如下:
Create a new Application

创建一个新的应用程序
Create a new Group called "admin" for the Application

为应用程序创建一个名为“ admin”的新组
Create a new Account in the admin Group


在管理组中创建一个新帐户

Create another new Account, but NOT in the admin Group

创建另一个新帐户,但不在管理员组中
In the code for this post, I've also included a handy error page so that if you are not in the admin Group you get a nicely formatted page rather than the default 403 page.
在这篇文章的代码中,我还包括了一个方便的错误页面,因此,如果您不在admin组中,则将获得格式良好的页面,而不是默认的403页面。
Now we're going to start up the application again, only this time we'll use the hrefs found in the Admin Console for the new Application and Group you just created.
现在,我们将再次启动该应用程序,仅这次,我们将在管理控制台中找到的hrefs用于刚刚创建的新应用程序和组。
With Maven:
使用Maven:
mvn clean package
STORMPATH_API_KEY_FILE=~/.stormpath/apiKey.properties \
STORMPATH_APPLICATION_HREF=https://api.stormpath.com/v1/applications/4YHCurbtcaFC4TKKsd3AYQ \
STORMPATH_AUTHORIZED_GROUP_ADMIN=https://api.stormpath.com/v1/groups/1wcsYMUZhzytUH5GmdaFXC \
mvn spring-boot:run
With Gradle:
使用Gradle:
gradle clean build
STORMPATH_API_KEY_FILE=~/.stormpath/apiKey.properties \
STORMPATH_APPLICATION_HREF=https://api.stormpath.com/v1/applications/4YHCurbtcaFC4TKKsd3AYQ \
STORMPATH_AUTHORIZED_GROUP_ADMIN=https://api.stormpath.com/v1/groups/1wcsYMUZhzytUH5GmdaFXC \
java -jar build/libs/spring-boot-spring-security-tutorial-0.1.0.jar
Browse to the /admin page.
浏览到/admin页面。
If you log in as the user you created in the Stormpath admin Group (micah+admin@stormpath.com in my case), you will have access to the admin page. If you log in as the user you created that's NOT in the Stormpath admin Group (micah+user@stormpath.com in my case), you will get the forbidden page.
如果您以在Stormpath admin组(在我的情况下为micah+admin@stormpath.com)中创建的用户身份登录,则可以访问管理页面。 如果您以创建的用户身份登录,而该用户不在Stormpath admin组(在我的情况下为micah+user@stormpath.com )中,则将显示禁止页面。
No matter who you log in as, you will have access to the /restricted page.
无论以谁身份登录,您都可以访问/restricted页面。

结语 ( Wrapping Up )
We've covered a lot of ground here, haven't we? Let's review:
我们在这里覆盖了很多地方,不是吗? 我们来复习:
- We saw how you can protect individual pages as well as protect methods based on membership in a Group. 我们看到了如何保护单个页面以及如何基于组中的成员资格来保护方法。
- We saw how you can apply Stormpath in your class that extends
WebSecurityConfigurerAdapterto define access controls for different paths as well as make use of the Spring Security@PreAuthorizeannotation for a finer grain of control. 我们看到了如何在你的类,它扩展应用 StormpathWebSecurityConfigurerAdapter定义不同的路径访问控制,以及利用Spring安全的@PreAuthorize注释控制的更细的晶粒。 - We saw how the Stormpath Java SDK manages environment configuration properties to provide a high degree of flexibility for your application without having to hardcode anything. 我们看到了Stormpath Java SDK如何管理环境配置属性,从而为您的应用程序提供了高度的灵活性,而无需进行任何硬编码。
There are a ton of additional features in the Java SDK and the Spring Boot integration that I didn't demonstrate in this tutorial. You can walk through a more in-depth Stormpath tutorial here.
有在Java SDK 一吨的附加功能和Spring集成引导,我并没有在本教程演示。 您可以在此处浏览更深入的Stormpath教程 。
If you have questions or want to learn more catch me on Twitter @afitnerd ot drop a line over to support anytime.
如果您有任何疑问或想了解更多信息,请在Twitter @afitnerd上关注我, 或者随时致电 支持 。
翻译自: https://scotch.io/tutorials/build-a-spring-boot-app-with-user-authentication


 609
609

 被折叠的 条评论
为什么被折叠?
被折叠的 条评论
为什么被折叠?
 到【灌水乐园】发言


