


ajax方式提交 表单
A lot of developers were submitting forms before AngularJS came out. There were so many different ways to submit forms that it could drive a person crazy... and they still can.
在AngularJS出现之前,许多开发人员都在提交表单。 提交表单的方式有很多,可能会使一个人发疯……而且他们仍然可以。
Today we'll be looking at a simple form that used to be submitted using PHP and how to convert that to Angular. Using Angular for forms was one of those AHA moments for me. Even though it barely scratches the surface of Angular, it helps a user see the potential after seeing forms submitted and understanding the idea of two-way data-binding.
今天,我们将研究一个以前使用PHP提交的简单表单,以及如何将其转换为Angular。 对我而言,使用Angular进行表单是AHA的重要时刻之一。 尽管它几乎不会刮擦Angular的表面,但它可以帮助用户在查看提交的表单并了解双向数据绑定的思想之后看到潜力。
We will look at processing a form with just plain jQuery. The work needed to do this will be primarily in the javascript. We will submit the form, show errors, add error classes, and show/hide messages in javascript.
我们将研究仅使用普通jQuery处理表单。 为此所需的工作将主要在javascript中。 我们将使用javascript提交表单,显示错误,添加错误类以及显示/隐藏消息。
After that, we will be using Angular. The bulk of the work that was needed before will go away and lots of the things we did before (showing errors, adding classes, showing/hiding messages) will be so much simpler. Let's dive in.
之后,我们将使用Angular。 之前需要做的大部分工作都将消失,而我们之前做过的许多事情(显示错误,添加类,显示/隐藏消息)将变得非常简单。 让我们潜入。
我们的样品表格 (Our Sample Form)
We'll be looking at two ways to submit this form: * The Old Way: AJAX Form with jQuery and PHP * The New Way: AJAX Form with AngularJS and PHP
我们将研究两种方式提交此表单:* 旧方法:使用jQuery和PHP的AJAX表单* 新方法:使用AngularJS和PHP的AJAX表单
Take a look at what we'll be building. Super simple.
看一下我们将要构建的东西。 超级简单。

表格要求 (Form Requirements)
- Process the form without page refresh 处理表单而不刷新页面
- Enter Name and Superhero Alias 输入名称和超级英雄别名
- Show errors if there are any 显示错误(如果有)
- Turn inputs red if there are errors 出现错误时将输入变为红色
- Show success message if all is good 如果一切顺利,则显示成功消息
档案结构 (File Structure)
We'll only need two files to demonstrate.
我们只需要两个文件即可演示。
- index.html index.html
- process.php process.php
处理表格 (Processing the Form)
Let's setup the PHP to process our form. This will be very minimal and will use http POST to get the form data.
让我们设置PHP以处理表单。 这将是最小的,并将使用http POST来获取表单数据。
<?php
// process.php

$errors = array();  // array to hold validation errors
$data = array();        // array to pass back data

// validate the variables ========
if (empty($_POST['name']))
  $errors['name'] = 'Name is required.';

if (empty($_POST['superheroAlias']))
  $errors['superheroAlias'] = 'Superhero alias is required.';

// return a response ==============

// response if there are errors
if ( ! empty($errors)) {

  // if there are items in our errors array, return those errors
  $data['success'] = false;
  $data['errors']  = $errors;
} else {

  // if there are no errors, return a message
  $data['success'] = true;
  $data['message'] = 'Success!';
}

// return all our data to an AJAX call
echo json_encode($data);
This is a very simple form processing script. We will just check if the data exists. If it does exist, don't do anything. If it doesn't exist, add a message to our $errors array.
这是一个非常简单的表单处理脚本。 我们将只检查数据是否存在。 如果确实存在,则不执行任何操作。 如果不存在,请向$errors数组中添加一条消息。
To return our data to an AJAX call, we have to echo and json_encode. This is all we have to do with our PHP form processing. It will be the same for processing a form using normal jQuery AJAX or Angular.
要将数据返回到AJAX调用,我们必须echo和json_encode 。 这就是我们与PHP表单处理所要做的全部。 使用普通的jQuery AJAX或Angular处理表单将是相同的。
显示表格 (Showing the Form)
Let's create our HTML that will show our form.
让我们创建显示表单HTML。
<!-- index.html -->

<!doctype html>
<html>
<head>
  <title>Angular Forms</title>

  <!-- LOAD BOOTSTRAP CSS -->
  <link rel="stylesheet" href="//netdna.bootstrapcdn.com/bootstrap/3.0.2/css/bootstrap.min.css">

  <!-- LOAD JQUERY -->
    <!-- when building an angular app, you generally DO NOT want to use jquery -->
    <!-- we are breaking this rule here because jQuery's $.param will help us send data to our PHP script so that PHP can recognize it -->
    <!-- this is jQuery's only use. avoid it in Angular apps and if anyone has tips on how to send data to a PHP script w/o jQuery, please state it in the comments -->
  <script src="//ajax.googleapis.com/ajax/libs/jquery/2.0.3/jquery.min.js"></script>

  <!-- PROCESS FORM WITH AJAX (OLD) -->
  <script>
    <!-- WE WILL PROCESS OUR FORM HERE -->
  </script>
</head>
<body>
<div class="container">
<div class="col-md-6 col-md-offset-3">

  <!-- PAGE TITLE -->
  <div class="page-header">
    <h1><span class="glyphicon glyphicon-tower"></span> Submitting Forms with Angular</h1>
  </div>

  <!-- SHOW ERROR/SUCCESS MESSAGES -->
  <div id="messages"></div>

  <!-- FORM -->
  <form>
    <!-- NAME -->
    <div id="name-group" class="form-group">
      <label>Name</label>
      <input type="text" name="name" class="form-control" placeholder="Bruce Wayne">
      <span class="help-block"></span>
    </div>

    <!-- SUPERHERO NAME -->
    <div id="superhero-group" class="form-group">
      <label>Superhero Alias</label>
      <input type="text" name="superheroAlias" class="form-control" placeholder="Caped Crusader">
      <span class="help-block"></span>
    </div>

    <!-- SUBMIT BUTTON -->
    <button type="submit" class="btn btn-success btn-lg btn-block">
      <span class="glyphicon glyphicon-flash"></span> Submit!
    </button>
  </form>

</div>
</div>
</body>
</html>
Now we have our form. We've also used Bootstrap to make it not super ugly. Using the Bootstrap syntax, there is also a spot under each input to show a line of text for our errors.
现在我们有了表格。 我们还使用了Bootstrap使其变得不难看。 使用Bootstrap语法,每个输入下方都有一个点,用于显示错误的一行文本。
用jQuery提交表单 (Submit the Form with jQuery)
Let's go through the process of submitting the form with jQuery now. We will add all the code into our empty <script> tags.
现在,让我们来看一下使用jQuery提交表单的过程。 我们将所有代码添加到空的<script>标记中。
<!-- index.html -->

...

<!-- PROCESS FORM WITH AJAX (OLD) -->
<script>
$(document).ready(function() {

// process the form
$('form').submit(function(event) {

  // remove the past errors
  $('#name-group').removeClass('has-error');
  $('#name-group .help-block').empty();
  $('#superhero-group').removeClass('has-error');
  $('#superhero-group .help-block').empty();

  // remove success messages
  $('#messages').removeClass('alert alert-success').empty();

  // get the form data
  var formData = {
      'name'              : $('input[name=name]').val(),
      'superheroAlias'    : $('input[name=superheroAlias]').val()
  };

  // process the form
  $.ajax({
    type        : 'POST',
    url         : 'process.php',
    data        : formData,
    dataType    : 'json',
    success     : function(data) {

      // log data to the console so we can see
      console.log(data);

      // if validation fails
      // add the error class to show a red input
      // add the error message to the help block under the input
      if ( ! data.success) {

        if (data.errors.name) {
          $('#name-group').addClass('has-error');
          $('#name-group .help-block').html(data.errors.name);
        }

        if (data.errors.superheroAlias) {
          $('#superhero-group').addClass('has-error');
          $('#superhero-group .help-block').html(data.errors.superheroAlias);
        }

      } else {

        // if validation is good add success message
        $('#messages').addClass('alert alert-success').append('<p>' + data.message + '</p>');
      }
    }
  });

  // stop the form from submitting and refreshing
  event.preventDefault();
});

});
</script>

...
There's a lot of code here to process the form. We have code to get the variables from the form, send it to our form using AJAX, check if there are any errors, and show a success message. On top of all that, every time the form is submitted, we want it to clear the past errors. Quite a lot of code.
这里有很多代码来处理表单。 我们有代码从表单中获取变量 , 使用AJAX将其发送到表单 , 检查是否有任何错误 ,并显示成功消息 。 最重要的是,每次提交表单时,我们希望它清除过去的错误。 很多代码。
Now if there is an error:
现在,如果有错误:
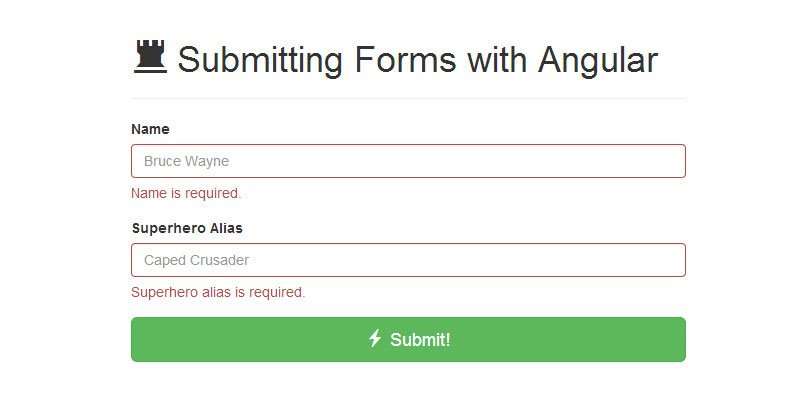 ]
]
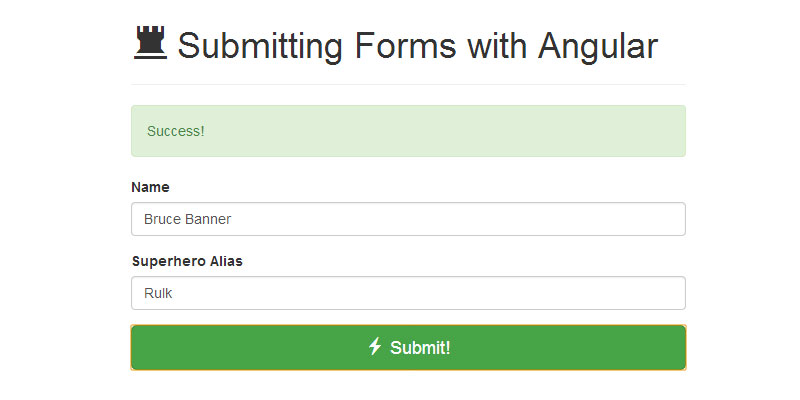
Or if there is a successful submission:
或者,如果提交成功:
Now let's look at the same form, submitted with Angular. Remember, we don't have to change anything about how our PHP processes the form and our application will function the same (showing errors and successes in the same places).
现在让我们看一下与Angular一起提交的表单。 记住,我们无需更改有关PHP如何处理表单以及应用程序将运行相同功能的任何信息(在同一位置显示错误和成功信息)。
用Angular提交表单 (Submit the Form with Angular)
We are going to set up our Angular application right inside the <script> tags we used earlier. So just delete everything inside and let's begin.
我们将在之前使用的<script>标记内设置Angular应用程序。 因此,删除其中的所有内容,然后开始吧。
设置Angular应用程序 (Setting Up An Angular Application)
The steps to set up our Angular application are:
设置Angular应用程序的步骤是:
- Load angular 负载角度
- Set up a module 设置模块
- Set up controller 设置控制器
- Apply module and controller to HTML 将模块和控制器应用于HTML
- Set up 2-way bound variables 设置2向绑定变量
- Set up errors and messages 设置错误和消息
It sounds like a lot, but in the end, we'll use far less code and it will be much cleaner. It will also be much easier to create larger forms with many more inputs.
听起来很多,但是最后,我们将使用更少的代码,它将更加干净。 用更多的输入创建更大的表格也将容易得多。
角模块和控制器 (Angular Module and Controller)
Let's load up Angular and create our module and controller.
让我们加载Angular并创建我们的模块和控制器。
<!-- index.html -->

...

  <!-- LOAD JQUERY -->
  <script src="//ajax.googleapis.com/ajax/libs/jquery/2.0.3/jquery.min.js"></script>
  <!-- LOAD ANGULAR -->
  <script src="//ajax.googleapis.com/ajax/libs/angularjs/1.2.0/angular.min.js"></script>

  <!-- PROCESS FORM WITH AJAX (NEW) -->
  <script>

    // define angular module/app
    var formApp = angular.module('formApp', []);

    // create angular controller and pass in $scope and $http
    function formController($scope, $http) {

    }

  </script>
</head>

<!-- apply the module and controller to our body so angular is applied to that -->
<body ng-app="formApp" ng-controller="formController">

...
We now have the foundation for our Angular app. We've loaded Angular, created a module and controller, and applied it to our site.
现在,我们为Angular应用奠定了基础。 我们已经加载了Angular,创建了模块和控制器,并将其应用于我们的网站。
Next we will be showing off how 2-way binding works.
接下来,我们将展示2向绑定的工作原理。
2向数据绑定 (2-Way Data-Binding)
This is one of the core ideas of Angular and one of its most powerful. From the Angular docs: "Data-binding in Angular web apps is the automatic synchronization of data between the model and view." This means that the step where we have to grab data from the form using $('input[name=name]').val() is not required.
这是Angular的核心思想之一,也是最强大的思想之一。 来自Angular文档 :“ Angular Web应用程序中的数据绑定是模型和视图之间的数据自动同步。” 这意味着不需要执行必须使用$('input[name=name]').val()从表单中获取数据的步骤。
We bind data to a variable in Angular, and whenever it changes in either the Javascript or in the view, it changes in both.
我们将数据绑定到Angular中的变量,并且只要它在Javascript或视图中发生变化,它在两者中都会发生变化。
To demonstrate data-binding, we'll get our form inputs to populate a variable formData automagically. Let's look back at our Angular controller that we applied to our page. We passed in $scope and $http.
为了演示数据绑定,我们将获取表单输入以自动填充变量formData 。 让我们回顾一下应用于页面的Angular控制器。 我们传入了$scope和$http 。
$scope: The glue between application controller and the view. Basically variables are passed to and from our controller and view using $scope. For a more detailed definition, check out the docs.
$http: The Angular service that will help us do our POST request. For more information, check out the docs.
$ scope:应用程序控制器和视图之间的粘合剂。 基本上,变量是通过$ scope传入和传出我们的控制器并进行查看的。 有关更详细的定义,请查看docs 。
$ http: Angular服务,它将帮助我们完成POST请求。 有关更多信息,请查看docs 。
使用数据绑定获取变量 (Getting the Variables Using Data-Binding)
Alright, enough talk. Let's apply this information to our form. It's way simpler than it sounded above. We will add a line to the Angular controller and a line to the view.
好吧,足够多的谈话。 让我们将此信息应用于表单。 它比上面听起来简单。 我们将向Angular控制器添加一条线,并向视图添加一条线。
<!-- index.html -->

...

<!-- PROCESS FORM WITH AJAX (NEW) -->
<script>

  // define angular module/app
  var formApp = angular.module('formApp', []);

  // create angular controller and pass in $scope and $http
  function formController($scope, $http) {

      // create a blank object to hold our form information
      // $scope will allow this to pass between controller and view
      $scope.formData = {};

  }

...
Now we have set up a formData object. Let's populate it with our form inputs. Before we had to explicitly call each input and get its val(). Not anymore. We will use ng-model to bind a specific input to a variable.
现在我们已经建立了一个formData对象。 让我们用表单输入填充它。 在我们必须显式调用每个输入并获取其val() 。 不再。 我们将使用ng-model将特定的输入绑定到变量。
<!-- index.html -->

...

<!-- FORM -->
<form>
  <!-- NAME -->
  <div id="name-group" class="form-group">
    <label>Name</label>
    <input type="text" name="name" class="form-control" placeholder="Bruce Wayne" ng-model="formData.name">
    <span class="help-block"></span>
  </div>

  <!-- SUPERHERO NAME -->
  <div id="superhero-group" class="form-group">
    <label>Superhero Alias</label>
    <input type="text" name="superheroAlias" class="form-control" placeholder="Caped Crusader" ng-model="formData.superheroAlias">
    <span class="help-block"></span>
  </div>

  <!-- SUBMIT BUTTON -->
  <button type="submit" class="btn btn-success btn-lg btn-block">
    <span class="glyphicon glyphicon-flash"></span> Submit!
  </button>
</form>

<!-- SHOW DATA FROM INPUTS AS THEY ARE BEING TYPED -->
<pre>
    {{ formData }}
</pre>

...
Now, Angular will know that each input is bound to formData. As you type into each input box, you can see the formData object being populated! It's magic!
现在,Angular将知道每个输入都绑定到formData。 在每个输入框中键入内容时,可以看到正在填充formData对象! 这是魔法!
处理表格 (Processing the Form)
In our old form, we had to use jQuery to submit the form using $('form').submit(). Now we will use an Angular feature called ng-submit. To do this, we will add a controller function to process the form, and tell our form to use that controller function..
在我们的旧表单中,我们必须使用jQuery通过$('form').submit() 。 现在,我们将使用一个名为ng-submit的Angular功能。 为此,我们将添加一个控制器函数来处理表单,并告诉我们的表单使用该控制器函数。 。
<!-- index.html -->

...

<!-- PROCESS FORM WITH AJAX (NEW) -->
<script>

  // define angular module/app
  var formApp = angular.module('formApp', []);

  // create angular controller and pass in $scope and $http
  function formController($scope, $http) {

    // create a blank object to hold our form information
    // $scope will allow this to pass between controller and view
    $scope.formData = {};

    // process the form
    $scope.processForm = function() {

    };

  }

...

<!-- FORM -->
<form ng-submit="processForm()">

...
Now our form knows to use that controller function when it is submitted. Now that we have that in place, let's actually process the form using $http.
现在,我们的表单知道在提交时使用该控制器功能。 现在我们已经准备好了,让我们实际使用$http处理表单。
The syntax for processing a form will look very similar to the original way of doing it. The benefit is that we don't have to grab our form data manually, or inject, hide, or add classes to show errors or success messages.
处理表格的语法看起来与原始方式非常相似。 好处是我们不必手动获取表单数据 , 也不必注入,隐藏或添加类来显示错误或成功消息 。
<!-- index.html -->

...

// process the form
$scope.processForm = function() {
  $http({
  method  : 'POST',
  url     : 'process.php',
  data    : $.param($scope.formData),  // pass in data as strings
  headers : { 'Content-Type': 'application/x-www-form-urlencoded' }  // set the headers so angular passing info as form data (not request payload)
 })
  .success(function(data) {
    console.log(data);

    if (!data.success) {
      // if not successful, bind errors to error variables
      $scope.errorName = data.errors.name;
      $scope.errorSuperhero = data.errors.superheroAlias;
    } else {
      // if successful, bind success message to message
      $scope.message = data.message;
    }
  });
};

...
That's it for our form! None of that adding or removing classes. We don't have to clear the errors every time we submit the form. We just have to bind the variables and the view will take care of the rest. This is great since the controller is for the data and the view is for showing the data.
这就是我们的表格! 没有添加或删除类。 我们不必每次提交表单时都清除错误。 我们只需要绑定变量,视图将负责其余的工作。 这很棒,因为控制器用于数据 , 视图用于显示数据 。
$.param function. There are ways to do it without jQuery but that's pretty much the only reason jQuery was included for this example. Because it was easier. The below cleaner syntax will work based on your server-side language. For more information on making AngularJS AJAX calls, read this great article:
$.param函数需要jQuery。 有多种方法可以在没有jQuery的情况下执行此操作,但这几乎是此示例包含jQuery的唯一原因。 因为比较容易。 下面的更干净的语法将根据您的服务器端语言工作。 有关进行AngularJS AJAX调用的更多信息,请阅读以下精彩文章:
Make AngularJS $http Service Behave Like jQuery AJAX Another option is to use the `transformRequest` to have our data act as URL parameters:
使AngularJS $ http服务像jQuery AJAX一样另一个选择是使用`transformRequest`将我们的数据用作URL参数:
Stack Overflow transformRequest
堆栈溢出transformRequest
清洁语法 (Cleaner Syntax)
This example sends data as a string and sets your headers. If you don't need to do that kind of stuff and just want the cleanest Angular $http POST possible, we'll use the shorthand method:
本示例将数据作为字符串发送并设置标题。 如果您不需要做这种事情,而只想获得最干净的Angular $ http POST,我们将使用速记方法:
<p>
  ... $http.post('process.php', $scope.formData) .success(function(data) { ... }); ... </code> </pre>
</p>

<pre><code><p>
Definitely cleaner and a much easier to remember method than the above.
绝对比上述方法更清洁,更容易记住的方法。
在视图中显示错误和消息 (Showing the Errors and Messages in the View)
We will use the directive ng-show and ng-class to handle our view. The Angular double brackets will place our variables where we need them also.
我们将使用指令ng-show和ng-class处理我们的视图。 角双括号会将我们的变量也放置在需要的地方。
ng-show: Show or hide an element based on if a variable exists. Docs
ng-class: Add or remove a class based on if a variable exists (or some other expression). Docs
ng-show:根据变量是否存在显示或隐藏元素。 文件
ng-class:根据变量是否存在(或其他表达式)添加或删除类。 文件
<!-- index.html -->

<!-- SHOW ERROR/SUCCESS MESSAGES -->
<div id="messages" ng-show="message">{{ message }}</div>

<!-- FORM -->
<form>
  <!-- NAME -->
  <div id="name-group" class="form-group" ng-class="{ 'has-error' : errorName }">
    <label>Name</label>
    <input type="text" name="name" class="form-control" placeholder="Bruce Wayne">
    <span class="help-block" ng-show="errorName">{{ errorName }}</span>
  </div>

  <!-- SUPERHERO NAME -->
  <div id="superhero-group" class="form-group" ng-class="{ 'has-error' : errorSuperhero }">
      <label>Superhero Alias</label>
      <input type="text" name="superheroAlias" class="form-control" placeholder="Caped Crusader">
      <span class="help-block" ng-show="errorSuperhero">{{ errorSuperhero }}</span>
  </div>

  <!-- SUBMIT BUTTON -->
  <button type="submit" class="btn btn-success btn-lg btn-block">
      <span class="glyphicon glyphicon-flash"></span> Submit!
  </button>
</form>
Our form is done! By using the power of Angular, we can move all of that stupid show/hide logic out of our javascript and into the view. Now our javascript file is free to just handle data and our view can do its thing.
我们的表格完成了! 通过使用Angular的功能,我们可以将所有愚蠢的显示/隐藏逻辑从我们的javascript中移出,并移入视图中。 现在,我们的javascript文件可以自由处理数据,并且我们的视图可以完成它的工作。
Our classes and errors/success messages will hide and show if they are available. This is so much easier since we don't have to worry about if we covered everything like in our old javascript. You don't have to wonder if you remembered to hide those error messages on every form submit.
我们的类和错误/成功消息将隐藏并显示它们是否可用。 这非常容易,因为我们不必担心是否涵盖了旧javascript中的所有内容。 您不必怀疑是否记得在每次提交表单时都隐藏这些错误消息。
结论 (Conclusion)
Now we have our beautiful form fully converted to Angular. We've gone through a lot of concepts and hopefully as you play with them more, they will be easier to use.
现在,我们已经将漂亮的表格完全转换为Angular。 我们已经经历了很多概念,并希望随着您更多地使用它们,它们将更易于使用。
We've gone through:
我们经历了:
- Creating an Angular module 创建一个Angular模块
- Creating an Angular controller 创建一个角度控制器
- 2-way data-binding 2路数据绑定
- ng-model to bind inputs ng-model绑定输入
- ng-click to submit a form ng-点击提交表格
- Showing form errors using 2-way data-binding 使用2向数据绑定显示表单错误
- Showing a div based on if a variable exists 根据变量是否存在显示div
- Adding a class based on if a varible exists 根据是否存在变量添加类
These Angular techniques will carry over into much larger applications and there are so many great things that you can build. Have fun with Angular and stay tuned for more advanced articles. In the meantime, you can continue your Angular learning by diving into directives, services and factories, and so much more.
这些Angular技术将延续到更大的应用程序中,您可以构建很多很棒的东西。 与Angular一起玩,并继续关注更多高级文章。 同时,您可以通过深入研究指令,服务和工厂等来继续学习Angular。
- Submitting AJAX Forms: The AngularJS Way (this article) 提交AJAX表单:AngularJS方式(本文)
- AngularJS Form Validation AngularJS表单验证
- Handling Checkboxes and Radio Buttons in Angular Forms 以角形式处理复选框和单选按钮
翻译自: https://scotch.io/tutorials/submitting-ajax-forms-the-angularjs-way
ajax方式提交 表单


 1万+
1万+

 被折叠的 条评论
为什么被折叠?
被折叠的 条评论
为什么被折叠?
 到【灌水乐园】发言


