maven 生成脚手架
Meteor is a web development platform built on top of Node.js and MongoDB. It covers client and server development in JavaScript and fully supports real time behavior and reactivity (automatic update of components when necessary). If you are new to Meteor you can find an introduction here.
Meteor是一个基于Node.js和MongoDB构建的Web开发平台。 它涵盖了JavaScript中的客户端和服务器开发,并完全支持实时行为和React性(必要时自动更新组件)。 如果您是Meteor的新手,可以在这里找到介绍。
脚手架可加快开发速度 (Faster Development with Scaffolding)
This article is about Meteor scaffolding. With the iron-cli tool scaffolding of Meteor apps becomes super easy. It automatically creates project structure, files and boilerplate code to speed up your development process significantly. In this article we’ll use the iron-cli tool to build a simple Meteor web application from scratch. Furthermore we will use the AutoForms extension to automatically generate HTML forms.
本文是关于流星脚手架的。 借助iron-cli工具,Meteor应用程序的脚手架变得非常容易。 它会自动创建项目结构,文件和样板代码,以大大加快您的开发过程。 在本文中,我们将使用iron-cli工具从头开始构建一个简单的Meteor Web应用程序。 此外,我们将使用AutoForms扩展名自动生成HTML表单。
入门 (Getting Started)
First of all you need to have Meteor installed:
首先,您需要安装Meteor:
- Install on Windows: Download from https://install.meteor.com/windows 在Windows上安装:从https://install.meteor.com/windows下载
- Install on Linux / OS X: Use command curl https://install.meteor.com/ | sh 在Linux / OS X上安装:使用命令curl https://install.meteor.com/ | SH
Second we’ll install the scaffolding tool iron-cli which is available on GitHub. Install is done via command line:
其次,我们将安装可在GitHub上使用的脚手架工具iron-cli 。 通过命令行完成安装:
npm install -g iron-meteorAfter successful install, the iron command is available. You can test it by executing:
成功安装后, iron命令可用。 您可以执行以下命令进行测试:
iron helpAs a result you can see the following output giving you an brief overview of command parameters:
结果,您可以看到以下输出,为您简要概述了命令参数:

The most important options are:
最重要的选择是:
create: Creates a new project structure. The project name needs to be specified as a second parameter, e.g.
iron create myprojectname.create :创建一个新的项目结构。 需要将项目名称指定为第二个参数,例如
iron create myprojectname。generate: Generates files and boilerplate code for your project. The generate parameter is followed by colon and the type of component you want to create, e.g. generate:view (can also be shortened to g:view) to create a new view. The name of the component is specified as second parameter, e.g
iron g:view myfirstview.generate :为您的项目生成文件和样板代码。 generate参数后跟冒号和要创建的组件的类型,例如generate:view (也可以缩写为g:view )以创建新视图。 组件的名称被指定为第二个参数,例如
iron g:view myfirstview。run: Runs the app.
run :运行应用程序。
创建项目结构 (Create a Project Structure)
As the iron command is available we’ll start by creating a new project:
随着iron命令可用,我们将从创建一个新项目开始:
iron create ironapp01From the command output you can see that a bunch of files is created and that packages (e.g. the iron:router package) are added to the new project automatically:
从命令输出中,您可以看到已创建了一堆文件,并且已将包(例如iron:router包)自动添加到新项目中:

Change to the newly created project directory ironapp01 and enter command ls -al to get a first impression of how the project structure looks like:
转到新创建的项目目录ironapp01,然后输入命令ls -al以获得项目结构的第一印象:
| .iron                     // iron configuration folder
| app                       // Meteor application folder
| bin
| build                     // builds of your applications
| config                    // environment configuration
   |----- development/
     |--- env.sh
     |--- settings.json
As you can see, the Meteor application is generated into the subfolder app/. If you take a look into app/ you can find the following structure:
如您所见,Meteor应用程序已生成到子文件夹app /中 。 如果您查看app / ,可以找到以下结构:
| app
   |----- client
   |----- lib
   |----- packages
   |----- private
   |----- public
|----- serverclient/: This is the place where the client code of the Meteor application is stored. The subfolder templates is containing a default home view (home.css, home.html and home.js), a application master layout (master_layout.html and master_layout.js), a template to display a loading message (loading.html) and a template to display a not found error message (not_found.html).
client / :这是存储Meteor应用程序的客户端代码的地方。 子文件夹模板包含一个默认主视图( home.css , home.html和home.js ),一个应用程序主布局( master_layout.html和master_layout.js ),一个用于显示加载消息的模板( loading.html )和显示未找到错误消息的模板( not_found.html )。
| app
   |--- client/
      |---- head.html
      |---- collections/
      |---- lib/
      |---- stylesheets/             // main stylesheets
        |--- main.css
      |---- templates/               // all views are stored here
        |--- home/                   // home view is created by default
          |-- home.css
          |-- home.html
          |-- home.js
        |--- layouts/               // contains a master layout
          |-- master_layout/
            |- master_layout.html
            |- master_layout.js
        |--- shared/                // templates for displaying loading message / not found message
          |-- loading/
            |- loading.html
          |-- not_found/
|- not_found.htmllib/: The lib/ directory contains the application code which is executed both on client and server. By default the scaffolding tool creates the subfolder collections/ and controllers/ within lib/. Within app/lib/controllers you can find the generated file home_controller.js with the following code inside:
lib / : lib /目录包含在客户端和服务器上都执行的应用程序代码。 默认情况下,脚手架工具在lib /中创建子文件夹collection /和controllers / 。 在app / lib / controllers中,您可以找到生成的文件home_controller.js,其中包含以下代码:
HomeController = RouteController.extend({
  layoutTemplate: 'MasterLayout',

  subscriptions: function() {
  },

  action: function() {
this.render('Home');
  }
});
The HomeController contains a property layoutTemplate which is set to ’MasterLayout’ by default. With this setting in place it is ensured that the master layout from file app/client/templates/layouts/master_layout/master_layout.html is used every time the router is calling a HomeController function to render a view template. The subscriptions property of HomeController is a function which is empty by default and used later to subscribe to data collections published by the server. The action function is calling this.render('Home') to output the Home template (stored in app/client/templates/home).
HomeController包含一个属性layoutTemplate ,该属性默认情况下设置为“ MasterLayout ” 。 有了此设置,可以确保每次路由器调用HomeController函数来呈现视图模板时,都使用文件app / client / templates / layouts / master_layout / master_layout.html中的主布局。 HomeController的subscriptions属性是一个默认情况下为空的函数,以后可用于订阅服务器发布的数据集合。 动作函数正在调用this.render('Home')以输出Home模板(存储在app / client / templates / home中) 。
Inside the lib/ directory there are two more files:
在lib /目录中,还有另外两个文件:
methods.js: Used to implement client and server methods, empty by default.
Methods.js :用于实现客户端和服务器方法,默认情况下为空。
router.js: Contains the routing configuration.
router.js :包含路由配置。
Take a look into router.js and you’ll find the initial iron:router configuration:
看一下router.js ,您将找到初始的iron:router配置:
Router.configure({
  layoutTemplate: 'MasterLayout',
  loadingTemplate: 'Loading',
  notFoundTemplate: 'NotFound'
});

Router.route('/', {
  name: 'home',
  controller: 'HomeController',
  action: 'action',
  where: 'client'
});
Note: The iron:router package is added to the iron project by default. It is one of the most popular Meteor packages and makes it extremely easy to configure URLs you want to use in your Meteor application. The iron:router is able to handle both, client and server routes at the same time.
注意:默认情况下, iron:router软件包已添加到iron项目。 它是最流行的Meteor软件包之一,它使配置要在Meteor应用程序中使用的URL非常容易。 iron:router能够同时处理客户端和服务器路由。
First, Router.configure() is used to set the general layout, loading and not found template. Second, the default application route '/' is configured. Route property controller is set to value 'HomeController‘ to ensure that this controller is used for processing the request. The action property defines the function of the controller which is called to render the browser output.
首先,使用Router.configure()设置常规布局 , 加载和找不到模板 。 其次,配置默认的应用程序路由“ /”。 路由属性控制器设置为值“ HomeController”,以确保使用该控制器来处理请求。 action属性定义了控制器的功能,调用该功能可呈现浏览器输出。
Note: As seen before, the action method of HomeController is displaying the home view, so all the different parts of the application are wired together by the routing configuration.
注意 :如前所述,HomeController的操作方法正在显示主视图,因此应用程序的所有不同部分都通过路由配置连接在一起。
public/: This folder is used to store any static assets of your applications like images etc.
public / :此文件夹用于存储应用程序的任何静态资产,例如图像等。
server/: Place to store all your Meteor server code. The following structure can be found in server/:
server / :用于存储所有Meteor服务器代码的位置。 在server /中可以找到以下结构:
| app
   |--- server/
     |---- collections/      // folder to store store collection code
     |---- controllers/
     |---- bootstrap.js      // Meteor startup code can be placed here
     |---- methods.js        // contains all server methods
     |---- publish.js        // use to publish data collections to the client
Now, that you have a basic understanding of the predefined project structure and the automatically created files we can move on with implementing our sample application. First of all we’ll extend the project by adding some Meteor packages.
现在,您已经对预定义的项目结构和自动创建的文件有了基本的了解,我们可以在执行示例应用程序时继续进行操作。 首先,我们将通过添加一些Meteor包来扩展项目。
添加,删除某些软件包 (Adding, Removing Some Packages)
Meteor packages are an easy way to add functionality or external libraries to your project. In the following we’ll use the Meteor package manager to add three packages to our project:
流星软件包是向项目添加功能或外部库的简便方法。 在下面的内容中,我们将使用Meteor包管理器将三个包添加到我们的项目中:
- aldeed:autoform aldeed:autoform
- aldeed:collection2 aldeed:collection2
- twbs:bootstrap twbs:bootstrap
aldeed:autoform: Easily create forms with automatic insert and update, and automatic reactive validation.
aldeed:autoform:通过自动插入和更新以及自动React验证轻松创建表单。
aldeed:collection2: Automatic validation of insert and update operations on the client and server.
aldeed:collection2 :自动验证客户端和服务器上的插入和更新操作。
twbs:bootstrap: Contains the Bootstrap framework. One of the most popular front-end frameworks for developing responsive, mobile first projects on the web.
twbs:bootstrap :包含Bootstrap框架。 一种最流行的前端框架,用于在Web上开发响应式,移动优先项目。
Execute the following commands to add the packages:
执行以下命令以添加软件包:
iron add aldeed:autoform
iron add aldeed:collection2
iron add twbs:bootstrapNote: Executing iron add in the top level folder of the iron project has the same effect as executing meteor add in the app/ subfolder. In this case the iron command is just acting as a proxy to the meteor command to make it a little bit easier for you (you do not have to change directories and you do not have to remember in which case use meteor and in which case use iron command). In fact you can use the iron command with all parameters which are available for the meteor command.
注意 :在Iron项目的顶层文件夹中执行Iron Add与在app /子文件夹中执行Meteor Add具有相同的效果。 在这种情况下, iron命令只是充当meteor命令的代理,从而使它变得更简单(您不必更改目录,也不必记住在这种情况下使用meteor和在这种情况下使用铁命令)。 实际上,您可以将iron命令与meteor命令可用的所有参数一起使用。
To ensure packages are installed successfully execute the following command:
为确保成功安装软件包,请执行以下命令:
iron listAs a result you will see a list of all installed packages in the current project.
结果,您将看到当前项目中所有已安装软件包的列表。

Note: From the list of packages you can also see that the autopublish and insecure packages are installed. The autopublish package publishes the entire database to all clients. The insecure package allows all database writes by default. Both, automatic publishing and allowing all database writes by default, is not recommendable for a production app. We’ll remove both packages and take back control of data publishing and write access in the next step:
注意:从软件包列表中,您还可以看到已安装了自动发布和不安全的软件包。 自动发布包将整个数据库发布到所有客户端。 默认情况下, 不安全的软件包允许所有数据库写入。 对于生产应用程序,建议不要同时使用自动发布和默认情况下允许所有数据库写入。 下一步,我们将删除这两个软件包,并收回对数据发布和写入访问的控制权:
iron remove autopublish
iron remove insecure
创建汽车收藏 (Creating a Cars Collection)
As the main purpose of the application is to manage a list of cars we’ll start the implementation by creating a cars collection. We’ll do this by using the iron scaffolding command line tool again:
该应用程序的主要目的是管理汽车列表,因此我们将通过创建汽车集合来开始实施。 我们将再次使用铁脚手架命令行工具来执行此操作:
iron g:collection carsA new file app/lib/collection/cars.js is created. Open this file, delete the Cars.deny rules and return true for the Cars.allow rules (insert, update and remove):
创建一个新文件app / lib / collection / cars.js。 打开这个文件,删除Cars.deny规则和返回的Cars.allow规则(插入,更新和删除) 真 :
Cars = new Mongo.Collection('cars');

if (Meteor.isServer) {
  Cars.allow({
    insert: function (userId, doc) {
      return true;
    },

    update: function (userId, doc, fieldNames, modifier) {
      return true;
    },

    remove: function (userId, doc) {
      return true;
    }
  });
}
With this configuration in place all actions (insert, update and remove) are allowed for Cars collection on the server.
使用此配置后,服务器上的Cars收集将允许所有操作(插入,更新和删除)。
附加架构并发布汽车收藏 (Attaching a Schema and Publishing Cars Collection)
Next step is to define a data schema for our cars collection. Insert the following schema code in file cars.js:
下一步是为我们的汽车集合定义数据模式。 在文件cars.js中插入以下模式代码:
Cars.attachSchema(new SimpleSchema({
  brand: {
    type: String,
    label: "Brand",
    max: 100
  },
  model: {
    type: String,
    label: "Model",
    max: 100
  },
  fueltype: {
    type: String,
    label: "Fuel Type",
    allowedValues: ['Petrol', 'Diesel', 'Hybrid', 'Electric'],
  },
  bodystyle: {
    type: String,
    label: "Body Style",
    allowedValues: ['Convertibles', 'Coupes', 'Hatchbacks', 'Vans', 'Sedans', 'Suvs', 'Trucks', 'Wagons'],
    optional: true
  },
  topspeed: {
    type: Number,
    label: "Top Speed (mph)",
    optional: true
  },
  power: {
    type: Number,
    label: "Power (HP)",
    optional: true
  }
}));
The data schema is the prerequisite for automatic form generation and automatic form validation which we’ll use in a moment.
数据模式是自动生成表单和自动进行表单验证的前提条件,我们稍后将使用它们。
发布收藏 (Publish Collection)
As we have removed the autopublish package from our project we now need to publish our data collection explicitly to make data available on the client. Again, we will accomplish this task by using the iron scaffolding command line tool:
当我们从项目中删除了autopublish包后,我们现在需要显式发布数据集合以使数据在客户端上可用。 同样,我们将通过使用铁脚手架命令行工具来完成此任务:
iron g:publish carsThis command automatically generates the following call of method Meteor.pubish() in file app/server/publish.js:
该命令自动在文件app / server / publish.js中生成以下方法Meteor.pubish()的调用:
Meteor.publish('cars', function (/* args */) {
  return Cars.find();
});
As you can see, publishing on server is quite simple. The call of method publish takes as a first parameter a string which contains the name of the publication. The second parameter is a function returning the data which are published.
如您所见,在服务器上发布非常简单。 方法publish的调用将包含发布名称的字符串作为第一个参数。 第二个参数是返回已发布数据的函数。
创建一个插入表格 (Creating an Insert Form)
As our newly created car collection is empty right now there is nothing to display so far. To enable the user to insert new cars we’ll create an insert form next. With the Cars schema in place and the aldeed:autoforms package installed it’s a simple process. First, create a new template for the insert form:
由于我们新创建的汽车收藏集目前为空,因此目前没有任何可显示的内容。 为了使用户能够插入新车,我们接下来将创建一个插入表格。 安装好Cars模式并安装aldeed:autoforms软件包后,这是一个简单的过程。 首先,为插入表单创建一个新模板:
iron g:template cars/create_carThis will create three new files in app/client/template/cats/create_car:
这将在app / client / template / cats / create_car中创建三个新文件:
- create_car.css create_car.css
- create_car.html create_car.html
- create_car.js create_car.js
Open create_car.html and insert the following code:
打开create_car.html并插入以下代码:
<template name="CreateCar">
  <h1>Create New Car</h1>
  {{> quickForm collection="Cars" id="insertCarForm" type="insert" buttonContent="Create"}}
</template>
That’s it! No more code needed to get an insert form. Quite simple, isn’t it? The quickForms inclusion is doing all the work for us generating a html form with validation (based on the Cars schema) for us.
而已! 无需其他代码即可获取插入表单。 很简单,不是吗? quickForms包含项为我们完成了所有工作,并为我们生成了带有验证(基于Cars模式)的html表单。
Next, let’s add a new controller to our application:
接下来,让我们向应用程序中添加一个新控制器:
iron g:controller CarsThis command creates the file cars_crontroller.js in app/lib/controllers. Insert a new method create and subscribe to the cars publication:
此命令在app / lib / controllers中创建文件cars_crontroller.js 。 插入一个新方法创建并订阅汽车出版物:
CarsController = RouteController.extend({
  subscriptions: function () {
    this.subscribe('cars');
  },
  data: function () {
  },
  create: function() {
    this.render('CreateCar', {});
  }
});
This create methods renders the CreateCar template to the browser. Subscriping to the Cars collection is done by calling this.subscribe('cars') in the subscription function.
In the next step we will connect the create method to the new route /cars/create. Open file routes.js and add the following route configuration:
此create方法将CreateCar模板呈现给浏览器。 订阅Cars集合是通过在订阅函数中调用this.subscribe('cars')完成的。
在下一步中,我们将create方法连接到新的路由/cars/create 。 打开文件route.js并添加以下路由配置:
Router.route('/cars/create', {
  name: 'createCar',
  controller: 'CarsController',
  action: 'create',
  where: 'client'
});
With this configuration in place we can start the application by executing the following command:
有了此配置后,我们可以通过执行以下命令来启动应用程序:
iron run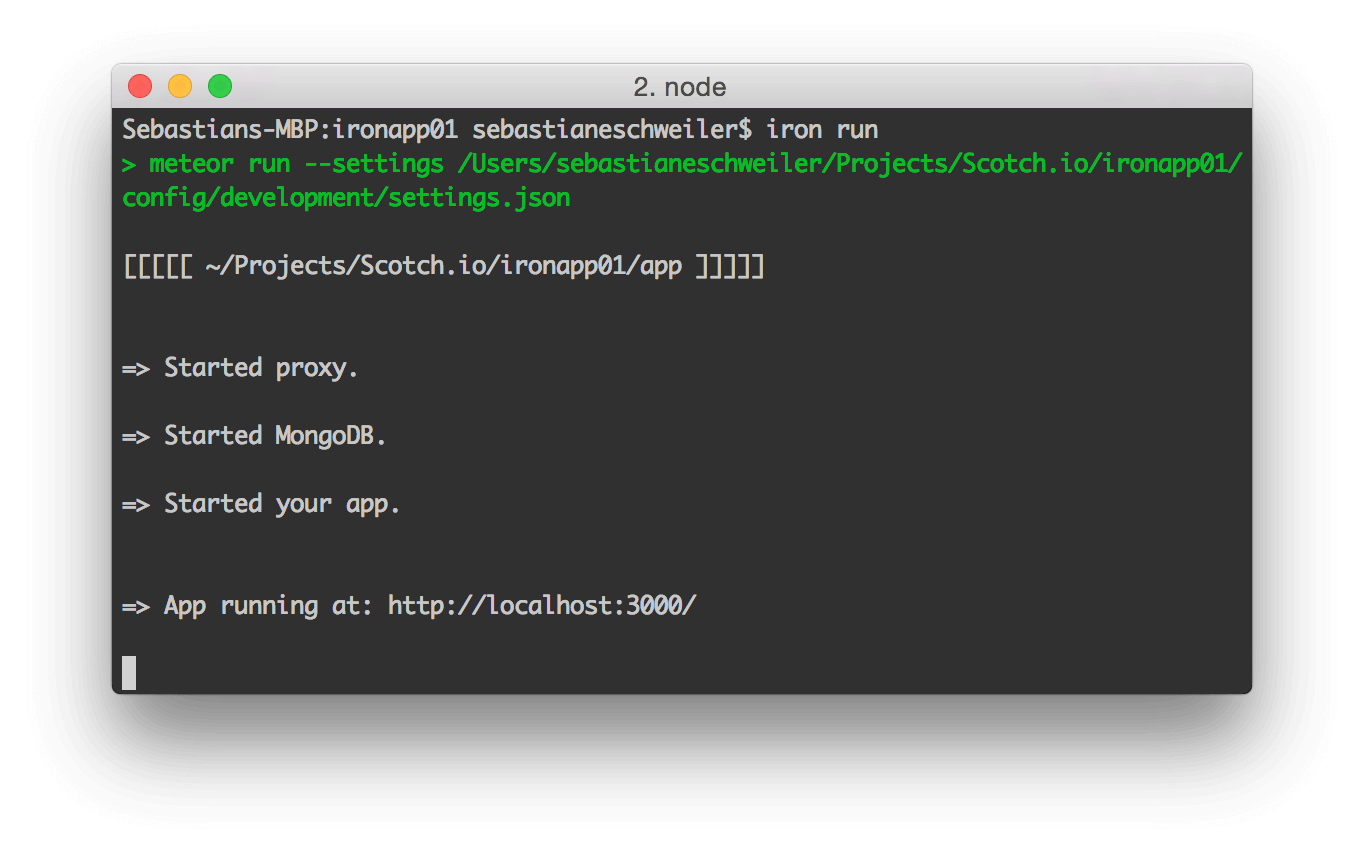
If you now open the browser and access URL http://localhost:3000/cars/create you can see the form:
如果现在打开浏览器并访问URL http://localhost:3000/cars/create ,则可以看到以下形式:
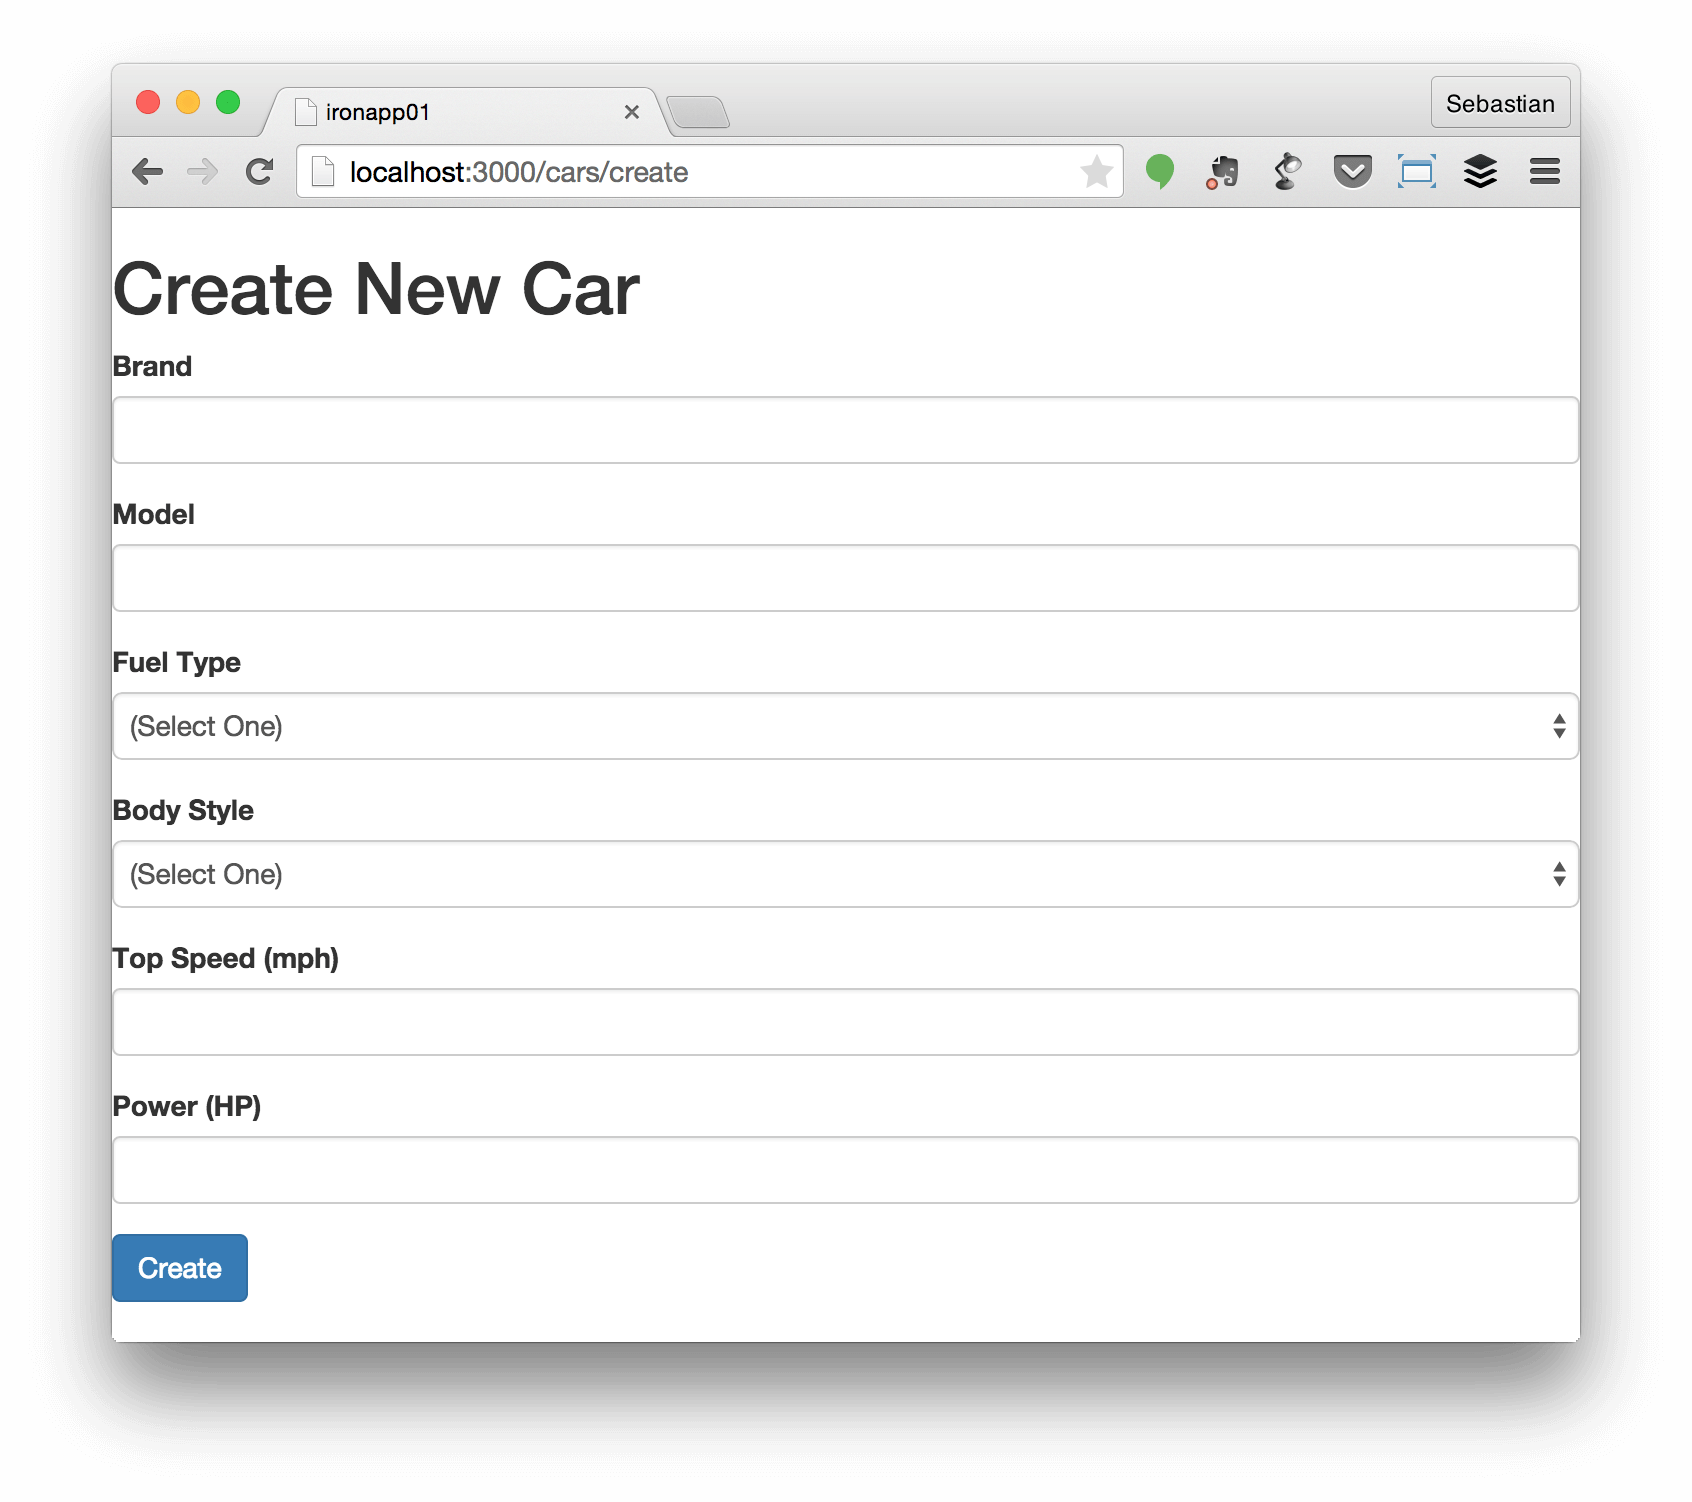
Without writing HTML form code the output was automatically generated by the AutoForms package. The best thing about it - it’s not only the form’s HTML code, it’s also the logic behind which is automatically generated. You can start right away creating records in the database by filling out the form.
无需编写HTML表单代码,输出将由AutoForms包自动生成。 最好的是-它不仅是表单HTML代码,而且还是背后自动生成的逻辑。 您可以通过填写表格立即开始在数据库中创建记录。
To test if everything is working correctly lets first try to submit the form without filling in a brand value (remember: the brand information is mandatory in our schema):
要测试一切是否正常,请首先尝试提交表单而不填写品牌价值(请记住:品牌信息在我们的架构中是必填项):

As you can see an error message is printed out stating that a value for field brand is required. The form is not submitted and further processing is aborted.
如您所见,将打印出一条错误消息,指出需要实地品牌的值。 表单未提交,进一步处理被中止。
Next add some car records by filling in all input fields and submitting the form. If no validation errors occur the form is cleared after successful submission. To check if data records have been created first open the browser console end enter the following command:
接下来,通过填写所有输入字段并提交表单来添加一些汽车记录。 如果未发生验证错误,则成功提交后将清除该表单。 要检查是否已创建数据记录,请首先打开浏览器控制台端,输入以下命令:
Cars.find().fetch()An array object is returned containing items for every car record created:
返回一个数组对象,其中包含创建的每个汽车记录的项目:

The same check can be done on the server. Go to console and enter
可以在服务器上进行相同的检查。 转到控制台并输入
meteor mongoin app/ directory of the project and query the server collection by using the following command:
在项目的app /目录中,并使用以下命令查询服务器集合:
db.cars.find().pretty()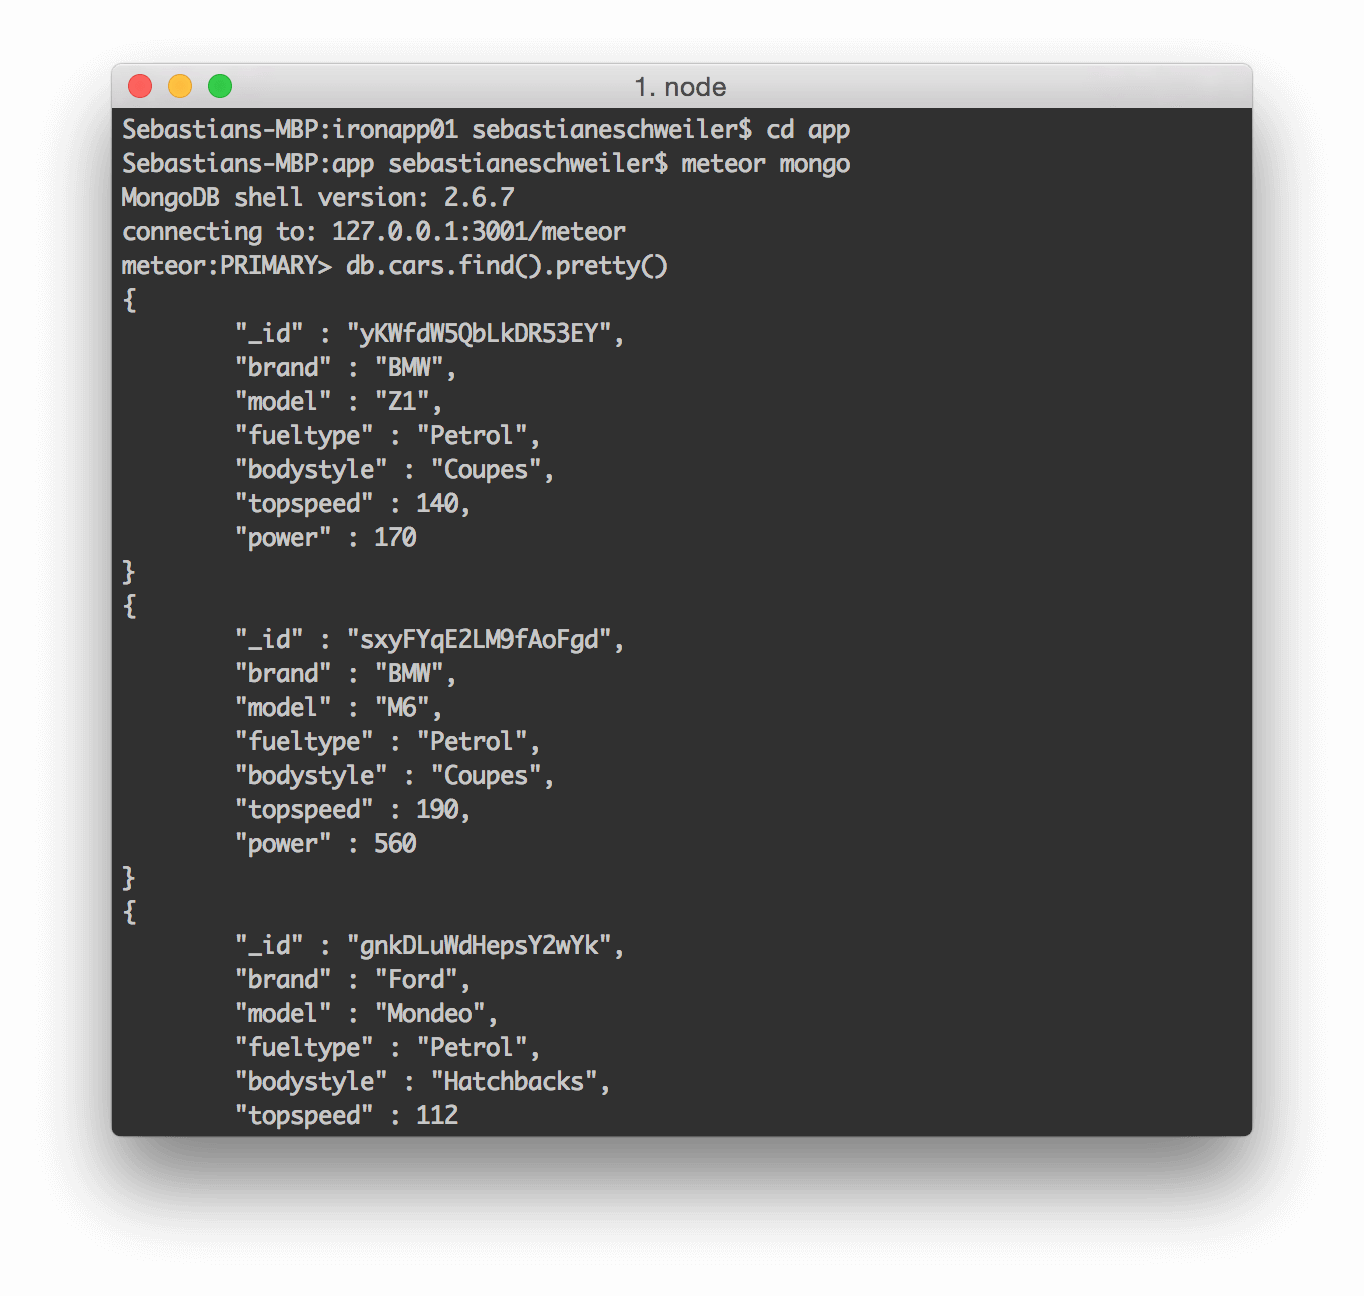
Again, as a result we get a list of all car records. This shows that the content of the client collection is automatically submitted to the server and stored in the MongoDB database correctly.
同样,结果是我们获得了所有汽车记录的列表。 这表明客户端集合的内容会自动提交到服务器,并正确存储在MongoDB数据库中。
更改主版面 (Changing the Master Layout)
So far our application only consists of one site, displaying a form for creating new car records. Before moving on and adding additional functionality (and templates) we’ll change the MasterLayout to contain some Bootstrap elements to display an application menu. The default MasterLayout template is available in app/client/templates/layouts/master_layout/master_layout.html and contains the following code by default:
到目前为止,我们的应用程序仅包含一个站点,显示用于创建新汽车记录的表单。 在继续并添加其他功能(和模板)之前,我们将更改MasterLayout使其包含一些Bootstrap元素以显示应用程序菜单。 默认的MasterLayout模板可在app / client / templates / layouts / master_layout / master_layout.html中找到,并且默认包含以下代码:
<template name="MasterLayout">
  {{> yield}}
</template>
The {{> yield}} inclusion is placed in the template code and a generic element which is replaced by the content of the route-specific template. To make our application look a little bit nicer we add a Bootstrap application menu (responsive) in the header and a footer area at the bottom. Replace the content of master_layout.html with the following template code:
{{> yield}}包含物放置在模板代码中,并由路由特定模板的内容替换了通用元素。 为了使我们的应用程序看起来更好一点,我们在页眉和底部的页脚区域添加了一个Bootstrap应用程序菜单(响应式)。 用以下模板代码替换master_layout.html的内容:
<template name="MasterLayout">
  <nav class="navbar navbar-inverse navbar-fixed-top" role="navigation">
    <div class="container">
      <div class="navbar-header">
        <button type="button" class="navbar-toggle" data-toggle="collapse" data-target="#navigationbar">
          <span class="sr-only">Toggle navigation</span>
          <span class="icon-bar"></span>
          <span class="icon-bar"></span>
          <span class="icon-bar"></span>
        </button>
        <a class="navbar-brand" href="#">Meteor Car Manager</a>
      </div>
      <div class="collapse navbar-collapse" id="navigationbar">
        <ul class="nav navbar-nav navbar-right">
          <li>{{#linkTo route="home"}}Home{{/linkTo}}</li>
          <li>{{#linkTo route="carsList"}}Cars{{/linkTo}}</li>
          <li>{{#linkTo route="createCar"}}Create New Car{{/linkTo}}</li>
        </ul>
      </div>
    </div>
  </nav>
  <div class="container" style="margin-top:40px">
    {{> yield}}
  </div>
  <nav class="navbar navbar-default navbar-fixed-bottom">
    <div class="container">
      <ul class="nav navbar-nav navbar-right">
        <li>Built with Meteor</li>
      </ul>
    </div>
  </nav>
</template>
Looks much better now:
现在看起来好多了:
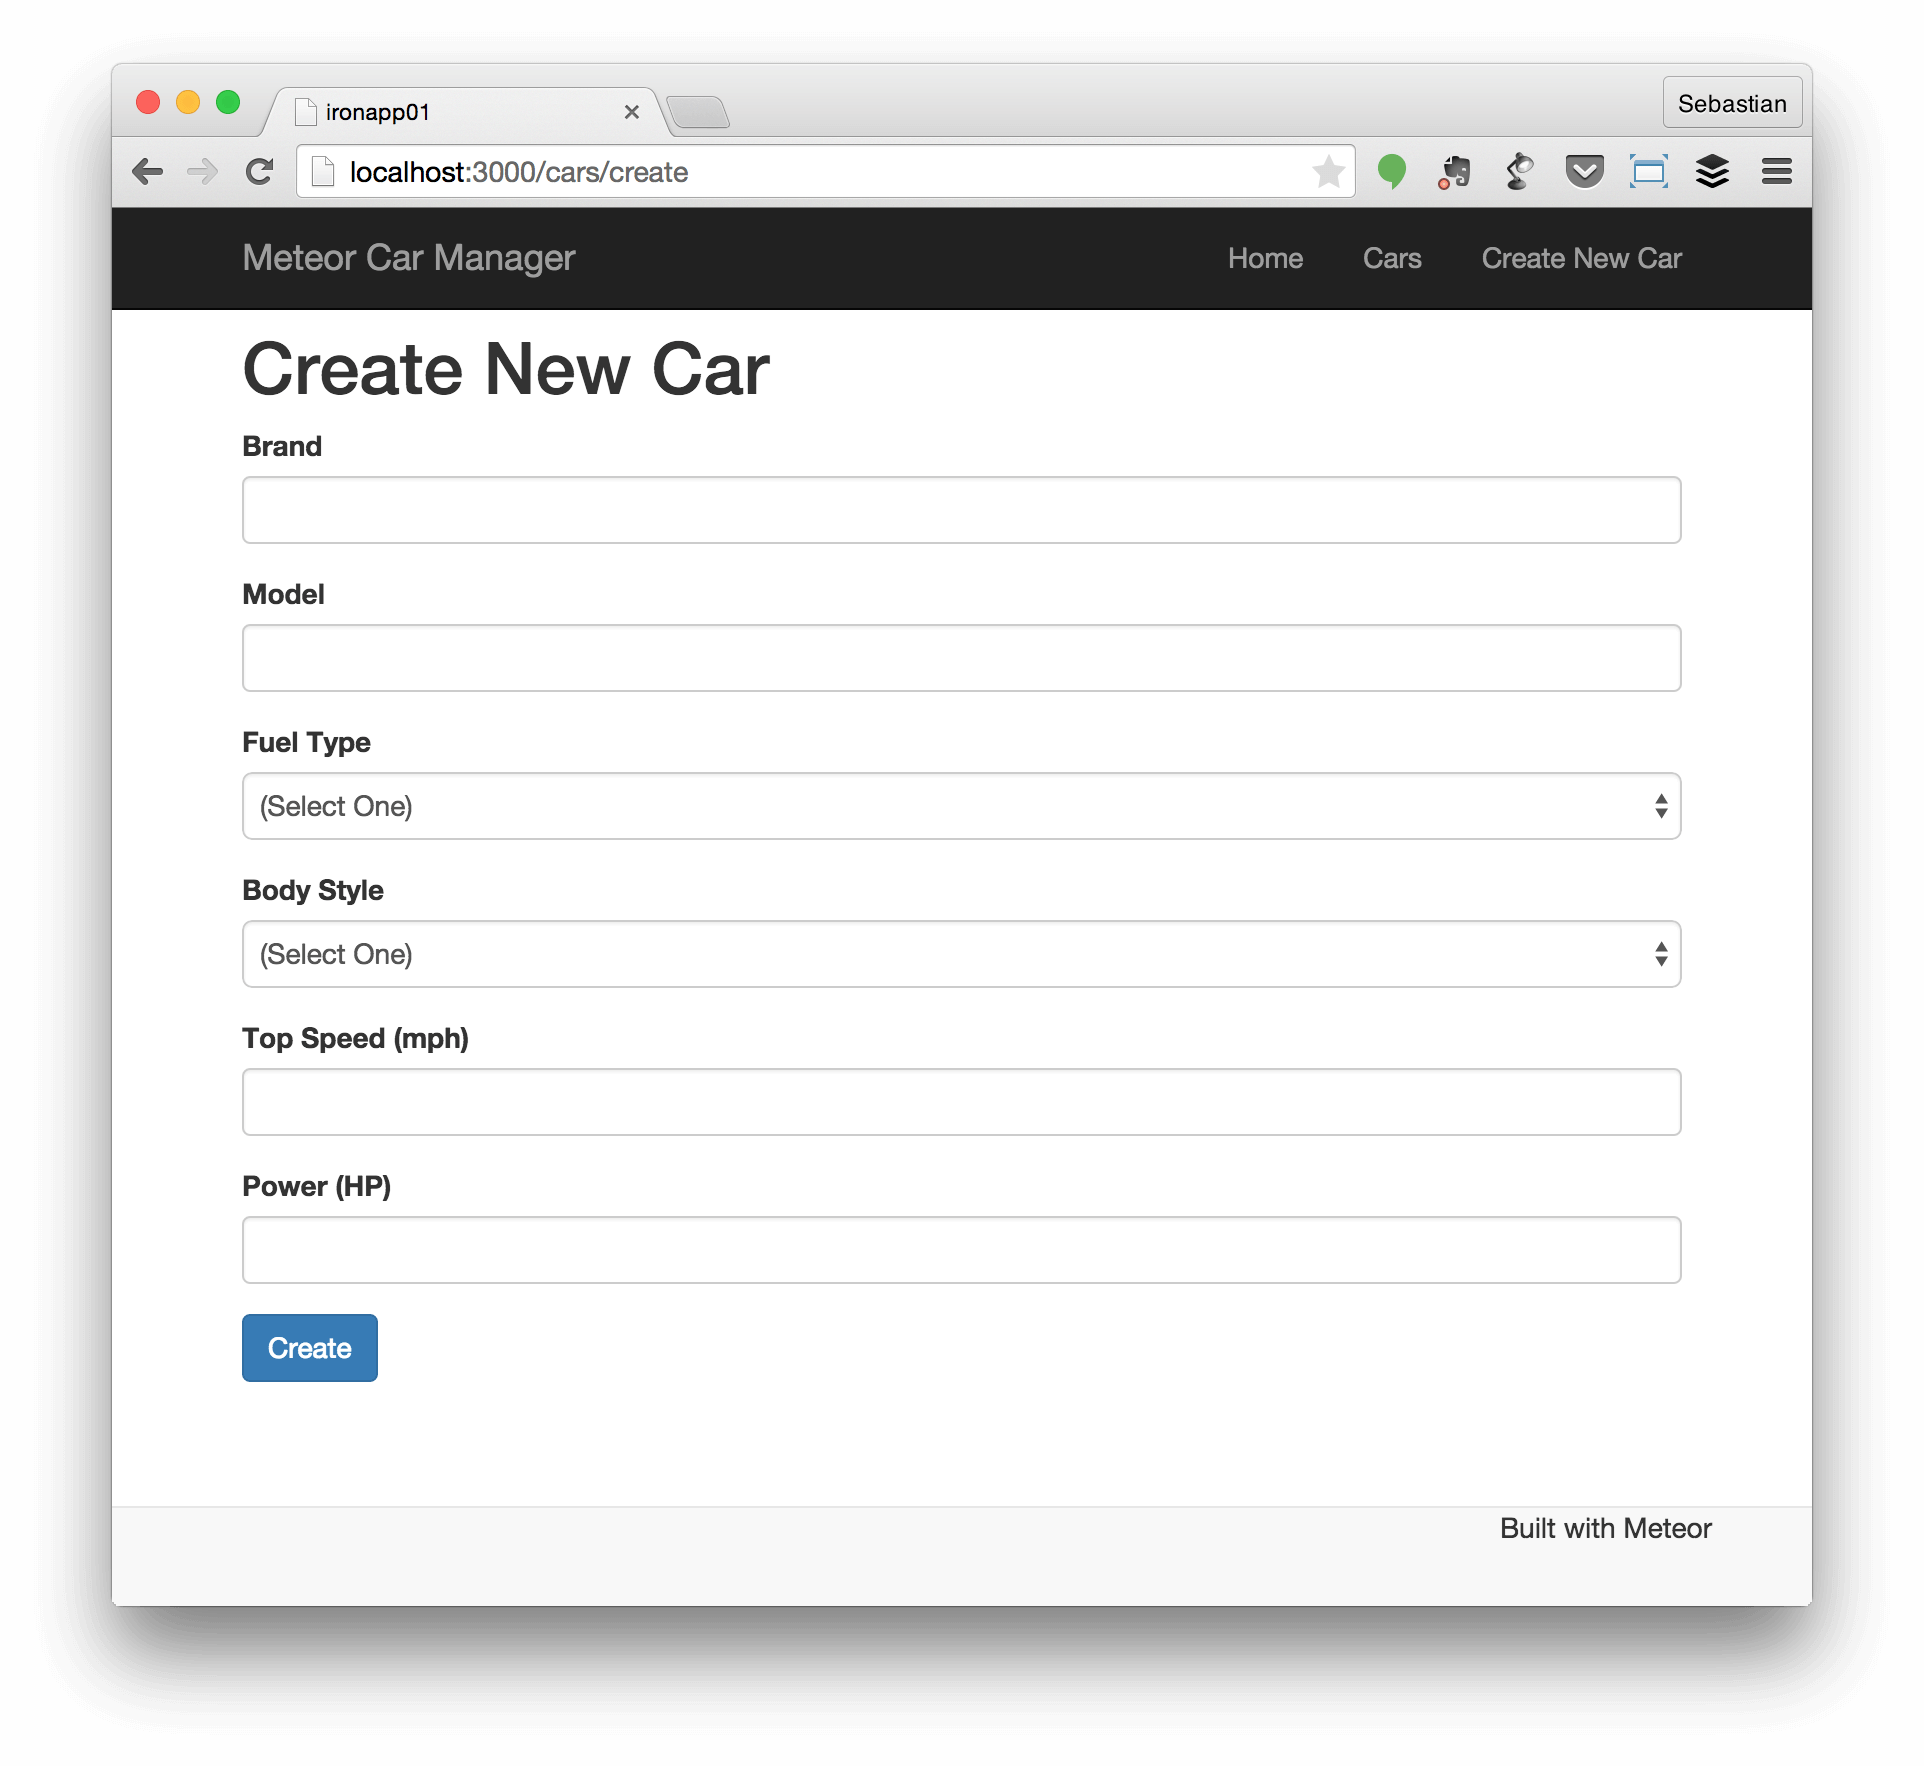
The menu on top contains three links: Home, Cars and Create New Car. The Create New Car link is pointing to the CreateCar template and the Cars link is pointing to the the carsList route which we’ll create later on. To create a link we simply use the {{#linkTo route="[Enter Template Name]"}}[Enter link Text]{/linkTo}} block helper provided by the Iron Router package. The block helper takes the name of the route as parameter and creates an corresponding HTML element in the output.
顶部的菜单包含三个链接: 主页 , 汽车和创建新汽车 。 “ 创建新汽车”链接指向CreateCar模板,“ 汽车”链接指向我们稍后将创建的carsList路线。 要创建链接,我们只需使用Iron Router软件包提供的{{#linkTo route="[Enter Template Name]"}}[Enter link Text]{/linkTo}}块帮助器即可。 块帮助器将路径名称作为参数,并在输出中创建相应HTML元素。
显示汽车清单 (Displaying a List of Cars)
Now, that we have the menu in place we can move on to the next step and create a new template for outputting a list of all cars. Create the template by using scaffolding:
现在,我们有了菜单,可以继续进行下一步,并创建一个新模板以输出所有汽车的列表。 通过使用脚手架创建模板:
iron g:template cars/list_carsNext we add a /cars route in routes.js:
接下来,我们在route.js中添加/ cars路线:
Router.route('/cars', {
  name: 'carsList',
  controller: 'CarsController',
  action: 'list',
  where: 'client'
});
The list action method is not existing in the CarsController so far. Lets create this method to output the rendered version of our ListCars template:
到目前为止, CarsController中还没有list动作方法。 让我们创建此方法来输出ListCars模板的渲染版本:
list: function() {
  this.render('ListCars', {});
}
If you now click on Cars link in the menu the default template is rendered as you can see in the following screenshot:
如果现在单击菜单中的Cars链接,则将呈现默认模板,如以下屏幕截图所示:
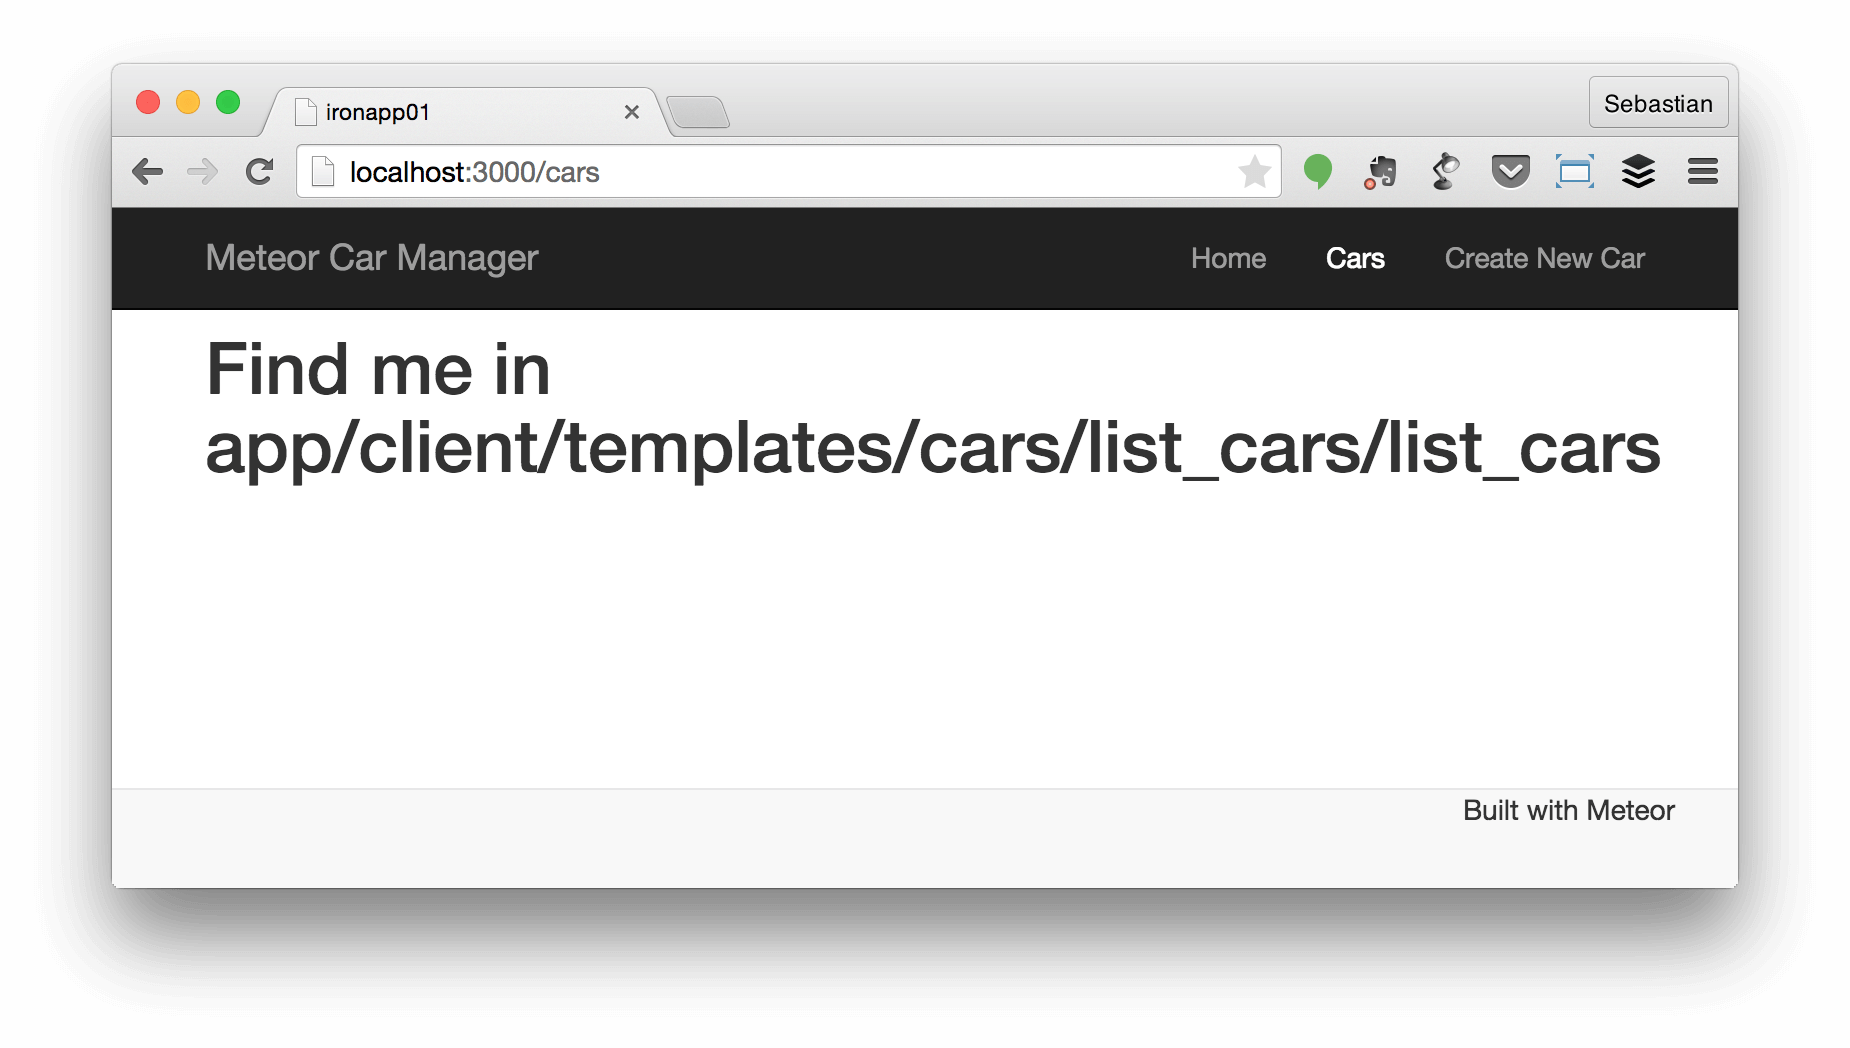
Next we’ll replace the content of list_cars.html with the following code:
接下来,我们将用以下代码替换list_cars.html的内容:
<template name="ListCars">
  <h1>Cars List</h1>
  <table class="table table-hover">
    <thead>
      <tr>
        <th>Brand</th>
        <th>Model</th>
        <th>Fuel Type</th>
        <th>Body Style</th>
        <th>Top Speed</th>
        <th>Power</th>
      </tr>
    </thead>
    <tbody>
      {{#each cars}}
        <tr>
          <td>{{brand}}</td>
          <td>{{model}}</td>
          <td>{{fueltype}}</td>
          <td>{{bodystyle}}</td>
          <td>{{topspeed}}</td>
          <td>{{power}}</td>
        </tr>
      {{/each}}
    </tbody>
  </table>
</template>
That’s the template code which is needed to print out the table of cars. To iterate over all objects in the cars collection a block helper is used: {{#each cars}} ... {{/each}}. The code inside this block helper is rendered for every item in objects cars. But what about cars? This object has not been defined yet, so we need to change that and make the cars object available to the template. Open file list_cars.js and add cars as a Template Helper:
这是打印汽车表格所需的模板代码。 要遍历cars集合中的所有对象,请使用块帮助器: {{#each cars}} ... {{/each}} 。 为对象汽车中的每个项目渲染此块帮助器中的代码。 但是汽车呢? 该对象尚未定义,因此我们需要对其进行更改,并使cars对象可用于模板。 打开文件list_cars.js并将汽车添加为模板帮助器:
Template.ListCars.helpers({
  cars: function() {
    return Cars.find();
  }
});
With that code in place the cars object is available in the template and the {{#each cars}} ... {{/each}} block will be iterating over all objects in cars. To make sure cars is filled with all data records a function is assigned returning the result of Cars.find().
有了这些代码的车对象是模板和可用{{#each cars}} ... {{/each}}块将在迭代在汽车中的所有对象。 为了确保cars充满所有数据记录,分配了一个函数,返回Cars.find()的结果。
Now you should see a table with all car records in the browser by accessing URL http://localhost:3000/cars:
现在,您应该通过访问URL http://localhost:3000/cars在浏览器中看到一个包含所有汽车记录的表:

编辑和删除 (Editing and Deleting)
To complete our line of business web application we need to add editing and delete capabilities finally. Let’s add one more view template to the project:
要完成我们的业务Web应用程序系列,我们最终需要添加编辑和删除功能。 让我们向项目添加另一个视图模板:
iron g:template cars/edit_carThis view will contain an editing form. Again, we’ll use the {{> quickForm ...}} inclusion to generate an editing form on the fly. Insert the following code into file edit_car.html:
该视图将包含一个编辑表单。 同样,我们将使用{{> quickForm ...}}包含来动态生成编辑表单。 将以下代码插入文件edit_car.html中 :
<template name="EditCar">
  <h1>Edit</h1>
  {{> quickForm collection="Cars" doc=this id="editCarForm" type="update" buttonContent="Update"}}
</template>
In this case the parameter type is set to value update. This tells quickForm to generate a editing form for updating existing datasets. To access the EditCar template we also need to configure a new route in file app/lib/routes.js:
在这种情况下,参数类型设置为值更新 。 这告诉quickForm生成用于更新现有数据集的编辑表单。 要访问EditCar模板,我们还需要在app / lib / routes.js文件中配置新路线:
Router.route('/cars/:_id', {
  name: 'editCar',
  controller: 'CarsController',
  action: 'edit',
  where: 'client'
});
In this case the route string /cars/:_id contains a routing parameter named _id. This parameter takes the identifier of a specific car records as part of the URL. With this information available we can set the data context to this single car records in the CarsController:
在这种情况下,路由字符串/ cars /:_ id包含名为_id的路由参数。 此参数将特定汽车记录的标识符作为URL的一部分。 有了这些信息,我们可以在CarsController中将数据上下文设置为该单个汽车记录:
data: function () {
  return Cars.findOne({_id: this.params._id});
}
The _id parameter can be accessed via the this.params object. To retrieve the corresponding car entry from the Cars collection the findOne method is called. The resulting data object is returned and assigned to the data property of the controller. Next the edit function is added to the CarsController as this is the function which was assigned to the action property of the editCar routing configuration:
可以通过this.params对象访问_id参数。 要从Cars集合中检索相应的汽车条目,将调用findOne方法。 返回结果数据对象,并将其分配给控制器的data属性。 接下来,将edit函数添加到CarsController,因为这是分配给editCar路由配置的action属性的函数 :
edit: function() {
  this.render('EditCar', {});
}
With the changes made we are now able to access the new edit form in the browser by pointing to URL http://localhost:3000/cars/[ID]. But how to retrieve the identifier of a specific dataset we must include in the URL? You already learned how to query the Cars collection on server by using the Meteor MongoDB Console:
进行更改后,我们现在可以通过指向URL http://localhost:3000/cars/[ID]来访问浏览器中的新编辑表单。 但是如何检索必须包含在URL中的特定数据集的标识符? 您已经学习了如何使用Meteor MongoDB控制台在服务器上查询Cars集合:
cd app
meteor mongo
db.cars.find().pretty()
The resulting list contains all car records including the _id value:
结果列表包含所有汽车记录,包括_id值:
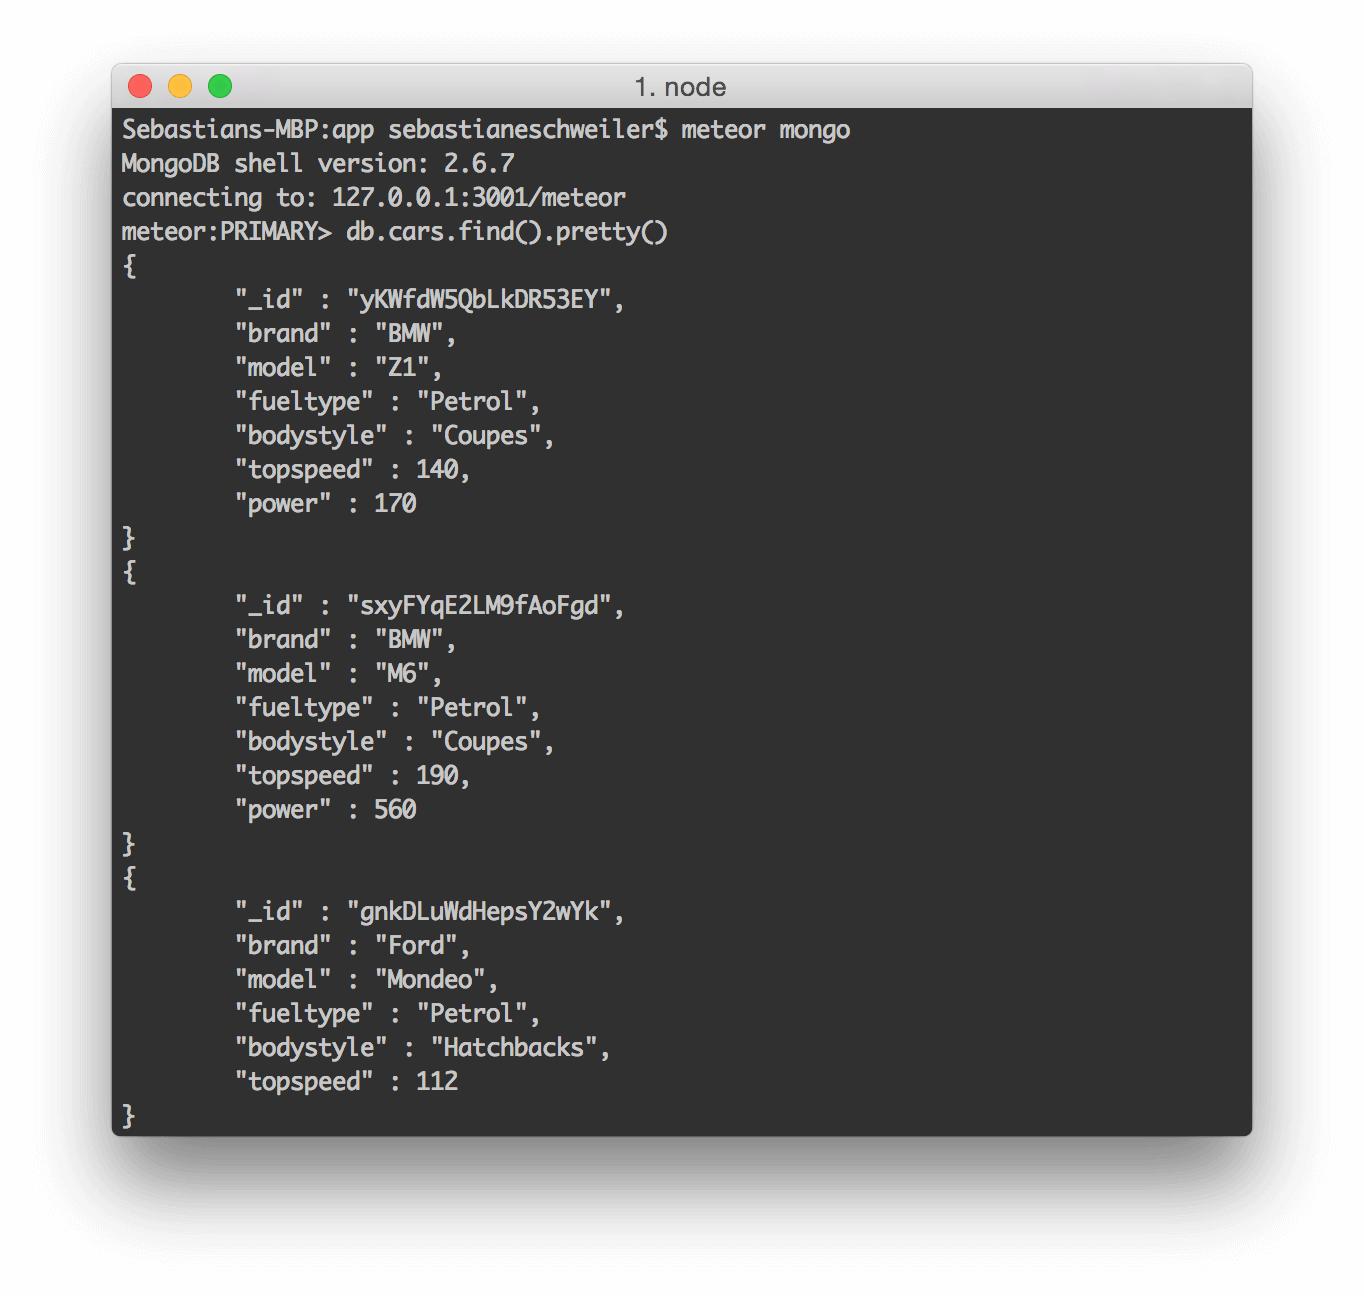
Just copy one single ID and complete the URL in browser. As a result you get the prefilled editing form:
只需复制一个ID,然后在浏览器中完成URL。 结果,您得到了预先填写的编辑表单:
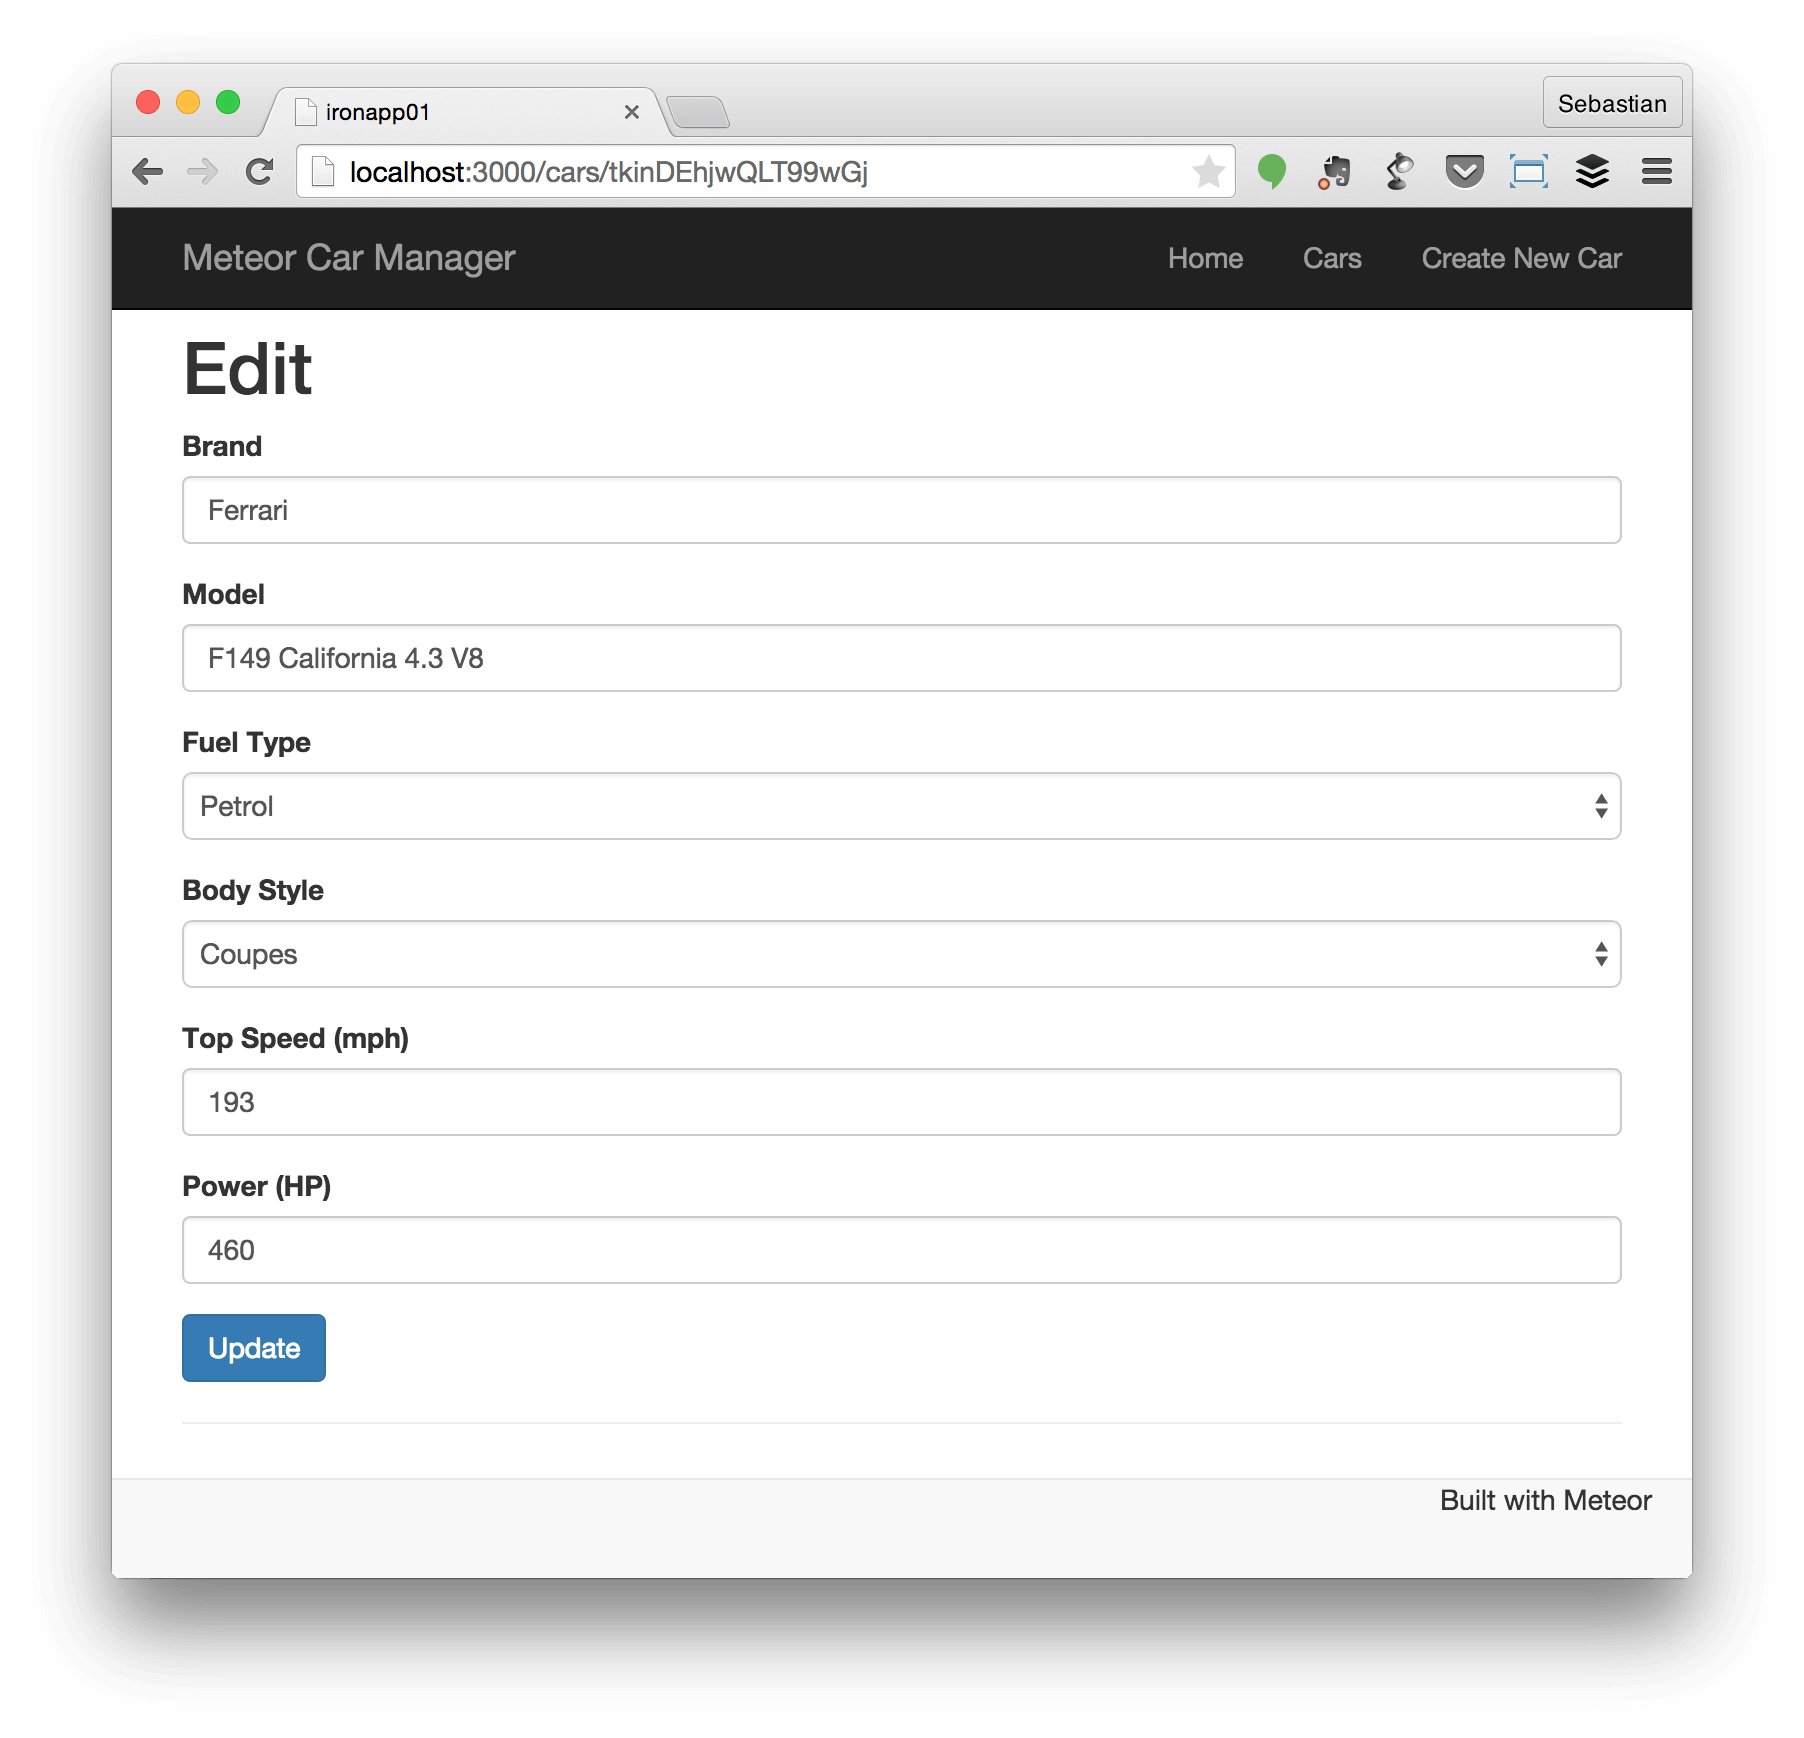
Ok, great so far! But maybe we should make it a little bit easier to access the edit form for a specific record. Let’s add direct links in the ListCars template:
好的,到目前为止很好! 但是也许我们应该使访问特定记录的编辑表单变得容易一些。 让我们在ListCars模板中添加直接链接:
<template name="ListCars">
  <h1>Cars List</h1>
  <table class="table table-hover">
    <thead>
      <tr>
        <th>Brand</th>
        <th>Model</th>
        <th>Fuel Type</th>
        <th>Body Style</th>
        <th>Top Speed</th>
        <th>Power</th>
        <th>Edit</th>
      </tr>
    </thead>
    <tbody>
      {{#each cars}}
        <tr>
          <td>{{brand}}</td>
          <td>{{model}}</td>
          <td>{{fueltype}}</td>
          <td>{{bodystyle}}</td>
          <td>{{topspeed}}</td>
          <td>{{power}}</td>
          <td>{{#linkTo route='editCar'}}<span class="glyphicon glyphicon-edit" aria-hidden="true"></span>{{/linkTo}}</td>
        </tr>
      {{/each}}
    </tbody>
  </table>
</template>
Another column is added to contain a separate link to the edit form for each table row. Again we are using the linkTo block helper. This time linkTo is pointing to the editCar route, so that a valid URL is generated to access the EditCar form template. What is not obvious at first sight, is that the route parameter is set automatically to the current dataset in the generated links. No need to write further code. The result is shown in the following screenshot:
添加了另一列,以包含指向每个表格行的编辑表单的单独链接。 再次,我们使用linkTo阻止助手。 这次linkTo指向editCar路线,因此生成了一个有效的URL来访问EditCar表单模板。 乍一看,不明显的是,将route参数自动设置为生成的链接中的当前数据集。 无需编写其他代码。 结果显示在以下屏幕截图中:

That was really easy, wasn’t it? Last thing to do is to add delete function so that the user is able to delete existing cars from database. In this case the quickForms generator is no option, as no input form is needed. Instead we just want to add an additional button in the EditCars template enabling the user to delete the current dataset. Let’s see what other packages may help us completing that task quickly. A search for „delete button“ on http://atmospherejs.com shows that there is exactly one package which matches our requirements: aldeed:delete-button.
那真的很容易,不是吗? 最后要做的是添加删除功能,以便用户能够从数据库中删除现有汽车。 在这种情况下, quickForms生成器不是选项,因为不需要输入表单。 相反,我们只想在EditCars模板中添加一个附加按钮,使用户可以删除当前数据集。 让我们看看还有哪些其他软件包可以帮助我们快速完成该任务。 在http://atmospherejs.com上搜索“ delete button”(删除按钮),表明完全有一个符合我们要求的软件包: aldeed:delete-button 。
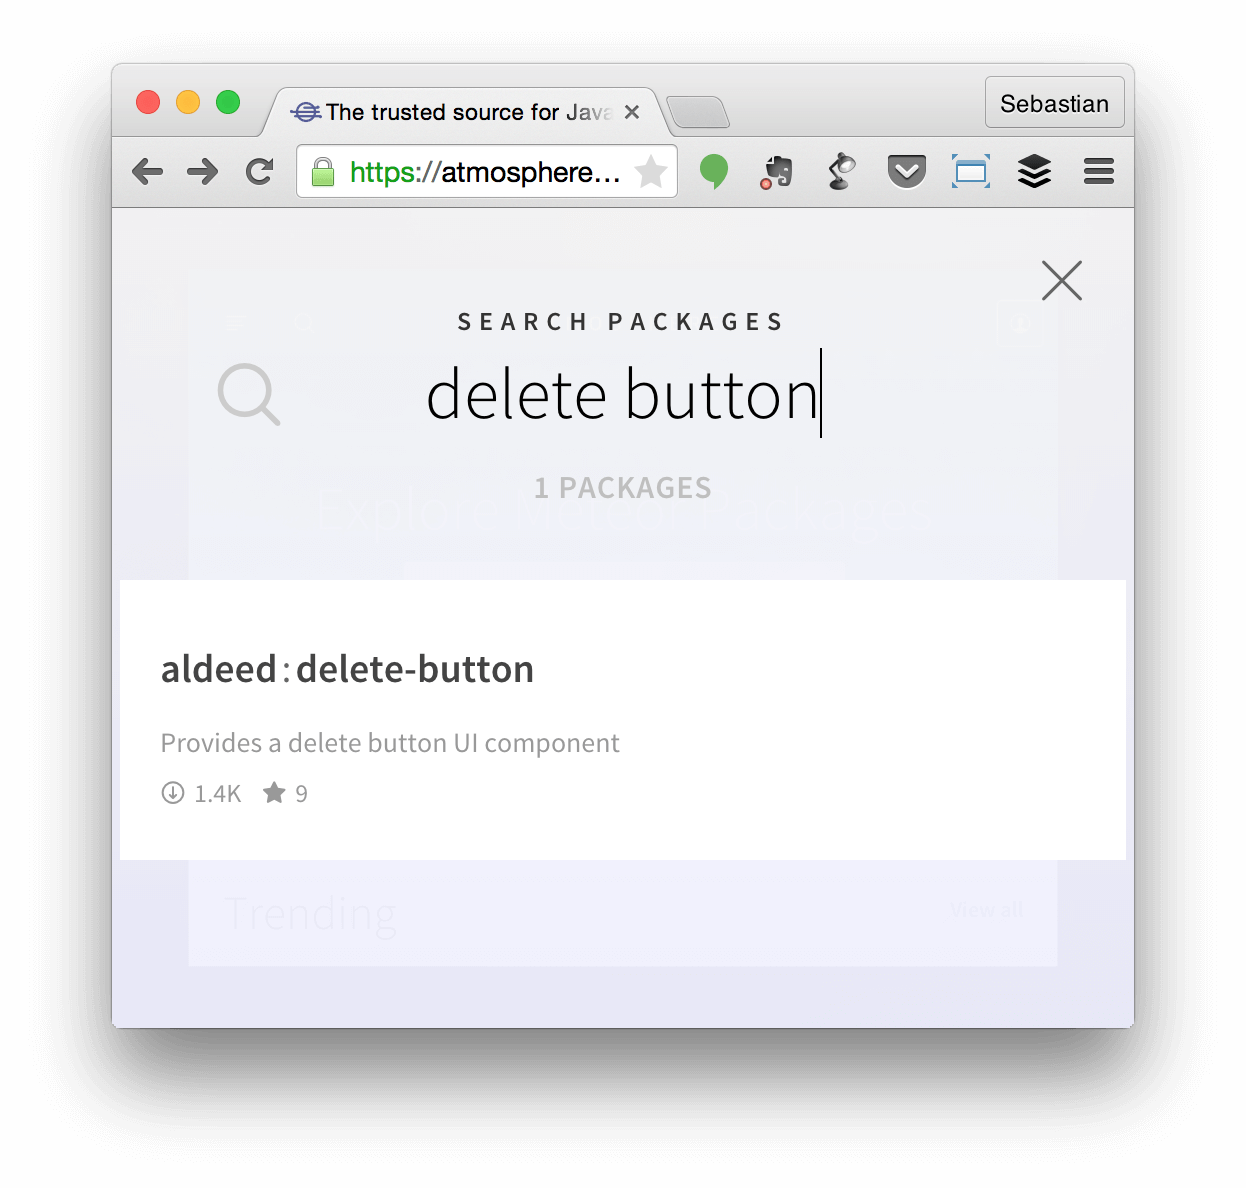
The package is installed by using the following command:
使用以下命令安装软件包:
iron add aldeed:delete-buttonAfter the package is added successfully the new inclusion {{> quickRemoveButton}} becomes available and can be used in the existing EditCar template (edit_car.html):
成功添加软件包后,新的包含物{{> quickRemoveButton}}可用,并且可以在现有的EditCar模板( edit_car.html )中使用:
<template name="EditCar">
  <h1>Edit</h1>
  {{> quickForm collection="Cars" doc=this id="editCarForm" type="update" buttonContent="Update"}}
  <hr>
  {{> quickRemoveButton collection="Cars" _id=this._id beforeRemove=beforeRemove class="btn btn-danger"}}
</template>
As you can see the {{> quickRemoveButton}} inclusions takes four parameters: collection, _id, beforeRemove and class.
如您所见, {{> quickRemoveButton}}包含包含四个参数: collection , _id , beforeRemove和class 。
- collection: The collection for which a delete button should be generated. collection :应该为其生成删除按钮的集合。
- _id: The ID of the dataset which should be deleted by clicking on the button. _id :应通过单击按钮删除的数据集的ID。
- beforeRemove: A function which should be executed everytime a delete operation is executed. beforeRemove :每次执行删除操作时应执行的功能。
- class: CSS classes to be applied. class :要应用CSS类。
The beforeRemove function is added because we want to display a confirm message before the record is deleted. The function is implemented as template helper in edit_car.js:
添加beforeRemove函数是因为我们要在删除记录之前显示确认消息。 该函数在edit_car.js中作为模板帮助器实现:
Template.EditCar.helpers({
  beforeRemove: function () {
    return function (collection, id) {
      var doc = collection.findOne(id);
      if (confirm('Really delete car: "' + doc.brand + " " + doc.model + '"?')) {
      this.remove();
      Router.go('carsList');
    }
  };
 }
});
That’s it. The result can be seen in the following screenshot:
而已。 结果可以在以下屏幕截图中看到:

现场演示 (Live Demo)
源代码 (Source Code)
结论 (Conclusion)
Meteor is a great platform for web and mobile development which is easy to learn and fun to use. With iron scaffolding Meteor developments becomes even more fun. Generating project structures, components and boilerplate code with just one command gives a boost to your development process.
Meteor是用于Web和移动开发的好平台,易于学习且易于使用。 随着铁脚手架流星的发展变得更加有趣。 仅需一个命令即可生成项目结构,组件和样板代码,从而促进了开发过程。
Hopefully this article has given you a good starting point to dive deeper into Meteor scaffolding with iron-cli and helps you to create great realtime, reactive web apps.
希望本文为您提供了一个很好的起点,使您可以更深入地研究具有Iron-cli的Meteor脚手架,并帮助您创建出色的实时,React性Web应用程序。
maven 生成脚手架


 22万+
22万+

 被折叠的 条评论
为什么被折叠?


