


Considering that Microsoft PowerPoint presentations are generally accompanied with tons of images, gifs, embedded videos, charts, graphs, and other content, it’s no surprise that you get some pretty big files. Here are a few steps you can take to reduce a presentation’s file size.
考虑到Microsoft PowerPoint演示文稿通常会附带大量的图像, GIF , 嵌入式视频 , 图表 ,图形和其他内容,因此,您会得到一些非常大的文件也就不足为奇了。 您可以采取一些步骤来减少演示文稿的文件大小。
Large files can be annoying. They take up loads of precious disk space, slow down playback performance, and can cause emails to bounce back due to exceeding the file size limit. You can prevent all of these things by reducing the file size of your presentation.
大文件可能会令人讨厌。 它们占用了宝贵的磁盘空间,降低了播放性能,并可能由于超出文件大小限制而导致电子邮件反弹。 您可以通过减小演示文稿的文件大小来防止所有这些情况。
We’ve mentioned it before, but the first thing you’d think of when considering file size reduction is images—and for a good reason. Image files can be quite large. There are steps you can take to reduce the size, such as compressing the images in the presentation. If you suspect the reason your PowerPoint file is so large is due to images, then be sure to read the article we’ve written on how to reduce the size of Office documents that contain images.
我们之前已经提到过,但是考虑减少文件大小时,您首先想到的是图像,这是有充分理由的。 图像文件可能很大。 您可以采取一些步骤来减小尺寸,例如压缩演示文稿中的图像。 如果您怀疑PowerPoint文件太大的原因是图像,那么请务必阅读我们撰写的有关如何减小包含图像的Office文档大小的文章 。
We do have some additional tips to add if you followed these steps but still need to reduce your presentation’s file size.
如果您按照以下步骤进行操作,我们确实要添加一些其他提示,但仍然需要减小演示文稿的文件大小。
将您的演示文稿转换为PPTX格式 (Convert Your Presentation to the PPTX Format)
Microsoft released the PPTX format in Office 2007. Still, it’s not uncommon to see PPT files floating around. So what’s the difference between a PPT and PPTX file? The PPTX version compresses all of the content within the presentation. If you have a PPT file and convert it into a PPTX file, you’ll notice a decrease in the file size.
微软在Office 2007中发布了PPTX格式。不过,看到PPT文件在周围浮动并不少见。 那么PPT和PPTX文件之间有什么区别 ? PPTX版本压缩演示文稿中的所有内容。 如果您有PPT文件并将其转换为PPTX文件,则会注意到文件大小减小了。
Converting the file is as simple as pressing a button and choosing the file type. Go ahead and open your PPT file, head over to the “File” tab, and then click “Convert.”
转换文件就像按下按钮并选择文件类型一样简单。 继续并打开您的PPT文件,转到“文件”标签,然后单击“转换”。

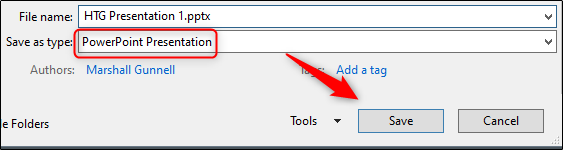
Windows File Explorer will appear. You’ll notice the Save As type is set as “PowerPoint Presentation.” This is the PPTX file type. Click “Save.”
Windows文件资源管理器将出现。 您会注意到“另存为”类型设置为“ PowerPoint演示文稿”。 这是PPTX文件类型。 点击“保存”。
Your PPT file will now be converted to a PPTX file. As you can see, the size of the file has been reduced.
您的PPT文件现在将转换为PPTX文件。 如您所见,文件的大小已减小。
HTG Presentation 2 is our PPT file, and HTG Presentation 3 is our PPTX file. Merely converting the file type reduced the size by 335 KB.
HTG Presentation 2是我们的PPT文件,而HTG Presentation 3是我们的PPTX文件。 仅转换文件类型将大小减小了335 KB。
While this isn’t a breathtaking drop in file size, we managed to reduce a Word document file size from 6,001 KB to 721 KB. It all depends on what’s inside the file. With any luck, this will be the only step you need to take. If not, keep reading.
尽管这并不是文件大小的惊人减少,但我们设法将Word文档文件的大小从6001 KB 减小到721 KB。 这完全取决于文件中的内容。 运气好的话,这将是您唯一需要采取的步骤。 如果没有,继续阅读。
插入图片-请勿复制和粘贴 (Insert Your Pictures—Don’t Copy and Paste)
It’s tempting to copy and paste an image in PowerPoint instead of using the insert function. This won’t be an issue if you’re not concerned about file size, but if you are, then beware of copy and paste—it may reformat your image to BMP or PNG. Why is this an issue? Both of those file formats are larger than JPG.
在PowerPoint中复制和粘贴图像而不是使用插入功能很诱人。 如果您不关心文件大小,那么这将不是问题,但是如果您担心文件大小,则请注意复制和粘贴-它可能会将图像重新格式化为BMP或PNG。 为什么这是一个问题? 这两种文件格式均大于JPG。

You can see in the above screenshot that the PNG file is 153KB compared to the 120KB JPG file of the same image. Each time you copy and paste a JPG file to PowerPoint, and it gets converted to PNG, you’re adding a bit of unnecessary file size to the presentation. Using the insert function will ensure your images are inserted as intended.
您可以在上面的屏幕截图中看到,与同一图像的120KB JPG文件相比,PNG文件为153KB。 每次将JPG文件复制并粘贴到PowerPoint,然后将其转换为PNG时,都会在演示文稿中添加一些不必要的文件大小。 使用插入功能将确保图像按预期插入。
在图像编辑器中进行图像编辑,而不是在PowerPoint中 (Do Image Edits in an Image Editor—Not in PowerPoint)
When you insert an image in PowerPoint, it’s best to make sure that it doesn’t need any edits. If it does require edits, you’re better off doing it in an image editor. Why? When you use PowerPoint to edit your image, it stores all of those edits as part of the presentation. For example, when you change an image to black and white, PowerPoint retains the full-color image as well. That’s a lot of extra bites being stored.
在PowerPoint中插入图像时,最好确保它不需要任何编辑。 如果确实需要编辑,则最好在图像编辑器中进行。 为什么? 当您使用PowerPoint编辑图像时,它将所有这些编辑存储为演示文稿的一部分。 例如,当您将图像更改为黑白时,PowerPoint也会保留全彩色图像。 存储了很多额外的东西。
If you don’t have an image editor (you do) or you simply must use PowerPoint, be sure to tell PowerPoint to discard all of that excess data saved from the edits. It won’t save you as much space as working in a dedicated editor, but it will help.
如果您没有图像编辑器( 您有 ),或者只是必须使用PowerPoint,请确保告诉PowerPoint 丢弃从编辑中保存的所有多余数据 。 它不会像在专用编辑器中那样为您节省太多空间,但会有所帮助。
压缩演示文稿中的所有图像 (Compress All of the Images in Your Presentation)
You can compress images in PowerPoint one at a time or all at once. If you’re looking to do the latter, here’s how.
您可以一次或一次全部压缩PowerPoint中的图像。 如果您要进行后者,请按以下步骤操作。
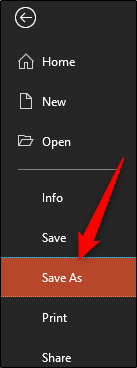
Open your presentation, head over to the “File” tab, and then select “Save As” in the left-hand pane.
打开演示文稿,转到“文件”选项卡,然后在左侧窗格中选择“另存为”。
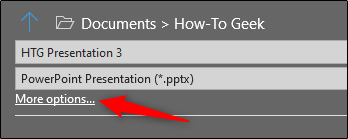
Next, select “More Options,” which you’ll find under the area where you would name your file and choose the file type.
接下来,选择“更多选项”,它将在您将为文件命名的区域下找到并选择文件类型。
The “Save As” window will appear—this time with a few extra options available to you. Next to the “Save” button, click “Tools.”
此时将显示“另存为”窗口,这一次您可以使用一些其他选项。 在“保存”按钮旁边,单击“工具”。

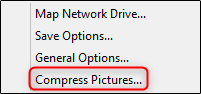
In the drop-down menu that appears, select “Compress Pictures.”
在出现的下拉菜单中,选择“压缩图片”。
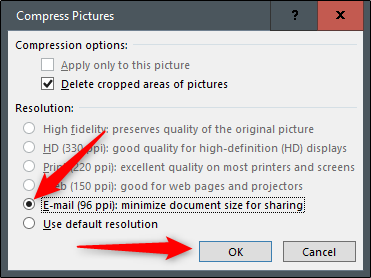
The “Compress Pictures” window will appear. Here, you can choose the resolution type of the images (based on PPI) in the presentation. You’ll also notice that you’re not able to select the “Apply only to this picture” option in the “Compression Options” group. That’s because, due to the way we accessed this tool, this option isn’t available.
出现“压缩图片”窗口。 在这里,您可以选择演示文稿中图像的分辨率类型(基于PPI)。 您还会注意到,您无法在“压缩选项”组中选择“仅应用于此图片”选项。 这是因为,由于我们访问此工具的方式,该选项不可用。
Note: If you do want to compress a single picture, select it and then head to Picture Tools Format > Compress Pictures.
注意:如果确实要压缩单个图片,请选择它,然后转到“图片工具格式”>“压缩图片”。
Once you’re happy with your selection, click “OK.”
对选择满意后,请单击“确定”。
Be sure to save your presentation afterward.
请确保以后保存您的演示文稿。
不要使用嵌入式字体 (Don’t Use Embedded Fonts)
We get why you might want to embed fonts—you might be making a Star Wars themed presentation and, as a result, anyone you may be sharing the presentation with is not likely to have those special fonts available to them. Embedding the fonts in your presentation could prevent issues down the line, but it comes at the cost of increased file sizes.
我们了解了为什么要嵌入字体的原因-您可能正在制作以《星球大战》为主题的演示文稿 ,因此,与您共享演示文稿的任何人都不太可能使用这些特殊字体。 在演示文稿中嵌入字体可以防止出现问题,但这是以增加文件大小为代价的。
In general, unless you are sure you need to display a particular font, we recommend turning off font embedding.
通常,除非您确定需要显示特定字体,否则建议您关闭字体嵌入。
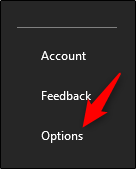
Head over to the “File” tab and select “Options” at the bottom of the left-hand pane.
转到“文件”选项卡,然后在左侧窗格的底部选择“选项”。
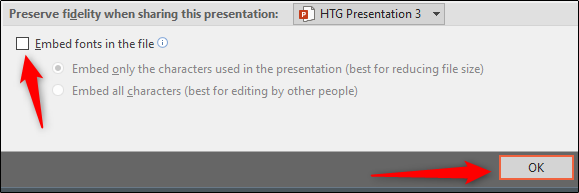
On the “Save” tab, untick the “Embed fonts in the file” checkbox and then click “OK.”
在“保存”选项卡上,取消选中“在文件中嵌入字体”复选框,然后单击“确定”。
We saved a copy of our presentation with all fonts embedded, without fonts embedded, and with only the fonts used in the presentation embedded. Look at the difference if file sizes:
我们保存了演示文稿的副本,其中嵌入了所有字体,没有嵌入字体,并且仅嵌入了演示文稿中使用的字体。 查看文件大小之间的差异:

Convinced yet?
说服了吗?
链接到文件而不是嵌入文件 (Link to Files Instead of Embedding Them)
Consider the difference in file size if you embed an entire YouTube video in your presentation instead of linking back to it. Embedding an entire video will significantly increase the size of your presentation. There are certainly some valuable benefits when embedding a file vs. linking to it (such as when the recipient might not have internet access to play the video), but if the file size is an issue, just don’t do it.
如果您在演示文稿中嵌入整个YouTube视频而不是链接回它,请考虑文件大小的差异。 嵌入整个视频将大大增加演示文稿的大小。 嵌入文件与链接文件相比,肯定有一些有价值的好处(例如,当收件人可能没有互联网访问权限来播放视频时),但是如果文件大小有问题,那就不要这样做。
不要为演示存储缩略图 (Don’t Store a Thumbnail for the Presentation)
Way back when Office let you save thumbnail images of your presentation so that you could get a sneak preview of the file when searching for it in File Explorer. Windows has grown to be more sophisticated, so it no longer requires the help of Office applications to do this. But, the option is still available.
Office允许您保存演示文稿的缩略图的方式可以追溯到过去,以便在“文件资源管理器”中搜索文件时可以预览该文件。 Windows已经变得越来越复杂,因此它不再需要Office应用程序的帮助。 但是,该选项仍然可用。
We ran a little test to see the difference in file size with and without this option enabled. Here are the results:
我们进行了一些测试,以查看启用和未启用此选项时文件大小的差异。 结果如下:
With the thumbnail option enabled, our file size was 2,660 KB. Without the option enabled, the file size was reduced to 2,662 KB, saving a total of 7 KB.
启用缩略图选项后,我们的文件大小为2,660 KB。 如果未启用该选项,文件大小将减少为2662 KB,总共节省7 KB。
This is a pretty small save, but when we tested it with a Word document, the difference was significant, showing 721 KB without the option enabled, and 3,247 KB with the option enabled.
这是一个很小的节省,但是当我们使用Word文档对其进行测试时,差异非常明显:未启用选项时显示为721 KB,而启用选项时显示为3,247 KB。
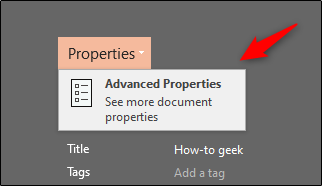
While this is a large gap between applications and it’s not exactly clear why the difference is so large, it’s still an option worth exploring. To disable the feature, open your presentation, head over to the “File” tab, and then select “Properties” found on the right-hand side, then “Advanced Properties.”
尽管这在应用程序之间存在很大的差距,并且尚不清楚为什么差异如此之大,但仍然值得探讨。 要禁用此功能,请打开演示文稿,转到“文件”选项卡,然后选择右侧的“属性”,然后选择“高级属性”。
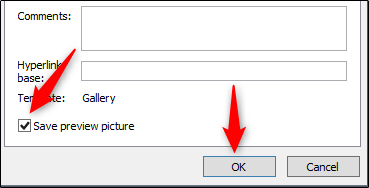
You’ll now be in the “Summary” tab of the “Properties” window. At the bottom of the window, uncheck the box next to “Save preview picture,” and then click “OK.”
您现在将位于“属性”窗口的“摘要”选项卡中。 在窗口底部,取消选中“保存预览图片”旁边的框,然后单击“确定”。
从演示文稿中删除个人信息和隐藏信息 (Remove Personal and Hidden Information from Your Presentation)
Microsoft Office will store your personal information (such as author name) and hidden properties within your presentation. Getting rid of this information can save you a bit of space.
Microsoft Office将在您的演示文稿中存储您的个人信息(例如作者姓名)和隐藏的属性。 摆脱这些信息可以为您节省一些空间。
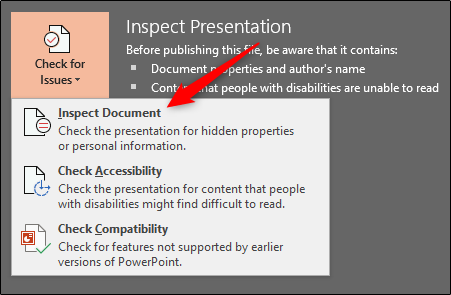
Open your presentation, head over to the “File” tab, select the “Check for Issues” option, then select “Inspect Document.”
打开演示文稿,转到“文件”选项卡,选择“检查问题”选项,然后选择“检查文档”。
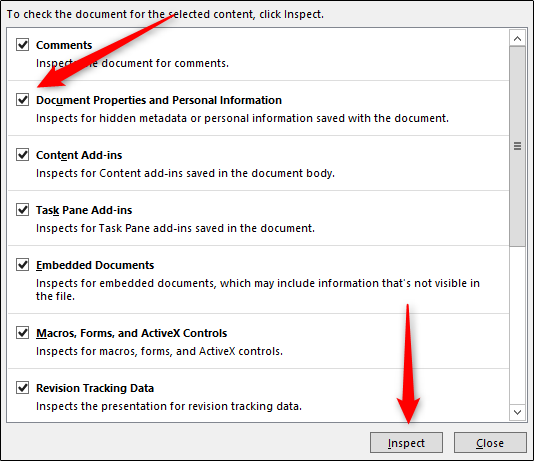
The “Document Inspector” window will appear. Make sure the “Document Properties and Personal Information” box is checked, and then click “Inspect.”
出现“文档检查器”窗口。 确保选中“文档属性和个人信息”框,然后单击“检查”。
In the next window, select “Remove All.” The information will now be removed, saving you a few KB of space.
在下一个窗口中,选择“全部删除”。 现在将删除该信息,为您节省了几KB的空间。
关闭自动恢复 (Turn Off AutoRecover)
We don’t necessarily recommend this, and it should only be used as a last resort effort. AutoRecover is an essential tool in Office, and if you’ve ever lost a document before saving, then you understand precisely what we mean.
我们不一定推荐这样做,它仅应作为最后的努力。 自动恢复是Office中必不可少的工具,如果您在保存之前曾经丢失过文档,那么您将确切地理解我们的意思。
Each time Office uses AutoRecover, it adds a little to the size of the file. To turn AutoRecover off, head over to the “File” tab and select “Options” found at the bottom of the left-hand pane.
Office每次使用AutoRecover时,都会增加文件大小。 要关闭自动恢复功能,请转到“文件”选项卡,然后选择左侧窗格底部的“选项”。
In the “Save” tab of the “Options” window, uncheck the box next to “Save AutoRecover information ever xx minutes.”
在“选项”窗口的“保存”标签中,取消选中“每隔XX分钟保存一次自动恢复信息”旁边的框。

If you save and exit out of the presentation immediately, you won’t notice a difference. Over time though, as you continue to progress through the presentation, the AutoRecover feature will add KB to your file.
如果您保存并立即退出演示文稿,则不会发现任何差异。 但是,随着时间的流逝,随着您继续进行演示,自动恢复功能将在您的文件中添加KB。
将所有内容复制到新的演示文稿中 (Copy Everything Into a New Presentation)
While you’re creating your presentation, PowerPoint will save various things in the background to help you out. We’ve mentioned how to turn off a lot of these features, delete data PowerPoint saves, and so on, but there’s always a chance something slipped through the cracks, and PowerPoint stored some information you don’t need. Copying your content over to a new presentation may be a good solution to the problem.
在创建演示文稿时,PowerPoint将在后台保存各种内容以帮助您。 我们已经提到了如何关闭许多这些功能,删除PowerPoint保存的数据等等,但是总是有可能出现一些漏洞,PowerPoint会存储一些您不需要的信息。 将您的内容复制到新的演示文稿中可能是解决此问题的好方法。
This may be a bit of a hassle though as, with PowerPoint, you’ll need to copy and paste each slide (and master slides). Once you do though, the new presentation won’t have any of the previous background saves, AutoRecover information, or previous versions of the file. As a result, you should see a change in file size.
不过,这可能有点麻烦,因为使用PowerPoint,您需要复制并粘贴每张幻灯片(和主幻灯片)。 不过,一旦完成,新的演示文稿将不会具有以前的任何后台保存,自动恢复信息或文件的先前版本。 结果,您应该会看到文件大小的变化。
While we can’t tell you exactly how much this will reduce your file size since each presentation will be different, it’s worth a shot.
由于每个演示文稿都不同,虽然我们不能确切告诉您这将减少多少文件大小,但是值得一试。
可能:解压缩演示文稿并压缩 (A Possibility: Unzip the Presentation and Compress It)
As we mentioned earlier, a PPTX file is a compressed file (which is why the size is much smaller than an old-school PPT file). This means you can open it with a tool such as 7-Zip or WinRar, extract all the files from your PPTX, add them to a compressed archive, and then rename the archive to a PPTX file extension.
正如我们前面提到的,PPTX文件是压缩文件(这就是为什么其大小比老式PPT文件小得多的原因)。 这意味着您可以使用7-Zip或WinRar之类的工具将其打开,从PPTX中提取所有文件,将它们添加到压缩存档中,然后将存档重命名为PPTX文件扩展名。
We had some issues here, though.
不过,我们在这里遇到了一些问题。
In Rob’s testing with his Word document, it successfully reduced the size of the file from 721 KB to 72 KB. However, it corrupted the file in the process. In my testing with my 2,614 KB file, it didn’t corrupt it, but it only reduced it to 2,594KB—a total of only 20 KB. We’re unsure what’s at play here, so if you want to give this a go, be sure to have a backup copy of your file before doing so.
在Rob的Word文档测试中,它成功地将文件大小从721 KB减小到72 KB。 但是,它在此过程中损坏了文件。 在使用我的2,614 KB文件进行测试时,它没有损坏,但仅将其减少到2,594KB,总共只有20 KB。 我们不确定这里发生了什么,因此,如果您想尝试一下,请确保在备份之前拥有文件的备份副本。
That’s all the tips we’ve got for reducing the size of your PowerPoint presentation. We’re always looking for new and interesting ways to reduce the size of our files, so if you have any tips, let us know in the comment section, and we’ll be happy to test them out!
这就是我们减少PowerPoint演示文稿大小的所有提示。 我们一直在寻找减少文件大小的新颖有趣的方法,因此,如果您有任何提示,请在评论部分告诉我们,我们将很乐意对其进行测试!
翻译自: https://www.howtogeek.com/424648/how-to-reduce-the-file-size-of-a-powerpoint-presentation/


 被折叠的 条评论
为什么被折叠?
被折叠的 条评论
为什么被折叠?
 到【灌水乐园】发言


