


 macOS Sierra新增iCloud桌面和文档同步功能,允许用户在不同设备间轻松共享文件。只需确保Mac上的iCloud桌面和文档同步已开启,并且所有Apple设备都连接到同一个iCloud帐户。

mac icloud 桌面
Over time, your Mac has inevitably amassed a lot of files in the Desktop and Documents folders. If you have more than one Mac, you can now share them easily over iCloud, and you can also access these files anywhere, on any device.
随着时间的流逝,您的Mac不可避免地会积累大量“桌面”和“文档”文件夹中的文件。 如果您拥有多个Mac,则现在可以通过iCloud轻松共享它们,并且还可以在任何设备上的任何位置访问这些文件。
The iCloud Desktop and Documents feature is new to macOS Sierra, and it’s one that promises to make a lot of people’s lives easier, provided your Apple devices are all connected to the same iCloud account.
iCloud桌面和文档功能是macOS Sierra的新增功能,如果您的Apple设备都连接到同一个iCloud帐户,则该功能有望使很多人的生活更加轻松。
Now, instead of moving your Documents to some other cloud-based folder or service, macOS will simply do it for you. Better still, you can have a universal Desktop as well, so no matter what Mac you’re using, you have the same files on your desktop.
现在,macOS无需为将文档移至其他基于云的文件夹或服务而已,而是会为您轻松完成此操作。 更妙的是,您也可以拥有通用桌面,因此,无论使用哪种Mac,桌面上的文件都相同。
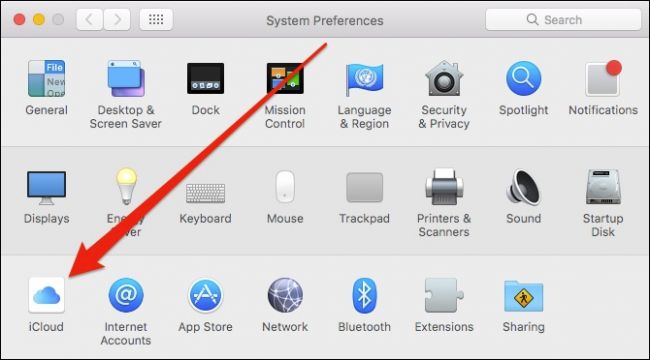
The first thing you will need to do is make sure iCloud Desktop and Document syncing is turned on for your Mac. First, open the System Preferences and click “iCloud”.
您需要做的第一件事是确保Mac上的iCloud桌面和文档同步已打开。 首先,打开系统偏好设置,然后单击“ iCloud”。
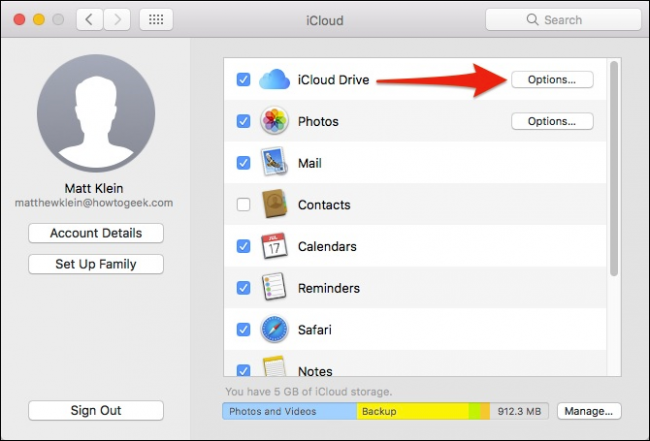
Now, in the iCloud preferences, tap on “Options” next to iCloud Drive.
现在,在iCloud首选项中,点击iCloud Drive旁边的“选项”。
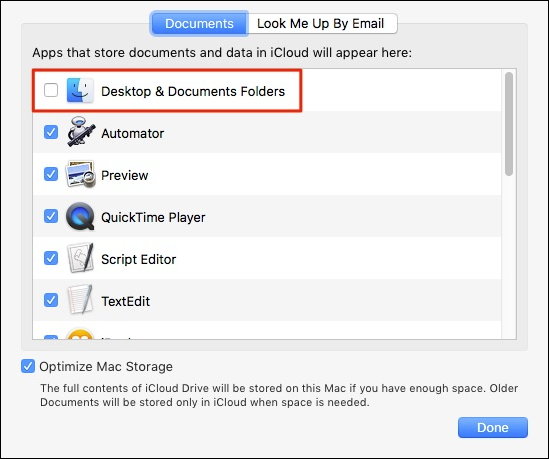
Under the Documents tab, enable Desktop & Documents Folders.
在“文档”选项卡下,启用“桌面和文档文件夹”。
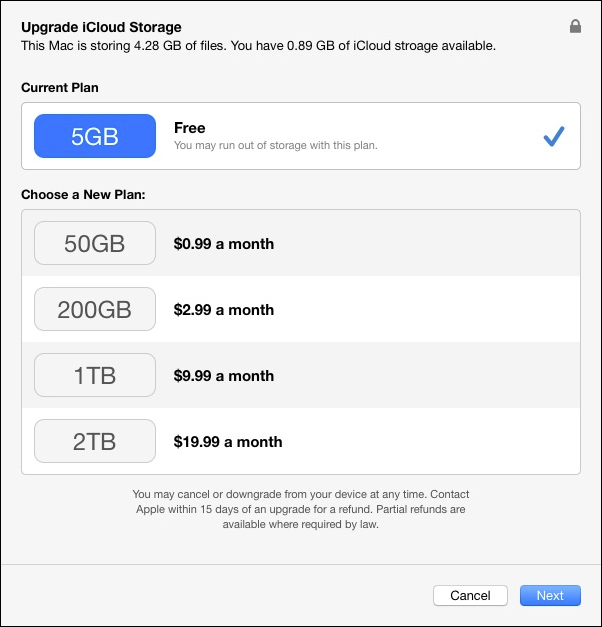
If you are running low on iCloud storage, you may be prompted to upgrade. The amount of storage you need will depend on what you’re keeping in your Documents and Desktop folders. If you want to avoid upgrading beyond the lowest storage tier (50 GB), then you may want to go through and move or delete some of your larger files and folders.
如果iCloud存储空间不足,则可能会提示您升级。 您需要的存储量将取决于您在“文档”和“桌面”文件夹中保留的内容。 如果要避免升级到最低存储层(50 GB)以上,则可能需要遍历并移动或删除一些较大的文件和文件夹。
After you’ve enabled iCloud document storage, your Mac will begin uploading your files. This may take anywhere from a few minutes to a few hours depending on the number of files you have and the speed of your connection.
启用iCloud文档存储后,Mac将开始上传文件。 这可能需要几分钟到几小时的时间,具体取决于您拥有的文件数和连接速度 。
One quick note: if you find that syncing isn’t working, or that the option won’t stay enabled in the iCloud settings, then the problem may be that your Documents folder isn’t located in your user folder. This typically happens if you moved your Documents folder to another location, such as another cloud-based folder. In order for iCloud Documents and Desktop to work properly, these folders must reside in their default locations, which is the root of your user folder.
快速说明:如果您发现同步不起作用,或者该选项在iCloud设置中没有保持启用状态,则可能是您的Documents文件夹不在您的用户文件夹中。 如果将“文档”文件夹移动到另一个位置 ,例如另一个基于云的文件夹,通常会发生这种情况。 为了使iCloud Documents和Desktop正常工作,这些文件夹必须位于其默认位置,这是用户文件夹的根目录。
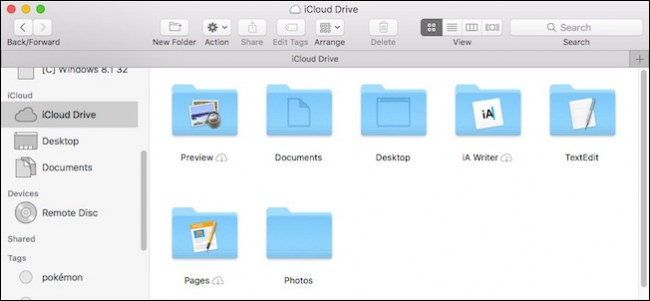
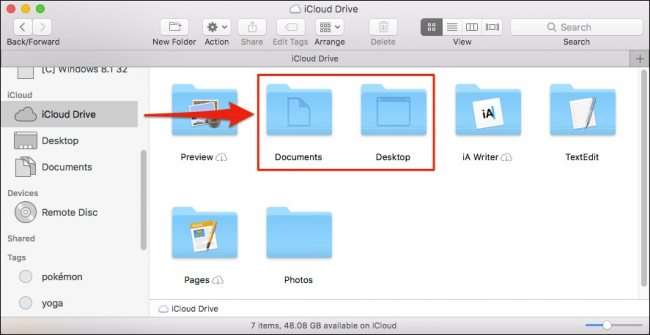
Assuming you’re good to go, you can open your iCloud Drive folder on your other Mac and see the results.
假设一切顺利,您可以在其他Mac上打开iCloud Drive文件夹并查看结果。
Once everything has uploaded and your iCloud Drive is synced, you can also access your files from any device, regardless of whether it’s using Windows, Android, iOS, or any other operating system.
上载所有内容并同步iCloud Drive后,无论使用Windows,Android,iOS还是任何其他操作系统,您都可以从任何设备访问文件。
从iOS访问桌面和文档 (Accessing Your Desktop and Documents from iOS)
Accessing your desktop and documents files from any iOS device is as simple as tapping open the iCloud Drive app.
从任何iOS设备访问您的桌面和文档文件就像轻按打开iCloud Drive应用一样简单。
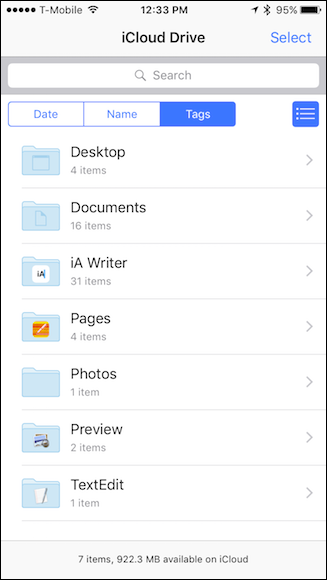
Just make sure that your iOS device is logged into the same iCloud account as your Mac.
只要确保您的iOS设备已登录到与Mac相同的iCloud帐户即可。
从任何Web浏览器访问您的桌面和文档 (Accessing Your Desktop and Documents from Any Web Browser)
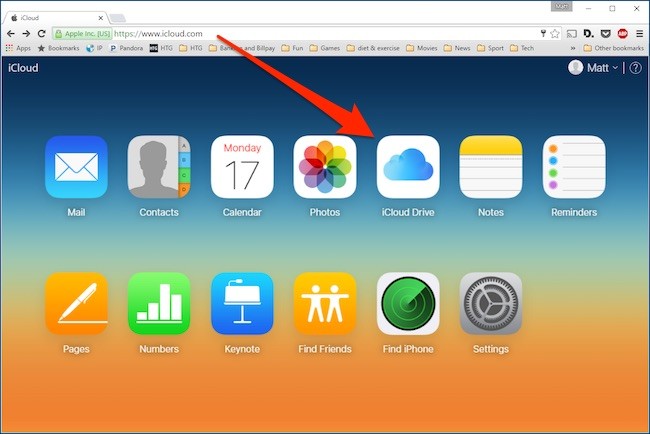
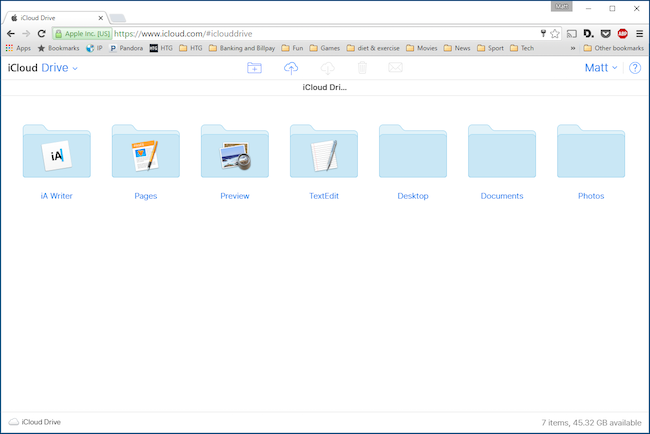
You can access your iCloud Desktop and Documents from any web browser, too. Just go to icloud.com and log into your iCloud account.
您也可以从任何Web浏览器访问iCloud桌面和文档。 只需转到icloud.com并登录到您的iCloud帐户即可。
Once you’re logged in, click open “iCloud Drive”.
登录后,单击打开的“ iCloud Drive”。
In your iCloud Drive, you can now access anything stored in iCloud including your Desktop and Documents folders.
现在,在iCloud驱动器中,您可以访问iCloud中存储的任何内容,包括“桌面”和“文档”文件夹。
Keep in mind, this will work regardless of the device and operating system, provided you can log into your iCloud account from the web browser.
请记住,只要您可以从Web浏览器登录到iCloud帐户,无论设备和操作系统如何,它都可以工作。
从Windows访问您的桌面和文档 (Accessing Your Desktop and Documents from Windows)
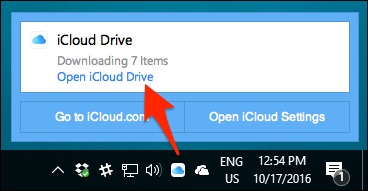
For those folks who work on both Windows and Mac, and who want to share Desktop and Documents files easily between the two systems, you can use the iCloud application on Windows. When installed, you can click on the iCloud icon on the taskbar and then “Open iCloud Drive”.
对于同时使用Windows和Mac并希望在两个系统之间轻松共享桌面和文档文件的人们,可以在Windows上使用iCloud应用程序 。 安装后,您可以单击任务栏上的iCloud图标,然后单击“打开iCloud驱动器”。
File Explorer will then open up to your iCloud folder. You can also access it from the Quick Access menu.
然后,文件资源管理器将打开您的iCloud文件夹。 您也可以从“快速访问”菜单访问它。
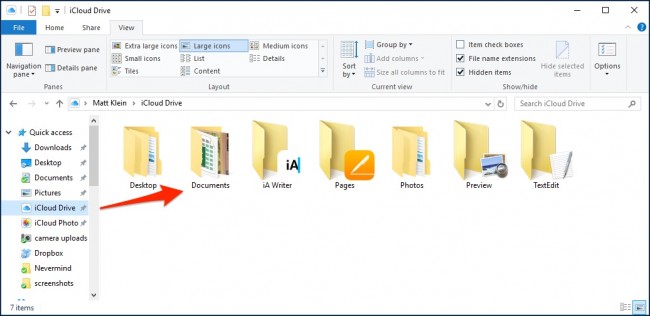
Regardless, both Desktop and Documents will appear once everything syncs and you should be able to interact with the files contained therein like any other.
无论如何,一旦所有内容同步,“桌面”和“文档”都将出现,并且您应该能够像其中的任何一个与其中包含的文件进行交互。
The new iCloud Desktop and Documents sharing feature clearly brings a lot of convenience to Mac users’ lives, particularly if they use various disparate devices on a regular basis. It’s nice to now know that if you’re working on your Mac at home, and you leave an important file on your desktop, you can still get to it at work, or from your phone.
新的iCloud桌面和文档共享功能显然为Mac用户的生活带来了很多便利,特别是如果他们定期使用各种不同的设备。 现在,很高兴知道,如果您在家中使用Mac,并且在桌面上留下了重要文件,您仍然可以在工作中或通过手机访问它。
mac icloud 桌面


 被折叠的 条评论
为什么被折叠?
被折叠的 条评论
为什么被折叠?
 到【灌水乐园】发言


