


 本文介绍如何在PowerPoint中为单个对象分配并组合多个运动路径,以创建平滑且连贯的动画效果。通过详细步骤指导,您将学会如何设置和调整路径,使动画更加生动。

You can assign multiple motion paths to a single object in PowerPoint, but if you don’t combine them, the object will reset to its original position before executing the next animation. Combine the motion paths for a smooth, seamless transition.
您可以在PowerPoint中为单个对象分配多个运动路径,但是如果不将它们组合在一起,则在执行下一个动画之前,该对象将重置为原始位置。 组合运动路径以实现平滑,无缝的过渡。
分配和组合运动路径 (Assigning and Combining Motion Paths)
Let’s assume you have an object that you want to bounce to the left, then drop down a bit into its final position. You can assign a single object with multiple motion paths, but if you don’t combine the motion paths then you’ll end up with something like this:
假设您有一个物体想要向左弹跳,然后再放一点到其最终位置。 您可以为一个对象分配多个运动路径,但是如果不合并运动路径,则会得到如下所示的结果:
As you can see, the motion path goes from A > B then A > C instead of the intended A > B > C. Obviously that’s not what we wanted to do. The fix is as simple as clicking and dragging, but before we get into combining motion paths, you first need to assign the animations to our object.
如您所见,运动路径从A> B到A> C而不是预期的A> B>C。显然,这不是我们想要的。 该修补程序就像单击和拖动一样简单,但是在我们组合运动路径之前,您首先需要将动画分配给我们的对象。
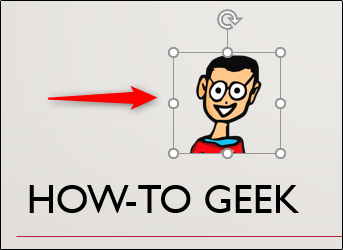
First, select the object to which you will assign multiple motion paths.
首先,选择要为其分配多个运动路径的对象。
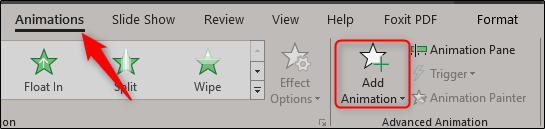
Next, head over to the “Animations” tab and click the “Add Animation” button.
接下来,转到“动画”选项卡,然后单击“添加动画”按钮。
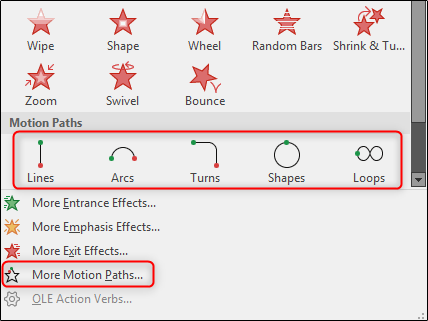
A menu will appear showing a large library of animations. Scroll to the very bottom to find the “Motion Paths” group. If you find the one you want to use here, great! If not, you can select “More Motion Paths” to browse through many more. We’ll go ahead and click that in this example.
将出现一个菜单,其中显示了大型动画库。 滚动到最底部以找到“运动路径”组。 如果您在此处找到要使用的那个,那就太好了! 如果没有,您可以选择“更多运动路径”来浏览更多内容。 在本示例中,我们将继续单击它。
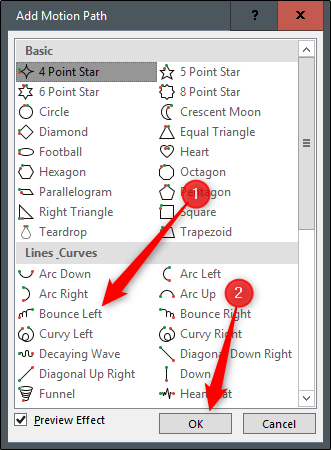
In this example, we’re going to be using the “Bounce Left” option, found in the “Lines_Curves” group. Once selected, click “OK.”
在此示例中,我们将使用“ Lines_Curves”组中的“ Bounce Left”选项。 选择后,单击“确定”。
You may notice the path doesn’t go exactly where you’d like it to go. To position the path, simply grab the box and drag.
您可能会注意到该路径未完全按照您希望的路径移动。 要定位路径,只需抓住盒子并拖动即可。
Now, head over to the “Animations” tab. Select the arrow next to “Start” to show the menu, then select “After Previous.”
现在,转到“动画”选项卡。 选择“开始”旁边的箭头以显示菜单,然后选择“上一步之后”。

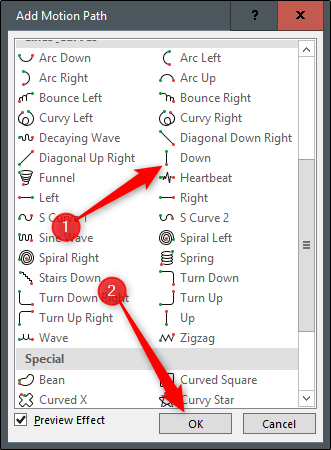
Repeat the previous steps to add the second motion path. This time, we’ll add “Down” which you’ll also find in the “Lines_Curves” group.
重复上述步骤以添加第二条运动路径。 这次,我们将添加“ Down”,您还将在“ Lines_Curves”组中找到它。
Now that our motion paths are assigned, we need to select the second motion path and drag the green arrow over the red arrow of the first. After that, drag the red dot of the second motion path to the final destination of the animation.
现在已经分配了运动路径,我们需要选择第二条运动路径并将绿色箭头拖动到第一条运动路径的红色箭头上。 之后,将第二个运动路径的红点拖到动画的最终目的地。

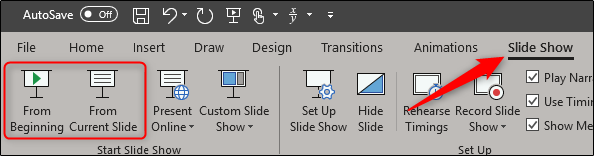
Once you’re finished, go ahead and preview the slide show to make sure it works properly. To quickly view the presentation starting at the current slide, press Shift+F5. Otherwise, head to the “Slide Show” tab and select either “From Beginning” or “From Current Slide,” whichever you’d prefer.
完成后,继续并预览幻灯片以确保其正常运行。 要从当前幻灯片开始快速查看演示文稿,请按Shift + F5。 否则,请转到“幻灯片放映”选项卡,然后选择“从开始”或“从当前幻灯片”,以您喜欢的方式为准。
Finally, you should have something that looks like this:
最后,您应该具有以下外观:
You’ve now successfully combined motion paths to make one smooth, seamless animation.
现在,您已经成功地组合了运动路径,以制作一个平滑,无缝的动画。
翻译自: https://www.howtogeek.com/407636/how-to-combine-motion-paths-in-powerpoint/


 被折叠的 条评论
为什么被折叠?
被折叠的 条评论
为什么被折叠?
 到【灌水乐园】发言


