


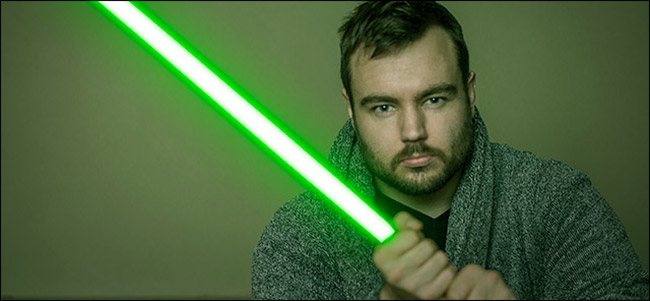
With Rogue One coming out this weekend, the internet is in full on Star Wars fever (well, more than usual). Why not use this for a little Photoshop fun? Let’s have a look at how to add a lightsaber special effect to a photo.
随着《 侠盗一号》(Rogue One)本周末问世,《 星际大战》 ( Star Wars)发烧使互联网充满了力量(嗯,比平时更多)。 为什么不使用它来获得一些Photoshop的乐趣呢? 让我们看一下如何为照片添加光剑特殊效果。
I’m going to keep everything as simple as possible, though to follow along, you will need to understand layers, layer masks, and adjustment layers. If you aren’t familiar with these subjects, check out our guides to layers and masks and adjustment layers before continuing.
我将使所有内容尽可能简单,尽管要继续进行,您将需要了解图层,图层蒙版和调整图层。 如果您不熟悉这些主题,请在继续之前查阅我们的图层,蒙版和调整图层指南。
准备使用照片 (Getting a Photo Ready to Use)
While you can use this technique to add a lightsaber to anything, it’s a lot easier if the person in the picture is holding something you can use as a base. You can go full cosplay and get a proper costume and prop lightsaber, or do what I did and put on a dressing gown and wave a broom handle around. Whether you’re dressed like Darth Vader or Darth Just-Out-of-Bed, the technique is the same.
虽然可以使用此技术为任何事物添加光剑,但如果图片中的人拿着可以用作基础的东西要容易得多。 您可以进行完整的角色扮演,并穿上合适的服装和道具光剑,或者做我做的事情,穿上晨衣,挥动扫帚柄。 不管您是穿着Darth Vader还是Darth Just-Out-Bed,它的技术都是一样的。
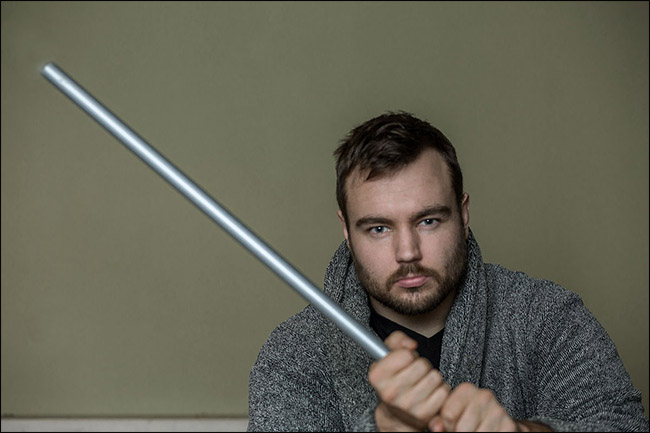
Open the photo you want to use in Photoshop and do any basic edits you think it needs. Adding special effects like lightsabers should always be one of the last steps in your workflow. I cleaned up some small blemishes, but otherwise, my photo was ready to go.
在Photoshop中打开要使用的照片,并进行您认为需要的任何基本编辑。 添加光剑等特殊效果应始终是工作流程的最后步骤之一。 我清理了一些小瑕疵 ,但除此之外,我的照片已经准备好了。
第一步:创建光剑基础形状 (Step One: Create the Lightsaber Base Shape)
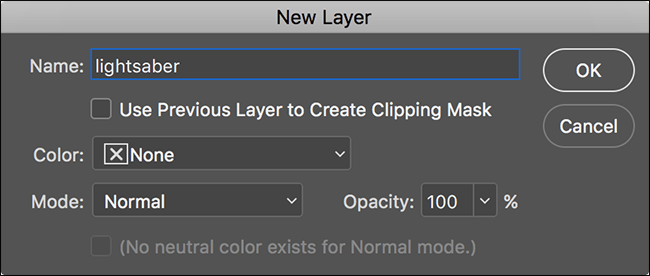
Create a new layer by either clicking on the New Layer button or using the keyboard shortcut Control+Shift+N (Command+Shift+N if you’re on a Mac).
通过单击“新建图层”按钮或使用键盘快捷键Control + Shift + N(如果使用Mac,则为Command + Shift + N)来创建新图层。

Call the new layer “lightsaber” or something similar and click OK.
将新图层称为“ lightsaber”或类似名称,然后单击“确定”。
We have a few options for selecting out the blade. If you’re familiar with how to use it, the Pen tool is one of the best methods. However, it’s quite complicated, and we can use a simpler tool to get the same effect.
我们有一些选择刀片的选项。 如果您熟悉如何使用它, 钢笔工具是最好的方法之一 。 但是,它非常复杂,我们可以使用更简单的工具来获得相同的效果。
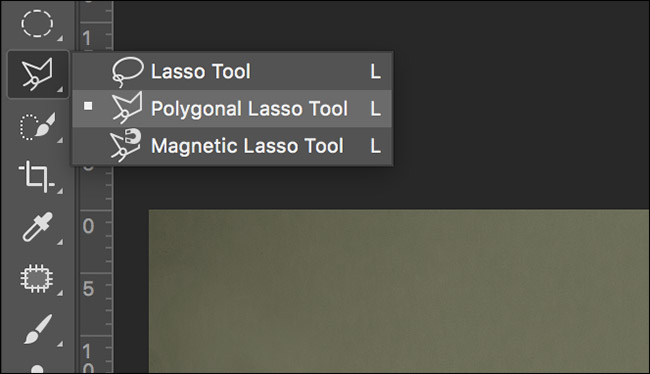
Select the Polygonal Lasso tool from the Tool menu. You can also find it under the Lasso tool or by pressing the keyboard shortcut Shift+L until you get it.
从工具菜单中选择多边形套索工具。 您也可以在套索工具下找到它,或者按键盘快捷键Shift + L直到找到它。
Zoom in to your fake lightsaber (or to where you want it to be) and click on one of its bottom corners.
放大到您的假光剑(或您想要的地方),然后单击其底角之一。
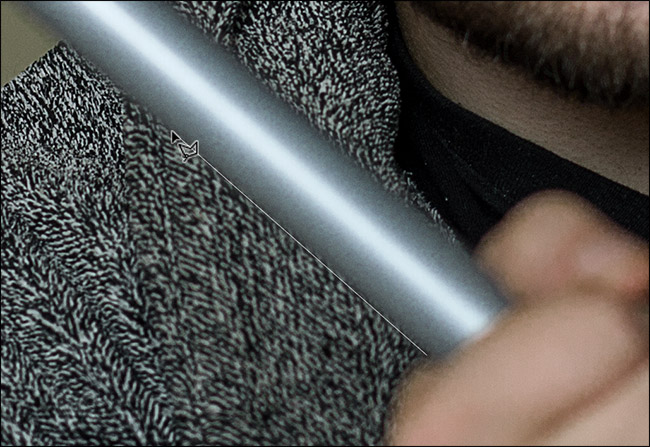
Next, click on one of its top corners. This will connect the two points.
接下来,单击其顶角之一。 这将连接两点。
Keep clicking around the fake lightsaber until you reach the point where you started.
不断点击假的光剑,直到到达起点为止。
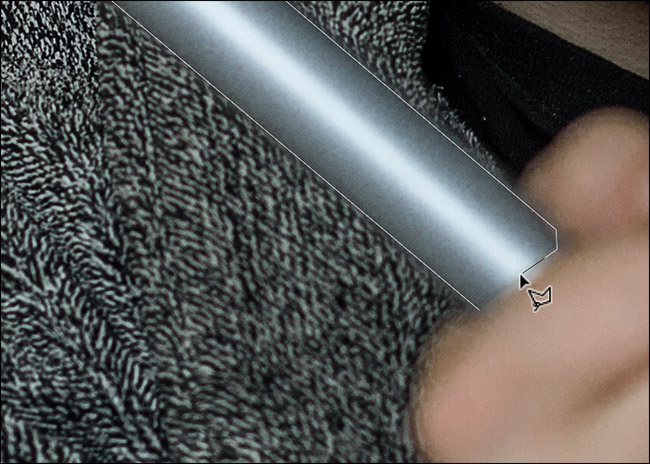
Click on the first point again to finish making the selection.
再次单击第一个点以完成选择。
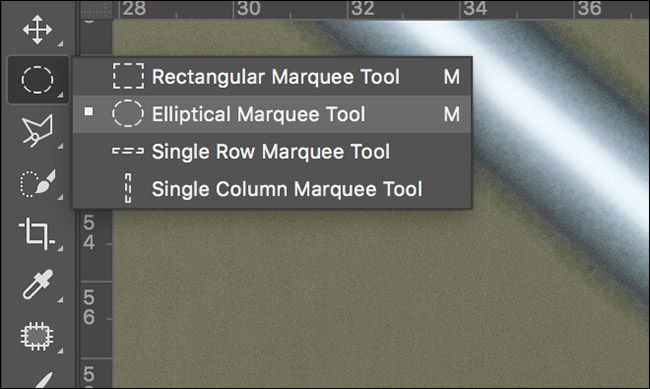
The Polygonal Lasso is great for making straight edged selections, but terrible for selecting curves. We want the lightsaber to have a rounded tip so we’re going to use the Elliptical Marquee Tool to do it.
多边形套索非常适合进行直边选择,但对于选择曲线却很糟糕。 我们希望光剑的尖端为圆形,因此我们将使用椭圆选框工具来实现。
Select the Elliptical Marquee tool from the Tool menu or cycle to it with the keyboard shortcut Shift+M.
从“工具”菜单中选择“椭圆选框”工具,或使用键盘快捷键Shift + M循环至该工具。
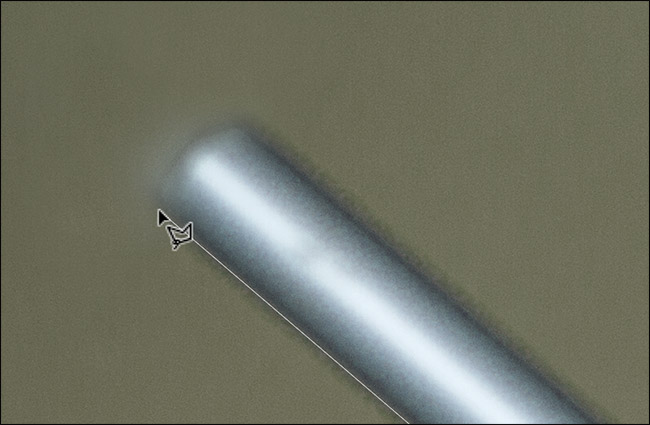
Zoom into the top of the lightsaber. We want to add to our selection, so hold down the Shift key and then click and drag to start drawing an ellipse.
放大到光剑的顶部。 我们要添加到选择中,因此按住Shift键,然后单击并拖动以开始绘制椭圆。
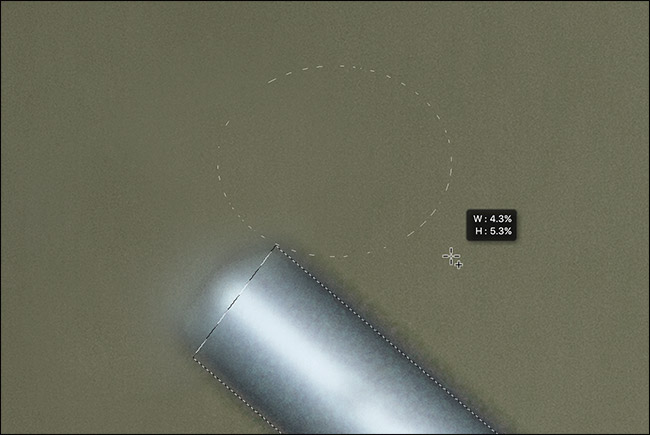
The Elliptical Marquee tool can be a little tricky to get right first time so the best thing to do is draw an ellipse away from your selection, then still holding down your click, press the Spacebar to move it into position.
椭圆选框工具在第一次使用时可能会有些棘手,因此最好的方法是从选择区域中绘制一个椭圆,然后仍然按住鼠标不放,按空格键将其移到适当位置。
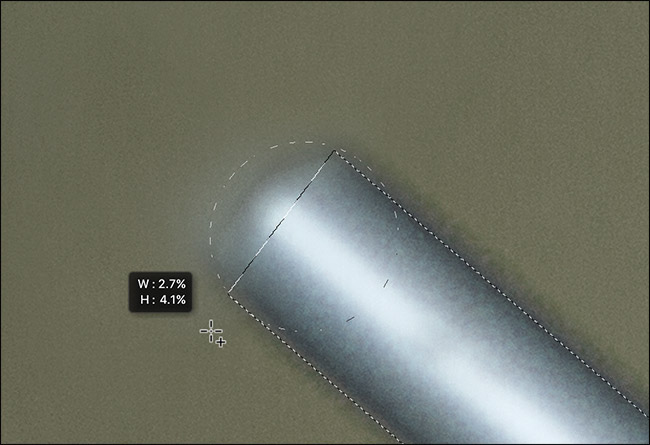
Release the mouse and you’ll have a nice selection around the top of the lightsaber.
释放鼠标,在光剑顶部附近会有一个不错的选择。
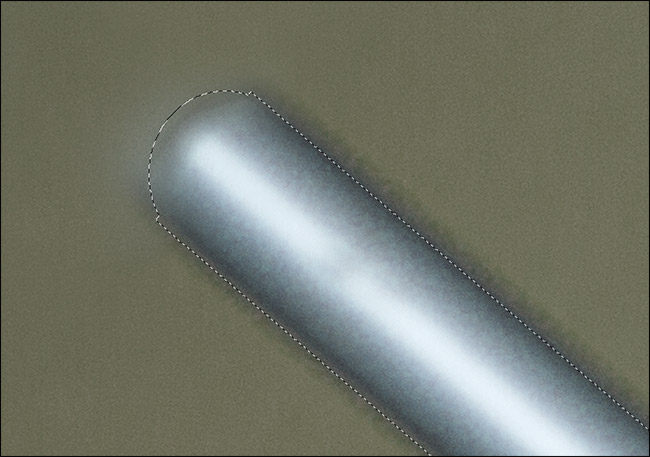
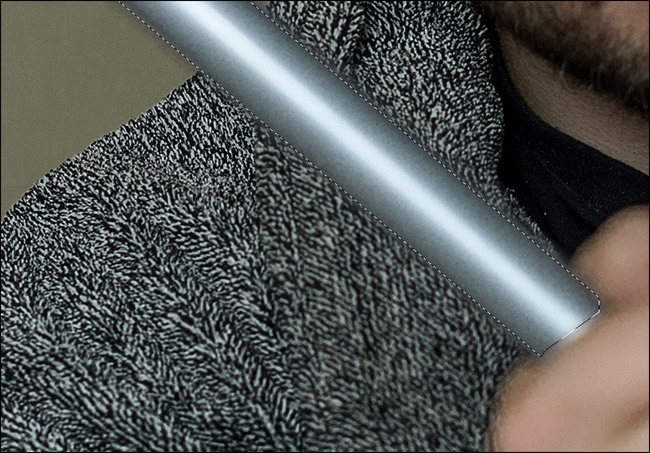
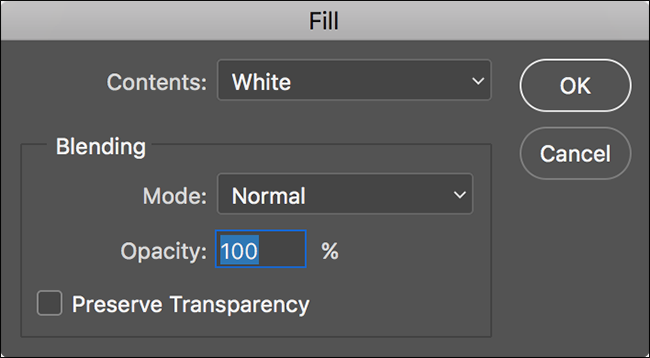
Go to Edit > Fill, select White, then click OK.
转到“编辑”>“填充”,选择“白色”,然后单击“确定”。
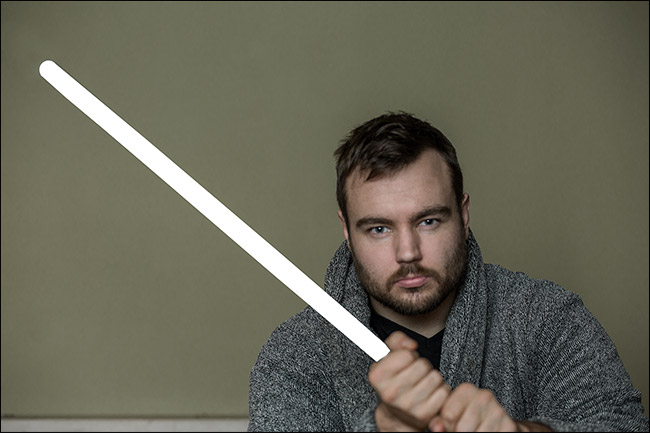
Now the model should look like they’re holding a solid white lightsaber. Press Control+D or Command+D to deselect the lightsaber.
现在,模型看起来应该像是拿着白色的光剑。 按Control + D或Command + D取消选择光剑。
第二步:创建一个模糊层 (Step Two: Create a Blur Layer)
Next, go to Layer > Duplicate Layer or use the keyboard shortcut Control+J (Command+J on a Mac) to create a copy of the lightsaber layer. Drag it beneath the original lightsaber layer and rename it “lightsaber blur”.
接下来,转到图层>复制图层,或使用键盘快捷键Control + J(在Mac上为Command + J)创建光剑图层的副本。 将其拖动到原始光剑图层下,并将其重命名为“光剑模糊”。
第三步:添加光剑效果 (Step Three: Add the Lightsaber Effect)
Select the lightsaber layer and go to Layer > Layer Style > Outer Glow. Dial in the following values:
选择光剑图层,然后转到图层>图层样式>外发光。 拨入以下值:
- Blend Mode: Normal. 混合模式:正常。
- Opacity: 80%. 不透明度:80%。
- Size: 120px for a high-res file, 60px for a low-res file. 大小:高分辨率文件为120像素,低分辨率文件为60像素。
You can play with these values to see what works best in your photo.
您可以使用这些值来查看最适合您的照片。

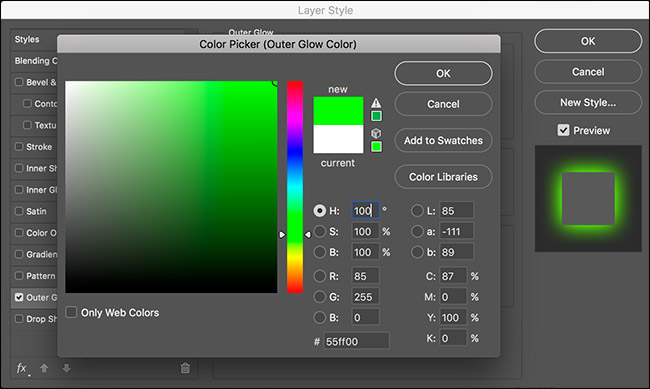
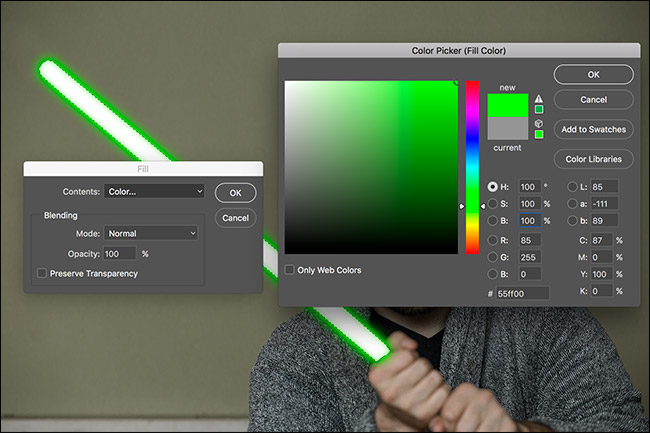
Then click on the white color swatch to pick the color of your lightsaber. Set the S and B values to 100.
然后单击白色色板以选择光剑的颜色。 将S和B值设置为100。
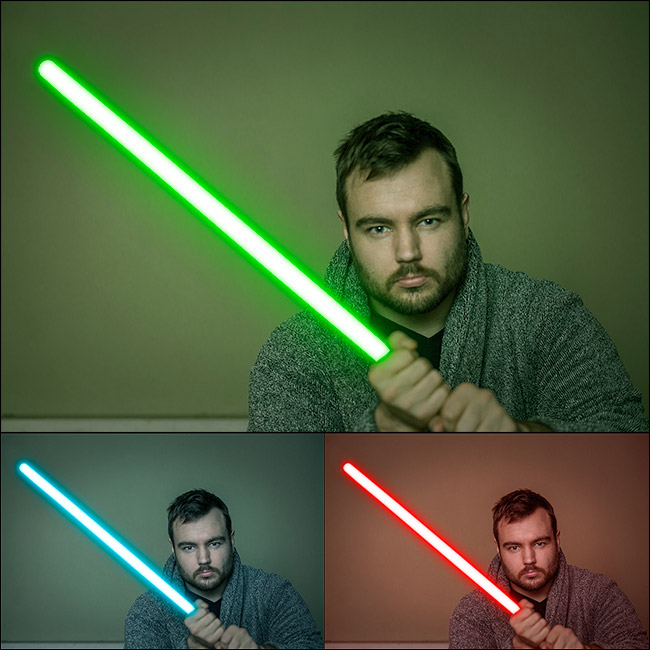
- If you want a red lightsaber, leave the H value set to 0. 如果要使用红色光剑,请将H值设置为0。
- If you want a blue lightsaber, set the H value to 190. 如果您想要蓝色的光剑,请将H值设置为190。
- If you want a green lightsaber, set the H value to 100. 如果您想要绿色的光剑,请将H值设置为100。
Click OK when you’re finished.
完成后,单击“确定”。
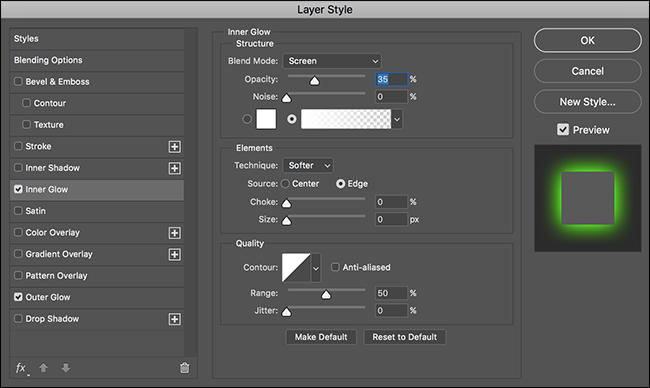
Next, select Inner Glow from the options on the left side.
接下来,从左侧的选项中选择“内部发光”。
Enter the following values:
输入以下值:
- Blend Mode: Normal. 混合模式:正常。
- Opacity: 40%. 不透明度:40%。
- Color: The same as the previous step. 颜色:与上一步相同。
- Size: 60px for a high-res file, 30px for a low-res file. 大小:高分辨率文件为60像素,低分辨率文件为30像素。
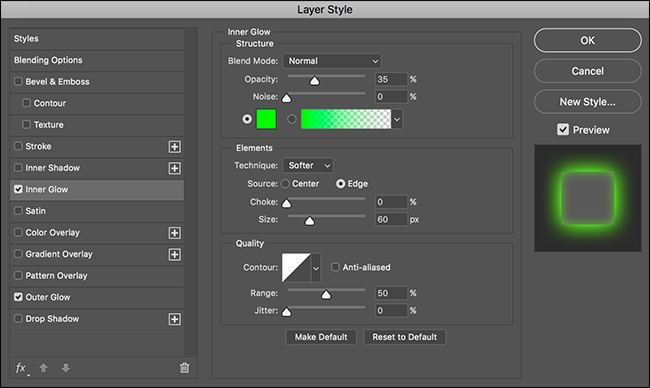
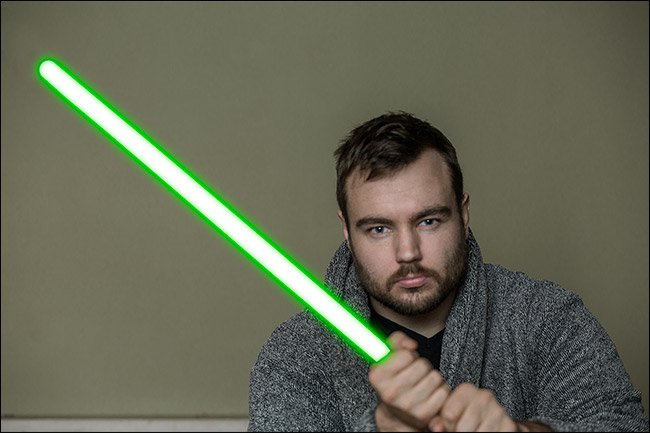
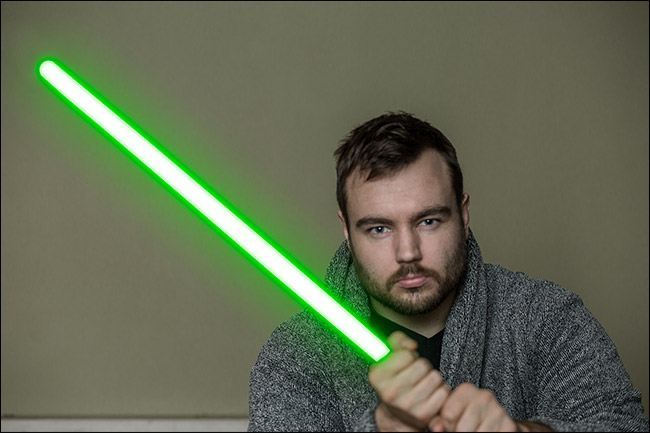
Click OK and the lightsaber should look like it’s beginning to take shape.
单击“确定”,光剑看起来应该开始成形。
第四步:添加模糊效果 (Step Four: Add a Blur Effect)
Hold down the Control or Command key and click on the lightsaber blur Layer Thumbnail. This will select the contents of the layer.
按住Control或Command键,然后单击光剑模糊图层缩略图。 这将选择图层的内容。

Go to Edit > Fill and for Contents, select Color…
转到“编辑”>“填充”,然后为“内容”选择“颜色”。
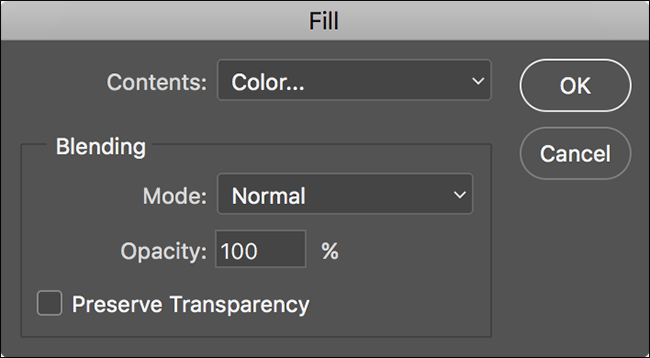
Dial in your lightsaber color from earlier.
从以前拨入您的光剑颜色。
Press Control+D or Command+D to deselect the lightsaber blur layer’s contents, then go to Filter > Blur > Gaussian Blur. Enter a value of 240px for a high-res file, 120px for a low-res file and press OK.
按Control + D或Command + D取消选择光剑模糊层的内容,然后转到“滤镜”>“模糊”>“高斯模糊”。 为高分辨率文件输入240px的值,为低分辨率文件输入120px的值,然后按OK。
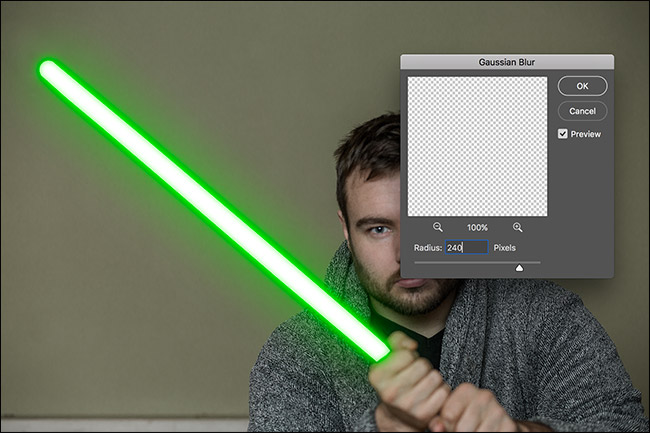
Now the lightsaber should really be starting to look the part. We just have a few finishing touches left to bring it all together.
现在,光剑真的应该开始看起来像零件了。 我们仅需完成一些最后的步骤,即可将它们整合在一起。
第五步:画龙点睛 (Step Five: Put On the Finishing Touches)
Go to Layer > New Fill Layer > Solid Color and call it Color Toning. Set the Mode to Soft Light at an Opacity of 20%.
转到“图层”>“新建填充图层”>“纯色”,并将其称为“色调”。 将模式设置为柔光,不透明度为20%。
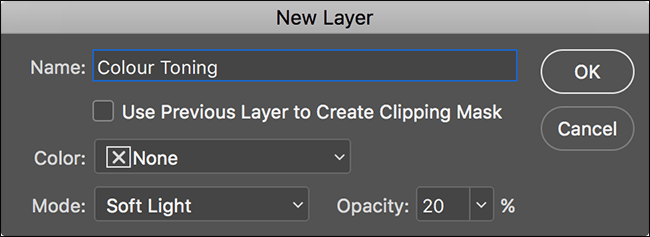
Dial in your lightsaber color and click OK.
输入您的光剑颜色,然后单击“确定”。

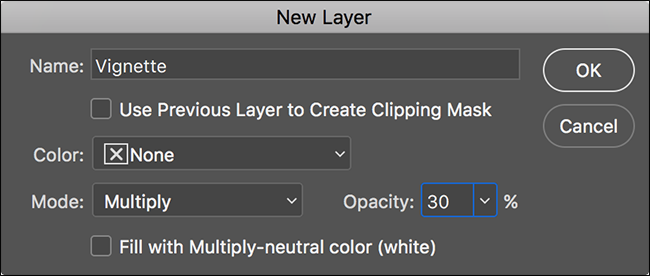
Create a new layer and call it Vignette. Set it’s Mode to Multiply and Opacity to 30%.
创建一个新层,并将其称为Vignette。 将其模式设置为正片叠底,不透明度设置为30%。
Grab the Elliptical Marquee tool and draw an ellipse around the centre of your image.
抓住椭圆选框工具并在图像中心周围绘制一个椭圆。

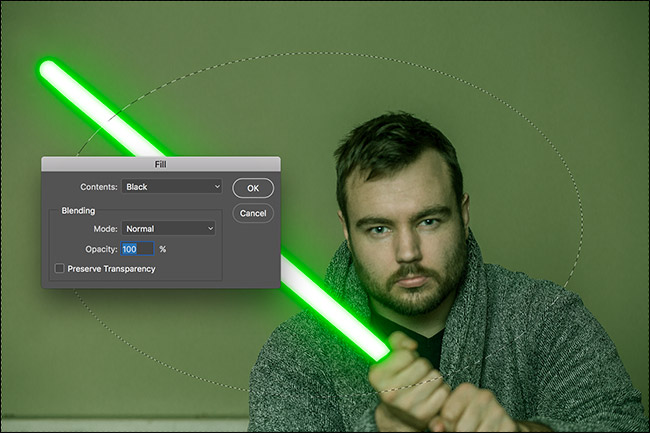
Go to Select > Inverse followed by Edit Fill. For the Contents, select Black and click OK.
转到选择>反向,然后进行编辑填充。 对于目录,选择黑色,然后单击确定。
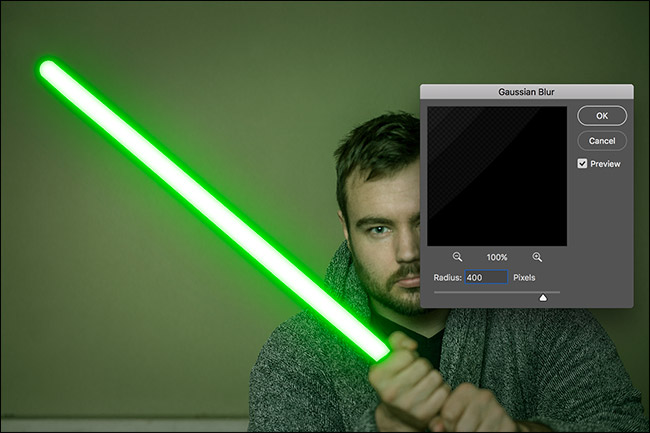
Press Control-D or Command-D and go to Filter > Blur > Gaussian Blur. Dial in a value that gives you a nice soft vignette (I’m using 400px) and press OK.
按Control-D或Command-D并转到“滤镜”>“模糊”>“高斯模糊”。 拨打一个可以给您带来柔和的小插图的值(我使用的是400px),然后按OK。
That’s it—you are finished, young padawan.
就是这样-年轻的帕达万,您就完蛋了。
翻译自: https://www.howtogeek.com/285001/how-to-create-a-lightsaber-in-photoshop/


 被折叠的 条评论
为什么被折叠?
被折叠的 条评论
为什么被折叠?
 到【灌水乐园】发言


