


centos7安装xen
This post introduces how to install a paravirtualized CentOS 7 DomU on Xen. The very common way of installing DomU does not work for CentOS 7. A little trick to set the repository and the network used by the VM should be used by adding a setting strings to the “extra=” field for this VM.
这篇文章介绍了如何在Xen上安装半虚拟化的CentOS 7 DomU。 在CentOS 7中,安装DomU的非常常见的方法不起作用。应通过在VM的“ extra =”字段中添加设置字符串来使用一些技巧来设置存储库和VM使用的网络 。
Note that this tutorials was tested with CentOS 7.2 (1511). The kernel in CentOS 7.4 seems have problems with Xen. Please check comments on some details.
请注意,本教程已使用CentOS 7.2(1511)进行了测试。 CentOS 7.4中的内核似乎在Xen中有问题。 请检查一些细节的评论。
To install the DomU VM, first download the pxeboot images from CentOS’s website at http://vault.centos.org/7.2.1511/os/x86_64/images/pxeboot/ (due to the problems of some later kernels with Xen, we use vault here to make sure it is a 7.2.1511 kernel).
要安装DomU VM,首先要从CentOS的网站http://vault.centos.org/7.2.1511/os/x86_64/images/pxeboot/下载pxeboot映像(由于Xen后来的某些内核存在问题,我们请在此处使用保管库以确保它是7.2.1511内核)。
The commands are (assume we are working in a directory of the VM /home/xen/centos7/ ):
这些命令是(假设我们正在VM的目录/home/xen/centos7/ ):
# wget http://vault.centos.org/7.2.1511/os/x86_64/images/pxeboot/vmlinuz
# wget http://vault.centos.org/7.2.1511/os/x86_64/images/pxeboot/initrd.img
Prepare the configuration file centos7.cfg used for the VM:
准备用于虚拟机的配置文件centos7.cfg:
name="centos7install"
vcpus=4
memory=2048
disk=['file:/home/xen/centos7/vmdisk0,xvda,w' ]
vif=['bridge=xenbr0']
on_reboot="restart"
on_crash="restart"
kernel="/home/xen/centos7/vmlinuz"
ramdisk="/home/xen/centos7/initrd.img"
extra="ksdevice= inst.repo=http://vault.centos.org/centos/7.2.1511/os/x86_64/ ip=10.0.0.222::10.0.0.2:255.255.0.0:cento7:eth0:none nameserver=8.8.8.8"
Here, note the trick of adding the line
在这里,请注意添加行的技巧
extra="ksdevice= inst.repo=http://vault.centos.org/centos/7.2.1511/os/x86_64/ ip=10.0.0.222::10.0.0.2:255.255.0.0:cento7:eth0:none nameserver=8.8.8.8"
Here 10.0.0.222 is the IP assigned to the VM and 10.0.0.2 is the gateway. You will need to change the parameters here according to your network environment for the VM.
这里10.0.0.222是分配给VM的IP,而10.0.0.2是网关。 您将需要根据虚拟机的网络环境在此处更改参数。
Prepare the disk image for the VM in the VM’s directory:
在虚拟机目录中为虚拟机准备磁盘映像 :
# dd if=/dev/zero of=./vmdisk0 bs=1k seek=20480k count=1
Now, start the VM and it will starts to install itself,
现在, 启动 VM,它将开始自行安装,
# xl create -c centos7.cfg
Then, just follow the CentOS 7’s instructions to install and configure the VM.
然后,只需按照CentOS 7的说明安装和配置VM。
Booted the kernel and starting to download the installation files:

Choose the installation interface (choose “Use text mode”):
选择安装界面(选择“使用文本模式”):

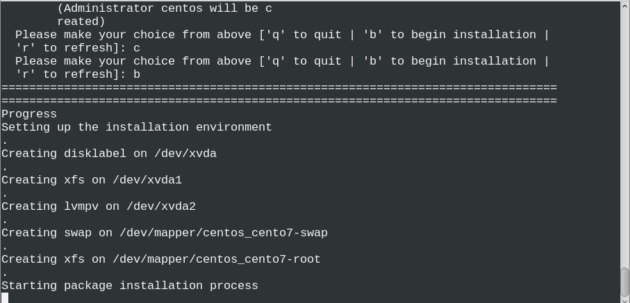
Make the choices for various OS configurations:
选择各种操作系统配置:

Started to install packages:
开始安装软件包:
Installation completes:
安装完成:

Boot the VM again with a normal configuration file as follows.
再次使用正常配置文件引导VM,如下所示。
name="centos7"
vcpus=4
memory=2048
disk=['file:/home/xen/centos7/vmdisk0,xvda,w' ]
vif=['bridge=xenbr0']
on_reboot="restart"
on_crash="restart"
bootloader = "pygrub"
The key changes here are to remove the kernel, ramdisk and extra variables and setting bootloader to “pygrub”.
这里的关键变化是删除kernel , ramdisk和extra变量,并设置bootloader ,以“pygrub”。
It works nicely now:
现在效果很好:

翻译自: https://www.systutorials.com/install-paravirtualized-centos-7-domu-xen/
centos7安装xen


 被折叠的 条评论
为什么被折叠?
被折叠的 条评论
为什么被折叠?
 到【灌水乐园】发言


