


蓝牙调试工具如何使用
This post is originally from www.jaredwolff.com
这篇文章最初来自www.jaredwolff.com
One of the most confusing things about Bluetooth Low Energy is how data is moved around. Depending on your application, your device state may be fairly complex. That means having an individual endpoint for every piece of data is suicide by Bluetooth.
低功耗蓝牙最令人困惑的事情之一是如何移动数据。 根据您的应用程序,设备状态可能会非常复杂。 这意味着蓝牙为每个数据提供一个单独的端点。
So, what’s he solution?
那么,他的解决方案是什么?
A protocol buffer is a programatic way to encode/decode optimized structured data. They can be shared and manipulated across almost any platform. Nordic actually uses a variant of it for their DFU service.
协议缓冲区是对优化的结构化数据进行编码/解码的一种编程方式。 它们几乎可以在任何平台上共享和操纵。 Nordic实际上为其DFU服务使用了它的变体。
There was a lot of buzz words in the first few sentences. Hopefully, by the end of this post you’ll understand exactly what I’m talking about.
前几句话中有很多时髦的词。 希望到本文结束时,您将完全理解我在说什么。
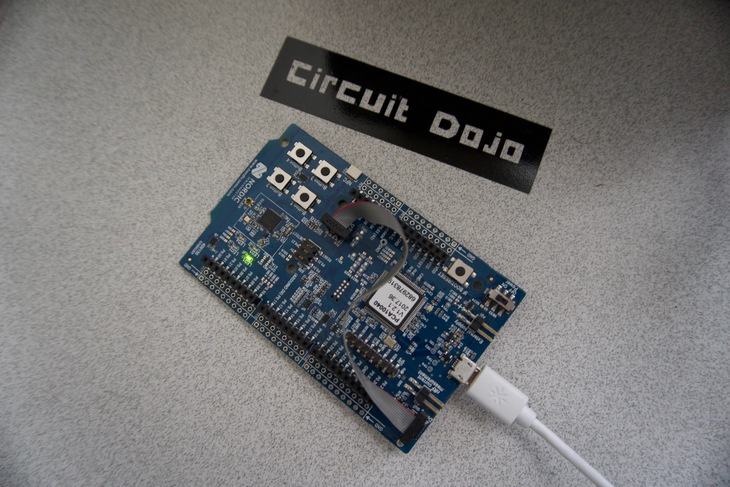
In this tutorial, i'll include fully flushed out example code that you can clone and start using immediately. All you need is one of these:
在本教程中,我将包含完全冲洗掉的示例代码,您可以克隆它们并立即开始使用它们。 您所需要的只是其中之一:
So, how do you use this magical software?
那么,您如何使用这个神奇的软件呢?
Read on!
继续阅读!
P.S. this post is lengthy. If you want something to download, click here for a a beautifully formatted PDF. (Added bonus, the PDF has all three parts of this series!)
PS这个帖子很长。 如果要下载某些内容, 请单击此处以获取格式精美的PDF。 (此外,PDF具有本系列的所有三个部分!)
安装 (Install)
The first part of the process is to make sure you’ve installed all the correct utilities. Depending on what programming language will determine what you install and use. In this case I’ll outline the utilities that I have used for several projects in the past using C, Go and Javascript.
该过程的第一部分是确保已安装所有正确的实用程序。 取决于哪种编程语言将确定您要安装和使用的语言。 在这种情况下,我将概述过去使用C,Go和Javascript在多个项目中使用的实用程序。
protoc is the most important utility you’ll have to install here. It's the Protobuf "compiler" which takes your .proto and .options files and turns them into static code.
protoc是您必须在此处安装的最重要的实用程序。 这是Protobuf的“编译器”,它将您的.proto和.options文件转换为静态代码。
For Mac, download the appropriate release here.
对于Mac,请在此处下载相应的版本。
- Unzip the folder 解压缩文件夹
Run
./autogen.sh && ./configure && makein the folder在文件夹中运行
./autogen.sh && ./configure && makeIf you get an error
autoreconf: failed to run aclocal: No such file or directoryinstallautoconfusing Homebrew:如果您收到错误
autoreconf: failed to run aclocal: No such file or directory使用Homebrew安装autoconf:
brew install autoconf && brew install automake
brew install autoconf && brew install automake
Then, re-run step 3.
然后,重新运行步骤3。
- Then run: 然后运行:
make check
sudo make install
which protoc
Consider protoc the compiler for Protocol Buffers. It can either output raw files or libraries directly. That’s because it’s got Go support built in.
考虑protoc为Protocol Buffers的编译器。 它可以直接输出原始文件或库。 那是因为它内置了Go支持。
That raw data can also be used to generate static libraries for other languages. That usually requires an extra utility (or utilities). I describe the two that the Dondi Lib project used below.
该原始数据还可以用于生成其他语言的静态库。 这通常需要一个或多个额外的实用程序。 我在下面描述Dondi Lib项目使用的两个。
nanopbis a python script used to create C libraries that encode/decode your structured data. It can be installed by navigating to the nanopb git repo and downloading the appropriate files. The most important pieces to include:nanopb是一个python脚本,用于创建对结构化数据进行编码/解码的C库。 可以通过导航到nanopb git repo并下载适当的文件来进行安装。 最重要的部分包括:pb_encode.c,pb_decode.candpb_common.cpb_encode.c,pb_decode.c和pb_common.c/generator/nanopb_generator.py/generator/nanopb_generator.pyAnd the
/generator/nanopb/directory co-located withnanopb_generator.py/generator/nanopb/目录与nanopb_generator.py并nanopb_generator.pynanopbis meant for deployment on embedded platforms. It's different fromprotoc-c(the regular C variant) because it is optimized for resource constrained systems like embedded processors. Buffers have finite sizes. There's no memory allocation! Depending on if there's bi-directional communication, you can only import and use the encoding functionality or decoding functionality.nanopb用于在嵌入式平台上进行部署。 它与protoc-c(常规C变体)不同,因为它已针对资源受限的系统(如嵌入式处理器)进行了优化。 缓冲区大小有限。 没有内存分配! 根据是否进行双向通信,您只能导入和使用编码功能或解码功能。pbjsuses the output fromprotocto generate a static javascript library. This is powerful because you can then use it in any javascript application. The best way to installpbjsis by running:pbjs使用输出从protoc生成静态JavaScript库。 这功能强大,因为您可以在任何javascript应用程序中使用它。 安装pbjs的最佳方法是运行:npm install -g protobufjs
I've simplified this step a bit in the example code. Get started by cloning the repos here.
我已在示例代码中对该步骤进行了一些简化。 在此处克隆存储库即可开始使用。
设置协议缓冲区 (Setting up the protocol buffer)
Create a file called command.proto. You can make the contents of that file what's below:
创建一个名为command.proto的文件。 您可以使该文件的内容如下所示:
syntax = "proto3";

message event {
  enum event_type {
    command = 0;
    response = 1;
  }
  event_type type = 1;
  string message = 2;
}
It may look foreign at first but once you take a deeper look, it’s not that much different than a standard C struct or hash table.
乍一看可能看起来很陌生,但是一旦您更深入地了解它,就与标准C结构或哈希表没有太大不同。
I'm using two types of data in this example: a string and enum as a type. There are actually a few more which you can read up at the documentation. When compiled, the equivalent c struct looks like:
在此示例中,我使用两种类型的数据: string和作为类型的enum 。 实际上,您可以在文档中阅读更多内容 。 编译后,等效的c结构看起来像:
/* Struct definitions */
typedef struct _event {
    event_event_type type;
    char message[64];
/* @@protoc_insertion_point(struct:event) */
} event;
Where event_event_type is
其中event_event_type是
/* Enum definitions */
typedef enum _event_event_type {
    event_event_type_command = 0,
    event_event_type_response = 1
} event_event_type;
You can nest as many messages inside each other as your hearts content. Typically though, a message is as small as possible so data transmission is as efficient as possible. This is particularly important for resource constrained systems or LTE deployments where you're charged for every megabyte used. Note: when elements are not used or defined they are typically not included in the encoded Protocol Buffer payload.
您可以将彼此之间尽可能多的消息嵌套在一起。 不过,通常情况下,消息应尽可能小,以便数据传输尽可能高效。 这对于资源受限的系统或LTE部署特别重要,在这种情况下,您需要为使用的每兆字节付费。 注意:当不使用或定义元素时,它们通常不包括在编码的协议缓冲区有效载荷中。
Normally, when you create a generic message like this, there is no limit to the size of the string message. That option can be set in the .options file:
通常,当您创建这样的通用消息时,字符串message的大小没有限制。 可以在.options文件中设置该选项:
event.message max_size:64This way, the memory can be statically allocated in my microprocessor code at compile time. If the message size is greater than 64 bytes then it will get chopped off in the code (or you'll simply get an error during decode). It's up to you, the software engineer, to figure out the absolute maximum amount of bytes (or characters) that you may need for this type of data.
这样,可以在编译时在我的微处理器代码中静态分配内存。 如果消息的大小大于64个字节,那么它将在代码中被砍掉(或者您在解码过程中会简单地得到一个错误)。 软件工程师将由您自己决定这种类型的数据可能需要的绝对最大字节数(或字符)。
You can look at more of the nanopb related features at their documentation.
您可以在其文档中 nanopb与nanopb相关的更多功能。
生成适当的静态库 (Generating the appropriate static libraries)
In order to make this as easy as possible, I put all the following code into a Makefile. When you make a change to the Protocol Buffer, that every library for every language used gets generated.
为了使此操作尽可能简单,我将以下所有代码放入Makefile中。 更改协议缓冲区时,将生成每种所用语言的每个库。
If we want to generate a static Go file the command looks like:
如果要生成静态Go文件,则命令如下所示:
protoc -I<directory with .proto> --go_out=<output directory> command.protoIf you've installed the nanopb plugin, you can do something similar to generate C code:
如果安装了nanopb插件,则可以执行类似的操作来生成C代码:
protoc -I<directory with .proto> -ocommand.pb command.proto
<path>/<to>/protogen/nanopb_generator.py -I<directory with .proto> command
The first file creates a generic "object" file. The second actually creates the static C library.
第一个文件创建一个通用的“对象”文件。 第二个实际上创建了静态C库。
For javascript:
对于javascript:
pbjs -t static-module -p<directory with .proto> command.proto > command.pb.jsYou can test each of these commands with the .proto and .options file examples above. I also built this manual process into one command in the example repository. Get access here.
您可以使用上面的.proto和.options文件示例测试每个命令。 我还在示例存储库中的一个命令中构建了该手动过程。 在此处获取访问权限。
编码和解码 (Encoding and Decoding)

In the examples below, I show you how to use your freshly compiled static code! This is where the fun begins.
在下面的示例中,我向您展示如何使用新编译的静态代码! 这就是乐趣的开始。
使用Javascript编码 (Encoding using Javascript)
Here’s a typical flow that you can follow when using a statically generated javascript library. First, initialize the library.
这是使用静态生成的javascript库时可以遵循的典型流程。 首先,初始化库。
// Import the config message
var protobuf  = require('./command.pb.js');
Then create an instance of event:
然后创建一个event的实例:
// setup command
var event = protobuf.event.create();
event.type = protobuf.event.event_type.command;
event.message = "This is";
Then, compile the payload. i.e. turn human readable JSON into nicely packed binary. See below.
然后,编译有效负载。 即将人类可读的JSON转换为打包好的二进制文件。 见下文。
// make sure it's valid
var err = protobuf.event.verify(event);
if( err != null ) {
   console.log("verify failed: " + err);
   return;
}
You'll get errors during this step if your object is malformed or if if you are missing required elements. I don't recommend using the required prefix when defining your .proto file. Any checks for required elements can be easily done in your application code.
如果您的对象格式错误或缺少required元素,则在此步骤中会出现错误。 建议不要在定义.proto文件时使用required前缀。 可以在您的应用程序代码中轻松完成对必需元素的任何检查。
Finally, the last step is to encode and turn it into raw bytes:
最后,最后一步是编码并将其转换为原始字节:
// encode into raw bytes
var payload = protobuf.event.encode(event).finish();
You can then use payload and send it over BLE, HTTP or whatever. If there's a communication protocol, you can send this buffer over it!
然后,您可以使用有效负载并通过BLE,HTTP或其他任何方式将其发送。 如果有通信协议,则可以通过它发送该缓冲区!
用C解码 (Decoding in C)
Once the data is received it’s decoded on the embedded end. nanopb is confusing. But luckily I have some code here that will work for you:
接收到数据后,将在嵌入式端对其进行解码。 nanopb令人困惑。 但幸运的是,我这里有一些对您有用的代码:
// Setitng up protocol buffer data
event evt;

// Read in buffer
pb_istream_t istream = pb_istream_from_buffer((pb_byte_t *)data, data_len);

if (!pb_decode(&istream, event_fields, &evt)) {
   NRF_LOG_ERROR("Unable to decode: %s", PB_GET_ERROR(&istream));
   return;
}

// Validate code & type
if( evt.type != event_event_type_command ) {
   return;
}
First, you create an input stream based on the raw data and the size of the data.
首先,根据原始数据和数据大小创建输入流。
Then, you use the pb_decode function. You point the first argument to the input stream. The second to the definition of our Protocol Buffer we’ve been working with. It's located in the command.pb.h file.
然后,您使用pb_decode函数。 您将第一个参数指向输入流。 我们一直在使用的协议缓冲区定义的第二个。 它位于command.pb.h文件中。
/* Defines for backwards compatibility with code written before nanopb-0.4.0 */
#define event_fields &event_msg
The last argument is a pointer to the struct to put the decoded data into. (In this case it's evt defined right before pb_istream_from_buffer above).
最后一个参数是指向将解码数据放入其中的结构的指针。 (在这种情况下,它的evt前右定义pb_istream_from_buffer上文)。
用C编码 (Encoding in C)
Let's now say we're going to reply to the message that was just decoded above. So now we have to create data, encode it and send it back. Here's the process:
现在,我们要回复上面刚刚解码的消息。 因此,现在我们必须创建数据,对其进行编码并将其发送回去。 流程如下:
// Encode value
pb_byte_t output[event_size];

// Output buffer
pb_ostream_t ostream = pb_ostream_from_buffer(output,sizeof(output));

if (!pb_encode(&ostream, event_fields, &evt)) {
   NRF_LOG_ERROR("Unable to encode: %s", PB_GET_ERROR(&ostream));
   return;
}
First create a buffer that holds the maximum amount of bytes that your Protocol buffer takes up. This is also defined in your command.pb.h. In this case event_size is set to 67. Then, similarly to the decode command, you create a stream and connect it to your buffer. Then finally encode the data by pointing your evt struct along with the stream and event_fields.
首先创建一个缓冲区,该缓冲区保存协议缓冲区占用的最大字节数。 这也在您的command.pb.h定义。 在这种情况下, event_size设置为67 。 然后,类似于解码命令,您创建一个流并将其连接到缓冲区。 然后最后通过指向evt结构以及stream和event_fields对数据进行编码。
As long as pb_encode returns without error, the encoded data has been written to output! The structure can be variable length so the best way to handle when sending it is to get the bytes_written from ostream:
只要pb_encode没有错误返回,编码的数据就被写入output ! 该结构的长度可以是可变的,因此发送时最好的处理方法是从ostream获取bytes_written :
NRF_LOG_INFO("bytes written %d",ostream.bytes_written);结论 (Conclusion)
Nice you made it! I hope you're starting to grasp the power of Protocol Buffers. Don't worry, it took me a little while to figure it all out. You too can be a Protocol Buffer master! ?
不错,您做到了! 希望您开始掌握协议缓冲区的功能。 不用担心,我花了一些时间才弄清楚。 您也可以成为协议缓冲区的主人! ?
If you're not too thrilled with Protocol Buffers, there are other alternatives. I've used MessagePack with some success on previous products. It's straightforward and has tons of support for a majority of programming languages.
如果您对协议缓冲区不太满意,那么还有其他选择。 我在以前的产品上使用MessagePack取得了一些成功。 它简单明了,并为大多数编程语言提供了大量支持。
If you are interested how to roll this into a Bluetooth Low Energy project, stay tuned for Part Two. In Part two, I’ll show you how to set up a very simple Bluetooth Service and Characteristic that will be used to transfer our freshly encoded data to-and-fro.
如果您有兴趣将其应用于蓝牙低功耗项目,请继续关注第二部分。 在第二部分中,我将向您展示如何设置一个非常简单的蓝牙服务和特征,该蓝牙服务和特征将用于来回传输我们新编码的数据。
Also, if you want to see all the code in action, you can download everything here.
另外,如果您想查看所有正在使用的代码,则可以在此处下载所有内容。
翻译自: https://www.freecodecamp.org/news/improve-your-bluetooth-project-with-this-valueable-tool/
蓝牙调试工具如何使用


 4610
4610

 被折叠的 条评论
为什么被折叠?
被折叠的 条评论
为什么被折叠?
 到【灌水乐园】发言


