


 本文介绍了PyTorch DataLoader的重要性和用法,包括DataLoader的构造参数、内置及自定义数据集上的应用。DataLoader通过并行加载和自动批处理优化了大型数据集的处理,提高机器学习和深度学习项目的效率。
We’ll be covering the PyTorch DataLoader in this tutorial. Large datasets are indispensable in the world of machine learning and deep learning these days. However, working with large datasets requires loading them into memory all at once.
在本教程中,我们将介绍PyTorch DataLoader。 如今,大型数据集在机器学习和深度学习领域中是必不可少的。 但是,使用大型数据集需要一次将它们全部加载到内存中。
This leads to memory outage and slowing down of programs. PyTorch offers a solution for parallelizing the data loading process with the support of automatic batching as well. This is the DataLoader class present within the torch.utils.data package.
这会导致内存中断并降低程序速度。 PyTorch还提供了一种在自动批处理支持下并行化数据加载过程的解决方案。 这是torch.utils.data包中提供的DataLoader类。
PyTorch DataLoader语法 (PyTorch DataLoader Syntax)
DataLoader class has the following constructor:
DataLoader类具有以下构造函数:
DataLoader(dataset, batch_size=1, shuffle=False, sampler=None,
           batch_sampler=None, num_workers=0, collate_fn=None,
           pin_memory=False, drop_last=False, timeout=0,
           worker_init_fn=None)
Let us go over the arguments one by one.
让我们一一讨论。
- Dataset – It is mandatory for a DataLoader class to be constructed with a dataset first. PyTorch Dataloaders support two kinds of datasets:
- Map-style datasets – These datasets map keys to data samples. Each item is retrieved by a
__get_item__()method implementation. - Iterable-style datasets – These datasets implement the
__iter__()protocol. Such datasets retrieve data in a stream sequence rather than doing random reads as in the case of map datasets.
- 映射样式的数据集 –这些数据集将键映射到数据样本。 每一项都是通过
__get_item__()方法实现检索的。 - 可
__iter__()样式的数据集 –这些数据集实现__iter__()协议。 这样的数据集按流序列检索数据,而不是像地图数据集那样进行随机读取。
- Map-style datasets – These datasets map keys to data samples. Each item is retrieved by a
- Batch size – Refers to the number of samples in each batch. 批次大小 –指每个批次中的样本数量。
- Shuffle – Whether you want the data to be reshuffled or not. 随机播放 –是否要重新随机播放数据。
- Sampler – refers to an optional torch.utils.data.Sampler class instance. A sampler defines the strategy to retrieve the sample – sequential or random or any other manner. Shuffle should be set to false when a sampler is used. Sampler –指可选的torch.utils.data.Sampler类实例。 采样器定义了检索样本的策略-顺序,随机或任何其他方式。 使用采样器时,应将随机播放设置为false。
- Batch_Sampler – Same as the data sampler defined above, but works at a batch level. Batch_Sampler –与上面定义的数据采样器相同,但以批处理级别工作。
- num_workers – Number of sub-processes needed for loading the data. num_workers –加载数据所需的子流程数。
- collate_fn – Collates samples into batches. Customized collation is possible in Torch. collate_fn –将样本整理为批次。 在Torch中可以自定义排序规则。
- pin_memory – Pinned (page-locked) memory locations are used by GPUs for faster data access. When set to True, this option enables the data loader to copy tensors into the CUDA pinned memory. pin_memory –固定(页面锁定)的内存位置供GPU使用,以加快数据访问速度。 设置为True时,此选项使数据加载器可以将张量复制到CUDA固定的内存中。
- drop_last – If the total data size is not a multiple of the batch_size, the last batch has less number of elements than the batch_size. This incomplete batch can be dropped by setting this option to True. drop_last –如果总数据大小不是batch_size的倍数,则最后一批的元素数少于batch_size。 通过将此选项设置为True,可以删除不完整的批处理。
- timeout – Sets the time to wait while collecting a batch from the workers (sub-processes). 超时 –设置从工作人员(子流程)收集批次时要等待的时间。
- worker_init_fn – Defines a routine to be called by each worker process. Allows customized routines. worker_init_fn –定义每个工作进程要调用的例程。 允许自定义的例程。
Let us now look at a few examples of how to use DataLoaders.
现在,让我们看一些如何使用DataLoader的示例。
内置数据集上的PyTorch DataLoader (PyTorch DataLoaders on Built-in Datasets)
MNIST is a dataset comprising of images of hand-written digits. This is one of the most frequently used datasets in deep learning. You can load the MNIST dataset first as follows.
MNIST是一个包含手写数字图像的数据集。 这是深度学习中最常用的数据集之一。 您可以按如下方式首先加载MNIST数据集。
import torch
import matplotlib.pyplot as plt
from torchvision import datasets, transforms
Before we proceed, it will help to learn a little about the torchvision transforms we have just imported. Transforms are commonly used with image datasets in order to perform operations such as normalization, resizing, cropping etc.
在继续之前,这将有助于您了解一些有关我们刚刚导入的火炬视觉转换的信息 。 变换通常与图像数据集一起使用,以执行诸如标准化,调整大小,裁剪等操作。
Transforms are in general stacked together using a compose function and applied to the images in the dataset after converting them to a tensor.
通常,使用compose函数将变换堆叠在一起,并在将其转换为张量后将其应用于数据集中的图像。
The only operation we need to perform upon MNIST images is the normalization. We pass the values 0.5 and 0.5 to the normalization transform to convert the pixels into values between 0 and 1, into distribution with a mean 0.5 and standard deviation of 0.5.
我们需要对MNIST图像执行的唯一操作是归一化。 我们将值0.5和0.5传递给归一化变换,以将像素转换为介于0和1之间的值,以平均为0.5,标准差为0.5的分布。
# Define a transform to normalize the data
transform = transforms.Compose([transforms.ToTensor(),
                              transforms.Normalize((0.5,), (0.5,)),
                              ])
Now we load the built-in dataset at ‘~/.pytorch/MNIST_data/’ into our working space as a torch dataset and then build a data loader using this dataset.
现在我们将内置数据集“〜/ .pytorch / MNIST_data /”作为火炬数据集加载到我们的工作空间中,然后使用该数据集构建数据加载器。
# Download and load the training data
trainset = datasets.MNIST('~/.pytorch/MNIST_data/', download=True, train=True, transform=transform)
trainloader = torch.utils.data.DataLoader(trainset, batch_size=64, shuffle=True)
To access the images from the dataset, all we need to do is to call an iter() function upon the data loader we defined here with the name trainloader. We can now access the images in the dataset using the .next() function.
要访问数据集中的图像,我们要做的就是在我们在此处定义的名称为trainloader的数据加载器上调用iter()函数。 现在,我们可以使用.next()函数访问数据集中的图像。
dataiter = iter(trainloader)
images, labels = dataiter.next()
print(images.shape)
print(labels.shape)
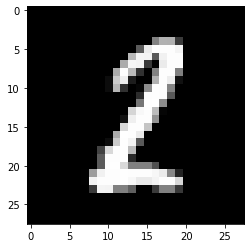
plt.imshow(images[1].numpy().squeeze(), cmap='Greys_r')
The following details regarding the batch size are printed along with the label of the image being printed.
以下有关批量大小的详细信息以及要打印的图像的标签一起打印。
torch.Size([64, 1, 28, 28])
torch.Size([64])
tensor(2)
自定义数据集上的DataLoader (DataLoaders on Custom Datasets)
PyTorch allows you to create custom datasets and implement data loaders upon then. This makes programming in PyTorch very flexible.
PyTorch允许您创建自定义数据集并在那时实现数据加载器。 这使得在PyTorch中编程非常灵活。
To define a custom dataset, you need to override two major functions of the torch.util.data.Dataset class – __len__ and __getitem__ – which are used to retrieve the size of the dataset and get a sample item from a particular index respectively.
要定义自定义数据集,您需要覆盖torch.util.data.Dataset类的两个主要函数__len__和__getitem__ ,这两个函数分别用于检索数据集的大小并从特定索引中获取样本项。
Let us create a sample dataset for illustrating this. We create a dataset that holds 1000 randomly generated numbers.
让我们创建一个样本数据集来说明这一点。 我们创建一个数据集,其中包含1000个随机生成的数字。
from torch.utils.data import Dataset
import random

class SampleDataset(Dataset):
  def __init__(self,r1,r2):
    randomlist=[]
    for i in range(1,1000):
      n = random.randint(r1,r2)
      randomlist.append(n)
    self.samples=randomlist

  def __len__(self):
      return len(self.samples)

  def __getitem__(self,idx):
      return(self.samples[idx])

dataset=SampleDataset(4,445)
dataset[100:120]
Output:
输出:
[439, 131, 338, 15, 212, 34, 44, 288, 387, 273, 324, 214, 115, 205, 213, 66, 226, 123, 65, 14]
Now we can define a data loader upon this custom dataset.
现在,我们可以在此自定义数据集上定义一个数据加载器。
from torch.utils.data import DataLoader
loader = DataLoader(dataset,batch_size=12, shuffle=True, num_workers=2 )
for i, batch in enumerate(loader):
        print(i, batch)
The output of the above code will be data divided into batches of 12. Some of the batches retrieved are shown below.
上面代码的输出将数据分为12个批次。下面显示了一些已检索的批次。
0 tensor([417, 410,   9, 261, 357, 288, 368,  97, 411,   8, 181,  80])
1 tensor([ 27,  59, 159, 392, 402, 294,  69,  67, 201, 427, 243, 402])
2 tensor([142, 267,  21, 399, 192, 377, 425, 270,  83, 370, 237, 199])
3 tensor([266, 305,  41, 315, 231, 260, 254, 383, 266, 285, 165, 118])
4 tensor([265, 320,  92, 162, 192, 153,  49, 344,  97, 240, 312, 192])
5 tensor([417,  35, 109,  75, 288, 258, 218, 275, 158, 251,  71, 276])
6 tensor([203,  86, 291, 429,  93, 334, 288, 392, 167, 242, 430, 194])
7 tensor([ 79,  52, 421, 147, 119,  76, 131,  28,  13, 277, 270, 164])
8 tensor([ 56, 410, 253, 159, 318,  68, 342, 260,  23, 289, 326, 134])
9 tensor([ 55,   9, 132, 353,  43, 225, 188, 217, 387,  32, 214, 242])
10 tensor([131,   6, 106, 191,  89,  91,  81, 271, 247, 347, 259, 366])
结论 (Conclusion)
As you can see, the PyTorch Dataloader can be used with both custom and built-in datasets. PyTorch DataLoaders give much faster data access than the regular I/O performed upon the disk. We hope this tutorial has helped you understand the PyTorch Dataloader in a much better manner.
如您所见,PyTorch Dataloader可以与自定义和内置数据集一起使用。 与在磁盘上执行常规I / O相比,PyTorch DataLoader提供了更快的数据访问速度。 我们希望本教程可以帮助您更好地理解PyTorch Dataloader。


 被折叠的 条评论
为什么被折叠?
被折叠的 条评论
为什么被折叠?
 到【灌水乐园】发言


