


 本文介绍了如何在Ubuntu 18.04上安装WordPress,WordPress是一个基于PHP和MySQL的内容管理平台,市场份额超过60%。安装过程包括安装Apache、MySQL、PHP,创建WordPress数据库,并通过WordPress向导完成CMS安装。
In this article, we will focus on how to install WordPress on Ubuntu 18.04. WordPress is a free and open-source content management platform based on PHP and MySQL. It’s the world’s leading blogging and content management system with a market share of over 60%, dwarfing its rivals such as Joomla and Drupal.
在本文中,我们将重点介绍如何在Ubuntu 18.04上安装WordPress。 WordPress是基于PHP和MySQL的免费开源内容管理平台。 它是全球领先的博客和内容管理系统,市场份额超过60%,与Joomla和Drupal等竞争对手相形见war。
WordPress was first released on May 27th, 2003 and powers over 60 million websites to date! So powerful and popular it has become that some major brands/companies have hosted their sites on the platform. These include Sony Music, Katy Perry, New York Post, and TED.
WordPress于2003年5月27日首次发布,迄今已为超过6000万个网站提供支持! 如此强大和流行,已成为一些主要品牌/公司在其平台上托管其网站。 其中包括Sony Music,Katy Perry,New York Post和TED。
为什么WordPress如此受欢迎? (Why WordPress is so Popular?)
So why is WordPress this popular? Let’s briefly look into some of the factors that have led to the immense success of the platform.
那么为什么WordPress如此流行呢? 让我们简要地分析一下导致平台取得巨大成功的一些因素。
使用方便 (Ease of Use)
WordPress comes with a simple, intuitive and easy to use dashboard. The dashboard doesn’t require any knowledge in web programming languages like PHP, HTML5, and CSS3 and you can build a website with just a few clicks on a button. In addition, there are free templates, widgets, and plugins that come with the platform to help you get started with your blog or website.
WordPress附带了一个简单,直观且易于使用的仪表板。 仪表板不需要任何Web编程语言(如PHP,HTML5和CSS3)的知识,您只需单击几下就可以构建网站。 此外,该平台随附了免费的模板,小部件和插件,可帮助您开始使用博客或网站。
成本效益 (Cost effectiveness)
WordPress drastically saves you the agony of having to pay developer tonnes of cash to develop your website. All you have to do is to get a free WordPress theme or purchase one and install it. Once installed, you have the freedom to deploy whatever features that suit you and customize a myriad of features without running much code. What’s more, is that it takes a much shorter time to design your site that coding from scratch.
WordPress大大节省了您不得不向开发人员支付大量现金来开发您的网站的痛苦。 您要做的就是获得一个免费的WordPress主题或购买一个主题并安装它。 安装后,您可以自由部署任何适合您的功能并自定义众多功能,而无需运行大量代码。 更重要的是,从头开始进行编码的网站设计时间要短得多。
WordPress网站具有响应能力 (WordPress sites are Responsive)
WordPress platform is inherently responsive and you do not have to stay awake worrying about your sites being able to fit across multiple devices. This benefit also adds to your site being ranked higher in Google’s SEO score!
WordPress平台具有固有的响应能力,您不必为保持站点可跨多种设备的使用而保持清醒状态。 这也使您的网站在Google SEO得分中排名更高!
WordPress已准备好SEO (WordPress is SEO ready)
WordPress is built using well-structured, clean and consistent code. This makes your blog/site easily indexable by Google and other search engines thereby making your site rank higher. In addition, you can decide which pages rank higher or alternatively use SEO plugins like the popular Yoast plugin which enhances your site’s ranking on Google.
WordPress是使用结构良好,整洁且一致的代码构建的。 这使您的博客/网站可以被Google和其他搜索引擎轻松索引,从而使您的网站排名更高。 此外,您可以决定哪些页面排名较高,或者使用SEO插件(例如流行的Yoast插件)来提高您的网站在Google上的排名。
易于安装和升级 (Easy to install and upgrade)
It’s very easy to install WordPress on Ubuntu or any other operating system. There are so many open-source scripts to even automate this process. Many hosting companies provide a one-click install feature for WordPress to get you started in no time.
在Ubuntu或任何其他操作系统上安装WordPress非常容易。 有许多开源脚本甚至可以自动执行此过程。 许多托管公司为WordPress提供一键式安装功能,可让您立即开始使用。
在Ubuntu 18.04上安装WordPress (Install WordPress on Ubuntu 18.04)
Before we begin, let’s update and upgrade the system. Login as the root user to your system and update the system to update the repositories.
在开始之前,让我们更新和升级系统。 以root用户身份登录到系统,然后更新系统以更新存储库。
apt update && apt upgradeOutput
输出量
Next, we are going to install the LAMP stack for WordPress to function. LAMP is short for Linux Apache MySQL and PHP.
接下来,我们将为WordPress安装LAMP堆栈。 LAMP是Linux Apache MySQL和PHP的缩写。
步骤1:安装Apache (Step 1: Install Apache)
Let’s jump right in and install Apache first. To do this, execute the following command.
让我们直接进入并首先安装Apache。 为此,请执行以下命令。
apt install apache2Output
输出量
To confirm that Apache is installed on your system, execute the following command.
要确认您的系统上已安装Apache,请执行以下命令。
systemctl status apache2Output
输出量
To verify further, open your browser and go to your server’s IP address.
要进一步验证,请打开浏览器并转到服务器的IP地址。
https://ip-addressOutput
输出量
步骤2:安装MySQL (Step 2: Install MySQL)
Next, we are going to install the MariaDB database engine to hold our WordPress files. MariaDB is an open-source fork of MySQL and most of the hosting companies use it instead of MySQL.
接下来,我们将安装MariaDB数据库引擎来保存我们的WordPress文件。 MariaDB是MySQL的一个开源分支,大多数托管公司都使用它代替MySQL。
apt install mariadb-server mariadb-clientOutput
输出量
Let’s now secure our MariaDB database engine and disallow remote root login.
现在让我们保护我们的MariaDB数据库引擎,并禁止远程root登录。
$ mysql_secure_installationThe first step will prompt you to change the root password to login to the database. You can opt to change it or skip if you are convinced that you have a strong password. To skip changing type n.
第一步将提示您更改root密码以登录数据库。 如果您确信自己的密码很安全,则可以选择更改或跳过。 要跳过更改,请键入n 。
For safety’s sake, you will be prompted to remove anonymous users. Type Y.
为了安全起见,系统会提示您删除匿名用户。 类型Y。
Next, disallow remote root login to prevent hackers from accessing your database. However, for testing purposes, you may want to allow log in remotely if you are configuring a virtual server
接下来,禁止远程root登录,以防止黑客访问您的数据库。 但是,出于测试目的,如果要配置虚拟服务器,则可能希望允许远程登录
Next, remove the test database.
接下来,删除测试数据库。
Finally, reload the database to effect the changes.
最后,重新加载数据库以使更改生效。
步骤3:安装PHP (Step 3: Install PHP)
Lastly, we will install PHP as the last component of the LAMP stack.
最后,我们将安装PHP作为LAMP堆栈的最后一个组件。
apt install php php-mysqlOutput
输出量
To confirm that PHP is installed , created a info.php file at /var/www/html/ path
要确认已安装PHP,请在/var/www/html/路径中创建一个info.php文件
vim /var/www/html/info.phpAppend the following lines:
追加以下几行:
<?php
phpinfo();
?>
Save and Exit.
保存并退出。
Open your browser and append /info.php to the server’s URL.
打开浏览器,并将/info.php附加到服务器的URL。
https://ip-address/info.phpOutput
输出量
步骤4:建立WordPress资料库 (Step 4: Create WordPress Database)
Now it’s time to log in to our MariaDB database as root and create a database for accommodating our WordPress data.
现在是时候以root用户身份登录到我们的MariaDB数据库,并创建一个数据库来容纳我们的WordPress数据。
$ mysql -u root -pOutput
输出量
Create a database for our WordPress installation.
为我们的WordPress安装创建数据库。
CREATE DATABASE wordpress_db;Output
输出量
Next, create a database user for our WordPress setup.
接下来,为我们的WordPress设置创建一个数据库用户。
CREATE USER 'wp_user'@'localhost' IDENTIFIED BY 'password';Output
输出量

Grant privileges to the user
向用户授予特权
Next, grant the user permissions to access the database
接下来,授予用户访问数据库的权限
GRANT ALL ON wordpress_db.* TO 'wp_user'@'localhost' IDENTIFIED BY 'password';Output
输出量
Great, now you can exit the database.
太好了,现在您可以退出数据库了。
FLUSH PRIVILEGES;

Exit;
步骤5:安装WordPress CMS (Step 5: Install WordPress CMS)
Go to your temp directory and download the latest WordPress File
转到您的临时目录并下载最新的WordPress文件
cd /tmp && wget https://wordpress.org/latest.tar.gzOutput
输出量
Next, Uncompress the tarball which will generate a folder called “wordpress”.
接下来,解压缩tarball,这将生成一个名为“ wordpress”的文件夹。
tar -xvf latest.tar.gzOutput
输出量
Copy the wordpress folder to /var/www/html/ path.
将wordpress文件夹复制到/var/www/html/路径。
cp -R wordpress /var/www/html/Run the command below to change ownership of ‘wordpress’ directory.
运行以下命令来更改“ wordpress”目录的所有权。
chown -R www-data:www-data /var/www/html/wordpress/change File permissions of the WordPress folder.
更改WordPress文件夹的文件权限。
chmod -R 755 /var/www/html/wordpress/Create ‘uploads’ directory.
创建“上传”目录。
$ mkdir /var/www/html/wordpress/wp-content/uploadsFinally, change permissions of ‘uploads’ directory.
最后,更改“上载”目录的权限。
chown -R www-data:www-data /var/www/html/wordpress/wp-content/uploads/Open your browser and go to the server’s URL. In my case it’s
打开浏览器,然后转到服务器的URL。 就我而言
https://server-ip/wordpressYou’ll be presented with a WordPress wizard and a list of credentials required to successfully set it up.
您将看到一个WordPress向导以及成功设置它所需的凭据列表。
Fill out the form as shown with the credentials specified when creating the WordPress database in the MariaDB database.
使用在MariaDB数据库中创建WordPress数据库时指定的凭据填写所示的表单。
Leave out the database host and table prefix and Hit ‘Submit’ button.
省略数据库主机和表前缀,然后单击“提交”按钮。
If all the details are correct, you will be given the green light to proceed. Run the installation.
如果所有详细信息都正确,则将为您提供绿灯以继续。 运行安装。
Fill out the additional details required such as site title, Username, and Password and save them somewhere safe lest you forget. Ensure to use a strong password.
填写所需的其他详细信息,例如网站标题,用户名和密码,并将其保存在安全的地方,以免您忘记。 确保使用强密码。
Scroll down and Hit ‘Install WordPress’.
向下滚动并单击“安装WordPress”。
If all went well, then you will get a ‘Success’ notification as shown.
如果一切顺利,那么您将收到如图所示的“成功”通知。
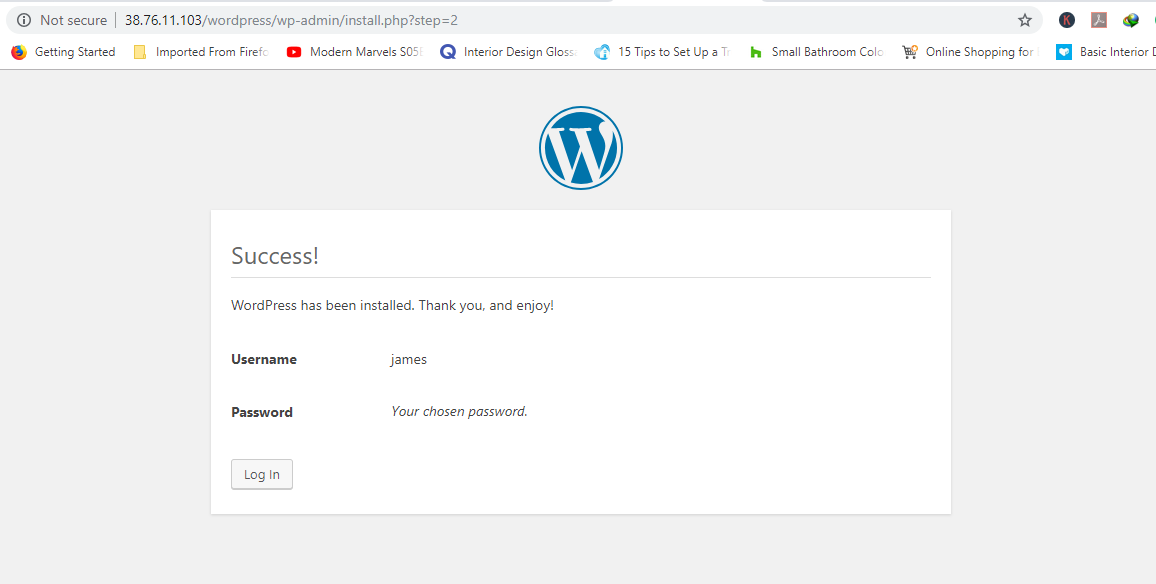
Sucess
成功
Click on the ‘Login’ button to get to access the Login page of your fresh WordPress installation.
单击“登录”按钮以访问新的WordPress安装的“登录”页面。
Provide your login credentials and hit ‘Login’.
提供您的登录凭据,然后单击“登录”。
Voila! there goes the WordPress dashboard that you can use to create your first blog or website!
瞧! 可以使用WordPress仪表板创建第一个博客或网站!
Congratulations for having come this far. You can now proceed to discover the various features, plugins, and themes and proceed setting up your first blog/website!
恭喜! 现在,您可以继续发现各种功能,插件和主题,并继续设置您的第一个博客/网站!
翻译自: https://www.journaldev.com/24954/install-wordpress-on-ubuntu


 520
520

 被折叠的 条评论
为什么被折叠?
被折叠的 条评论
为什么被折叠?
 到【灌水乐园】发言


