


 本文详细介绍了Android CameraX API,它是Google Jetpack支持库的一部分,旨在简化相机应用的开发过程。CameraX通过抽象Camera2 API,提供更好的设备一致性,并减少了样板代码。主要用例包括预览、图像分析和图像捕获,同时支持设备原生相机功能的扩展。通过几个简单的代码示例展示了如何在项目中使用CameraX。
camerax
In this tutorial, we’ll be discussing at length upon Android CameraX API. CameraX was one of the popular releases in Google IO 2019. Let’s see what it has in store for us.
在本教程中,我们将详细讨论Android CameraX API。 CameraX是Google IO 2019中最受欢迎的版本之一。让我们看看它为我们提供的功能。
什么是Android CameraX? (What is Android CameraX?)
Developing Camera Apps has always been hard. Getting a hold of the Camera APIs was never easy.
开发Camera Apps一直很困难。 掌握Camera API绝非易事。
Hence, CameraX which is introduced in the Jetpack Support Library is a respite. It aims at making the development process easier.
因此,Jetpack支持库中引入的CameraX是一个喘息的机会。 它旨在简化开发过程。
Besides API complexity, while developing camera applications, we had to tackle a lot of scenarios such as:
除了API的复杂性,在开发相机应用程序时,我们还必须解决许多情况,例如:
- OS Versions 操作系统版本
- Device Model specifications – Android Market is fragmented and has a vast variety of device configurations. Same Application can behave differently on different phones especially Samsung. 设备型号规范 – Android电子市场是零散的,具有各种各样的设备配置。 同一应用程序在不同的手机(尤其是三星)上的行为可能有所不同。
In this regards, CameraX strives to be more consistent across devices. CameraX basically uses Camera2 API under the hood but with a better implementation process. It is backward compatible until Android Lollipop (SDK 21).
在这方面,CameraX努力使设备之间的一致性更高。 CameraX基本上在后台使用Camera2 API,但实现过程更好。 它向后兼容,直到Android Lollipop(SDK 21)。
How did Google do this?
Google如何做到这一点?
Using an Automated CameraX test lab with a number of devices from various manufacturers.
将Automated CameraX测试实验室与各种制造商的许多设备一起使用。
CameraX has tackled the following issues as per Google IO 2019.
根据Google IO 2019,CameraX解决了以下问题。
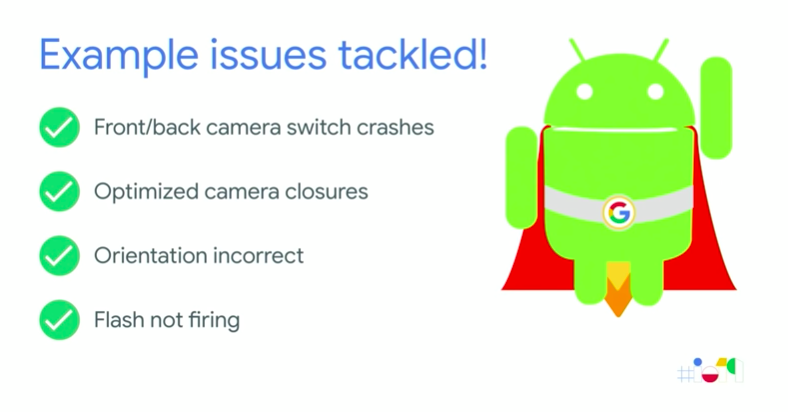
Source: Google IO 2019
资料来源:Google IO 2019
Android CameraX:抽象Camera2 API (Android CameraX : Abstracting Camera2 API)
Camera2 API provided us a lot of fine grain control over the sensors. More so, it required a lot of boilerplate code. It required communication with the HAL (Hardware Acceleration Layer) in order to access the hardware and drivers of the camera.
Camera2 API为我们提供了许多对传感器的精细控制。 更重要的是,它需要大量样板代码。 为了访问摄像机的硬件和驱动程序,它需要与HAL(硬件加速层)进行通信。
What CameraX essentially does is abstract all of this.
CameraX本质上所做的就是抽象所有这些。
Hence CameraX provides ease of use, thanks to more readability and less boilerplate code.
因此,由于具有更高的可读性和更少的样板代码,CameraX提供了易用性。
Android CameraX:用例 (Android CameraX : Use Cases)
CameraX has come up with a use case-based approach to focus on the task you need to get done instead of spending time managing device-specific configurations.
CameraX提出了一种基于用例的方法来专注于您需要完成的任务,而不是花费时间管理特定于设备的配置。
The three core use cases are:
三个核心用例是:
- Preview – What you see. The Camera Feed. 预览 –您所看到的。 相机供稿。
- Image Analysis – What you do. Processing the Camera Feed. 图像分析 –您的工作。 处理相机供稿。
- Image Capture – What you keep. Capturing the photo/video. 图像捕获 –您保留的内容。 捕获照片/视频。
Android CameraX扩展 (Android CameraX Extensions)
Extensions basically allow us to use device-native camera features directly in our custom camera application with just a few lines of code.
扩展基本上使我们仅需几行代码就可以直接在自定义相机应用程序中使用设备本机相机功能。
Features like portrait mode, depth, Bokeh effect if supported by the device can be integrated into the use cases easily.
如果设备支持,还可以将肖像模式,深度,散景效果等功能轻松集成到用例中。
onResume() and
CameraX.bindToLifecycle()来开始和停止
onPause(), we can do that, using
onResume()和
CameraX.bindToLifecycle().
onPause()的相机预览以及其他用例,而不必这样做。
Enough talk. Let’s deep dive into CameraX code now.
聊够了。 现在让我们深入研究CameraX代码。
In the section below, we’ll be implementing two use cases – Preview and Image Capture. Image Analyzer would be covered in a separate tutorial.
在下面的部分中,我们将实现两个用例-预览和图像捕获。 图像分析器将在单独的教程中介绍。
CameraX示例项目结构 (CameraX Example Project Structure)

Android Camerax Project Structure
Android Camerax项目结构
CameraX实施代码 (CameraX Implementation Code)
Let’s set up the build.gradle first:
让我们首先设置build.gradle :
implementation 'androidx.appcompat:appcompat:1.1.0-alpha03'
implementation 'androidx.constraintlayout:constraintlayout:1.1.3'
def cameraxVersion = "1.0.0-alpha02"
implementation "androidx.camera:camera-core:${cameraxVersion}"
implementation "androidx.camera:camera-camera2:${cameraxVersion}"
We need to add the permissions for Camera and External Storage in the AndroidManifest.xml file.
我们需要在AndroidManifest.xml文件中添加“摄像机和外部存储”的权限。
The code for the activity_main.xml layout is given below:
下面给出了activity_main.xml布局的代码:
<?xml version="1.0" encoding="utf-8"?>
<androidx.constraintlayout.widget.ConstraintLayout xmlns:android="https://schemas.android.com/apk/res/android"
    xmlns:app="https://schemas.android.com/apk/res-auto"
    xmlns:tools="https://schemas.android.com/tools"
    android:layout_width="match_parent"
    android:layout_height="match_parent"
    tools:context=".MainActivity">

    <TextureView
        android:id="@+id/view_finder"
        android:layout_width="match_parent"
        android:layout_height="match_parent"
        app:layout_constraintTop_toTopOf="parent"
        app:layout_constraintBottom_toBottomOf="parent"
        app:layout_constraintStart_toStartOf="parent"
        app:layout_constraintEnd_toEndOf="parent" />

    <ImageButton
        android:id="@+id/imgCapture"
        android:layout_width="72dp"
        android:layout_height="72dp"
        android:layout_margin="24dp"
        app:srcCompat="@android:drawable/ic_menu_camera"
        app:layout_constraintBottom_toBottomOf="parent"
        app:layout_constraintEnd_toEndOf="parent"
        app:layout_constraintStart_toStartOf="parent" />

</androidx.constraintlayout.widget.ConstraintLayout>
The code for the MainActivity.java class is given below.
下面给出MainActivity.java类的代码。
package com.journaldev.androidcamerax;

import androidx.annotation.NonNull;
import androidx.annotation.Nullable;
import androidx.appcompat.app.AppCompatActivity;
import androidx.camera.core.CameraX;
import androidx.camera.core.ImageCapture;
import androidx.camera.core.ImageCaptureConfig;
import androidx.camera.core.Preview;
import androidx.camera.core.PreviewConfig;
import androidx.core.app.ActivityCompat;
import androidx.core.content.ContextCompat;
import androidx.lifecycle.LifecycleOwner;


import android.content.pm.PackageManager;
import android.graphics.Matrix;
import android.os.Bundle;
import android.os.Environment;
import android.util.Rational;
import android.util.Size;
import android.view.Surface;
import android.view.TextureView;
import android.view.View;
import android.view.ViewGroup;
import android.widget.Toast;

import java.io.File;

public class MainActivity extends AppCompatActivity {


    private int REQUEST_CODE_PERMISSIONS = 101;
    private final String[] REQUIRED_PERMISSIONS = new String[]{"android.permission.CAMERA", "android.permission.WRITE_EXTERNAL_STORAGE"};
    TextureView textureView;

    @Override
    protected void onCreate(Bundle savedInstanceState) {
        super.onCreate(savedInstanceState);
        setContentView(R.layout.activity_main);

        textureView = findViewById(R.id.view_finder);

        if(allPermissionsGranted()){
            startCamera(); //start camera if permission has been granted by user
        } else{
            ActivityCompat.requestPermissions(this, REQUIRED_PERMISSIONS, REQUEST_CODE_PERMISSIONS);
        }
    }

    private void startCamera() {

        CameraX.unbindAll();

        Rational aspectRatio = new Rational (textureView.getWidth(), textureView.getHeight());
        Size screen = new Size(textureView.getWidth(), textureView.getHeight()); //size of the screen


        PreviewConfig pConfig = new PreviewConfig.Builder().setTargetAspectRatio(aspectRatio).setTargetResolution(screen).build();
        Preview preview = new Preview(pConfig);

        preview.setOnPreviewOutputUpdateListener(
                new Preview.OnPreviewOutputUpdateListener() {
                    //to update the surface texture we  have to destroy it first then re-add it
                    @Override
                    public void onUpdated(Preview.PreviewOutput output){
                        ViewGroup parent = (ViewGroup) textureView.getParent();
                        parent.removeView(textureView);
                        parent.addView(textureView, 0);

                        textureView.setSurfaceTexture(output.getSurfaceTexture());
                        updateTransform();
                    }
                });


        ImageCaptureConfig imageCaptureConfig = new ImageCaptureConfig.Builder().setCaptureMode(ImageCapture.CaptureMode.MIN_LATENCY)
                .setTargetRotation(getWindowManager().getDefaultDisplay().getRotation()).build();
        final ImageCapture imgCap = new ImageCapture(imageCaptureConfig);

        findViewById(R.id.imgCapture).setOnClickListener(new View.OnClickListener() {
            @Override
            public void onClick(View v) {
                File file = new File(Environment.getExternalStorageDirectory() + "/" + System.currentTimeMillis() + ".png");
                imgCap.takePicture(file, new ImageCapture.OnImageSavedListener() {
                    @Override
                    public void onImageSaved(@NonNull File file) {
                        String msg = "Pic captured at " + file.getAbsolutePath();
                        Toast.makeText(getBaseContext(), msg,Toast.LENGTH_LONG).show();
                    }

                    @Override
                    public void onError(@NonNull ImageCapture.UseCaseError useCaseError, @NonNull String message, @Nullable Throwable cause) {
                        String msg = "Pic capture failed : " + message;
                        Toast.makeText(getBaseContext(), msg,Toast.LENGTH_LONG).show();
                        if(cause != null){
                            cause.printStackTrace();
                        }
                    }
                });
            }
        });

        //bind to lifecycle:
        CameraX.bindToLifecycle((LifecycleOwner)this, preview, imgCap);
    }

    private void updateTransform(){
        Matrix mx = new Matrix();
        float w = textureView.getMeasuredWidth();
        float h = textureView.getMeasuredHeight();

        float cX = w / 2f;
        float cY = h / 2f;

        int rotationDgr;
        int rotation = (int)textureView.getRotation();

        switch(rotation){
            case Surface.ROTATION_0:
                rotationDgr = 0;
                break;
            case Surface.ROTATION_90:
                rotationDgr = 90;
                break;
            case Surface.ROTATION_180:
                rotationDgr = 180;
                break;
            case Surface.ROTATION_270:
                rotationDgr = 270;
                break;
            default:
                return;
        }

        mx.postRotate((float)rotationDgr, cX, cY);
        textureView.setTransform(mx);
    }

    @Override
    public void onRequestPermissionsResult(int requestCode, @NonNull String[] permissions, @NonNull int[] grantResults) {

        if(requestCode == REQUEST_CODE_PERMISSIONS){
            if(allPermissionsGranted()){
                startCamera();
            } else{
                Toast.makeText(this, "Permissions not granted by the user.", Toast.LENGTH_SHORT).show();
                finish();
            }
        }
    }

    private boolean allPermissionsGranted(){

        for(String permission : REQUIRED_PERMISSIONS){
            if(ContextCompat.checkSelfPermission(this, permission) != PackageManager.PERMISSION_GRANTED){
                return false;
            }
        }
        return true;
    }
}
PreviewConfig is where we configure the preview which is the live camera feed.
PreviewConfig是我们配置预览的地方,它是实时摄像机的提要。
In the builder, we can set stuff like Aspect Ratios, Lens front or back, and target resolution.
在构建器中,我们可以设置纵横比,镜头前后或目标分辨率等内容。
The Preview is displayed on a TextureView.
预览显示在TextureView 。
ImageCaptureConfiguration.Builder() is configuration for image when captured. We set different configuration like MIN_LATENCY or MAX_QUALITY.
ImageCaptureConfiguration.Builder()是捕获图像时的配置。 我们设置了不同的配置,例如MIN_LATENCY或MAX_QUALITY。
An output screenshot of the application in action is given below:
运行中的应用程序的输出屏幕截图如下:

Android Camerax Output
Android Camerax输出
That brings an end to this tutorial. You can download the project from the link below or view the full source code from the Github Link provided underneath.
这样就结束了本教程。 您可以从下面的链接下载项目,也可以从下面提供的Github链接查看完整的源代码。
翻译自: https://www.journaldev.com/30132/android-camerax-overview
camerax


 1209
1209

 被折叠的 条评论
为什么被折叠?
被折叠的 条评论
为什么被折叠?
 到【灌水乐园】发言


