


android表情面板
In this tutorial, we’ll be discussing how to show the Settings Panel in our android application. With the introduction of Android Q, it’s possible to show a Floating Settings Menu without switching to the Settings App.
在本教程中,我们将讨论如何在我们的android应用程序中显示“设置面板”。 随着Android Q的推出,无需切换到设置应用程序就可以显示浮动设置菜单。
Android Q设置面板 (Android Q Settings Panel)
A Settings Panel is like a Bottom Sheet Floating Menu which allows us to view/edit the settings.
设置面板就像“底部浮动菜单”一样,它使我们可以查看/编辑设置。
Currently, the Settings Panel can show three different types of Settings:
当前,“设置面板”可以显示三种不同类型的设置:
- Connectivity Settings – Mobile Data/Wifi Airplane Mode 连接设置–移动数据/ Wifi飞机模式
- Volume Settings – Change the volumes of alarm, calls notification etc. 音量设置–更改警报,呼叫通知等的音量。
- NFC – Configure NFC connection settings NFC –配置NFC连接设置
To invoke each such setting, we need to call Intents with the specific Action Strings Constants.
要调用每个这样的设置,我们需要使用特定的操作字符串常量来调用Intent。
Following are the Action Strings for each Panel:
以下是每个面板的操作字符串:
- ACTION_INTERNET_CONNECTIVITY ACTION_INTERNET_CONNECTIVITY
- ACTION_NFC ACTION_NFC
- ACTION_VOLUME ACTION_VOLUME
Using the above Settings Panel makes the UX much more smooth. Earlier to change settings from the current application, the user had to launch the Settings App using Intents.
Now, the transition is much more smooth.
使用上面的“设置面板”可使UX更加流畅。 要从当前应用程序更改设置,用户必须先使用Intents启动设置应用程序。
现在,过渡更加顺畅。
Despite all the pros, there is one con in this new Settings Panel Design.
尽管有很多优点,但这种新的“设置面板”设计还是有缺点的。
Why is the Settings Panel really needed when the user can access these actions from the System notification tray in the Status Bar?
当用户可以从状态栏中的系统通知托盘访问这些操作时,为什么真正需要设置面板?
In the following section, we’ll be implementing each of these three Settings Panel in our Android Studio Project.
在下一节中,我们将在Android Studio项目中实现这三个设置面板中的每一个。
Android Q应用内设置面板项目结构 (Android Q In-App Settings Panel Project Structure)
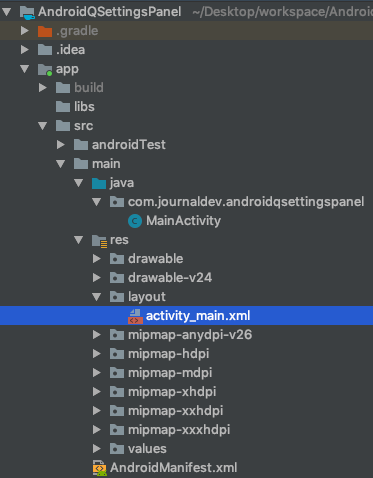
Android Q Settings Panel Project Structure
Android Q设置面板项目结构
Please make sure that you have updated your Android SDK and builds to the latest Android – Q.
请确保您已更新Android SDK,并已构建到最新的Android –Q。
码 (Code)
The code for the activity_main.xml layout is given below:
下面给出了activity_main.xml布局的代码:
<?xml version="1.0" encoding="utf-8"?>
<LinearLayout xmlns:android="https://schemas.android.com/apk/res/android"
    xmlns:app="https://schemas.android.com/apk/res-auto"
    xmlns:tools="https://schemas.android.com/tools"
    android:layout_width="match_parent"
    android:layout_height="match_parent"
    android:orientation="vertical"
    android:gravity="center"
    tools:context=".MainActivity">

    <Button
        android:id="@+id/btnInternet"
        android:layout_width="wrap_content"
        android:layout_height="wrap_content"
        android:text="INTERNET SETTINGS"
        app:layout_constraintBottom_toBottomOf="parent"
        app:layout_constraintLeft_toLeftOf="parent"
        app:layout_constraintRight_toRightOf="parent"
        app:layout_constraintTop_toTopOf="parent" />

    <Button
        android:id="@+id/btnVolume"
        android:layout_width="wrap_content"
        android:layout_height="wrap_content"
        android:text="VOLUME SETTINGS"
        app:layout_constraintBottom_toBottomOf="parent"
        app:layout_constraintLeft_toLeftOf="parent"
        app:layout_constraintRight_toRightOf="parent"
        app:layout_constraintTop_toTopOf="parent" />

    <Button
        android:id="@+id/btnNFC"
        android:layout_width="wrap_content"
        android:layout_height="wrap_content"
        android:text="NFC SETTINGS"
        app:layout_constraintBottom_toBottomOf="parent"
        app:layout_constraintLeft_toLeftOf="parent"
        app:layout_constraintRight_toRightOf="parent"
        app:layout_constraintTop_toTopOf="parent" />

</LinearLayout>
The code for the MainActivity.java class is given below:
MainActivity.java类的代码如下:
package com.journaldev.androidqsettingspanel;

import androidx.appcompat.app.AppCompatActivity;

import android.content.Intent;
import android.os.Bundle;
import android.provider.Settings;
import android.view.View;
import android.widget.Button;

public class MainActivity extends AppCompatActivity implements View.OnClickListener {

    Button btnInternet, btnVolume, btnNFC;

    @Override
    protected void onCreate(Bundle savedInstanceState) {
        super.onCreate(savedInstanceState);
        setContentView(R.layout.activity_main);

        btnInternet = findViewById(R.id.btnInternet);
        btnVolume = findViewById(R.id.btnVolume);
        btnNFC = findViewById(R.id.btnNFC);

        btnInternet.setOnClickListener(this);
        btnVolume.setOnClickListener(this);
        btnNFC.setOnClickListener(this);
    }

    @Override
    public void onClick(View view) {

        switch (view.getId()) {
            case R.id.btnInternet:
                showInternetSettings();
                break;
            case R.id.btnVolume:
                showVolumeSettings();
                break;
            case R.id.btnNFC:
                showNFCSettings();
                break;
        }
    }

    private void showInternetSettings() {
        startActivity(new Intent(Settings.Panel.ACTION_INTERNET_CONNECTIVITY));
    }

    private void showVolumeSettings() {
        startActivity(new Intent(Settings.Panel.ACTION_VOLUME));
    }

    private void showNFCSettings() {
        startActivity(new Intent(Settings.Panel.ACTION_NFC));
    }
}
The above code is self-explanatory.
We’ve simply launched each of the Settings Panel on different Button click Intents.
上面的代码是不言自明的。
我们只是在不同的按钮单击意图上启动了每个设置面板。
The output of the above application in action is given below:
上面应用程序的输出如下:

Android Q Settings Panel Output
Android Q设置面板输出
Ignore the lags and UI getting cut since it’s an issue with the Android Emulator.
忽略滞后和UI被削减,因为这是Android模拟器的问题。
That brings an end to this tutorial. You can download the project from the link below or view the full source code in our Github Repository.
这样就结束了本教程。 您可以从下面的链接下载项目,或者在我们的Github存储库中查看完整的源代码。
翻译自: https://www.journaldev.com/28036/android-q-in-app-settings-panel
android表情面板


 1355
1355

 被折叠的 条评论
为什么被折叠?
被折叠的 条评论
为什么被折叠?
 到【灌水乐园】发言


