


Angular是一个流行的框架,用于为Web和移动应用程序创建前端。 这一切都始于AngularJS 1.x,然后是AngularJS 2,现在终于是Angular,Angular团队正在研究最新的更新和错误修复。
组件是Angular Web应用程序的重要组成部分。 在本教程中,您将看到如何开始使用Angular创建Web应用程序,并且还将了解组件。
入门
通过使用节点包管理器(npm)安装Angular CLI入门。
npm install -g @angular/cli 一旦安装了Angular CLI,请使用CLI创建一个新的Angular应用。
ng new angular-app导航到应用程序文件夹并启动服务器。
cd angular-app
ng serve将浏览器指向http:// localhost:4200 / ,您应该正在运行默认应用程序。
角度应用程序结构
导航到angular-app项目文件夹,然后查看项目结构。 外观如下:
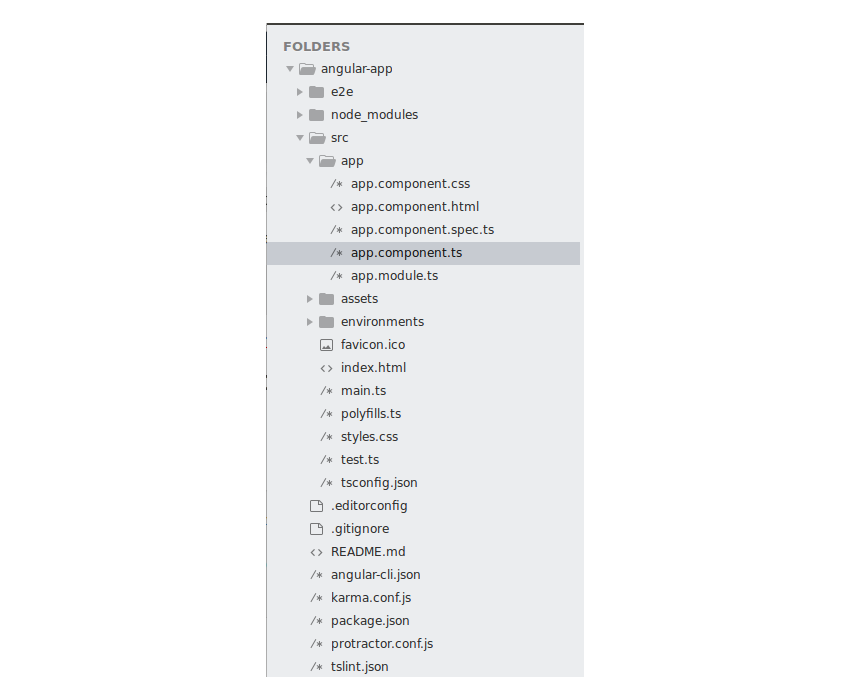
每个Angular应用程序都有一个根模块,您可以在其中定义要加载的主要组件。 在默认的Angular应用中,根模块在app.module.ts定义。 加载AppModule时,它将检查引导的组件并加载该模块。 从app.module.ts可以看出,引导的模块是AppComponent 。 AppComponent组件在文件app.component.ts定义。
使用@Component装饰器定义组件。 在@Component装饰器内,您可以定义组件selector ,组件template和相关style 。
什么是角组件?
组件就像Angular应用程序中的基本构建块。 组件是使用@component装饰器定义的。 组件具有selector , template , style和其他属性,通过它们可以指定处理组件所需的元数据。
从官方文档:
组件是Angular应用程序中UI的最基本构建块。 Angular应用程序是Angular组件树。 角组件是指令的子集。 与指令不同,组件始终具有一个模板,并且模板中每个元素只能实例化一个组件。
理解与编程相关的东西的最好方法是实际操作。 因此,让我们开始创建一个用于添加两个数字的Angular组件。 我们称其为CalculatorComponent 。
创建计算器组件
让我们从为计算器创建一个组件开始。 在src/app文件夹中,创建一个名为calc的文件夹。 这是我们的calc组件将驻留的位置。 在calc文件夹中,创建一个名为calc.component.html的文件。 这将是我们计算器组件的模板。 外观如下:
<h1>
    Calculator component
</h1> 创建一个名为calc.component.ts的文件。 在这里您将定义calc组件并指定相关的元数据。 您将使用@component装饰器定义组件。 要定义组件,您需要从角铁芯导入component模块。
import { Component } from '@angular/core'; 通过指定template , style和selector来定义组件。 您还将定义一个class来管理@component装饰器指定的模板。 外观如下:
import { Component } from '@angular/core';

@Component({
  selector: 'calc',
  templateUrl: 'calc.component.html',
  styleUrls: ['calc.component.css']
})
export class CalcComponent {

}
与组件模板有关的所有样式都应在组件装饰器中指定的文件内定义。 因此,在calc文件夹中创建一个名为calc.component.css的文件。 您将把计算器组件的样式放在此文件中。
现在您已经准备好组件,让我们在根模块app.module.ts定义组件。
首先将组件导入app.module.ts file ,然后将其包括在declarations部分中。 添加CalcComponent后的CalcComponent如下:
import { BrowserModule } from '@angular/platform-browser';
import { NgModule } from '@angular/core';

import { AppComponent } from './app.component';
import { CalcComponent } from './calc/calc.component'

@NgModule({
  declarations: [
    AppComponent,
    CalcComponent
  ],
  imports: [
    BrowserModule
  ],
  providers: [],
  bootstrap: [AppComponent]
})
export class AppModule { } 如您在根模块app.module.ts , AppComponent是自举模块,因此它将默认呈现。 因此,要查看我们的计算器组件,请在app.component.html定义它。 这是app.component.html文件的外观:
<div style="text-align:center">
  <calc></calc>
</div>
保存以上更改并启动服务器。 您应该能够看到显示的计算器组件HTML内容。
添加计算器功能
让我们从为Angular计算器添加模板开始。 将以下代码添加到calc.component.html文件:
<div class="container">
    <div class="header">
    	<h2>
			Calculator component
		</h2>
	</div>

	<div class="grid">
		<div class="row">
			<div class="col-6">
				<div class="operation">
					<div class="row">
						<div class="col-12">
							<input type="number" name="" placeholder="number">
						</div>
					</div>
					<div class="row">
						<div class="col-12">
							<input type="number" name="" placeholder="number">
						</div>
					</div>
					<div>
						<div class="col-12">
							<button class="button">
								Add
							</button>
						</div>
					</div>
				</div>
			</div>
			<div class="col-6">
				<div class="result">
					<span>
						Result
					</span>
				</div>
			</div>
		</div>
	</div>
</div> 将以下样式添加到calc.component.css文件。
.grid{
width: 100%
}
.row{
width: 100%;
display: flex;
}
.col-1 {
width: 8.33%;
}
.col-2 {
width: 16.66%;
}
.col-3 {
width: 25%;
}
.col-4 {
width: 33.33%;
}
.col-5 {
width: 41.66%;
}
.col-6 {
width: 50%;
}
.col-7 {
width: 58.33%;
}
.col-8 {
width: 66.66%;
}
.col-9 {
width: 75%;
}
.col-10 {
width: 83.33%;
}
.col-11 {
width: 91.66%;
}
.col-12 {
width: 100%;
}
.header{
width: 100%;
background-color: #003A60;
height: 100px;
}
.header h2{
line-height: 100px;
color: #fff;
}
.button {
background-color: #4CAF50; /* Green */
border: none;
color: white;
padding: 15px 32px;
text-align: center;
text-decoration: none;
display: inline-block;
font-size: 16px;
margin: 4px 2px;
cursor: pointer;
}
input{
border: none;
border-bottom: 1px solid grey;
width: 80%;
margin: 0% 10%;
padding: 5%;
}
.result{
background-color: #ddffff;
width: 80%;
margin: 20px 10px 10px 10px;
height: 100px;
border-left: 3px solid #2196F3;
}
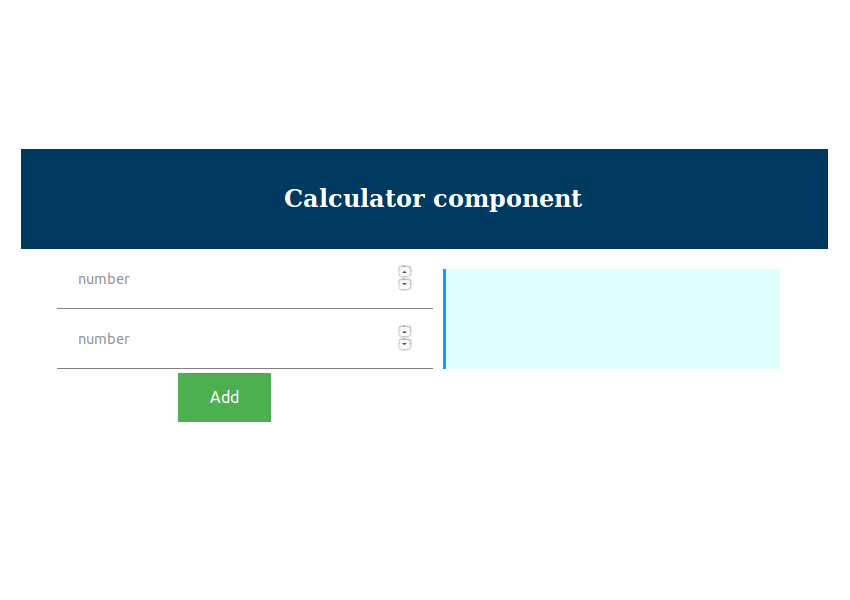
.result span{
line-height: 100px;
}保存以上更改,您应该能够查看以下用户界面。
让我们将ngModel指令添加到上面显示的输入文本框中。 修改calc.component.html代码,如下所示:
<div class="row">
	<div class="col-12">
		<input [(ngModel)]="number1" type="number" name="" placeholder="number">
	</div>
</div>
<div class="row">
	<div class="col-12">
		<input [(ngModel)]="number2" type="number" name="" placeholder="number">
	</div>
</div> 如上所示,已将输入文本框的ngModel设置为变量number1和number2 。
让我们定义中的变量CalcComponent在calc.component.ts文件。
export class CalcComponent {
  public number1 : number;
  public number2 : number;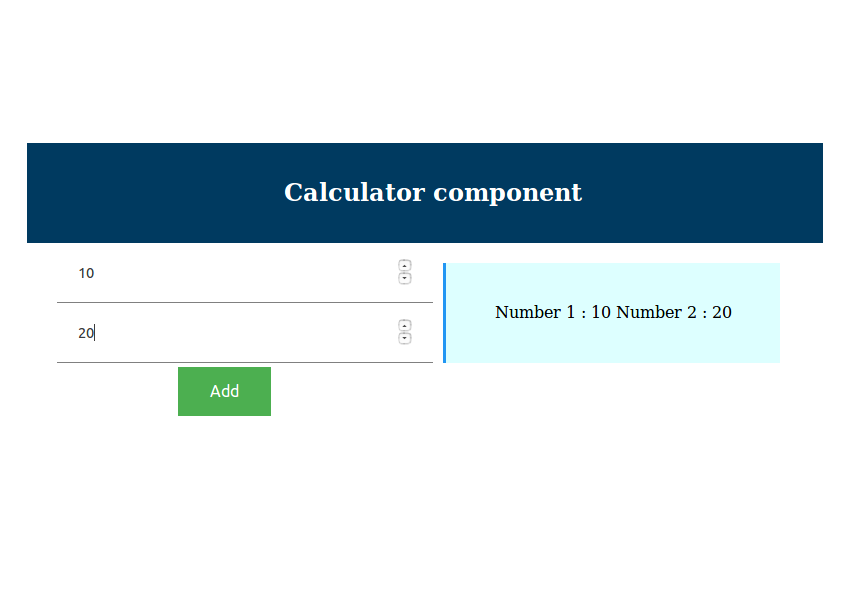
} 现在,当用户在文本框中键入内容时,相应的ngModel变量将得到更新。 您可以通过在组件的模板文件中显示变量来进行检查。
<div class="result">
	<span>
		Number 1 : {{number1}}
		Number 2 : {{number2}}
	</span>
</div>
保存更改并在输入框中输入值,您应该在跨度内更新数据。
让我们添加一个按钮,点击该Add按钮,将计算的总和number1和number2的按键点击时。
如图所示,修改HTML代码以包含click指令。
<button (click)="add()" class="button">
	Add
</button> 定义CalcComponent内部的add函数,如下所示:
import { Component } from '@angular/core';

@Component({
  selector: 'calc',
  templateUrl: 'calc.component.html',
  styleUrls: ['calc.component.css']
})
export class CalcComponent {
  public number1 : number;
  public number2 : number;
  public result : number;

  public add(){
      this.result = this.number1 + this.number2
  }
} 如上面的代码所示,加法的结果被放置在一个名为result的变量中。
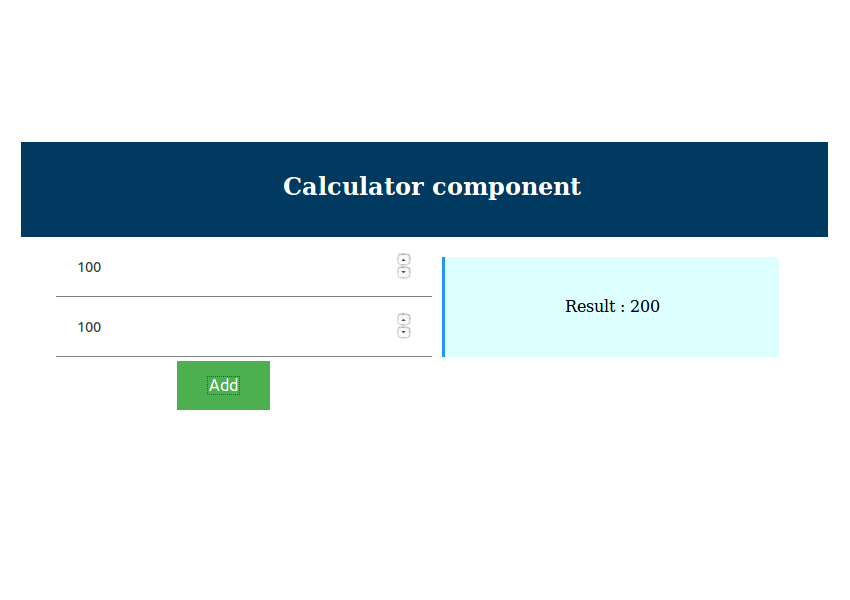
设置变量后,让我们修改HTML模板以显示结果。
<div class="result">
	<span>
		Result : {{result}}
	</span>
</div>
保存以上更改,然后尝试通过单击“ 添加”按钮将两个数字相加。 您将在用户界面中显示结果。
包起来
在本教程中,您了解了如何开始使用Angular 4创建Web应用程序。您了解了Angular组件以及如何创建组件。 您创建了一个简单的Angular组件以添加两个数字。
该教程的源代码可在GitHub上获得 。 如果您正在寻找其他资源来学习或在工作中使用,请查看Envato Market上可用的资源 。
请在下面的评论中让我们知道您的想法,建议或任何更正。
翻译自: https://code.tutsplus.com/tutorials/beginners-guide-to-angular-4-components--cms-29674


 2277
2277

 被折叠的 条评论
为什么被折叠?
被折叠的 条评论
为什么被折叠?
 到【灌水乐园】发言


