


NativeScript是用于使用XML,CSS和JavaScript构建跨平台本机移动应用程序的框架。 在本系列中,我们正在尝试使用NativeScript应用程序可以执行的一些很酷的操作:地理位置和Google Maps集成,SQLite数据库,Firebase集成和推送通知。 在此过程中,我们正在构建一个具有实时功能的健身应用程序,它将使用这些功能中的每一个。
在本教程中,您将了解使用Firebase Cloud Messaging Service向您的NativeScript应用添加推送通知有多么容易。
您将要创造的
从上一教程中摘录,您将向应用程序添加推送通知。 当用户中断当前记录或其中一个朋友离开他们的第一名时,将触发通知。
设置项目
如果您遵循了Firebase上的上一教程,则只需使用同一项目并构建将在本教程中添加的功能。 否则,您可以创建一个新项目,并将启动程序文件复制到项目的应用程序文件夹中。
tns create fitApp --appid "com.yourname.fitApp"之后,您还需要安装地理位置,Google Maps,SQLite和Firebase插件:
tns plugin add nativescript-geolocation
tns plugin add nativescript-google-maps-sdk
tns plugin add nativescript-sqlite
tns plugin add nativescript-plugin-firebase
安装后,您需要配置Google Maps插件。 您可以通过阅读前面的教程中有关安装Google Maps插件的部分来阅读有关如何执行此操作的完整说明。
接下来,安装fecha库以设置日期格式:
npm install --save fecha之后,您还需要配置Firebase插件。 请确保阅读上一教程中的以下部分,以使应用程序运行:
- 运行项目
- 设置Firebase应用
- 设置Facebook应用
- 安装Firebase插件
- 配置Facebook集成
由于我们已经在上一篇文章中设置了Firebase插件,因此只需做少量工作即可设置推送通知。
首先,您必须通过进入node_modules / nativescript-plugin-firebase目录并运行npm run config来重新配置插件。 这次,选择Facebook身份验证和消息传递。
完成后,打开项目根目录中的firebase.nativescript.json文件,并确保将messaging设置为true :
{
    "using_ios": false,
    "using_android": true,
    "remote_config": false,
    "messaging": true,
    "crash_reporting": false,
    "storage": false,
    "facebook_auth": true,
    "google_auth": false,
    "admob": false,
    "invites": false
} 接下来,打开app / App_Resources / Android / AndroidManifest.xml并将以下服务添加到<application> 。 这将为该应用程序启用Firebase消息传递服务:
<application ...>

<service android:name="org.nativescript.plugins.firebase.MyFirebaseInstanceIDService">
    <intent-filter>
        <action android:name="com.google.firebase.INSTANCE_ID_EVENT"/>
    </intent-filter>
</service>
<service android:name="org.nativescript.plugins.firebase.MyFirebaseMessagingService">
    <intent-filter>
        <action android:name="com.google.firebase.MESSAGING_EVENT"/>
    </intent-filter>
</service>

</application>
运行项目
您可以通过执行tns run android来运行项目。 但是由于该应用程序将基于地理位置功能,因此我建议您使用GPS模拟器来快速设置和更改位置。 您可以在之前的教程中的“ 运行应用程序 ”部分中了解有关操作方法的信息。
如果遇到任何构建错误,则可以删除平台并重新运行该应用程序:
tns platform remove android
tns run android
设置Firebase云功能
您将使用Firebase Cloud Functions创建将发送推送通知的服务器。 每当您正在使用的Firebase功能内发生特定事件时,此Firebase功能都将用于运行后端代码,例如,如果实时数据库中保存了新数据,或者通过Firebase身份验证服务。 对于此应用程序,当移动应用程序向特定端点发出请求时,您将使用HTTP触发器发送推送通知。
要使用Firebase Cloud Functions,首先需要全局安装firebase-tools软件包:
npm install -g firebase-tools 接下来,创建一个包含服务器代码的新文件夹。 该文件夹应位于您的应用文件夹之外。 在该文件夹中,安装firebase-functions软件包:
npm install firebase-functions@latest --save 安装完成后,通过运行firebase login到Firebase。 这将打开一个新的浏览器选项卡,使您可以使用Google帐户登录。 经历整个过程并同意要求所有权限。
登录后,您现在可以为特定的Firebase项目初始化Firebase功能:
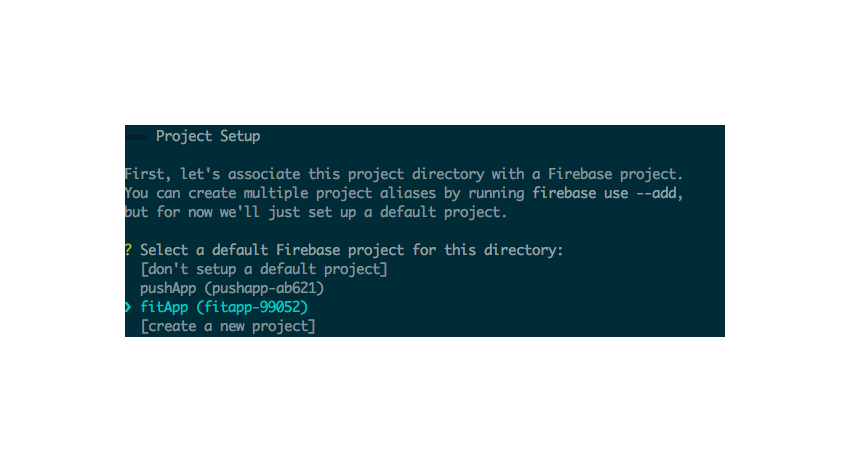
firebase init functions这将询问您是否要设置默认项目。 选择您在上一个教程中创建的Firebase项目:
接下来,将询问您是否要安装依赖项。 说是。
一旦所有依赖项都已安装,您应该在目录内看到一个firebase.json文件和一个functions文件夹。 您将要使用的文件是functions / index.js文件。 打开该文件,您将看到以下内容:
const functions = require('firebase-functions');

// // Create and Deploy Your First Cloud Functions
// // https://firebase.google.com/docs/functions/write-firebase-functions
//
// exports.helloWorld = functions.https.onRequest((request, response) => {
//  response.send("Hello from Firebase!");
// }); 取消注释helloWorld函数,您将看到正在使用的HTTP触发器。
exports.helloWorld = functions.https.onRequest((request, response) => {
    response.send("Hello from Firebase!");
});
运行以下命令将该功能部署到云中:
firebase deploy --only functions部署完成后,它应显示功能已部署的URL:
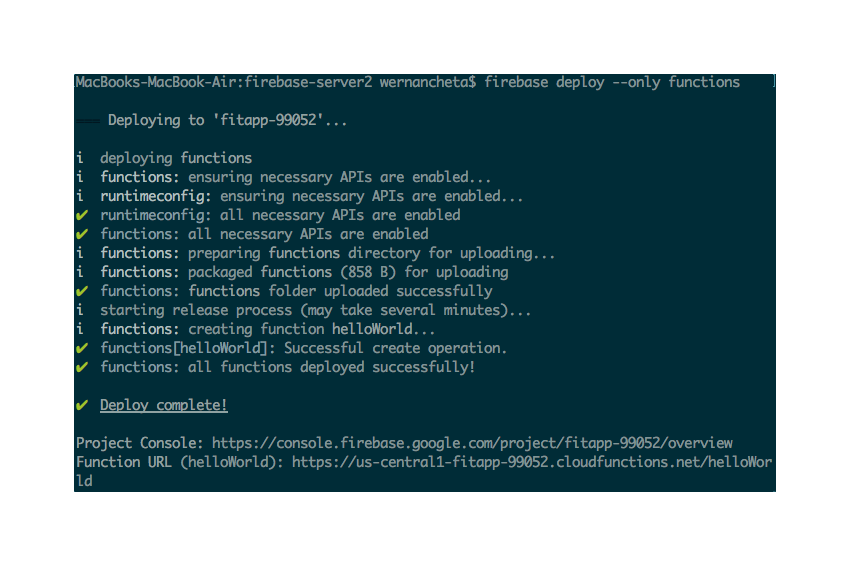
从浏览器访问该URL,以查看输出“ Firebase的问候!”。
添加服务器代码
现在,您准备添加用于实现推送通知的代码。 首先,您将添加服务器组件的代码,然后添加该应用程序的代码。
打开functions / index.js文件并清空其内容。
创建Firebase函数
导入您需要的Firebase软件包:
const functions = require('firebase-functions'); // for listening to http triggers
const admin = require('firebase-admin'); // for accessing the realtime database
admin.initializeApp(functions.config().firebase); // initialize the Firebase Admin SDK 创建init_push函数。 请注意,任何请求方法都会调用HTTP触发器,因此您必须过滤要处理的请求方法。 在这种情况下,我们只想处理POST请求。 我们希望应用程序提交id , steps和friend_ids作为请求数据。
exports.init_push = functions.https.onRequest((request, response) => {

    if(request.method == 'POST'){

        var id = request.body.id; // ID of the user who made the request (Firebase Auth ID)
        var steps = parseInt(request.body.steps); // latest steps, not recorded yet
        var friend_ids = request.body.friend_ids.split(',');

        friend_ids.push(id); // also include the ID of the current user

        // next: add code for getting the user and friends data
    }

});
获取用户和朋友数据
接下来,查询Firebase数据库以检查用户ID是否存在。 这是一种保护端点的方法,因此不仅任何人都可以触发推送通知。 (当然,真正的应用程序应具有更好的后端安全性,以便用户不能欺骗自己的数据或其他人的数据。)
如果用户确实存在,请再次查询数据库,以便它返回所有用户。 请注意,Firebase当前不提供基于ID数组返回记录的方法,因此我们必须自己过滤相关数据:
admin.database().ref('/users')
    .orderByChild('id')
    .limitToFirst(1)
    .equalTo(id)
    .once('value').then(snapshot => {

    var user_data = snapshot.val();

    if(user_data){
        // get all users from the database
        admin.database().ref('/users')
            .once('value').then(snapshot => {
            // next: add code for getting the current user's data and their friends data
        });
    }
}); 接下来,循环浏览从Firebase返回的结果,并创建一个包含friends_data的新数组。 完成此操作后,根据每个用户的步骤数对数组进行排序。 步骤数最多的那个具有第一个索引。
var friends_data = [];
var current_user_data = null;
var notification_data = {};
var has_notification = false;

var users = snapshot.val();
for(var key in users){
    var user_id = users[key].id;

    if(friend_ids.indexOf(user_id) != -1 && id != user_id){ // the current user's friends
        friends_data.push(users[key]);
    }else if(id == user_id){ // the current user
        current_user_data = users[key];
    }
}

// sort in descending order by the number of steps
var sorted_friends_data = friends_data.sort(function(a, b) {
    return b.steps - a.steps;
});

// next: add code for constructing the notification payload
构建通知有效负载
现在,我们准备确定谁将接收通知并构造通知有效负载。 谁在第一? 是当前用户还是该用户的朋友之一? 由于当前用户在打破第一人的总体记录时也会打破自己的记录,因此我们只需要检查该记录是否已被打破。
if(steps > sorted_friends_data[0].steps){
// notify friend who was overtaken
var diff_steps = steps - sorted_friends_data[0].steps;
notification_data = {
payload: {
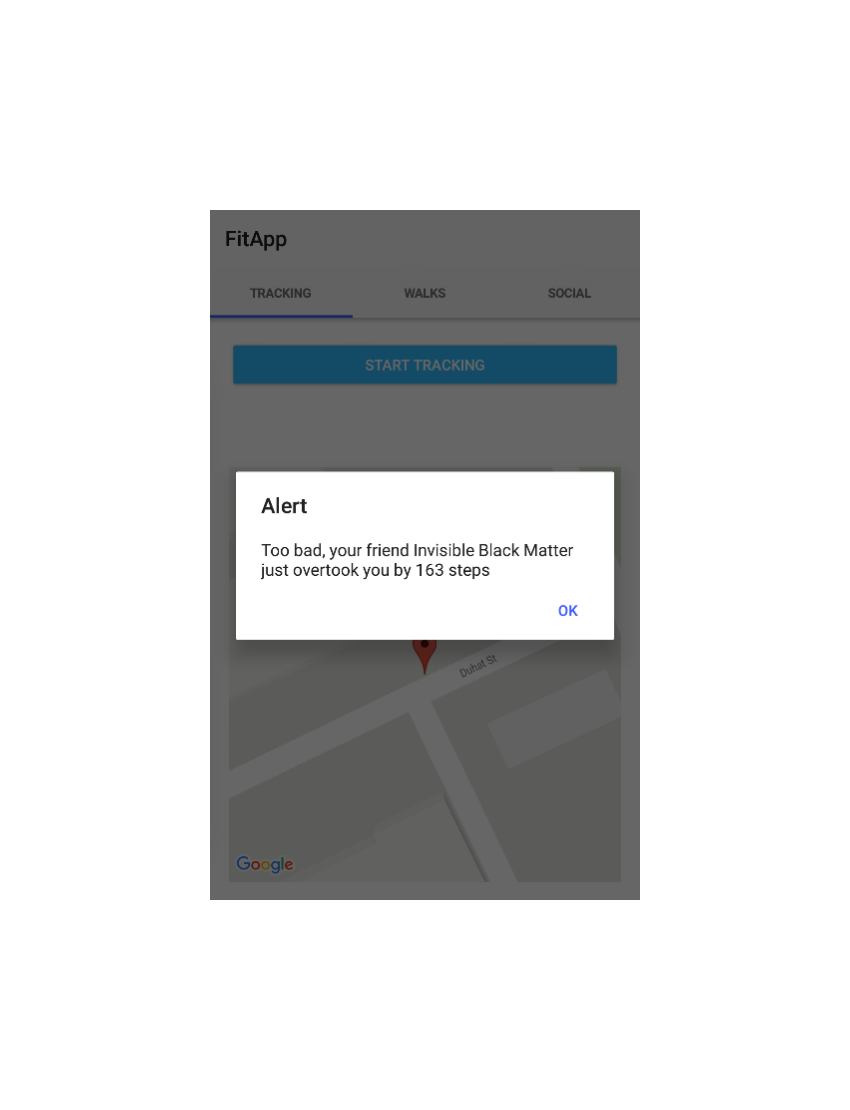
title: 'One of your friends beat your record',
body: 'Too bad, your friend ' + current_user_data.user_name + ' just overtook you by ' + diff_steps + ' steps'
},
device_token: sorted_friends_data[0].device_token
};
has_notification = true;
}else if(steps > current_user_data.steps){
// notify current user
var diff_steps = steps - current_user_data.steps;
notification_data = {
payload: {
title: 'You beat your record!',
body: 'Congrats! You beat your current record by ' + diff_steps + ' steps!'
},
device_token: current_user_data.device_token
};
has_notification = true;
}
// next: add code for sending push notification发送通知
最后,发出通知:
if(has_notification){

    var payload = {
      notification: notification_data.payload
    };

    // send push notification
    admin.messaging().sendToDevice(notification_data.device_token, payload).then(function(res) {

        response.send(JSON.stringify({'has_notification': true})); // inform the app that a notification was sent
    })
    .catch(function(error) {
        response.send(JSON.stringify(error)); // send the push notification error to the app
    });

}else{
    response.send(JSON.stringify({'has_notification': false})); // inform the app that a notification was not sent
}
更新应用程序代码
之前,您对应用程序进行了设置,以使其能够接收推送通知。 这次,您将添加代码,以便您的应用可以处理这些推送通知并将其显示给用户。
接收推送通知
为了接收推送通知,您需要做的第一件事是更新firebase.init()函数,使其包含用于接收设备令牌的侦听器:
onPushTokenReceivedCallback: function(token) {
    // temporarily save it to application settings until such time that
    // the user logs in for the first time
    applicationSettings.setString('device_token', token);
},
该功能仅执行一次,因此您必须使用应用程序设置将令牌保存在本地。 稍后,这将使我们能够在用户首次登录时获取设备令牌。 如果您还记得以前的教程,我们将在用户首次登录时将其数据保存到Firebase。
接下来,您可以添加接收通知的侦听器。 这将显示一个警告框,该框使用消息的标题和正文作为内容:
onMessageReceivedCallback: function(message) {
    dialogs.alert({
        title: message.title,
        message: message.body,
        okButtonText: "ok"
    });
},
将设备令牌保存到Firebase
在向特定设备发送推送通知时,Firebase Cloud Messaging需要设备令牌。 由于我们已经在使用Firebase,因此我们将只保存设备令牌以及用户数据。 为此,您需要编辑用于保存用户数据的代码,以包括我们之前获得的设备令牌:
if(firebase_result.value == null){

    var device_token = applicationSettings.getString('device_token');

    var user_data = {
        'uid': fb_result.uid,
        'user_name': fb_result.name,
        'profile_photo': fb_result.profileImageURL,
        'device_token': device_token
    };

}
触发推送通知
当发生以下两种情况之一时,将触发“推送通知”:
- 当用户打破当前记录时
- 当用户的一个朋友打破记录并获得第一名时
第一个很简单,因此实际上不需要其他设置。 但是对于第二个,您需要做一些工作。 首先,您必须编辑auth状态更改时的代码。 从Facebook结果中提取朋友ID之后,您必须立即使用应用程序设置保存朋友ID。
// extracting the friend IDs from the Facebook result
var friends_ids = r.data.map(function(obj){
    return obj.id;
});

// save the friend IDs
applicationSettings.setString('friends_ids', JSON.stringify(friends_ids));

friends_ids.push(user[user_key].id);
接下来,更新用户停止跟踪步行时的代码。 在用于构造用于更新用户的用户数据的代码之后,立即从应用程序设置中获取朋友ID,并将其包括在包含用于触发推送通知的请求数据的对象中。
// construct the user data for updating the user's distance and steps
var user_key = applicationSettings.getString('user_key');
var user = applicationSettings.getString('user');
var user_data = JSON.parse(user);
user_data[user_key].distance = total_distance;
user_data[user_key].steps = total_steps;

// get friend IDs
var friends_ids = JSON.parse(applicationSettings.getString('friends_ids'));

var request_data = {
    'id': user_data[user_key].id,
    'friend_ids': friends_ids.join(','),
    'steps': total_steps
};
向您先前创建的Firebase Cloud Functions端点发出请求。 一旦返回成功响应,则只有这样,用户的数据才会在Firebase数据库上更新。
http.request({
    url: "https://us-central1-pushapp-ab621.cloudfunctions.net/init_push",
    method: "POST",
    headers: { "Content-Type": "application/json" },
    content: JSON.stringify(request_data)
}).then(function (response) {

    var statusCode = response.statusCode;
    if(statusCode == 200){
        // update the user's data on Firebase
        firebase.update(
            '/users',
            user_data
        );

    }

}, function (e) {
    console.log('Error occurred while initiating push: ', e);
});
测试推送通知
您可以通过先从模拟器或设备上卸载应用程序来测试推送通知的发送。 这使我们能够正确触发获取设备令牌的功能。 确保添加console.log以输出设备令牌:
onPushTokenReceivedCallback: function(token) {
    applicationSettings.setString('device_token', token);
    console.log('device token: ', device_token); // <-- add this
}
在NativeScript控制台中输出设备令牌后,请对其进行复制,然后在Firebase应用仪表板上单击“ 数据库”菜单,然后将其作为设备令牌添加到该应用程序的所有用户。 使用device_token作为属性名称。
要触发推送通知,您可以使用curl向Firebase Function端点发出POST请求:
curl -X POST -H "Content-Type:application/json" YOUR_FIREBASE_FUNCTION_ENDPOINT -d '{"id":"ID OF A FIREBASE USER", "steps":NUMBER_OF_STEPS, "friend_ids":"COMMA,SEPARATED,FIREBASE,USER_IDs"}'如果您没有安装curl,可以使用Postman App发送请求。 对请求使用以下设置:
- 请求方法:
POST - 网址:您的Firebase函数端点
- 标头关键字:
Content-type - 标头值:
application/json - 身体:
{"id":"ID OF A FIREBASE USER", "steps":NUMBER_OF_STEPS, "friend_ids":"COMMA,SEPARATED,FIREBASE,USER_IDs"}触发后,您将看到类似于以下内容的输出:
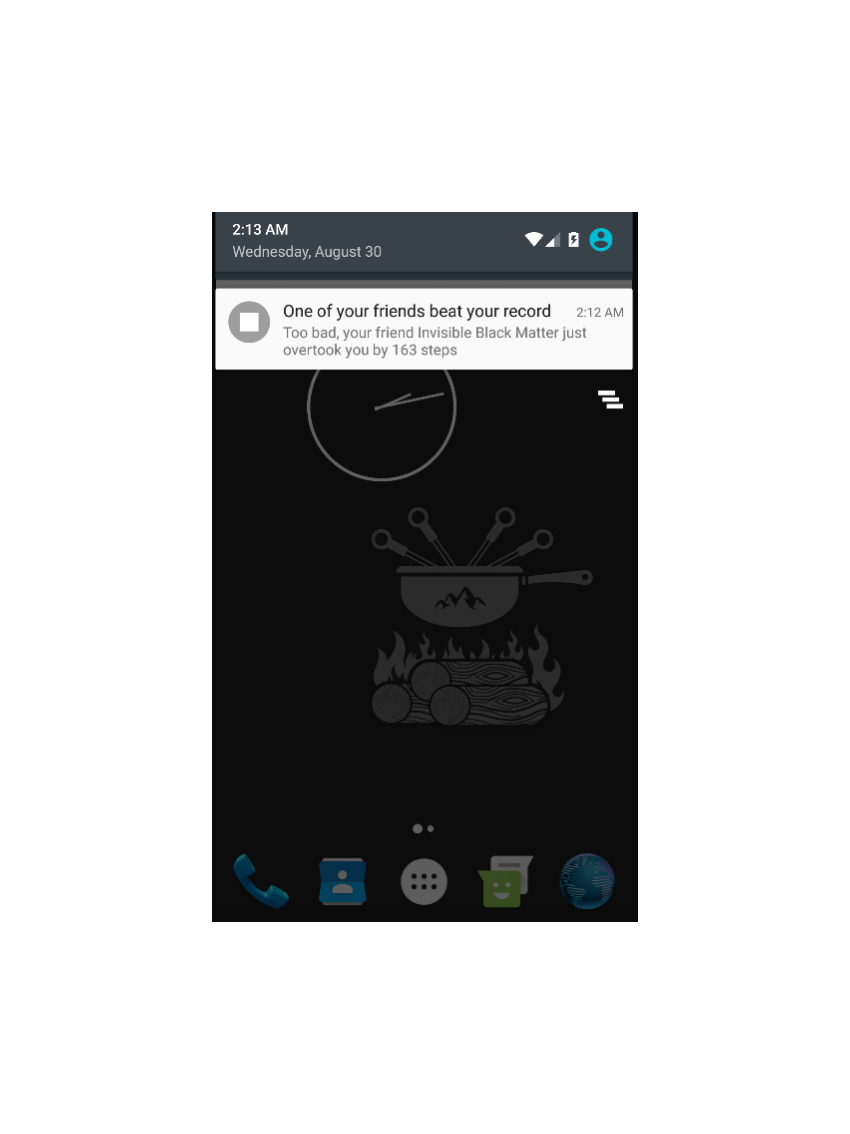
如果该应用程序当前未打开,您将在通知区域中看到通知:
结论
恭喜你! 您终于完成了健身应用程序。 在这四个教程中,您已经构建了一个NativeScript应用程序,该应用程序使用Google地图,SQLite,Firebase Realtime数据库和Firebase Cloud Messaging。 现在,您已经为构建使用这些技术的NativeScript应用程序奠定了良好的基础。


 367
367

 被折叠的 条评论
为什么被折叠?
被折叠的 条评论
为什么被折叠?
 到【灌水乐园】发言


