在本系列中,您将学习如何使用React Native创建移动应用程序中常用的页面布局。 您将要创建的布局将不起作用-相反,本系列的主要重点是让您动手以布局React Native应用程序中的内容。
为了跟随本系列的进行,在您阅读本教程中的分步说明之前,我建议您先尝试自己重新创建每个屏幕。 仅仅阅读本教程,您将不会真正从中受益! 首先尝试,然后再在此处查找答案。 如果成功使它看起来像原始屏幕,则将您的实现与我的实现进行比较。 然后自己决定哪个更好!
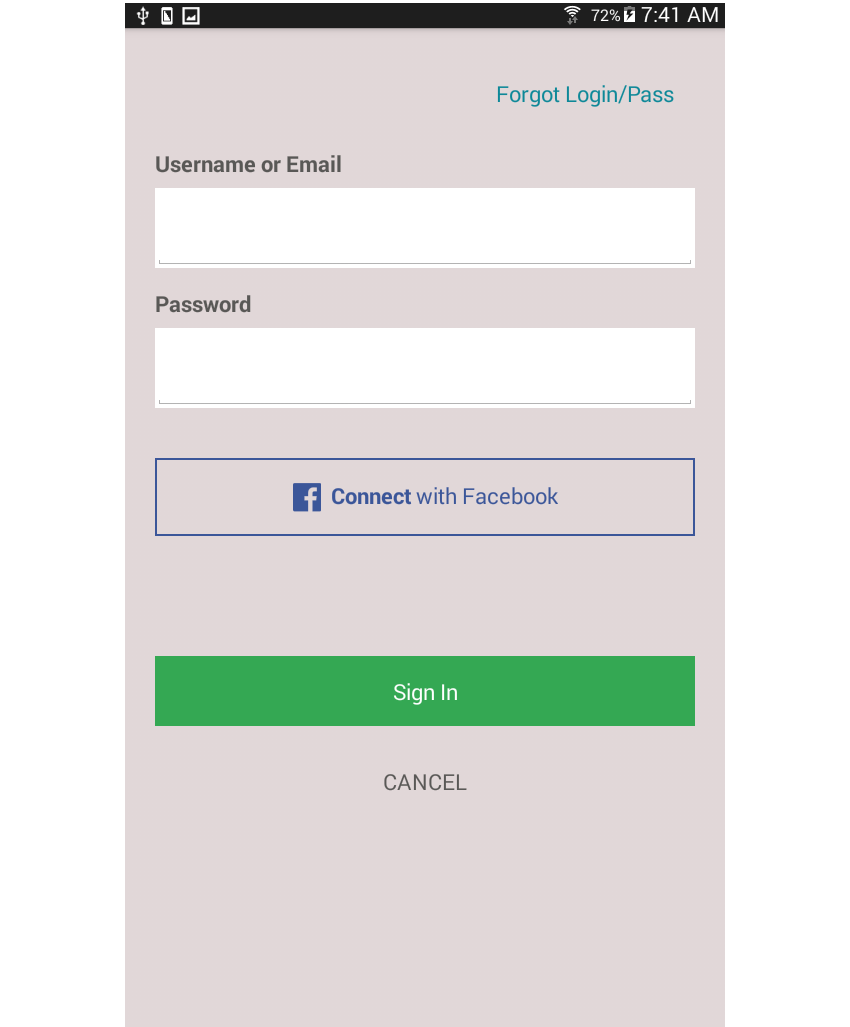
在本系列的第一部分中,您将创建以下登录页面:
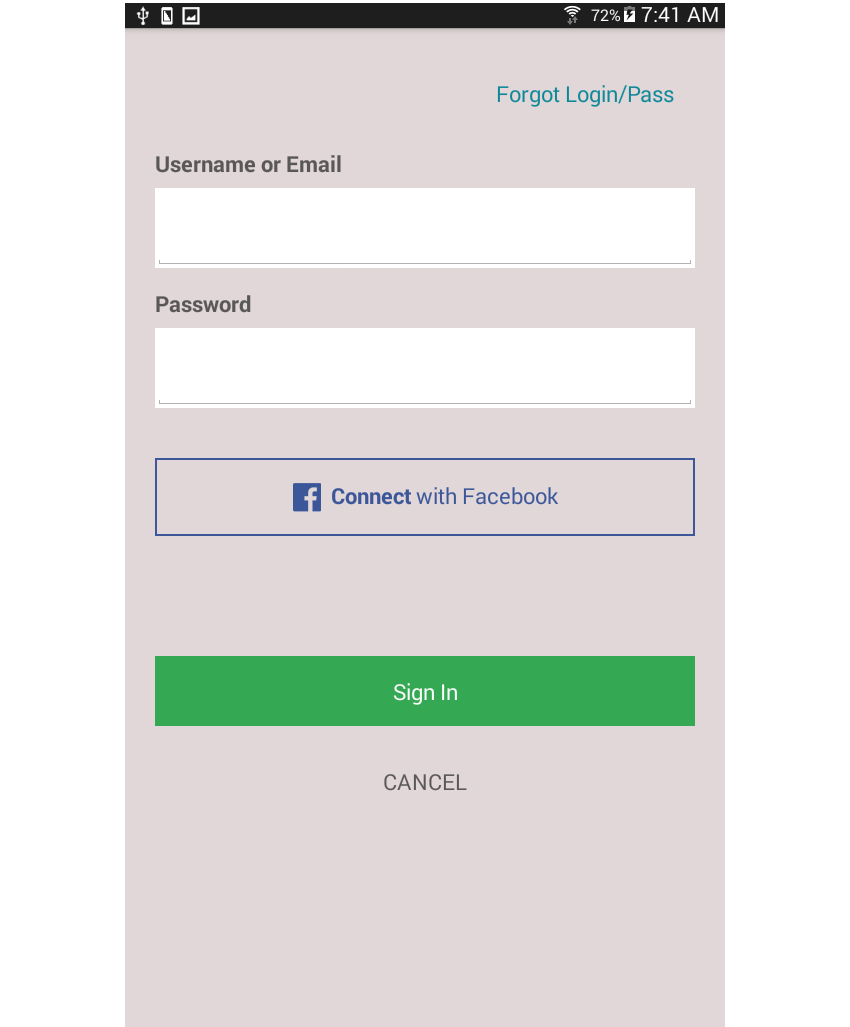
登录页面通常用作要求用户拥有帐户的应用程序的初始页面。
以下是野外这种布局的几个示例:
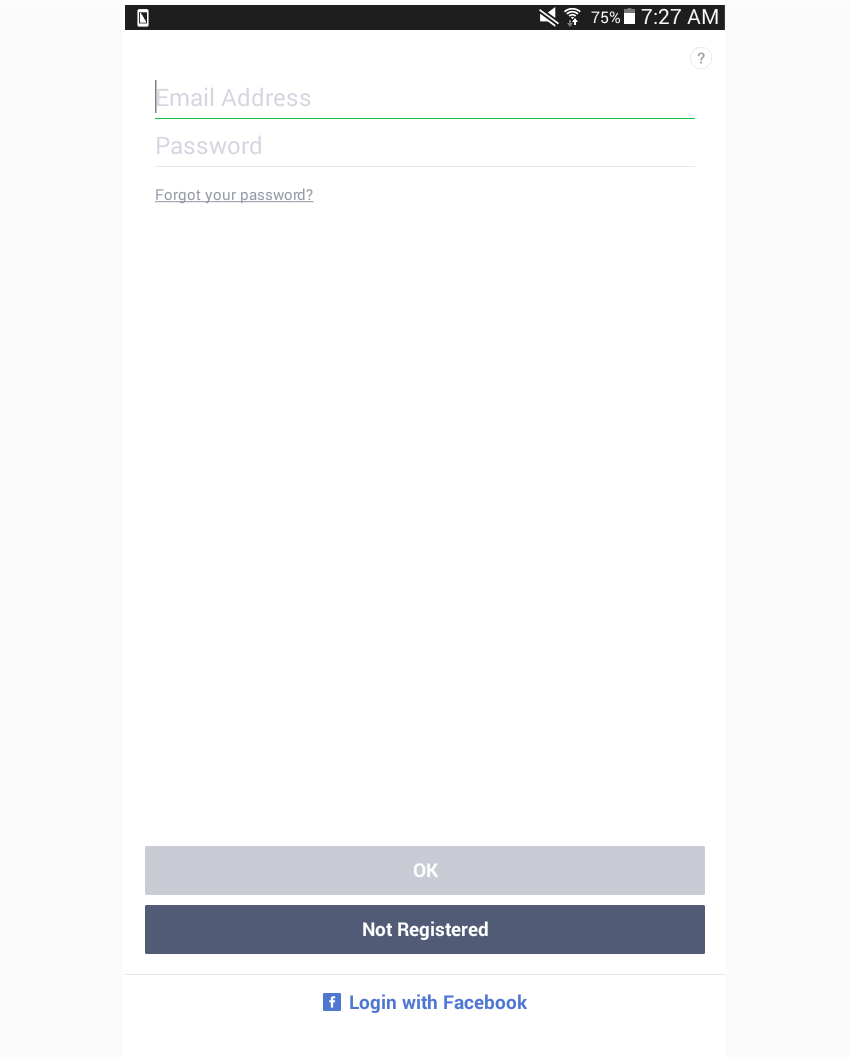
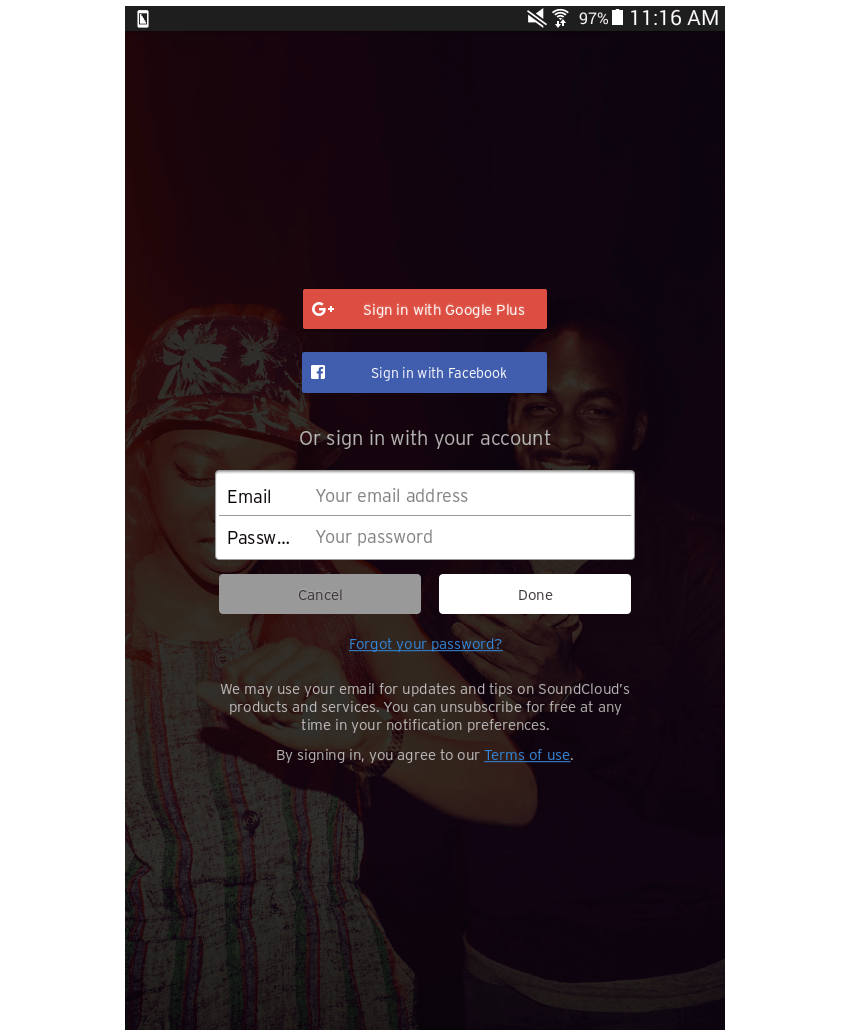
项目设置
当然,第一步是建立一个新的React Native项目:
react-native init react-native-common-screens 设置项目后,打开index.android.js文件,并将默认代码替换为以下代码:
import React, { Component } from 'react';
import {
  AppRegistry
} from 'react-native';

import Login from './src/pages/Login';

export default class ReactNativeCommonScreens extends Component {

  render() {
    return (
      <Login />
    );
  }

}

AppRegistry.registerComponent('ReactNativeCommonScreens', () => ReactNativeCommonScreens); 创建一个src/pages文件夹,并在其中创建一个Login.js文件。
您还需要react-native-vector-icons包。 这专门用于呈现Facebook登录按钮的Facebook图标。
npm install --save react-native-vector-icons 打开android/app/build.gradle文件并添加对该包的引用:
dependencies {
    //rest of the dependencies are here at the top
    compile project(':react-native-vector-icons') //add this
} 通过在底部添加以下内容,对android/settings.gradle文件执行相同的操作:
include ':react-native-vector-icons'
project(':react-native-vector-icons').projectDir = new File(rootProject.projectDir, '../node_modules/react-native-vector-icons/android') 打开android/app/src/main/java/com/react-native-common-screens/MainApplication.java并导入软件包:
import java.util.Arrays;
import java.util.List;

import com.oblador.vectoricons.VectorIconsPackage; //add this
最后,初始化程序包:
@Override
protected List<ReactPackage> getPackages() {
  return Arrays.<ReactPackage>asList(
      new MainReactPackage(),
      new VectorIconsPackage() //add this
  );
}
创建登录页面
好的,既然您已尝试自己编写布局代码(不作弊,对吗?),我将向您展示如何构建实现。 打开src/pages/Login.js文件,然后导入您需要的内容:
import React, { Component } from 'react';

import {
  StyleSheet,
  Text,
  View,
  TextInput,
  ScrollView
} from 'react-native';

import Icon from 'react-native-vector-icons/FontAwesome'; 除了默认的React组件和react-native-vector-icons包之外,您还需要包括三个自定义组件:
import Container from '../components/Container';
import Button from '../components/Button';
import Label from '../components/Label'; 第一个是Container ( src/components/Container.js ),其作用是在其包装的内容上添加底部边距。 这听起来很琐碎,是的,您实际上可以只使用View并在每次使用时添加相同的样式。 这样做的好处是,您不必多次将相同的样式应用于View ,并且还允许您每次需要在某处添加底边距时重用该组件。
import React, { Component } from 'react';

import {
  StyleSheet,
  View
} from 'react-native';

const Container = (props) => {
    return (
		<View style={styles.labelContainer}>
			{ props.children }
		</View>
	);
}

const styles = StyleSheet.create({
	labelContainer: {
		marginBottom: 20
	}
});

export default Container;
顾名思义, Button组件( src/components/Button.js )用于创建按钮。 如果存在,它将吐出添加到其中的所有子组件。 否则,它将输出一个Text组件,该组件显示按钮内的文本。 默认样式也已添加,但如果道具中没有noDefaultStyles ,则不会使用该noDefaultStyles 。 从道具传递的独特按钮样式也是可选的。
import React, { Component } from 'react';

import {
  StyleSheet,
  Text,
  TouchableHighlight,
} from 'react-native';

const Button = (props) => {

	function getContent(){
		if(props.children){
			return props.children;
		}
		return <Text style={props.styles.label}>{props.label}</Text>
	}

	return (
		<TouchableHighlight
			underlayColor="#ccc"
			onPress={props.onPress}
			style={[
				props.noDefaultStyles ? '' : styles.button,
				props.styles ? props.styles.button : '']}
		>
		    { getContent() }
		</TouchableHighlight>
	);
}

const styles = StyleSheet.create({
	button: {
        alignItems: 'center',
        justifyContent: 'center',
        padding: 20
    },
});

export default Button; 最后,还有Label组件( src/components/Label.js ),它基本上只是具有某些预定义样式的Text组件。
import React, { Component } from 'react';

import {
  StyleSheet,
  Text,
} from 'react-native';

const Label = (props) => {
    return (
		<Text
			style={props.styles && props.styles.textLabel ? props.styles.textLabel : styles.textLabel}
		>
			{props.text}
		</Text>
	);
}

const styles = StyleSheet.create({
	textLabel: {
		fontSize: 20,
		fontWeight: 'bold',
		fontFamily: 'Verdana',
		marginBottom: 10,
		color: '#595856'
	}
});

export default Label;
现在,您可以转到实际的登录页面。 在render()方法内部,将所有内容包装在ScrollView组件中。 如果您希望您的应用程序能够适应各种设备尺寸和屏幕方向,则这非常重要。
通常,无论您认为内容要消耗多少高度,总会有一种设备无法完全显示它。 因此,需要用于滚动内容的滚动条。
export default class Login extends Component {
  render() {
    return (
        <ScrollView style={styles.scroll}>
        ...
        </ScrollView>
    );
  }
}
接下来,初始化样式:
const styles = StyleSheet.create({

}); 将以下样式应用于ScrollView 。 flexDirection是可选的,但是明确定义它是一个好习惯,以便将来的开发人员只需看一眼代码就可以准确了解应用程序的主要内容的布局。
scroll: {
    backgroundColor: '#E1D7D8',
    padding: 30,
    flexDirection: 'column'
},
从前面的屏幕快照中可以看到,您要添加的第一部分内容是最顶部的内容,即“忘记密码”按钮。 请注意,提供了onPress道具,因为如果在按下按钮时没有提供功能,则underlayColor实际上不会被应用。
<Container>
    <Button
        label="Forgot Login/Pass"
        styles={{button: styles.alignRight, label: styles.label}}
        onPress={this.press.bind(this)} />
</Container> 除了alignSelf: 'flex-end'之外,用于此样式的样式非常不言自明。 这告诉React Native将元素定位在当前行的最后。 alignSelf与alignItems等效,用于指定元素本身而不是其子元素的对齐方式。 使用flex-end可以使您获得类似于float: right在CSS中的效果。
label: {
    color: '#0d8898',
    fontSize: 20
},
alignRight: {
    alignSelf: 'flex-end'
},
接下来是两个文本字段及其标签。
<Container>
    <Label text="Username or Email" />
    <TextInput
        style={styles.textInput}
    />
</Container>
<Container>
    <Label text="Password" />
    <TextInput
        secureTextEntry={true}
        style={styles.textInput}
    />
</Container>
此时,页面现在应如下所示:
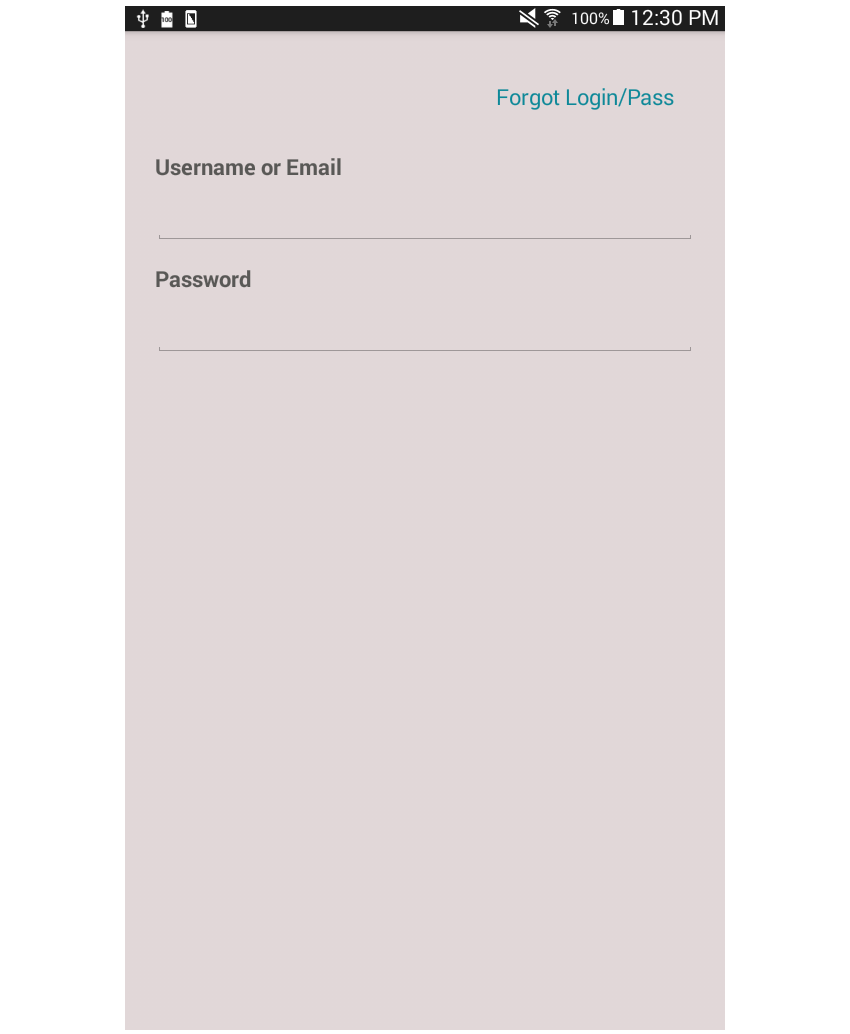
这是textInput的样式:
textInput: {
    height: 80,
    fontSize: 30,
    backgroundColor: '#FFF'
}, 现在您可能已经开始注意到为什么Container组件很重要。 它允许您封装默认样式,以免最终在每个文件中重新声明它们。 这是React的基本原则:每次看到机会时,您都应始终努力实现组件的重用。
登录Facebook的按钮与您之前创建的按钮有些不同。 这次,它内部有一些内容,其中显示了一个图标以及一些文本。 这些是代替label道具添加的,以便进一步自定义按钮的内容。
<Container>
    <Button
        styles={{button: styles.transparentButton}}
        onPress={this.press.bind(this)}
    >
        <View style={styles.inline}>
            <Icon name="facebook-official" size={30} color="#3B5699" />
            <Text style={[styles.buttonBlueText, styles.buttonBigText]}>  Connect </Text>
            <Text style={styles.buttonBlueText}>with Facebook</Text>
        </View>
    </Button>
</Container>
添加后,页面现在应如下所示:
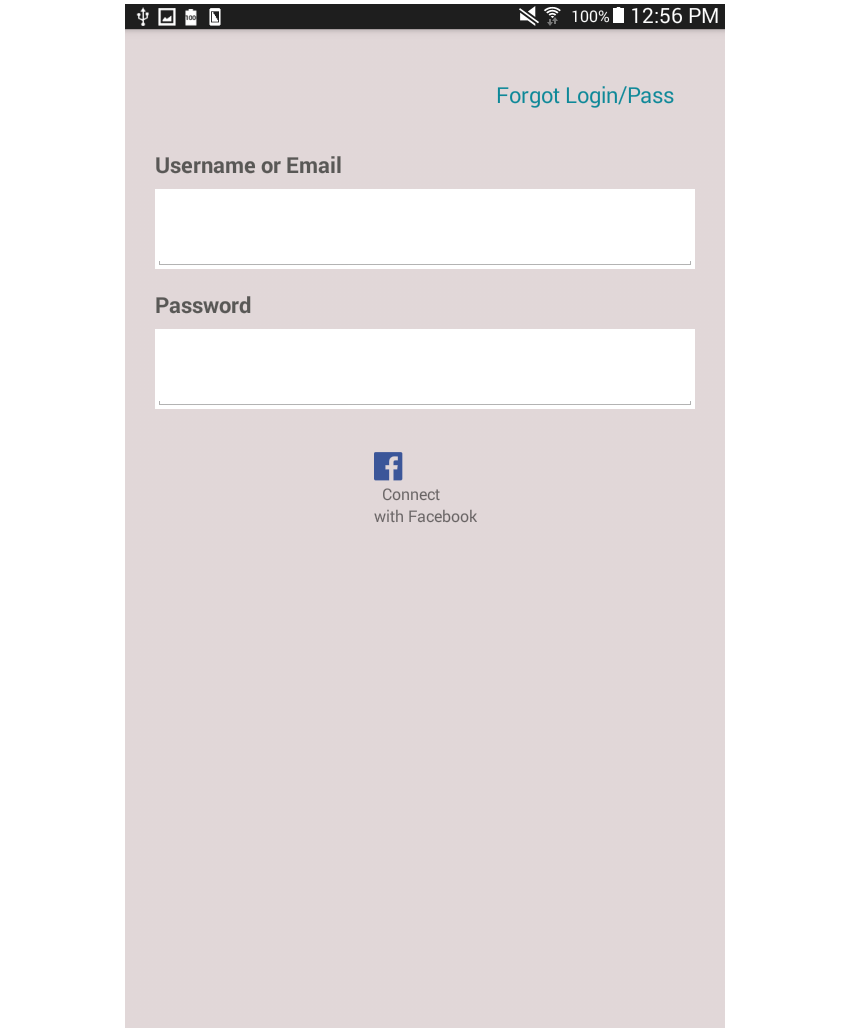
为Facebook登录按钮添加样式:
transparentButton: {
    marginTop: 30,
    borderColor: '#3B5699',
    borderWidth: 2
},
buttonBlueText: {
    fontSize: 20,
    color: '#3B5699'
},
buttonBigText: {
    fontSize: 20,
    fontWeight: 'bold'
},
inline: {
    flexDirection: 'row'
}, 除了styles.inline ,这里实际上没有什么值得注意的styles.inline ,它用作一个帮助器类,用于将其中的所有元素水平堆叠。 这与在HTML中使用<span>来包装要内联显示的文本具有相似的效果。 在CSS中,可以使用display: inline或display: inline-block 。
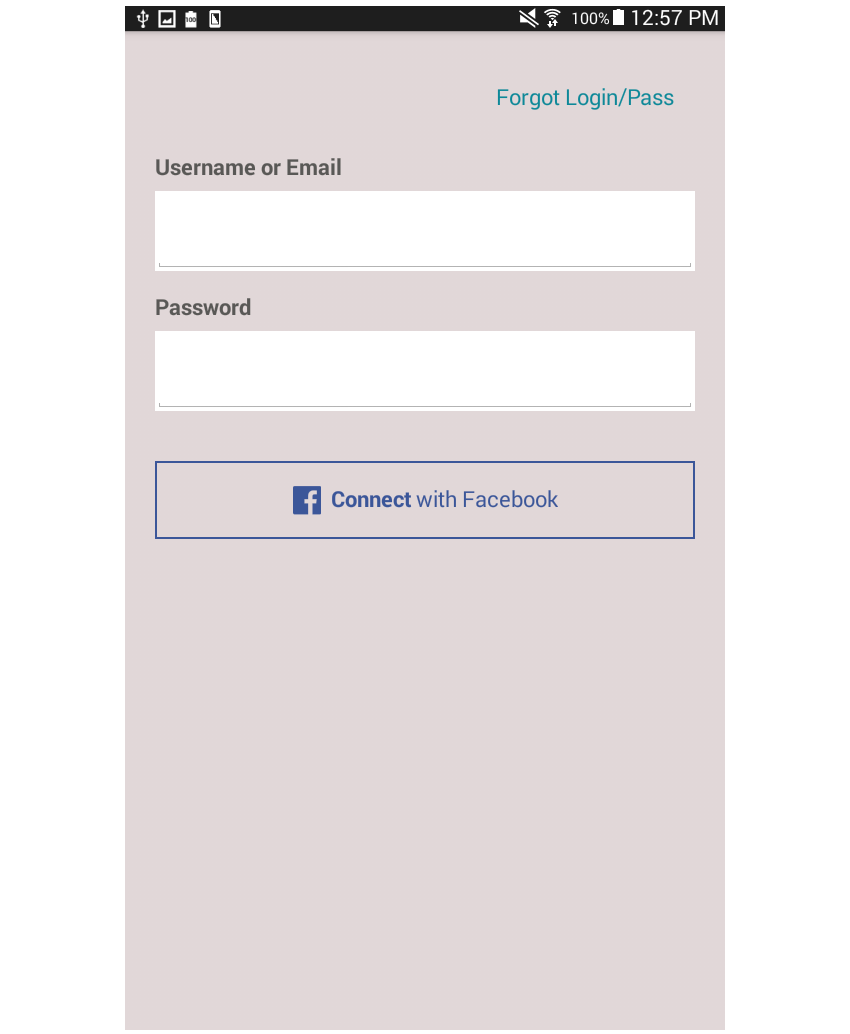
此屏幕上的最后一个元素是“ 登录”和“ 取消”按钮。 与其他元素相比,它们上方需要更多的空间,因此最好将它们包装在容器( footer )中并对其应用marginTop 。 这比仅为这些按钮声明新样式更有意义。
<View style={styles.footer}>
    <Container>
        <Button
            label="Sign In"
            styles={{button: styles.primaryButton, label: styles.buttonWhiteText}}
            onPress={this.press.bind(this)} />
    </Container>
    <Container>
        <Button
            label="CANCEL"
            styles={{label: styles.buttonBlackText}}
            onPress={this.press.bind(this)} />
    </Container>
</View>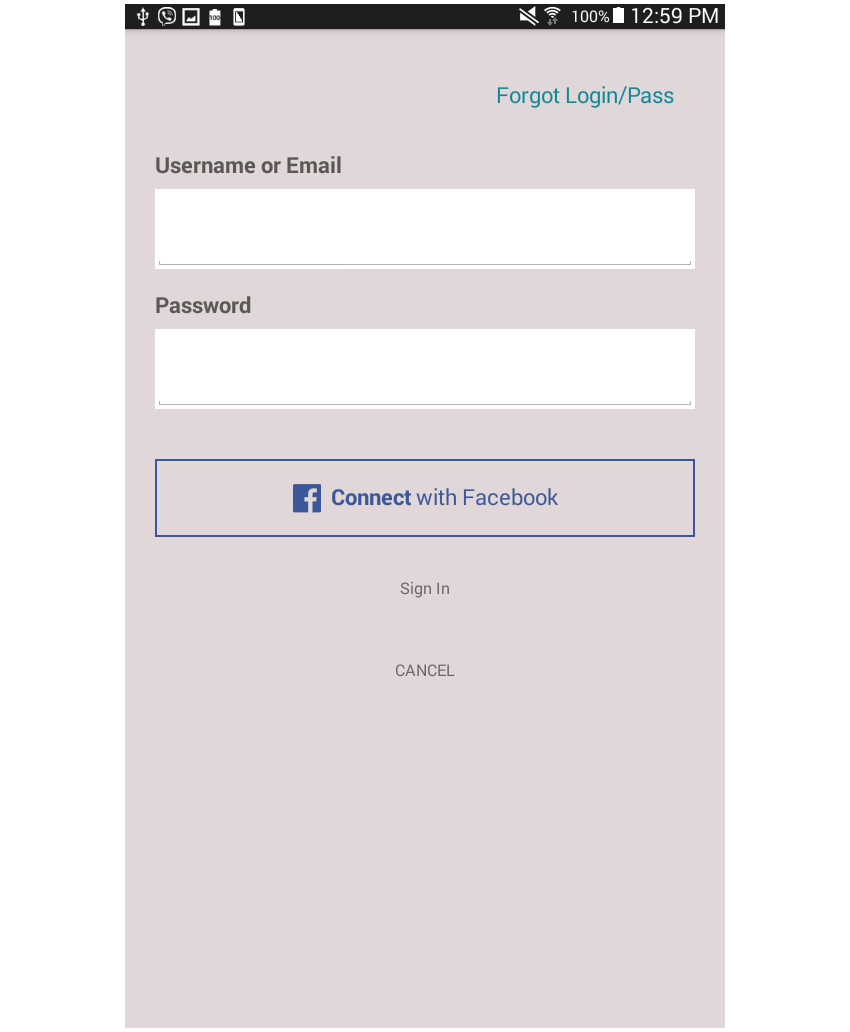
最后,为“ 登录”和“ 取消”按钮添加样式:
buttonWhiteText: {
    fontSize: 20,
    color: '#FFF',
},
buttonBlackText: {
    fontSize: 20,
    color: '#595856'
},
primaryButton: {
    backgroundColor: '#34A853'
},
footer: {
   marginTop: 100
}
最后,不要忘了定义按下任何按钮时将执行的代码!
press() {
  //execute any code here
}
结论
而已! 在本教程中,您已经使用Flexbox知识成功创建了登录页面。 在此过程中,您还学习了如何使用名为React Native Vector Icons的第三方库轻松在应用程序中添加图标。 我的解决方案与您的解决方案相比如何? 在下面的讨论论坛中让我们知道。
翻译自: https://code.tutsplus.com/tutorials/common-react-native-app-layouts-login-page--cms-27639


 本教程将指导你使用React Native创建一个登录页面。通过实践,了解如何布局React Native应用,包括设置项目、创建登录界面,使用Flexbox和自定义组件。你将学习到如何导入和使用图标包,以及如何处理按钮点击事件。


 1319
1319

 被折叠的 条评论
为什么被折叠?


