


 本文介绍了virt-customize,一个用于管理Linux虚拟机和磁盘的实用工具,包含如何安装、加载映像、挂载ISO、连接Libvirt、设置内存、删除文件、设置主机名、安装包、创建目录、运行命令和脚本等操作。

qemu-kvm-rhev
I am gonna show you today a practical and useful tool for managing Linux virtual machines and disks. With virtualization, people start to use a lot of VMS in their personal or corporate PC’s. But managing them is difficult. I faced these difficulties too. So I search for a tool helps me especially in updates. I came with virt-customize which is a tool in libguestfs-tools package. Here we start.
今天,我将向您展示一个实用且有用的工具,用于管理Linux虚拟机和磁盘。 通过虚拟化,人们开始在其个人或公司PC中使用大量VMS。 但是管理它们很困难。 我也面临这些困难。 因此,我搜索一种工具,尤其是在更新方面对我有帮助。 我附带了virt-customize,它是libguestfs-tools软件包中的工具。 从这里开始。
安装virt-customize (Install virt-customize)
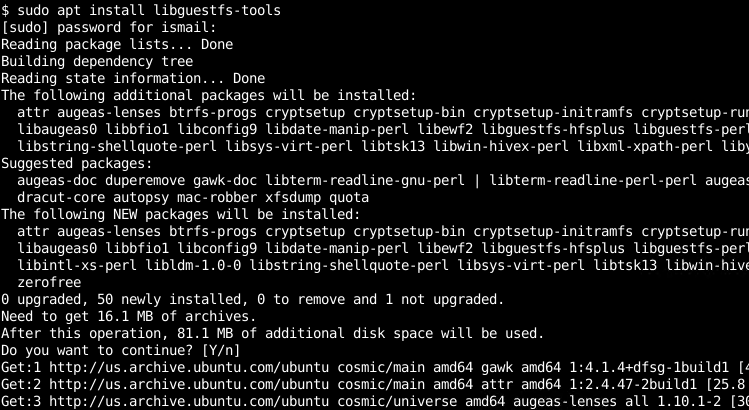
In order to use the virt-customize command, we will install libguestfs-tools package.
为了使用virt-customize命令,我们将安装libguestfs-tools软件包。
为Ubuntu,Debian,Mint,Kali安装 (Install For Ubuntu, Debian, Mint, Kali)
$ sudo apt install libguestfs-tools
为Fedora,CentOS,Red Hat安装(Install For Fedora, CentOS, Red Hat)
$ sudo yum install libguestfs-tools-c
OR
要么
$ sudo dnf install libguestfs-tools-c
载入图片 (Load Image)
Update existing disk image Virt-customize opens the disk and then look for last update seed and then try to run update commands which are used this distro. Windows image are not supported yet but you can use the run command to update windows images. Here you can you URI for remote disk images. The disk format is automatically detected. While loading image we may get some errors which prevent to load the image. This is generally permission related error which can be solved with the sudo command.
更新现有的磁盘映像Virt-customize打开磁盘,然后查找最后的更新种子,然后尝试运行此发行版使用的更新命令。 Windows映像尚不支持,但是您可以使用run命令来更新Windows映像。 您可以在此处使用URI来获取远程磁盘映像。 磁盘格式会自动检测。 在加载图像时,我们可能会遇到一些错误,导致无法加载图像。 这通常是与权限相关的错误,可以使用sudo命令解决。
$ sudo virt-customize -a opensuse12.qcow2

将ISO挂载到映像(Mount ISO to Image)
We can also run the interactive shell by attaching an ISO image into the VM image. We will use --attach command by providing the ISO file.
我们还可以通过将ISO映像附加到VM映像中来运行交互式外壳。 我们将通过提供ISO文件来使用--attach命令。
$ sudo virt-customize --attach fedora30.iso -a opensuse12.qcow2
连接Libvirt或Hypervisor (Connect Libvirt or Hypervisor)
To connect and hypervisor and run virt-customize there use -c option with hypervisor URI which is here local libvirtd and give domain name or UUID with -d option. In this example, we will connect the local hypervisor and open the VM named Debian disk image.
要连接和管理程序并运行virt-customize,请在管理程序URI中使用-c选项(在这里是本地libvirtd),并使用-d选项提供域名或UUID。 在此示例中,我们将连接本地管理程序并打开名为Debian磁盘映像的VM。
$ virt-customize -c qemu:///system -d debian
[   0.0] Examining the guest ...
[  35.0] Setting a random seed
[  35.0] Finishing off
在测试模式下运行操作 (Run Operations in Test Mode)
All actions done inside image will be persistent. But if we want to work on test or dry run mode we can use -n option where the action will not affect the image.
在映像内完成的所有动作将是持久的。 但是,如果我们要在测试或空运行模式下工作,则可以使用-n选项,其中操作不会影响图像。
$ virt-customize -n -c qemu:///system -d debian
[   0.0] Examining the guest ...
[   6.0] Setting a random seed
[   7.0] Finishing off
设置RAM /内存 (Set RAM/Memory)
You can specify memory usage with -m or –memory option. Default memory size can be seen with guesfish get-memsize command which is 500MB. In this example, we will set the memory size 512 MB with the -m option like below.
您可以使用-m或–memory选项指定内存使用情况。 可以使用guesfish get-memsize命令查看默认内存大小,该命令为500MB。 在此示例中,我们将使用-m选项将内存大小设置为512 MB,如下所示。
$ guestfish get-memsize
500

$ virt-customize -m 512 -c qemu:///system -d debian
[   0.0] Examining the guest ...
[   6.0] Setting a random seed
[   6.0] Finishing off
没有网络就开始 (Start Without Network)
By default, the started image will be connected to the default network which is generally the internet connection. We can prevent to connect to the network with the --no-network option like below.
默认情况下,启动的映像将连接到默认网络,通常是Internet连接。 我们可以使用--no-network选项阻止连接到网络,如下所示。
$ virt-customize --no-network -c qemu:///system -d debian
[   0.0] Examining the guest ...
[   6.0] Setting a random seed
[   6.0] Finishing off
详细或调试模式 (Verbose or Debug Mode)
If there is a problem to troubleshoot or we need more information about the start we can print detailed information with the -v verbose option.
如果有问题要解决,或者我们需要有关启动的更多信息,则可以使用-v verbose选项打印详细信息。
$ sudo virt-customize -v -a fedora.qcow2
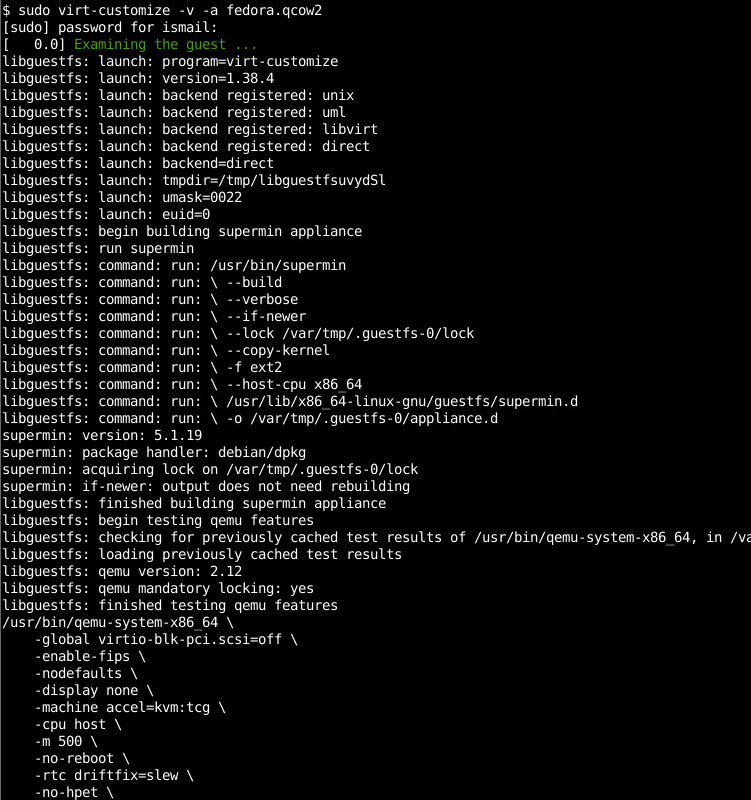
We can see from the screenshot that all actions and configuration are printed to the terminal in a detailed way.
从屏幕截图中我们可以看到,所有操作和配置都已详细打印到终端上。
删除文件(Delete File)
We can delete file and folders inside the VM image with the --delete option by providing the file or folder name. In this example, we will delete the folder /root/.ssh.
我们可以使用--delete选项通过提供文件或文件夹名称来删除VM映像内的文件和文件夹。 在此示例中,我们将删除文件夹/root/.ssh 。
$ sudo virt-customize -c qemu:///system -d fedora --delete /root/.ssh
[   0.0] Examining the guest ...
[   4.0] Setting a random seed
[   4.0] Deleting: /root/.ssh
[   5.0] Finishing off
设置主机名 (Set Hostname)
We can set the hostname for the given system. We will use the --hostname option and provide the hostname which is poftut.fed1 in this example. poftut is the domain part where fed1 is the hostname.
我们可以设置给定系统的主机名。 在本示例中,我们将使用--hostname选项并提供主机名poftut.fed1 。 poftut是域部分,其中fed1是主机名。
$ sudo virt-customize -c qemu:///system -d fedora --hostname poftut.fed1
[   0.0] Examining the guest ...
[   4.0] Setting a random seed
[   4.0] Setting the hostname: poftut.fed1
[   5.0] Finishing off
安装套件 (Install Packages)
We can also install packages into a domain image by using the --install option. With the –install option we will also provide the package names we want to install. In this example, we will install packages named httpd and vim.
我们也可以使用--install选项将软件包安装到域映像中。 使用–install选项,我们还将提供我们要安装的软件包名称。 在此示例中,我们将安装名为httpd和vim的软件包。
$ sudo virt-customize -c qemu:///system -d fedora --install httpd,vim
[   0.0] Examining the guest ...
[   3.0] Setting a random seed
[   3.0] Installing packages: httpd
[  49.0] Finishing off
建立目录 (Create Directory)
To create directories on file system use --mkdir option. There is no border it acts like root you can create whatever you want
要在文件系统上创建目录,请使用--mkdir选项。 它没有边界,就像root一样,您可以创建任何想要的东西
$ sudo virt-customize -c qemu:///system -d fedora --mkdir /root/sil
[   0.0] Examining the guest ...
[   3.0] Setting a random seed
[   3.0] Making directory: /root/sil
[   4.0] Finishing off
运行命令 (Run Command)
Up to now, we call options related to standard Linux commands also we can run commands inside disk image with –run-command option.
到目前为止,我们调用与标准Linux命令相关的选项,也可以使用–run-command选项在磁盘映像中运行命令。
$ sudo virt-customize -c qemu:///system -d fedora --run-command "rmdir /root/sil"
[   0.0] Examining the guest ...
[   3.0] Setting a random seed
[   3.0] Running: rmdir /root/sil
[   4.0] Finishing off
运行脚本 (Run Script)
If we want to run script we can use –run command with the script path. In this example, we will run the script named test.sh which is stored under the directory named downloads
如果要运行脚本,可以在脚本路径中使用–run命令。 在此示例中,我们将运行名为test.sh的脚本,该脚本存储在名为downloads的目录下。
$ sudo virt-customize -c qemu:///system -d fedora --run downloads/test.sh
[   0.0] Examining the guest ...
[   3.0] Setting a random seed
[   3.0] Running: downloads/test.sh
[   3.0] Finishing off
将文件上传到图像 (Upload File To The Image)
We can upload a file from the host system to the image with the --upload option. We will provide the local file name and the destination path in the image we wanto upload to. In this example, we will upload the file named test.sh into the image /root/test.sh.
我们可以使用--upload选项将文件从主机系统上传到映像。 我们将在要上传到的图像中提供本地文件名和目标路径。 在此示例中,我们将名为test.sh的文件上传到映像/root/test.sh 。
$ sudo virt-customize -c qemu:///system -d fedora --upload downloads/test.sh:/root/test.sh
[   0.0] Examining the guest ...
[   2.0] Setting a random seed
[   2.0] Uploading: downloads/test.sh to /root/test.sh
[   3.0] Finishing off
翻译自: https://www.poftut.com/linux-kvm-qemu-virt-customize-tutorial/
qemu-kvm-rhev


 1380
1380

 被折叠的 条评论
为什么被折叠?
被折叠的 条评论
为什么被折叠?
 到【灌水乐园】发言


