


Hyper-V is a virtualization technology that is created by Microsoft. Hyper-V provides to create, run, delete, revert virtual systems, machines, environments. Hyper-V is also an alternative for other virtualization products and technologies like VMware, VirtualBox, Linux KVM, Citrix, etc.
Hyper-V是由Microsoft创建的一种虚拟化技术。 Hyper-V提供了创建,运行,删除,还原虚拟系统,计算机,环境的功能。 Hyper-V还是VMware,VirtualBox,Linux KVM,Citrix等其他虚拟化产品和技术的替代产品。
启用/安装Hyper-V的前提条件 (Prerequirements To Enable/Install Hyper-V)
In order to install or enable Hyper-V, there are some requirements to meet. First of all, Hyper-V cannot be install on Windows 10 Home edition which means it should be upgraded into higher versions like Enterprise, Pro or Education. Hyper-V also requires 64 processors with the 64-bit operating system where Second Level Address Translation simply SLAT is available. But SLAT is provided with most of the modern CPUs. CPU should provide the VM Monitor Mode Extension or VT-d or equivalent for AMD. VT-d also supported by most of the modern CPUs. Also at least 4 GB memory should be provided by the system.
为了安装或启用Hyper-V,需要满足一些要求。 首先,Hyper-V无法安装在Windows 10家庭版上,这意味着应将其升级到更高版本,例如Enterprise,Pro或Education。 Hyper-V还需要64位处理器和64位操作系统,其中仅提供SLAT即可进行Second Level Address Translation 。 但是大多数现代CPU都提供了SLAT。 CPU应该为AMD提供VM Monitor Mode Extension或VT-d或同等功能。 大多数现代CPU也支持VT-d。 系统还应至少提供4 GB的内存。
- Windows 10 Enterprise, Pro or Education or Windows Server 2012 and later Windows 10企业版,专业版或教育版或Windows Server 2012及更高版本
- 64-bit CPU with SLAT带SLAT的64位CPU
- CPU with VT-d support 支持VT-d的CPU
- Minimum 4GB memory 最小4GB内存
使用PowerShell启用/安装Hyper-V(Enable/Install Hyper-V using PowerShell)
Perhaps the easiest way to install Hyper-V is using the PowerShell command with PowerShell command-line interface. We will install the Hyper-V as a Windows optional feature which is named Microsoft-Hyper-V. We will use Enable-WindowsOptionalFeature PowerShell cmdlet. This cmdlet requires Administrative rights like Administrator login. So we will open the PowerShell as Administrator.
安装Hyper-V的最简单方法可能是将PowerShell命令与PowerShell命令行界面一起使用。 我们将安装Hyper-V作为Windows的可选功能,名为Microsoft-Hyper-V 。 我们将使用Enable-WindowsOptionalFeature PowerShell cmdlet。 此cmdlet需要管理权限,例如管理员登录名。 因此,我们将以管理员身份打开PowerShell。
From the start menu, we will just type powershell which will list the windows PowerShell shortcut like below. Then we will click to the Run as Administrator with Administrator rights.
从开始菜单中,我们将只键入powershell ,它将列出Windows PowerShell快捷方式,如下所示。 然后,我们将单击Run as Administrator具有管理员权限的以管理员Run as Administrator 。
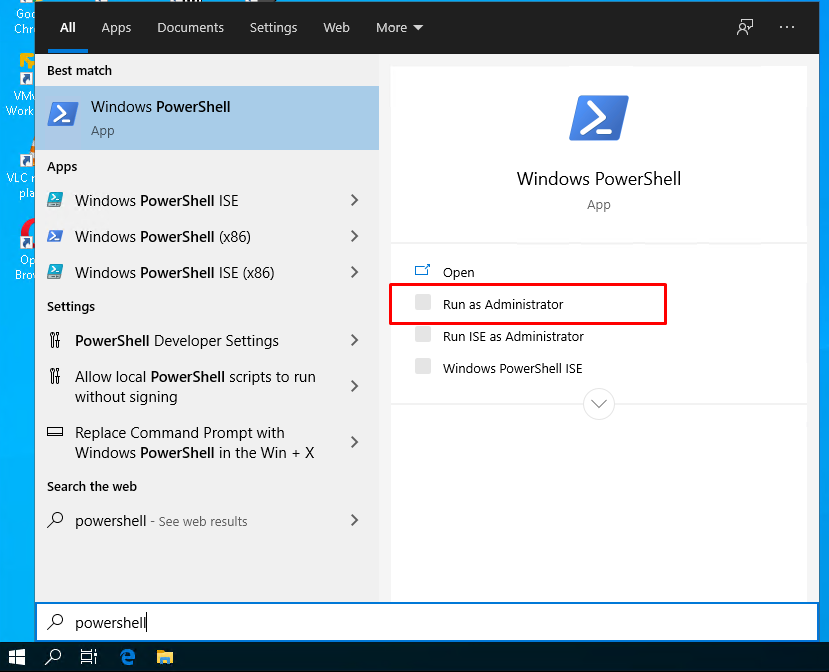
Alternatively, we can open the PowerShell with Administrative rights like below. Type powershell to the start menu where the Windows PowerShell will be listed. Then right-click to Windows PowerShell item and click to Run as administrator like below.
或者,我们可以使用以下管理权限打开PowerShell。 在将要列出Windows PowerShell的开始菜单中键入powershell 。 然后右键单击“ Windows PowerShell”项,然后单击Run as administrator身份Run as administrator如下所示。

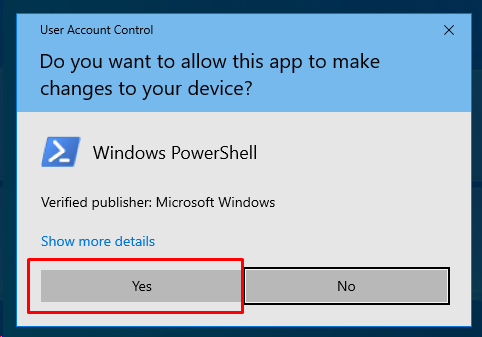
We will see a dialog box to proceed to the PowerShell with admin rights where we will click to Yes like below.
我们将看到一个对话框,以管理员身份继续执行PowerShell,在该对话框中,单击“ Yes如下所示。
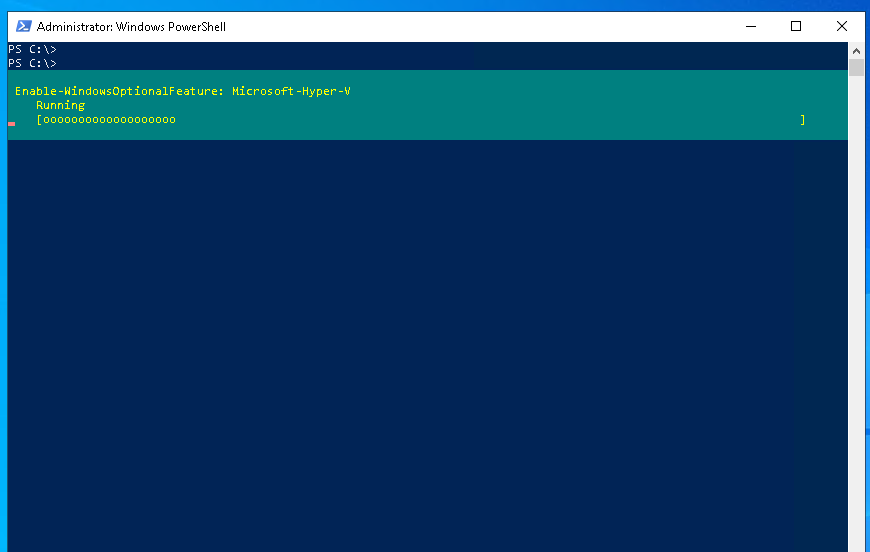
Then we will type the following command to the PowerShell which will start the installation of Hyper-V feature or module.
然后,我们将在PowerShell中键入以下命令,该命令将开始安装Hyper-V功能部件或模块。
PS> Enable-WindowsOptionalFeature -Online -FeatureName Microsoft-Hyper-V -All
During the Hyper-V feature and module installation, we will see the following progress bar. The Hyper-V module and related libraries and files will be installed.
在Hyper-V功能和模块安装过程中,我们将看到以下进度栏。 Hyper-V模块以及相关的库和文件将被安装。
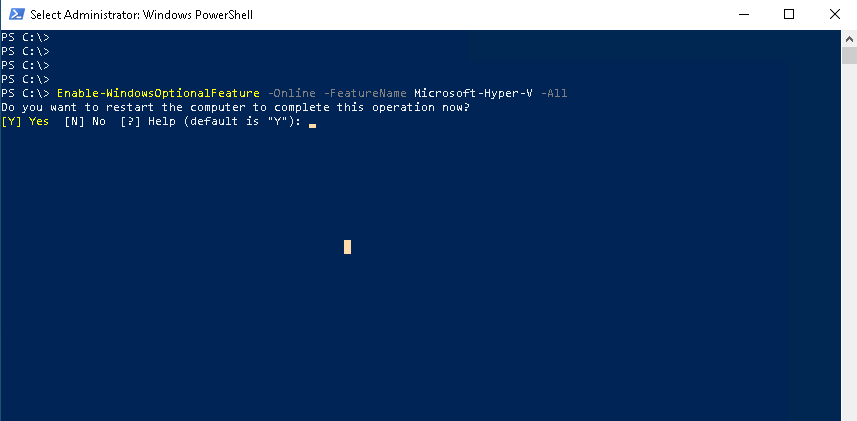
When the Hyper-V module or feature installation is complete we will see the following screen which simply asks us to reboot the system. In order to use Hyper-V, we will reboot the system by simply typing Y for yes and enter.
Hyper-V模块或功能部件安装完成后,我们将看到以下屏幕,仅要求我们重新引导系统。 为了使用Hyper-V,我们将通过简单地键入Y (是)并输入来重启系统。
通过命令行使用DISM启用/安装Hyper-V(Enable/Install Hyper-V using DISM via Command Line)
Hyper-V feature can be installed by using DISM or Deployment Image Servicing and Management tool. We will open the command line with Administrative rights which is explained in the previous part. We can use PowerShell or MS-DOS without a problem.
可以使用DISM或“ Deployment Image Servicing and Management tool来安装Hyper-V功能。 我们将打开具有管理权限的命令行,这已在上一部分中进行了说明。 我们可以毫无问题地使用PowerShell或MS-DOS。
PS> DISM /Online /Enable-Feature /All /FeatureName:Microsoft-Hyper-V

使用Windows功能启用/安装Hyper-V (Enable/Install Hyper-V using Windows Features)
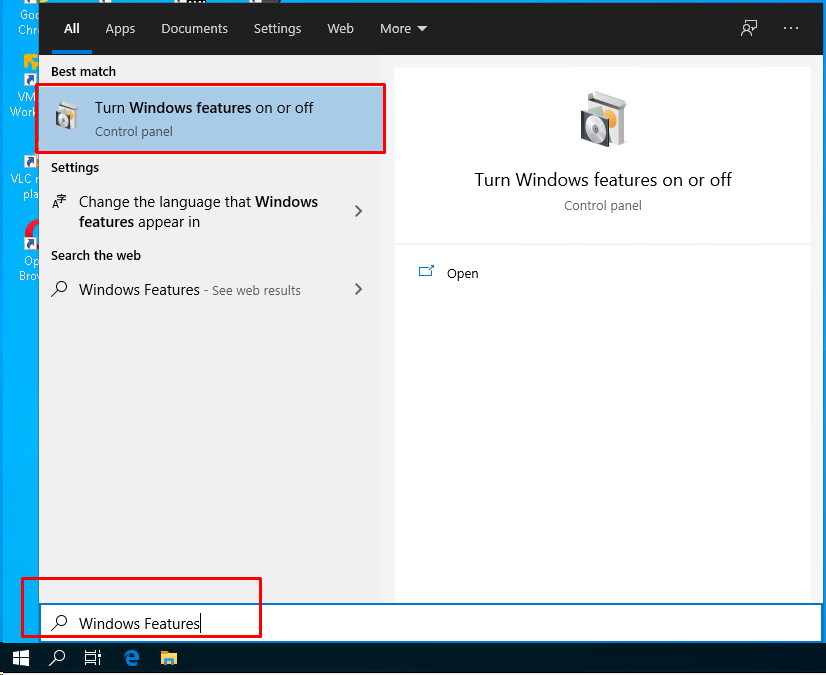
We can also use the Windows Features GUI tool in order to install/enable the Hyper-V. We will type windows features into the start menu where the Windows Features app will be listed below. We will just click on and open it.
我们还可以使用Windows Features GUI工具来安装/启用Hyper-V。 我们将在开始菜单中键入windows features ,其中Windows功能应用程序将在下面列出。 我们将点击并打开它。
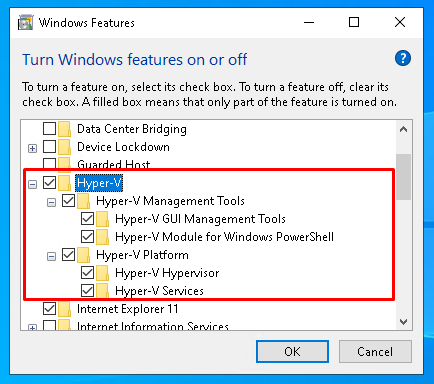
We will see a screen like below which will list the Windows features. We will select the Hyper-V. Optionally we can specifically specify the submodules we want to install like the GUI Management tool, Hyper-V Services, etc.
我们将看到如下屏幕,其中列出了Windows功能。 我们将选择Hyper-V 。 (可选)我们可以专门指定要安装的子模块,例如GUI管理工具,Hyper-V服务等。
打开Hyper-V Manager GUI (Open Hyper-V Manager GUI)
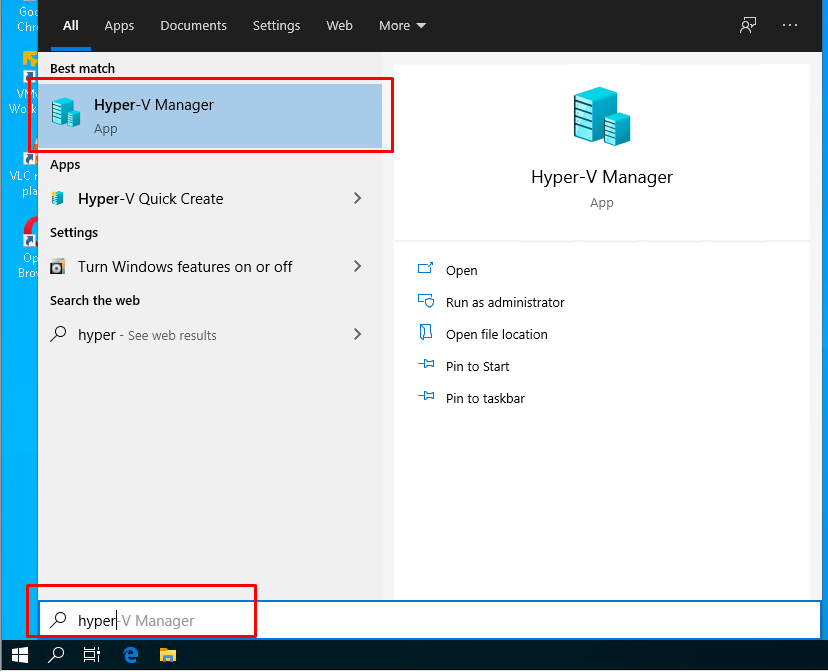
Now we have installed the Hyper-V feature and related tools like Hyper-V Manager which is a GUI tool in order to manage Hyper-V easily with the graphical user interface. We can open the Hyper-V Manager from the start menu typing hyper where the Hyper-V Manager will be listed as below.
现在,我们已经安装了Hyper-V功能和相关工具,例如Hyper-V Manager这是一个GUI工具),以便通过图形用户界面轻松管理Hyper-V。 我们可以从开始菜单中键入hyper ,打开Hyper-V Manager,其中Hyper-V Manager如下所示。
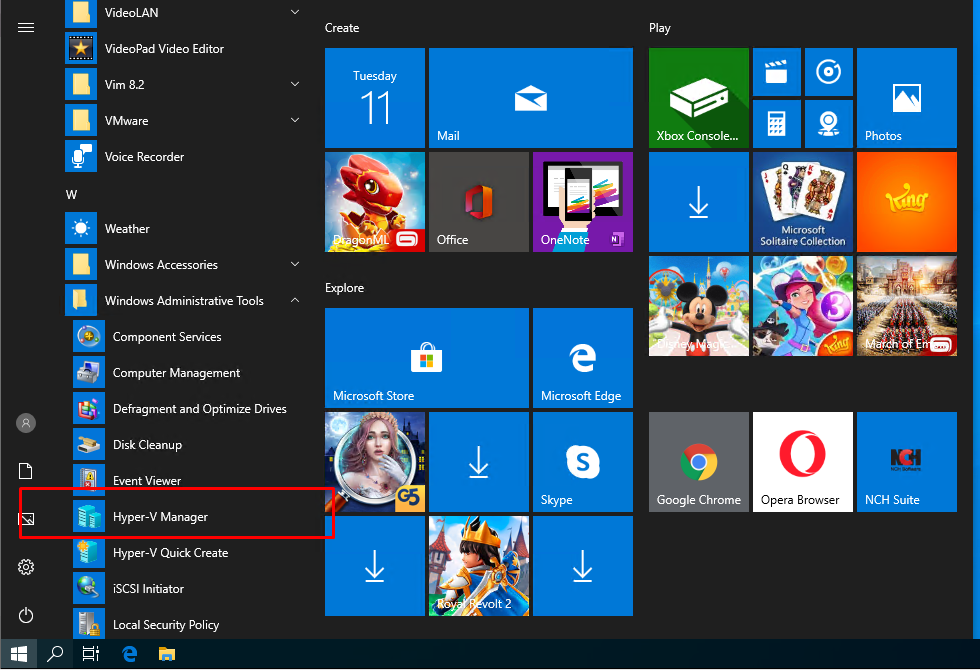
Alternatively, it can be opened from the listed programs Windows Administrative Tools->Hyper-V Manager like below.
另外,也可以从列出的程序Windows Administrative Tools -> Hyper-V Manager打开它,如下所示。
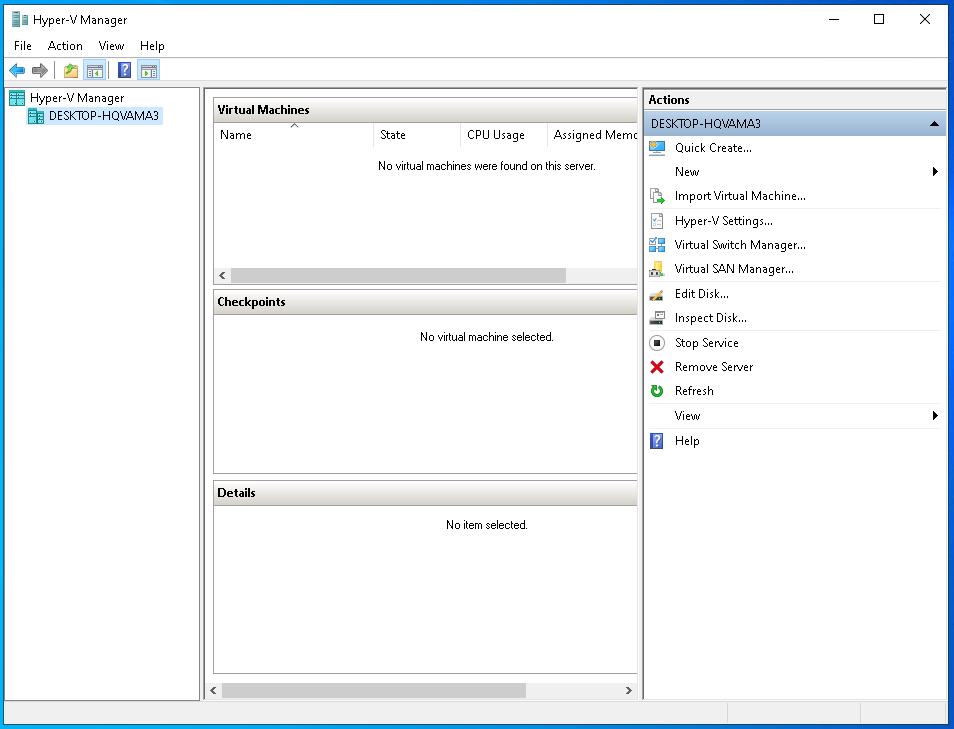
The Hyper-V Manager is like below. where it consists of a menu and three panes to list, manage and take actions for VMs.
Hyper-V管理器如下所示。 它由一个菜单和三个窗格组成,用于列出,管理和执行VM的操作。
创建VM(虚拟机)(Create VM (Virtual Machine))
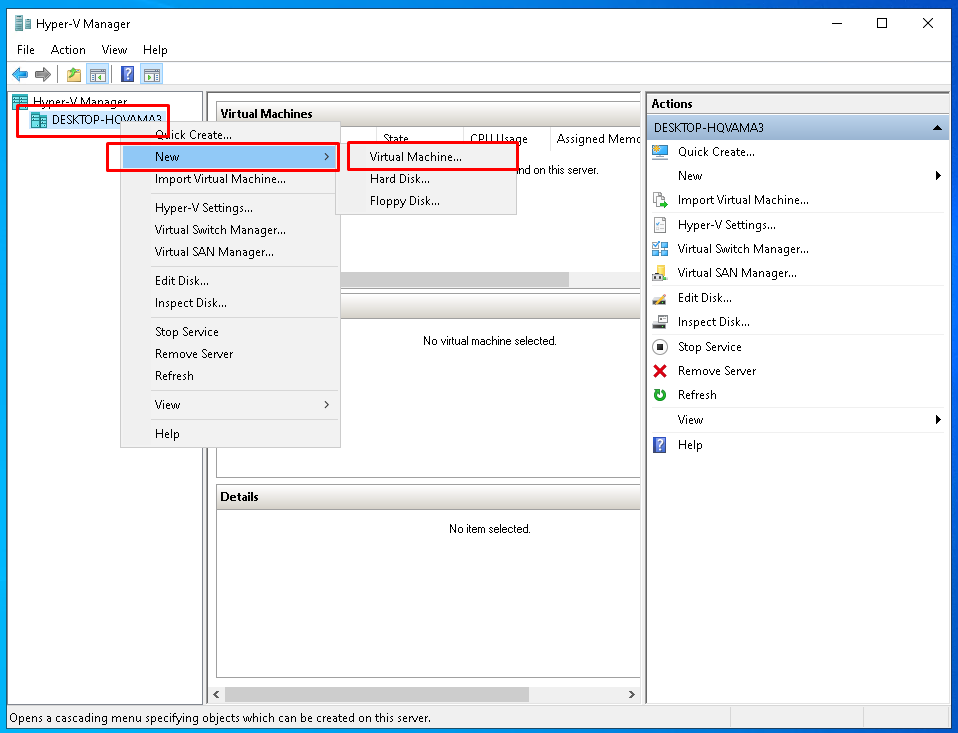
We can create a Virtual Machine or VM from the left pane. We will select the Hyper-V host we want to use and click right which will open a menu. From this menu, we will select New and Virtual Machine like below.
我们可以从左窗格创建虚拟机或VM。 我们将选择我们要使用的Hyper-V主机,然后单击右键,将打开一个菜单。 从此菜单中,我们将选择“ New和Virtual Machine如下所示。
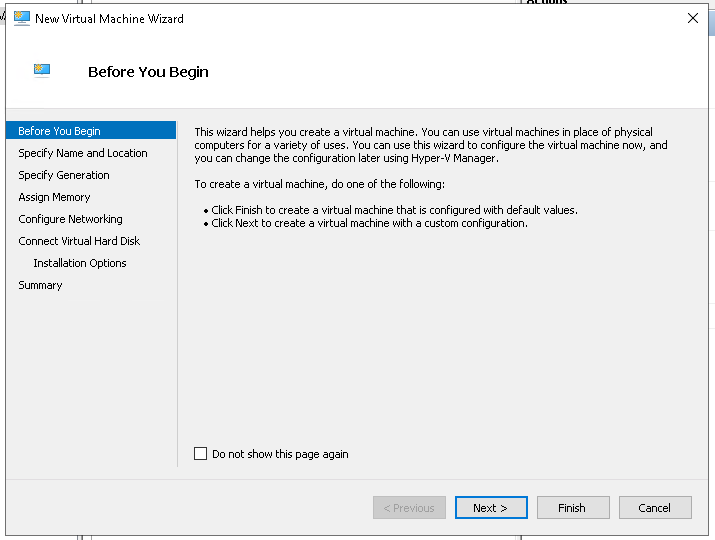
We will see the following welcome screen for the VM creation. We will simply click to the Next. We can also do not show this page by checking Do not show this page again checkbox.
我们将看到以下用于创建VM的欢迎屏幕。 我们只需单击Next 。 我们也可以通过不选中Do not show this page again复选框来Do not show this page again 。
指定名称和位置 (Specify Name and Location)
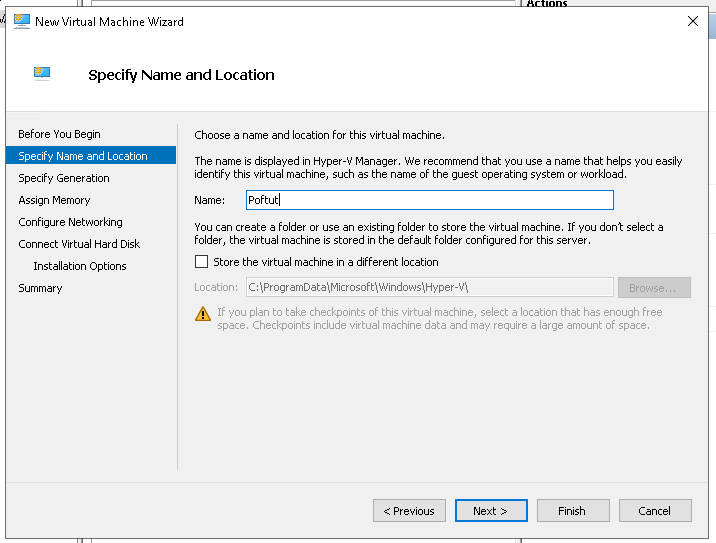
The following screen is named Specify Name and Location where we will specify the name of the VM. Optionally we can set the VM files location where C:\ProgramData\Microsoft\Windows\Hyper-V is the default one.
以下屏幕名为“ Specify Name and Location ,我们将在其中指定VM的名称。 (可选)我们可以设置VM文件的位置,其中C:\ProgramData\Microsoft\Windows\Hyper-V是默认位置。
指定世代(Specify Generation)
In this step, we will specify the generation of the VM where Generation 1 is the default. Generation 2 is selected to use UEFI-based firmware.
在此步骤中,我们将指定VM的生成,其中默认为Generation 1。 选择第2代以使用UEFI-based firmware 。

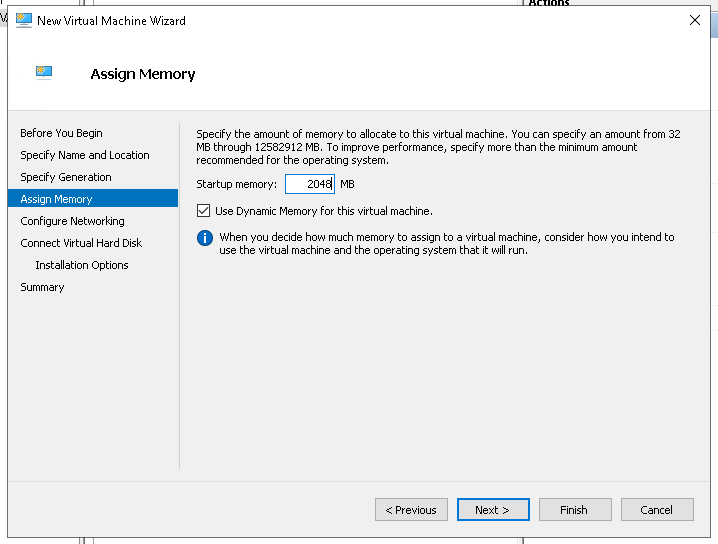
设置内存大小(Set Memory Size)
In this Assign Memory screen, we will set the memory size of the VM. We will set the VM ram as 2048MB
在此“ Assign Memory屏幕中,我们将设置VM的内存大小。 我们将VM ram设置为2048MB
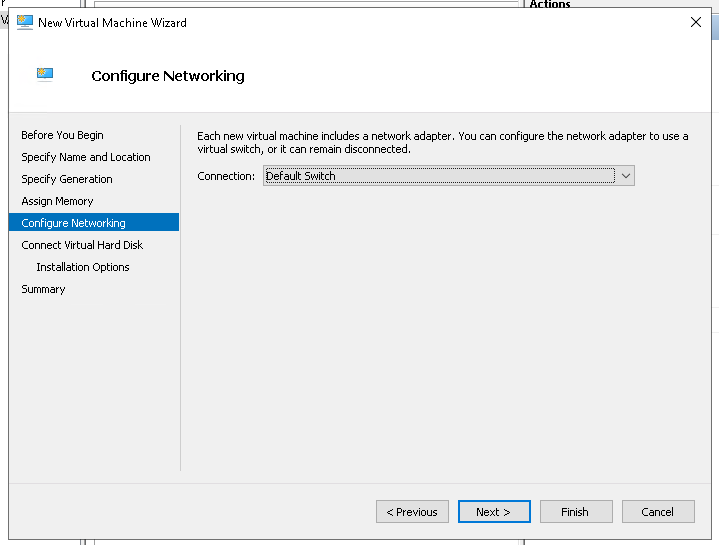
配置网络(Configure Network)
In this step, we will configure the network where we will select the switch. We will select the Default Switch which is a NAT to connect the internet.
在此步骤中,我们将配置要选择交换机的网络。 我们将选择Default Switch ,它是用于连接Internet的NAT。
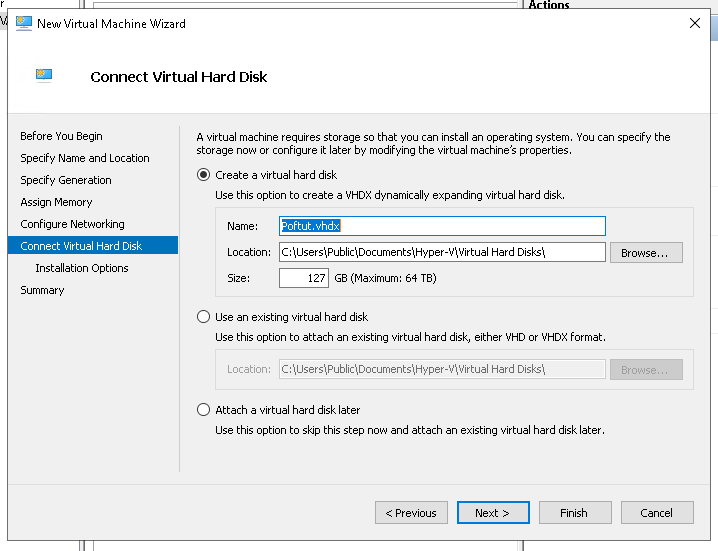
设置硬盘文件和大小(Set Hard Disk File and Size)
This step is the most complex step where we will specify the VM hard disk name, Size, and location. We do not change the default size which is 127GB.
此步骤是最复杂的步骤,在此我们将指定VM硬盘名称,大小和位置。 我们不会更改默认大小127GB。
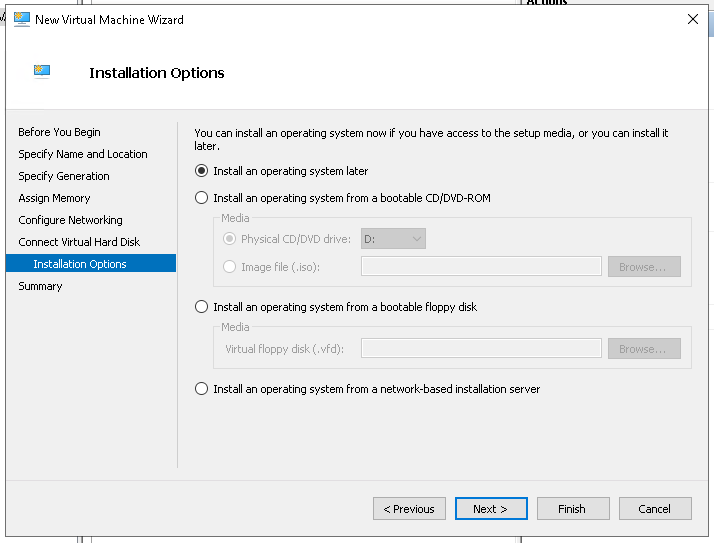
选择安装介质/ ISO(Select Installation Media/ISO)
In this step, we can specify an installation media like CD-ROM or ISO file. In this case, we skip by choosing Install an operating system later option.
在此步骤中,我们可以指定安装介质,例如CD-ROM或ISO文件。 在这种情况下,我们跳过跳过“选择Install an operating system later选项。
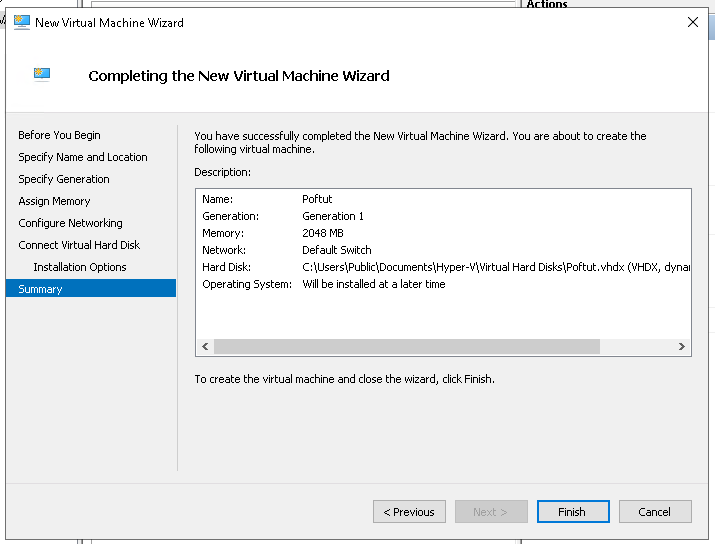
完成新的VM创建 (Complete New VM Creation)
In this step, we will review the new VM configuration and click on the Finish in order to create a new VM.
在此步骤中,我们将检查新的VM配置,然后单击Finish以创建新的VM。
翻译自: https://www.poftut.com/how-to-enable-install-hyper-v-on-windows/


 360
360

 被折叠的 条评论
为什么被折叠?
被折叠的 条评论
为什么被折叠?
 到【灌水乐园】发言


