


Cygwin is a free software to provide Linux and Unix environment, tools, and libraries in Windows operating systems. Cygwin is also called an emulator because it translates Linux system calls into Windows type systems calls. Cygwin generally used to run Linux tools like ssh, SCP, bash, X11, GCC in the Windows environment. Cygwin support following operating systems
Cygwin是一款免费软件,可在Windows操作系统中提供Linux和Unix环境,工具和库。 Cygwin也称为仿真器,因为它将Linux系统调用转换为Windows类型的系统调用。 Cygwin通常用于在Windows环境中运行Linux工具,例如ssh,SCP,bash,X11,GCC。 Cygwin支持以下操作系统
- Windows XPWindows XP
- Windows Vista Windows Vista
- Windows 7 Windows 7的
- Windows 8Windows 8
- Windows 10 Windows 10
- Windows Server 2003 Windows Server 2003
- Windows Server 2008 Windows Server 2008
- Windows Server 2012 Windows Server 2012
- Windows Server 2016 Windows Server 2016
安装 (Installation)
下载安装文件(Download Installation Files)
We will download installation files from Cygwin site. There is two type of installation files
我们将从Cygwin网站下载安装文件。 有两种类型的安装文件
32位– x86(32 bit – x86)
32 bit installation file can be downloaded from following link.
可以从以下链接下载32位安装文件。
https://www.cygwin.com/setup-x86.exe
https://www.cygwin.com/setup-x86.exe
64位– x86_64 (64 bit – x86_64)
64 bit installation file can be downloaded from following link.
可以从以下链接下载64位安装文件。
https://www.cygwin.com/setup-x86.exe
https://www.cygwin.com/setup-x86.exe
开始安装Cygwin (Start Setup Of Cygwin)
We will start installation by clicking the downloaded files. To install we need Administrator privileges.
我们将通过单击下载的文件开始安装。 要安装,我们需要管理员权限。
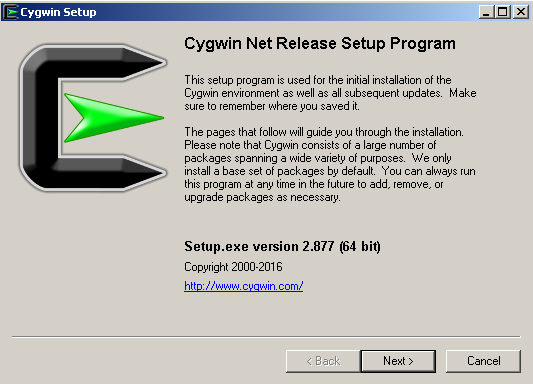
In this screen we see information about installation like version, architecture.
在此屏幕中,我们看到有关安装的信息,例如版本,体系结构。
安装方式 (Installation Method)
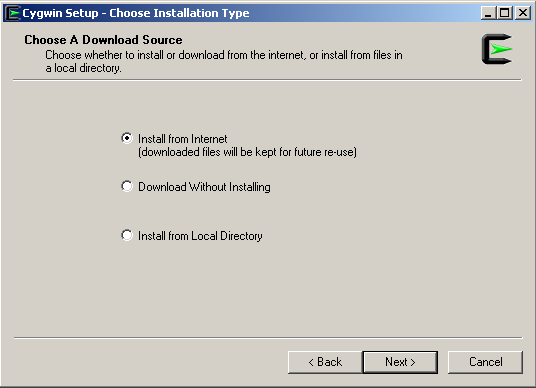
We have three option to get installation files.
我们有三种选择来获取安装文件。
Install from Internetwill get files from repositories and installInstall from Internet存储库中获取文件并进行安装Download Without Installingwill only get files and do not installDownload Without Installing将仅获取文件,而不安装Install from Local Directorywill get files from local disk and start installation.Install from Local Directory磁盘获取文件并开始安装。
选择安装目录(Choose Installation Directory)
We need to choose the installation directory. Default path is good but we can change to the Program Files too. There is also an option to chose which users can use Cygwin.
我们需要选择安装目录。 默认路径是好的,但是我们也可以更改为Program Files 。 还有一个选项可以选择哪些用户可以使用Cygwin。

下载目录(Download Directory)
We will chose where to save the downloaded Cygwin packages.
我们将选择保存下载的Cygwin软件包的位置。

选择互联网连接类型(Select Internet Connection Type)
We will select the connection type. For regular network connections Direct Connection is enough but if we use proxy we should provide related parameters with the other options.
我们将选择连接类型。 对于常规的网络连接, Direct Connection就足够了,但是如果我们使用代理服务器,则应在其他选项中提供相关参数。

选择下载站点(Choose Download Site)
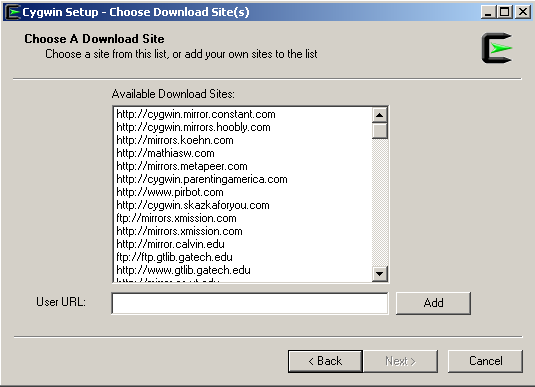
We will choose the site for downloading packages. Prefer physically near sites for faster download.
我们将选择下载软件包的站点。 物理上更喜欢站点附近,以便更快地下载。
更新软件包存储库信息(Update Package Repository Information)
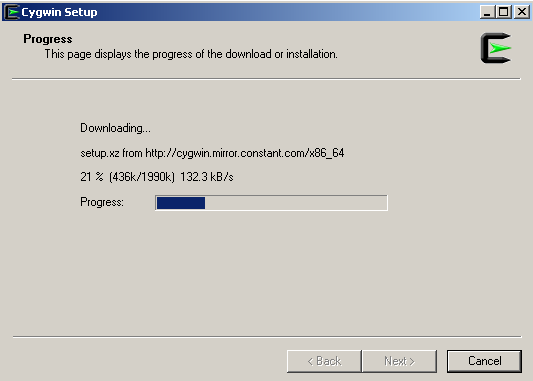
Then the package and repository information will be updated from previously selected site.
然后,将从先前选择的站点更新软件包和存储库信息。
选择套餐(Select Packages)
Now we are here to select applications, tools, libraries, groups to install.
现在我们在这里选择要安装的应用程序,工具,库,组。
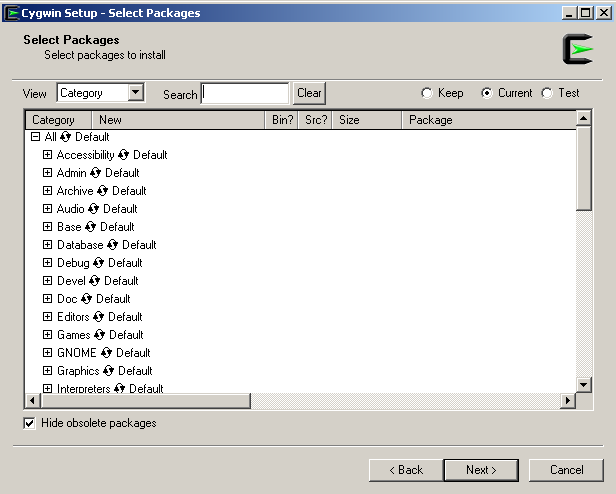
We can search package name with the Search box or select from the list directly. Packages are grouped according to their functionalities like Admin , Database , GNOME etc. We can select the whole group or single package from the group.
我们可以在“ Search框中搜索包裹名称,或直接从列表中选择。 软件包根据其功能分组,如Admin , Database , GNOME等。我们可以选择整个组或从该组中选择单个软件包。
安装SSH (Install SSH)
For simplicity we have searched ssh to installation. After search operation the dependencies are resolved and we will click Next
为简单起见,我们搜索了ssh进行安装。 搜索操作完成后,相关性已解决,我们将单击“ Next

安装 (Installation)
We install ssh by downloading dependencies packages. Also this is the first installation so the Cygwin will install base packages those are used by a lot of other applications, tools.
我们通过下载依赖包来安装ssh。 这也是第一次安装,因此Cygwin将安装许多其他应用程序和工具使用的基本软件包。

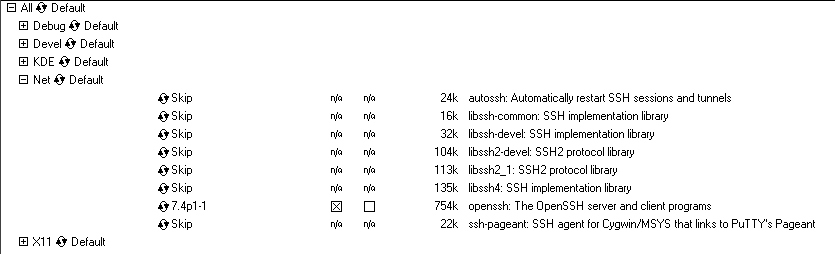
添加新软件包或工具(Add New Package or Tool)
We will install ssh from Net group. We search and select package named openssh.
我们将从Net组安装ssh。 我们搜索并选择名为openssh软件包。
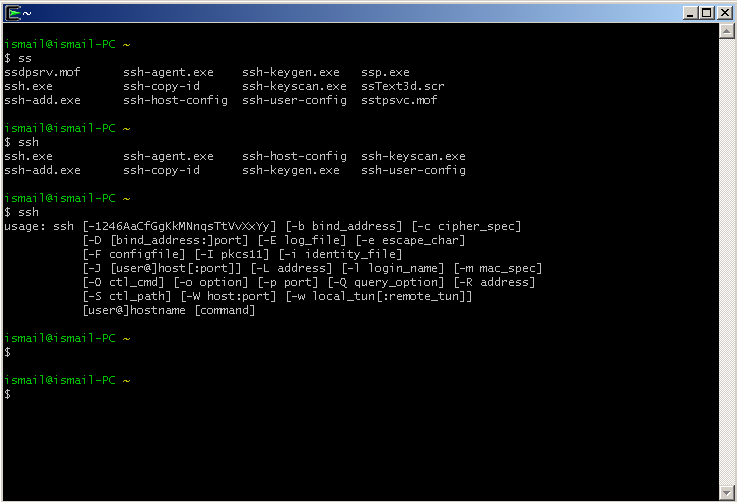
与Cygwin一起运行Ssh(Run Ssh With Cygwin)
After the ssh installation is completed we can access the ssh from the Cygwin command line. Cygwin shortcut is created on the desktop. Open it by clicking. And type ssh like below.
ssh安装完成后,我们可以从Cygwin命令行访问ssh。 Cygwin快捷方式是在桌面上创建的。 通过单击将其打开。 然后像下面一样输入ssh 。
与Cygwin一起跑步 (Run Bash With Cygwin)
The default shell is bash. We can check the current shell with the env command which will list environment-related variables. We will search for SHELL line and variable like below.
默认的shell是bash。 我们可以使用env命令检查当前shell,该命令将列出与环境相关的变量。 我们将搜索如下所示的SHELL行和变量。
$ env | grep SHELL
翻译自: https://www.poftut.com/install-use-cygwin-terminal-ssh-examples/


 448
448


 被折叠的 条评论
为什么被折叠?
被折叠的 条评论
为什么被折叠?
 到【灌水乐园】发言


