


Linux provides a lot of tools for hexadecimal and binary manipulation. Xxd is one of the most popular tool. Xxd is generally used to create hex dump of the given file or standard input.
Linux提供了许多用于十六进制和二进制操作的工具。 Xxd是最受欢迎的工具之一。 Xxd通常用于创建给定文件或标准输入的十六进制转储。
帮帮我 (Help)
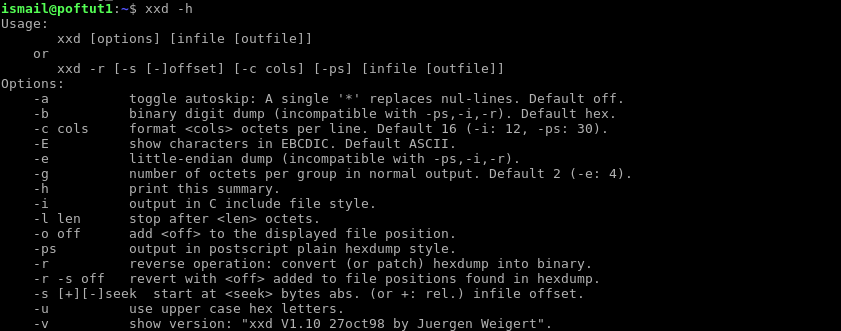
We can list help information about xxd command with the -h option.
我们可以使用-h选项列出有关xxd命令的帮助信息。
$ xxd -h
句法(Syntax)
We will use following syntax for xxd command.
我们将对xxd命令使用以下语法。
xxd [options] [infile [outfile]]
转储为十六进制 (Dump to Hexadecimal)
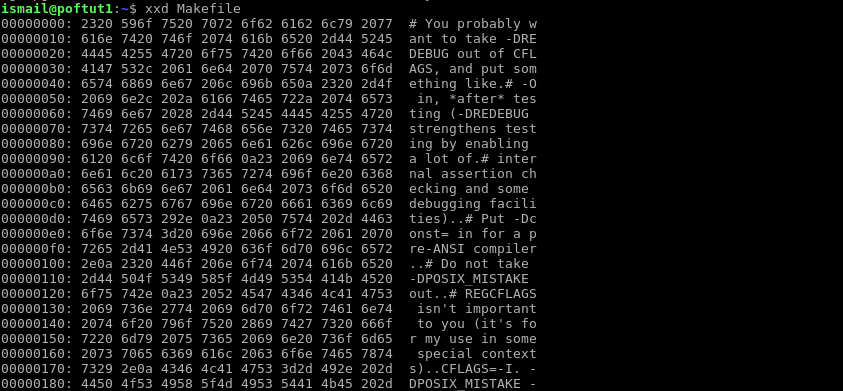
A file can be dumped into hexadecimal format just providing the file name. We will dump the file named Makefile in this example.
只需提供文件名即可将文件转储为十六进制格式。 在本示例中,我们将转储名为Makefile的文件。
$ xxd Makefile
从命令行或标准输入转储(Dump From Commands Line or Standard Input)
In previous example we have dumped from a file. xxd also supports dumping from standard input or console. We will provide - to specify input as standard input. At the end of the input we will stop input with CTRL+d shortcut.
在前面的示例中,我们已从文件中转储。 xxd还支持从标准输入或控制台转储。 我们将提供-将输入指定为标准输入。 在输入结束时,我们将停止使用CTRL+d快捷键的输入。
$ xxd -

设置开始索引(Set Start Index)
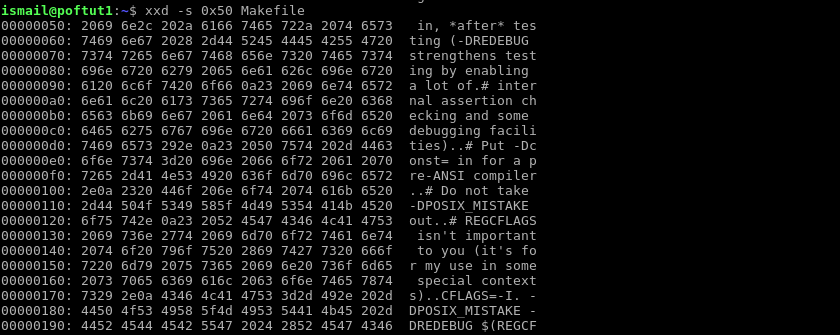
While dumping from a file there may be a lot of data those we are not interested. So we simply skip them. xxd provides -s option to skip to the specified index. In this example we will skip first 5 lines and start from 6. line.
从文件中转储时,可能会有很多我们不感兴趣的数据。 因此,我们只是跳过它们。 xxd提供-s选项以跳到指定的索引。 在此示例中,我们将跳过前5行并从6行开始。
$ xxd -s 0x50 Makefile
设置结束索引(Set End Index)
Previous example we have set the start index , we can also set the end index to limit printing data range in a file. We will use -l option with the value. In this example we set end index as 30 .
在前面的示例中,我们设置了开始索引,我们还可以设置结束索引以限制文件中的打印数据范围。 我们将-l选项与该值一起使用。 在此示例中,我们将结束索引设置为30 。
$ xxd -l 100 Makefile

设置列长(Set Column Length)
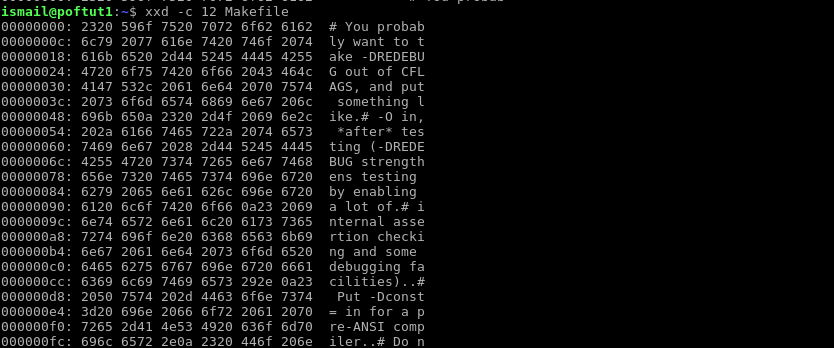
xxd uses 16 as the default column length. This value can be changed with the -l option providing length value. In this example we will set column length as 12 .
xxd使用16作为默认列长度。 可以使用-l选项提供长度值来更改此值。 在此示例中,我们将列长度设置为12。
$ xxd -c 12 Makefile
翻译自: https://www.poftut.com/use-linux-xxd-command-tutorial-hex-binary-operations-example/


 1167
1167


 被折叠的 条评论
为什么被折叠?
被折叠的 条评论
为什么被折叠?
 到【灌水乐园】发言


