


[该教程翻译自Spring官方,并进行适当删减。]
任务调度是一种常用的功能,比如定期更新系统日志等。
你将搭建的
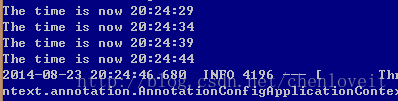
使用Spring的@Scheduled注解在控制台每5秒钟打印出当前时间。
工具
一个文本编辑器,JDK1.6及以上,Maven 3.0+或者Gradle 1.11+。(本文将使用Maven)
pom.xml清单:
<?xml version="1.0" encoding="UTF-8"?>
<project xmlns="http://maven.apache.org/POM/4.0.0" xmlns:xsi="http://www.w3.org/2001/XMLSchema-instance"
    xsi:schemaLocation="http://maven.apache.org/POM/4.0.0 http://maven.apache.org/xsd/maven-4.0.0.xsd">
    <modelVersion>4.0.0</modelVersion>

    <groupId>org.springframework</groupId>
    <artifactId>gs-scheduling-tasks</artifactId>
    <version>0.1.0</version>

    <parent>
        <groupId>org.springframework.boot</groupId>
        <artifactId>spring-boot-starter-parent</artifactId>
        <version>1.1.5.RELEASE</version>
    </parent>

    <dependencies>
        <dependency>
            <groupId>org.springframework.boot</groupId>
            <artifactId>spring-boot-starter</artifactId>
        </dependency>
    </dependencies>

    <properties>
        <start-class>hello.Application</start-class>
    </properties>

    <build>
        <plugins>
            <plugin>
                <artifactId>maven-compiler-plugin</artifactId>
                <version>2.3.2</version>
            </plugin>
            <plugin>
                <groupId>org.springframework.boot</groupId>
                <artifactId>spring-boot-maven-plugin</artifactId>
            </plugin>
        </plugins>
    </build>

    <repositories>
        <repository>
            <id>spring-releases</id>
            <name>Spring Releases</name>
            <url>http://repo.spring.io/libs-release</url>
        </repository>
    </repositories>
    <pluginRepositories>
        <pluginRepository>
            <id>spring-releases</id>
            <name>Spring Releases</name>
            <url>http://repo.spring.io/libs-release</url>
        </pluginRepository>
    </pluginRepositories>
</project>
新建项目
首先你新建一个符合Maven规范的目录结构, src/main/java/hello
- └── src
- └── main
- └── java
- └── hello
package hello;

import java.text.SimpleDateFormat;
import java.util.Date;
import org.springframework.scheduling.annotation.EnableScheduling;
import org.springframework.scheduling.annotation.Scheduled;

@EnableScheduling
public class ScheduledTasks {

    private static final SimpleDateFormat dateFormat = new SimpleDateFormat("HH:mm:ss");

    @Scheduled(fixedRate = 5000)
    public void reportCurrentTime() {
        System.out.println("The time is now " + dateFormat.format(new Date()));
    }
}
使得这段代码执行调度任务的核心是使用了@EnableScheduling和@Schduled注解。
@EnabledScheduling确保后台任务执行器被创建,否则,没有什么能得到调度。@Scheduled去配置一个特定的方法。这个例子使用的是 fixedRate,表示方法开始调用的时间间隔;可选还有 fixedDelay等,表示任务完成的间隔。你也可以使用 @Schduled(cron="...")表达式执行更复杂的调度。
注:
Example patterns:
- "0 0 * * * *" = the top of every hour of every day. 每天每小时的开始
- "*/10 * * * * *" = every ten seconds. 每10秒
- "0 0 8-10 * * *" = 8, 9 and 10 o'clock of every day. 每天的8点到10点
- "0 0/30 8-10 * * *" = 8:00, 8:30, 9:00, 9:30 and 10 o'clock every day. 每天的8点,8点半,9点,9点半,10点
- "0 0 9-17 * * MON-FRI" = on the hour nine-to-five weekdays 周一到周五的9点到17点
- "0 0 0 25 12 ?" = every Christmas Day at midnight 12月25号
Application类
虽然调度任务能嵌入到一个Web应用中,但更简单的是生成一个独立的应用。
package hello;

import org.springframework.boot.SpringApplication;

public class Application {

    public static void main(String[] args) throws Exception {
        SpringApplication.run(ScheduledTasks.class);
    }
}
打包执行的方法和之前的文章类似,
mvn clean package然后,
java -jar target/gs-scheduling-tasks-0.1.0.jar结果如下:


 9711
9711

 被折叠的 条评论
为什么被折叠?
被折叠的 条评论
为什么被折叠?
 到【灌水乐园】发言


