


spray 框架
在该站点上,您已经可以找到有关如何使用多个不同框架进行REST的几篇文章。 您可以在Play上找到一个旧的,在Scalatra上找到一个,我什至在Express上开始了一个(尚未完成的)系列。 因此,除了在Express上完成该系列之外,我还将在本文中介绍Spray。
入门
我们需要做的第一件事就是设置正确的库,以便我们可以开始开发(我使用IntelliJ IDEA,但是您可以使用任何想要的东西)。 最简单的入门方法是使用SBT。 我已经使用以下最小的SBT文件开始使用。
organization  := "org.smartjava"

version       := "0.1"

scalaVersion  := "2.11.2"

scalacOptions := Seq("-unchecked", "-deprecation", "-encoding", "utf8")

libraryDependencies ++= {
  val akkaV = "2.3.6"
  val sprayV = "1.3.2"
  Seq(
    "io.spray"            %%  "spray-can"     % sprayV withSources() withJavadoc(),
    "io.spray"            %%  "spray-routing" % sprayV withSources() withJavadoc(),
    "io.spray"            %%  "spray-json"    % "1.3.1",
    "io.spray"            %%  "spray-testkit" % sprayV  % "test",
    "com.typesafe.akka"   %%  "akka-actor"    % akkaV,
    "com.typesafe.akka"   %%  "akka-testkit"  % akkaV   % "test",
    "org.specs2"          %%  "specs2-core"   % "2.3.11" % "test",
    "org.scalaz"          %%  "scalaz-core"   % "7.1.0"
  )
}
将此文件导入所选的IDE后,您应该具有正确的Spray和Akka库才能上手。
创建一个启动器
接下来,我们创建一个启动器,您可以使用该启动器运行我们的Spray服务器。 为此,我们只是一个对象,该对象创造性地命名为Boot,它从标准的scala App特性延伸而来。
package org.smartjava;

import akka.actor.{ActorSystem, Props}
import akka.io.IO
import spray.can.Http
import akka.pattern.ask
import akka.util.Timeout
import scala.concurrent.duration._

object Boot extends App {

  // create our actor system with the name smartjava
  implicit val system = ActorSystem("smartjava")
  val service = system.actorOf(Props[SJServiceActor], "sj-rest-service")

  // IO requires an implicit ActorSystem, and ? requires an implicit timeout
  // Bind HTTP to the specified service.
  implicit val timeout = Timeout(5.seconds)
  IO(Http) ? Http.Bind(service, interface = "localhost", port = 8080)
}
这个对象没有发生太多的事情。 我们要做的是发送HTTP.Bind()消息(最好说我们“询问”)以注册侦听器。 如果绑定成功,只要在端口上收到请求,我们的服务就会收到消息。
接待演员
现在,让我们看看将从IO子系统向其发送消息的参与者。
package org.smartjava

import akka.actor.Actor
import spray.routing._
import spray.http._
import MediaTypes._
import spray.httpx.SprayJsonSupport._
import MyJsonProtocol._

// simple actor that handles the routes.
class SJServiceActor extends Actor with HttpService {

  // required as implicit value for the HttpService
  // included from SJService
  def actorRefFactory = context

  // we don't create a receive function ourselve, but use
  // the runRoute function from the HttpService to create
  // one for us, based on the supplied routes.
  def receive = runRoute(aSimpleRoute ~ anotherRoute)

  // some sample routes
  val aSimpleRoute = {...}
  val anotherRoute = {...}
因此,这里发生的是,当我们使用HttpService提供的runRoute函数来创建用于处理传入消息的receive函数时。
创建路线
我们需要配置的最后一步是创建一些路由处理代码。 在下一篇文章中,我们将对此部分进行更详细的介绍,因此,现在我们将向您展示如何创建基于传入的媒体类型发送回JSON的路由。 为此,我们将使用Spray的标准JSON支持。 作为JSON对象,我们将使用以下非常基本的case类,并通过JSON支持对其进行了扩展。
package org.smartjava

import spray.json.DefaultJsonProtocol

object MyJsonProtocol extends DefaultJsonProtocol {
  implicit val personFormat = jsonFormat3(Person)
}

case class Person(name: String, fistName: String, age: Long)
这样,当我们设置正确的响应媒体类型时,Spray会将这个对象编组为JSON。 现在我们有了响应对象,让我们看一下路由的代码:
// handles the api path, we could also define these in separate files
  // this path respons to get queries, and make a selection on the
  // media-type.
  val aSimpleRoute = {
    path("path1") {
      get {

        // Get the value of the content-header. Spray
        // provides multiple ways to do this.
        headerValue({
          case x@HttpHeaders.`Content-Type`(value) => Some(value)
          case default => None
        }) {
          // the header is passed in containing the content type
          // we match the header using a case statement, and depending
          // on the content type we return a specific object
          header => header match {

            // if we have this contentype we create a custom response
            case ContentType(MediaType("application/vnd.type.a"), _) => {
              respondWithMediaType(`application/json`) {
                complete {
                  Person("Bob", "Type A", System.currentTimeMillis());
                }
              }
            }

            // if we habe another content-type we return a different type.
            case ContentType(MediaType("application/vnd.type.b"), _) => {
              respondWithMediaType(`application/json`) {
                complete {
                  Person("Bob", "Type B", System.currentTimeMillis());
                }
              }
            }

            // if content-types do not match, return an error code
            case default => {
              complete {
                HttpResponse(406);
              }
            }
          }
        }
      }
    }
  }

  // handles the other path, we could also define these in separate files
  // This is just a simple route to explain the concept
  val anotherRoute = {
    path("path2") {
      get {
        // respond with text/html.
        respondWithMediaType(`text/html`) {
          complete {
            // respond with a set of HTML elements
            <html>
              <body>
                <h1>Path 2</h1>
              </body>
            </html>
          }
        }
      }
    }
  }
里面有很多代码,所以让我们详细突出几个元素:
val aSimpleRoute = {
    path("path1") {
      get {...}
   }
}
路由的起点首先检查是否向“ localhost:8080 / path1”路径发出请求,然后检查HTTP方法。 在这种情况下,我们只对GET方法感兴趣。 一旦有了get方法,我们将执行以下操作:
// Get the value of the content-header. Spray
        // provides multiple ways to do this.
        headerValue({
          case x@HttpHeaders.`Content-Type`(value) => Some(value)
          case default => None
        }) {
          // the header is passed in containing the content type
          // we match the header using a case statement, and depending
          // on the content type we return a specific object
          header => header match {

            // if we have this contentype we create a custom response
            case ContentType(MediaType("application/vnd.type.a"), _) => {
              respondWithMediaType(`application/json`) {
                complete {
                  Person("Bob", "Type A", System.currentTimeMillis());
                }
              }
            }

            // if we habe another content-type we return a different type.
            case ContentType(MediaType("application/vnd.type.b"), _) => {
              respondWithMediaType(`application/json`) {
                complete {
                  Person("Bob", "Type B", System.currentTimeMillis());
                }
              }
            }

            // if content-types do not match, return an error code
            case default => {
              complete {
                HttpResponse(406);
              }
            }
          }
        }
      }
在这段代码中,我们提取请求的Content-Type标头,并根据该标头确定响应。 由于responseWithMediaType设置为application / json,因此响应会自动转换为JSON。 如果提供了我们不理解的媒体类型,则会返回406消息。
让我们测试一下
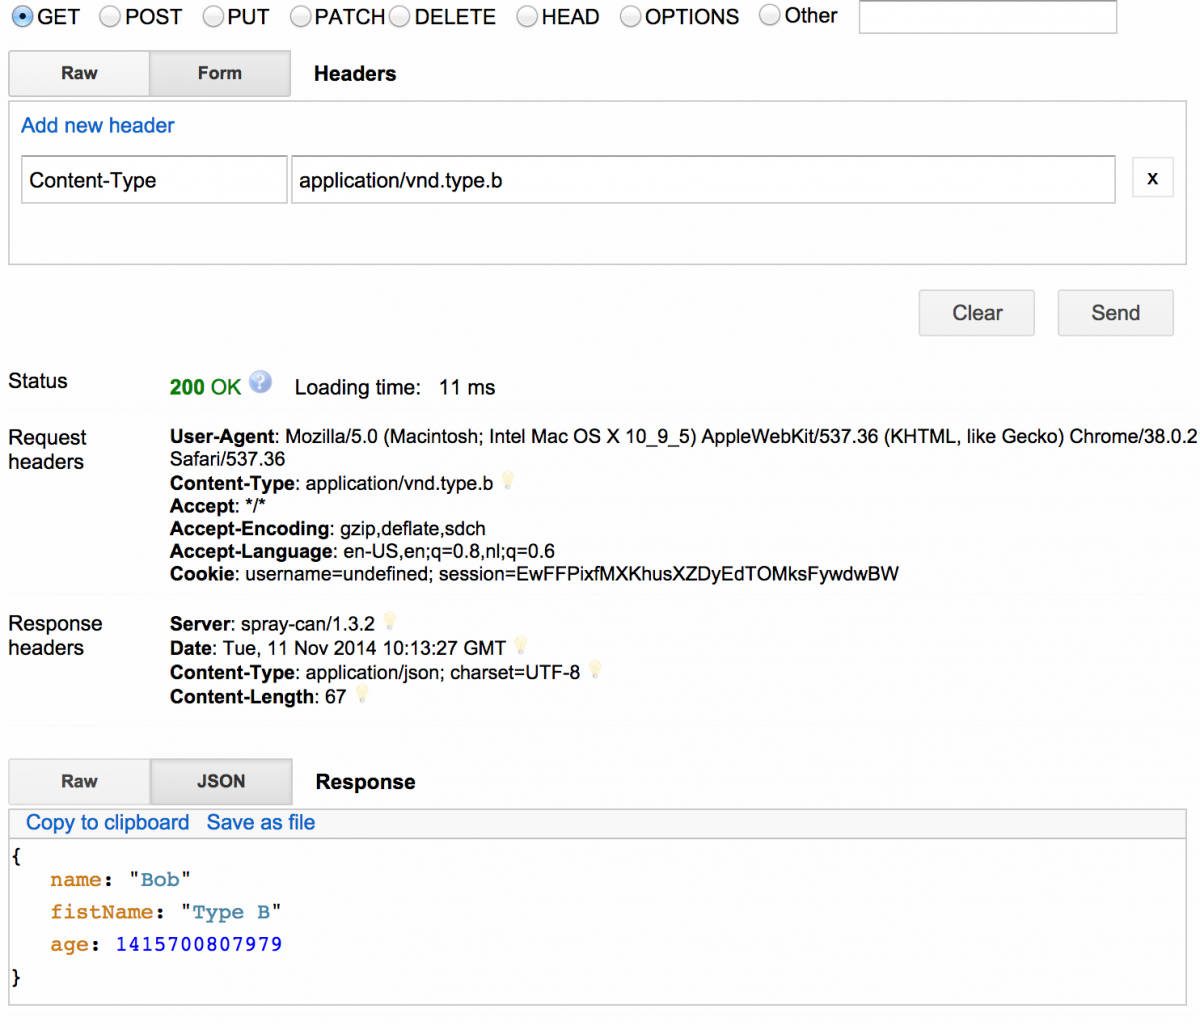
现在让我们测试一下是否正常。 Spray提供了自己的库和类进行测试,但是现在,让我们只使用一个简单的基本rest客户即可。 为此,我通常使用Chrome Advanced Rest Client 。 在以下两个屏幕截图中,您可以看到对http:// localhost:8080 / path1的三个调用:
使用媒体类型“ application / vnd.type.a”进行调用:

使用媒体类型“ application / vnd.type.b”进行调用:
使用媒体类型“ application / vnd.type.c”进行调用:
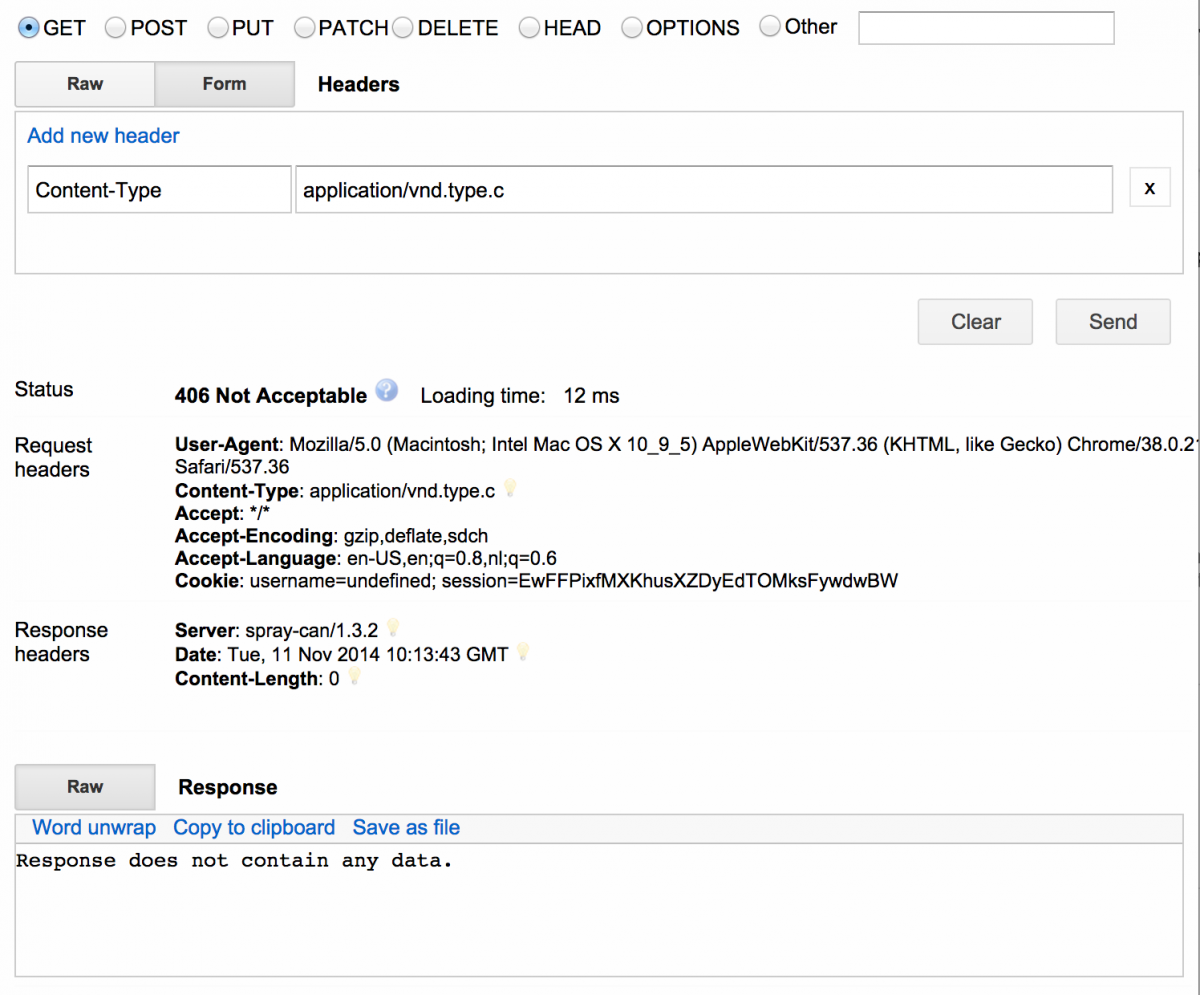
如您所见,响应完全符合我们定义的路线。
接下来是什么
在下面的文章中,我们将把Spray IO连接到数据库,使测试变得更加容易,并探索许多其他Spray.IO功能。
翻译自: https://www.javacodegeeks.com/2014/11/first-steps-with-rest-spray-and-scala.html
spray 框架


 568
568


 被折叠的 条评论
为什么被折叠?
被折叠的 条评论
为什么被折叠?
 到【灌水乐园】发言


