


在本教程中,我们将了解如何创建具有固定页眉和页脚但具有可滚动内容的简单Android布局。 尽管布局中的某些组件尽管要显示的项目数量很多,但对用户始终是可见的,您可能会发现这特别有用。 菜单栏,选项按钮,小部件或只是标题可能就是此类组件。 例如,在创建图像库应用程序时,您希望用户能够上下滚动图像列表,但同时也希望图像处理菜单栏始终可见。 本教程将提供产生此类布局的基本基础结构。
对于本教程,我们将在Windows 64位平台上使用以下工具:
- JDK 1.7
- Eclipse 4.3开普勒
- Android SKD 4.3
1.创建一个新的Android项目
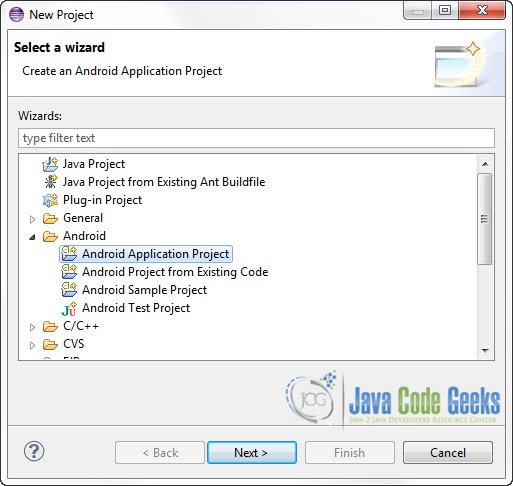
打开Eclipse IDE,然后转到File-> New-> Project-> Android-> Android Application Project。
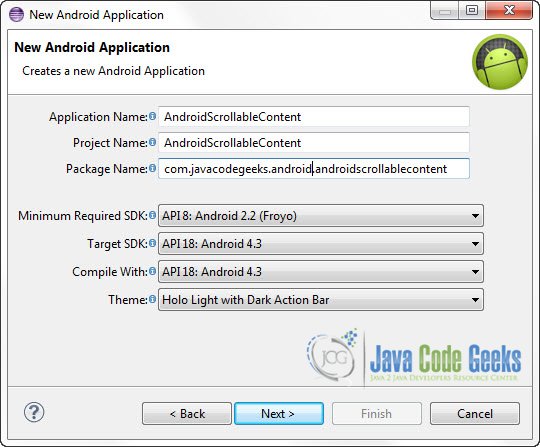
您必须在适当的文本字段中指定应用程序名称,项目名称和程序包名称,然后单击下一步。
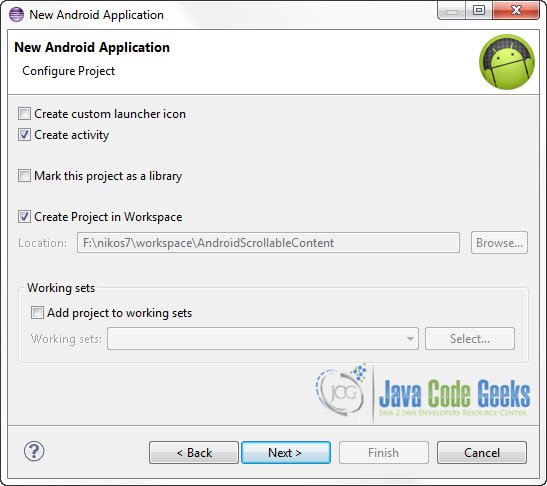
在下一个窗口中,确保选择“创建活动”选项,以便为您的项目创建新活动,然后单击“下一步”。 这是可选的,因为您可以在创建项目后创建新活动,但是您可以一步一步完成所有操作。
选择“ BlankActivity”,然后单击“下一步”。

系统将要求您指定一些有关新活动的信息。 在“布局名称”文本字段中,您必须指定将包含应用程序的布局描述的文件的名称。 在本例中,将创建文件res/layout/main.xml 。 然后,单击“完成”。

2.创建主要活动的布局
打开res/layout/main.xml文件:
并粘贴以下代码:
main.xml:
<?xml version="1.0" encoding="utf-8"?>
<RelativeLayout xmlns:android="http://schemas.android.com/apk/res/android"
  xmlns:tools="http://schemas.android.com/tools"
  android:layout_width="match_parent"
  android:layout_height="match_parent" >

  <!-- Header aligned to top -->
  <RelativeLayout
    android:id="@+id/header"
    android:layout_width="match_parent"
    android:layout_height="wrap_content"
    android:layout_alignParentTop="true"
    android:background="#FC9"
    android:gravity="center" >

    <TextView
      android:layout_width="wrap_content"
      android:layout_height="wrap_content"
      android:layout_margin="5dp"
      android:text="Fixed Header"
      android:textColor="#000"
      android:textSize="20sp" />
  </RelativeLayout>

  <!-- Footer aligned to bottom -->
  <RelativeLayout
    android:id="@+id/footer"
    android:layout_width="match_parent"
    android:layout_height="wrap_content"
    android:layout_alignParentBottom="true"
    android:background="#FC0"
    android:gravity="center" >

    <TextView
      android:layout_width="wrap_content"
      android:layout_height="wrap_content"
      android:layout_margin="5dp"
      android:text="Fixed Footer"
      android:textColor="#000"
      android:textSize="20sp" />
  </RelativeLayout>

  <!-- Scrollable Item below header and above footer -->
  <ScrollView
    android:id="@+id/scrollableContents"
    android:layout_width="fill_parent"
    android:layout_height="fill_parent"
    android:layout_above="@id/footer"
    android:background="#005"
    android:layout_below="@id/header" >

    <LinearLayout
      android:layout_width="fill_parent"
      android:layout_height="wrap_content"
      android:gravity="center_horizontal"
      android:orientation="vertical" >

      <TextView
        android:layout_width="wrap_content"
        android:layout_height="wrap_content"
        android:layout_marginBottom="22dp"
        android:layout_marginTop="22dp"
        android:text="Item 1"
        android:textColor="#CCCCCC"
        android:textSize="19sp" />

      <TextView
        android:layout_width="wrap_content"
        android:layout_height="wrap_content"
        android:layout_marginBottom="22dp"
        android:layout_marginTop="22dp"
        android:text="Item 2"
        android:textColor="#CCCCCC"
        android:textSize="19sp" />

      <TextView
        android:layout_width="wrap_content"
        android:layout_height="wrap_content"
        android:layout_marginBottom="22dp"
        android:layout_marginTop="22dp"
        android:text="Item 3"
        android:textColor="#CCCCCC"
        android:textSize="19sp" />

      <TextView
        android:layout_width="wrap_content"
        android:layout_height="wrap_content"
        android:layout_marginBottom="22dp"
        android:layout_marginTop="22dp"
        android:text="Item 4"
        android:textColor="#CCCCCC"
        android:textSize="19sp" />

      <TextView
        android:layout_width="wrap_content"
        android:layout_height="wrap_content"
        android:layout_marginBottom="22dp"
        android:layout_marginTop="22dp"
        android:text="Item 5"
        android:textColor="#CCCCCC"
        android:textSize="19sp" />

      <TextView
        android:layout_width="wrap_content"
        android:layout_height="wrap_content"
        android:layout_marginBottom="22dp"
        android:layout_marginTop="22dp"
        android:text="Item 6"
        android:textColor="#CCCCCC"
        android:textSize="19sp" />

      <TextView
        android:layout_width="wrap_content"
        android:layout_height="wrap_content"
        android:layout_marginBottom="22dp"
        android:layout_marginTop="22dp"
        android:text="Item 7"
        android:textColor="#CCCCCC"
        android:textSize="19sp" />

       <TextView
        android:layout_width="wrap_content"
        android:layout_height="wrap_content"
        android:layout_marginBottom="22dp"
        android:layout_marginTop="22dp"
        android:text="Item 8"
        android:textColor="#CCCCCC"
        android:textSize="19sp" />

        <TextView
        android:layout_width="wrap_content"
        android:layout_height="wrap_content"
        android:layout_marginBottom="22dp"
        android:layout_marginTop="22dp"
        android:text="Item 9"
        android:textColor="#CCCCCC"
        android:textSize="19sp" />

         <TextView
        android:layout_width="wrap_content"
        android:layout_height="wrap_content"
        android:layout_marginBottom="22dp"
        android:layout_marginTop="22dp"
        android:text="Item 10"
        android:textColor="#CCCCCC"
        android:textSize="19sp" />

    </LinearLayout>

  </ScrollView>

</RelativeLayout>
这里的想法很简单。 我们有两个RelativeLayouts ,一个在屏幕的顶部对齐,使用android:layout_alignParentTop="true"属性,以及一个用屏幕的底部对齐android:layout_alignParentBottom="true"属性。 然后,我们只需使用android:layout_above="@id/footer"和android:layout_below="@id/header"在这两个视图之间放置一个ScrollView即可。 这些属性会将ScrollView放在具有id footer的元素上方,并将其放在具有ID header的元素下方。
2.对主要活动进行编码
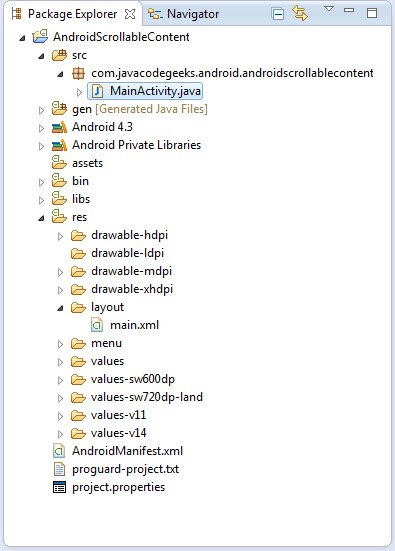
使用包资源管理器导航到您创建的活动的Java文件:
对于此示例,您无需对自动生成的代码进行任何更改,因此可以保持原样。
MainActivity.java:
package com.javacodegeeks.android.androidscrollablecontent;

import android.os.Bundle;
import android.app.Activity;
import android.view.Menu;

public class MainActivity extends Activity {

	@Override
	protected void onCreate(Bundle savedInstanceState) {
		super.onCreate(savedInstanceState);
		setContentView(R.layout.main);
	}

	@Override
	public boolean onCreateOptionsMenu(Menu menu) {
		// Inflate the menu; this adds items to the action bar if it is present.
		getMenuInflater().inflate(R.menu.main, menu);
		return true;
	}
}
4.运行应用程序
这是我们应用程序的主屏幕:
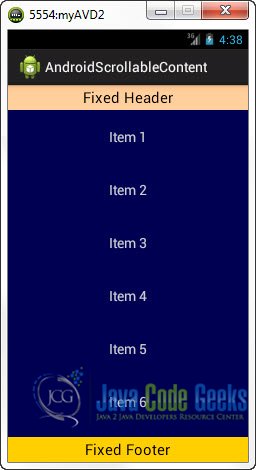
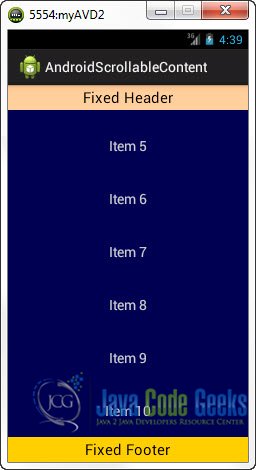
现在,如果向下滚动项目列表,您将看到页眉和页脚元素保持其位置。
使可滚动内容灵活
在上面的代码中,我们在活动的主布局中对ScrollView的内容进行了硬编码。 但是,您可能希望使用例如自定义ArrayAdapter在代码中动态添加ScrollView 。 或者,更重要的是,您可能希望使此布局可重用于其他活动,每个活动都有自己的内容要显示。
为此,我们仅要将主布局与ScrollView的内容分开。 继续,将上一个示例的main.xml文件重命名为scrollable_contents.xml然后只需从ScrollView删除项目即可。
scrollable_contents.xml:
<?xml version="1.0" encoding="utf-8"?>
<RelativeLayout xmlns:android="http://schemas.android.com/apk/res/android"
xmlns:tools="http://schemas.android.com/tools"
android:layout_width="match_parent"
android:layout_height="match_parent" >
<!-- Header aligned to top -->
<RelativeLayout
android:id="@+id/header"
android:layout_width="match_parent"
android:layout_height="wrap_content"
android:layout_alignParentTop="true"
android:background="#FC9"
android:gravity="center" >
<TextView
android:layout_width="wrap_content"
android:layout_height="wrap_content"
android:layout_margin="5dp"
android:text="Fixed Header"
android:textColor="#000"
android:textSize="20sp" />
</RelativeLayout>
<!-- Footer aligned to bottom -->
<RelativeLayout
android:id="@+id/footer"
android:layout_width="match_parent"
android:layout_height="wrap_content"
android:layout_alignParentBottom="true"
android:background="#FC0"
android:gravity="center" >
<TextView
android:layout_width="wrap_content"
android:layout_height="wrap_content"
android:layout_margin="5dp"
android:text="Fixed Footer"
android:textColor="#000"
android:textSize="20sp" />
</RelativeLayout>
<!-- Scrollable Item below header and above footer -->
<ScrollView
android:id="@+id/scrollableContents"
android:layout_width="fill_parent"
android:layout_height="fill_parent"
android:layout_above="@id/footer"
android:background="#005"
android:layout_below="@id/header" >
<!-- Inflate the contents of the ScrollView dynamicaly -->
</ScrollView>
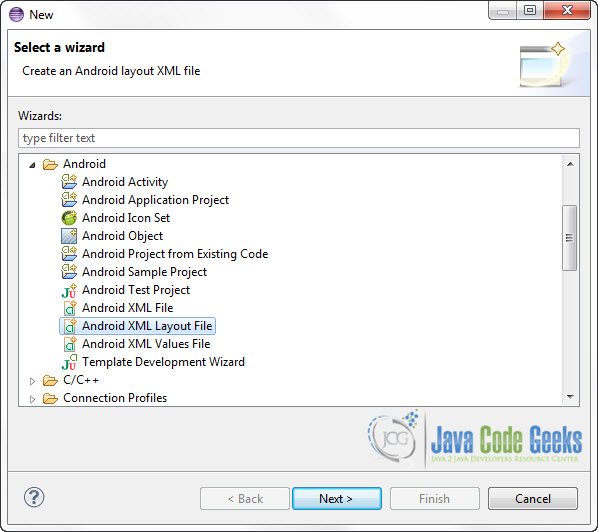
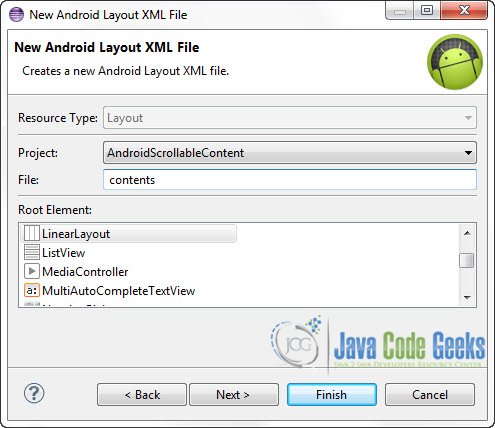
</RelativeLayout> 现在,您可以创建一个新的XML Layout文件,其中包含您要用来填充ScrollView的项目。 要创建一个新的布局文件,请转到Package Explorer并找到/res/layout文件夹。 右键单击文件夹->新建->其他-> Android-> Android XML布局文件:
为新的布局文件命名,然后单击“完成”:
这是新的项目结构:

打开contents.xml并放入所需的项目:
contents.xml:
<?xml version="1.0" encoding="utf-8"?>
<LinearLayout xmlns:android="http://schemas.android.com/apk/res/android"
    android:layout_width="match_parent"
    android:layout_height="match_parent"
    android:gravity="center_horizontal"
    android:orientation="vertical" >

    <TextView
        android:layout_width="wrap_content"
        android:layout_height="wrap_content"
        android:layout_marginBottom="22dp"
        android:layout_marginTop="22dp"
        android:text="Item 1"
        android:textColor="#CCCCCC"
        android:textSize="19sp" />

    <TextView
        android:layout_width="wrap_content"
        android:layout_height="wrap_content"
        android:layout_marginBottom="22dp"
        android:layout_marginTop="22dp"
        android:text="Item 2"
        android:textColor="#CCCCCC"
        android:textSize="19sp" />

    <TextView
        android:layout_width="wrap_content"
        android:layout_height="wrap_content"
        android:layout_marginBottom="22dp"
        android:layout_marginTop="22dp"
        android:text="Item 3"
        android:textColor="#CCCCCC"
        android:textSize="19sp" />

    <TextView
        android:layout_width="wrap_content"
        android:layout_height="wrap_content"
        android:layout_marginBottom="22dp"
        android:layout_marginTop="22dp"
        android:text="Item 4"
        android:textColor="#CCCCCC"
        android:textSize="19sp" />

    <TextView
        android:layout_width="wrap_content"
        android:layout_height="wrap_content"
        android:layout_marginBottom="22dp"
        android:layout_marginTop="22dp"
        android:text="Item 5"
        android:textColor="#CCCCCC"
        android:textSize="19sp" />

    <TextView
        android:layout_width="wrap_content"
        android:layout_height="wrap_content"
        android:layout_marginBottom="22dp"
        android:layout_marginTop="22dp"
        android:text="Item 6"
        android:textColor="#CCCCCC"
        android:textSize="19sp" />

    <TextView
        android:layout_width="wrap_content"
        android:layout_height="wrap_content"
        android:layout_marginBottom="22dp"
        android:layout_marginTop="22dp"
        android:text="Item 7"
        android:textColor="#CCCCCC"
        android:textSize="19sp" />

    <TextView
        android:layout_width="wrap_content"
        android:layout_height="wrap_content"
        android:layout_marginBottom="22dp"
        android:layout_marginTop="22dp"
        android:text="Item 8"
        android:textColor="#CCCCCC"
        android:textSize="19sp" />

    <TextView
        android:layout_width="wrap_content"
        android:layout_height="wrap_content"
        android:layout_marginBottom="22dp"
        android:layout_marginTop="22dp"
        android:text="Item 9"
        android:textColor="#CCCCCC"
        android:textSize="19sp" />

    <TextView
        android:layout_width="wrap_content"
        android:layout_height="wrap_content"
        android:layout_marginBottom="22dp"
        android:layout_marginTop="22dp"
        android:text="Item 10"
        android:textColor="#CCCCCC"
        android:textSize="19sp" />

</LinearLayout>
编码主要活动
现在,我们必须使用contents.xml文件中的项目为ScrollView充气。 让我们看看如何做到这一点:
MainActivity.java:
package com.javacodegeeks.android.androidscrollablecontent;

import android.app.Activity;
import android.os.Bundle;
import android.widget.ScrollView;

public class MainActivity extends Activity {

	@Override
	protected void onCreate(Bundle savedInstanceState) {
		super.onCreate(savedInstanceState);
		setContentView(R.layout.scrollable_contents);

		ScrollView scrollable_contents = (ScrollView) findViewById(R.id.scrollableContents);
		getLayoutInflater().inflate(R.layout.contents, scrollable_contents);

	}

}
运行应用程序
这是我们应用程序的主屏幕:
现在,如果向下滚动项目列表,您将看到页眉和页脚元素保持其位置。
下载Eclipse项目
这是一个有关如何创建具有可滚动内容布局的固定页眉和页脚的Android示例。 下载本教程的Eclipse项目: AndroidScrollableContent.zip


 1030
1030

 被折叠的 条评论
为什么被折叠?
被折叠的 条评论
为什么被折叠?
 到【灌水乐园】发言


