


链接导航
<router-link tag="li" to="/about"> <a>About</a> </router-link>
标签将会成为真实的链接 (并且可以获取到正确的跳转)
编程导航
<Button @click=”headleson1”></Button>
<button @click=”headlecon2></button>
Methods:{
headleson1(){
This.$router.push({name:”son1”})
}
}
Headleson2(){
headleson1(){
This.$router.push({name:”son2”})
}
}
}


嵌套路由
嵌套路由指的是在渲染的路由组件页面中包含了下级路由渲染出口(<router-view>),浏览器的URL 中各段动态路径也按某种结构对应嵌套的各层组件,
在项目的app.vue 文件中<router-view>是最顶层的出口,渲染最高级路由匹配到的组件。
<div id="app">
<router-view></router-view>
</div>
第一步:定义路由配置文件router >index.js,在路由上使用children属性定义下级路由
import Vue from 'vue'
import Router from 'vue-router'
import helloWorld from '@/components/HelloWorld'
import home from '@/components/Home'
import book from '@/components/Book'
import water from '@/components/Water'
Vue.use(Router)
export default new Router({
routes: [
{
path: '/',
component:helloWorld
},
{
path: '/home',
component: home,
children:[
{
path:'', //当访问的子路由路径无匹配时会指向到该空的子路由
component:water,
},
{
path:'book',
component:book,
},
{
path:'water',
component:water,
},
]
},
]
})
第二步:路由组件home.vue的内容,子路由导航包括了声明式和编程式导航
<template>
<div class="hello">
<h3>{{msg}}</h3>
<button @click="showBookRouter()">点击按钮显示子路由页面book</button>
<button @click="showWaterRouter()">点击按钮显示子路由页面water</button><br>
<router-link to="/home/book">book</router-link>
<router-link to="/home/water">water</router-link>
<router-link to="/home/">foo</router-link>
<router-view></router-view>
</div>
</template>
<script>
export default {
name: 'Home',
data () {
return {
msg: 'Welcome to Home !!!'
}
},
methods:{
showBookRouter:function(){
this.$router.push('/home/book'); //编程式路由导航
},
showWaterRouter:function(){
this.$router.push('/home/water');
},
}
}
</script>
<!-- Add "scoped" attribute to limit CSS to this component only -->
<style scoped>
h3 {
color:red;
}
</style>
第三步:子组件book.vue 和water.book这里就不写了
命名视图
同时 (同级) 展示多个视图,而不是嵌套展示,例如创建一个布局,有 sidebar (侧导航) 和 main (主内容) 两个视图,这个时候命名视图就派上用场了。你可以在界面中拥有多个单独命名的视图,而不是只有一个单独的出口。如果 router-view 没有设置名字,那么默认为 default。
<router-view class="view one"></router-view>
<router-view class="view two" name="a"></router-view>
<router-view class="view three" name="b"></router-view>
一个视图使用一个组件渲染,因此对于同个路由,多个视图就需要多个组件。确保正确使用 components配置 (带上 s):
{
path: '/',
components: {
default: water,
a: book,
b: water
}
}
————————————————
路由重定向
路由配置{ path: '/a', redirect: '/b' },路由重定向是指当用户访问 /a时,路由跳转到b路由,URL 将会被替换成 /b
1、在路由配置文件 router >index.js上使用:
const router = new VueRouter({
routes: [
{ path: '/router1', redirect: '/router2' }, //是从 /route1 重定向到 /router2
{ path: '/b', redirect: {name:'foo'} }, //重定向的目标也可以是一个命名的路由
{ path: '/c', redirect:(to)=>{
// 方法接收 目标路由 作为参数
// return 重定向的 字符串路径/路径对象
//注意:导航守卫应用在导航跳转目标to上
}},
]
})
2、注意在给路由设置有路由重定向时,再使用的路由导航会应用在跳转to指向的路由上,如下路由router1上的导航守卫无效
{
path: '/router1',
redirect: '/router2',
name: 'routerNum1',
component: router1,
beforeEnter:(from,to,next)=>{ //导航守卫无效
console.log("在路由1上进行重定向");
next();
}
},
{
path: '/router2',
name: 'routerNum2',
component: router2,
beforeEnter:(from,to,next)=>{
console.log("进入到了路由2");
next();
}
},
3、重定向指向自身会报错:[Vue warn]: Error in beforeCreate hook: "RangeError: Maximum call stack size exceeded,使用动态路径参数传参除外
动态路由匹配:
使用情况:
1、如果导航目的地和当前路由相同,只有参数发生了改变 (比如从一个用户资料到另一个 /users/1 -> /users/2),需要组件复用,组件复用意味着组件的生命周期钩子函数不会被调用!
2、或者所有路由映射到同一个组件模式渲染,只是参数不同时。那么,我们可以在 vue-router 的路由路径中使用“动态路径参数”(dynamic segment) 来达到这个效果:
动态路径参数的使用
第一步:动态路径参数的使用需要在路由配置文件上使用冒号开头的形式
{
//动态路径参数的使用 冒号开头
//那么像/router1/1 和/router1/2都将跳转到该路由页面
path: '/router1/:userNum',
name: 'routerNum1',
component: router1,
},
第二步:使用this.$router.push({path: `/router1/${userNum1}` }); 形式进行动态路径传参,注意反引号,url中的参数不会刷新丢失
<template>
<div class="hello">
<h3>{{ msg }}</h3>
<button @click="goBack()">js编程式go方法返回history页面</button>
<hr>
<h3>js动态路由匹配的使用:</h3>
<button @click="pathParam1To()">动态路径参数1导航</button>
<button @click="pathParam2To()">动态路径参数2导航</button>
<hr>
<button @click="diffParamsTo()">导航到当前组件(组件复用),但传递的参数不同</button>
</div>
</template>
<script>
export default {
name: 'Home',
data () {
return {
msg: 'Welcome to Home 主页!!!!'
}
},
watch: {
'$route' (to, from) {
// 对路由变化作出响应...
console.log('路由发生变化');
console.log(this.$route.params.userNum);
}
},
methods:{
goBack:function(){
this.$router.go(-1);
},
pathParam1To:function(){
let userNum1=111111;
this.$router.push({path:`/router1/${userNum1}`});
},
pathParam2To:function(){
let userNum2=222222;
this.$router.push({path:`/router1/${userNum2}`});
},
diffParamsTo:function(){
let userNum2=666;
this.$router.push({path:`/router1/${userNum2}`});
},
}
}
</script>
<style scoped>
h1, h2 {
color:red;
}
</style>
第三步:可以在路由组件中使用this.$route.params获取动态路径参数,如下
<p>{{this.$route.params.userNum}}</p>
组件的复用:
<div id="components-demo"> <
button-counter></button-counter> 组件
<button-counter></button-counter> 组件
<button-counter></button-counter> 组件
</div>
注意当点击按钮时,每个组件都会各自独立维护它的 count。因为你每用一次组件,就会有一个它的新实例被创建。
Beforeenter
进入该组件

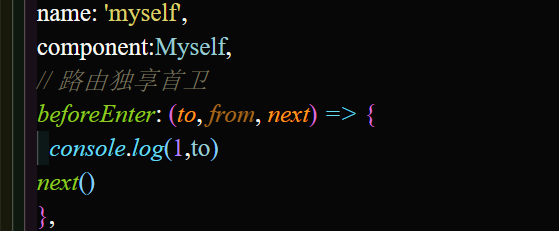
beforeenter可以单独写一个导航守卫
beforeRouteEnter (to, from, next) {
// ...
console.log("111")
// 不能使用this
// 当该组件对样的路由被渲染时会执行这个函数
// 注意这个函数内不能使用this关键字 组件还没有实列化
next()
},
// 带有动态路由传值的路径在/fo/1和/fo/2之间触发
beforeRouteUpdate (to, from, next) {
console.log("22222")
next()
},
beforeRouteLeave(to, from, next){
// 导航离开该组件对样的路由 会执行这个函数
console.log("33333")
next()
}
}
beforeEach是在全局下书写
router.beforeEach((to, from, next) => {
// to和from都是router
console.log(to)
next()
})
书写以后
添加: document.title=to.meta.title

再添加meta可以进行全局修改 导航守卫。


 7655
7655


 被折叠的 条评论
为什么被折叠?
被折叠的 条评论
为什么被折叠?
 到【灌水乐园】发言


