


 本文详细介绍了Vue Router的History模式,对比Hash模式,History模式利用history.pushState API实现URL跳转,使URL更加美观。然而,该模式需要后端配置支持,避免404错误。文章还提供了一个Node.js示例,展示如何配置服务器以支持History模式。
vue-router 默认 hash 模式 —— 使用 URL 的 hash 来模拟一个完整的 URL,于是当 URL 改变时,页面不会重新加载。
如果不想要很丑的 hash,我们可以用路由的 history 模式,这种模式充分利用 history.pushState API 来完成 URL 跳转而无须重新加载页面。
const router = new VueRouter({
  mode: 'history',
  routes: [...]
})
当你使用 history 模式时,URL 就像正常的 url,例如 http://yoursite.com/user/id,也好看!
不过这种模式要玩好,还需要后台配置支持。因为我们的应用是个单页客户端应用,如果后台没有正确的配置,当用户在浏览器直接访问 http://oursite.com/user/id 就会返回 404,这就不好看了。
所以呢,你要在服务端增加一个覆盖所有情况的候选资源:如果 URL 匹配不到任何静态资源,则应该返回同一个 index.html 页面,这个页面就是你 app 依赖的页面。
以下为nodejs的后台配置:
本人当前项目结构为:
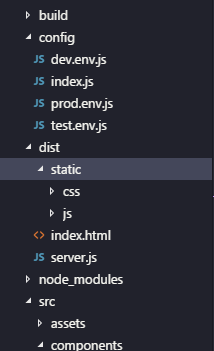
其中server为打包之后创建的新文件:
// server.js

const http = require('http')
const fs = require('fs')
const httpPort = 8090

http.createServer((req, res) => {
  if (req.url.startsWith('/static/css') || req.url.startsWith('/static/js')) {
    fs.readFile('.' + req.url, (err, data) => {
      res.end(data);
      return;
    })
  }
  fs.readFile('index.html', 'utf-8', (err, content) => {
    if (err) {
      console.log('We cannot open "index.htm" file.')
    }

    res.writeHead(200, {
      'Content-Type': 'text/html; charset=utf-8'
    })

    res.end(content)
  })
}).listen(httpPort, () => {
  console.log('Server listening on: http://localhost:%s', httpPort)
})
在dist目录下,开启当前的node服务(node server.js),然后访问 localhost:8090 即可访问,然后在路由的任何页面刷新,都不会出现404,这样就完美解决了


 被折叠的 条评论
为什么被折叠?
被折叠的 条评论
为什么被折叠?
 到【灌水乐园】发言


