


Springboot 和 Mybatis集成开发
本项目使用的环境:
- 开发工具:Intellij IDEA 2017.1.3
- jdk:1.7.0_79
- maven:3.3.9
额外功能
- PageHelper 分页插件
- mybatis generator 自动生成代码插件
步骤:
1.创建一个springboot项目:
2.创建项目的文件结构以及jdk的版本
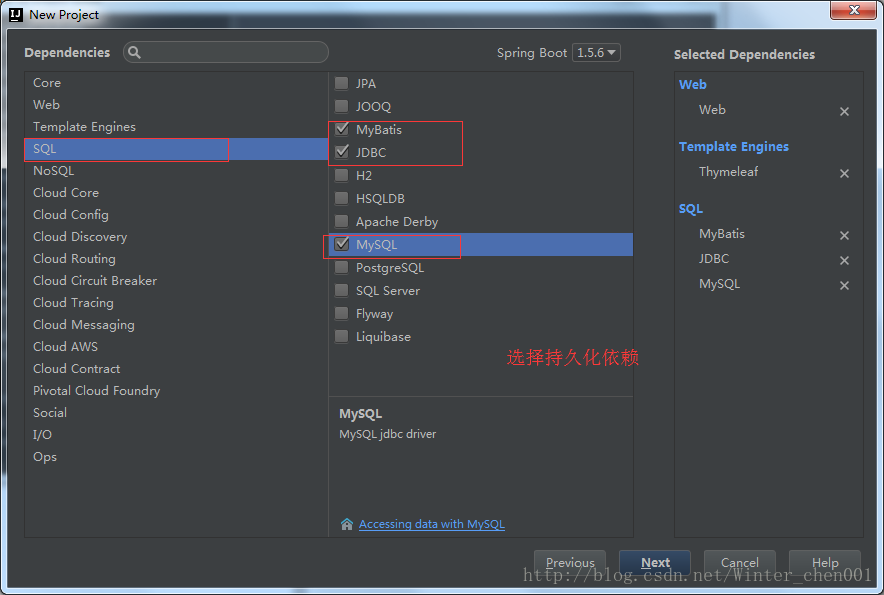
3.选择项目所需要的依赖
然后点击finish


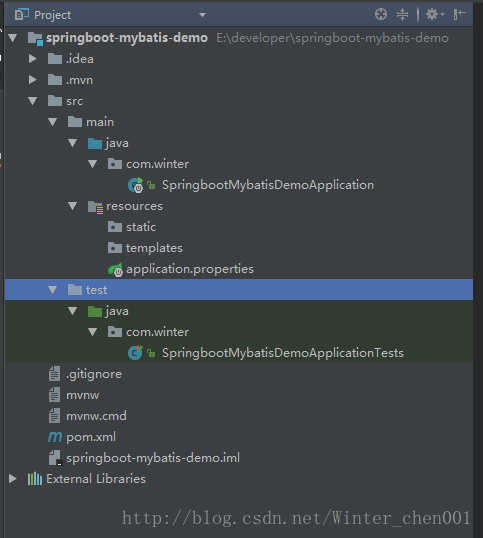
5.看一下文件的结构:
6.查看一下pom.xml:
<?xml version="1.0" encoding="UTF-8"?>
<project xmlns="http://maven.apache.org/POM/4.0.0" xmlns:xsi="http://www.w3.org/2001/XMLSchema-instance" xsi:schemaLocation="http://maven.apache.org/POM/4.0.0 http://maven.apache.org/xsd/maven-4.0.0.xsd"> <modelVersion>4.0.0</modelVersion> <groupId>com.winter</groupId> <artifactId>springboot-mybatis-demo</artifactId> <version>0.0.1-SNAPSHOT</version> <packaging>jar</packaging> <name>springboot-mybatis-demo</name> <description>Demo project for Spring Boot</description> <parent> <groupId>org.springframework.boot</groupId> <artifactId>spring-boot-starter-parent</artifactId> <version>1.5.6.RELEASE</version> <relativePath/> <!-- lookup parent from repository --> </parent> <properties> <project.build.sourceEncoding>UTF-8</project.build.sourceEncoding> <project.reporting.outputEncoding>UTF-8</project.reporting.outputEncoding> <java.version>1.7</java.version> </properties> <dependencies> <dependency> <groupId>org.springframework.boot</groupId> <artifactId>spring-boot-starter-jdbc</artifactId> </dependency> <dependency> <groupId>org.mybatis.spring.boot</groupId> <artifactId>mybatis-spring-boot-starter</artifactId> <version>1.3.0</version> </dependency> <dependency> <groupId>org.springframework.boot</groupId> <artifactId>spring-boot-starter-thymeleaf</artifactId> </dependency> <dependency> <groupId>org.springframework.boot</groupId> <artifactId>spring-boot-starter-web</artifactId> </dependency> <dependency> <groupId>org.springframework.boot</groupId> <artifactId>spring-boot-starter-test</artifactId> <scope>test</scope> </dependency> <dependency> <groupId>mysql</groupId> <artifactId>mysql-connector-java</artifactId> <version>5.1.35</version> </dependency> <!-- alibaba的druid数据库连接池 --> <dependency> <groupId>com.alibaba</groupId> <artifactId>druid</artifactId> <version>1.0.11</version> </dependency> <dependency> <groupId>com.fasterxml.jackson.core</groupId> <artifactId>jackson-core</artifactId> </dependency> <dependency> <groupId>com.fasterxml.jackson.core</groupId> <artifactId>jackson-databind</artifactId> </dependency> <dependency> <groupId>com.fasterxml.jackson.datatype</groupId> <artifactId>jackson-datatype-joda</artifactId> </dependency> <dependency> <groupId>com.fasterxml.jackson.module</groupId> <artifactId>jackson-module-parameter-names</artifactId> </dependency> <!-- 分页插件 --> <dependency> <groupId>com.github.pagehelper</groupId> <artifactId>pagehelper-spring-boot-starter</artifactId> <version>1.1.2</version> </dependency> <!-- alibaba的druid数据库连接池 --> <dependency> <groupId>com.alibaba</groupId> <artifactId>druid-spring-boot-starter</artifactId> <version>1.1.0</version> </dependency> </dependencies> <build> <plugins> <plugin> <groupId>org.springframework.boot</groupId> <artifactId>spring-boot-maven-plugin</artifactId> </plugin> <!-- mybatis generator 自动生成代码插件 --> <plugin> <groupId>org.mybatis.generator</groupId> <artifactId>mybatis-generator-maven-plugin</artifactId> <version>1.3.2</version> <configuration> <configurationFile>${basedir}/src/main/resources/generator/generatorConfig.xml</configurationFile> <overwrite>true</overwrite> <verbose>true</verbose> </configuration> </plugin> </plugins> </build> </project>
7.项目不使用application.properties文件 而使用更加简洁的application.yml文件:
将原有的resource文件夹下的application.properties文件删除,创建一个新的application.yml配置文件,
文件的内容如下:
server:
  port: 8080

spring:
    datasource:
        name: test
        url: jdbc:mysql://127.0.0.1:3306/depot username: root password: root # 使用druid数据源 type: com.alibaba.druid.pool.DruidDataSource driver-class-name: com.mysql.jdbc.Driver filters: stat maxActive: 20 initialSize: 1 maxWait: 60000 minIdle: 1 timeBetweenEvictionRunsMillis: 60000 minEvictableIdleTimeMillis: 300000 validationQuery: select 'x' testWhileIdle: true testOnBorrow: false testOnReturn: false poolPreparedStatements: true maxOpenPreparedStatements: 20 mybatis: mapper-locations: classpath:mapping/*.xml type-aliases-package: com.winter.model #pagehelper分页插件 pagehelper: helperDialect: mysql reasonable: true supportMethodsArguments: true params: count=countSql
8.创建数据库:
CREATE DATABASE mytest;

CREATE TABLE t_user( user_id INT NOT NULL PRIMARY KEY AUTO_INCREMENT, user_name VARCHAR(255) NOT NULL , password VARCHAR(255) NOT NULL , phone VARCHAR(255) NOT NULL ) ENGINE=INNODB AUTO_INCREMENT=1000 DEFAULT CHARSET=utf8;
9.使用mybatis generator 自动生成代码:
- 配置pom.xml中generator 插件所对应的配置文件 ${basedir}/src/main/resources/generator/generatorConfig.xml
<?xml version="1.0" encoding="UTF-8"?>
<!DOCTYPE generatorConfiguration
        PUBLIC "-//mybatis.org//DTD MyBatis Generator Configuration 1.0//EN"
        "http://mybatis.org/dtd/mybatis-generator-config_1_0.dtd">
<generatorConfiguration>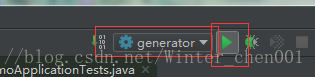
<!-- 数据库驱动:选择你的本地硬盘上面的数据库驱动包--> <classPathEntry location="E:\developer\mybatis-generator-core-1.3.2\lib\mysql-connector-java-5.1.25-bin.jar"/> <context id="DB2Tables" targetRuntime="MyBatis3"> <commentGenerator> <property name="suppressDate" value="true"/> <!-- 是否去除自动生成的注释 true:是 : false:否 --> <property name="suppressAllComments" value="true"/> </commentGenerator> <!--数据库链接URL,用户名、密码 --> <jdbcConnection driverClass="com.mysql.jdbc.Driver" connectionURL="jdbc:mysql://127.0.0.1/mytest" userId="root" password="root"> </jdbcConnection> <javaTypeResolver> <property name="forceBigDecimals" value="false"/> </javaTypeResolver> <!-- 生成模型的包名和位置--> <javaModelGenerator targetPackage="main.java.com.winter.model" targetProject="src"> <property name="enableSubPackages" value="true"/> <property name="trimStrings" value="true"/> </javaModelGenerator> <!-- 生成映射文件的包名和位置--> <sqlMapGenerator targetPackage="main.resources.mapping" targetProject="src"> <property name="enableSubPackages" value="true"/> </sqlMapGenerator> <!-- 生成DAO的包名和位置--> <javaClientGenerator type="XMLMAPPER" targetPackage="main.java.com.winter.mapper" targetProject="src"> <property name="enableSubPackages" value="true"/> </javaClientGenerator> <!-- 要生成的表 tableName是数据库中的表名或视图名 domainObjectName是实体类名--> <table tableName="t_user" domainObjectName="User" enableCountByExample="false" enableUpdateByExample="false" enableDeleteByExample="false" enableSelectByExample="false" selectByExampleQueryId="false"></table> </context> </generatorConfiguration>- 点击run-Edit Configurations
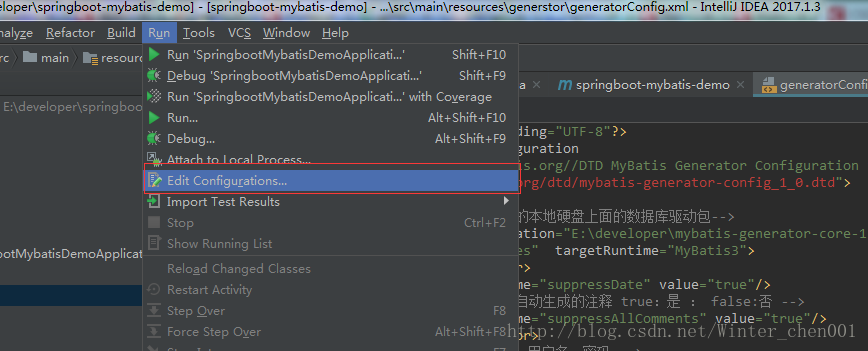
- 添加配置
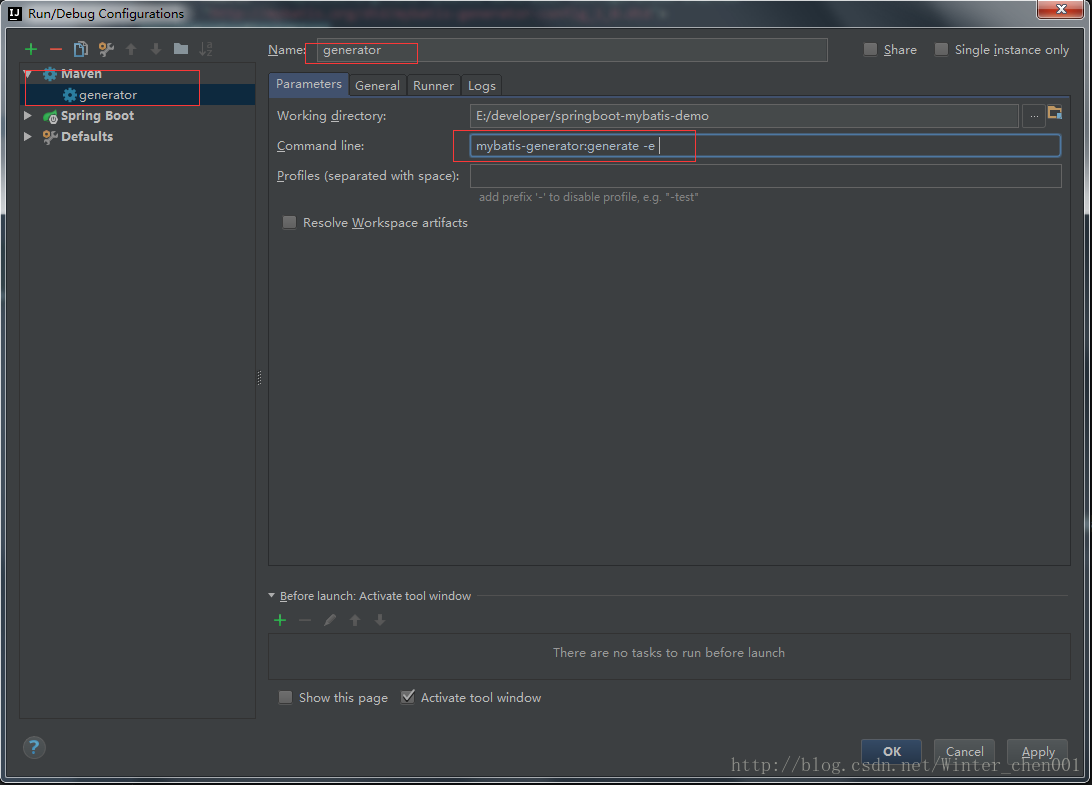
-
运行
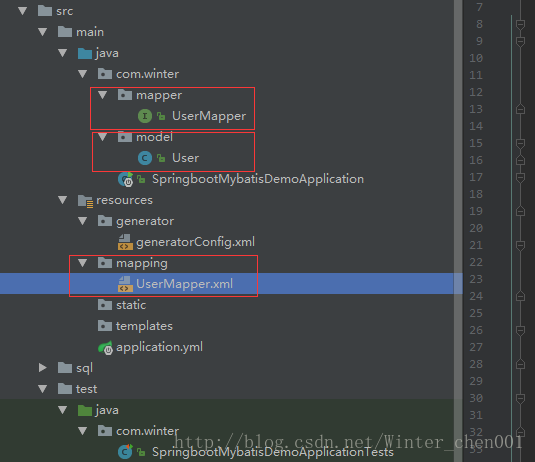
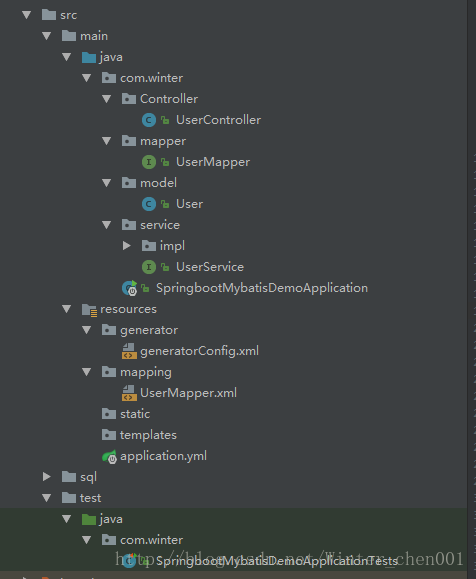
最后生成的文件以及结构:
10.我们还需要修改有点东西,因为生成的类中的路径写了全路径,所以我们要把前面多余的删掉:
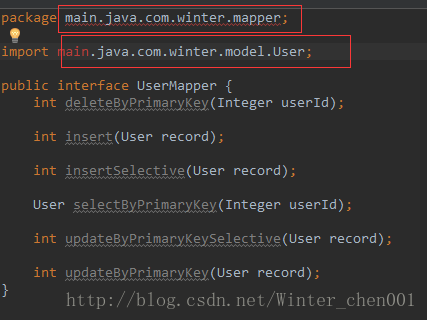
UserMapper.java
package com.winter.mapper;

import com.winter.model.User;

public interface UserMapper { int deleteByPrimaryKey(Integer userId); int insert(User record); int insertSelective(User record); User selectByPrimaryKey(Integer userId); int updateByPrimaryKeySelective(User record); int updateByPrimaryKey(User record); //这个方式我自己加的 List<User> selectAllUser(); }
User.java
package com.winter.model;
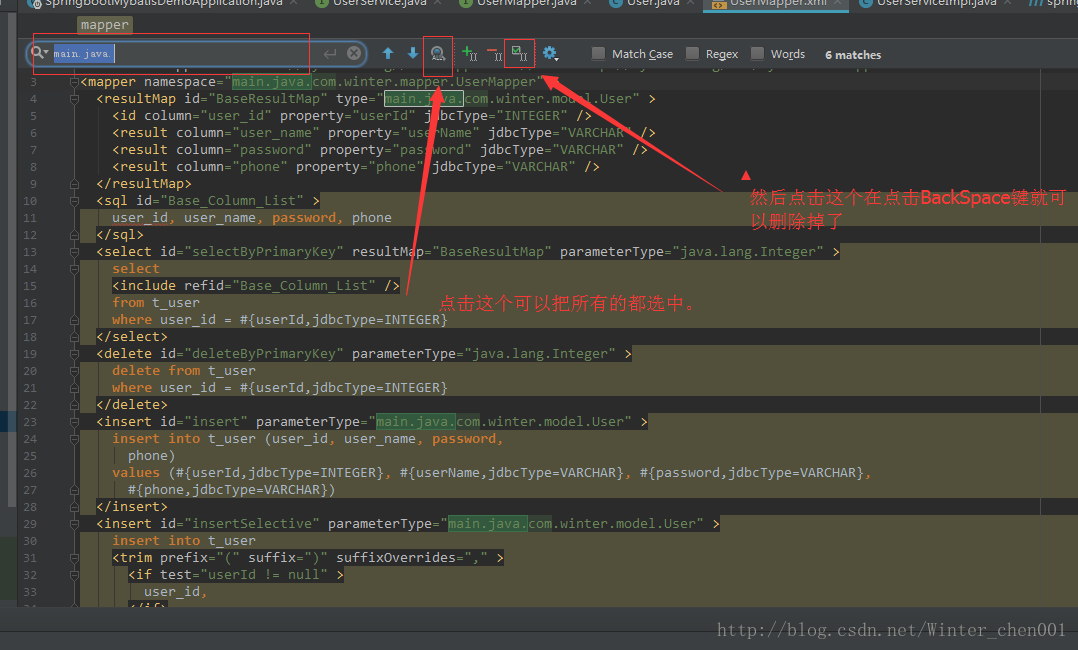
public class User { private Integer userId; private String userName; private String password; private String phone; public Integer getUserId() { return userId; } public void setUserId(Integer userId) { this.userId = userId; } public String getUserName() { return userName; } public void setUserName(String userName) { this.userName = userName == null ? null : userName.trim(); } public String getPassword() { return password; } public void setPassword(String password) { this.password = password == null ? null : password.trim(); } public String getPhone() { return phone; } public void setPhone(String phone) { this.phone = phone == null ? null : phone.trim(); } }对于映射文件xml有一个快捷的方式把所有德多余的代码一次删掉:
Ctrl+F 进行搜索“main.java.”:
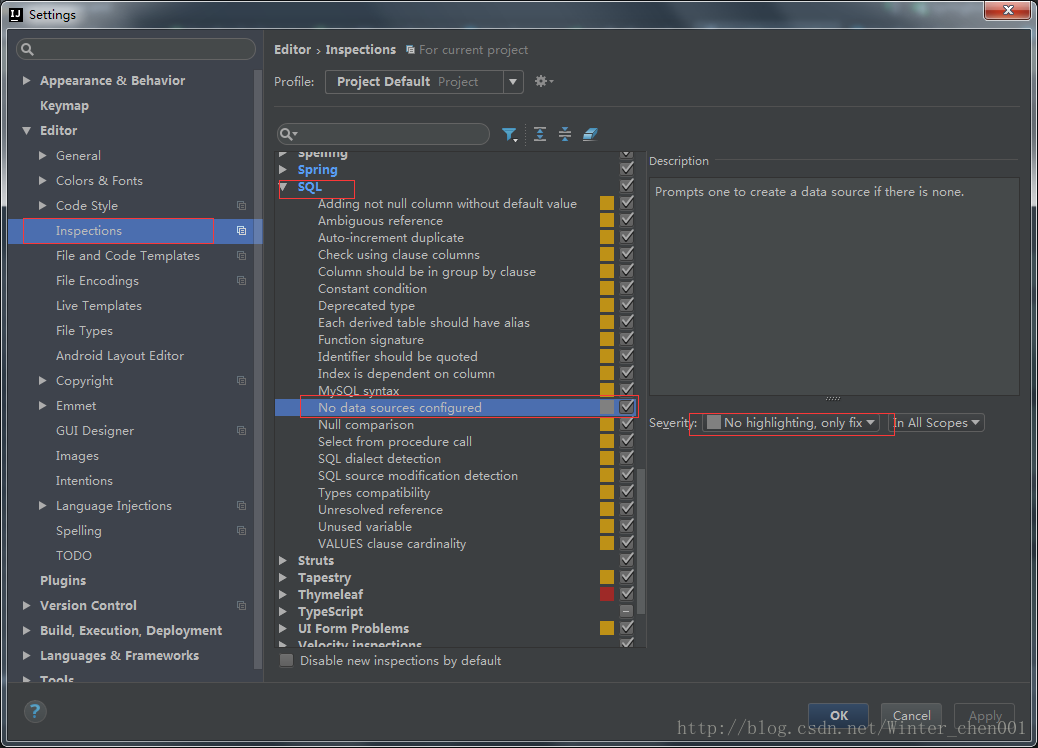
对于sql语句这种黄色的背景,真心是看不下去了(解决方案):
UserMapper.xml
<?xml version="1.0" encoding="UTF-8" ?>
<!DOCTYPE mapper PUBLIC "-//mybatis.org//DTD Mapper 3.0//EN" "http://mybatis.org/dtd/mybatis-3-mapper.dtd" >
<mapper namespace="com.winter.mapper.UserMapper" > <resultMap id="BaseResultMap" type="com.winter.model.User" > <id column="user_id" property="userId" jdbcType="INTEGER" /> <result column="user_name" property="userName" jdbcType="VARCHAR" /> <result column="password" property="password" jdbcType="VARCHAR" /> <result column="phone" property="phone" jdbcType="VARCHAR" /> </resultMap> <sql id="Base_Column_List" > user_id, user_name, password, phone </sql> <select id="selectByPrimaryKey" resultMap="BaseResultMap" parameterType="java.lang.Integer" > select <include refid="Base_Column_List" /> from t_user where user_id = #{userId,jdbcType=INTEGER} </select> <!-- 这个方法是我自己加的 --> <select id="selectAllUser" resultMap="BaseResultMap"> select <include refid="Base_Column_List" /> from t_user </select> <delete id="deleteByPrimaryKey" parameterType="java.lang.Integer" > delete from t_user where user_id = #{userId,jdbcType=INTEGER} </delete> <insert id="insert" parameterType="com.winter.model.User" > insert into t_user (user_id, user_name, password, phone) values (#{userId,jdbcType=INTEGER}, #{userName,jdbcType=VARCHAR}, #{password,jdbcType=VARCHAR}, #{phone,jdbcType=VARCHAR}) </insert> <insert id="insertSelective" parameterType="com.winter.model.User" > insert into t_user <trim prefix="(" suffix=")" suffixOverrides="," > <if test="userId != null" > user_id, </if> <if test="userName != null" > user_name, </if> <if test="password != null" > password, </if> <if test="phone != null" > phone, </if> </trim> <trim prefix="values (" suffix=")" suffixOverrides="," > <if test="userId != null" > #{userId,jdbcType=INTEGER}, </if> <if test="userName != null" > #{userName,jdbcType=VARCHAR}, </if> <if test="password != null" > #{password,jdbcType=VARCHAR}, </if> <if test="phone != null" > #{phone,jdbcType=VARCHAR}, </if> </trim> </insert> <update id="updateByPrimaryKeySelective" parameterType="com.winter.model.User" > update t_user <set > <if test="userName != null" > user_name = #{userName,jdbcType=VARCHAR}, </if> <if test="password != null" > password = #{password,jdbcType=VARCHAR}, </if> <if test="phone != null" > phone = #{phone,jdbcType=VARCHAR}, </if> </set> where user_id = #{userId,jdbcType=INTEGER} </update> <update id="updateByPrimaryKey" parameterType="com.winter.model.User" > update t_user set user_name = #{userName,jdbcType=VARCHAR}, password = #{password,jdbcType=VARCHAR}, phone = #{phone,jdbcType=VARCHAR} where user_id = #{userId,jdbcType=INTEGER} </update> </mapper>
11.打开类SpringbootMybatisDemoApplication.java,这个是springboot的启动类。我们需要添加点东西:
package com.winter;

import org.mybatis.spring.annotation.MapperScan;
import org.springframework.boot.SpringApplication;
import org.springframework.boot.autoconfigure.SpringBootApplication;

@SpringBootApplication @MapperScan("com.winter.mapper")//将项目中对应的mapper类的路径加进来就可以了 public class SpringbootMybatisDemoApplication { public static void main(String[] args) { SpringApplication.run(SpringbootMybatisDemoApplication.class, args); } }
12.到这里所有的搭建工作都完成了,接下来就是测试的工作,没使用junit4进行测试:
首先看一下完成之后的文件的结构:
现在controller,service层的代码都写好:
UserController.java
package com.winter.Controller;

import com.winter.model.User;
import com.winter.service.UserService;
import org.springframework.beans.factory.annotation.Autowired;
import org.springframework.stereotype.Controller; import org.springframework.web.bind.annotation.PathVariable; import org.springframework.web.bind.annotation.RequestMapping; import org.springframework.web.bind.annotation.ResponseBody; /** * Created by Administrator on 2017/8/16. */ @Controller @RequestMapping(value = "/user") public class UserController { @Autowired private UserService userService; @ResponseBody @RequestMapping(value = "/add", produces = {"application/json;charset=UTF-8"}) public int addUser(User user){ return userService.addUser(user); } @RequestMapping(value = "/all/{pageNum}/{pageSize}", produces = {"application/json;charset=UTF-8"}) public Object findAllUser(@PathVariable("pageNum") int pageNum, @PathVariable("pageSize") int pageSize){ return userService.findAllUser(pageNum,pageSize); } }
UserService.java
package com.winter.service;

import com.winter.model.User;

import java.util.List;

/**
 * Created by Administrator on 2017/8/16.
 */
public interface UserService { int addUser(User user); List<User> findAllUser(int pageNum, int pageSize); }
UserServiceImpl.java
package com.winter.service.impl;
import com.github.pagehelper.PageHelper;
import com.winter.mapper.UserMapper;
import com.winter.model.User;
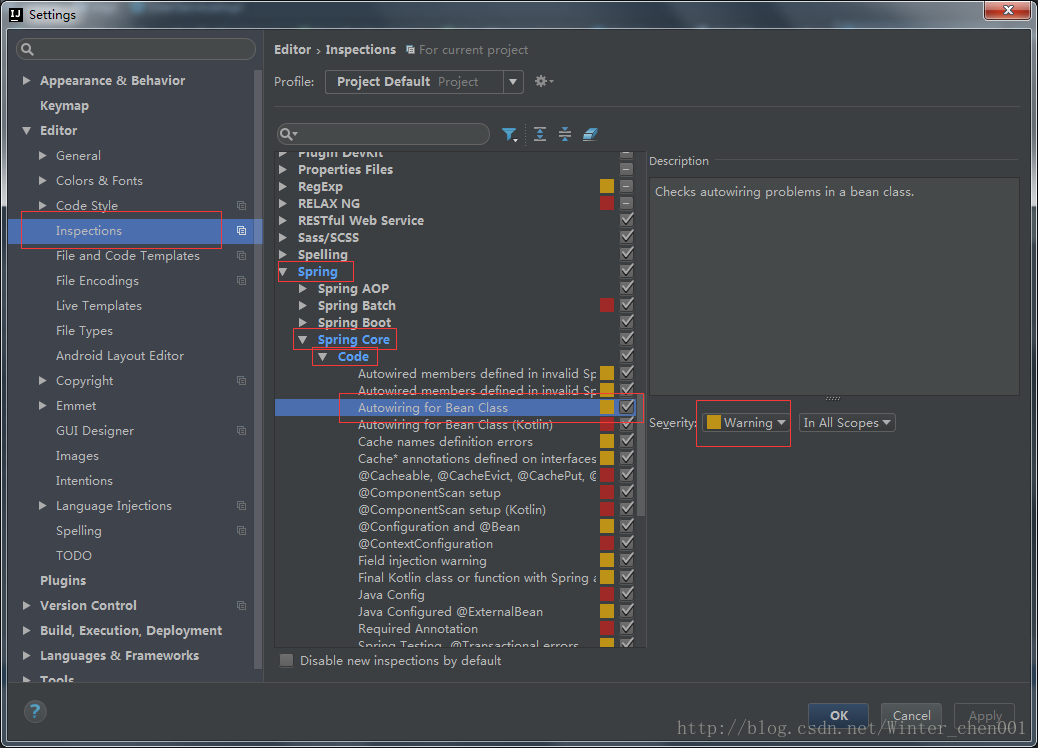
import com.winter.service.UserService; import org.springframework.beans.factory.annotation.Autowired; import org.springframework.stereotype.Service; import java.util.List; /** * Created by Administrator on 2017/8/16. */ @Service(value = "userService") public class UserServiceImpl implements UserService { @Autowired private UserMapper userMapper;//这里会报错,但是并不会影响 @Override public int addUser(User user) { return userMapper.insertSelective(user); } /* * 这个方法中用到了我们开头配置依赖的分页插件pagehelper * 很简单,只需要在service层传入参数,然后将参数传递给一个插件的一个静态方法即可; * pageNum 开始页数 * pageSize 每页显示的数据条数 * */ @Override public List<User> findAllUser(int pageNum, int pageSize) { //将参数传给这个方法就可以实现物理分页了,非常简单。 PageHelper.startPage(pageNum, pageSize); return userMapper.selectAllUser(); } } 如果强迫症看不下去那个报错:(解决方法)
测试我使用了idea一个很用心的功能。
可以发http请求的插件:
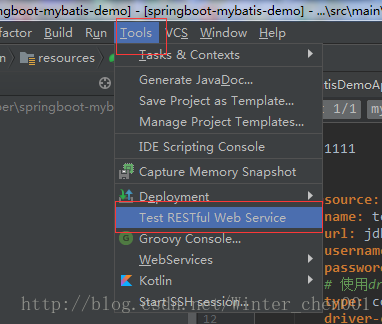
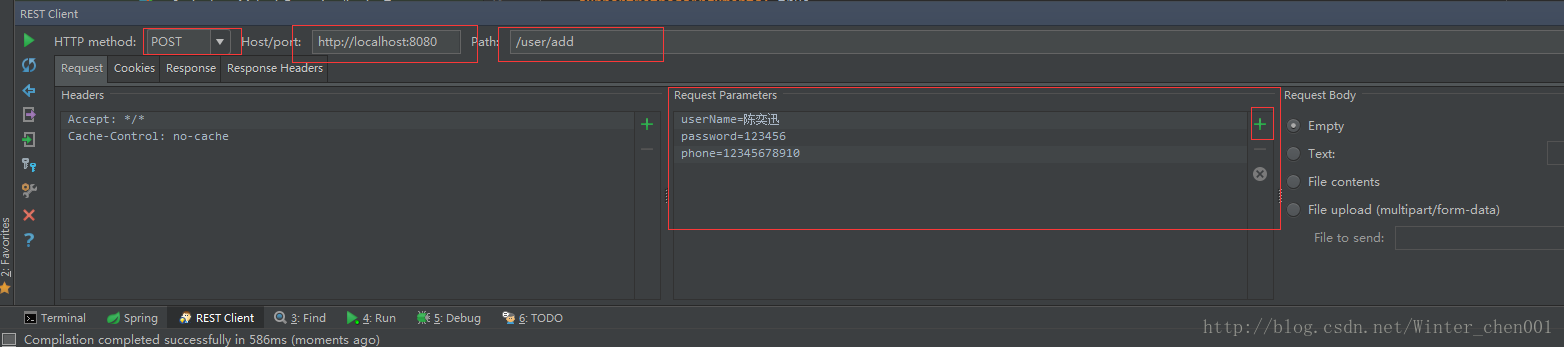
点击左侧的运行按钮就可以发送请求了;
如果返回值正确 说明你已经搭建成功了!!
如果大家想使用事务控制的话,请参照Spring boot Mybatis 整合(注解版) ,这个里面就有关于事务控制的使用


 4万+
4万+


 被折叠的 条评论
为什么被折叠?
被折叠的 条评论
为什么被折叠?
 到【灌水乐园】发言


