


题目,写的有点大了,其实就是 对一张表的基本处理,增删改查的基本操作演示。
好了,我们开始了。
假如,我们在做一个单表处理,就举例是 学院(某个大学的学院) 吧。
首先,我们分析 学校这样表有哪些属性,分析完后,就可以在数据库中 建 depart 这张表了。
有三个属性:

然后要在项目中 做一个 depart Bean 可以使用generate mybais 工具自动生成 depart model ,现在我们model已经做好了。

下面是Depart.java 中的代码,都是自动生成的,但是有时因为后面业务的需求,需要去其他表里查 需要增加 Model 像代码中的school ,因为学院是隶属于学校的,
    * @mbggenerated
     */
    private String departId;

    /**
     * This field was generated by MyBatis Generator.
     * This field corresponds to the database column depart.schoolId
     *
     * @mbggenerated
     */
    private String schoolId; /** * This field was generated by MyBatis Generator. * This field corresponds to the database column depart.name * * @mbggenerated */ private String name; /** * This method was generated by MyBatis Generator. * This method returns the value of the database column depart.departId * * @return the value of depart.departId * * @mbggenerated */ public String getDepartId() { return departId; } /** * This method was generated by MyBatis Generator. * This method sets the value of the database column depart.departId * * @param departId the value for depart.departId * * @mbggenerated */ public void setDepartId(String departId) { this.departId = departId == null ? null : departId.trim(); } /** * This method was generated by MyBatis Generator. * This method returns the value of the database column depart.schoolId * * @return the value of depart.schoolId * * @mbggenerated */ public String getSchoolId() { return schoolId; } /** * This method was generated by MyBatis Generator. * This method sets the value of the database column depart.schoolId * * @param schoolId the value for depart.schoolId * * @mbggenerated */ public void setSchoolId(String schoolId) { this.schoolId = schoolId == null ? null : schoolId.trim(); } /** * This method was generated by MyBatis Generator. * This method returns the value of the database column depart.name * * @return the value of depart.name * * @mbggenerated */ public String getName() { return name; } /** * This method was generated by MyBatis Generator. * This method sets the value of the database column depart.name * * @param name the value for depart.name * * @mbggenerated */ private School school; public void setName(String name) { this.name = name == null ? null : name.trim(); } public School getSchool() { return school; } public void setSchool(School school) { this.school = school; }
model我们已经做好了, model-view-controller mvc
下来我们做controller层():
(现在我们的业务需求是,把depart中的数据展示出来)
DepartController.java
@Controller  //spring 注解 作用是 表示这是个控制器
@RequestMapping(value="depart") //以后用来做访问的地址 public class DepartController { @Resource //表示这个类是 依赖于spring来注入的,即控制反转 DepartService departService; //上面相当于 DepartService departService=new DepartServiceImpl(); spring 帮助我们实现了注入 @RequestMapping(value="list") public String list(@ModelAttribute Page<Depart>page,Depart depart,Model model, HttpServletRequest request){ departService.selectByModel(page, depart);//查找结果 return "basic/depart_list"; //到view } }
看到了,上面的代码,你能会问 DepartService 这个东西在哪,我们现在做个这个东西,我实际做的时候,一般是先吧service层搭起来,然后再做controller层。

可以看到这是个接口,
具体实现是在下面这个: 
这个时候你就要问了,spring是如何实现
DepartService departService=new DepartServiceImpl();- 1
这个的。
看
他里面的代码:
@Service //这个注解,就代表 要被spring注入
public class DepartServiceImpl extends GenericServiceImpl<Depart, DepartExample, String> implements DepartService{ @Resource DepartMapper departMapper; @Override public void selectByModel(Page<Depart> page, Depart depart) { departMapper.selectByModel(page, depart);//调用dao层 } }
dao层: 大多是 自动生成的,不过到了具体的业务需求,也要需要手动去写,就像 我们调用的selectByModel(page, depart); 就是我们手动写的


接下来,看看 selectByModel(page, depart);
这个具体的。
用到了动态SQL:
<select id="selectByModel" parameterType="com.xuezhixin.mls.web.model.Depart" resultMap="BaseResultMap">
        select d.* from depart d <where> <if test="name !=null and name !=''"> and name=#{name,jdbcType=CHAR} </if> </where> </select>
generate mybatis自动生成的
<resultMap id="BaseResultMap" type="com.xuezhixin.mls.web.model.Depart" > <!-- WARNING - @mbggenerated This element is automatically generated by MyBatis Generator, do not modify. --> <id column="departId" property="departId" jdbcType="CHAR" /> <result column="schoolId" property="schoolId" jdbcType="CHAR" /> <result column="name" property="name" jdbcType="VARCHAR" /> </resultMap>
到这里,我们的业务基本就处理就完成了。
接下来,我们 做 view 层 把数据展示出来
这个代码 属于伪代码,只是想表达逻辑
- 1
- 2
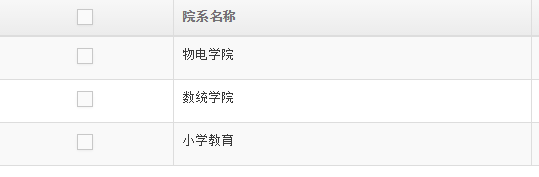
    <th>院系名称</th>
<c:forEach items="${page.result }" var="depart1" varStatus="status"> <td>${depart1.name}</td>- 1
- 2
- 3
可以看到,这样就基本完成了 整个流程。


 6432
6432

 被折叠的 条评论
为什么被折叠?
被折叠的 条评论
为什么被折叠?
 到【灌水乐园】发言


