


这篇文章我们来了解一些项目中的一个很重要的功能:任务调度
可能有些同学还不了解这个,其实简单点说任务调度与数据库中的Job是很相似的东西
只不过是运行的物理位置与管理方式有点不一样,从功能上来说我觉得还是差不多的,
存储过程有很大的局限性,耦合性也太高,所以最好把系统的一些Job放在代码层,
于是就有了Quartz.net,我们本篇就是针对Quartz.net的二次开发
一、新建HelloJob
HelloJob.cs,示例Job,每次执行都输出msg变量中的信息

 1 using Common.Logging;
 2 using Quartz;  3  4 namespace Job.Items  5 {  6 public class HelloJob : IJob  7  {  8 public const string Message = "msg";  9 private static readonly ILog log = LogManager.GetLogger(typeof(HelloJob)); 10 11 public virtual void Execute(IJobExecutionContext context) 12  { 13 var jobKey = context.JobDetail.Key; 14 var message = context.JobDetail.JobDataMap.GetString(Message); 15 log.InfoFormat("HelloJob: msg: {0}", message); 16  } 17  } 18 }
HelloJobExample.cs,每5秒执行一次
 1         public class HelloJobExample
 2  {  3 public virtual void Run()  4  {  5 ISchedulerFactory sf = new StdSchedulerFactory();  6 IScheduler sched = sf.GetScheduler();  7  8 IJobDetail job = JobBuilder.Create<HelloJob>()  9 .WithIdentity("job1", "group1") 10  .Build(); 11 12 JobDataMap map = job.JobDataMap; 13 map.Put("msg", "Your remotely added job has executed!"); 14 15 ITrigger trigger = TriggerBuilder.Create() 16 .WithIdentity("trigger1", "group1") 17  .ForJob(job.Key) 18 .WithCronSchedule("/5 * * ? * *") 19  .Build(); 20 21  sched.ScheduleJob(job, trigger); 22  sched.Start(); 23  } 24 }
好了,有效代码就那么多,我们来试试
 1     class Program
 2     {
 3 static void Main(string[] args)  4  {  5 var example = new HelloJobExample();  6  example.Run();  7  8  Console.ReadKey();  9  } 10 }
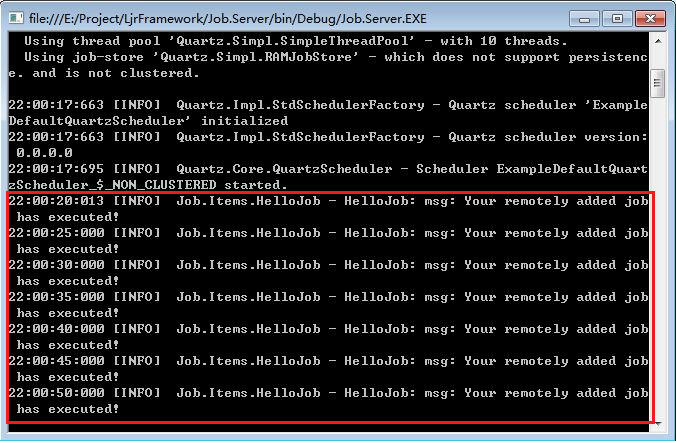
貌似没什么问题,如愿地执行了。
但是我们想想,实际运行中执行任务的服务器一般都是独立出来的,那怎么去管理这些任务的开启、关闭及暂停呢?
肯定不能每次手动去操作,那太麻烦了。我们的希望是在应用中(系统管理后台)去管理这些任务。万幸Quartz.net足够强大,
他是支持远程操作的,没有太深入了解,不过看调用参数应该是通过TCP请求进行操作的,我们试试看
二、Job远程管理
2.1、新建Job.Items项目,把之前新建的HelloJob.cs放在其中
2.2、新建Job.Server项目
新建RemoteServer.cs
 1     public class RemoteServer : ILjrJob
 2  {  3 public string Name  4  {  5 get { return GetType().Name; }  6  }  7  8 public virtual void Run()  9  { 10 ILog log = LogManager.GetLogger(typeof(RemoteServer)); 11 12 NameValueCollection properties = new NameValueCollection(); 13 properties["quartz.scheduler.instanceName"] = "RemoteServer"; 14 properties["quartz.threadPool.type"] = "Quartz.Simpl.SimpleThreadPool, Quartz"; 15 properties["quartz.threadPool.threadCount"] = "5"; 16 properties["quartz.threadPool.threadPriority"] = "Normal"; 17 properties["quartz.scheduler.exporter.type"] = "Quartz.Simpl.RemotingSchedulerExporter, Quartz"; 18 properties["quartz.scheduler.exporter.port"] = "555"; 19 properties["quartz.scheduler.exporter.bindName"] = "QuartzScheduler"; 20 properties["quartz.scheduler.exporter.channelType"] = "tcp"; 21 properties["quartz.scheduler.exporter.channelName"] = "httpQuartz"; 22 properties["quartz.scheduler.exporter.rejectRemoteRequests"] = "true"; 23 24  } 25 }
2.3、新建控制器HelloJobController
 1     public class HelloJobController : Controller
 2  {  3 public ActionResult Index()  4  {  5 try  6  {  7 if (HelloJobHelper.Trigger != null)  8  {  9 ViewBag.JobKey = "remotelyAddedJob"; 10 ViewBag.State = HelloJobHelper.Scheduler.GetTriggerState(HelloJobHelper.Trigger.Key); 11 ViewBag.StartTime = HelloJobHelper.Trigger.StartTimeUtc.ToString(); 12  } 13 else 14  { 15 ViewBag.State = "获取Job执行状态失败"; 16  } 17  } 18 catch (Exception ex) 19  { 20 ViewBag.State = "Job服务器连接失败"; 21  } 22 23 return View(); 24  } 25 public ActionResult Run() 26  { 27  HelloJobHelper.RunJob(); 28 29 return RedirectToAction("Index", "HelloJob"); 30  } 31 public ActionResult Pause() 32  { 33  HelloJobHelper.PauseJob(); 34 35 return RedirectToAction("Index", "HelloJob"); 36  } 37 public ActionResult Resume() 38  { 39  HelloJobHelper.ResumeJob(); 40 return RedirectToAction("Index", "HelloJob"); 41  } 42 }
2.4、新建HelloJobHelper
先配置连接远端任务服务器的参数,这个要和上面的RemoteServer.cs对应
1 properties["quartz.scheduler.proxy"] = "true"; 2 properties["quartz.scheduler.proxy.address"] = "tcp://127.0.0.1:555/QuartzScheduler";
我们来看看开始操作,运行这个方法,任务服务器将自动开启这个Job
 1         public static void RunJob()
 2  {  3 if (!scheduler.CheckExists(jobKey))  4  {  5 IJobDetail job = JobBuilder.Create<HelloJob>()  6  .WithIdentity(jobKey)  7  .Build();  8  9 JobDataMap map = job.JobDataMap; 10 map.Put("msg", "Your remotely added job has executed!"); 11 12 ITrigger trigger = TriggerBuilder.Create() 13  .WithIdentity(triggerKey) 14  .ForJob(job.Key) 15 .WithCronSchedule("/5 * * ? * *") 16  .Build(); 17 18  scheduler.ScheduleJob(job, trigger); 19 20 JobDetail = job; 21 Trigger = trigger; 22  } 23 }
暂停比较简单
1         public static void PauseJob()
2         {
3  scheduler.PauseJob(jobKey); 4 }
2.5、View
 1 @{
 2     ViewBag.Title = "Index";
 3  Layout = "~/Views/Shared/_Bootstrap.cshtml";  4 }  5  6 <!DOCTYPE html>  7  8 <html>  9 <head> 10 <meta name="viewport" content="width=device-width" /> 11 <title>Index</title> 12 <style> 13  .col-sm-offset-2 { 14  margin-left:20px; 15 } 16 </style> 17 </head> 18 <body> 19 <br /> 20  @using (Html.BeginForm("Run", "HelloJob", null, FormMethod.Post, new { @id = "form1", @class = "form-horizontal", role = "form" })) 21  { 22  @Html.AntiForgeryToken() 23 <div class="form-group"> 24 <div class="col-sm-offset-2 col-sm-10"> 25 <input type="hidden" name="Id" id="Id" /> 26 <button type="submit" class="btn btn-default">Run</button> 27 </div> 28 </div> 29  } 30 31  @using (Html.BeginForm("Pause", "HelloJob", null, FormMethod.Post, new { @id = "form2", @class = "form-horizontal", role = "form" })) 32  { 33  @Html.AntiForgeryToken() 34 <div class="form-group"> 35 <div class="col-sm-offset-2 col-sm-10"> 36 <input type="hidden" name="Id" id="Id" /> 37 <button type="submit" class="btn btn-default">Pause</button> 38 </div> 39 </div> 40  } 41 42  @using (Html.BeginForm("Resume", "HelloJob", null, FormMethod.Post, new { @id = "form3", @class = "form-horizontal", role = "form" })) 43  { 44  @Html.AntiForgeryToken() 45 <div class="form-group"> 46 <div class="col-sm-offset-2 col-sm-10"> 47 <input type="hidden" name="Id" id="Id" /> 48 <button type="submit" class="btn btn-default">Resume</button> 49 </div> 50 </div> 51  } 52 53 <br /> 54 <div> 55 <ul> 56 <li>ViewBag.JobKey: @ViewBag.JobKey</li> 57 <li>ViewBag.State: @ViewBag.State</li> 58


 132
132


 被折叠的 条评论
为什么被折叠?
被折叠的 条评论
为什么被折叠?
 到【灌水乐园】发言


