本系列旨在展示我如何使用react-native构建一个应用程序以服务WordPress博客中的内容。 由于我的博客谈论的是本机反应,因此该系列和文章相互联系。 我们将学习如何设置许多使我们的生活舒适的程序包,并学习如何处理WordPress API。 在此,本书中讨论的最突出的功能是深色主题,脱机模式,无限滚动等。 您可以在本系列中找到更多。 本教程系列的灵感来自instamobile的React Native App模板
在这里,我们将在Home.js文件中实现主屏幕的整体UI。 在这里,我们将简单地从WordPress API中获取数据,并将数据以FlatList显示在主屏幕上。 我们还将利用react-native-paper包使用为我们提供许多有用的组件。 但是,首先,我们需要安装react-native-paper软件包,如下面的代码片段所示:
yarn add react-native-paper然后,我们可以使用在安装其他软件包时学到的配置将软件包链接到我们的本机平台。然后,我们需要从react-native-paper导入组件,如下面的代码片段所示:
 import {
      Avatar,
      Button,
      Card,
      Title,
      Paragraph,
      List,
      Headline,
    } from 'react-native-paper' ;
在渲染功能中,我们将利用
react-native-paper包以形成列表模板。 为此,我们需要使用以下代码片段中的代码:
  render() {
        return (
          < View >
             <Card
              style={{
                shadowOffset: {width: 5, height: 5},
                width: '90%',
                borderRadius: 12,
                alignSelf: 'center',
                marginBottom: 10,
              }}>
              <Card.Content>
              <Title>Blog post</Title>
                <Card.Cover
                  style={{
                    width: 350,
                    height: 190,
                    alignSelf: 'center',
                  }}
                  source={{
                    uri:
                      'https://images.unsplash.com/photo-1573921470445-8d99c48c879f?ixlib=rb-1.2.1&ixid=eyJhcHBfaWQiOjEyMDd9&auto=format&fit=crop&w=1050&q=80',
                  }}
                />
                <Paragraph>just a blog post</Paragraph>
              </Card.Content>
            </Card>
          </View>
        );
      }
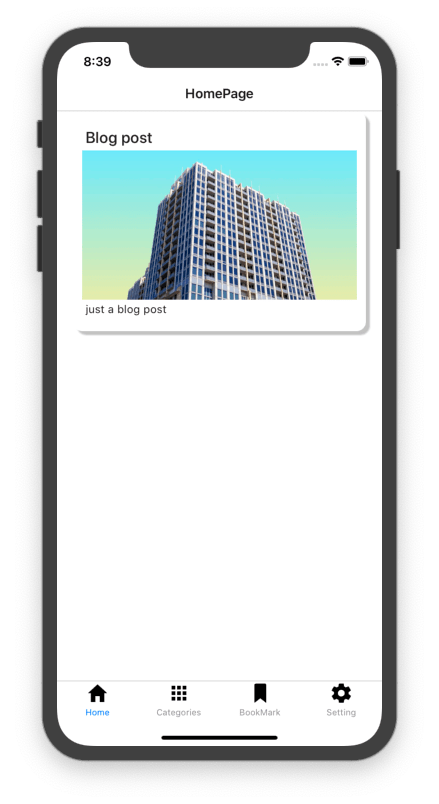
在这里,我们将Card组件用作包装其子组件的父组件。 所有组件都集成了一些样式,以使它们看起来不错。
因此,我们将在仿真器屏幕中获得以下结果:

获取帖子数据
接下来,我们将使用fetch()方法从Wordpress API中获取帖子。 取后,我们将解析响应为JSON格式,并配置它称为latestpost状态。 编码实现在名为fetchLastestPost()的函数中,其总体配置在下面的代码片段中提供:
  componentDidMount() {
       this .fetchLastestPost();
     }
     async fetchLastestPost() {
       const response = await fetch(
         'https://kriss.io/wp-json/wp/v2/posts?per_page=5'
       );
       const post = await response.json();
       this .setState({ lastestpost : post});
     }
在这里,我们从该函数对WordPress API进行了异步调用。 在这里,我们在componentDidMount函数中调用了该函数。 现在,我们还需要定义一个称为lastestpost的状态,如下面的代码片段所示:
   export default class Home extends React . Component  {
      constructor (props) {
        super (props);
        this .state = {
          lastestpost : []
        };
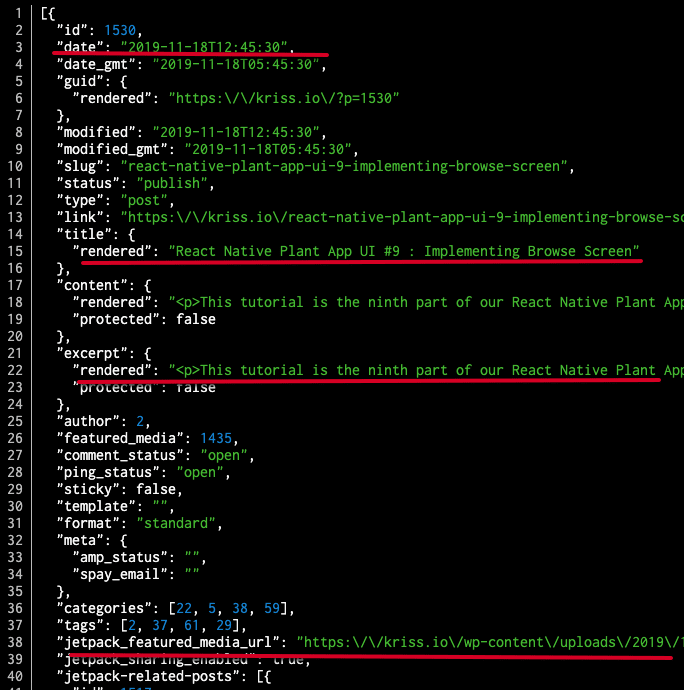
来自请求的数据显示在下面的屏幕快照中:

我们将在模板中显示的数据用红线突出显示。
接下来,我们将使用FlatList组件包装Card组件, FlatList API数据馈入FlatList 。 然后, FlatList将返回Card组件模板。 但是首先,我们需要导入FlatList组件,如下面的代码片段所示:
import {View, Text, FlatList} from 'react-native' ; 现在,我们将使用lastestpost状态数据进入FlatList如下所示:
显示在下面的代码片段中:
  <Headline style={{ marginLeft : 30 }}>Lastest Post< /Headline>
            <FlatList
              data={this.state.lastestpost}
              renderItem={({ item }) => (
                  <Card
                    style={{
                      shadowOffset: { width: 5, height: 5 },
                      width: '90%',
                      borderRadius: 12,
                      alignSelf: 'center',
                      marginBottom: 10,
                    }}>
                    <Card.Content>
                      <Title>{item.title.rendered}</ Title>
                    </ Card.Content >
                     <Card.Cover
                      source={{ uri: item.jetpack_featured_media_url }}
                    />
                  </Card>
              )}
              keyExtractor={item => item.id}
            />
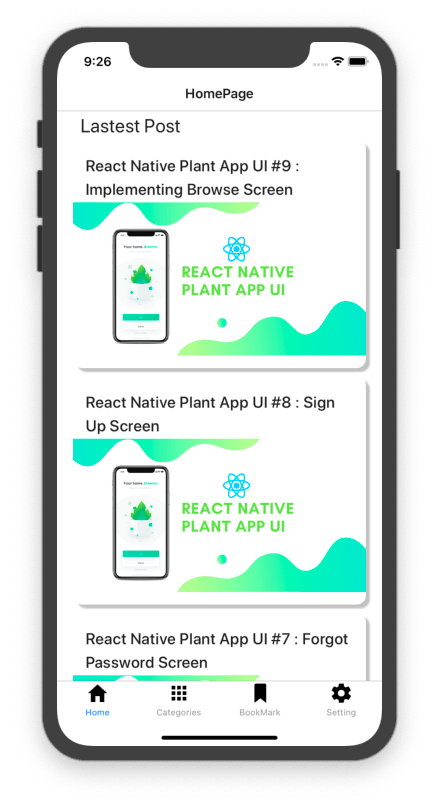
因此,我们将在仿真器屏幕中获得以下结果:

摘要
在本章中,我们学习了如何使用react-native-paper包实现Home屏幕选项卡的整体UI。 我们还学习了如何使用fetch方法从WordPress服务器获取数据。
From: https://hackernoon.com/build-wordpress-app-with-react-native-5-home-screen-hobf32tq


 被折叠的 条评论
为什么被折叠?


