


渐变在我们的应用程序中带来了丰富多彩的味道。 因此,重要的是要知道如何以及何时在移动应用程序中使用它们。 在React Native中,渐变非常易于集成,在本文中,我们将确切描述如何实现它们。 React Native和CSS中主要有两种类型的线性渐变:线性渐变和径向渐变
在React Native中用于生成梯度的两个最常用JavaScript库是
expo-linear-gradient and react-native-linear-gradient 它们都非常相似,对于这篇关于React Native中的渐变的文章,我们将使用expo-linear-gradient 。
安装:
1.对于Expo:expo安装expo-linear-gradient
2.对于裸项目:
- 安装和配置unimodules
- expo安装expo-linear-gradient
- cd ios && pod安装
渐变的第一个用例是使按钮看起来更坚固:
import React from "react" ;
import { StyleSheet, Text, View, Button } from "react-native" ;
import { LinearGradient } from "expo-linear-gradient" ;

function GradientExampleOne ()  {
  return (
    < View style = {styles.container} >
       <LinearGradient
        colors={["#48F10E", "#078716", "#093203"]}
        style={styles.buttonContainer}
      >
        <Text
          style={styles.buttonText}
        >
          Login to read
        </Text>
      </LinearGradient>
    </ View >
  );
}

const styles = StyleSheet.create({
  container : {
    flex : 1 ,
    backgroundColor : "#fff" ,
    alignItems : "center" ,
    justifyContent : "center" ,
  },
  buttonContainer : {
    padding : 15 ,
    alignItems : "center" ,
    borderRadius : 5
  },
  buttonText : {
    fontWeight : "bold" ,
    fontSize : 18 ,
    color : "#fff" ,
  }
});
彩色道具接受要以线性渐变显示的颜色数组。
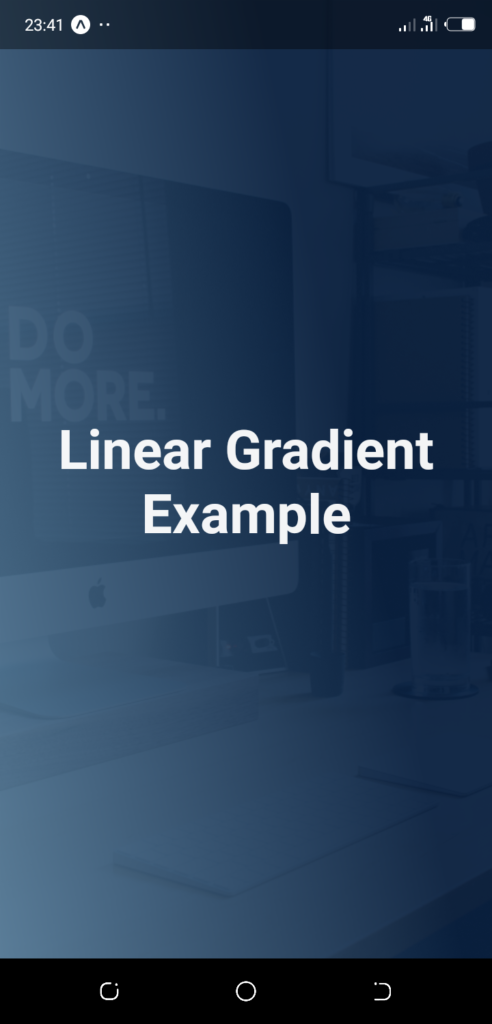
让我们用渐变做另外一件好事:我们将图像与渐变结合起来,如下例所示:

现在,这是怎么回事? 我们在ImageBackground(一个React Native组件)上叠加了一个渐变,然后降低了渐变的不透明度。 然后,将文本置于LinearGradient内部。
import React from "react" ;
import { StyleSheet, Text, View, ImageBackground } from "react-native" ;
import { LinearGradient } from "expo-linear-gradient" ;

function GradientExampleOne ( { navigation } )  {
  return (
    < View style = {styles.container} >
       <ImageBackground source={require('./assets/workspace.jpg')} style={styles.imgBackground}>
        <LinearGradient
          colors={["#09203f", "#537895"]}
          start={[0.1, 0.1]}
          style={styles.linearGradient}
        >
          <Text style={styles.text} >Linear Gradient Example</Text>
        </LinearGradient>
      </ImageBackground>
    </ View >
  );
}

const styles = StyleSheet.create({
  container : {
    flex : 1 ,
    backgroundColor : "#fff" ,
    alignItems : "center" ,
    justifyContent : "center" ,
  },
  imgBackground : {
    flex : 1 ,
    width : "100%" ,
    alignItems : "center" ,
  },
  linearGradient : {
    width : '100%' ,
    height : '100%' ,
    opacity : 0.95 ,
    justifyContent : 'center' ,
    alignItems : 'center'
  },
  text : {
    color : '#fff' ,
    fontSize : 40 ,
    fontWeight : 'bold' ,
    textAlign : 'center'
  }
});
我介绍了一个prop start , start prop是一个告诉渐变从哪里开始的数组。 第一个元素水平放置梯度(x轴),而第二个元素垂直放置梯度。
例如,[0.1,0.2]表示渐变将从左侧开始10%,从顶部开始20%。
让我们看一些视觉示例:

这就是开始为 [0.9,0.9]的渐变的样子。
React Native中的LinearGradient易于实现且无缝实现。 我们使用它们来使按钮具有坚实的外观和感觉。 我们为文本制作了清晰的UI背景,并研究了启动道具。
这是您可以在React Native中实现渐变的方法。 如您所见,这非常简单。
先前发布在 https://www.instamobile.io/mobile-development/gradients-react-native/


 2万+
2万+

 被折叠的 条评论
为什么被折叠?
被折叠的 条评论
为什么被折叠?
 到【灌水乐园】发言


