


http://blog.csdn.net/yerenyuan_pku/article/details/72231763
之前我整合了Spring和MyBatis这两个框架,不会的可以看我的文章MyBatis框架的学习(六)——MyBatis整合Spring。本文我再来讲SpringMVC和MyBatis整合开发的方法,这样的话,Spring、MyBatis和SpringMVC三大框架的整合开发我们就学会了。这里我使用的Spring是Spring4.1.3这个版本(SpringMVC自然也是这个版本),MyBatis是MyBatis3.2.7这个版本。
为了更好的学习SpringMVC和MyBatis整合开发的方法,需要将SpringMVC和MyBatis进行整合。整合目标:控制层采用SpringMVC、持久层使用MyBatis实现。
需求
实现商品查询列表,从MySQL数据库表中查询商品信息。
为了实现这个需求,我们需要新建一个数据库,例如springmvc,然后将以下sql脚本文件导入springmvc数据库中:
-
springmvc.sql:
/*
Navicat MySQL Data Transfer

Source Server         : localhost_3306
Source Server Version : 50611
Source Host           : localhost:3306
Source Database       : springmvc

Target Server Type    : MYSQL
Target Server Version : 50611
File Encoding         : 65001

Date: 2016-05-09 19:45:13
*/

SET FOREIGN_KEY_CHECKS=0;

-- ---------------------------- -- Table structure for items -- ---------------------------- DROP TABLE IF EXISTS `items`; CREATE TABLE `items` ( `id` int(11) NOT NULL AUTO_INCREMENT, `name` varchar(32) NOT NULL COMMENT '商品名称', `price` float(10,1) NOT NULL COMMENT '商品定价', `detail` text COMMENT '商品描述', `pic` varchar(64) DEFAULT NULL COMMENT '商品图片', `createtime` datetime NOT NULL COMMENT '生产日期', PRIMARY KEY (`id`) ) ENGINE=InnoDB AUTO_INCREMENT=4 DEFAULT CHARSET=utf8; -- ---------------------------- -- Records of items -- ---------------------------- INSERT INTO `items` VALUES ('1', '台式机', '3000.0', '该电脑质量非常好!!!!', null, '2016-02-03 13:22:53'); INSERT INTO `items` VALUES ('2', '笔记本', '6000.0', '笔记本性能好,质量好!!!!!', null, '2015-02-09 13:22:57'); INSERT INTO `items` VALUES ('3', '背包', '200.0', '名牌背包,容量大质量好!!!!', null, '2015-02-06 13:23:02'); -- ---------------------------- -- Table structure for user -- ---------------------------- DROP TABLE IF EXISTS `user`; CREATE TABLE `user` ( `id` int(11) NOT NULL AUTO_INCREMENT, `username` varchar(32) NOT NULL COMMENT '用户名称', `birthday` date DEFAULT NULL COMMENT '生日', `sex` char(1) DEFAULT NULL COMMENT '性别', `address` varchar(256) DEFAULT NULL COMMENT '地址', PRIMARY KEY (`id`) ) ENGINE=InnoDB AUTO_INCREMENT=27 DEFAULT CHARSET=utf8; -- ---------------------------- -- Records of user -- ---------------------------- INSERT INTO `user` VALUES ('1', '王五', null, '2', null); INSERT INTO `user` VALUES ('10', '张三', '2014-07-10', '1', '北京市'); INSERT INTO `user` VALUES ('16', '张小明', null, '1', '河南郑州'); INSERT INTO `user` VALUES ('22', '陈小明', null, '1', '河南郑州'); INSERT INTO `user` VALUES ('24', '张三丰', null, '1', '河南郑州'); INSERT INTO `user` VALUES ('25', '陈小明', null, '1', '河南郑州'); INSERT INTO `user` VALUES ('26', '王五', null, null, null);
如此一来items表就是这样的: 
由于需求决定,我们只对items表进行操作。
jar包管理
我之前有写过一篇Spring、Hibernate和Struts2整合的文章——hibernate-5.0.7+struts-2.3.24+spring-4.2.4三大框架整合,在整合的时候,我个人不喜欢乱,不喜欢啪叽一下将所有jar包往lib中一扔,因为那样没有条理,所以在整合SSM的时候,我还是遵循jar包分类的原则,首先看一下SSM整合都用到了哪些jar包:
- Spring(包括SpringMVC)所需jar包
- MyBatis所需jar包
- mybatis-spring整合包
- 数据库驱动包
- 第三方数据库连接池
这样一共需要31个jar包,我整理出来如下: 
这里我用的是dbcp数据库连接池,当然也可以用c3p0等其他连接池,归归类后jar包就很有条理。
整合思路
关于SSM的架构可以简单看一下下面的草图: 
可以看出,Spring在进行管理时,是很有条理的,每个层都由Spring管理,然后不同的层可以调用其它层,Handler调用service,service调用mapper等。根据这个架构,我们来总结一下整合的思路,根据这个调用关系,我们可以从下往上一步步整合。
- Dao层
- SqlMapConfig.xml,空文件即可。
- applicationContext-dao.xml
- a) 数据库连接池
- b) SqlSessionFactory对象,需要Spring和MyBatis的整合包。
- c) 配置mapper文件扫描器。
- Service层
- applicationContext-service.xml文件中配置包扫描器,扫描带@service注解的类。
- applicationContext-trans.xml文件中配置事务。
- 表现层
- 包扫描器,扫描带@Controller注解的类。
- 配置注解驱动。
- 配置视图解析器
- web.xml
在web.xml文件中配置前端控制器。
现在思路清晰了,接下来就开始整合了。在整合前先看一下我整合完的工程结构: 
整合Dao层
整合Dao层也就是整合持久层,那么需要Spring的核心包,持久层包,MyBatis包,数据库以及连接池的包。
MyBatis全局配置文件
在classpath下创建mybatis/sqlMapConfig.xml这样的MyBatis全局配置文件,如下:
<?xml version="1.0" encoding="UTF-8"?>
<!DOCTYPE configuration
PUBLIC "-//mybatis.org//DTD Config 3.0//EN"
"http://mybatis.org/dtd/mybatis-3-config.dtd">
<configuration>
</configuration>
可以看出,整合的时候,这个全局配置文件已经很清爽了,根本就没啥东东了,因为数据源啊、mapper啊啥的都交给Spring去管理了。
配置Spring配置文件
配置完MyBatis的全局配置文件后,接下来就要配置Spring的配置文件了,Spring的配置文件我将分类写在不同的文件中,都放在config/spring/目录下了,这里是对Dao的整合,所以起名applicationContext-dao.xml。
<?xml version="1.0" encoding="UTF-8"?>
<beans xmlns="http://www.springframework.org/schema/beans" xmlns:context="http://www.springframework.org/schema/context" xmlns:p="http://www.springframework.org/schema/p" xmlns:aop="http://www.springframework.org/schema/aop" xmlns:tx="http://www.springframework.org/schema/tx" xmlns:xsi="http://www.w3.org/2001/XMLSchema-instance" xsi:schemaLocation="http://www.springframework.org/schema/beans http://www.springframework.org/schema/beans/spring-beans-4.0.xsd http://www.springframework.org/schema/context http://www.springframework.org/schema/context/spring-context-4.0.xsd http://www.springframework.org/schema/aop http://www.springframework.org/schema/aop/spring-aop-4.0.xsd http://www.springframework.org/schema/tx http://www.springframework.org/schema/tx/spring-tx-4.0.xsd http://www.springframework.org/schema/util http://www.springframework.org/schema/util/spring-util-4.0.xsd"> <!-- 加载配置文件 --> <context:property-placeholder location="classpath:db.properties" /> <!-- 数据库连接池 --> <bean id="dataSource" class="org.apache.commons.dbcp.BasicDataSource" destroy-method="close"> <property name="driverClassName" value="${jdbc.driver}" /> <property name="url" value="${jdbc.url}" /> <property name="username" value="${jdbc.username}" /> <property name="password" value="${jdbc.password}" /> <property name="maxActive" value="10" /> <property name="maxIdle" value="5" /> </bean> <!-- mapper配置 --> <!-- 让spring管理sqlsessionfactory 使用mybatis和spring整合包中的 --> <bean id="sqlSessionFactory" class="org.mybatis.spring.SqlSessionFactoryBean"> <!-- 数据库连接池 --> <property name="dataSource" ref="dataSource" /> <!-- 加载mybatis的全局配置文件,虽然这个全局配置文件是空的,但是这个全局配置文件是必不可少的 --> <property name="configLocation" value="classpath:mybatis/SqlMapConfig.xml" /> </bean> <!-- 配置Mapper扫描器 --> <bean class="org.mybatis.spring.mapper.MapperScannerConfigurer"> <property name="basePackage" value="com.itheima.springmvc.mapper"/> </bean> </beans>
注意:一定记得加载mybatis的全局配置文件,虽然这个全局配置文件是空的,但是这个全局配置文件是必不可少的。
可以看出,整合Dao层的时候主要配置了一下数据源、sqlSessionFactory和mapper扫描器, 这样的话,数据源,sqlSessionFactory和mapper在tomcat启动时就被Spring实例化到了容器中。
这儿db.properties该属性配置文件的内容为:
jdbc.driver=com.mysql.jdbc.Driver jdbc.url=jdbc:mysql://localhost:3306/springmvc?characterEncoding=utf-8 jdbc.username=root jdbc.password=yezi整合Service层
先把jar包导了再说,整合Service层需要配置事务了。
配置applicationContext-service.xml
这里是第二个Spring的配置文件了,还是在config/spring文件夹下面,主要是用来配置所有的service的,如下:
<?xml version="1.0" encoding="UTF-8"?>
<beans xmlns="http://www.springframework.org/schema/beans" xmlns:context="http://www.springframework.org/schema/context" xmlns:p="http://www.springframework.org/schema/p" xmlns:aop="http://www.springframework.org/schema/aop" xmlns:tx="http://www.springframework.org/schema/tx" xmlns:xsi="http://www.w3.org/2001/XMLSchema-instance" xsi:schemaLocation="http://www.springframework.org/schema/beans http://www.springframework.org/schema/beans/spring-beans-4.0.xsd http://www.springframework.org/schema/context http://www.springframework.org/schema/context/spring-context-4.0.xsd http://www.springframework.org/schema/aop http://www.springframework.org/schema/aop/spring-aop-4.0.xsd http://www.springframework.org/schema/tx http://www.springframework.org/schema/tx/spring-tx-4.0.xsd http://www.springframework.org/schema/util http://www.springframework.org/schema/util/spring-util-4.0.xsd"> <!-- 配置包扫描器,扫描带@Service注解的类 --> <context:component-scan base-package="com.itheima.springmvc.service"></context:component-scan> </beans>
这儿只须配置包扫描器,专门扫描带@Service注解的类。
配置applicationContext-trans.xml
这里是第三个Spring的配置文件了,还是在config/spring文件夹下面,主要是用来配置Spring事务管理的,如下:
<?xml version="1.0" encoding="UTF-8"?>
<beans xmlns="http://www.springframework.org/schema/beans" xmlns:context="http://www.springframework.org/schema/context" xmlns:p="http://www.springframework.org/schema/p" xmlns:aop="http://www.springframework.org/schema/aop" xmlns:tx="http://www.springframework.org/schema/tx" xmlns:xsi="http://www.w3.org/2001/XMLSchema-instance" xsi:schemaLocation="http://www.springframework.org/schema/beans http://www.springframework.org/schema/beans/spring-beans-4.0.xsd http://www.springframework.org/schema/context http://www.springframework.org/schema/context/spring-context-4.0.xsd http://www.springframework.org/schema/aop http://www.springframework.org/schema/aop/spring-aop-4.0.xsd http://www.springframework.org/schema/tx http://www.springframework.org/schema/tx/spring-tx-4.0.xsd http://www.springframework.org/schema/util http://www.springframework.org/schema/util/spring-util-4.0.xsd"> <!-- 事务管理器,用的是Spring JDBC的事务管理器 --> <bean id="transactionManager" class="org.springframework.jdbc.datasource.DataSourceTransactionManager"> <!-- 数据源 --> <property name="dataSource" ref="dataSource" /> </bean> <!-- 通知 --> <tx:advice id="txAdvice" transaction-manager="transactionManager"> <tx:attributes> <!-- 传播行为 --> <tx:method name="save*" propagation="REQUIRED" /> <tx:method name="insert*" propagation="REQUIRED" /> <tx:method name="delete*" propagation="REQUIRED" /> <tx:method name="update*" propagation="REQUIRED" /> <tx:method name="find*" propagation="SUPPORTS" read-only="true" /> <tx:method name="get*" propagation="SUPPORTS" read-only="true" /> </tx:attributes> </tx:advice> <!-- 切面 --> <aop:config> <aop:advisor advice-ref="txAdvice" pointcut="execution(* com.itheima.springmvc.service.*.*(..))" /> </aop:config> </beans>
有关Spring中事务的传播行为,我也不是特别了解。也只是听说过一嘴,先记录如下:
- propagation=”REQUIRED”:如果当前方法执行的时候,没有事务要开启事务,如果有事务,就在当前事务中执行。也可理解为当前方法被调用的时候没有事务传递进来,就自己开启事务。
- propagation=”SUPPORTS”:如果当前方法执行的时候,如果有事务,就在当前事务中执行,如果没有事务就不开启事务。也可理解为当前方法被调用的时候没有事务传递进来,自己不开启事务。
整合表现层
上面提到过,SpringMVC是Spring的一个模块,所以不需要整合,我们只需要加入SpringMVC所需的jar包即可。
配置处理器映射器、处理器适配器和视图解析器
这里使用注解的方式配置,因为注解的方式比较简单。如此一来SpringMVC配置文件——springmvc.xml的内容就为:
<?xml version="1.0" encoding="UTF-8"?>
<beans xmlns="http://www.springframework.org/schema/beans" xmlns:xsi="http://www.w3.org/2001/XMLSchema-instance" xmlns:p="http://www.springframework.org/schema/p" xmlns:context="http://www.springframework.org/schema/context" xmlns:mvc="http://www.springframework.org/schema/mvc" xsi:schemaLocation=" http://www.springframework.org/schema/beans http://www.springframework.org/schema/beans/spring-beans-4.0.xsd http://www.springframework.org/schema/mvc http://www.springframework.org/schema/mvc/spring-mvc-4.0.xsd http://www.springframework.org/schema/context http://www.springframework.org/schema/context/spring-context-4.0.xsd"> <context:component-scan base-package="com.itheima.springmvc.controller"/> <!-- 配置一个注解驱动,如果配置此标签,那么就可以不用配置处理器映射器和处理器适配器 --> <mvc:annotation-driven /> <!-- 配置视图解析器 --> <bean class="org.springframework.web.servlet.view.InternalResourceViewResolver"> <property name="prefix" value="/WEB-INF/jsp/"></property> <property name="suffix" value=".jsp"></property> </bean> </beans>
该配置文件依然在config/spring文件夹下面。
配置前端控制器
前端控制器要配置在WEB-INF/web.xml中,如下:
<?xml version="1.0" encoding="UTF-8"?>
<web-app xmlns:xsi="http://www.w3.org/2001/XMLSchema-instance" xmlns="http://java.sun.com/xml/ns/javaee" xsi:schemaLocation="http://java.sun.com/xml/ns/javaee http://java.sun.com/xml/ns/javaee/web-app_2_5.xsd" id="WebApp_ID" version="2.5"> <display-name>springmvc-web</display-name> <welcome-file-list> <welcome-file>index.html</welcome-file> <welcome-file>index.htm</welcome-file> <welcome-file>index.jsp</welcome-file> <welcome-file>default.html</welcome-file> <welcome-file>default.htm</welcome-file> <welcome-file>default.jsp</welcome-file> </welcome-file-list> <!-- 配置前端控制器 --> <servlet> <servlet-name>springmvc</servlet-name> <servlet-class>org.springframework.web.servlet.DispatcherServlet</servlet-class> <init-param> <!-- 指定springmvc配置文件的路径。如果不指定,默认为:/WEB-INF/${servlet-name}-servlet.xml --> <param-name>contextConfigLocation</param-name> <param-value>classpath:spring/springmvc.xml</param-value> </init-param> </servlet> <servlet-mapping> <servlet-name>springmvc</servlet-name> <url-pattern>*.action</url-pattern> </servlet-mapping> </web-app>
加载Spring容器
注意千万不要忘记了在web.xml中添加Spring容器监听器,加载Spring容器:
<!-- 初始化Spring容器 -->
<context-param>
    <param-name>contextConfigLocation</param-name> <param-value>classpath:spring/applicationContext-*.xml</param-value> </context-param> <listener> <listener-class>org.springframework.web.context.ContextLoaderListener</listener-class> </listener>
到此为止,Spring、MyBatis和SpringMVC三大框架就整合完了。整合完之后,接着就来实现我们的需求——商品列表的展示。
商品列表的展示
Dao层代码的编写,借助逆向工程生成po类及mapper
关于如何使用MyBatis的逆向工程我就不再赘述了,如果不太清楚的童鞋请看一下我的这篇文章——MyBatis框架的学习(七)——MyBatis逆向工程自动生成代码!将生成的代码拷贝到我们自己的工程中即可,如下: 
Service层代码的编写
之前提到过,service是用来调用mapper的,mapper是用来操作数据库的,所以在Service层,我们首先要获取mapper接口的代理对象,只不过在这里我们通过Spring注入进来,然后通过这个代理对象去操作数据库。
【第一步】,首先在com.itheima.springmvc.service包下编写一个ItemService接口,如下:
public interface ItemService {
    List<Items> getItemList();
}
可以看出,这个接口和上面那个mapper接口其实是一样的,当然并不是说一定一样,只不过这里要实现的逻辑都一样而已。
【第二步】,在com.itheima.springmvc.service.impl包下编写ItemService接口的实现类——ItemServiceImpl.java,如下:
@Service
public class ItemServiceImpl implements ItemService { @Autowired private ItemsMapper itemsMapper; @Override public List<Items> getItemList() { ItemsExample example = new ItemsExample(); List<Items> list = itemsMapper.selectByExampleWithBLOBs(example); return list; } }
注意:selectByExampleWithBLOBs指代带大文本那一列(即detail列)的方法。从items这个数据库表的建表语句中可看出detail这列的数据类型是text,如下:
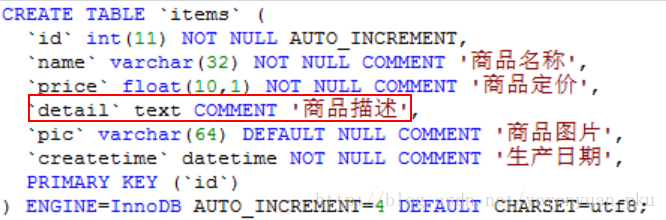
Web层代码的编写
在com.itheima.springmvc.controller包下编写一个Controller类,如下:
@Controller
public class ItemController { @Autowired private ItemService itemService; @RequestMapping("/itemList") public ModelAndView getItemsList() { // 查询商品列表 List<Items> itemList = itemService.getItemList(); // 把查询结果传递给页面 ModelAndView modelAndView = new ModelAndView(); modelAndView.addObject("itemList", itemList); // addObject方法相当于放到request域上 // 设置逻辑视图 modelAndView.setViewName("itemList"); // 返回结果 return modelAndView; } }
前台itemList.jsp页面还是第一篇博文中写的那个,没有变,就不写了。
测试
最后在浏览器地址栏中输入url地址——http://localhost:8080/springmvc-web/itemList.action,回车,即可看到如下效果: 
这已然充分说明Spring、MyBatis和SpringMVC这三大框架就整合成功了!!!事实雄于一切。读者如需源码,可点击SpringMVC学习(四)——Spring、MyBatis和SpringMVC的整合进行下载!


 8893
8893

 被折叠的 条评论
为什么被折叠?
被折叠的 条评论
为什么被折叠?
 到【灌水乐园】发言


