Overview
You can use Objective-C and Swift files together in a single project, no matter which language the project used originally. This makes creating mixed-language app and framework targets as straightforward as creating an app or framework target written in a single language.

The process for using your Objective-C declarations from your Swift code within mixed-language targets differs slightly depending on whether you’re writing an app or a framework. Both processes are described below.
Import Code Within an App Target
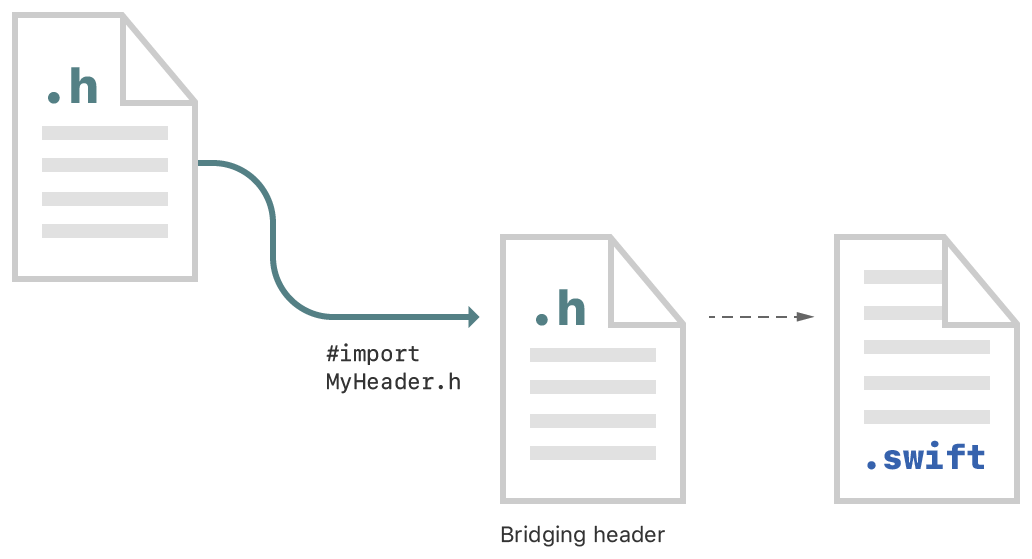
To import a set of Objective-C files into Swift code within the same app target, you rely on an Objective-C bridging header file to expose those files to Swift. Xcode offers to create this header when you add a Swift file to an existing Objective-C app, or an Objective-C file to an existing Swift app.

If you accept, Xcode creates the bridging header file along with the file you were creating, and names it by using your product module name followed by "-Bridging-Header.h". Alternatively, you can create a bridging header yourself by choosing File > New > File > [operating system] > Source > Header File.
Edit the bridging header to expose your Objective-C code to your Swift code:
-
In your Objective-C bridging header, import every Objective-C header you want to expose to Swift.
-
In Build Settings, in Swift Compiler - Code Generation, make sure the Objective-C Bridging Header build setting has a path to the bridging header file. The path should be relative to your project, similar to the way your
Info.plistpath is specified in Build Settings. In most cases, you won't need to modify this setting.
Any public Objective-C headers listed in the bridging header are visible to Swift. The Objective-C declarations are automatically available from any Swift file within that target, with no import statements. Use classes and other declarations from your custom Objective-C code with the same Swift syntax you use for system classes.
Import Code Within a Framework Target
To use the Objective-C declarations in files in the same framework target as your Swift code, you’ll need to import those files into the Objective-C umbrella header—the master header for your framework. Import your Objective-C files by configuring the umbrella header:
-
Under Build Settings, in Packaging, make sure the Defines Module setting for the framework target is set to Yes.
-
In the umbrella header, import every Objective-C header you want to expose to Swift.
Swift sees every header you expose publicly in your umbrella header. The contents of the Objective-C files in that framework are automatically available from any Swift file within that framework target, with no import statements. Use classes and other declarations from your Objective-C code with the same Swift syntax you use for system classes.
https://developer.apple.com/documentation/swift/imported_c_and_objective-c_apis/importing_objective-c_into_swift


 被折叠的 条评论
为什么被折叠?


