


首先来看看最终效果:

下边我们来一步一步实现:
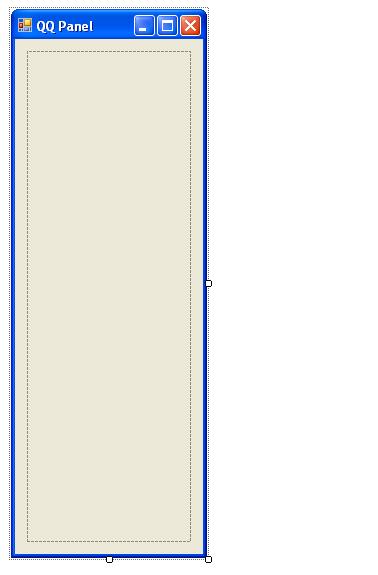
首先新建一个C# windows application,并在界面上添加一个Pannel控件,拉成合适的形状,如下图:
我们要做的,就是将Button加入到Pannel控件中,并根据鼠标点击移动Button和添加子Button.
第一步,定义一些必要的变量和属性:
private
string
[] _Module;
private string [,] _ChildModule;
private int _ModuleButtonHeight = 50 ;
private int _ChildButtonHeight = 30 ;
/// <summary>
/// 初始模块
/// </summary>
public string [] Module
{
get { return _Module; }
set { _Module = value; }
}
/// <summary>
/// 初始子模块
/// </summary>
public string [,] ChildModule
{
get { return _ChildModule; }
set { _ChildModule = value; }
}
其中Module数组和ChildModule数组分别是第一层菜单和第二层菜单的Button的Name,_ModuleButtonHeight和_ChildButtonHeight是第一层和第二层菜单的Height.
定义好相关变量和属性了.我们就开始往Panel里面添加东西了.在Form1_Load里面加入下边的代码:
private
void
Form1_Load(
object
sender, EventArgs e)
{
this .panel1.BorderStyle = BorderStyle.FixedSingle;
// 初始化
Module = new string [] { " 初始模块1 " , " 初始模块2 " , " 初始模块3 " };
ChildModule = new string [ 3 , 2 ];
ChildModule[ 0 , 0 ] = " 子模块1 " ;
ChildModule[ 0 , 1 ] = " 子模块2 " ;
ChildModule[ 1 , 0 ] = " 子模块3 " ;
ChildModule[ 1 , 1 ] = " 子模块4 " ;
ChildModule[ 2 , 0 ] = " 子模块5 " ;
ChildModule[ 2 , 1 ] = "" ;
for ( int i = 0 ; i < Module.Length; i ++ )
{
// 增加模块Button
Button btn = new Button();
btn.FlatStyle = FlatStyle.Flat;
btn.Width = this .panel1.Width;
btn.Height = _ModuleButtonHeight;
btn.Name = string .Format( " Button{0} " , i.ToString());
btn.Text = Module[i];
btn.Top = _ModuleButtonHeight * i;
btn.Click += new EventHandler(btn_Click);
this .panel1.Controls.Add(btn);
}
}
{
this .panel1.BorderStyle = BorderStyle.FixedSingle;
// 初始化
Module = new string [] { " 初始模块1 " , " 初始模块2 " , " 初始模块3 " };
ChildModule = new string [ 3 , 2 ];
ChildModule[ 0 , 0 ] = " 子模块1 " ;
ChildModule[ 0 , 1 ] = " 子模块2 " ;
ChildModule[ 1 , 0 ] = " 子模块3 " ;
ChildModule[ 1 , 1 ] = " 子模块4 " ;
ChildModule[ 2 , 0 ] = " 子模块5 " ;
ChildModule[ 2 , 1 ] = "" ;
for ( int i = 0 ; i < Module.Length; i ++ )
{
// 增加模块Button
Button btn = new Button();
btn.FlatStyle = FlatStyle.Flat;
btn.Width = this .panel1.Width;
btn.Height = _ModuleButtonHeight;
btn.Name = string .Format( " Button{0} " , i.ToString());
btn.Text = Module[i];
btn.Top = _ModuleButtonHeight * i;
btn.Click += new EventHandler(btn_Click);
this .panel1.Controls.Add(btn);
}
}
上边代码是根据Module定义的数目往Pannel里面塞Button,这些Button就是第一层的菜单项.当我们点击这些Button的时候,就要显示子菜单项.所以当点击Button的时候触发的事件需要做如下处理:
private
void
btn_Click(
object
sender, EventArgs e)
{
// 标志是否找到用户点击的Button
bool findOutStatus = false ;
// 清除上一次操作加载的子菜单项
for ( int i = 0 ; i < this .panel1.Controls.Count; i ++ )
{
if ( this .panel1.Controls[i].GetType().Name == " Panel " )
{
this .panel1.Controls.RemoveAt(i);
}
}
for ( int i = 0 ; i < this .panel1.Controls.Count; i ++ )
{
if ( this .panel1.Controls[i].GetType().Name == " Button " )
{
// 重新定义各个button位置
if ( ! findOutStatus)
{
this .panel1.Controls[i].Top = _ModuleButtonHeight * i;
}
else
{
this .panel1.Controls[i].Top = this .panel1.Height - (_ModuleButtonHeight * (Module.Length - i));
}
// 找到所点击的Button,在其下加载子菜单
if ( this .panel1.Controls[i].Name == ((Button)sender).Name)
{
findOutStatus = true ;
Panel panel = new Panel();
panel.BackColor = Color.AliceBlue;
panel.Top = _ModuleButtonHeight * (i + 1 );
panel.Width = this .panel1.Width;
panel.Height = this .panel1.Height - _ModuleButtonHeight * Module.Length;
this .panel1.Controls.Add(panel);
for ( int j = 0 ; j < ChildModule.Length / Module.Length; j ++ )
{
if ( ! string .IsNullOrEmpty(ChildModule[i, j]))
{
Button btn = new Button();
btn.FlatStyle = FlatStyle.Flat;
btn.Top = _ChildButtonHeight * j;
btn.Width = this .panel1.Width;
btn.Height = _ChildButtonHeight;
btn.Name = string .Format( " ChildButton{0}_{1} " , i.ToString(), j.ToString());
btn.Text = ChildModule[i, j];
btn.Click += new EventHandler(btnChild_Click);
panel.Controls.Add(btn);
}
}
}
}
}
}
{
// 标志是否找到用户点击的Button
bool findOutStatus = false ;
// 清除上一次操作加载的子菜单项
for ( int i = 0 ; i < this .panel1.Controls.Count; i ++ )
{
if ( this .panel1.Controls[i].GetType().Name == " Panel " )
{
this .panel1.Controls.RemoveAt(i);
}
}
for ( int i = 0 ; i < this .panel1.Controls.Count; i ++ )
{
if ( this .panel1.Controls[i].GetType().Name == " Button " )
{
// 重新定义各个button位置
if ( ! findOutStatus)
{
this .panel1.Controls[i].Top = _ModuleButtonHeight * i;
}
else
{
this .panel1.Controls[i].Top = this .panel1.Height - (_ModuleButtonHeight * (Module.Length - i));
}
// 找到所点击的Button,在其下加载子菜单
if ( this .panel1.Controls[i].Name == ((Button)sender).Name)
{
findOutStatus = true ;
Panel panel = new Panel();
panel.BackColor = Color.AliceBlue;
panel.Top = _ModuleButtonHeight * (i + 1 );
panel.Width = this .panel1.Width;
panel.Height = this .panel1.Height - _ModuleButtonHeight * Module.Length;
this .panel1.Controls.Add(panel);
for ( int j = 0 ; j < ChildModule.Length / Module.Length; j ++ )
{
if ( ! string .IsNullOrEmpty(ChildModule[i, j]))
{
Button btn = new Button();
btn.FlatStyle = FlatStyle.Flat;
btn.Top = _ChildButtonHeight * j;
btn.Width = this .panel1.Width;
btn.Height = _ChildButtonHeight;
btn.Name = string .Format( " ChildButton{0}_{1} " , i.ToString(), j.ToString());
btn.Text = ChildModule[i, j];
btn.Click += new EventHandler(btnChild_Click);
panel.Controls.Add(btn);
}
}
}
}
}
}
点击第一层菜单项,就根据点击的Button相应调整各个Button的位置,并在其下填充一个pannel控件,在这个pannel控件里面填充子菜单项.
当填充完成的时候,就实现了类似QQ面板的功能了.在这个Click事件里面更可以加上声音效果,或者对Button和Form贴一些图片.就更像QQ面板.
当点击子菜单,则会触发相应事件:
private
void
btnChild_Click(
object
sender, EventArgs e)
{
MessageBox.Show( string .Format( " 你点击了 \ " { 0 }\ " 按钮! " , ((Button)sender).Name), " 系统提示 " , MessageBoxButtons.OK, MessageBoxIcon.Information);
}
{
MessageBox.Show( string .Format( " 你点击了 \ " { 0 }\ " 按钮! " , ((Button)sender).Name), " 系统提示 " , MessageBoxButtons.OK, MessageBoxIcon.Information);
}
完整源代码下载: http://files.cnblogs.com/KenBlove/QQPanel.7z
(本代码修改自网络上相关代码)


 521
521

 被折叠的 条评论
为什么被折叠?
被折叠的 条评论
为什么被折叠?
 到【灌水乐园】发言


