


- home
- articles
- quick answers
- discussions
- All Message Boards...
- Application Lifecycle
- Design and Architecture
- ASP.NET
- JavaScript
- C / C++ / MFC
- C#
- Free Tools
- Objective-C and Swift
- Database
- Hardware & Devices
- Hosting and Servers
- Java
- .NET Framework
- Android
- iOS
- Mobile
- SharePoint
- Silverlight / WPF
- Visual Basic
- Web Development
- Site Bugs / Suggestions
- Spam and Abuse Watch
- features
- community
- help


RESTful Web API Help Documentation using Swagger UI and Swashbuckle
How to create an interactive interface (help documentation) to represent our RESTful API using popular framework Swagger & Swashbuckle.
Source Code: Download SwaggerUi_2.zipIdeaThe aim of this article is to educate developers on how to create interactive interface which represent their Restful API to provide a rich discovery, documentation and playground experience to their API consumers. ProcessIn this article we are going to create a simple Restful API in Asp.Net and integrate Swashbuckle & Swagger UI. The article has been listed into three sections
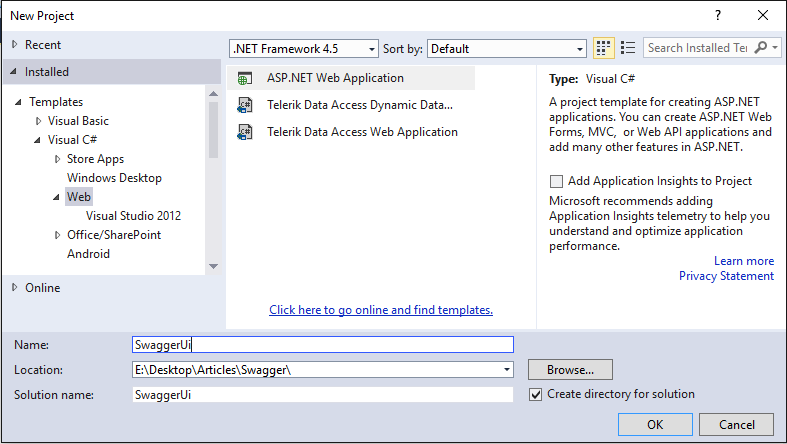
Creating an Asp.Net Web API projectStart by creating a new “Asp.Net Web Application” with the name “Swagger”
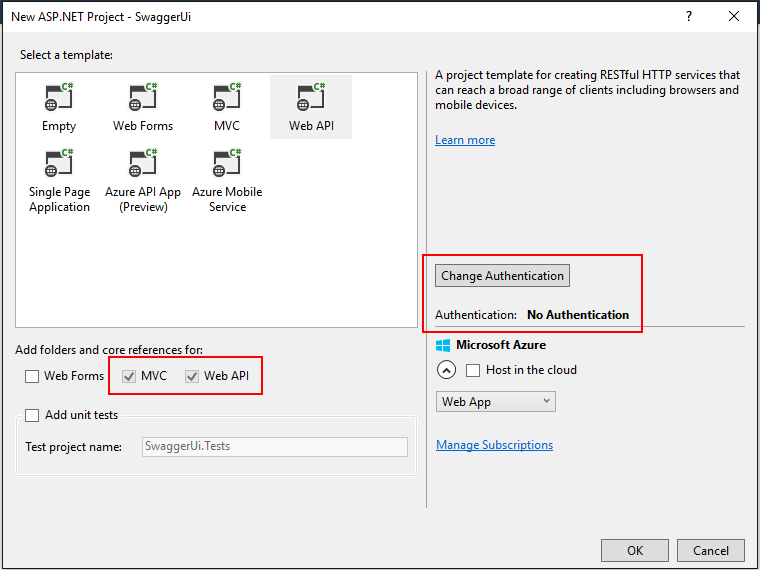
Select Web API from the template which means Visual Studio is going to add MVC and Web API related folders and core references to our application. Also, click “Change Authentication” to choose “No Authentication” and click OK. With this we are going to skip Account related Controller as well as Views from our project.
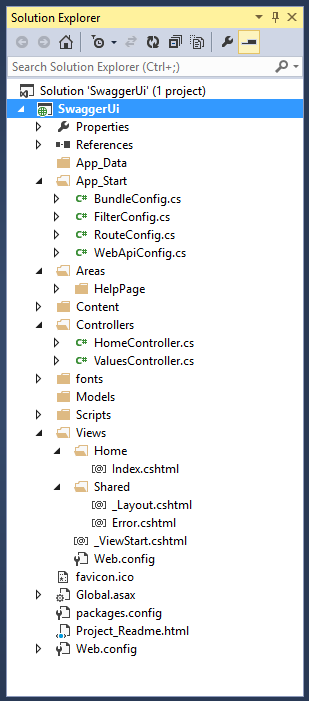
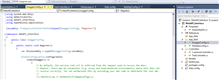
After executing Visual Studio bootstrap here is the project files and folder structure:
We will get routes set for both RouteConfig.cs for MVC controller as well as WebApiConfig.cs for Web API Controller in our App_Start folder. Note: You can see “HelpPages” folder in Areas. This folder will hold Models, Views, Controllers and other Help related files that are being generated by Visual Studio to represent Web API help (We will see this later in this article)
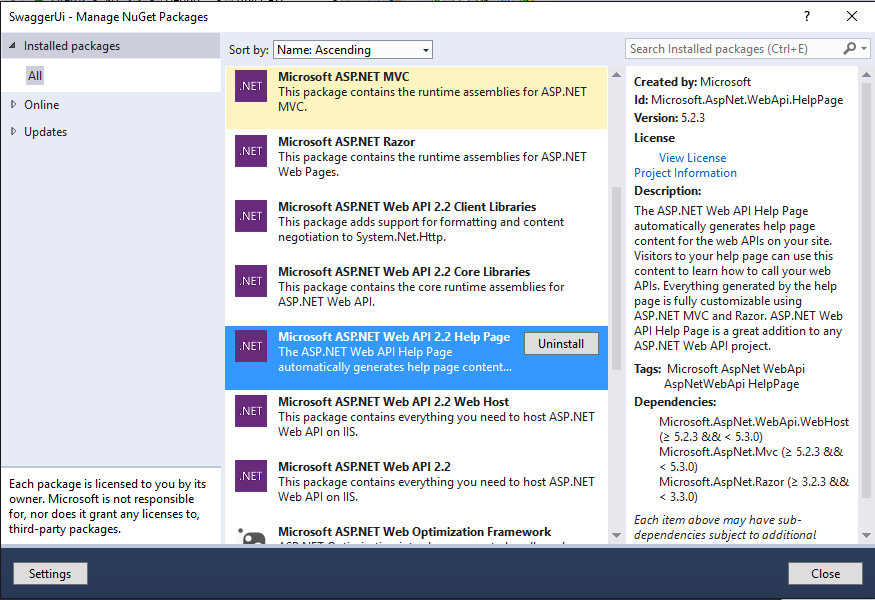
If you see "Installed packages" under NuGet Package Manager, you will notice “Microsoft Asp.Net Web API 2.2 Help Page” package already being added to the project along with MVC, Razor and Core packages.
Connect to SQL Server Database using Entity Data Model (edmx) and Scaffold API ControllerLet us first connect our application to the database table using entity data model. Start by creating a new item “ADO.NET Entity Data Model” with the name “SwaggerModel” in the Models folder. Attached is the script file used to create new table to our database Download SQL.zip
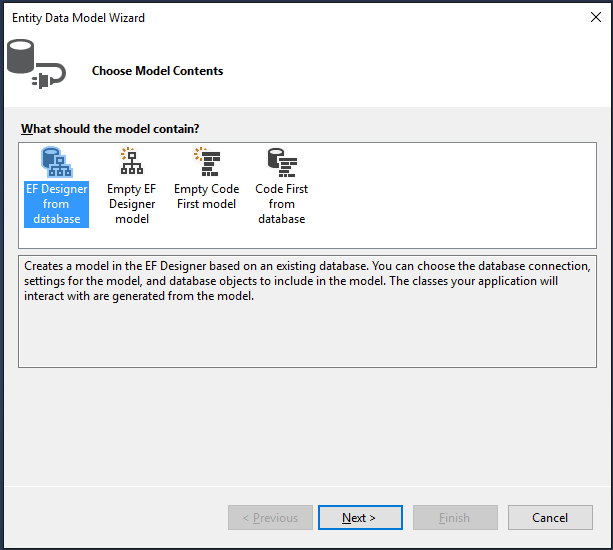
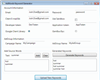
Select “EF Designer from database” from the wizard and click “Next” to connect to the Database server (SQL Server in our case)
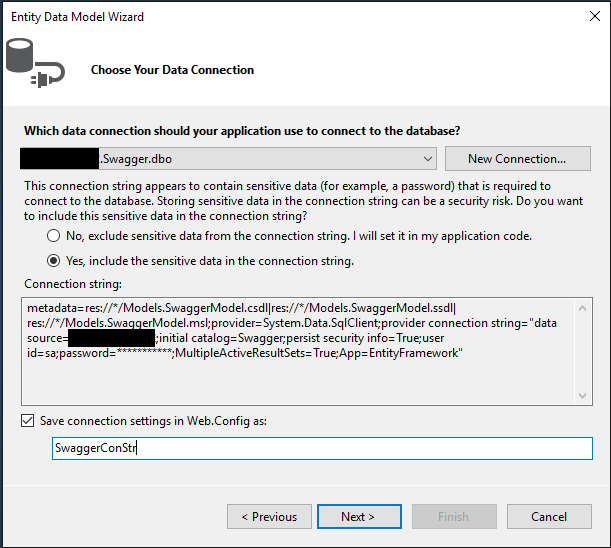
From the Entity Data Model Wizard screen, select connection to the Sql Server and name the connection string as “SwaggerConStr” which will be saved in web.config file.
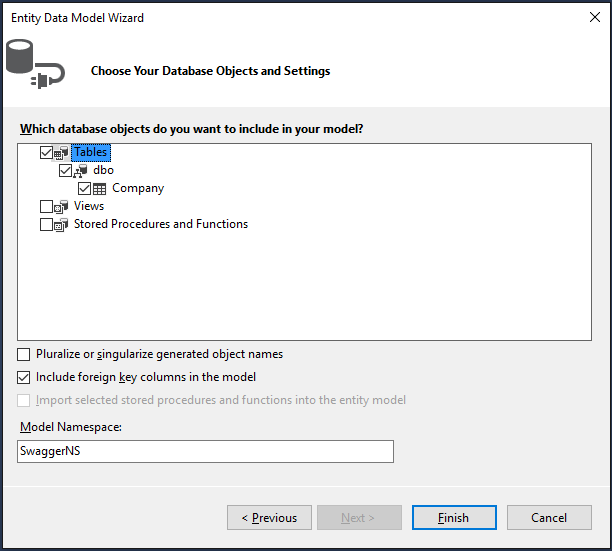
Hit “Next” to select Entity Framework version (in our case 6.x). Click “Next” to choose our Company table to include in our EDMX file.
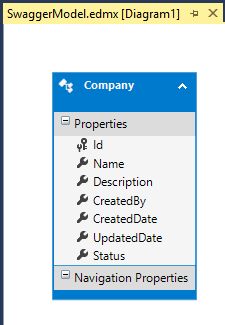
Select the table and click “Finish” button which will eventually generate our POCO class “Company.cs” and a database context class “SwaggerConStr”
Now that our Entity Data Model and Context is created, we can create a new API Controller using visual Studio scaffolding feature. But before scaffolding API controller, let us first build the application in order to make use of the context. Delete existing ValuesController.cs from the controller folder before scaffolding. Right click on the Controllers folder and add “Controller…” this will open “Add Scaffold” window with various scaffolding options. Select “Web API 2 Controller with actions, using Entity Framework” and click “Add”
From the Add Controller window, select Model (in our case Company.cs) as well as Data Context classes (SwaggerConStr.cs). Name the new controller as “CompanyController.cs” and click “Add” button
New controller created with operations for each http verbs (GET, PUT, POST and DELETE)
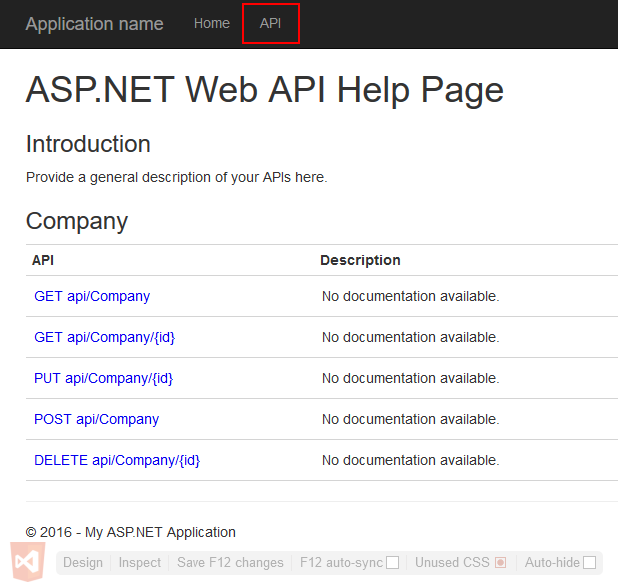
Build and run the application to see the following screen. From the UI top navigation, you can see the “API” link which will navigate us to default “Asp.Net API Help Page” screens. The Help home page looks like this.
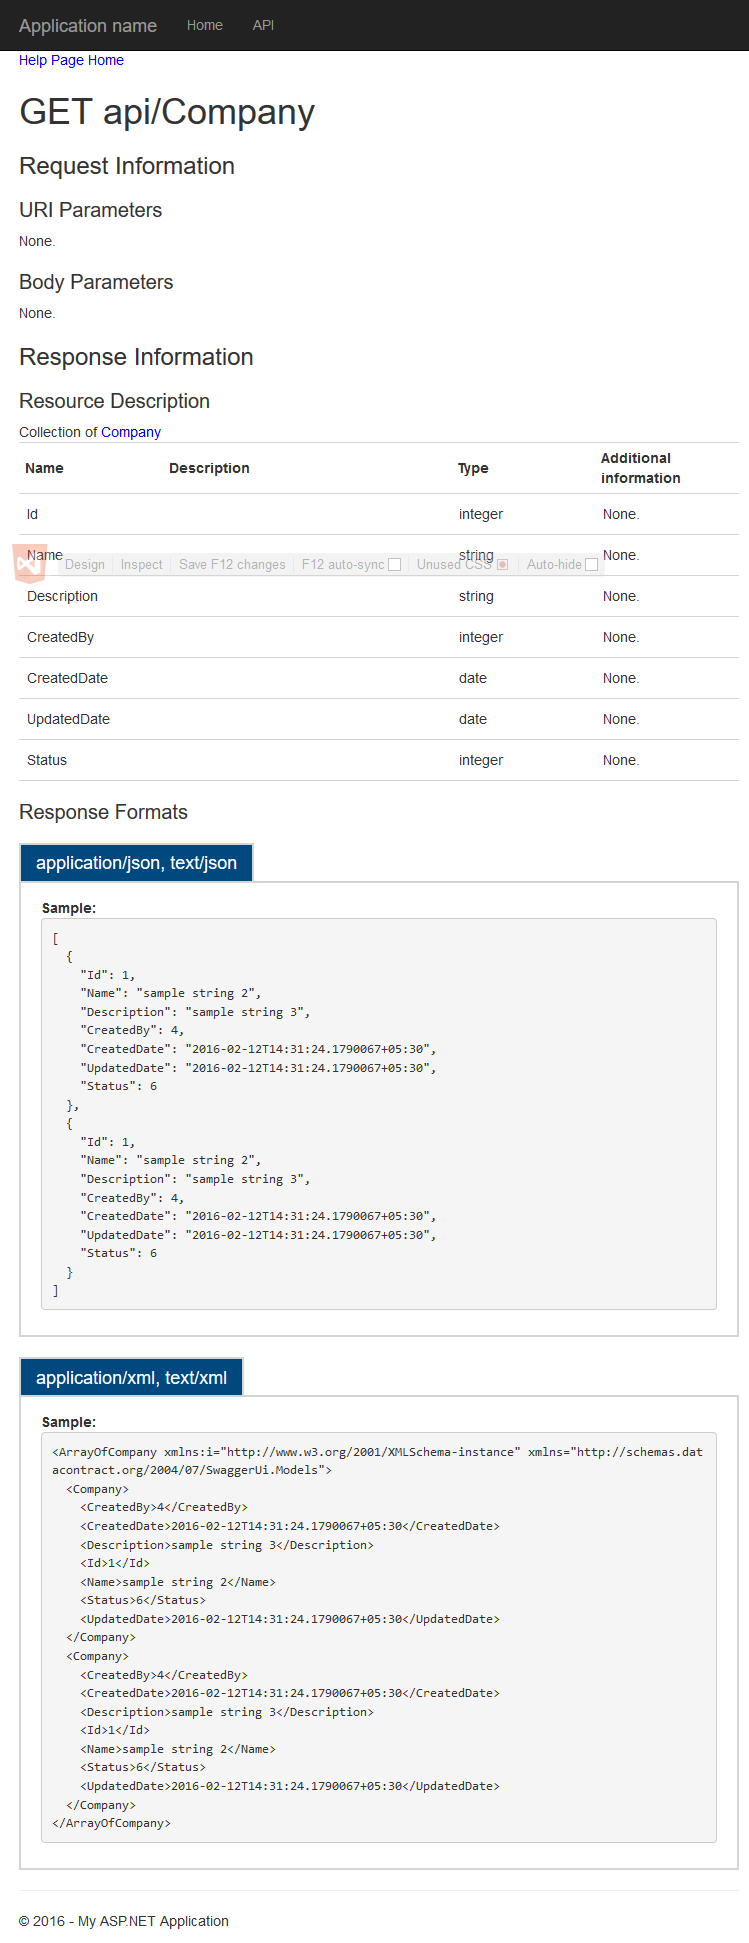
Note: In order to check the API, add “/api/company” to the url and submit in the browser. If you click on any of the operation link, it will show more details like the “Request” information with URI & body parameters and “Response” type and formats like json or xml. Here is how it displays for GET method:
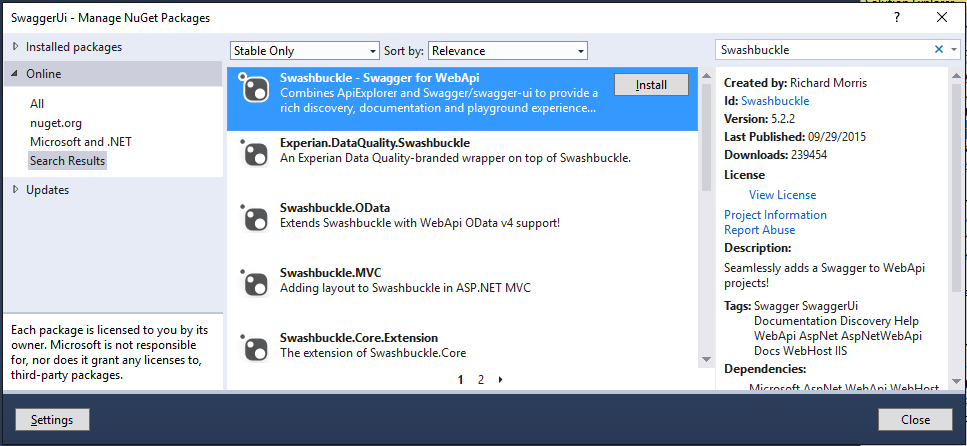
Although Visual Studio team has put in a great effort to represent Web API Help for those who consume the service, its low point is its very basic user interface and there is no way we could try out an action method. This is where Swagger UI & Swashbuckle come into play. Integrating Swashbuckle/Swagger UI to represent API operationsAccording to Swagger website, Swagger is a simple yet powerful representation of your RESTful API. It gives a powerful interface to our API. According to Swashbuckle GitHub, Swashbuckle seamlessly adds a Swagger to WebApi projects! Combines ApiExplorer and Swagger/swagger-ui to provide a rich discovery, documentation and playground experience to your API consumers. In addition to its Swagger generator, Swashbuckle also contains an embedded version of swagger-ui. Adding Swashbuckle to our Web APIGo to “Manage NuGet Packages…” and search online for “Swashbuckle”. From the list select “Swashbuckle - Swagger for Web API” created by Richard Morris with the version 5.2.2 and click Install
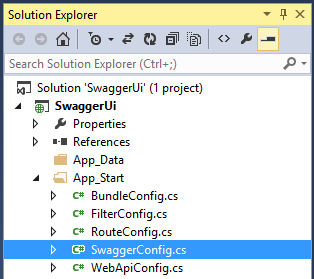
This will add references to “Swashbuckle - Swagger for Web API” and also to “Swashbuckle.Core - Swagger for Web API” to our project after checking its dependencies. The same will appear in packages.config file as.. <package id="Swashbuckle" version="5.2.2" targetFramework="net45" /> <package id="Swashbuckle.Core" version="5.2.2" targetFramework="net45" /> After successful installation, we see there is a new “SwaggerConfig.cs” config file in our App_Start folder. This is where we set all Swagger related configurations.
In order to have a direct link to our Swagger API interface, all the following action link to the top navigation in “_Layout.cshtml” page. <li>@Html.ActionLink("Swagger Help", "", "Swagger", new { area = "" }, null)</li>
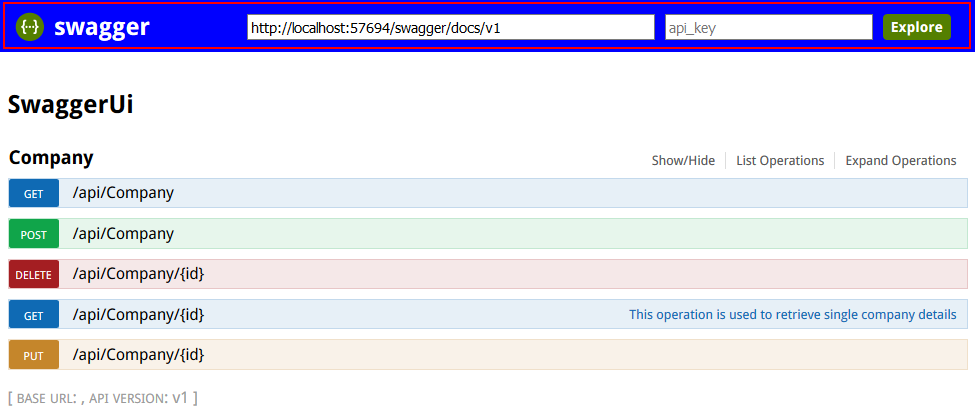
Now build and run the application. From the top navigation click on “Swagger Help”. It will take us to the Swagger user interface. Hit List Operations to view all interactive action operations with their corresponding verbs.
Clicking on operation will show us Response Class. Clicking on “Try it out!” button will display additional details like Request URL, Response Body, Response Code and Response Headers. GET Operation:
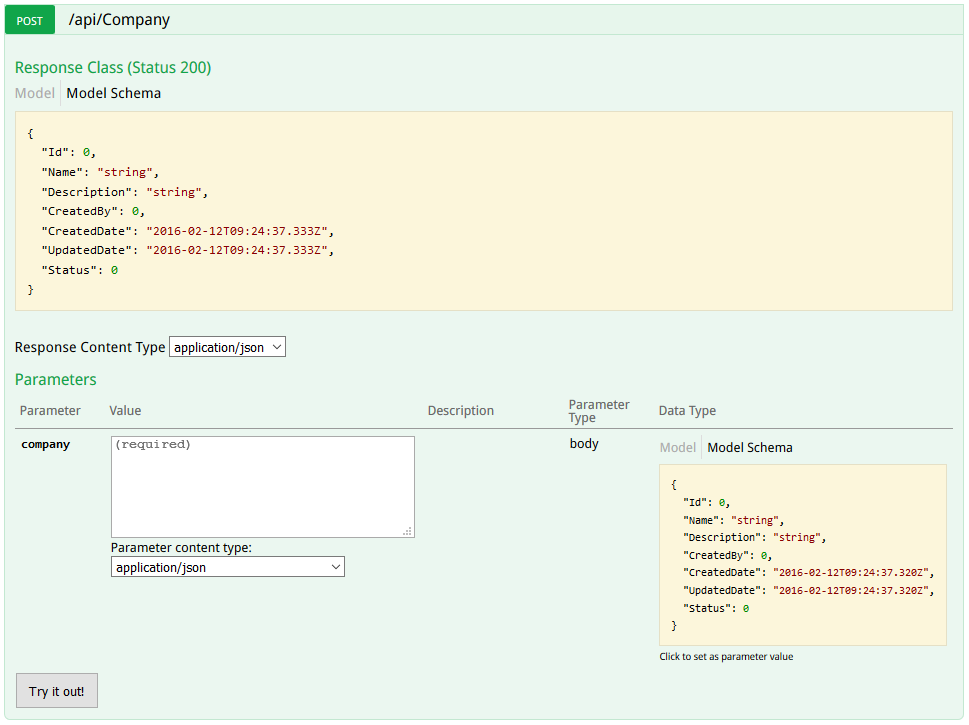
POST operation details:
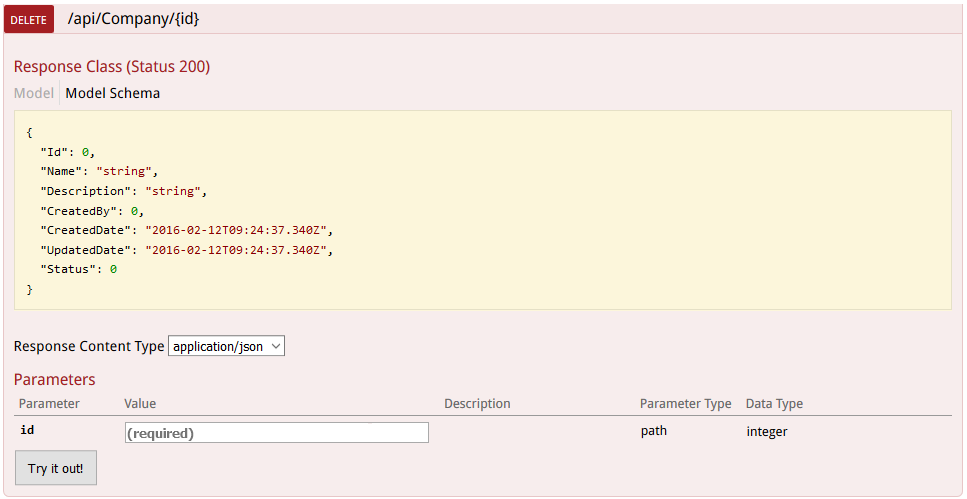
DELETE operation details:
GET by Id operation details:
PUT operation details:
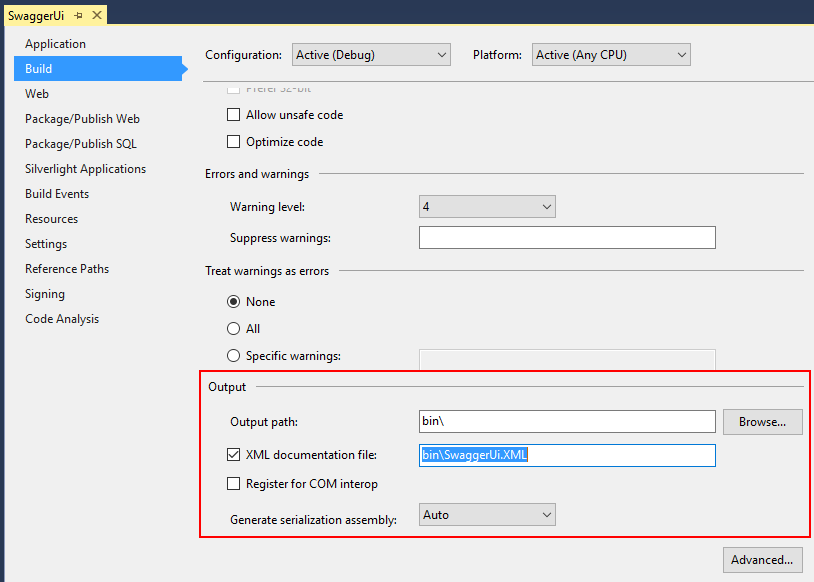
To include XML comments in the help documentGo to project properties and under Build tab, select the checkbox “XML documentation file:” in Output section and you will see the XML path from Bin folder where the file is saved.
Now open the Swagger Config file and add the “IncludeXmlComments” statement with a function that returns the path to XML file from bin folder. private static string GetXmlCommentsPath() { return String.Format(@"{0}\bin\SwaggerUi.XML", System.AppDomain.CurrentDomain.BaseDirectory); } This is how global configuration is enabled in SwaggerConfig.cs Register static method public static void Register() { var thisAssembly = typeof(SwaggerConfig).Assembly; GlobalConfiguration.Configuration .EnableSwagger(c => { c.SingleApiVersion("v1", "SwaggerUi"); c.IncludeXmlComments(GetXmlCommentsPath()); }) .EnableSwaggerUi(c => { }); } To check if XML comments are working on not... Edit controller Get method with some comments like
Run the application and navigate to Swagger Help page from top navigation. You can see xml comments added to the Swagger Help pages.
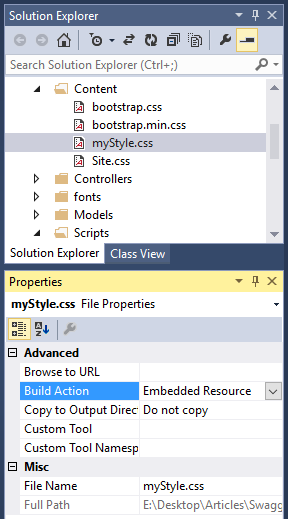
Customizing Swagger UI with our own Cascading Style Sheets:Swashbuckle document states that developer can use the predefined method “InjectStylesheet” to inject their custom .css files as an embedded resources. We need to use “Logical Name” of the file as the second parameter and “media=screen” as third optional parameter along with current assembly as a first parameter. Go and create a new cascading style sheets file “myStyle.css” in the Content folder and add the following style to change the headers default background color from Green to Blue: .swagger-section #header { background-color: #0000ff; padding: 14px; } Right click on the file and select properties and set its Build Action to “Embedded Resource”
Now add the following line to the SwaggerConfig settings to enable UI: c.InjectStylesheet(thisAssembly, "SwaggerUi.Content.myStyle.css"); Note: The “Logical Name” of the style sheet file. Now run the application to see the change.
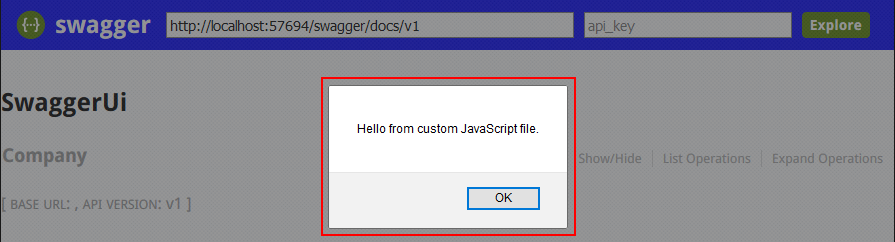
Customizing Swagger UI with our own JavaScript:Swashbuckle document states that developer can use the predefined method “InjectJavaScript” to inject their custom JavaScript files as an embedded resources. We need to use “Logical Name” of the file as the second parameter along with current assembly as a first. Go and create a new JavaScript file “myScript.js” in the Scripts folder and add the following basic script to display custom alert message when the document loads. $(document).ready(function () { alert("Hello from custom JavaScript file."); }); Right click on the file and select properties to set its Build Action to “Embedded Resource”.
Now add the following line to the SwaggerConfig settings to enable UI: c.InjectJavaScript(thisAssembly, "SwaggerUi.Scripts.myScript.js"); Note: The “Logical Name” of the JavaScript file. Run the application to see the alert message:
Note: We can use “InjectJavaScript” feature to add our own user interface and behavior before we interacting with the API help. Check this nice article by Steve Michelotti on how to "Customize Authentication Header in SwaggerUI using Swashbuckle". Finally our SwaggerConfig Register method file looks like this: public static void Register() { var thisAssembly = typeof(SwaggerConfig).Assembly; GlobalConfiguration.Configuration .EnableSwagger(c => { c.SingleApiVersion("v1", "SwaggerUi"); c.IncludeXmlComments(GetXmlCommentsPath()); }) .EnableSwaggerUi(c => { c.InjectStylesheet(thisAssembly, "SwaggerUi.Content.myStyle.css"); c.InjectJavaScript(thisAssembly, "SwaggerUi.Scripts.myScript.js"); }); } There are several other methods to implement to customize. I will update this article later. Check out my other articles related Asp.Net MVC, Web API, Angular etc.,Create an ASP.NET Web Forms Application using Bootstrap and Web API Create a Responsive HTML Table using FooTable and Apply Client Side Binding using Handlebars.Js First AngularJs Application using ASP.NET MVC, $http & $window Services, EF and CRUD Implementation Baby Steps towards ASP.NET 5 Web Application and see What’s New Hope you learnt something new from this article. Feel free to "Rate This Article", "Bookmark" and give suggestion in "Comments" section below. LicenseThis article, along with any associated source code and files, is licensed under The Code Project Open License (CPOL) ShareAbout the AuthorYou may also be interested in...
Comments and Discussions
| ||||||||||||||||||||||


Web02 | 2.8.160426.1 | Last Updated 18 Feb 2016
Everything else Copyright © CodeProject, 1999-2016


 430
430


 被折叠的 条评论
为什么被折叠?
被折叠的 条评论
为什么被折叠?
 到【灌水乐园】发言


